How to Start a Traeger Grill: A Complete Beginner’s Guide

Bought a brand new Traeger grill, but don’t know how to fire it up? If you are new to grilling or are more used to gas or charcoal or traditional wood burning grills, switching to a Traeger can be a little nerve-wracking. But while you might find starting a Traeger pellet grill difficult, these appliances are among the best out there.

Besides using a Traeger grill for preparing burger patties, cooking juicy ribs, and grilling steaks, you can also use them to smoke sausages, cheese, and even herbs and spices. But before getting that far, you need to know the 101 on Traeger startup and assembly.

In case you’ve never used this kind of grill before, let this article be your Traeger grill manual. We will show you how to start a Traeger pellet grill, use it the right way, and take care of it for the long haul. Since there’s a lot of ground to cover, let’s get started!

You may also like: What is Medium Heat on a Grill: Cracking the Temperature Code of Your BBQ

What is a Traeger Grill?
how to start a traeger grill

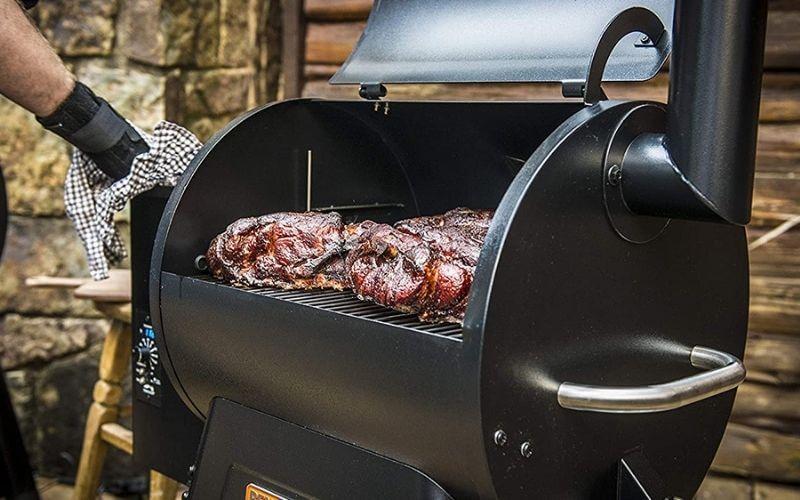
Let’s start with the introductions. The Traeger is a wood pellet grill. 

To use it, pellets are drawn from a side-mounted hopper to a central burn chamber using an auger, then lit by a hot metal rod. This mechanism runs on electricity, so you need to plug it in before use.

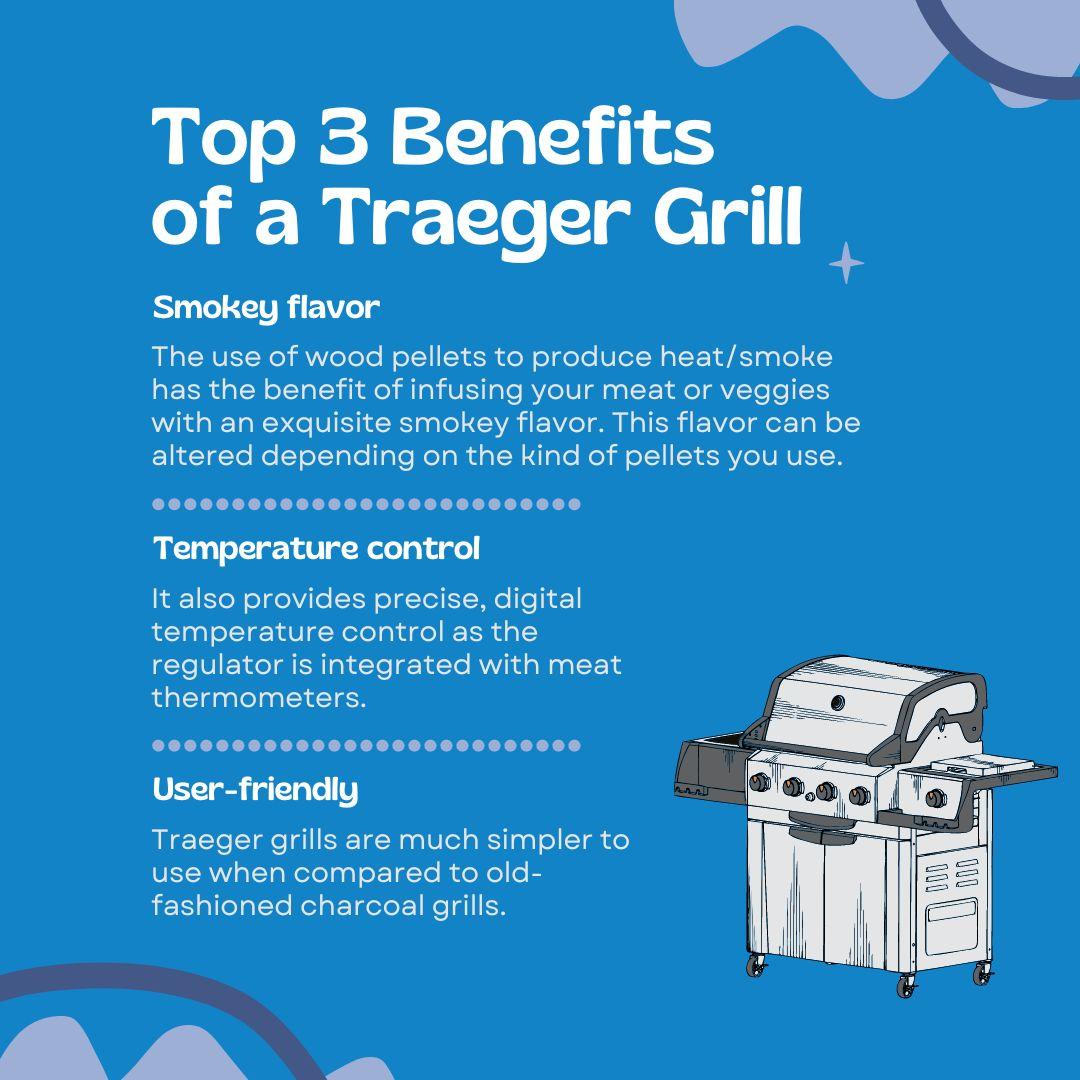
Top 3 Benefits of a Traeger Grill

There are several benefits of using a Traeger pellet grill. 
Top 3 Benefits of a Traeger Grill
  1. Smokey flavor

The use of wood pellets to produce heat/smoke has the benefit of infusing your meat or veggies with an exquisite smokey flavor. This flavor can be altered depending on the kind of pellets you use (check out any Traeger pellets guide!).

  1. Temperature control

It also provides precise, digital temperature control as the regulator is integrated with meat thermometers. This means that you can set the desired temperature easily by choosing a setting on the dial. At the same time, Traeger pellet grill assembly instructions are easy to follow.

  1. User-friendly

Traeger grills are much simpler to use when compared to old-fashioned charcoal grills. You can control the desired cooking temperature and smoke plus, the different flavored Traeger wood pellets are easy to use to lend different smokey flavors to your food. 

These benefits make a Traeger pellet grill a great choice for grill novices!

How to Start a Traeger Grill
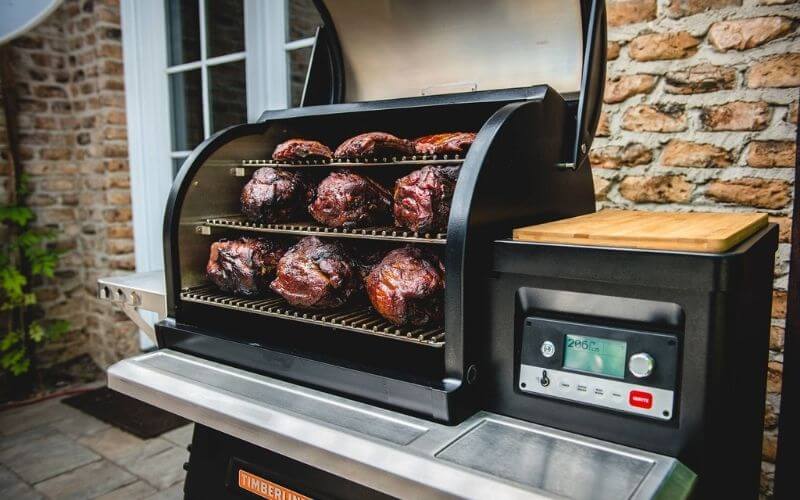
starting traeger

There are two main ways to start a Traeger wood pellet grill, depending on the model you are using. A Traeger not igniting can be fixed by following these steps.

For Closed-Lid Models:

This may be the simplest way to set up your grill. Check your grill model number to see if this model applies to your Traeger pellet grill.

  1. When you are ready to grill or smoke, just set your Traeger pellet grill to the desired temperature, using the knob on the control panel.
  2. Preheat the wood pellet grill for 15 minutes with the lid closed to bring it up to temperature.
  3. Then open your grill lid and add food, as the unit is ready for use!

For Open-Lid Models:

  1. To start, assemble the grill according to the make and grill model, as instructed by the manufacturer in the manual. If you are igniting your grill for the first time, take out the grill grates, grease drain pan, and heat baffle. This will make any Traeger grill troubleshooting and other start-up issues easy to deal with.
  1. Start by plugging your grill into an electrical socket or outlet. This is because the internal fan, thermostat, and igniter are all powered by electricity.
  2. Add the wood pellets to your grill’s hopper. This is the large metal box attached to the main body of the grill. If your Traeger ran out of pellets while cooking, you can add more from the hopper.
  3. Then, preheat your grill. To do this, open the grill’s lid and switch it on. This can be done by toggling the power switch found on your unit’s control panel to the On setting.
  4. Then, look for the Traeger smoke setting. There is a small temperature dial on the grill’s control panel. For instance, the Traeger Pro 780 smoke setting.
    Turn the knob on the dial to the Smoke setting. If your grill doesn’t have this option, set the Traeger smoke setting temp to between 160°F (71°C) and 200°F (93°C).
  5. Let the grill come up to temperature by letting it sit for around 5 minutes.
  6. Once the grill starts making a lot of noise, it is a sign that it has reached the target temperature. At this point, shut the lid until you are ready to start adding food to preserve heat and smoke.
  7. You can also increase the temperature at this stage, before adding meat if you want to sear your food.
  8. Don’t forget to hang a grease bucket by the side of the grill to collect all the grease from grilling or smoking. 
  9. If your Traeger won’t turn on, check the auger, fan, or hotrod for malfunctioning. If any debris or dust is clogging up these components, your grill won’t be able to start properly.

Using a Traeger Pellet Smoker:

These steps will help you make sure that smoking on your Traeger grill is a success every time.

  1. Start by plugging in your Traeger and selecting the smoke setting. Or set the temperature dial to 190°F (90°C).
  2. Make sure the auger is spinning. The auger feeds the pellets from the pellet hopper into the burner.
  3. Ensure that air is blowing out of the burner and that it is heated through.
  4. You should be able to feel the air blowing out of the pellet smoker with your hand. The fire pot will smoke a little, and then begin to glow red as it heats up.
  5. Replace the baffle, grease pan, and grill trays into the smoker, and then pour the pellets into the pellet hopper.
  6. Shut the lid, and then set the smoker temperature to high.
  7.  Allow it to smoke on high, with the lid closed, for 45 minutes if using it for the first time to season the smoker.
  8. If you have a Traeger not smoking, the temperature might be too high, or the pellets not hard enough.
  9. Then add your meat to the grill body, lowering the temperature to your desired heat. For the best results, follow the Traeger meat temperature probe instructions as this will give you even better temperature control.
  10. Check if the grease bucket is there to catch the grease from all the cooking. 

If you want to smoke food perfectly, use a pellet smoker tube to convert your grill into a Traeger electric smoker to better infuse the smoke into the meat or cheese.

Just cram it full of pellets, light one end with a blowtorch or lighter, and set it on the grate in your Traeger. It will then burn for around 4 hours. Yup, smoking with a Traeger is really that easy.

How to Turn Off a Traeger Grill

After you’re smoking or grilling your food on the Traeger grill, follow the steps below to turn it off properly. 

1. Turn the dial to the Shut Down Cycle setting on the grill. This step helps to stop the auger and speed up the fan and increase the hot rod temperature so that the leftover pellets are burned up. 

This is important so that the pellets don’t continue to smolder. Moreover, once you’ve used these wood pellets, they can’t be reused. So, it’s better to burn them up. 

The Shut Down Cycle setting on the Traeger grill makes sure that the next time you’re about to use it, you don’t come across a fire pot full of unusable pellets. 

2. Keep the power switch on otherwise, it won’t work. 

3. After about ten minutes, the fan will turn off automatically. Now, unplug the Traeger pellet grill after moving the dial to Off. 

4. Wait until the grill grates have cooled down completely. Then, empty the wood pellet auger and the hopper. Put these pellets away in a resealable bag or bucket. 

Pro Tip: Don’t be tempted to leave the pellets in the hopper as they will absorb moisture and won’t be ignitable. Plus, they could lead to mold formation in the hopper, adding an unnecessary chore for you. 

How to Clean a Traeger Pellet Grill

Keeping your Traeger clean is the best way to make sure it keeps working properly for a very long time. It also prevents your food from tasting odd and also stops unexpected charring and even fires.

  1. Start with a cold or slightly warm grill. Take the grates apart and separate the other internal components.
  2. Use a strong degreasing grill cleaner to get rid of remnants of food, debris, and grease from the cooking grates. Don’t use a wire brush as this can scratch the enamel.
  3. Once the grill is cold, remove the drip tray, porcelain grates, and heat baffle. After 3-5 grilling sessions, use a vacuum attachment to remove excess ash from the firepot, and then replace the drip pan and other parts.
  4. Take out the grease pan and use something like a spatula or wooden spoon to scrape the congealed grease from the bucket. Clean the drip pan the same way. Then, clean the remaining oil with paper towels.
  5. Every couple of months, clean the smokestack and get rid of any debris stuck there.
  6. Do not use liquid cleaners on the inside of your grill. Either use a vacuum attachment to get rid of charred bits and ash, or use a cloth to wipe down the inside.
  7. Spray a mild degreaser on the outside of the grill and allow it to soak through, before wiping it away with a cloth.
  8. Reassemble the grill as specified by the manufacturer.

Maintenance Tips for Your Traeger
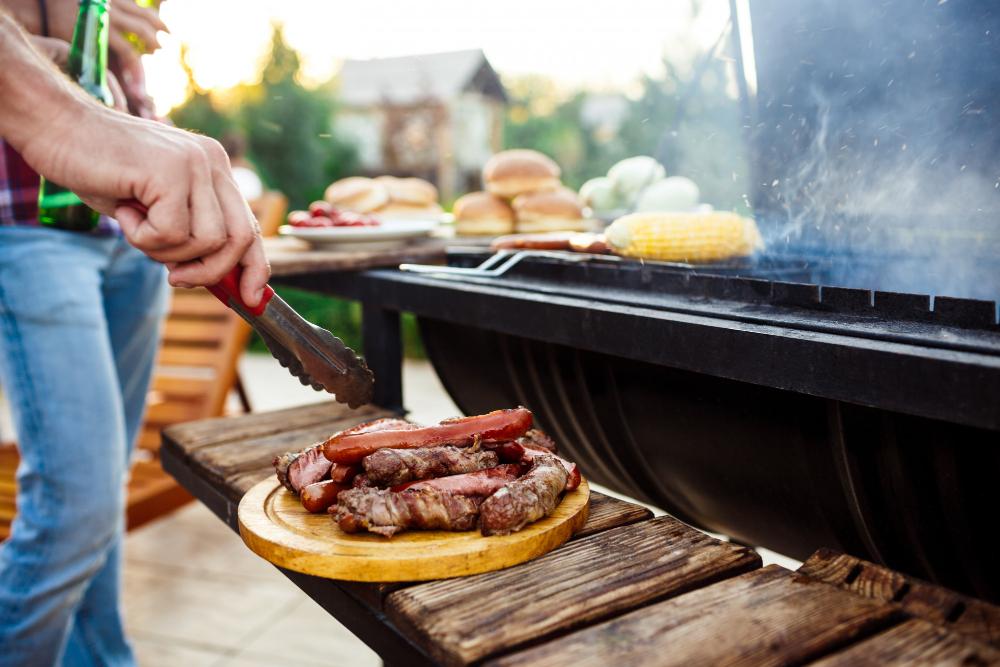
How to Start a Traeger Grill: A Complete Beginner's Guide 1

Besides cleaning your grill after each use, and spring cleaning it every grilling season, you also need to focus on maintaining it. This will prevent serious issues from taking over your Traeger and even slow down rusting, corrosion, and exposure.

  1. Invest in a grill cover, and use it to cover the Traeger whenever it isn’t in use.
  2. Keep your grill grates clean by removing grease and debris after each use. Once in a while, fire up the grill and keep it going on high for 10 to 15 minutes, burning out any bits of food and debris. Once it has cooled down again, vacuum the ash out from the grill.
  3. Store your grill in a cool and dry place during the winter. Make sure it isn’t kept in humid or damp conditions.
  4. Use a grill mat to minimize mess and simplify cleanup.
  5. Periodically get rid of old aluminum foil lining the drip trays and other components.
  6. To keep your grill grates looking new and shiny, wipe down the exterior of your grill after each cooking session.
  7. Make sure the wiring isn’t frayed and that the plug has all the screws attached. Replace worn-out wiring as soon as possible.
  8. Avoid using bleach, steel wool, wire brushes, and other harsh and abrasive materials when cleaning your Traeger.

Frequently Asked Questions

Below you’ll find answers to questions we get asked the most about starting and using a Traeger grill properly.

01. How Does a Traeger Grill Work?

Traeger units are pellet grills, which means they work by burning wood pellets that are lit by a HotRod. The wood pellets are placed in the hopper and are then moved to the fire pot by an auger. The entire unit needs to be connected to an electrical outlet for it to work.

02. Why Doesn’t My Traeger Turn On? 

If your Traeger doesn’t start, it may be due to a blown fuse, a faulty plug or socket, or even because the firepot doesn’t have enough wood pellets. Follow the troubleshooting methods in the instruction manual to identify why your grill won’t light up.

03. How Long Does It Take to Warm Up a Traeger Grill?

After turning on the grill and setting it to the desired temperature, it should take your grill 10-15 minutes to get it to warm up completely.

04. How Does a Traeger Ignite?

When the Traeger is switched on, a HotRod ignites the wood pellets, causing them to smolder and produce heat and smoke.

05. How Do I Get My Traeger To Produce More Smoke?

Using lots of dry wood pellets and grilling at a slightly lower temperature is the best way to build up more smoke in your Traeger pellet grills.

06. Is There a Fuse on a Traeger Grill?

Like most electrical devices, Traeger grills have a fuse added for safety. This fuse can be found on the back of the grill’s controller board.

07. Can I Use My Traeger Grill in the Rain?

Yes, contrary to popular belief, you can use this grill in the rain. Just make sure your pellets don’t get dampened in the rain and that your food doesn’t end up soaked.

08. Do I Have to Season Traeger Pellet Grills?

Before using your grill for the first time, you need to season your grill. This involves burning off the empty grill at high temperatures to get rid of any chemicals, cleaners, debris, and other residues on the inside of the grill.

09. Can I Leave My Traeger Outside in the Winter? 

While you can use your Traeger in winter, you shouldn’t leave it outside, as moisture can get into the pellet hopper and this can cause your grill to malfunction.

Conclusion

A Traeger is a unique sort of grill, as it combines the efficiency of an electric grill with the flavor and smokiness of an old-fashioned charcoal grill. Whether you use hickory, maple, or applewood, you can be sure that your food will have a fantastic smoked-out flavor with Traeger brand pellets.

The first step to getting all this done is knowing how to start a Traeger grill. Once you get that out of the way, you can take your grilling to the next level with this amazing unit!

Pin Later
How to Start a Traeger Grill Like a Pro

How to Clean Rusty Grill Grates: Keeping It Clean and Rust-Free

Has this ever happened to you?

It’s the beginning of summer and you want to bust out the gas grill for an idyllic BBQ. But on closer inspection, you notice that your grill grates are covered in rust. Turns out, you didn’t store them properly throughout winter.

You might think that the only solution is to trash them and buy new grates. After all, rusty surfaces aren’t appealing to cook on, and rust can cause serious problems if accidentally consumed.

But the good news is that you can transform your rusty grill grates into sparkling clean, brand-new looking ones with just a bit of patience and legwork. The best part? Most of the things you need can be found in your pantry, and cost pennies!

If you want to learn how to clean rusty grill grates, this article has all the details you need to know. So let’s get you started on the path to clean and rust-free grill grates.

How to Remove Rust from Grill Grates

how to clean rusty grill grates

To remove rust from grill grates and other parts of your grill, you need something that cuts through the rust and breaks it down. While you can choose professional rust busters for your grill, using more natural products is seen as safer, as they lack overly strong chemicals.

Removing Rust with Salt and Vinegar:

You may have seen people clean old jewelry by soaking them overnight in acidic solutions like white vinegar and Coke. The idea to remove rust with vinegar is simple as the acid in vinegar dissolves the rust. Salt speeds up the process and helps break down rust.

Combine two cups of vinegar with one cup of salt in a bowl. Put your rusty grill grates in a big heavy-duty garbage bag. Pour the vinegar-salt mixture into the bag and tie it shut. 

Lay the bag flat and let the grill soak in the mix overnight. Then, wipe the rust off with a cloth. The salt acts as a mild abrasive that scrapes off the rust.

Removing Rust with Baking Soda and Vinegar:

Like salt, baking soda can also be used as an abrasive. Add enough vinegar to the baking soda to form a sort of loose paste. 

Then, apply the paste to the areas covered in rust. Let the baking soda and vinegar do their thing for 30-40 minutes. After that, rinse off the paste with warm water and wipe down the grates with a dry cloth.

Removing Rust with Lemon Juice:

Mixing lemon juice with detergent powder is also a good way to clean rust from your grill. Combine the two until a kind of soapy paste is formed and apply it to the grill grates. Leave the grate overnight and then rinse to remove the paste.

Removing Rust with the Wire Brush Method:

If you don’t mind a little elbow grease, using a wire brush is a good way to get rid of rust on your grill grate. Take the grate off your barbecue and set it flat on the ground on a concrete patio or driveway.

Use a stiff wire brush to brush the rust off. Start with one side of the grill grate and then turn it over and brush the rust away from the other side. 

Prop the grate on its side and then brush between each of the metal rungs. When you’re done, wipe the extra residual rust off the grill with a rag.

Removing Rust with Store-Bought Rust Removers:

If you want something that works quickly and effectively, go for a commercial rust remover. These usually work well but contain toxic chemicals that need to be rinsed thoroughly afterward.

It is important to choose a commercial rust remover that is meant for cleaning grill grates. A safe rust remover can be used on cooking tools without damaging surfaces and won’t contain harsh acids or solvents.

Removing Rust with Vegetable Oil:

This is a good way to remove tiny bits of rust that can be removed quickly. Brushing on some oil to these areas and letting it rest will get rid of the rust. This can be combined with a wire brush to spot treat rust.

Removing Rust with Sandpaper:

Sounds pretty shocking, right? While unconventional, the method definitely works. Wrap a sheet of sandpaper around the rung of the rusty grill grate, rub the sandpaper along the length of the grate. 

While this will remove the rust effectively, it can also scratch the surface of the grate, so keep track of how much you are sanding off.

Removing Rust from Grill Grates Quickly

Removing Rust from Grill Grates

The important thing about removing rust, regardless of the method used, is to give the grates time. The cleaning material needs to reach all parts of the grates, and get to work dissolving the rust.

However, if you don’t have time, you can apply the vinegar/salt or vinegar/baking soda (or any other solution) to the grates and place it back in the grill. The turn on your grill. The mixture will start bubbling. This bubbling will dissolve the rust much more quickly.

It also gives your grates a more thorough cleaning. If you don’t want to wait 12 hours to let the rust break down, this is a good alternative. However, make sure you are wearing heat-resistant gloves when handling the hot grate.

Maintenance Tips for Your Grill Grates

Preventing rust from taking over your grill grates is much easier than getting rid of rust once it has set in. These tips will keep your grates working well and keep them in good shape for years to come.

  • When not in use, protect your grill and grates with a grill cover to prevent moisture from seeping in and starting the process of rusting.
  • Use a good grill cleaner to lean your cooking grates after each use. Moisture from food left on a grill can speed up the formation of rust.
  • Try to use porcelain-coated grill grates, as they are less likely to get rusty.
  • After cleaning and drying your grill grates, brush a tiny bit of oil on the grates. This forms a barrier between the surface and the moisture in the environment around it, preventing it from rusting.
  • Before putting away your grill for the winter, inspect it carefully and clean it. This will allow you to treat any rust starting out, instead of allowing it to fester and grow throughout the winter months.
  • In winter, periodically take out your grates and other grill parts and then check them for rust. This will also allow you to treat minor spots of rust quickly, instead of dealing with a grate that is mostly covered with rust and needs a whole day to clean.

Frequently Asked Questions

Have more questions about eliminating rust from your grill grates? You might find the answer here.

01. Can I Pressure Wash My Grill Grates?  

Gas or electric power washers can be used to pressure wash grills and get rid of caked-on grime and debris. It can even clean smaller spots of rust from grill grates.

02. Can I Use Steel Wool on My Grill Grates?

While you can use steel wool to clean grill grates, this can be too abrasive and should be used as a final measure. If power washing, overnight soaking, and high temperatures don’t clean your grill grates properly, you can use steel wool to scrub off dirt and rust.

03. What is the Easiest Way to Remove Rust from Grates?

Soaking your grill grates in a tub or container of undiluted white vinegar may be the easiest and most hands-off approach to cleaning rusty grill grates. Just leave the grate to sit in the vinegar for 12 hours and the rust will slowly dissolve.

04. Can I Use Acetone to Remove Rust?

Acetone can be used to remove rust quickly, and acetone evaporates quickly, requiring minimal cleanup afterward.

Closing Thoughts

It can be disheartening to expect a delicious grilling exploit, only to be thwarted by rusted grill grates. But on the bright side, knowing how to clean rusty grill grates will just delay your BBQ instead of putting it off indefinitely.

Besides this, you will also understand the importance of protecting your grill grates and preventing rust from forming in the first place. In short, you will be able to enjoy a cookout any time you want without being held back by pesky rust. Happy grilling!

How to Clean Cast Iron Grill Easily: Banish Dirt Forever

If you went out and purchased a pricey cast iron grill pan without much research, you likely had no idea how to maintain it. While cast iron cookware is well-loved and praised by professionals and home cooks alike, it isn’t easy to deal with.

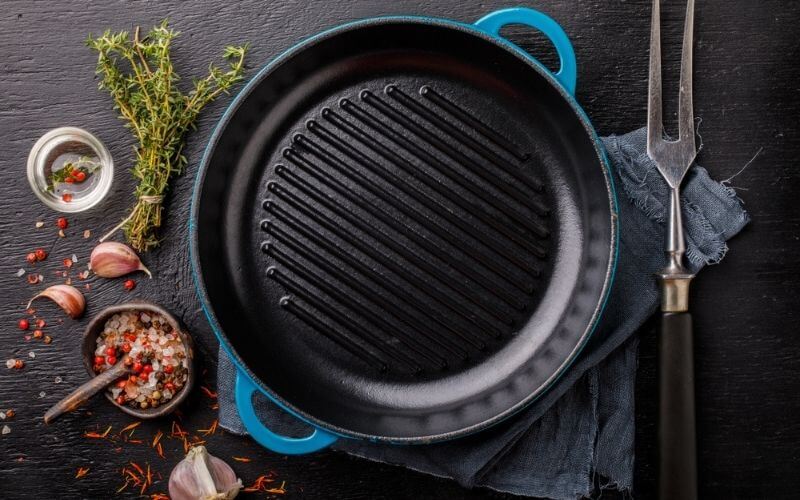
So if you messed up your cast iron cookware, whether it’s the classic cast iron skillet or a cast iron grill pan, you’ve come to the right place. This article will show you how to clean cast iron grill pans and utensils easily. You can even use these methods to clean cast iron grill grates!

Besides showing how to clean your cast iron cooking pans, you will also learn how to season and maintain your cast iron grill pan/skillet to keep it in great shape for much longer.

So without further ado, let’s look at how you can clean your cast iron cookware!

The Best Ways to Clean a Cast Iron Grill Pan

how to clean cast iron grill

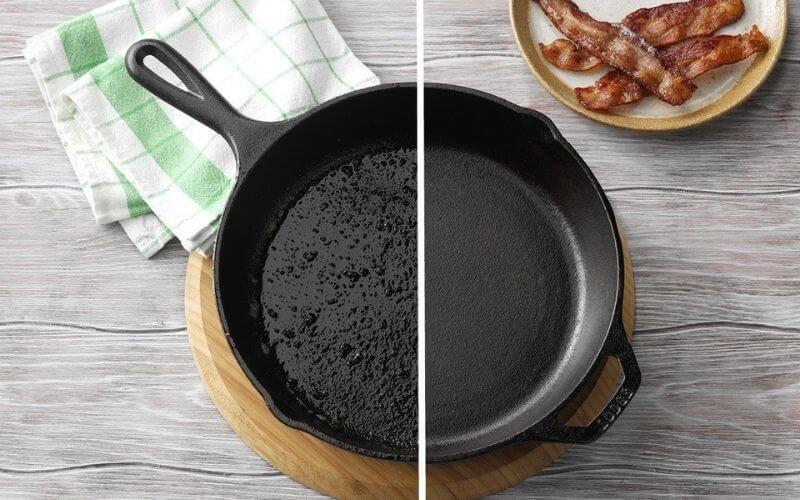
Because cast iron has a seasoned surface, it is very important to make sure that the cleaning process doesn’t damage this protective coating. If this layer is scratched off, the pan loses its nonstick surface and will need to be seasoned intensively, which is labor and time-consuming.

Instead, work gently and use substances that are very mildly abrasive to remove the gunk and debris from your cast iron grill pan. Although the process may take longer, it is worth it as it will be better for your cookware in the long run.

Here’s what you will need:

  • Salt
  • Dish detergent
  • Hot/Boiling water
  • Spatula
  • A soft cloth or dish sponge

Cleaning a Cast Iron Grill Pan with Just Hot Water:

This is the gentlest and most effective way to remove small bits of burnt food, grease, and debris from your pan. It is also particularly useful for pans with tall sides. All it needs is a little elbow grease.

Instructions:

  1. Boil some water in your grill pan on the stovetop. The water needs to be 2-3 inches in depth.
  2. Once the water starts to boil, the bits of food and debris will gradually loosen up and rise to the water surface.
  3. Use a spatula to gently scrape larger or more stubborn bits of debris stuck to the pan.
  4. Then, allow your grill pan to cool and drain the water and debris/residue into your sink.
  5. Once the cast iron pan is emptied out, rinse it with clean hot water and then dry it off with a soft dish towel.

Cleaning a Cast Iron Grill Pan with Just Salt:

Grill Pan cleaning Salt

Many cooks prefer a ‘dry’ method to clean their cast iron cookware. The good news is that salt is mildly abrasive and can clean a slightly dirty cast iron pan on its own.

Instructions:

  1. Cover the pan’s surface with a thick layer of salt.
  2. Use a napkin or small dishcloth to gently scrub the cast iron grill pan with the salt. As you rub the surface, you will notice the salt dislodging the pieces of food and residue from cooking.
  3. Add more salt if needed, and keep scrubbing until all the burnt bits of food have been loosened from the pan surface.
  4. Discard the salt and use a clean cloth to remove the bits of salt and loosened debris in the pan, until it is completely cleaned.

Cleaning a Cast Iron Grill Pan with Salt and Hot Water:

If your cast iron grill pan is dirtier than expected, using salt and hot water together will work well to scrape bits of food without scratching the cast iron surface.

Instructions:

  1. After use, allow the cast iron pan to cool down a little.
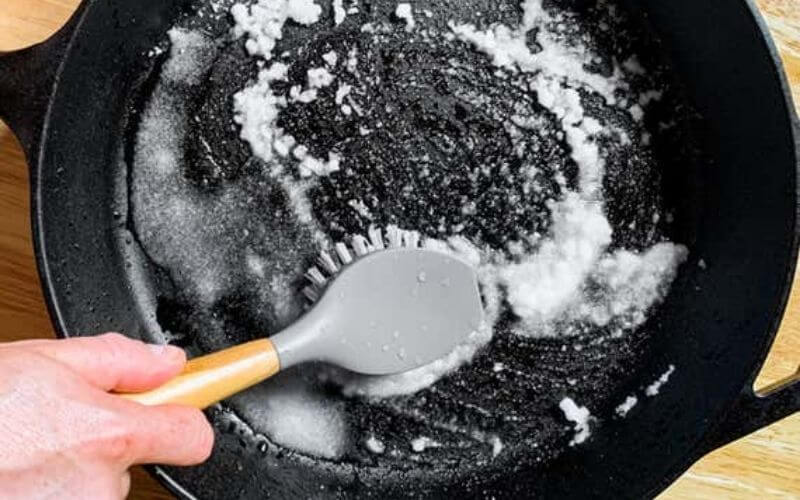
  2. Once the pan is just warm, pour some coarse salt into the grill pan, making sure the entire surface is covered.
  3. Then, pour a small amount of hot water into the salt. This will turn the salt into a sort of paste.
  4. Use your dish sponge to scrub the salt-paste into the grill pan surface. Clean between the ridges, as well as the sides as these areas often have hardened residue.
  5. Once all the gunk is loosened up, rinse the salt mix and debris off with hot water, then dry with a kitchen towel or paper napkin.

Cleaning a Cast Iron Grill Pan with Soap and Water:

Cast Iron Grill Pan with Soap and Water

Using dish detergent and water may be the most common way to clean dirty cast iron grill cookware. It is also a good way to clean a pan that is dirty but doesn’t have stubborn bits of burnt food stuck to it.

However, harsh soaps can affect the seasoning of your pan, so use this method sparingly and make sure you use a very mild detergent.

Instructions:

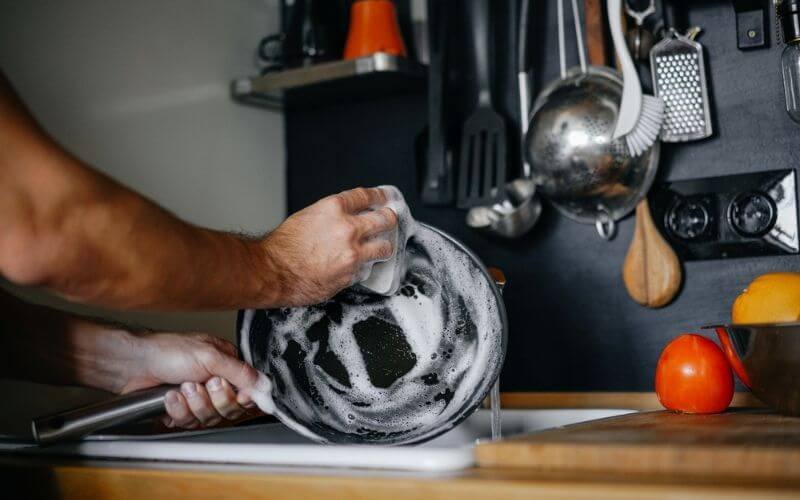
  1. Start by adding a tiny amount of mild dish detergent in the middle of your grill pan.
  2. Then add a bit of hot water to the pan to make a lather.
  3. Use a soft scrubber or sponge to gently scrub the surface and sides of the cast iron pan.
  4. Once all the gunk has been cleaned off and the surface of the pan is smooth, rinse off thoroughly, making sure no soap remains in the pan.
  5. Dry completely with a dish towel or any other soft cloth.

Seasoning a Cast Iron Grill Pan

This is an important part of maintaining all kinds of cast iron cookware like griddles and pans. 

Even if you haven’t scratched your cast iron grill pan while cleaning, seasoning it afterward is still necessary. This will keep your pan in good shape for much longer, and make cooking in it absolutely pain-free.

Here’s the quick and easy way to season your cast iron pan:

  1. After cleaning your pan, dry it carefully with a towel or napkin.
  2. Then set it on the stovetop on high heat for a minute, until any lingering moisture has evaporated.
  3. Once the pan is cool enough to work with, use a paper towel to rub any kind of neutral oil (vegetable, sunflower seed, peanut) across the entire cooking surface, as well as the bottom of the pan. Don’t forget to oil the sides! This will also protect glass cooktops.
  4. Use another napkin to wipe off any excess oil. The whole pan just needs to be coated with a thin layer of oil.
  5. Then set the pan back onto the stove and heat until it starts smoking just a bit.
  6. Wait for the pan to cool down again before storing it in a dry place.

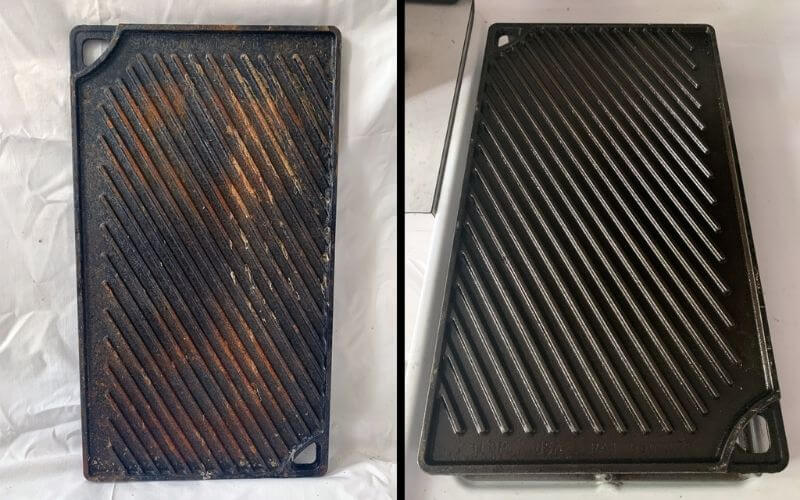
Removing Rust from a Cast Iron Grill Pan

Removing Rust from Grill Pan

If you’ve left your cast iron cookware in a damp space, and the coating has been compromised, rust will set in immediately. Here’s how you can fix all that:

Step One: Removing the Rust

First things first, get rid of the rust. There are two ways to do this: soaking and scrubbing.

You can either soak your pan in a bucket or sink filled with white vinegar diluted with an equal amount of water. The important thing to remember is that you need to remove the pan immediately after the rust dissolves and flakes away.

This is because the pan has no coating and the unseasoned surface will be totally rusted. This kind of rust can not be fixed so you need to be careful.

Or you can gently scrub the rust away with steel wool. While this is more labor-intensive, it is safer for your pan. You can also use soapy water. The important thing is to dry your pan completely afterward with a towel, or by placing it over medium heat on the stove.

Step Two: Season the Pan

Then re-season the pan from scratch. This takes more time than your regular seasoning.

Preheat your oven to 350˚F and place a large sheet of aluminum foil on the bottom rack. Rub a neutral oil all across the entire pan. Then, put the pan upside-down in the oven over the foil, as this will catch any oil drips.

Let the pan bake in the oven for an hour, cooling afterward for at least 45 minutes before using it. Make sure you dry your pan completely when cleaning, and season lightly as mentioned before to keep it working well.

To prevent rusting, store the cast iron cookware in a low-humidity environment. Always wipe it down with a bit of oil that has no taste and a high smoke point.

Maintaining Your Cast Iron Grill Pan

If you’ve been dealing with rust and other issues with your cast iron cookware, these tips will help avoid them in the future.

  • Avoid using soap or detergent as much as possible when cleaning your grill pan.
  • Avoid using metal utensils and stick to wooden or silicone spatulas and spoons.
  • Store your cast iron grill pan in a clean, cool, and dry place.
  • Don’t store any food in your pan, especially when cooking things like sauces that have tomatoes, vinegar, lemon juice, or other acidic ingredients.
  • Always keep your cast iron pan coated with a light layer of neutral oil.
  • Clean your cast iron pan immediately after each use, and do not leave it to soak overnight, as this encourages rusting.
  • Never use a steel wool scrubber to clean your pan after cooking-instead use a gentle scrubber or dish sponge to dislodge bits of food.

Frequently Asked Questions

Here you will find answers to questions we get asked the most about cast-iron grill pans.

01. Is Cast Iron Good for Grilling? 

Yes, grilling steaks on a cast iron pan will allow the meat to brown evenly, and will also contain any drippings from the meat, which adds more flavor.

02. Is It Healthy to Cook in Cast Iron?

Because you can steam, broil, and even ‘fry’ without oil in a well-seasoned cast-iron pan, it is a pretty healthy option to cook in.

03. What is a Cast Iron Grill Pan Good for?

These grill pans are best for grilling veggies, searing steaks, pork chops, and cuts of meat.

04. Why is Cast Iron Better for Grilling Steak?

Cast iron heats very evenly, which means the steak will be cooked uniformly with even browning. It also keeps the meat nice and juicy without drying out.

05. What are the Disadvantages of Cast Iron?

Cast iron cookware is a little tricky to use, as the seasoned surface needs maintenance and cannot be scratched off. You also need to be careful when cleaning and storing your pan.

06. Is Cast Iron Better Than Non-Stick?

Although cast iron is pricier than non-stick cookware, cast iron is better for cooking because it conducts heat more effectively and evenly than non-stick.

Also, the non-stick surface wears off over time and the pan will need replacing, while a cast iron pan can be re-seasoned and used for decades.

In Brief

While cast-iron seems scary for first-time cooks, it is one of the best investments for your kitchen. You can grill, fry, steam, and even bake in one of these, which makes it a great tool for cooking. 

Once you learn how to clean cast iron grill pans, you can maintain your cookware indefinitely, using it without damage. As you can see, cleaning the pan will just take a bit of extra effort and time. Once you get your pan nice and clean, you can cook almost anything out there. So what will it be? Will you use your pan to cook some burgers, or grill a mighty Tomahawk steak?

Making the Poor Man’s Lobster: How to Cook Monkfish to Taste Like Lobster

Craving lobster tails while waiting for payday? You can order some of the rather overpriced lobster at some fancy restaurant that you’ll regret the next time you look at your credit card bill.

Or you can get yourself some monkfish, prepare it at home and have it with some Rosé, all for a very affordable price point. And the best part? It’ll taste just like high-end lobster! 

Monkfish or poor man’s lobster is a great way to enjoy an inexpensive but seemingly fancy dinner. Besides, we’re always on the lookout for great inexpensive seafood recipes.

The fish has almost the same firm, yet soft texture as lobster and pairs well with butter sauces. If you haven’t made monkfish before, it can be a little scary when cooking it for the first time. This guide will show you how to cook monkfish to taste like lobster.

Whether you want to make your faux lobster in the oven, grill it like rockfish, or pan-fry them in a skillet, find out all the cooking tips and secrets right here!

What is Monkfish?

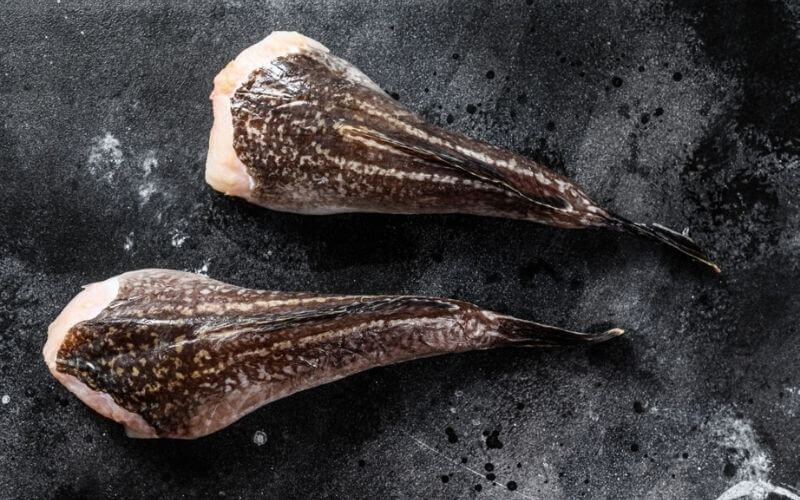
Monkfish

Monkfish are deep ocean bottom-dwellers, generally harvested in the North Atlantic from coastal Norway to the Mediterranean. Instead of swimming, they use their fins to kind of ‘walk’ along the ocean floor and look for prey. They are ravenous feeders and eat almost anything they find.

Each fish can be cut into two thick fillets on either side of the spine, usually weighing between one and four pounds. The tail is popular for its tenderness and mild flavor and is most readily available.

When filleted, the flesh is bright white and the texture and mouthfeel are pretty similar to that of a cooked lobster. This is why there are lots of monkfish recipes that taste like lobster.

Monkfish Taste:

As mentioned earlier, monkfish and lobster have a similar flavor profile and texture. Both fish are bottom feeders as well. Monkfish has a meaty texture, a mild and almost sweet flavor, and pairs well with butter and white wine-based sauces.

Monkfish is also popular because when cooked fresh, it doesn’t have that fishy or muddy taste associated with seafood. It is also the perfect vehicle for taking on sharp, tangy, or bold flavors like lemon, garlic, or capers.

Nutrients:

Monkfish is a lean protein like flounder and halibut. This fish is an excellent source of omega-3 fatty acids, and minerals like phosphorus, selenium. 

It also contains vitamin B12, B6, and niacin. Furthermore, it is low in saturated fat, and a three-ounce serving will contribute to just one percent of the recommended daily intake.

Monkfish Storage:

Monkfish needs to be stored in the refrigerator and cooked and eaten within two days of purchasing. If you want to store it for longer, keep it in the freezer.

Tightly wrap the fillets in plastic wrap, then pack in a freezer bag, and force out the air. When stored this way, the monkfish should last up to six months. If you buy frozen monkfish and it has not been defrosted, it can be placed directly into the freezer for up to six months.

Cooked monkfish can be stored in the fridge for up to 2 days. For the best taste and freshness, consume the monkfish the day it is cooked.

Cooking Monkfish to Taste Like Lobster

Cooking Monkfish

With just a little effort, you can transform the humble monkfish and make it taste like fine-dining lobster. These recipes will make your monkfish fillets taste and feel just like lobster.

Baking Monkfish:

What You Need:

  • 1.5 pounds of fresh monkfish fillets
  • 1 teaspoon paprika
  • 1 cup of melted butter
  • Salt and pepper to taste
  • 1 shallot or small red onion
  • 2-3 cloves of garlic
  • 5-6 sprigs of parsley
  • Lemon wedges

Instructions:

  1. Preheat the oven to 375F.
  2. Set the monkfish in a shallow baking dish, making sure they are spread out evenly. Drizzle half the butter over the fish and season with salt, pepper, and paprika.
  3. Bake for 15-20 minutes, until the fish is firm and tender, basting with the seasoned butter from time to time.
  4. While the fish is baking, heat a small pan and add the remaining butter to it. Add in your finely diced onion, garlic, and sprigs of parsley and cook on low heat, infusing the butter with the aromatics.
  5. When the fish is done cooking, serve it with the wedges of lemon and pour the infused butter over the top. You can also chop up some fresh parsley for garnishing.

Pan-Seared Monkfish:

What You Need:

  • 2 large monkfish tail fillets
  • ⅓ cup sun-dried tomatoes with Italian herbs, chopped
  • 1 tablespoon sun-dried tomato oil
  • 1 tablespoon butter
  • 3 tablespoons olive oil, divided
  • 2 tablespoons balsamic vinegar
  • 2 cloves of minced garlic
  • ½ teaspoon white sugar
  • Lemon slices
  • 2 tablespoons minced fresh parsley
  • Salt and ground black pepper to taste

Instructions:

  1. Mix sun-dried tomatoes, balsamic vinegar, tomato oil, garlic, sugar, and two spoons of olive oil in a small bowl. Stir together to make sure everything is well combined.
  2. Cut each fillet into 3 to 4 pieces and season with salt and pepper.
  3. Heat 1 tablespoon olive oil and melt the butter in a large skillet over medium-high heat. Sear monkfish for about 3 minutes or until the first side is golden brown.
  4. Flip and keep cooking until cooked through around 2-3 minutes. Decrease the heat to low, then remove fish to a plate, and cover with foil to keep warm.
  5. Add the sun-dried tomato mixture into the skillet and stir around the pan until just warmed and slightly thickened, for around 30 seconds.
  6. Pour over the fillets to serve and garnish with slices of lemon.

Grilled Monkfish:

What You Need:

  • 1 pound monkfish fillets
  • 2 scallions, chopped finely
  • 2 cloves garlic, minced
  • Juice of 1 lemon
  • 3.5 tablespoons olive oil
  • 2 tablespoons chopped parsley
  • 1 bird’s eye pepper, finely chopped
  • 6 grape or cherry tomato, diced
  • 1/2 teaspoon sea salt
  • 1/2 teaspoon black pepper

Instructions:

  1. Clean the monkfish fillets and pat them dry with kitchen towels. Season with a pinch of salt and pepper. Put them aside for now.
  2. Mix all the other ingredients well by whisking together to make a dressing.
  3. Then drizzle two-thirds of the dressing over the fish fillets, and allow to marinate for 5-10 minutes.
  4. Fire up your grill to 400-450F. Brush the grill with a little oil and place the fish fillets on it.
  5. Close the lid and let it cook for 2-3 minutes.
  6. Flip over the fillets, and pour the remaining marinade on top. Place the lid back on.
  7.  Flip one more time if necessary. Depending on the thickness of the fillets, you will need to grill it for 6-10 minutes in total.
  8. Serve the fillets and pour the remaining dressing on top.

Have Any Questions?

Here you will find answers to questions people often have about cooking monkfish to taste like lobster.

01. Does Monkfish Taste Good?

Monkfish lacks the fishy taste that other seafood often has. The flesh is also mild and firm and takes on the flavors of sauces very well.

02. Is Monkfish Expensive?

Monkfish is a pretty affordable fish, which makes it more easily accessible for everyone.

03. Why Does Monkfish Taste Like Lobster?

Like lobster, monkfish is a bottom-feeder and lives on the ocean floor. This makes them closely related species. Also, they have a similar kind of flesh, in terms of texture and appearance. All these reasons make monkfish taste like lobster.

04. How Should Monkfish Be Cooked?

For the best results, monkfish should be baked or pan-fried. However, you can also deep fry them or grill them.

05. Is It Hard to Cook Monkfish?

Monkfish is pretty easy to cook, especially when filleted. It takes just a couple of minutes to bake, grill, or cook on the stovetop and it compliments most sauces and marinades.

In a Nutshell

Monkfish AKA poor man’s lobster is a healthy and delicious meal that won’t burn a hole in your wallet. The soft, flakey, and tender flesh is a perfect vehicle for buttery sauces and it pairs well with tangy dressings and fresh salads.

Knowing how to cook monkfish to taste like lobster will give you an easy weekday meal that will lift your spirits and help you celebrate any small victory. And with all that being said, do you think monkfish should be baked or seared?

How to Clean Electric Kettle: It’s Easier Than You Thought!

The electric kettle might just be my favorite kitchen appliance because of how useful it is when you’re in a hurry. It is the ultimate tool for quick and convenient meals; even more so than instant pots and rice cookers.

They are perfect for small, single servings and are great at making tea, a quick cup of coffee, instant oatmeal, soup, ramen, and even potatoes. The electric kettle is right up there with microwaves when it comes to easy, affordable, and quick meals.

There’s just one solitary issue.

Electric kettles need regular cleaning and maintenance so that they work properly. Cleaning any type of kettle requires more thought and care than anticipated so many people put it off until the mineral buildup gives them a disgusting cup of tea.

So today I’m going to dish out the secrets on how to clean electric kettles. Besides telling how often you need to be giving your kettle a deep cleaning, this article will show you how to clean tea kettles, as well tips on keeping your kettle cleaner in the long run.

What Makes Electric Kettles Dirty?

So what’s making your boiling hot water taste all gross? There are two main sources for the funky smell ruining your morning Earl Grey:

Mold:

If your kettle has a filter, you need to clean or change it frequently. Otherwise, the damp interior is the perfect place for mold to grow and thrive. 

This can also happen if you leave water in your kettle often. This is a pretty serious issue, as the mold can make you sick.

Mineral Buildup:

When you use your electric kettle, the minerals from the tap water (especially hard water) build up inside it. This buildup is called kettle fur and alters the taste of the water. Because of this, you need to descale your kettle every few months.

How often depends on the frequency with which you use your water boiling kettle. If you use your kettle as a hot pot water boiler, you may have to descale it every other month.

Things You Need to Clean Electric Tea Kettles

how to clean electric kettle

To get a clean stainless-steel kettle (or any kind of electric kettle for that matter), you’ll need a couple of things first. Before you start, gather these cleaning tools:

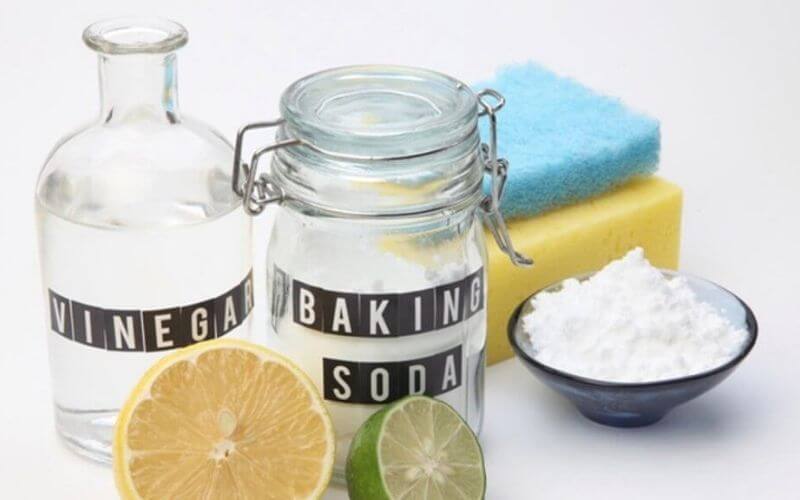
White vinegar or lemon juice or citric acid powder

  • Baking soda
  • Dishwashing liquid or mild detergent
  • Soft scrubber pad or bottle brush
  • Microfiber cloth or soft dish towel

How to Clean Electric Kettle

This guide will tell you how to deep clean electric kettles with affordable products and very little elbow grease. It will work for almost all conventional electric kettles, like KitchenSmith electric kettle, Farberware electric glass kettle, or Epica electric kettle.

Descale the Kettle with Vinegar, Lemon Juice or Citric Acid:

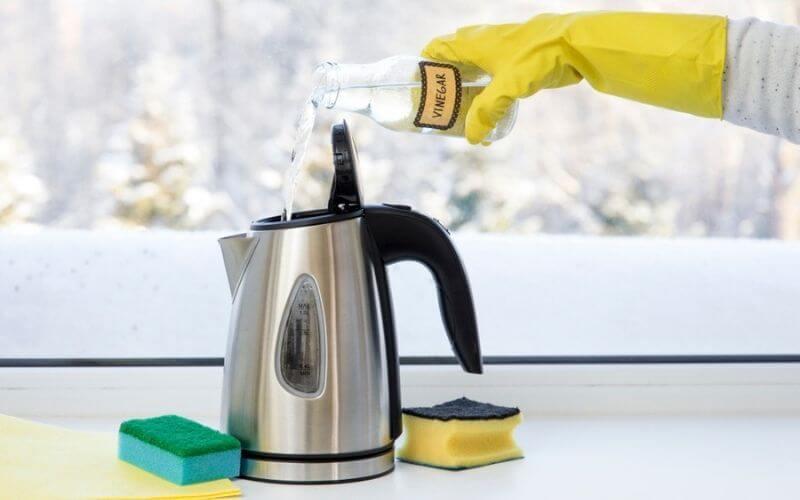
Fill around half the kettle with a 1:1 solution of water mixed with and an equal amount of distilled white vinegar or lemon juice. If you are using citric acid powder, use two tablespoons for half a kettle of water. Bring the solution to a full boil.

If the kettle doesn’t shut off automatically, turn it off. Let the acidic solution sit for at least 20-30 minutes. Then, empty the solution into your sink.

Unplug the Kettle:

After that, you need to unplug the kettle. If the kettle comes with a detachable filter, remove it from inside the kettle.

Clean or Replace the Filter:

If your model has a water filter or filter cartridge, clean the filter following the manufacturer’s directions (like the Hamilton Beach electric kettle manual).

Most filters are metallic and can be cleaned by soaking in distilled white vinegar diluted in hot water for at least five minutes. Scrub with the bottle brush, sponge, or scrubbing pad and rinse with fresh water.

If your filter is disposable, throw it out and keep a new one ready at hand.

Clean the Kettle Interior:

Use a non-abrasive scrubber, sponge, or soft-bristled bottle brush to scrub the inside of the kettle. This loosens any mineral build-up, dirt, and mold that remains inside.

Focus on the areas around the spout where mineral build-up tends to be quite heavy. Dipping the brush or sponge in pure vinegar, baking soda, or dishwashing liquid can help remove build-up around the spout.

Clean the Kettle Exterior:

Gently wipe the exterior of the kettle with a soft sponge or scrubber soaked in a mix of warm water and a little dishwashing liquid to remove any smudges or grease. You can even dip the sponge in some baking soda to loosen stubborn dirt.

After the exterior is clean, wipe the kettle dry with a clean dish towel microfiber cloth to remove streaks and smudges.

Final Rinsing:

After all, the dirt is removed and you are satisfied with how clean the inside of your electric hot water kettle, reassemble the parts. Fill around half the kettle with water and bring it to a boil.

Discard the water and repeat this rinsing step until the water doesn’t taste or smell like vinegar or dishwashing liquid. It will also remove any loose bits of mineral remaining in the kettle.

Cleaning an Electric Water Heater Kettle without Vinegar

Don’t have vinegar? You can still get a squeaky-clean kettle.

Use Lemon or Lime Juice:

Squeeze the juice from 2-3 lemons or limes. Mix the juice with an equal amount of water, enough to fill half your kettle.

Cut up the lemon slices and add to the solution. Bring the kettle to a boil and leave it standing for at least 30 minutes.

Use Coke or Soda:

Your favorite fizzy drink can descale your electric kettle too. The solution is acidic and can handle mineral deposits.

Fill three-quarters of your kettle with the drink and bring to a boil. Let it cool for 30 minutes before disposing of.

Use Citric Acid Powder:

Fill half the kettle with fresh water and boil it. Then add 2 tablespoons of citric acid powder to the boiling water and let the kettle stand for 20 minutes before emptying the mixture.

Use Baking Soda:

Fill half the kettle with water and 1-2 teaspoons of baking soda. Bring the mixture to a boil and then let it soak for 20-30 minutes. Pour out the solution and boil some fresh water in the kettle.

Use a Kettle Cleaning Product:

There are lots of commercial kettle cleaners available. Follow the instructions mentioned on the packaging; you generally dilute the cleaner with water in the kettle and bring it to a boil.

Let it soak and then dispose of the solution. Then boil fresh water and discard until there are no lingering odors in the kettle.

Ways to Maintain Your Electric Kettle

By now you know all the methods on how to descale electric kettle and how to clean inside of tea kettle. Let’s move onto how you can keep it clean for longer.

  • Don’t leave water sitting in your kettle. Only boil the amount of water you need. Otherwise, pour the boiled water into bottles, jugs, or pitchers after the water has cooled.
  • Try to use distilled water instead of tap water, especially if your area has hard water.
  • Never submerge your electric kettle in water, or hold it under running water. This will damage the heating element.
  • Clean the outside of your kettle every few days to keep the exterior polished and shiny.
  • Descale your kettle every 3 months, if not more often.
  • Do not use harsh abrasives like steel wool or heavy-duty scrubbers as this can damage the kettle.
  • Do not plug in an empty kettle. Besides wrecking the heating element, it can also start a fire.
  • Do not use the kettle to boil things like milk, tea, or broth, as it can ruin the filter and make it harder to clean the kettle.

Got Some Questions?

 Below you’ll find answers to questions we get asked frequently about cleaning electric kettle.

01. How Do I Descale a Kettle?

You can descale a kettle boiling a solution of water and vinegar/lemon juice/citric acid/baking soda/commercial descaler. Once it has reached a boil, let the mixture do its job for 20 minutes before disposing of it.

02. How Do I Clean the Inside of a Glass Kettle?

The best way to clean a glass kettle is to boil a mixture of white vinegar and water in it. You can also use a very soft bottle brush and a mild dish detergent. Avoid using abrasive materials as this can leave scratches on the glass.

03. Does Boiling Water Kill Mold in the Kettle?

Boiling water for sufficient time will kill mold and its spores effectively. Adding things like vinegar makes the process more efficient.

04. Is Boiling Vinegar Safe for the Electric Kettle?

Boiling vinegar in the kettle won’t damage it as it is diluted in water. If you are worried about tasting vinegar in your instant oatmeal later, boil water in the cleaned kettle and discard it. Repeat this until the water loses the taste/smell of vinegar.

In Outline

Electric kettles, like many other kitchen appliances, need a bit of extra TLC to keep them working properly. It may seem annoying, but doing so will extend the lifespan of your kettle.

Since you now know how to clean electric kettles, you won’t dread the descaling process. Sure it’s annoying, but it will make your tea taste so much better!

How to Use a Milk Frother: It’s Super Simple!

Ever craved a rich latte or cappuccino while you were at home? Maybe it’s late and the coffee shops nearby are closed for the night. Or perhaps you want a thick and velvety cup of hot cocoa in the middle of the night.

You may have wondered how to recreate the taste and texture of the milk in café-style drinks. The answer lies in the milk. The frothy texture comes from incorporating air into the milk, giving it tiny bubbles, which makes it very smooth and creates the characteristic foam.

The good news is that you can get this kind of texture at home, without having to run to a coffee shop every single time. You don’t even have to use the steaming wand from a pricey espresso machine; a good milk frother will give you the very same results.

In this article, we’re going to look at how to use a milk frother. Whether you own a manual frother or an automatic one, you’ll be able to wield one like an experienced barista!

What is a Frother?

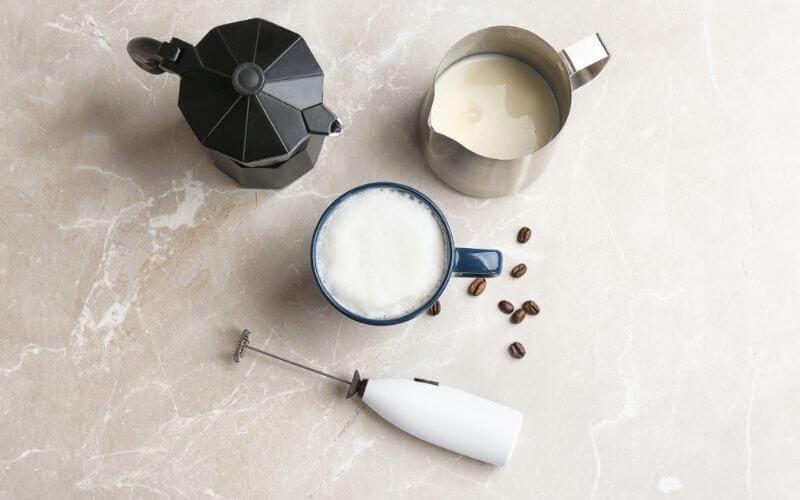
latte milk frother

If you’ve watched people make lattes at home, you might have noticed them use a milk frother. A frother is an appliance or tool that adds texture and richness to milk. 

A frother works by forcefully spinning the milk with a coiled whisk, whipping air into it. Some automatic frothers work by pushing steam through the milk, creating microbubbles that give it a creamy texture.

These tools can be used for steamed milk for latte drinks. The whipping thickens up the milk, making it rich and creamy. Also, they create the signature foam that we love in cappuccinos, giving the drink lots of texture.

You can use a hand frother or steaming wand with non-dairy milk as well. However, the amount of froth created depends on the fat content of the milk. As a result, you will get the best results with full-fat milk.

Different Kinds of Milk Frothers

Like most appliances, you won’t find just one kind of milk frother. There are three main types of milk frothers:

  • Manual
  • Handheld electric
  • Automatic

Manual Milk Frothers:

This kind of frother comes with a frothing pitcher, a plunger or pump, and a sealed lid. You have to fill the pitcher with milk, insert the plunger and cover it with the lid. Use the plunger to pump the milk by hand, which agitates the milk and incorporates air into it. 

Manual frothers are much cheaper and pretty versatile. This can take longer (up to a couple of minutes) and is a little more labor-intensive (consider it an arm workout!)

Handheld Electric Frothers:

These are the most common kind of frothers and are easily available everywhere. It is commonly used as a latte milk frother for use at home. It is basically a thin, battery whisk that whips the milk to create bubbles and foam. 

An electric or battery-operated frother has a handle and thin coil, making it very easy to use. You just need to hold it in place for a minute or two and your milk will be frothed in no time.

Automatic Milk Frothers:

These come in two categories. One is the steam wand that we see in espresso machines. The other is known as an auto frother. Auto frothers often come as self-contained units, where you pour the milk into the machine, plug it in, and the frothy milk is dispensed into your cup.

With a steam wand, you have to hold your pitcher of milk to the wand, which then infuses it with steam, creating the velvety mouthfeel and foam.

Using Manual and Battery-Operated Milk Frothers

In this section, we are going to look at how you can froth milk at home using either a manual frother or an electric handheld one.

Using a Manual Frother:

A manual frother is a good way to froth cold milk. Although it takes longer, it makes for some creamy and fragrant frothed milk that is great for coffee and hot chocolate.

What You Need:

  • Milk (either cold or hot)
  • Cup
  • Frother with pitcher, plunger, and lid
  • Spoon

Instructions:

  1. Add the amount of required milk to the pitcher. If you are making a hot drink, heat up your milk in advance.
  2. Assemble the frother with its plunger and lid.
  3. Vigorously pump the plunger up and down in the milk. Try plunging for 10 seconds at first, and you should feel the pressure between the plunger and the bottom of the pitcher increase. This means you are on the right track, so continue agitating the milk.
  4. You will need to repeat this plunging motion 60-90 times to sufficiently froth your milk. Also, the more pressure you apply, the more foam you will create.
  5. After frothing, gently swirl the milk in the pitcher. You can also gently tap the bottom of the pitcher to separate the milk from the foam.
  6. Gently pour the frothed milk into your cup, holding pack the foam with a spoon. You can top your drink with the foam after adding the melted chocolate or brewed coffee to the milk.

Using a Battery-Operated Frother:

Using a handheld electric frother seems easy, as you just have to place the frothing coil into the milk, turn on the appliance, and hold it in there. This is a common frother for coffee beverages at home.

What You Need:

  • Milk (preferably warmed)
  • Electric frother
  • Large pitcher or carafe

Instructions:

  1. Pour the milk into a large pitcher or glass.
  2. Place your frothing wand into the milk vertically with the head completely submerged in the milk.
  3. Once you are sure the frother head is fully inserted into the milk, turn it on.
  4. Swirl the wand in the pitcher gently in a circular motion for 30 seconds.
  5. Then, move the wand in up and down motions slowly for another 30 seconds. At this point, you should be able to see the milk get foamier.
  6. Hold the pitcher at a slight angle while frothing for the last 10 seconds.
  7. Once the milk is done frothing, turn off the frother and heat the milk again if needed.

This kind of foam is much finer and more delicate, so handle the milk with care.

How to Use an Automatic Milk Frother

An espresso machine with a milk frother is the most common kind of automatic milk frother. If you aren’t sure how to use the steam wand attachment to froth milk, follow this guide step-by-step.

What You Need:

  • Milk
  • Pitcher

Instructions:

  1. Gather your ingredients and set up the wand attachment and assemble the espresso machine.
  2. Pour the milk into a metallic pitcher.
  3. Hold the pitcher under the steam wand.
  4. Place the steam wand into the milk, just below the surface. Use the dial to get a steady stream of steam into the milk.
  5. Keep the pitcher at a slight angle. The end of the steam wand should be near a side of the pitcher and make a vortex in the milk.
  6. Move the pitcher up and down, and swirl the milk around the wand. This incorporates more air and breaks up larger bubbles, creating microfoam.
  7. Once the volume of the milk has increased (around double in size) turn off the dial and remove the wand from the pitcher.
  8. The frothed milk should look and feel smooth and rich, a lot like melted ice cream.
  9. Gently swirl the milk in the pitcher, and then pour into your cup.

Milk Frothing Tips

If you want perfectly frothy milk, follow these tips. They’ve been approved by baristas and coffee aficionados!

  • To break up larger bubbles, gently tap the pitcher against the table or countertop, then swirl the milk around the pitcher a few times.
  • Clean your frothing appliance after every use to prevent the growth of bacteria.
  • Do not leave the frothed milk out for long-use it quickly. This is because the texture breaks down and you will lose the foam.
  • When using a steam wand, start with cold milk.
  • Make sure your vessel or pitcher is no more than half-filled with milk, as frothing increases the volume.
  • When using non-dairy milk, soy is your best bet as it froths easily and creates perfectly smooth microbubbles.
  • You can use a French Press as a manual milk frother, and it gives amazing results.

More Questions?

If you’re still confused by the idea of using these kinds of frothers, you will find answers to some of the most immediate concerns regarding frothing milk.

01. Why Do People Use Milk Frothers?

Milk frothers are used to create texture in milk. The microbubbles give the milk a creamy and velvety mouthfeel which makes coffee and chocolate-based drinks richer and more pleasant.

Frothing also improves the taste and smell of the milk, and the foam produced makes attractive latte art.

02. Is a Milk Frother Worth Buying?

If you enjoy coffee-based drinks and want to make them at home, getting a milk frother will allow you to make them whenever you want. If you have a café set up in your kitchen, a cheap electric frother is a good backup plan in case your espresso machine stops working.

03. Which Milk is Best for Frothing?

Whole milk makes the silkiest frothed milk with a creamy texture and lots of thick foam. If you prefer a plant-based alternative, using soy or almond milk will give you similar results.

04. Can I Froth Coffee Creamer?

Depending on the fat and protein content, it is possible to froth certain liquid coffee creamers. You can even try frothing vegan creamers! You may need to experiment with different kinds of creamers to get the results you want.

05. How to Make a Latte at Home Without a Frother or Steam Wand?

You can make frothed milk without any kind of frothing tool. All you need is a secure mason jar. Fill a third of the jar with milk, and screw the lid tightly.

Shake the milk in the jar vigorously, until the milk doubles in volume. Heat the milk in the microwave, pour it into a mug or cup and add freshly brewed coffee to make a latte.

Wrapping Up

By now, you probably know how to use a milk frother. As you can see, each method is easy to use, and the milk will foam up at no time at all.

You can enjoy velvety milk in your cappuccinos, chai lattes, and even in hot chocolate, all made at home in your kitchen. You can cut down on your coffee consumption outside, saving you valuable time and money.

Who knows you might end up making better coffee than your local coffee shop!

How to Use a Smoker Box: Smoke Food without a Smoker!

Do you love smoked meat? If you have an abundance of fresh meat, smoking them is a good method for storing and preserving it. Many people shy away from smoking because they do not own a complete smoker.

But this doesn’t mean you can’t smoke things at home. If you have a gas grill and a little ingenuity, you can smoke herbs, meat, veggies, spices, and even cheese! Many people own a smoker box for gas grills, but few know how to use it properly.

This article aims to change that. If you own a gas grill smoker box, you can smoke anything without much trouble. We’ll show you how easy it is to use them, and give you all the tips you need to smoke meat like a professional. If that sounds like an interesting deal, keep on reading!

What is a Smoker Box?

bbq smoker box

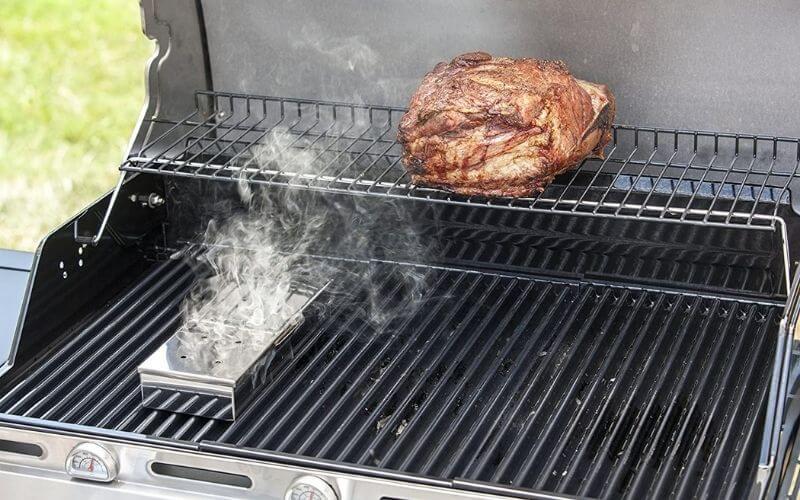
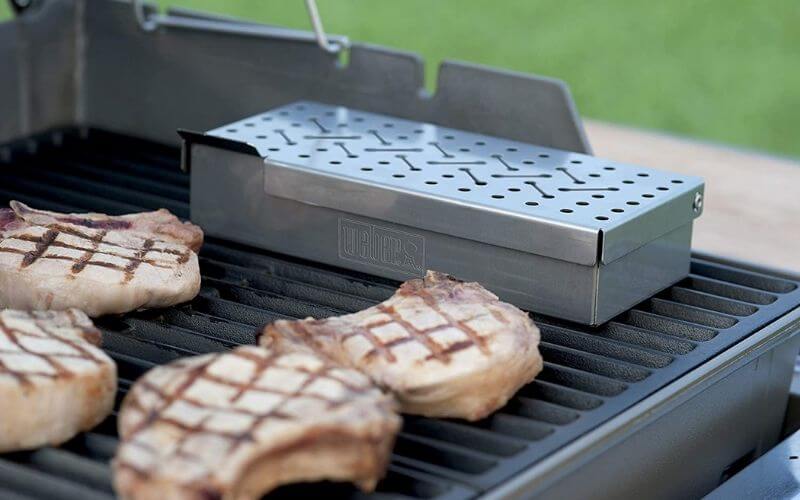
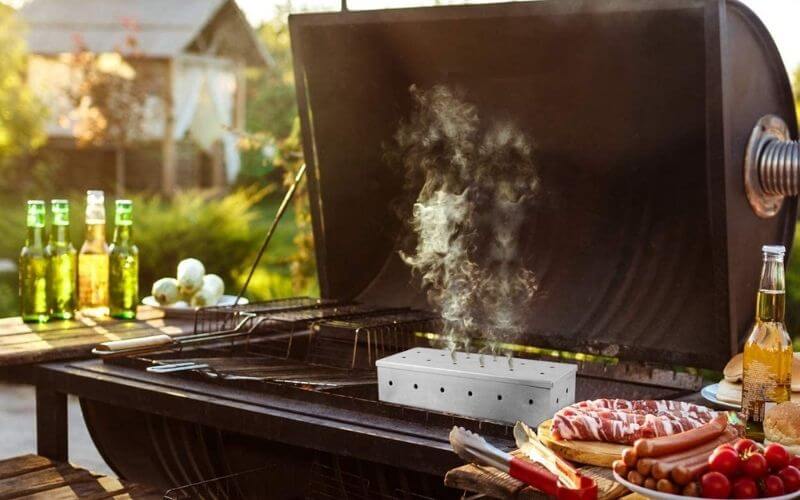
A smoker box is a small metal container that can be used on grills to infuse a smoky flavor into grilled or food cooked on indirect heat. Just fill it with pellets or soaked wood chips then place it under your grill grates. 

Smoker boxes are an inexpensive add-on to your grill, allowing you to easily smoke food without investing in a separate smoker.

Getting a cast-iron smoker box for gas grill will ensure that you can smoke meat for years to come. However, a Weber stainless steel smoker box can also get the job done. If you are out of options, you can even make a homemade smoker box for gas grills.

When grilling over charcoal briquettes, the smoker box is positioned right on the briquettes. Similarly, when used on gas or electric grills, the smoker box is placed directly on the heat source, under the grate on the grill.

Simply put, smoker boxes are used for providing a smoky flavor to grilled foods as they cook. They hold the soaked wood chips that are to be placed over a charcoal or gas fire for this flavor. Besides water, liquids like beer, soda, or juice can be used to infuse the wood chips with unique flavors.

Smoker boxes generally range in size from 8-12 inches long and 4-6 inches wide. If you don’t smoke large quantities frequently, we suggest getting a small smoker box. This is also a good option if you want to experiment with using a smoker box.

What are the Different Kinds of Smoker Boxes?

Before we get into using a smoker box, let’s have a quick peek at the kinds of smoker boxes out there. Whether you have a stainless-steel smoking box, a Weber grill smoking box, or a cast-iron one, knowing the sort of tool you have will help with your smoker setup.

Smoker Box Under-Grate:

This kind of smoker can be made from disposable aluminum foil or from stainless steel or cast iron that can be reused. They are meant for directly mounting between the flame diffusers under the gas grill grate.

Smoker boxes under-grate available nowadays come in a range of shapes and sizes: they may be flat, round, V-shaped, or tube-shaped. Because the smoker box is right under the grate, the result is a richer flavor and more intense smokiness.

Smoker Box Over-Grate:

Smoker boxes over-grate are typically rectangular; others may have flatter designs. This kind of box is mainly made from stainless steel like smoker boxes under-grate. They may also be found in the form of pouches, grids, and trays.

Disposable Smoker Box:

A disposable smoker box can only be used once because it is made of aluminum foil. You can make these yourself at home in the easiest way ever- make foil pans and aluminum foil lids and poke holes in them. 

You can also just use aluminum foil to create a box-like container and cover it with a foil lid if you don’t have foil pans at home.

Make sure that the holes in the lid are roughly the same shape and size so that the smoke is dispersed evenly. You can also use wood chips in these boxes so the smoke can pass directly through the burners.

Free-Standing Smoker Box:

The free-standing smoker box is very versatile and can be used on charcoal in a coal oven, burned directly on a furnace, or even used on a griddle. 

They are often made from stainless steel and sometimes cast iron. This kind of box can be much larger in size and uses up more pellets or wood chips per smoking session.

Most traditional rectangular smoker boxes can be pretty forgiving and you can use them both on the burner of the grill and under an actual grill. 

However, some models are specially designed for use under the grill. As a result, you can use some smoker boxes in different grill settings, which is super convenient.

How to Use a Smoker Box

how to use a smoker box

With the introductions out of the way let’s look at how to use a gas or propane grill with a smoker box. Whether you have a Weber Genesis smoker or a Napoleon smoker box, or anything else in between, this guide will work for you.

How to Use Smoker Boxes on a Gas Grill:

  1. Preheat your gas grill.
  2. Set up a smoker box or make a disposable one from aluminum foil.
  3. Then load your smoker box with soaked wood chips. We’ll talk about the best kinds of pellets to smoke wood chips on gas grills later.
  4. Set the smoker box over the burner you will leave on during indirect cooking. You can place it over or under the cooking grates.
  5. After the box starts smoking, set up the grill for indirect cooking by turning off all extra burners.
  6. Adjust the remaining lit burners until the internal temperature reaches anywhere from 220F-250F.
  7. Add the food to the grill and smoke the meat until it registers an internal temperature of 160F.

You might need to keep adding extra wood chips to the smoker box, whenever they stop producing smoke.

How to Use a BBQ Smoker Box:

You don’t have to be an expert at barbecuing to know how to use a smoker box for BBQs.

  1. Put your dry wood chips or pellets in the smoker box.
  2. Shut the lid properly. Don’t overload the box with wood chips, as this can prevent you from closing the lid properly.
  3. Set the smoker box above the grill, inside the smoking compartment. When using charcoal as fuel, place the smoker box right above the charcoal, under the open grill grate.
  4. Preheat your grill by turning it to a high temperature until the wood starts smoking; this takes around 10-15 minutes.
  5. Then, reduce the temperature to medium heat.
  6. Put in the meat you want to smoke above the grill in the smoking compartment, next to your smoker box.
  7. After the food has been sufficiently smoked and reaches 160F, kill the heat and open the smoking compartment.
  8. Put out the smoldering wood chips inside the smoker box.
  9. Remove the food and let it rest for 5-10 minutes.

Setting Up Your Smoker Box

​Place the wood chips in your smoker box. When using wood chips on gas grills, people soak their wood chips first to prevent them from catching fire.

If your smoker box doesn’t have holes on the bottom, the wood pellets won’t generally catch on fire, so you can use dry wood chips. Using dry chips can produce smoke much faster.

​Set the smoker box as close to the heat source as possible. When using a gas grill, this means placing it on top of the burners. If using charcoal, place it right on top of the charcoal.

We suggest turning your burners on the highest setting at first to get the smoker box hot enough to start producing smoke. It can take up to 10 minutes for the box depending on your grill.

​After the smoker box starts producing smoke, you can decrease your burners back to regular cooking temperatures. It will stay hot enough at that point to keep producing smoke for the rest of the cooking process.

Best Wood Chips for Your Smoker Box

Confused about the right wood chips on the gas grill? Here’s everything you need to know!

Almond: This wood adds a sweet hint to your meat, and works well for poultry, pork, and fish. It also creates less ash!

Apple:  It is pretty mild and has a subtle fruity flavor, and is slightly sweet. It is great with poultry and pork.

Cherry: Cherry wood adds a fruity sweet-and-tart flavor. It works well no matter what you are smoking and is considered the best wood for smoking.

Hickory: This is the ideal wood for a heavy smoky flavor. It is a great choice when smoking red meat, bacon, and ham.

Orange/Lemon/Grapefruit: The citrus notes work well with fish and white meat.

Oak: It is best for heavy-duty smoking like ribs, pork, and heavy game. It has a particularly intense smoke flavor.

Frequently Asked Questions

Below you’ll find answers to questions we get asked the most about smoker boxes.

01. What are the Steps on How to Use a Smoker Box on a Charcoal Grill?

Place your smoker box with wood pellets/chips above the charcoal, then light the charcoal on high until the wood starts smoking. Then, lower the heat to medium, add the food, and smoke until it reaches 160F.

02. What is a Smoker Attachment for Grill?

Some gas grills come with a smoker box as an accessory or attachment. This is convenient as you know that the smoker box is perfectly compatible with your grill.

03. What is the Best Method for Using a Gas Grill as a Smoker?

Place the smoker directly over the burner that will be lit throughout the smoking process. Put the cooking grates in place.

Turn on the grill, and set all the burners to high, and close the lid. When smoke appears, set your food on the grates, lower the temperature of the grill, or turn off the extra burners as needed.

04. What is the Best Wood for Smoking Meat?

A combination of pecan, oak, or hickory with cherry or applewood will give you the best results when smoking meat. The best wood to use also depends on the kind of meat you are smoking.

Final Say

Smoking meat at home can take your culinary exploits to the next level. Whether you have a dedicated smoker, a smoker box attachment, or even a DIY box made from foil, you can make beautifully smoked meat with complex flavor right at home. Now that you know how to use a smoker box, you can experiment with various meats, wood chips, and smoking methods. To learn more about smoking meat on gas grills, check this out.

How to Put Out Charcoal Grill: Wrap It Up with No Fuss!

Grilling with charcoal is always an amazing experience, and this kind of grilling infuses the food with an intense smoky taste. Using charcoal grill and accessories requires a bit of finesse and grilling itself is a culinary art.

Most beginners get the hang of lighting a charcoal fire pretty easily. The process of grilling meat isn’t overly complicated either. But what about putting out a charcoal grill? Many guides gloss over this part of grilling, so grill amateurs aren’t sure how to put out charcoal grills.

However, knowing how to handle a grill after you are done using it is extremely important. You should extinguish your embers/charcoal as soon as possible as this saves fuel and also prevents accidents from flare-ups.

Also, if you have small children or pets, it is important to put out your grill right away. If you fumble around with your grill once the BBQ is winding down, you can be risking a fire hazard.

This article will change that. If you just got a BBQ charcoal grill, and you aren’t sure how to deal with the aftermath, keep reading. We cover everything; from putting out your charcoal grill to cleaning up the ash and debris.

How to Put Out a Charcoal Grill

how to put out charcoal grill

The easiest way to turn off your grill is to close all the vents, cutting off the oxygen supply to the burning coals. This method is a little slower, and it can take up to 2 days to let the coals cool down completely.

Putting out the grill with water is a little risky, but much faster. To completely put out charcoal, you need a bit of expertise in handling them. We’ll walk you through extinguishing barbecue grill charcoal.

What You Need:

Putting Out the Grill:

  1. Start by putting on heat proof oven mitts or BBQ gloves and make sure that they are heat resistant so that the heat from the grill won’t burn you.
  2. Take the rack off your grill and carefully close the lid. If your grill has vents then make sure that they are closed all the way to cut off the oxygen supply.
  3. Charcoal for the grill can always take a very long time to cool down, and it can be difficult to tell whether they’re still burning or not.

    Because of this, it is best to leave the coals to cool down for around 48 hours, just to make sure that they are completely cool.

Ash Disposal:

After this time has passed, and the contents of the grill have cooled down, you can start cleaning up the ash and remnants of the burnt charcoal.

  1. Use something like an ash removal bucket to safely scoop up the ashes. Pour them onto a large sheet of aluminum foil before disposing of them, as this prevents the ash from spilling and making a mess.
  2. Carefully fold up the foil, sealing the ashes inside securely. Dispose of the foil and ashes in a large metal basket or trash can. Avoid using plastic, as any remaining embers can burn it.
  3. When handling the ash and aluminum, wear gloves and use tongs. Even though the ash is mostly cold, it is safer to make sure any sparks or glowing embers won’t burn you.
  4. However, you don’t always have to wait for the charcoal briquettes to cool down completely. You can still remove them with the ash while they are still warm using a pair of sturdy tongs.

    However, in doing so, you need to use separate metal trash cans or containers; one for the ash and one for the charcoal.
  5. If the coals are still very hot, this means that they will keep burning in the metallic container and create more ashes. To extinguish them completely, use tongs to dip the burning coal into a large container or bucket of water.
  6. Do not spray or pour water onto the hot grill or charcoals. This can create flare-ups, and you can be injured by the jets of steam. The steam can also scatter the hot ash which can result in serious burns.
  7. Furthermore, coals burn at very high temperatures, and spritzing them with water can result in a cracked grill.
  8. Always wait until the ash and coals have completely cooled down, even if it takes two whole days, to stay on the safe side.

Cleaning the Grill:

  1. Use a metal grill spatula or a trowel to brush off the remaining ash from the grill.
  2. Then, thoroughly clean out the chamber containing ash. Pay particular attention to the vents, as stray bits of ash can end up there, blocking the vents when you next use your grill.
  3. Use a wire brush and grill cleaner to thoroughly clean the grates and lower section of the grill. You can also clean the grates using just soap and water.
  4. After the grates are clean and dry, spray some silicone to lubricate them. The spray acts as an anti-rusting agent and improves the lifespan of your grill grates in the long run.

After they have completely cooled down, use a pair of tongs to place the cold charcoal briquettes back in the bottom half of your grill so that you can use them the next time you fire up your grill.

Tips for Shutting Down Your Grill

After cooking on a charcoal grill, you need to put out the embers right away. These tips will help you extinguish your grill safely and quickly.

  • Don’t ever put hot charcoal in plastic bins or garbage bags, as this can burn up and even start a fire if there is an ember.
  • Don’t move the grates around before they have completely cooled down.
  • Locate the vents on top and bottom of the grill and close them. This will gradually put out the burning coals.
  • Always keep a bucket of water nearby to douse any hot smoldering charcoal briquettes. Keeping a fire extinguisher in the immediate vicinity is also a good idea.
  • Even if you think the charcoal grill is not hot enough to cause burns, use gloves and tongs anyways. Even after 48 hours, some ash or remaining charcoal can still be very hot.

Frequently Asked Questions

Below you’ll find answers to questions we get asked the most about putting out charcoal grills.

01. What Do I Do with Charcoal after Grilling?

After you are done with putting out the grill and cleaning the ash, you can reuse partially burnt coals the next time. After putting them out with water and allowing them to cool, let them dry completely before putting them back in the grill.

02. How Should I Put Out a Grill Fire?

To put out a grill fire, close all the vents to cut off the fire’s oxygen supply. This will slowly choke out the fire and eventually put it out.

03. Can You Reuse Charcoal?

After the charcoal is used or partially burned, it can be lit again after it has cooled and dried.

04. How Long Does Charcoal Burn for?

Lump charcoal generally burns for 4-6 hours, while briquettes will give you a good 8-10 hours. However, every BBQ grill is different and these burn times are dependent on the grill, and the airflow of the vents. If the vents are completely open, they will burn more intensely.

05. At What Temperature Does Charcoal Burn?

Charcoal burns at extremely hot temperatures. Charcoal burns at temperatures over 1,100 degrees Celsius (2,010 degrees Fahrenheit). This makes it even more vital to be careful around burning charcoal.

06. How Do I Get Rid of Charcoal Ash?

Let the ashes fully cool down or pour plenty of water onto them and stir thoroughly to speed up the process. Once the ashes have cooled completely, use a trowel to remove them from the grill.

Wrap them in aluminum foil or put them in a small metal container, like a coffee can. Then dispose of the ashes in an outdoor or metal garbage bin.

Conclusion

The best way to enjoy a BBQ is to use the grill properly and safely. Once you know how to put out a charcoal grill, you will be able to put a wrap on your cookout safely and quickly.

The key to handling a hot grill is patience; just shut off the vents and let science do the rest! Give the grill, charcoal, and ash time to cool off so you can handle them more safely.

What do you think? Are you going to follow this method after your next BBQ?

Chocolate Covered Espresso Beans: Does It Have Too Much Caffeine?

People around the world drink around two billion cups of coffee every day, making it the 3rd most popular beverage on earth, after water and tea! We love coffee, not just for the rich, delicious taste but also for that stimulating kick of caffeine.

Chocolate is debatably the world’s most popular sweet item. People who enjoy eating chocolate are not limited to children. This sinfully delicious sweet treat is loved by people of all ages and ethnicity. Unsurprisingly, chocolate is also rich in the highly sought-after stimulant, caffeine.

People love to pair chocolate with coffee. Be it a steaming cup of mocha or chocolate coffee cake, it is undeniably a mouthwatering combo. But, is the combination an overload of caffeine?

Chocolate and Espresso Beans

Chocolate and Espresso Beans

Chocolate and espresso beans are a great pair. That is why café mocha ranks quite high on the list of the more popular coffee drinks. The café mocha is a chocolatey concoction with a hint of coffee and this is made by using shots of espresso, with hot milk adding chocolate syrup or powder to flavor.

Other than café mocha, chocolate and espresso beans can be combined in the following ways.

Chocolate Flavor Infused Espresso Beans

Chocolate Flavor Infused Espresso Beans

As far as espresso beans go, if you check out this list of favorites, you will find that some popular espresso beans are infused with flavors. One of the popular hints of flavors infused in coffee other than vanilla is chocolate since it pairs so well with coffee.

Chocolate-infused espresso beans often have only a hint of cocoa which does not overpower the strong coffee flavor. These coffee beans are used like regular espresso beans, grounded, and used to make brewed coffee.

The only caffeine you will find in these beans comes from the coffee beans. The chocolate flavoring is artificial and does not have any caffeine. The flavor is often light and doesn’t overpower the coffee.

Chocolate Covered Espresso Beans

Did you know that some people eat coffee beans directly? The bean is not a seed, rather, it is the dried version of the coffee fruit or cherry. Chewing roasted coffee beans can be bitter, but you get your caffeine fix for a lot fewer calories.

If you want to munch on coffee beans, but do not want the bitter test, try eating chocolate-covered coffee instead. People who love the choco-coffee combo, love this confectionary. The espresso coffee beans are covered in either dark, milk, or white chocolate.

These decadent chocolate treats are not just delicious but also provide a punch of caffeine. However, They are also decked with calories. You may be tempted to eat too many of them, but don’t.

Nutritional Information of Chocolate Covered Espresso Beans

NutrientAmount per 1 oz (28 g) serving
Calories140-150
Fat9-10 g
Saturated Fat6-7 g
Trans Fat0 g
Cholesterol5-10 mg
Sodium0 mg
Carbohydrates15-17 g
Fiber1-2 g
Sugar12-13 g
Protein2-3 g

Please note that the nutritional information may vary depending on the brand and type of chocolate covered espresso beans.

Why shouldn’t You Overeat Chocolate-Covered Espresso Beans?

Just with any sweet treat, it’s healthier to eat chocolate-covered espresso beans in moderation. Taking too much sugar causes three common health problems: Type-2 Diabetes, cardiovascular disease, and obesity. Taking a large amount of sugar causes insulin intolerance, which leads to diabetes.

When you consume glucose more than you burn, the body turns the sugar into fat and stores it in your body. This can cause multiple cardio-vascular problems, like artery blockage that can lead to high blood pressure, heart attacks, and strokes.

Extra fat can lead to obesity. Let’s not forget that they make your teeth rot. However, when enjoyed in moderation they boost your health and make you live longer! But, too much caffeine intake can also cause health problems.

So, How Much Caffeine Do Chocolate Covered Espresso Beans Have?

There is a claim that consuming coffee beans gives you a more concentrated dose of caffeine, as it doesn’t go through the brewing process and no residue is thrown away.

One unroasted arabica bean coffee has about 1.9 mg of caffeine, while robusta has around 2.9 mg caffeine.

Chocolate has a lot less caffeine with dark chocolate around 80 mg of caffeine per 100gms and milk chocolate, 20 mg per 100gms. White chocolate has no caffeine.

So, depending on the thickness of the coating, one dark chocolate-covered espresso bean has anywhere from 6mgs to 13mgs of caffeine. Milk chocolate varieties have 5-10 milligrams of caffeine. This isn’t much, unless you eat 100gms of chocolate-covered espresso beans, at one time!

Can You Replace Your Daily Cup Of Coffee For Chocolate-Covered Espresso Beans?

People can swap coffee for chocolate-covered coffee beans if they love chocolate. However, eating too much sweetened-chocolate can give you health problems. But, eating an unsweetened one will be bitter and reduces its yummy test.

Plus the caffeine content means you have to take them in moderation. An average cup of Joe contains 85-200 mg of caffeine, depending on the type of bean and the coffee-making process, a shot of espresso has around 65 mg of caffeine.

To match that kind of caffeine level, you need to eat from 7 to 33 dark chocolate-covered beans for every cup, and more for milk chocolate! For each shot of espresso, you will have to eat 5 to 11 pieces.

Making Your Own Chocolate-Covered Espresso Beans At Home

Anyone who loves eating chocolate-covered espresso beans knows how expensive they are. Save yourself the expense and try making it at home. The best part about this is you can control the sweetness and increase or decrease it according to your taste.

You will need few ingredients; mainly good quality coffee beans of your choice. For every 1.5 oz, you will need 3.5 oz or 100gms of solid chocolate. You can choose any type of chocolate, depending on what kind you want to make.

Bring some water to boil in a saucepan, then lower the heat. Place a heatproof bowl over the saucepan and melt your chocolate. Coat your beans and put them in the refrigerator.

Final Thoughts

Chocolate-covered espresso beans are a delight. You can easily replace your regular cups of coffee with these beans. However, you will have to eat quite a few.

The content of caffeine in each chocolate-coated bean is not that high, but since they are delicious, people can easily overeat. So, be careful not to eat too much, as it can become a health hazard.

Try making these delicious treats at home and enjoy a fun dose of caffeine with every mouthwatering bite. The dosage of caffeine is more concentrated so try not to eat them at night, unless you want to stay awake!

Why Doesn’t Caffeine Affect Me? Find Out Why Your Cup of Coffee Feels Useless

After a long night of tossing and turning, it’s normal to feel exhausted the next day at work. Most of us can survive dreary mornings with a little help from a strong cup of coffee or two. We strike the right balance, where coffee helps us feel more awake and alert.

But not everyone is so lucky. Some people are sensitive to caffeine and a small cup will have them still jittery at 11 pm. And for some people, things go the other way. They can drink a few cups of strong brewed tea or coffee, only to find the caffeine not working.

If you’re one of those people, you may have asked yourself, coffee doesn’t affect me? This article will explore the reasons why caffeine doesn’t work anymore on you. Once you’ve figured out why you have a caffeine immunity, you can then look for ways to fix it!

Why Doesn’t Caffeine Work on Me?

coffee doesn't affect me

You may think that your brain is broken if coffee can’t get it out of its foggy, sleepy state. But the truth is, there are lots of factors that determine the effect of coffee (or the lack of it) on the body.

Here’s why your cup of coffee doesn’t have the same kick as it once had:

Your Genetics:

Your genes may affect how your body takes in caffeine. Caffeine enters your bloodstream through the stomach and intestines, and as it passes through the body, it binds to a number of “receptors,” most of which are in your brain.

These receptors can behave differently based on genetics. How fast does caffeine work? This depends. 

Some people have receptors that are more likely to join up with the caffeine while others don’t. Then, the caffeine is metabolized in the liver. Genetics also play a major role in how your body metabolizes caffeine

In your liver, here are certain enzymes that metabolize caffeine. Some people produce less of the one that removes the caffeine from your system. If you feel the effects of your coffee vanishing in an hour or two, you are probably a fast caffeine metabolizer.

Caffeine Tolerance:

If you drink multiple glasses of cold brew a day, you might have built up a coffee tolerance. If you are wondering why caffeine has no effect on me, it may be because you built the habit of drinking lots of coffee every day.

After a while, you will have to keep drinking more and more coffee to keep you awake and alert. This can lead to caffeine overdoses which are unpleasant and can cause serious health problems in the long run.

Too Little Caffeine:

Sometimes, it could be that you are consuming the wrong amount of caffeine. Or perhaps the kind of coffee you are drinking is weakly brewed or diluted with milk. Also, if your body metabolizes coffee quickly, you may need a stronger brew, or more coffee to achieve the same effect.

This can also have to do with your height and body weight. Smaller people can get the effects of caffeine with a cup of coffee or tea. On the other hand, taller and bigger people may need to consume more to feel properly alert.

Too Little Sleep:

Yes, coffee can help you stay awake after an all-nighter. But if you haven’t slept in 3 days, a pitcher of coffee won’t help your brain stay conscious. We feel sleepy because of a chemical called adenosine. 

After drinking coffee, the caffeine binds to these molecules, which makes us feel more alert instead of tired. This reverses the effects of adenosine, keeping you awake instead.

But there’s a big catch: if you are sleep deprived, your body will produce even more adenosine. The extra adenosine can counteract the effects of the caffeine, so it won’t have the usual effects. 

This is why your regular cup of coffee won’t work in keeping you awake. Instead, try a couple of shots of espresso!

Also, sleep deprivation can intensify in cases of neurodivergent. If you ever thought, ‘caffeine makes me tired,’ ADHD can play a role and the coffee will not have any effect on individuals with this condition.

Too Much Coffee:

Too much of a good thing can go bad, and this might be the reason that caffeine doesn’t work for you. If you’ve been drinking way too much coffee each day, you risk a number of health concerns, the most dangerous being a heart attack.

If you consume more than 400mg of caffeine a day, you will begin experiencing severe side effects. These can range from mild irritability and jitters to severe nausea, diarrhea, cramps, headaches, and vomiting.

The worst part? Extreme caffeine will also have a negative effect on your sleep at night. You won’t be able to sleep, you’ll feel anxious and jittery, and the exhaustion you felt during the day will assault you in full force. And the next day, you will drink even more coffee, repeating the cycle.

This is why it is important to consume the right amount of caffeine. Some blends and roasts have more caffeine, so it is important to drink less of it. You can also try lighter roasts and even decaf coffee.

Everything Else You’ve Been Consuming:

At the bottom of the list, the things you eat also affect how caffeine works in your system. Food, drinks, medicine, drugs- anything you consume influences the way caffeine is metabolized.

Certain enzymes metabolize various substances, so each compound has to wait to get metabolized, which in turn, slows down the overall process and keeps the substance in your system longer. Some painkillers can make you tired and sleepy, counteracting the effects of caffeine.

On the other hand, smoking cigarettes increases the rate at which caffeine is metabolized. It also means that the caffeine leaves the system faster, so smokers often end up drinking more coffee.

Frequently Asked Questions

Below you will find answers to questions that people often have about caffeine and its effects.

01. Why Doesn’t Coffee Wake Me Up?

If your coffee isn’t waking you up, it may be because your blend of coffee is weak, or your brew is diluted. It can also be due to sleep deprivation, genetics, and tolerance to caffeine.

02. Can You Build a Tolerance to Caffeine?

If you drink too much coffee and drink tea frequently, your body can build a tolerance for caffeine. This can lead to caffeine overdoses which have a plethora of nasty side effects.

03. Why Am I So Sensitive to Caffeine?

A number of factors result in caffeine sensitivity, including things like genetics and the liver’s ability to metabolize caffeine. A caffeine allergy occurs if your immune system mistakes caffeine as a potentially dangerous invader and tries to fight it off with antibodies. This can cause severe negative reactions to coffee.

04. How Does Caffeine Affect the Brain?

Caffeine works as a stimulant to the central nervous system. Once it reaches the brain, the most significant effects are wakefulness and alertness. You will feel more aware and less exhausted, which is why a cup of coffee is the perfect pick-me-up for long and tiring days.

05. Where in the Body Does Caffeine Act?

Caffeine affects the central nervous system (CNS) mainly altering the way the brain works. However, as caffeine is a stimulant, it can also increase the heart rate.

To Summarize

Consuming coffee while tired, only to find that you are both jittery and exhausted can be a ghastly experience. If you’ve been asking yourself, ‘Why doesn’t caffeine affect me?’ it might be time to look at the coffee you are consuming.

Is your coffee too weak? Or are you developing a tolerance to coffee? If the reason is the latter, it might be a good idea to cut back on your caffeine intake. 

Switching to decaf, or trying milder teas can be a good way to make sure consuming caffeine doesn’t lose its edge. May your coffee always be hot, flavorful, and strongly brewed!

More Related Articles: