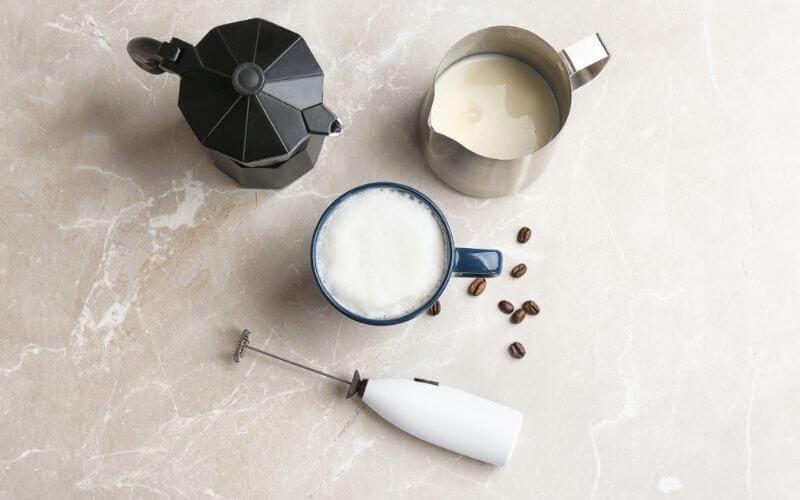
Ever craved a rich latte or cappuccino while you were at home? Maybe it’s late and the coffee shops nearby are closed for the night. Or perhaps you want a thick and velvety cup of hot cocoa in the middle of the night.
You may have wondered how to recreate the taste and texture of the milk in café-style drinks. The answer lies in the milk. The frothy texture comes from incorporating air into the milk, giving it tiny bubbles, which makes it very smooth and creates the characteristic foam.
The good news is that you can get this kind of texture at home, without having to run to a coffee shop every single time. You don’t even have to use the steaming wand from a pricey espresso machine; a good milk frother will give you the very same results.
In this article, we’re going to look at how to use a milk frother. Whether you own a manual frother or an automatic one, you’ll be able to wield one like an experienced barista!
What is a Frother?

If you’ve watched people make lattes at home, you might have noticed them use a milk frother. A frother is an appliance or tool that adds texture and richness to milk.
A frother works by forcefully spinning the milk with a coiled whisk, whipping air into it. Some automatic frothers work by pushing steam through the milk, creating microbubbles that give it a creamy texture.
These tools can be used for steamed milk for latte drinks. The whipping thickens up the milk, making it rich and creamy. Also, they create the signature foam that we love in cappuccinos, giving the drink lots of texture.
You can use a hand frother or steaming wand with non-dairy milk as well. However, the amount of froth created depends on the fat content of the milk. As a result, you will get the best results with full-fat milk.
Different Kinds of Milk Frothers
Like most appliances, you won’t find just one kind of milk frother. There are three main types of milk frothers:
- Manual
- Handheld electric
- Automatic
Manual Milk Frothers:
This kind of frother comes with a frothing pitcher, a plunger or pump, and a sealed lid. You have to fill the pitcher with milk, insert the plunger and cover it with the lid. Use the plunger to pump the milk by hand, which agitates the milk and incorporates air into it.
Manual frothers are much cheaper and pretty versatile. This can take longer (up to a couple of minutes) and is a little more labor-intensive (consider it an arm workout!)
Handheld Electric Frothers:
These are the most common kind of frothers and are easily available everywhere. It is commonly used as a latte milk frother for use at home. It is basically a thin, battery whisk that whips the milk to create bubbles and foam.
An electric or battery-operated frother has a handle and thin coil, making it very easy to use. You just need to hold it in place for a minute or two and your milk will be frothed in no time.
Automatic Milk Frothers:
These come in two categories. One is the steam wand that we see in espresso machines. The other is known as an auto frother. Auto frothers often come as self-contained units, where you pour the milk into the machine, plug it in, and the frothy milk is dispensed into your cup.
With a steam wand, you have to hold your pitcher of milk to the wand, which then infuses it with steam, creating the velvety mouthfeel and foam.
Using Manual and Battery-Operated Milk Frothers
In this section, we are going to look at how you can froth milk at home using either a manual frother or an electric handheld one.
Using a Manual Frother:
A manual frother is a good way to froth cold milk. Although it takes longer, it makes for some creamy and fragrant frothed milk that is great for coffee and hot chocolate.
What You Need:
- Milk (either cold or hot)
- Cup
- Frother with pitcher, plunger, and lid
- Spoon
Instructions:
- Add the amount of required milk to the pitcher. If you are making a hot drink, heat up your milk in advance.
- Assemble the frother with its plunger and lid.
- Vigorously pump the plunger up and down in the milk. Try plunging for 10 seconds at first, and you should feel the pressure between the plunger and the bottom of the pitcher increase. This means you are on the right track, so continue agitating the milk.
- You will need to repeat this plunging motion 60-90 times to sufficiently froth your milk. Also, the more pressure you apply, the more foam you will create.
- After frothing, gently swirl the milk in the pitcher. You can also gently tap the bottom of the pitcher to separate the milk from the foam.
- Gently pour the frothed milk into your cup, holding pack the foam with a spoon. You can top your drink with the foam after adding the melted chocolate or brewed coffee to the milk.
Using a Battery-Operated Frother:
Using a handheld electric frother seems easy, as you just have to place the frothing coil into the milk, turn on the appliance, and hold it in there. This is a common frother for coffee beverages at home.
What You Need:
- Milk (preferably warmed)
- Electric frother
- Large pitcher or carafe
Instructions:
- Pour the milk into a large pitcher or glass.
- Place your frothing wand into the milk vertically with the head completely submerged in the milk.
- Once you are sure the frother head is fully inserted into the milk, turn it on.
- Swirl the wand in the pitcher gently in a circular motion for 30 seconds.
- Then, move the wand in up and down motions slowly for another 30 seconds. At this point, you should be able to see the milk get foamier.
- Hold the pitcher at a slight angle while frothing for the last 10 seconds.
- Once the milk is done frothing, turn off the frother and heat the milk again if needed.
This kind of foam is much finer and more delicate, so handle the milk with care.
How to Use an Automatic Milk Frother
An espresso machine with a milk frother is the most common kind of automatic milk frother. If you aren’t sure how to use the steam wand attachment to froth milk, follow this guide step-by-step.
What You Need:
- Milk
- Pitcher
Instructions:
- Gather your ingredients and set up the wand attachment and assemble the espresso machine.
- Pour the milk into a metallic pitcher.
- Hold the pitcher under the steam wand.
- Place the steam wand into the milk, just below the surface. Use the dial to get a steady stream of steam into the milk.
- Keep the pitcher at a slight angle. The end of the steam wand should be near a side of the pitcher and make a vortex in the milk.
- Move the pitcher up and down, and swirl the milk around the wand. This incorporates more air and breaks up larger bubbles, creating microfoam.
- Once the volume of the milk has increased (around double in size) turn off the dial and remove the wand from the pitcher.
- The frothed milk should look and feel smooth and rich, a lot like melted ice cream.
- Gently swirl the milk in the pitcher, and then pour into your cup.
Milk Frothing Tips
If you want perfectly frothy milk, follow these tips. They’ve been approved by baristas and coffee aficionados!
- To break up larger bubbles, gently tap the pitcher against the table or countertop, then swirl the milk around the pitcher a few times.
- Clean your frothing appliance after every use to prevent the growth of bacteria.
- Do not leave the frothed milk out for long-use it quickly. This is because the texture breaks down and you will lose the foam.
- When using a steam wand, start with cold milk.
- Make sure your vessel or pitcher is no more than half-filled with milk, as frothing increases the volume.
- When using non-dairy milk, soy is your best bet as it froths easily and creates perfectly smooth microbubbles.
- You can use a French Press as a manual milk frother, and it gives amazing results.
More Questions?
If you’re still confused by the idea of using these kinds of frothers, you will find answers to some of the most immediate concerns regarding frothing milk.
01. Why Do People Use Milk Frothers?
Milk frothers are used to create texture in milk. The microbubbles give the milk a creamy and velvety mouthfeel which makes coffee and chocolate-based drinks richer and more pleasant.
Frothing also improves the taste and smell of the milk, and the foam produced makes attractive latte art.
02. Is a Milk Frother Worth Buying?
If you enjoy coffee-based drinks and want to make them at home, getting a milk frother will allow you to make them whenever you want. If you have a café set up in your kitchen, a cheap electric frother is a good backup plan in case your espresso machine stops working.
03. Which Milk is Best for Frothing?
Whole milk makes the silkiest frothed milk with a creamy texture and lots of thick foam. If you prefer a plant-based alternative, using soy or almond milk will give you similar results.
04. Can I Froth Coffee Creamer?
Depending on the fat and protein content, it is possible to froth certain liquid coffee creamers. You can even try frothing vegan creamers! You may need to experiment with different kinds of creamers to get the results you want.
05. How to Make a Latte at Home Without a Frother or Steam Wand?
You can make frothed milk without any kind of frothing tool. All you need is a secure mason jar. Fill a third of the jar with milk, and screw the lid tightly.
Shake the milk in the jar vigorously, until the milk doubles in volume. Heat the milk in the microwave, pour it into a mug or cup and add freshly brewed coffee to make a latte.
Wrapping Up
By now, you probably know how to use a milk frother. As you can see, each method is easy to use, and the milk will foam up at no time at all.
You can enjoy velvety milk in your cappuccinos, chai lattes, and even in hot chocolate, all made at home in your kitchen. You can cut down on your coffee consumption outside, saving you valuable time and money.
Who knows you might end up making better coffee than your local coffee shop!


