What is Masago in Sushi? Learn All About It Here!

Trying to be a more adventurous eater? Or are you venturing into the cooking of foreign delicacies? Either way, Japanese cuisine offers some of the tastiest and visually appealing dishes out there. On top of that, it uses some of the most intriguing ingredients you can imagine.

One of these gorgeous ingredients happens to be masago. Commonly used in sushi rolls, it adds a great pop of color to your plate. But what is masago in sushi rolls? This article will tell you a great deal about this cooking component and all the reasons why you should give it a try!

411 on Masago

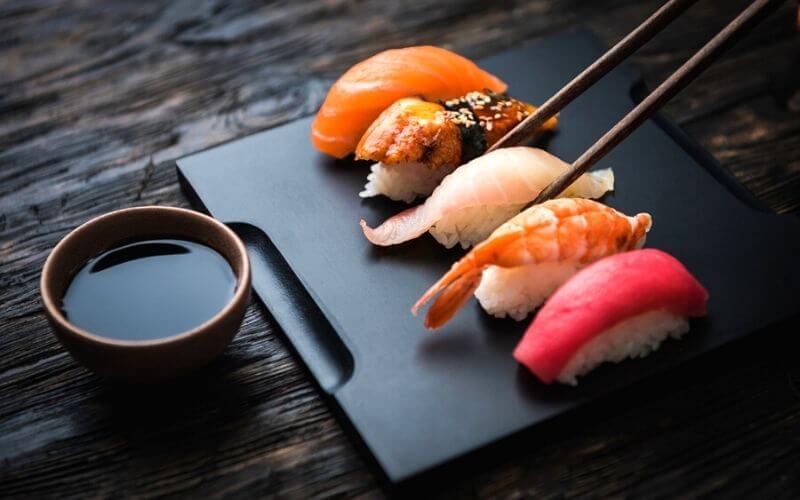
what is masago in sushi

Masago is also known as smelt roe, and put simply they are the edible eggs of the capelin fish. So, masago─ smelt roe are harvested from the silver-green capelin fish and used in the food industry.

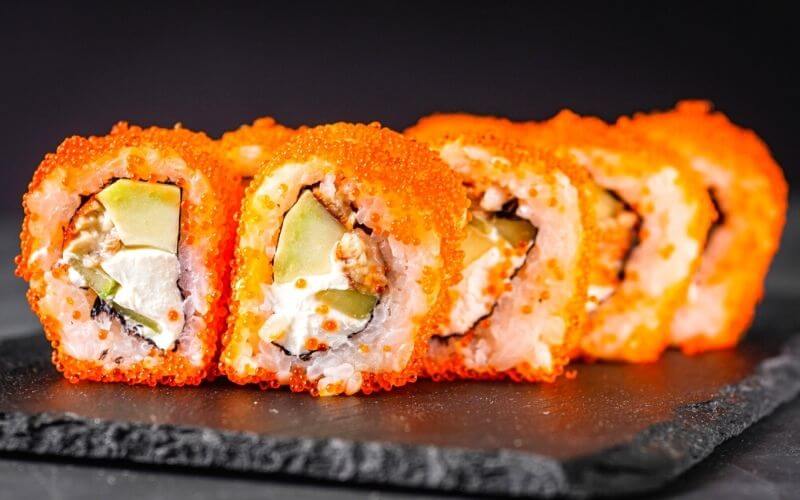
These eggs are pale yellow and are often dyed orange, red, or yellow. This gives them a vibrant look, which in turn makes the sushi rolls they are in appear much more enticing. Moreover, masago fish eggs are pretty mild-flavored, which makes it a solid pairing for pickled ginger, wasabi, and soy sauce.

Health Benefits of Masago

Want a quick rundown on masago nutrition facts? Masago has a nutrition profile similar to its parent fish. One ounce of these masago capelin roe eggs has just 2 grams of fat. It also contains 6 grams of protein and less than one gram of fat.

Besides that, masago is rich in vitamin B2 and B12 which are great for the skin and nails. Moreover, these fish eggs contain plenty of essential minerals and nutrients like selenium, phosphorus, and folate.

These translate to some pretty awesome masago health benefits. There are very few fats and carbs in it, and you won’t have to worry about counting calories. Like other fish products, they have lots of protein and essential fatty acids, all of which are good for you.

The polyunsaturated fats in masago help reduce inflammation and keep your heart, muscles, and immune system healthy. Furthermore, the amino acids in the capelin eggs are essential for tissue repair and protein synthesis.

The Other Side of Masago

But things aren’t sunshine and rainbows with masago eggs. Some masago side effects include bloating and blood pressure as these capelin roe eggs are high in sodium. Moreover, the sushi dish is eaten with soy sauce and MSG, which makes it taste better but increases the overall sodium content.

On the other hand, those who are allergic or sensitive to seafood should avoid it altogether. But it goes beyond that─ some people get an allergic reaction from masago even though they aren’t allergic to seafood.

So if you haven’t tried masago before, have a tiny amount to gauge your body’s reaction to make sure you aren’t allergic to it. And it is best to consume masago dishes in moderation so that you don’t overdo the sodium.

Capelin fishing is also a concern for some. Sometimes other fish get caught and killed when catching capelin, and this can cause a steep decline in their population, as well as issues with overfishing.

Sourcing Your Masago Eggs
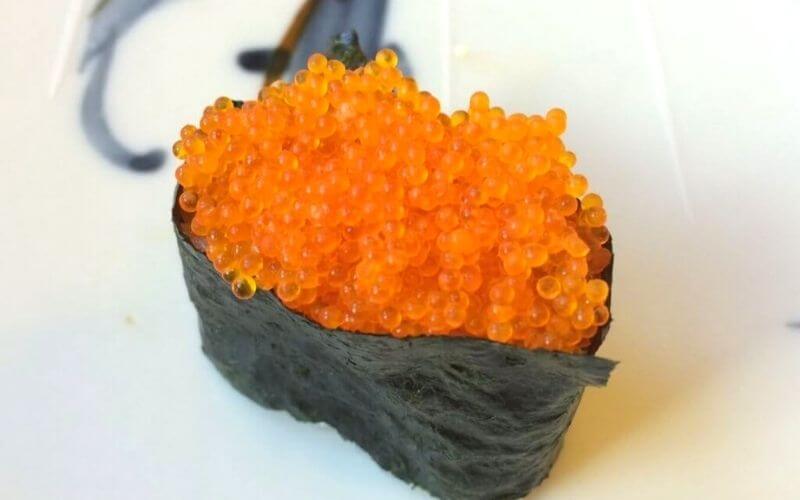
Masago Eggs

People are often at a loss when looking for capelin roe eggs. Where to buy masago that won’t burn a hole into your wallet. For starters, you can easily buy some online, but some people find that perishable ingredients go bad when bought and shipped over long distances.

Instead, you can track these eggs down in any Asian supermarket. Sure they will be pricier, but you’ll be guaranteed quality and freshness. You can also try looking for them in gourmet stores, and if you’re lucky you might even find them in your local grocery store.

Tobiko or Masago?
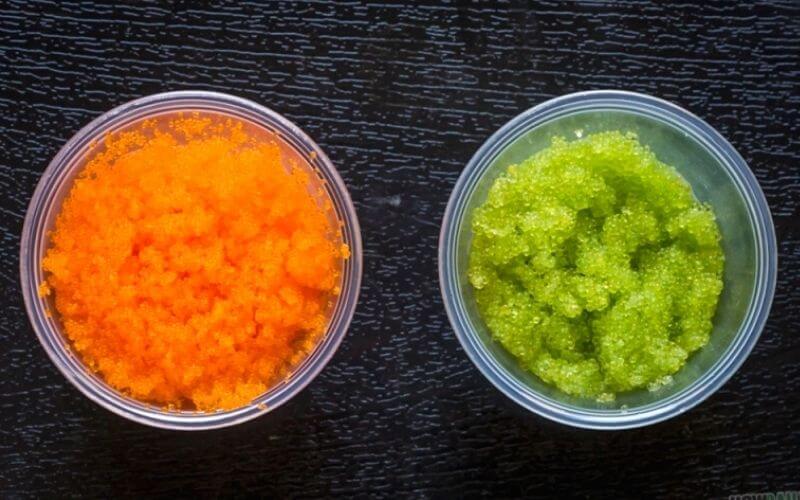
Tobiko vs Masago

If you’re unfamiliar with sushi rolls, you may be confused by tobiko or masago. As far as the tobiko vs masago debate goes, the two aren’t all that different.

Tobiko are eggs that come from tropical fly fish. These are brightly colored and do not need to be dyed like masago. They have a mild, yet sweet-salty flavor and a pleasant crunch that contrasts well with the soft texture of sushi.

Like masago, tobiko is used to finish off sushi rolls and other dishes, and its bright red color makes it an attractive garnish for many other foods. However, tobiko has lots of cholesterol which means it should be eaten in small amounts.

Tobiko eggs are larger than masago, and in general, tobiko is supposed to be superior to masago. However, many restaurants substitute masago for tobiko to cut costs. However, masago won’t have that pleasant crunchy sweetness of tobiko.

Masago Sushi

masago in sushi

We are used to seeing just the masago sushi roll, but in reality, masago can be used in all kinds of salty and umami dishes. They make a great topping for brown rice, sushi rice, and noodles, as well as Japanese curries, katsu, and even Asian-fusion meals. You can also use it to garnish salads, roast veggies, baked fish, and other savory dishes.

Because masago comes cleaned and prepared, you don’t really need to do anything to it. Just spoon some out of the jar they come from and incorporate it into your cooking. The jar will also come with instructions on how to correctly store the masago, and you can keep it in the fridge to extend its usage. 

Speaking of freezing, were you aware of the know-hows of keeping sushi in the fridge? Check that out here. 

Got More Questions?

Below you will find answers to questions people often have about masago.

01. What is Masago Gunkan Maki?

This is a sort of sushi roll, where the nori-wrapped rice is topped with masago eggs. This dish was invented by Ginza Kyubei, a famous Japanese restaurant, and is also called a Battleship Maki.

02. What is the Difference between Masago, Tobiko and Caviar?

All three are fish roe or eggs, but each comes from different kinds of fish. Because of this, they each have their own flavor, texture, and price point.

03. Is Tobiko Better Than Masago?

Tobiko is more expensive than masago and is considered to be of better quality. Tobiko also doesn’t need to be dyed and has a nice crunchy texture, but is harder to find when compared to masago.

Final Say

Well, now you know the answer to the question: what is masago in sushi? These delicate fish eggs make any plate of maki rolls much prettier and more interesting to eat. If you’re worried about the flavor, you will be relieved to know it has a very mild taste.

Whether you are trying to cook new and exciting Japanese dishes or want to order the best stuff at an Asian restaurant, you will have this particular ingredient nailed. Who knows, you might even impress your friends with an interesting fact or two about capelin roe!
How Long Does Rice Last in the Fridge? Find Out Right Here!

Cooked way too much rice? Happens to the best of us.

You might think boxing up your leftover rice and leaving it in a pantry cupboard is good enough. Think again! Cooked rice is notorious for going bad quickly and you might come back to find the rice moldy, sour, or watery.

Instead, refrigerate your rice dishes. Refrigerating rice after cooking is the easiest way to keep it edible for longer. But how long does rice last in the fridge? A week, ten days, maybe even a fortnight?

This article aims to take out the guesswork and tell you how long you can keep rice in your fridge. You won’t have to meet a spoiled rice surprise for dinner, and our storage and reheating tips will keep your meal-prep rice soft and fluffy.

How Long Does Cooked Rice Last in the Fridge?

how long does rice last in the fridge

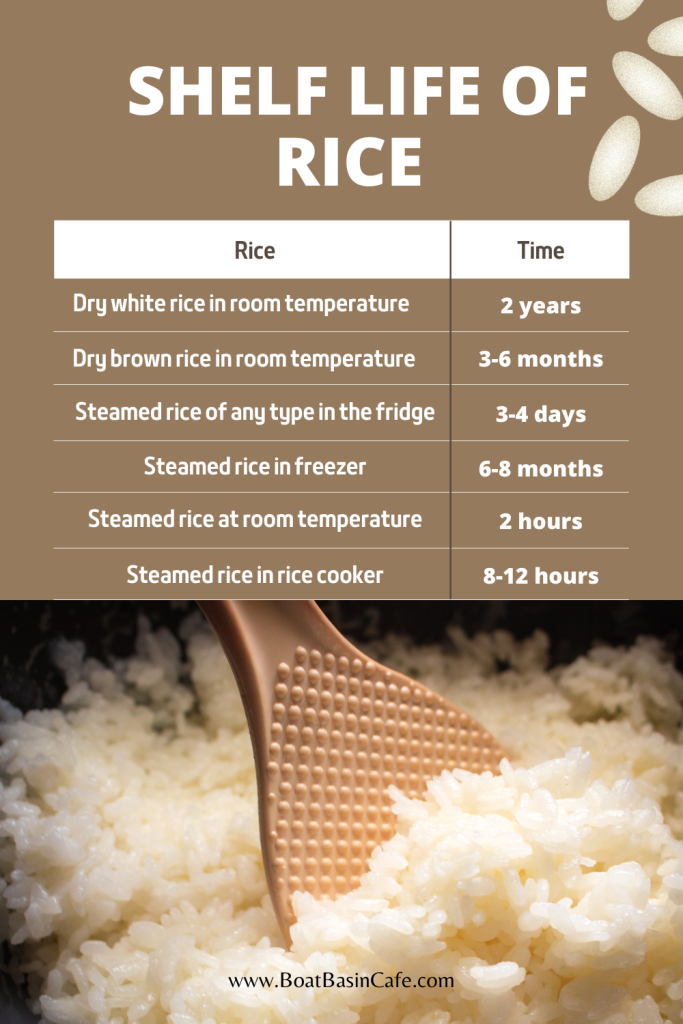
Everyone knows uncooked rice has a very long shelf life. When stored correctly (aka in an airtight container, kept in a clean and dry place) rice grains can keep for up to 5 years. But cooked rice is a whole different story.

How long does cooked rice last? If you leave rice out for an hour or two, you will notice the cooked rice release water and change texture, and taste a little strange. This change can happen even faster in hotter climates.

Your best bet is to stick your cooked rice in the fridge. How long does white rice last in the fridge? Most experts say that cooked white rice, like jasmine rice, can be kept in the fridge for 5-7 days. On the other hand, cooked brown rice keeps fresh in the fridge for just 4 or 5 days.

Meanwhile, wild rice will stay fresh in your refrigerator for up to a week. On this note, how long is cooked rice good for in the freezer? Well, in most cases, most kinds of cooked rice will keep for a whopping 6-8 months when stored in the freezer.

How Long Does Cooked Brown Rice Last in the Fridge?

Cooked brown rice can be stored for a couple days in the refrigerator and will last up to 6 days.

To maximize its shelf life, refrigerate covered or resealable plastic bags of cooked grains- it’s important that you use them quickly though!

How Long Does Cooked Cauliflower Rice Last in the Fridge?

Cooled cauliflower will last for 3 to 4 days in an airtight container in the fridge.

Once cooked let cool about room temperature before refrigeration but remember limit cooling period less than 2 hours because it starts turning bitter if kept too long!

How Long Can Steamed Rice Last in the Fridge?

Any type of cooked rice can last three to four days in the fridge. 

How Long Does Rice Last in the Fridge? Find Out Right Here! 1

How to Keep Your Rice in the Fridge

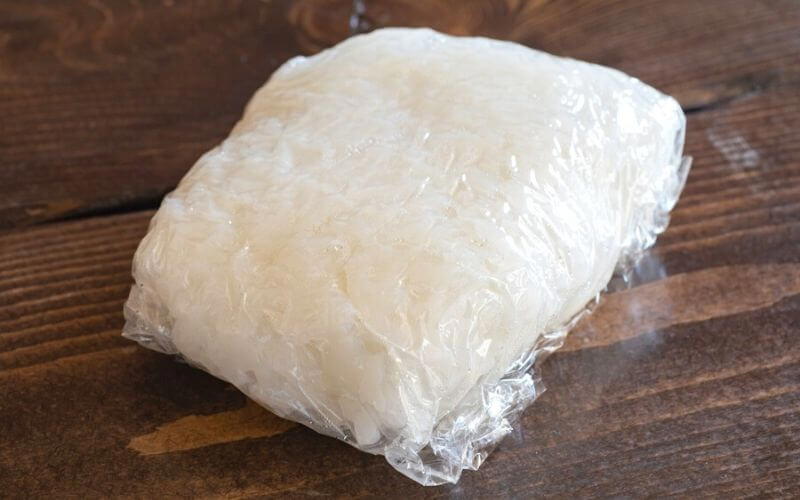
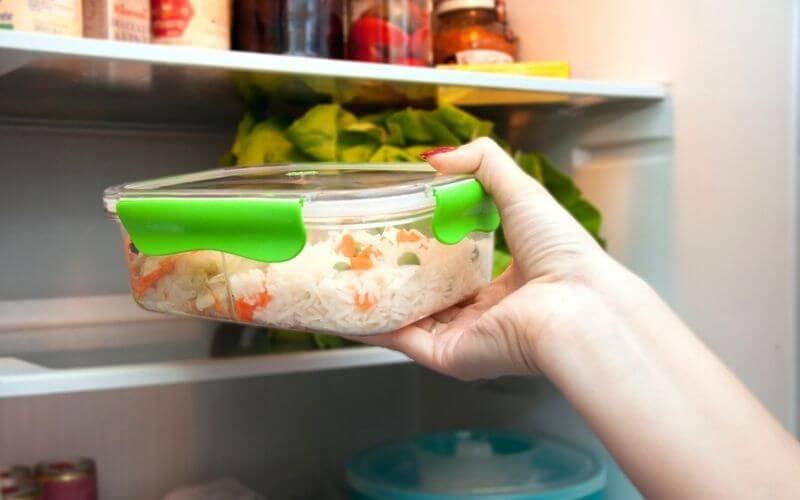
Believe it or not, there is a right way to store cooked rice in the fridge. Putting hot rice in the fridge is a surefire way to turn your rice into a rock-hard mess later on. Instead, cool the rice first; either leave it in an uncovered pot or spread it on a large sheet pan.

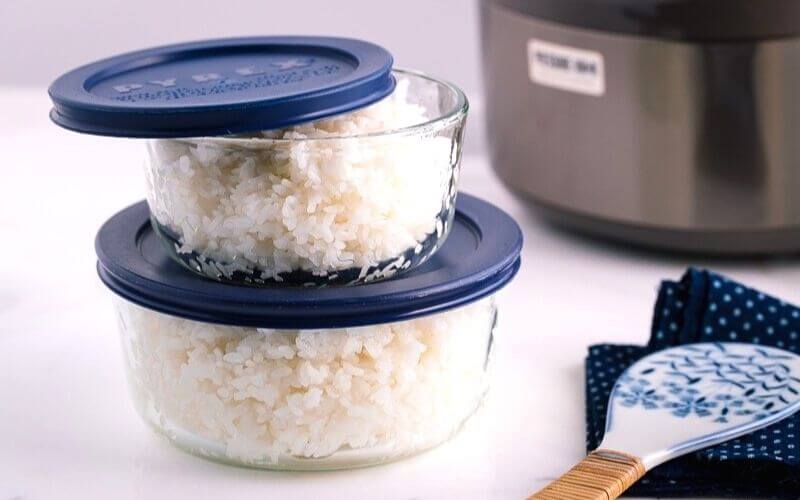
Then, transfer the rice to an airtight container like Tupperware. Cover tightly with the lid and put it in the middle of your fridge.

Reheating the Refrigerated White Rice

Rice will often lose its moisture when kept in the fridge. This is especially true if you don’t cover the storage container all the way, as it allows the water to escape. As a result, the rice becomes dry, tough, and crumbly.

But to reheat rice properly can fix these issues and make the rice seem like it was served fresh from a steaming pot. Here’s how to do it right:

  • Take out the rice from the fridge, and put it in a microwave-safe dish.
  • For every cup of rice, you want to reheat, add one or two tablespoons of water.
  • Cover the bowl and heat in the microwave for 3-4 minutes. The rice should be piping hot all throughout and should have an internal temperature of 165F.
  • Serve hot and enjoy!

You can also steam your cold leftover rice on the stovetop like this:

  • Place your rice in a saucepan or pot with 1–2 tablespoons of butter or oil.
  • For each cup of rice, add a tablespoon or two of water. Cover with a lid and bring to a simmer. Your heat should be medium-low.
  • Stir occasionally to prevent the rice from sticking or burning. Once the water has boiled off, use a probe thermometer to make sure the internal temperature is above 165°F.
  • Take off the heat and serve piping hot.

Why You Need to Store Cooked Rice

Why Does Rice Need Refrigeration

Why do you have to refrigerate cooked rice? Lots of other cooked dishes can survive being left out on the counter overnight. But rice left out overnight will definitely have a sour smell and taste off.

But why exactly does rice need to be refrigerated? Rice is moist and has high water content. Bacillus cereus is the culprit here. It thrives in damp environments and that is what rice is.

After the rice is cooked, the Bacillus cereus bacteria grows and multiplies in the moist, warm rice. Refrigeration slows down this process. And what happens if you eat bad rice? Food poisoning, which can leave you feeling terrible for days.

If your rice smells bad after cooking, it is a sign that it has already gone bad. This can happen much more quickly during the summer months, or if you live in a hotter climate. It will have a sour or musty smell, taste bad, and have a sort of crumbly texture.

In this case, it is best to throw out the rice and start from scratch. Leaving your rice warm and in a humid state will encourage bacterial growth, which will ruin it and make you ill.

Frequently Asked Questions

Here you will find answers to questions people tend to ask about storing rice in the fridge.

Does Rice Go Bad?

Rice goes bad because of microbial growth that comes from Bacillus cereus which is present in rice and other grains. The bacteria grow in damp and warm environments which makes it easy for rice to go bad quickly.

Does Uncooked Rice Go Bad?

While uncooked rice isn’t as perishable, it can go bad when stored in damp places, or if mold, insects, and pests get to them first.

How Long Can Cooked Rice Stay in the Fridge?

Cooked rice stays fresh in the fridge for up to a week for white rice. Brown cooked rice has a shorter fridge life and needs to be consumed in 5 days.

How Long Can Rice Sit Out and Be Safe to Eat?

You should not leave rice out on the counter for more than an hour or two. Anything longer than this will risk the rice going bad.

What are the Signs of Rice Gone Bad?

If your cooked rice goes bad, you will notice a sour and unpleasant smell. There may also be a change in color and texture. It will also taste-off, although you should not try tasting rice that seems to have gone bad.

Conclusion

Next time you cook a large batch of rice, you won’t have to ask yourself How long does rice last in the fridge? Refrigerating rice is the safest way to keep your meals safe to eat for up to a week. 

On the other hand, if you want to meal-prep for the month ahead, freezing your rice in airtight containers is the best way to go.

So, are you going to start storing your rice in the fridge from now on?

Does Soy Sauce Go Bad? Ever?

If you are a fan of fried rice or stir fry, soy sauce is something you always have in the pantry. But how long do they last? Does soy sauce ever go bad? What is the best way to store soy sauce anyway? 

Well, aren’t you at the right place as we discuss all those topics today! If you are interested to know more, keep on reading.

Does Soy Sauce Go Bad?

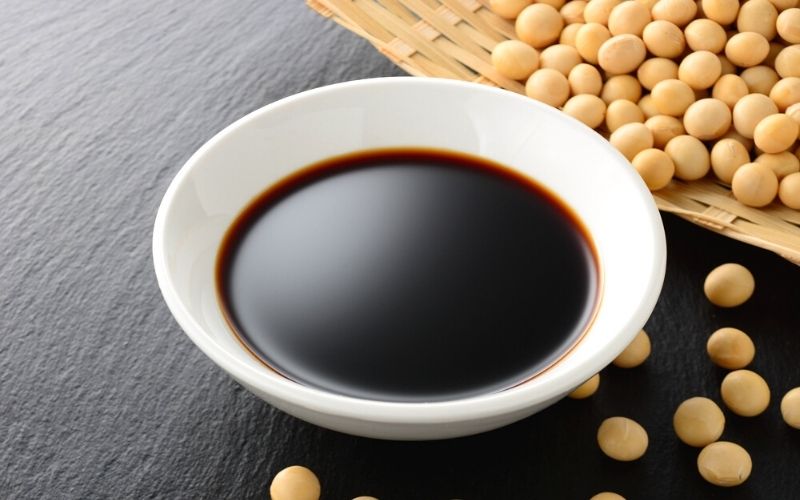
does soy sauce go bad

Soy sauce does go bad eventually but it takes a long time. Soy sauce is known to have an indefinite shelf life which means it is excellent at self-preserving. 

This happens due to the high concentration of sodium in the sauce. Sodium kills all the microbes that can spoil the soy sauce which ensures its stable shelf-life. 

How Long Does Soy Sauce Last?

Soy sauce has an indefinite shelf life which means it technically does not go bad. The only reason why it might spoil is if you store it incorrectly.

We will talk about the proper way to store soya sauce in a minute. Keep reading if you are interested. 

An unopened soy sauce bottle can last for years and years without any issue.

How Long Does Opened Soy Sauce Last?

An opened bottle can survive 2-3 years in the fridge and 6 months in the pantry.

How to Tell If it’s Bad Soy Sauce?

how long does soy sauce last

Soy sauce eventually goes bad but it can be tricky to tell sometimes. We have a simple guide to know whether the soy sauce has gone bad or not.

Fragrance:

When you open the lid, the smell is the first thing that catches your attention. Soy sauce has a very distinctive smell. So when it goes bad, you would be able to tell instantly. 

Taste:

To be honest, when was the last time you tasted raw soy sauce before adding it to a dish? Probably never. That’s what we all do but we shouldn’t!

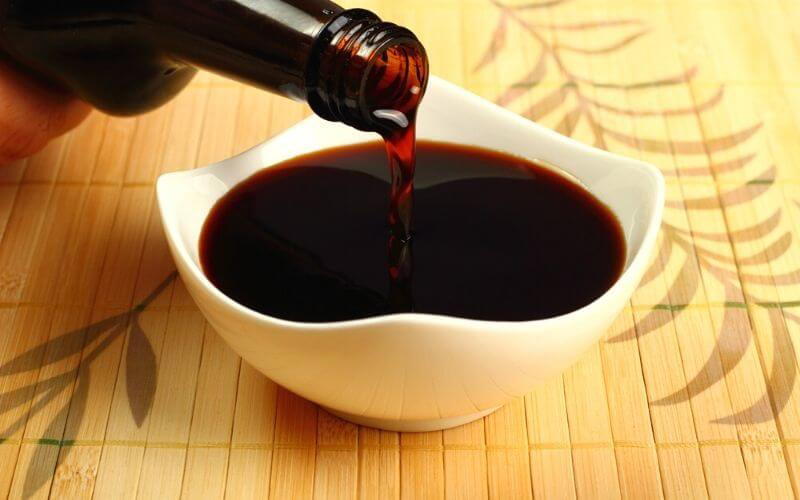
The only time we taste raw soy sauce is when we are eating sushi. Soy sauce tastes very salty and slightly pungent due to the fermentation. It has a pleasant taste.

When the sauce is spoiled, it tastes very acidic and oftentimes too harsh. So make sure to taste it before adding it to any dish. 

Color:

Soy sauce comes in a wide variety from light brown to deep, almost black soy sauce. What you need to focus on is whether there is a color change. If your sauce was light brown but has turned deep brown, it has either oxidized or it’s spoiled. 

The best way to know which one it is is by tasting the soy sauce a bit. Sometimes the opposite can happen too. Dark soy sauce can turn transparent with time if you store it under direct sunlight. 

Mold:

It might seem strange for soy to get molds but it happens. Soy sauce is a fermented condiment. This means it is created by adding mold and letting it ferment the soya beans for months. 

But certain molds can make the soy sauce taste or smell bad. We don’t want those to affect the quality in any way. 

Molds can occur if you forget to close the lid properly. So if you notice any anomaly, don’t consume that bottle. 

Consistency:

Depending on the brand, soy sauce has a medium to a light consistency. If you notice your sauce looking too thick or chunky, it’s time to throw it away in the trash! 

How to Store Soy Sauce: Our 5 Key Tips

How to Store Soy Sauce

Even though soy sauce has quite a self-sustaining shelf life, you need to store it properly to make sure it stays that way. 

Actually, out of all the kitchen condiments, soy sauce is the easiest to store as it requires very little effort. Here are our five key ways to keep your soy sauce fresh for longer:

01. Keep It Sealed:

If you want your soy sauce to last the longest, the best thing to do is not open the original packaging. Keep the soy sauce bottle as it is and store in a cool, dry place, 

If you keep the bottle sealed, it can survive 3-4 years and way past its expiry date. We like to bulk purchase a variety of soy sauces and keep them in our pantry for years. 

It might feel tempting to transfer the sauce to a fancier and nicer-looking bottle but trust us! Keeping the original packaging allows us to retain its flavor the most. 

02. Airtight Bottle/Jar 

If you have already broken the seal and used some of the soy sauce, the next best thing would be to transfer it to an airtight bottle or jar.

We like to use glass bottles as it is eco friendly and more durable. And let’s not forget how classy glass bottles look! 

Always make sure that the lid is tightly closed so no oxygen can touch the soy sauce inside. 

03. Consistent Temperature:

Unless you live in a very tropical climate, this shouldn’t be an issue. Soy sauce stays the best when the temperature is consistent and stable.

So do not keep your soy sauce bottle closer to the oven or stove. The rise and fall of temperature will actually ruin your sauce. 

If you keep your soy sauce under or around windows, regular sunlight will also damage it. Soy sauce can expire months before its past date if you store it in a hot environment. 

04. Pantry or Basement:

The best place to store soy sauce is somewhere without direct sunlight or heat. Pantry is a great place to store. If you do not have a pantry, try to store it in the basement. 

If your basement is wet and damp, this might not be the best option for you. The key thing is to store soy sauce in a cool and dry place. 

05. Refrigerator: 

One of the reasons why people store soy sauce in the refrigerator is due to the consistent temperature. When your house does not have any temperature control, storing soy sauce in the refrigerator is the smartest idea. 

Some brands specifically mention storing the sauce in the fridge after opening. Some brands advise against it. So make sure to read the labels before doing it. 

Can You Freeze Soy Sauce? 

Soy sauce can go bad if it’s not being stored properly. It can go bad due to it being shelved for years. Soy sauce usually has a shelf life of 2-3 years. After that, it starts to deteriorate and eventually goes bad. 

If the bottle is not closed properly and air can go inside, molds will develop and the soy sauce will go bad faster. 

You don’t need to freeze soy sauce as it is quite long-lasting anyway. Freezing might help with maintaining the color and taste for longer. 

Keep in mind soya sauce might not freeze at all as it contains a lot of salt. We know salt melts ice so anything with such sodium content might not freeze well. 

Honestly, just store your soy sauce in a dark, cool palace and it will stay fresh for years. Why go through the hassle of freezing anyway?

Frequently Asked Questions 

Should I Refrigerate Soy Sauce?

You should not refrigerate soy sauce after opening a bottle unless you hardly use it. If you use soy sauce regularly on your dishes, leaving it at room temperature is perfectly fine. 
But if you use soy sauce once or twice a week or month, storing it in the fridge will help to keep it tasting fresh for longer. 

Does Soy Sauce Expire?

Pure soy sauce does not expire for years if it’s stored properly. Most of the soy sauce we buy is a mixture of a few ingredients. The shelf life of store-bought soy sauce is not as long as organic ones. 

How Long is Soy Sauce Good for?

Soy sauce has an indefinite shelf life which means it lasts depending on how it’s being stored. The expiration date on soy sauce bottles is totally meaningless as it stays safe to use for years past that date. Refrigerated soy sauce lasts for 2-3 years without losing its taste and quality.

Does Soy Sauce Have Alcohol?

Soy sauce contains zero alcohol. A lot of us assume soy sauce has alcohol due to its strong taste. But this taste is acquired by a fermentation process. 
During the fermentation process, the starch in the soy sauce mixture is broken down into sugar and the sugar turns into alcohol over time. 
So the alcohol in soy sauce is not added, instead, it’s part of the formulation that turns soybeans into soy sauce.

Can Soy Sauce Make You Sick?

Just like any other ingredients, too much soy sauce can make you sick. Any food item in moderation is good for us. When we overdo it, the consequences are bad. 
Soy sauce has a high amount of sodium, amines including histamine and tyramine. These ingredients can cause toxic reactions if you consume too much. 
Some of the symptoms include sweating, itching, stomach issues, headaches, dizziness, and bloating. You might see a spike in your blood pressure due to the high sodium content. So next time when you eat sushi, be mindful of your soy dip. 

Does Soy Sauce Get Molds?

Soy sauce is created through a fermentation process where a turning mold called Aspergillus is added. This mold helps to break down the soybeans and wheat mixture. 
Soy sauce can get moldy if you keep it in an open jar. But the structure of soy sauce contains mold by nature. 
So when you store your soy sauce, you will notice it getting darker and darker over time. This oxidation process makes soy sauce stronger and more aromatic. 

What’s the Difference between Chinese and Japanese Soy Sauce?

Most of us westerners think soy sauce is soy sauce. But just like cheese, there is a wide range and variety of soy sauce. Each has its distinctive taste and usage as well. 
The two most popular are Chinese soy sauce and Japanese soy sauce. The difference between them is in the ingredients.
Chinese soy sauce is made using 100 percent soybeans. Japanese soy sauce on the other hand uses a mixture of soy and wheat.
This makes the Japanese version sweeter and less pungent. Chinese soy sauce on the other hand is strong, salty and aggressive.

Final Words

We absolutely love soy sauce and add it to all sorts of recipes. It adds such a delicious saltiness to dishes and alleviates all the other spices with it. 

Now that you know how easy it is store soy sauce, hopefully you will always have a battle in your pantry. You can keep your soy sauce fresh and high-quality for years with our tips and tricks. 

Was it helpful? Let us know in the comments!

More Related Articles:

Can You Freeze Olive Oil? (And Why It Might Come in Handy)

Olive oil has been used by mankind for ages.

For thousands of years, people have been using them for cooking and preserving food. Popular in the Mediterranean and the Middle East, olive oil is now popular across the globe, thanks to research that proves it is a much healthier oil compared to canola or sunflower oil.

But olive oil, especially the good kind, can be expensive. Many people take advantage of mega sales and buy extra-virgin olive oil in bulk. The issue? Your bulk stash of oil can go rancid very quickly, and just end up being a waste of money.

What can one do instead? Can you freeze olive oil? Many people think freezing oils cause them to lose flavor. But we’re here to tell whether you can preserve olive oil and the best way to do so.

A Brief History of Olive Oil

frozen olive oil

Olive oil, as the name suggests, is produced by extracting the juice from olives. Olive trees were first grown and harvested in the Mediterranean basin nearly 6000 years ago. It was first used in religious rituals as lamp fuels and as an offering to gods in this region around 2500 BC.

This gradually evolved to the oil being used for cooking purposes during the 5th-4th century BC. In more recent years, olive oil is used predominantly in Italian, Greek, and Middle Eastern cuisine.

It is also growing in popularity across North America over the past century. Olives are even grown in California and this oil is seen as healthier and more flavorful than many others. It is also a common vegetable oil substitute.

Besides cooking and baking, olive oil is used in hair, nail, and skincare by people across the world.

Producing Olive Oil

Olive oil is made by grinding olives and extracting the oil through either mechanical or chemical processes. Green olives usually produce more bitter oil, compared to black olives. On the other hand, overripe olives can produce rancid oil.

Because of this, the olives used for producing oil need to be perfectly ripe. The following processes take place to extract olive oil from the fruit:

  1. The olives are first crushed to make a paste.
  2. After grinding, the olive paste is spread across fiber disks stacked over each other in a column, then placed into the press. Pressure (or a centrifuge) is then used to separate the vegetal liquid from the paste.
  3. The paste is then stirred slowly in a special container, tiny oil drops cumulate into bigger drops, speeding up the mechanical extraction. This oil is then separated from the rest of the paste with a second round of centrifuging.

    How long does it take for olive oil to form? This depends on the exact method being used.
  4. Lastly, the extracted oil is filtered to remove debris and impurities.

Different Kinds of Olive Oil:

As you may have noticed, different kinds of brands of olive oil have different tastes. This is because the flavor depends on the region where the olives were harvested, the exact extraction process, and the kind of olives used.

Different kinds of olive oil also have different purposes. That being said, there are a few different kinds of oil being sold.

Extra Virgin Olive Oil:

This is the oil most often used by chefs as it is the highest quality and grade of olive oil. EVOO is extracted through purely mechanical processes, instead of chemical ones. This makes the oil purer and gives it a stronger, ‘rawer’ flavor.

It also has no more than 0.8% free acidity. All this means that EVOO has a superior taste and a beautifully complex flavor that makes it great for salads, marinades, dressings, and even as a drizzle over things like hummus and other dips.

However, different brands of extra virgin olive oil can have different flavors, colors, and quality. There are also lots of counterfeit EVOO that sell inferior oils at a very high price.

Virgin Olive Oil:

What makes this kind of oil different from EVOO? For starters, it has a 1.5% free acidity. This makes it a slightly lower-grade oil in terms of flavor and quality. However, it is still a great option for cooking and works well for sauteing and pan roasting.

Refined Olive Oil:

This is generally sold as just olive oil in most stores. It is made by refining the virgin olive oil, which removes much of the complex flavors. Because it is quite bland, it is mixed with other oils for cooking. It is also used for skin and hair care as it doesn’t have a potent smell.

Can I Freeze Olive Oil?

can you freeze olive oil

All this leads us to the core of the matter. Does olive oil spoil? Does olive oil expire? If it does, how can one preserve their oil to make it last longer?

Well, anyone who’s lost a bottle of olive oil in the back of their pantry will recognize the rancid smell of oil that has gone bad. Extra virgin olive generally lasts 12-18 months, while other oils have a longer shelf life (18-24 months).

Storing olive oil in refrigerators may seem like a good option, but this only works for regular refined or cold-pressed olive oil. In this case, simply put your bottle of oil in the fridge. The oil will solidify after a few hours.

But if you have extra virgin or virgin olive oil, this will cause a loss of flavor. Instead, you can freeze your olive oil. Frozen olive oil can be safely thawed and used in cooking.

Does olive oil freeze well? Yes, and there is no significant change in flavor or texture after EVOO is frozen and thawed.

The best way to freeze olive oil is to pour it into plastic jars or containers, securing them tightly with a lid, and putting them in a freezer. Leave half an inch of space in the jar to reduce the chances of freezer burn.

However, this has one issue. You will need to thaw the entire jar of oil to use just a little bit and then freeze the oil again. Does olive oil go bad after repeated thawing and freezing? Not really, but it will affect the general quality of the oil.

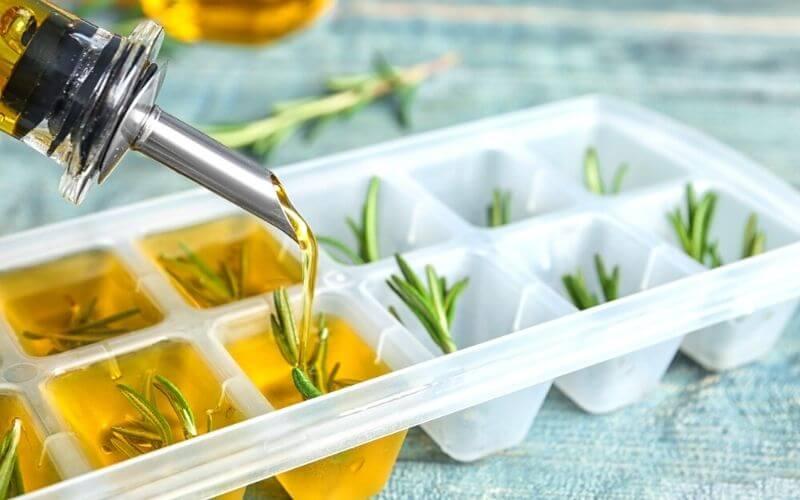
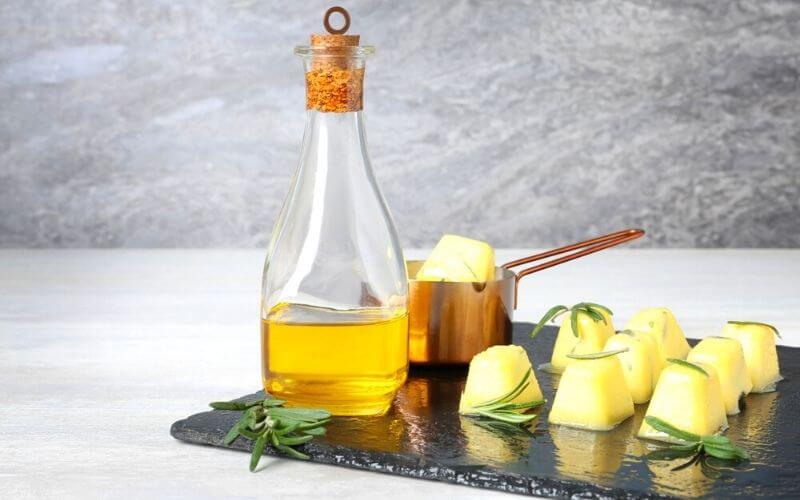
A better option would be to fill up a small silicone ice cube tray with olive oil and freeze them until solid. Then, transfer the oil cubes to a large freezer bag and seal the bag, pushing out all the air that you can. Next, place this bag into another freezer bag and seal it up for extra security.

This will let you pop out a couple of cubes of frozen oil as needed instead of thawing everything from scratch. It also lets you store even more oil than you would with just a bottle.

But here’s a better idea. Want your cooking to be even more flavorful? Infuse your oil with herbs and whole spices beforehand. 

  • To do so, start with a cold pan. Add the herbs of your choice. You can use a mix of dried oregano, rosemary, and thyme in Italian cooking.
  • For Asian cooking, you can work with whole black peppercorns, bay leaves, cinnamon, cardamom, cloves, and even Indian five-spice. You can even use a knob of ginger, diced garlic, or shallots.
  • Add your olive oil and heat in on low, stirring frequently. Wait for the oil herbs and spices to infuse the oil, heating gently until you can smell the aromatics. Make sure nothing burns. Once fragrant, remove from heat.
  • Strain the oil into a large bowl. After it cools down to room temperature, fill the silicone tray with the oil and repeat the steps mentioned above. You will now have a supply of herby, spicy fragrant oil that will take your cooking to the next level.

You can even do this with regular cooking oil too! Does cooking oil freeze? Yes, and it acts similarly to olive oil once frozen.

Still Got Questions?

Here you will find answers to questions people have about freezing olive oil.

01. How Long Can I Store Olive Oil That is Unopened?

Unopened olive oil lasts for about 2 years without any change in flavor. Check your bottle for the ‘harvest’ or ‘bottling’ date and do the math from there.

02. How Can I Know If My Olive Oil Has Gone Bad?

Rancid olive oil will have a distinct smell and taste. Most people describe the oil to have a sweetish, rotten smell when it goes bad. For many, it smells like crayons or Elmer’s glue.

03. How Do I Thaw Frozen Olive Oil?

You can wait for the oil to melt on your counter. However, the better way is to add the cubes of oil to your pan and melt it over low heat.

Summing Up

Hopefully, this write-up answers the question, ‘Can you freeze olive oil?’ Once you know how to store lots of olive oil in bulk, you won’t have to panic and buy overpriced gourmet oils when you suddenly run out.

Instead, you can use your olive oil for a variety of dishes. You can use infused oils for pasta, sauces, curries, and other savory dishes. Light oils work splendidly for baked goods and desserts. Best of all, you will always have olive oil when you need some.

Can You Freeze Scrambled Eggs? (Yes, and Here’s How to Do It Right!)

There’s a funny thing about eggs. I never seem to have enough when I really need them. And at other times, the pantry is overflowing with eggs!

This led me to ask myself: can you freeze scrambled eggs? With a little bit of Googling and lots of experimenting, I cracked the code to freezing scrambled eggs and they turned out perfect. But that’s not all! I also learned how to freeze all kinds of eggs with great results.

Whether you want to meal prep and freeze cooked eggs or keep your raw eggs fresh for longer, this article will show you how it’s done.

Why You Should Freeze Eggs

freeze cooked eggs

So why do people freeze cooked eggs? And what brings the need for freezing uncooked eggs?

Saving Space:

Eggs take up a lot of room in the fridge, especially if you have a small one. On the other hand, frozen eggs use up little space, leaving you with more room in the freezer.

Demand and Supply:

Freezing eggs, especially raw ones ensure you always have a supply of eggs. Have unexpected breakfast guests? You can thaw some eggs and whip up a quick dish.

Want to make custard tarts or flan at 2 in the morning? Freeze egg yolks in advance and you’re good to go.

Cost Efficiency:

Freezing eggs is a great way to make the most of mega sales and stock up on eggs. It also means you won’t have to throw out eggs if you’re worried about them expiring. In short, freezing eggs is a good way to save money, especially if you’re on a budget.

Time Saver:

If you hate making breakfast, freezing scrambled eggs and casseroles is a great way to save time during the morning rush. Can you meal-prep eggs?

All you need to do is take put the frozen eggs in the fridge to thaw the night before. Reheating will take less than 5 minutes!

Freezing Eggs: An All-in-One Guide

can you freeze scrambled eggs

This section will look at whether you can freeze different versions of cooked and uncooked eggs. You will also learn how to freeze eggs, as well as the best way to thaw and reheat them.

Can You Freeze Raw Scrambled Eggs?

Freezing raw scrambled eggs may be the easiest way to freeze eggs. The best way to do so is to crack your eggs into a bowl and add salt or sugar to them. This will prevent the gelatinous yolks from thickening as they freeze.

If you want to freeze eggs for savory dishes, add 1/8 teaspoon per egg, or a whole teaspoon per cup of eggs. If you want to use the eggs to make cakes, pancakes, or other desserts, use the same amount of sugar.

Pour the beaten eggs into a muffin tin, cover with foil or plastic wrap and freeze. Once they solidify, take them out and place them into a large container or freezer bag. Push out all the air you can if using a bag, as this can lead to freezer burn.

Label the box or bag with the date. How long do scrambled eggs last in the freezer? When stored this way, they are safe to eat for a year, although they taste the best within six months. To thaw, refrigerate overnight or on the counter for a few hours and use as usual.

Can Scrambled Eggs Be Frozen Once Cooked?

You can also freeze scrambled eggs after they have been cooked. This is a good way to meal prep for the week and saves time during breakfast. Scrambled eggs freeze well, and taste amazing once reheated.

They also save money in the long run and last much longer than the fridge. How long do scrambled eggs last in the fridge? They are supposed to be consumed within 4-5 days. Meanwhile, frozen scrambled eggs last a whole year.

Cook your scrambled eggs, and leave them a little runny, so the eggs don’t overcook when warmed. Let them cool, and then freeze in individual portions in freezer-safe bags.

Thaw them overnight in the fridge and reheat them on low heat on the stovetop. Reheating scrambled eggs can also be done quickly with a microwave.

Can You Freeze Hard Boiled Eggs?

Hard-boiled eggs become soggy and watery once frozen because the water in the whites separates. Because of this, it is best not to freeze hard-boiled eggs. Can hard-boiled eggs be frozen at all then?

Hard-boiled yolks freeze pretty well, so you can separate the yolks from the whites and freeze them instead. Do boiled eggs go bad in the freezer? While they taste off and feel weird, frozen hard-boiled eggs are still safe to eat.

How long can you keep boiled eggs in the refrigerator? They are good for up to a week in the fridge, so it is best to use them up within this time frame.

Can You Freeze Cooked Eggs?

How long are cooked eggs good for? Omelets and cooked eggs go bad after just a few days in the fridge. Freezing is a better long-term storage solution.

You can quite easily freeze cooked eggs like omelets, quiches, and fried eggs and thaw them later without much change in taste or texture.

Can you freeze a frittata?

Yes, of course! When freezing cooked eggs, wait for them to cool, and cut them into individual portions if needed.

Then, wrap the portions in clingfilm so that they are airtight. After this, pack them into a freezer bag and put them in the freezer.

They will stay fresh for around 3 months. Thaw them overnight and reheat them in a microwave or stovetop.

Can You Freeze Egg Salad?

Egg salad has delicate ingredients like mayonnaise that go bad quickly. You can store it in airtight containers in the fridge for up to 5 days or the freezer for 3 months. However, the texture will change, making the salad more watery and less creamy.

Can You Freeze Raw Whole Eggs?

Can you freeze eggs in the shell? The water content in raw egg whites can cause the eggshell to crack, making the eggs unsafe to eat. If you want frozen eggs safe to eat, you need to do things differently.

Here’s how to freeze raw eggs the right way: crack your eggs into a lightly greased muffin tin. Once frozen, unmold them and place them in an airtight container or freezer bag, and put them back in the freezer. They will be good for a year.

You can thaw them on the counter by placing the container or bag in a bowl of room temperature water. Also, you can leave the bag overnight in the fridge. Once thawed, you can use them as you would use fresh eggs.

Can you freeze liquid egg whites? Yes, you can separate the whites from the yolks, beat the whites, and freeze them. They make for great souffle, egg-white omelets, and cheesecakes!

Can You Freeze Egg Beaters?

You can freeze Egg Beaters by freezing them in their original container. You can also freeze them in large ice cube trays to freeze them in individual serving sizes. The best way to defrost them is in the fridge overnight, and then you can use them in cooking and baking.

Still Have Questions?

Below you will find answers to questions people have about storing and freezing eggs.

01. Why Do Eggs Freeze in the Refrigerator?

Eggs freeze in the fridge because they get too cold. This happens when the eggs are placed near the fan or too close to the freezer. To prevent this from happening, place your eggs in a tray on the fridge door.

02. How to Keep Eggs from Turning Green?

Eggs go green when overcooked. This can be prevented by cooking your eggs for the right amount of time, especially when cooking hard-boiled eggs.

03. How Long are Scrambled Eggs Good for in the Fridge?

You can safely eat scrambled eggs for 4-5 days when stored in the refrigerator.

04. What Happens if Eggs Freeze?

When raw eggs freeze, the liquid in the whites expands, causing the shells to crack. This can lead to cross-contamination and change the texture of the eggs.

05. If Eggs Freeze, are They Still Good?

Frozen eggs are safe to eat and remain for up to a year in the freezer.

So the Point is…

Eggs are one of the best foods to freeze, raw or cooked. This article goes beyond answering the question, ‘Can you freeze scrambled eggs?’ You’ve learned how to freeze all sorts of eggs, and how to thaw and use them afterward.

So at the next sale, stock up on all the eggs you want. There won’t be any waste in your house anymore.

Can You Freeze Corned Beef? (And Much More!)

Each year, as Saint Patrick’s Day rolls around, cooking channels and social media are flooded with recipes and pictures of corned beef dishes. Chances are, you buy some during this time, make a few sandwiches, and you’re stuck with a pound of corned beef you don’t want anymore.

Instead of pretending your corned beef doesn’t exist, why not try for a long-term solution. Can you freeze corned beef? Well, in this article, you will learn all about freezing corned beef. But that’s not all. I’m going to unravel the mysteries surrounding corned beef and even go into other things you cook with it!

Corned Beef: The Stuff No One Tells You

freezing corned beef

Corned beef has always been shrouded in a bit of ambiguity. Most people rarely eat corned beef, and so they don’t know much about it.

What is corn beef? What meat is corned beef? How long does corned beef last?

For starters, as the name suggests, it is made from beef. More specifically, corned beef is made from a tough cut of beef, like brisket. The brisket is salt-cured, sometimes in a brine solution in a long process, not unlike pickling.

The only difference between corned beef brisket vs regular brisket is that regular brisket is raw and unprepared, while corned beef is cured.

After the meat is cured, the brisket becomes soft and tender, so it is easy to slice or cut. What does corned beef taste like?

Corned beef has a rich, savory, umami flavor, with added saltiness from the brining. This flavorful taste makes it great for many different recipes.

Corned beef in Jewish preparations is often used as a sandwich filling. On the other hand, it is cut into long slices and consumed with cabbage for a more traditional Irish meal. However, there are other ways to cook corned beef.

But what about health concerns? Is corned beef bad for you? People are often wary about cured meats because of the high salt content and nitrates used in the process. While opinions about this vary, you can try using uncured versions of corned beef if you are concerned about this.

Now, let’s talk shelf life. How long is corned beef good for?

Uncooked corned beef can last for 5-7 days in the fridge when wrapped and stored correctly. Cooked corned beef is edible for 3-4 days in the fridge when kept in an airtight container.

But for long-term storage, freeze corned beef is your best bet.

Freeze Corned Beef

can you freeze corned beef

If your leftover corned beef is nearing its expiry date, you can freeze it to prolong its life. Can you freeze cooked corned beef? Yes, you can cook and prepare corned beef in advance, freeze it, and then use it when needed.

Here is how to tell if leftover corned beef is bad. As soon as you think your beef smells ‘off’, it is time to discard it. You may also notice areas of discoloration, as well as a general sliminess to the corned beef.

If this happens, throw out your meat instantly; don’t risk tasting it first. The idea is to freeze the corned beef before it gets to this stage. Uncooked corned beef will last up to 8 months in the freezer, while the cooked beef can be eaten within 6 months.

Freezing an Entire Block of Uncooked Corned Beef brisket:

To freeze a large uncooked chunk of corned beef, start by draining the excess liquid from the beef. The salt in the meat can draw out moisture, and moisture is the key enemy when preserving food. You can leave the meat on a colander over a bowl for an hour or so, and then pat dry with paper towels to get it dry.

💡Tips: A corned beef brisket (or piece of corned beef) should be wrapped in a double layer of plastic wrap, ensuring that no piece of the meat is exposed to the air. 

Then, wrap the block of corned beef in two layers of cling film or plastic wrap. You need to ensure that there are no exposed parts, as this can cause freezer burn.

Lastly, put the wrapped corned beef in a heavy-duty freezer bag. Push out as much air as you can, then seal and label with the date. Place the freezer bag in the coldest area of your freezer.

Freezing Slices of Uncooked Corned Beef:

Slicing corned beef in advance can save you some prep, especially if you just use it for sandwiches. This also makes defrosting easier.

After cooking a whole corned beef cut it into several smaller pieces for faster cooling or slice it. Wrap each slice of beef with cling film twice. Then, pack the slices into an airtight container or freezer bag. Label with the date and then put it in the freezer.

Freezing Cooked Corned Beef:

Freezing cooked corned beef is a little harder because the added ingredients can affect the meat’s flavor and shelf life. If you really want to prolong the shelf life of cooked corned beef, you should use a vacuum sealer.

Place your leftover corned beef in a heavy-duty, freezer-safe plastic bag and vacuum seal it. Label with the storage date then put in the freezer. If you don’t have a vacuum sealer, follow the instructions mentioned above for uncooked corned beef.

If you don’t vacuum seal cooked corned beef before freezing, your meat may change in flavor and texture when thawed and reheated.

How to Make the Most Out of Your Corned Beef

how long is corned beef good for

People who dislike corned beef often do so because they don’t know how to cook it right. Can you overcook corned beef? Overcooked beef tends to become rubbery and flavorless, and this can happen to cured meats as well.

On the other hand, undercooked corn beef is safe to eat as long as it reaches 145F/63C, but the meat won’t be fork tender. If you want to know how to tell when corned beef is done, cook until it is just over 145F with 3 minutes of resting time. The meat should take on a brown-grey color.

If this is the internal temp of corned beef, you can go ahead and use it in your dishes. There is no consensus as to what temperature corned beef should be for it to be cooked to perfection, so you should cook it to your preference.

How to Reheat Corned Beef:

The best way to thaw corned beef is to keep it in the fridge overnight. For faster thawing, place the plastic-wrapped meat in a bowl of cool water and let it thaw on the counter. Defrosting trays also speed up the thawing process.

After defrosting, the uncooked corned beef can be cooked or added to other dishes. Meanwhile, if you are dealing with frozen cooked corned beef, you can add it to the dish during cooking, as no defrosting or reheating is needed.

Using Up Leftover Corned Beef:

There are many ways of preparing corned beef, so you can use your creativity when cooking.

Here’s the best way on how to buy corned beef: get ready-to-cook corned beef in a vacuum-sealed pack in the meat section of a grocery store. You can also check farmer’s markets for freshly made versions, or use canned corned beef.

You can use corned beef in omelets, as a pizza topping, in soups and stews, and even as a filling in wraps and tacos. Because corned beef cooked temperature is more forgiving, you can add it to the very end of the cooking process.

Even if you aren’t celebrating Saint Patrick’s Day, you can try making traditional corned beef and cabbage. Together with roasted potatoes and soda bread, it makes for a simple, yet hearty dish. Best of all, you can prep and freeze all the ingredients in advance.

Can you freeze cooked cabbage? Does cooked cabbage freeze well? The answer is yes, just place them into airtight freezer bags first. Microwave to reheat and you are good to go. In case you are wondering: Can you freeze uncooked cabbage, blanching it first is a better option.

Further Questions

If you still have queries about freezing corned beef, you’ll find answers here!

01. Why is Corned Beef Called Corned Beef?

Corned beef uses chunks of salt which resemble corn kernels. This is where the name corned beef was coined and this was done during the 17th century.

02. How Long is Cooked Beef Good in the Fridge?

Cooked beef can be safely stored in the fridge for 4-5 days when covered and kept in an airtight container.

03. Where to Buy Fresh Corned Beef?

Fresh corned beef can be found in most chain grocery stores, farmer’s markets, and even gourmet meat shops.

04. What Temperature is Corned Beef Done?

Corned beef is ready to eat as soon as it reaches a temperature of 145F.

Summary

By now, you know if you can freeze corned beef or not. With that knowledge in mind, you won’t have to force yourself to eat corned beef sandwiches each year for weeks after Saint Paddy’s Day. Instead, freeze your meat, and use it in a myriad of dishes throughout the year!

Can You Freeze Nacho Cheese? (And How You Can Do It Right)

Did someone say nachos? Nachos are a favorite snack and appetizer. They are perfect for parties, dinner dates, watch parties and games, or even when you’re alone and hungry at 3 in the morning.

But ultimately, nachos are just a way to deliver things like guac and salsa into your mouth. And for me, they are simply a vehicle for lots and lots of cheese. The trouble is large containers of nacho cheese are difficult to use up in one go, but can you freeze nacho cheese?

The good news is that you can absolutely freeze nacho cheese. The downside? There might be a slight change inconsistency. But when frozen and thawed right, you won’t notice any difference in the texture of flavor nacho cheese.

What is Nacho Cheese?

What is Nacho Cheese

Before we get started on this cheese-related saga, let’s get one thing clear. Liquid nacho cheese isn’t a separate kind of cheese.

Instead, it is a sauce made from cheese. In fact, there isn’t a proper definition for nacho cheese. It is most often sold in cans or jars, but you can easily make it from scratch as well.

That being said, nacho cheese sauce is simply delightful, with a lusciously rich creamy texture, perfect for dipping chips, or as a topping for nachos. The canned version is also readily available in most grocery stores.

Where to buy nacho cheese sauce? You will be able to find it online like GFS nacho cheese, as well as stores like Costco, Target, and Walmart.

On top of that, a big can of nacho cheese can last forever, which makes dealing with leftovers rather tricky.

How long does cheese sauce last in the fridge when stored correctly? Store-bought nacho cheese has preservatives that keep it fresh in the fridge for up to 4 days.

Is nacho cheese pasteurized? In a way, yes, as it is made from pasteurized cheeses like cheddar or American cheese.

However, the homemade nacho cheese sauce can only hold up for 3-4 days when refrigerated. How long is cheese dip good for outside the fridge? I honestly don’t think you can safely eat nacho cheese dip left on the counter for over a day.

So can you freeze nacho cheese sauce? Storing cheese in the freezer is a good option to extend the life of your nacho cheese.

Freezing Your Nacho Cheese

can you freeze nacho cheese

When freezing nacho cheese, you first have to make sure of two things. Firstly, don’t freeze cheese sauce with broken bits of nacho chips, or pieces of salsa and guacamole. This can alter the quality of your cheese dip.

You should also avoid freezing hot or warm nacho cheese sauce. Instead, make sure it is at room temperature before freezing.

Whether you want to freeze store-bought or homemade nacho cheese sauce, the best way to do it is to spoon the cheese into individual freezer bags, preferably smaller ones. This will make it easier to thaw the exact amount you need.

Just fill the bags completely and then seal, pushing out any air to avoid freezer burn. Then, pack the bags of cheese into another container or larger freezer bag for an added layer of protection.

Nacho cheese can keep in the freezer for nearly 6 months when kept at a steady 0-degree temperature. Storing them in individual serving bags is also a good idea, as you won’t have to thaw a big bag, and then refreeze after use. This also keeps the consistency and taste the same.

To thaw the frozen cheese sauce, place the freezer bag in the fridge and allow it to defrost overnight. During the thawing process, the milk fats can clump together, turning the cheese sauce into a watery and congealed mess.

To fix this, use a whisk to incorporate the separated ingredients together. To reheat, pour the sauce into a microwave-safe bowl and blitz until warm and melty. You can also simmer the nacho cheese over low heat on the stovetop before serving.

Making Nacho Cheese Sauce at Home

If you don’t like the weird ingredients in canned nacho cheese, you can easily make some from scratch. Knowing how to make your own nacho cheese can even save you a trip to the supermarket!

There are lots of easy nacho cheese sauce recipes online, and if you don’t want to look, I’ve included one here as well.

This homemade nacho sauce will be ready in under 15 minutes and works best when served in a hot pot or fondue dish. It also reheats very well. And it’s way better than the best store-bought nacho cheese!

Ingredients Needed:

  • 2 tablespoons of unsalted butter
  • 2 tablespoons of AP flour
  • ½ teaspoon salt
  • 1 cup full-fat whole milk
  • 8 ounces of grated sharp cheddar cheese
  • ¼ teaspoon cayenne or chili powder
  • Hot sauce (optional)

Instructions:

  1. Start by making a roux. Over medium heat, melt your butter in a saucepan and add the flour.
  2. Whisk the flour into the butter until it forms a blond paste. It should bubble around the edges, and the raw smell of flour should be replaced with a slightly nutty aroma.
  3. Add the salt and the cayenne/chili powder.
  4. Whisk in the milk right after seasoning the roux. When the milk is fully incorporated, increase the heat to high, and bring to a boil, whisking the whole time.
  5. Lower the heat and let the sauce simmer until it thickens a little. Don’t stop whisking, as this can lead to the milk scorching.
  6. Once thickened, take the pot off the stove and add in your shredded cheddar. Gently stir in the cheese and let it melt and further thicken the sauce.
  7. When you are pleased with the texture, add a dash of hot sauce if you want a spicier nacho cheese. When the cheese is completely melted, and the sauce is smooth, it is ready to serve. Your DIY nacho cheese is done!

However, canned or jarred nacho cheese has its uses as well. Besides using it as a dipping sauce for chips or breadsticks, recipes using canned nacho cheese sauce include enchiladas, cheesy taco casserole, Tex-Mex pizza, an alfredo sauce thickener, and even queso.

Can you Freeze Nacho Cheese Sauce?

You can freeze nacho cheese sauce. Nachos will become more diluted but it’s easy to bring back normal with these tips!

Make sure you thaw out nacho cheese sauce before using. You may have to heat it up a bit in order for the consistency of your dish or meal be restored, but this is typically an easy fix!

Can you Freeze Cheese Dip?

Yes! If you’re making your own cheese dip and want to freeze some of it, make sure that the sauce has been cooled before freezing. Once frozen solid (and Hemisphere), all preparation work needs do is defrosting!

Frequently Asked Questions

Below you will find answers to questions people have about freezing nacho cheese.

01. Can I Freeze Nacho Cheese in Its Tin?

Freezing things in cans isn’t safe, so you should remove the cheese and put them in airtight plastic containers or freezer bags before freezing.

02. Does Nacho Cheese Freeze Properly?

Nacho cheese doesn’t freeze as well as firm and semi-firm cheeses, but you can freeze it pretty well, especially when stored correctly.

03. Can I Leave Nacho Cheese Out for a Day?

It is best not to leave nacho cheese out for more than a few hours.

04. Can I Use Nacho Cheese in Grilled Cheese Sandwiches?

Using nacho cheese in your sandwich can make it soggy, but you can dunk your grilled cheese into a bowl of nacho cheese for a next-level cheesy experience.

To Pack Up

Buying bulk nacho cheese can be a lifesaver, especially when you are planning a big party or event. Now that you can answer the question can freeze nacho cheese, you will know just how to freeze and store it in advance.

Thawing it will be easy as a dream whether you are throwing a party or indulging in a mid-morning nacho cheese craving!

More Related Articles:

Can You Use a Propane Heater Inside?

Propane heaters are one of the most convenient ways to heat a room. They are not only easy to install but also cost-effective. The problem is, people think propane heaters can’t be used indoors. 

Is that true? What if there is a way around it? In this article, we discuss how to use a propane heater inside. If you are interested, keep on reading!

Difference Between Indoor and Outdoor Propane Heaters

Most of the confusion around propane heaters comes from the misconception that you can’t use them indoors. But there are two different types of propane heater: indoor-safe and outdoor

Outdoor heaters are called torpedo heaters because they use kerosene or gas as fuels. As we know, kerosene heaters are not safe to use indoors. When these types of heaters are brought inside, they can eat tons of carbon monoxide gas. The risk of CO poisoning becomes very high. 

Indoor heaters on the other hand come with an oxygen depletion sensor (ODS) which turns the heater off if the average oxygen level goes below a certain degree. This means you can use these heaters safely at home. 

More expensive models have other safety features as well. Find an indoor propane heater with a thermostat as they are better. 

Can You Use a Propane Heater Inside?

can you use a propane heater inside

Of course, you can. Propane heaters are extremely useful especially if you live in a very cold climate. But you can not use just any propane heaters. 

There are indoor propane heaters built specifically to be used inside of your house. Only use those otherwise you run a risk of carbon monoxide poisoning. 

This is why spending time on research to find the correct type of propane heater is worth it in the long run. 

One of the advantages of having a propane heater indoor is how affordable they are. They heat up faster and super high without using too many fuels in the process. 

To avoid any type of risks, check the manufacturer’s guide before buying a propane heater. 

Propane Heaters Indoor Safety Guide

  • Don’t store the propane tanks indoors. The tank should be outside of the house and only a hose should connect the tank and the heater inside. This is more secure and safe.
  • Make sure that the tank is not under direct sunlight. Put a shade or a cover on it to keep it within a certain temperature. The tanks should not be too hot or too cold. 
  • Keep it away from flammable things. This means not putting it in a wooden shed or anything that can spread a fire.
  • Select the right propane heater for you based on its size and the size of your space. 
  • Don’t put anything on top of the heater. A lot of people put plants, books or decors on top of it to make it look better. But this can result in serious issues if someone knocks something over. 
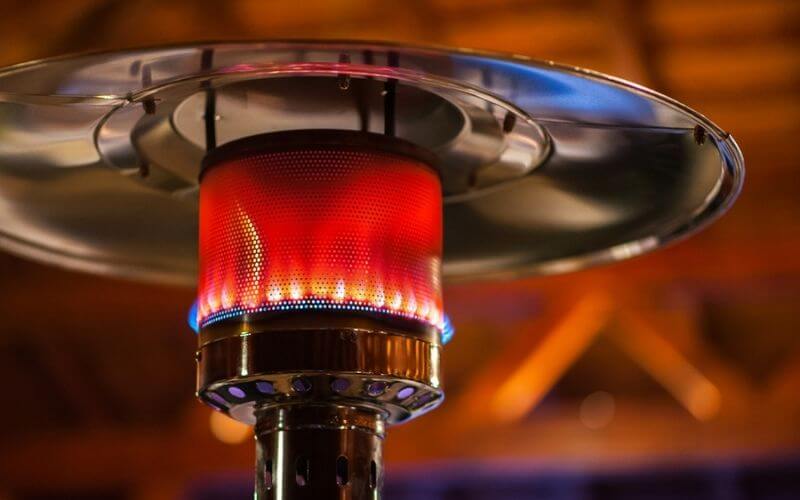
  • Pay attention to the color of the flames. If the flame color is yellow instead of blue, turn off the heater and contact the manufacturers. 
  • Keep the heater at a safe distance from all your furniture and fabric items. 
  • Always follow the manufacturer’s instructions and guidelines on how to use your propane heater. 
  • Check for features like the low oxygen sensor, safety guard, and overheat protection before purchasing a heater.
  • Fill it to 80% capacity. 

How to Clean a Propane Heater 

Propane heaters accumulate a lot of dust and dirt that can be a hindrance to their overall performance. If you are struggling to light up the indoor safe propane heater, maybe it’s time to give it a proper cleaning:

  1. Turn off your propane heater and let it cool down completely.
  2. Use a vacuum cleaner to remove as much dirt and debris as possible. Don’t forget to vacuum inside the vents and grids too.
  3. Use a small dusting brush to dust away into tricky crevices. Make sure to dust away from the igniter and the flame areas too.
  4. Remove the screws of the cover panne of the heater and use a wet cloth to wipe the inside. You should use warm water. Let the newly cleaned area dry properly
  5. Vacuum inside the propane heater too. There is an oxygen sensor near the gas line tubing. Make sure to clean it too.
  6. After you have dust away all the different parts, put the cover back on and tighten the screws. 

And that’s it. Your propane heater is thoroughly cleaned. 

Propane Heater Safety Tips

Propane Heater Safety Tips

If you want to use your propane heater carefully, certain things need to be kept in mind to avoid any possible accidents or issues. Here are some of our propane heater safety tips: 

Installing a Carbon Monoxide Detector:

If you are planning to buy or install a new propane heater at your house, put some extra effort into installing a carbon monoxide detector too. Not many people do this but it makes life extremely easy. 

What a carbon monoxide detector does is it keeps an eye on your CO levels. So if the levels are increasing or decreasing drastically, it will give you an alarm to make you aware of this. 

We like the Kidde AC Carbon Monoxide Detector Alarm. This works similarly to a smoke alarm. The advantage is, you don’t have to think about it as the Carbon Monoxide detector eases your worries. 

It’s also important to buy an indoor propane heater with a thermostat.

Have Proper Ventilation:

This might seem counterproductive but try leaving the window open when you are trying to heat a room with propane heaters. We are not saying you need to open all the windows.  

A wall-mounted propane heater is a good option to avoid accidents.

What we mean is, keep a few inches of the window open in case gas leaks. The carbon monoxide will have a path to get out of the house. It’s a simple step that does not affect the heating but keeps your home safe. 

Beware of Any Smells:

With propane heaters, any type of strange smell is a matter of concern. If you can smell gas it means the tank is leaking somewhere and it can be disastrous. If you smell carbon monoxide in the air. Immediately turn off the heater and open all the windows in the house. 

Keep an eye on it!

You should never leave a propane heater unattended as anything can happen. Children and pets can easily get in touch with the heater so make sure to childproof it. It’s better to run your heart when you are inside the room. 

Safety Switches:

Not all propane heaters come with a safety switch but the premium ones do. It might cost you a few extra bucks but it will be worth it in the long run. Most propane accidents happen when the heater accidentally tips over and creates a huge fire hazard. 

Having one with safety switches ensures that it won’t be able to move even if someone knocks it over. This switch grips to the surface the heater is standing on and you can’t move it without unlocking first.  

Imagine having an unlocked propane heater right in the middle of an earthquake! Who wants to take that risk anyway. 

Check for Leaks:

If the propane tank or hose has any leaks, carbon monoxide can spread everywhere and make the house a matchstick away from burning. Don’t worry as you can easily handle this by doing regular safety checkups. Check for leaks at least once a week. 

Maintenance of the propane heater is necessary. Check for leaks, cracks, or anything that can cause the gas to come out. To check leaks easily use soap water. 

If you are unsure if a certain part of the heater is leaking or not, wipe the soap water with a cloth on that area. If it’s leaked, you will start noticing bubbles forming around it. 

Store It Properly:

Storing your heater properly is very important. Make sure to store it upright and somewhere dry. It shouldn’t be crowded with other things. The heater and propane tanks should not be around anything flammable. We also recommend storing them somewhere with proper ventilation. 

How to Choose the Right Indoor Propane Heater

How to Choose Indoor Propane Heater

Choosing the right indoor safe propane heater is the biggest task to do. Once you have done that, the rest becomes super easy. Here’s what you should look for in a good propane heater:

Heating Capacity:

Depending on where you live, checking the heating capacity is crucial. As the goal of a propane heater is to heat a room, you have to make sure it can reach high enough to do so. 

Most indoor propane heaters range between 8000 BTU to 68000TU. That’s a big jump but you have to keep in mind that not all houses are the same size nor are they in the same climate. But the great thing about that is, there is something for everybody. 

Size:

It is better to go for a compact size instead of a bulky one as the bigger pens stand out more in a room. Compact heaters can be easily blended with the room furniture so they don’t feel like an eyesore all the time. As much as we want a well-heated room, we don’t want to feel like we are cluttered with a massive device. 

The downside of smaller indoor propane heaters is that they are not that powerful. They do not heat up super high so if you live in a super cold climate, there might be no compact option for you to choose from. 

Build Quality:

Even if it costs a few extra bucks, it is ideal to invest in a sturdy and durable heater. There are certain household items that you shouldn’t compromise on. Heaters are one of them as they are directly linked to our safety. 

Reliability is a huge factor while choosing a heater. Go for renowned brands with high ratings. Make sure your heater has a solid warranty system. These things are a sign of quality and assurance. 

Portability:

If you want to move your heater around the house depending on where you are, choosing a portable option becomes a priority. You might have to sacrifice the heating strength but it becomes very convenient to take the heater with you. These heaters are also good for people living in a rental and might change the house soon. 

How to Light an Indoor Propane Heater

If you don’t know how to light an indoor propane heater, here’s what to do:

  1. The supply line should be properly hooked up with your heater and well-placed to avoid any safety issues. If that’s done, we can move on to the actual steps. 
  2. Before lighting up the propane heater, always check the heater’s igniter. 
  3. Turn on the supply line and put the heater in pilot mode. Keep dressing the knob for 20-39 seconds or until the heater is ready.
  4. Then turn the knob counterclockwise to adjust to your preferred temperature level. After that, the heater will light up. 

If you’re having trouble understanding the process, check out this video to have a clear demonstration.

Learn more about Best BBQ Temperature Controllers

Frequently Asked Questions 

01. Can Kerosene Heaters be Used Indoors?

You can use a kerosene heater indoors but we don’t recommend it. Kerosene heaters need a well-ventilated room. Otherwise, the whole room feels suffocating as it becomes filled with carbon monoxide. 

Kerosene heaters also tend to create a lot of smoke which can damage the walls of the room. There is a reason why people stopped using kerosene heaters. 

Not only are they high in carbon monoxide, but they also emit a lot of sulfur dioxide and nitrogen oxides. All of these are bad for our lungs and health. 

If you have asthma or anyone in your family does, it’s not recommended to use a kerosene heater indoors. 

02. Do You Need Ventilation for a Propane Heater?

Yes, you need ventilation for a propane heater of any type of heater that uses gas or oil. 

Propane heaters can emit carbon monoxide which is not good for our health. So keeping the window a few inches open is a great way to keep the room airy and open. 

Propane heaters need oxygen to breathe. So if you close all the windows and vents, the fire will die soon. 

03. Are Propane Heaters Safe in Garages?

If your garage is not well ventilated as it has no windows, it’s not ideal to put a propane heater in there. You can install carbon monoxide detectors in the garage to make sure the CO level doesn’t go too high. 

04. Can You Get Carbon Monoxide Poisoning from a Propane Heater? 

Carbon monoxide poisoning is no joke as it can affect someone within a matter of minutes after being exposed. Oil, gas, and propane heaters emit a lot of CO that can cause health and breathing issues. 

The only way to not get carbon monoxide poisoning from a propane heater is by having proper ventilation inside the room. It’s ideal to keep a window open or to put the heater around air vents. 

What to Do Next?

It’s very important to pick the right heater for your home. Now that you know everything about propane heaters, hopefully, you can pick the right one for you.

Be careful and stay safe!

How to Clean a Pancake Griddle and Make It Shiny!

Pancakes are the best breakfast items in the world, and nothing will change my mind.

Think about it. They are soft and fluffy, and can be made as healthy or as indulgent as you want. 

There are sugarless banana pancakes you can load with fruit. You can make thick pancakes and smother them with whipped cream, chocolate shavings, and maple syrup.

But to make perfect pancakes, you need a pancake griddle. And you must know how to clean a pancake griddle. These cooking tools make even-shaped, fluffy pancakes and allow you to make huge batches in one go.

They are also good for toasting sandwiches, frying eggs, making French toast, and even stir-frying (if you’re out of options).

So if you have a funky-looking pancake griddle, follow these steps to clean it right up.

What You Need to Clean Your Pancake Griddle Pan

Before we begin, you need to understand that there are two sorts of pancake griddles available. This is because stovetop pancake griddles and an electric pancake skillet function differently. 

A plug in pancake griddle should never be immersed in water or cleaned under running water.

With all that being said, these are the things you need to clean your pancake griddle.

  • Soft dishcloth/sponge
  • Paper towel
  • Mild dish detergent
  • Lukewarm water
  • Spatula
  • Heat resistant gloves

How to Clean a Pancake Griddle

how to clean a pancake griddle

These steps will show how to safely and effectively clean both electric and stovetop pancake griddle pans. Here’s what you need to do:

Step 1: Heat Things Up

Heat up your pancake griddle. Before we begin cleaning, you need a hot griddle as this will make it easier to get rid of grease and burnt bits of batter.

Step 2: Get Rid of the Debris

To get rid of burnt and hardened food scraps, use a flat-headed spatula to scrape off the debris while the griddle is hot. For better cleaning, scrape back and forth gently without scratching the surface. Then sweep all the crumbs out of the griddle.

Step 3: Start Washing the Griddle

While the pan is still hot, add a little water to the surface, and a few drops of dish soap. Bring the water on the griddle to a boil─ this will loosen up grease and bits of burnt batter stuck onto the surface. You can repeat this step as needed.

Step 4: Finish Up

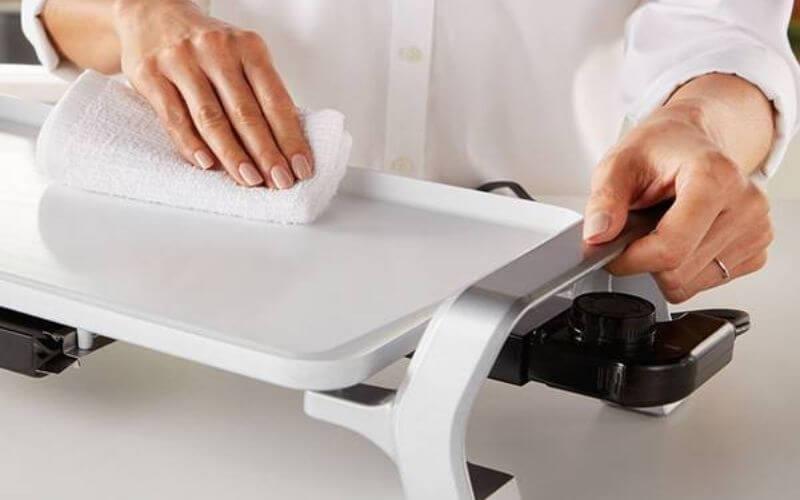
To get rid of any remaining water and soapy residue, fold up a paper napkin and use it to soak up all the liquid in the griddle. Use your spatula to sweep the napkin around the pan. Keep doing this until the pan is dry with no soap or water.

Step 5: Drying Your Griddle

If your pancake griddle pan is still a little damp, you can use a kitchen towel (or more paper napkins) to wipe it dry. Or, you can just let it air dry.

For the last 2 steps, make sure your griddle is off the heat. If you have a non-stick pancake griddle, try not to use a metal spatula, and use a wooden spoon or silicone spatula instead.

Cleaning Tips for Your Pancake Griddle

electric pancake skillet

Want to prevent a buildup of grease and nastiness on your pancake griddle? These maintenance tips will show you how regular care can keep your flat pan for pancakes in better shape.

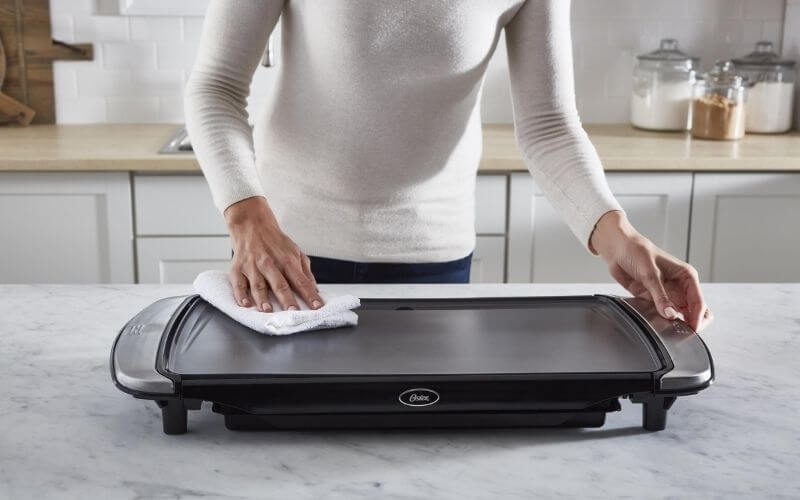
  • Wipe down your griddle after each use. A damp paper napkin is the best way to prevent grease from building up. 

    This is a great option for nonstick and ceramic pancake pan griddles, like the Oster pancake griddle. Remember to let your griddle cool down mostly first.
  • Scrape off burnt bits as soon as possible. Don’t let the bits of burnt pancakes and grease stick to your pan. Instead, use a scraper or spatula to remove debris while the pan is still hot after cooking.
  • If you have a stovetop griddle, you can also rinse it under a tap while still hot, which will loosen the caked-on residue. [This is not applicable for electric pancake griddles.]
  • If you have a cast iron griddle, season it frequently and wipe it down with a damp dish towel after every use.
  • Once your griddles have dried completely after cleaning, spritz an even layer of cooking spray to prevent bits of food from sticking to it.
  • When using your griddle to make things like hash browns or omelets, don’t cook things at very high temperatures, as this will encourage burning and build up.
  • To help cut through lots of greases and to remove caked-on food, you can also spray the griddle with white vinegar, before adding the soap and water.

Got More Questions?

Below you’ll find answers to questions we get asked the most about cleaning pancake griddles.

01. How Do I Get Rid of Burnt Food from My Pancake Griddle?

Dilute some vinegar with a little water. Heat up the griddle, add your vinegar, and allow it to boil for 10 minutes. 

Then add a tablespoon of baking soda, which will react with the vinegar and form bubbles, loosening the bits of burnt food and stains. Cream of Tartar will also work instead of baking soda.

02. How Should I Clean My Griddle for the First Time?

Before using your stovetop pancake griddle for the first time, wash it in hot, soapy water. This is the only time you should actively wash the griddle. Rinse off until there’s no soap or residue and dry completely with paper towels.

03. What is the Best Oil to Cook with on a Griddle?

Always use an oil with a high smoke point on your pancake griddle to prevent greasy buildup and burn marks. This includes vegetables, sunflower seed, and canola oil.

04. How Should I Prevent My Pancakes from Sticking to My Griddle?

  • Try to get a nonstick pancake griddle.
  • Use a paper towel to evenly grease the surface of the griddle with a little oil or clarified butter.
  • Use cooking spray to spritz a thin and even layer of grease that will act as a barrier between the cooking surface and pancake batter.

05. Can I Use Apple Cider Vinegar on My Pancake Griddle?

Apple cider vinegar gets rid of built-up grease and burned food just like white vinegar, but it has a stronger smell that may linger around in your griddle.

To Finish Off

Griddles are awesome because you can make a whole host of breakfast dishes on them besides pancakes. But just like any other super-useful kitchen tool, they tend to get dirty fast.

Knowing how to clean a pancake griddle will make sure you don’t have to go out and buy a new one every 6 months. So bust out your spatula, find yourself some dish soap and paper napkins, and get to work on your pancake griddle! 

You’ll be thanking me at breakfast.

More Related Informational Guides:

Can You Grind Coffee Beans in a Food Processors? Find Out How!

Have you ever rushed through a supermarket aisle, only to realize half the stuff you bought isn’t right? I once grabbed what I thought was pre-ground coffee, and then discovered it was a bag of whole coffee beans.

Turns out, this is a common mishap for many people. Some just go without coffee until their next grocery run or buy coffee every morning from their local Starbucks. But others have attempted to grind their coffee beans, using regular kitchen appliances.

I did wonder: can you grind coffee beans in a food processor? Today I am going to divulge the answer to my dilemma and tell you how you can brew a perfect cup of coffee from scratch, with basic cooking tools.

Using a Food Processor Instead of a Coffee Grinder

can you grind coffee beans in a food processor

Most people who grind their coffee beans at home own some kind of a coffee grinder, specially designed for grinding beans. Others use spice grinders which also work pretty well.

But what about using a food processor to grind coffee? The short answer is, yes. 

You can absolutely use a food processor for grinding coffee beans. The only difference is that it is best to grind a small batch of coffee beans at a time in a food processor.

The Difference between a Grinder and Food Processor:

Although you can use both to grind coffee beans, a coffee grinder and food processor work differently. A coffee grinder uses burrs to crush and break the beans by using a very abrasive surface.

This results in a softer and finer grind, which is a better option for things like Turkish coffee, espresso, Moka pot, and AeroPress coffee. 

Moreover, coffee grinder burrs result in a uniform grind which makes perfect extraction much easier, resulting in a bold, strong, and smooth flavor.

On the other hand, a food processor uses sharp blades to cut through food. These blades will pulverize the beans, giving you a somewhat coarser grind. Moreover, the grounds won’t be as uniform as those of the coffee mill.

However, you can still make a great cup of coffee from these grounds. The coarser grind makes it best for French presses, percolators, and Chemex brewers.

How to Grind Coffee in Food Processor Appliances:

Grind Coffee in Food Processor Appliances

If you haven’t used a food processor to grind coffee beans before, you might find this how-to guide useful. For the best results, you will need two tablespoons of coffee beans to brew 6-8 ounces of coffee.

Here’s what you need to do:

  1. Put your coffee beans into the bowl of the food processor, close the lid and plug it in.
  1. Find the On/Off buttons on your food processor or the High/Low-speed settings. Press the button five times, for about 2 seconds each time. Start at a low speed so you can keep track of how fine the coffee grinds are.
  1. Gently shake the processor so that the particles at the top of the bowl fall to the bottom by the blades. You can also tap the feet of the appliance gently on your counter.
  1. Next, hold down the High button for around 30 to 45 seconds, keeping a close eye on the texture of the beans. Any whole beans that have been pushed to the side of the should be tapped or shaken back to the center.
  1. You want the coffee grounds to be medium-fine or coarse, instead of extremely powdery.
  1. Tap or shake the processor cover to dislocate the loose grounds and lift off the cover and set it aside.
  1. Rotate and lift the worktop bowl off the processor base.
  1. Empty the ground beans and into a separate bowl or jar.
  1. For any residual ground coffee left in the processor, use a pastry brush or even a small silicone spatula to sweep them out of the bowl.
  1. Clean the bowl of the food processor with dish soap to prevent greasy buildup or lingering smells.
  1. Use your grounds to brew yourself a nice cup of coffee!

Other Methods for Grinding Coffee Beans

In case you don’t have a food processor, there are still a few other options for grinding coffee beans using household appliances.

Blender:

A blender uses the same slicing mechanism to crush coffee beans like a good processor. A Ninja blender coffee grinder will work just as well as any food processor, as will a Vitamix coffee grinding as an alternative.

To get a coarse ground, use the Pulse option a couple of times for 5-6 seconds each time. For a finer grind, blitz the beans in 10-second increments. Once again, it is important to keep an eye on the beans to assess how fine the grounds are.

Mortar and Pestle:

If you are okay with going old-school and putting in some elbow grease, a mortar and pestle is a great way to grind coffee. In fact, this process releases some of the more fragrant oils from the coffee beans, which will give your coffee a stronger and richer flavor.

You need to work with a small scoop of coffee beans at a time. With one hand, hold the mortar in place, while you use your dominant hand to hold the pestle. Use the pestle to forcibly press down and crush the beans in a twisting motion.

After the beans have been crushed, use the pestle to move the coffee around the bowl, so you can see the texture. If you are satisfied with the consistency, empty the grounds into a bowl or your coffee maker.

Hammer or Rolling Pin:

The idea behind this is simple, you use something heavy like a rolling pin, dowel, or large can to crush and grind the coffee beans. Make sure the beans are in a sealed bag. The advantage of the rolling pin is that it can crush and grind at the same time, so you get a finer texture.

When you use a wooden dowel or rolling pin, you end up with a medium-fine to fine grind, which is ideal for drip coffee brewing or pour-over coffee.

A hammer or mallet simply crushes the beans, which results in a coarser grind. This makes it a good option for cold brews, Chemex, and drip coffee makers.

To learn more about different and creative ways to grind coffee beans in greater detail, check this out!

Still Got Questions?

Here you will find answers to questions people often have about grinding coffee beans in a food processor.

01. Can I Grind Whole Coffee Beans in a Food Processor?

Yes, you can grind coffee beans in a processor, but the texture and consistency won’t be as fine as they would get with a proper coffee grinder.

02. Can I Grind Coffee Beans in a Small Bullet Blender?

Small bullet blenders are perfectly okay if you want to grind enough coffee beans for a single serving of coffee, like one or two tablespoons of beans.

03. What are the Grind Consistencies for Different Brewing Methods?

Grind ConsistencyBrewing Method
CoarseCold Brew Coffee, French Press, Percolator
Medium-CoarseChemex coffee maker, Clever Dripper
MediumConical Pour-over Brewers,Flat Bottom Drip Coffee Machines
Medium-FineConical Pour-over Brewers, Aeropress
FineEspresso, Moka Pot
Extra-FineTurkish Coffee

04. Can I Grind Coffee the Day before Brewing?

For the best flavor, grind your coffee beans right before brewing them. Brewing them a day before, or even the night before will result in a weaker tasting brew with a subdued fragrance.

Final Say

A broken coffee grinder is no reason to ditch your morning cup of joe. The next time you need to crush whole coffee beans, you will know the answer to the question: can you grind coffee beans in a food processor? 

Instead, you grab your trusty processor and have a steaming cup of coffee in minutes. Best of all, you’ll never have to resort to diner coffee again!