Sour Coffee Moka Pot: Causes and Solutions

As a veteran in the coffee industry for over 20 years, I have come to appreciate the importance of a well-balanced cup of coffee. A perfect cup of coffee should be rich in flavor, aroma, and body, without any overpowering tastes. However, one issue that can ruin your coffee experience is sourness.

When it comes to moka pot brewing, sour coffee is a common problem that affects the taste and quality of the coffee. It’s essential to learn how to avoid sourness in moka pot coffee to ensure that you can enjoy a delicious and satisfying cup of coffee every time.

Sour Coffee Moka Pot: Causes and Solutions 1

In this article, we will explore the causes of sour coffee from a moka pot and provide practical solutions to help you fix this issue.

Understanding Sour Coffee

Sour coffee is a common problem that can occur when brewing coffee in a moka pot. It’s characterized by a sharp, acidic taste that can be unpleasant and overwhelming.

Sourness is a problem for moka pot coffee because it detracts from the overall taste and quality of the coffee. In some cases, it can be so pronounced that it renders the coffee undrinkable.

Acidity is an essential component of coffee, and it plays a crucial role in determining the flavor and taste of the coffee. Some coffees are naturally more acidic than others, depending on the type of coffee bean, the growing conditions, and the roasting process. For example, African coffees tend to be more acidic than South American coffees.

When it comes to moka pot brewing, several factors can contribute to sourness in the coffee. One of the most common causes is the brewing temperature. If the water is too hot, it can over-extract the coffee, leading to sourness. On the other hand, if the water is not hot enough, it can under-extract the coffee, resulting in a sour taste.

Grind size is another critical factor that can affect the taste of moka pot coffee. If the coffee is ground too finely, it can over-extract and cause the coffee to taste sour. If the coffee is ground too coarsely, it can under-extract and result in a sour taste.

Water quality is also essential when brewing moka pot coffee. Hard water, for example, can affect the taste of the coffee, making it more acidic. Using filtered water can help prevent this issue.

How to Avoid Sour Coffee in a Moka Pot
Sour Coffee Moka Pot: Causes and Solutions 2

Brewing coffee in a moka pot can be a simple and satisfying way to enjoy a delicious cup of coffee. However, as we discussed earlier, sourness can be a common issue that affects the taste and quality of the coffee. In this section, we will explore practical steps that you can take to avoid sourness and achieve a well-balanced flavor profile in your moka pot coffee.

Step 1: Select the right coffee beans

Choosing the right coffee beans is crucial for achieving a great-tasting cup of moka pot coffee. Look for high-quality coffee beans that are freshly roasted and have a medium-fine grind. Ideally, you should use beans that are specifically labeled for moka pot brewing, as they are typically roasted and ground to suit this brewing method.

Step 2: Add water and coffee

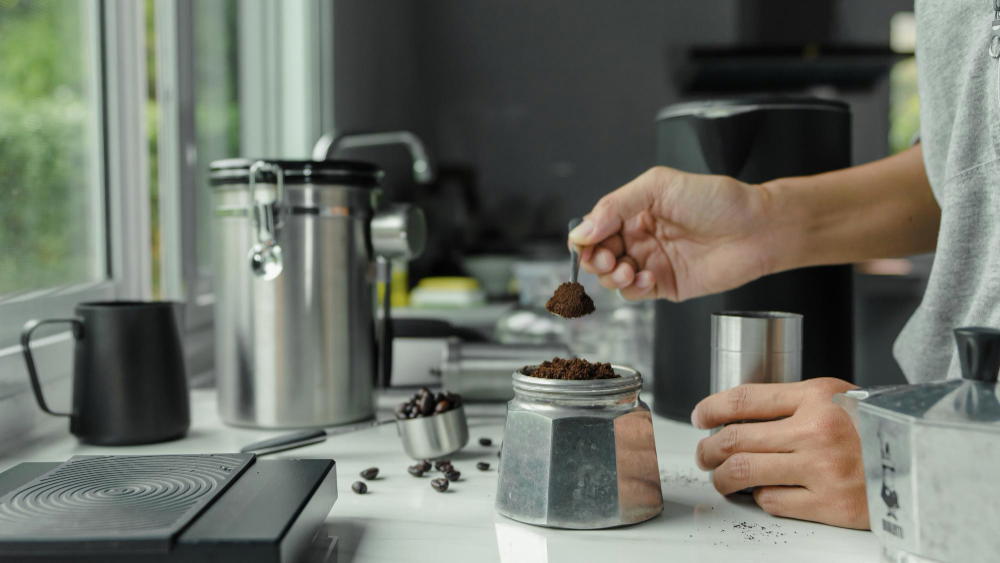
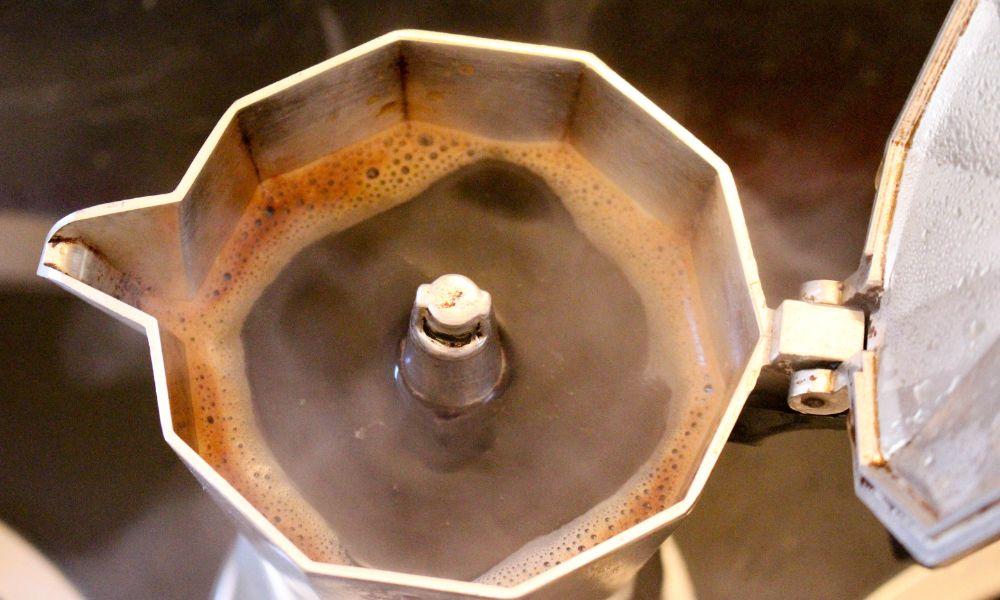
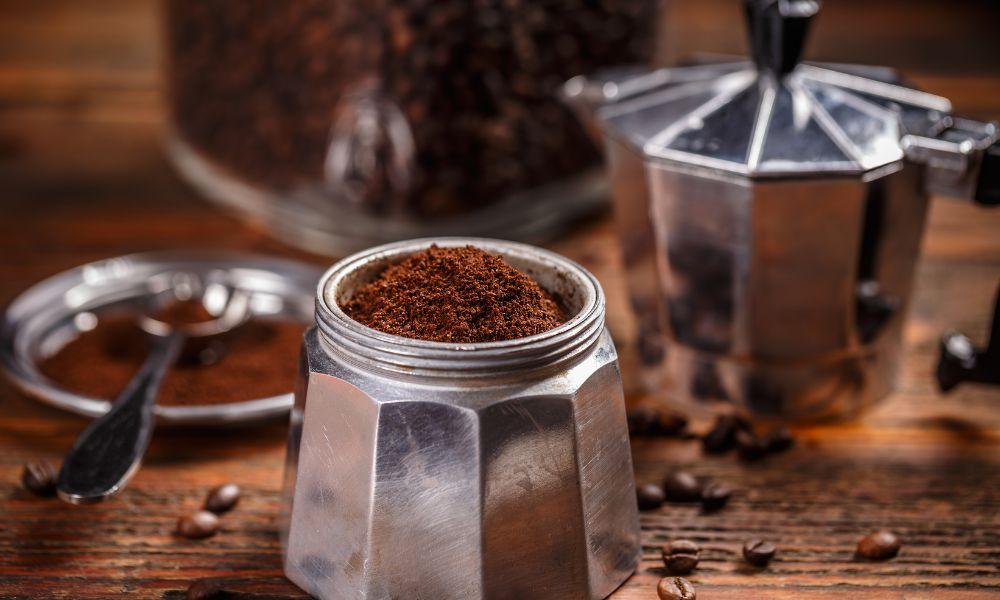
Fill the bottom chamber of the moka pot with cold water up to the level indicated on the pot. Next, add the ground coffee to the filter basket in the middle chamber. Avoid packing the coffee too tightly, as this can lead to over-extraction and sourness.

Step 3: Heat the water

Place the moka pot on a medium heat setting and wait for the water to heat up. Keep an eye on the pot, as you don’t want the water to overheat, which can lead to sourness. Once the coffee starts to flow, reduce the heat further to prevent over-extraction.

Step 4: Serve and enjoy

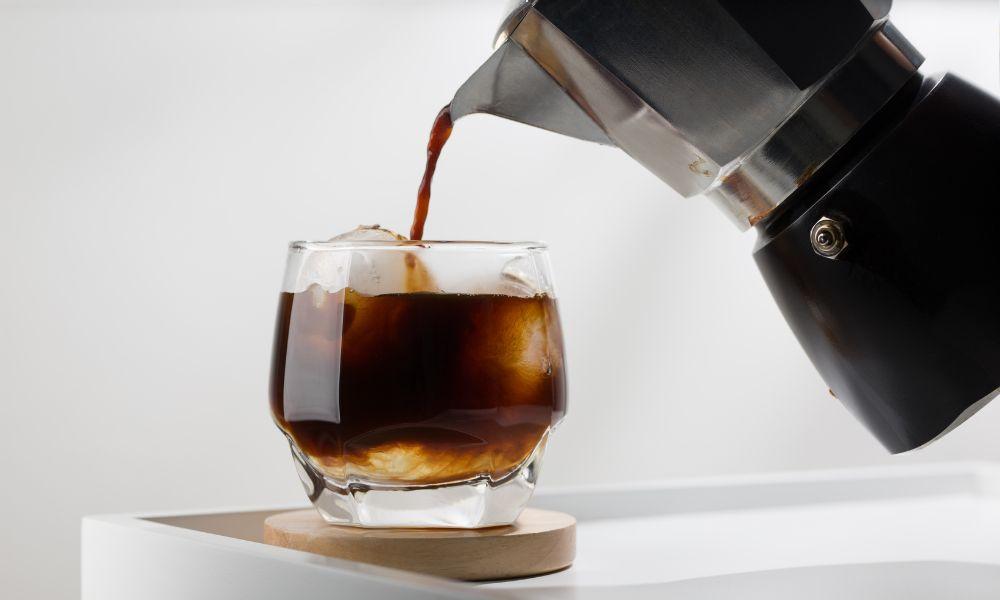
Once the coffee has finished brewing, remove the pot from the heat source and serve the coffee immediately. Enjoy your delicious cup of moka pot coffee!

To avoid sourness in moka pot coffee, you can adjust the brewing factors, such as the temperature, grind size, and water quality. Here are some tips:

  • Use filtered water to avoid hard water that can affect the taste of the coffee.
  • Brew the coffee at a temperature between 195-205°F (90-96°C) to prevent over-extraction and sourness.
  • Use a medium-fine grind to ensure that the coffee is extracted correctly and avoid sourness.
  • Avoid overheating the water, as this can cause the coffee to over-extract and taste sour.

In addition to these tips, it’s also essential to avoid common mistakes when brewing moka pot coffee, such as:

  • Reusing coffee grounds, which can result in over-extraction and sourness.
  • Using stale coffee, which can affect the taste of the coffee and make it more acidic.
  • Cleaning the moka pot infrequently, which can result in residue buildup that affects the taste of the coffee.

Troubleshooting Sourness in Moka Pot Coffee
Sour Coffee Moka Pot: Causes and Solutions 3

Sourness is a common problem that can occur when brewing coffee in a moka pot. It can be frustrating to experience this issue, especially if you’re a coffee lover who appreciates a well-balanced cup of coffee. However, the good news is that sourness in moka pot coffee can be fixed by identifying the potential causes and making small adjustments to the brewing process. In this article, we will explore the potential causes of sourness in moka pot coffee and provide practical solutions to help you troubleshoot and fix this issue.

Potential Causes of Sourness in Moka Pot Coffee

Incorrect grind size

One of the most common causes of sourness in moka pot coffee is the incorrect grind size. If the coffee is ground too finely, it can over-extract, resulting in sourness. On the other hand, if the coffee is ground too coarsely, it can under-extract, resulting in a sour taste.

Overextraction

Overextraction occurs when the coffee is brewed for too long or at too high a temperature. This can cause the coffee to become too bitter and sour.

Water temperature

If the water temperature is too low, it can cause under-extraction and sourness. If the water temperature is too high, it can lead to over-extraction and bitterness.

Stale coffee

Using stale coffee can also result in a sour taste. Coffee loses its freshness over time, and if it’s not stored properly, it can become stale and affect the taste of the coffee.

Troubleshooting and Fixing Sourness in Moka Pot Coffee
Sour Coffee Moka Pot: Causes and Solutions 4

Adjust the grind size

To fix sourness caused by an incorrect grind size, adjust the grind to a medium-fine size. This size will ensure that the coffee is extracted correctly and will prevent over-extraction and under-extraction. If the coffee is still sour, adjust the grind size slightly to a finer or coarser setting until you find the right balance.

Adjust the brewing time

If the coffee is overextracted, try reducing the brewing time or using a lower heat setting. If the coffee is under-extracted, try extending the brewing time or using a higher heat setting.

Adjust the water temperature

If the water temperature is too low, try using hotter water to brew the coffee. If the water temperature is too high, try using slightly cooler water or reducing the heat setting.

Use fresh coffee beans

If the coffee tastes sour due to stale coffee beans, try using freshly roasted coffee beans. Fresh coffee beans will have a better flavor profile and will not be as acidic as stale coffee beans.

Small Adjustments That Can Improve the Taste of Moka Pot Coffee
Sour Coffee Moka Pot: Causes and Solutions 5

Preheat the water

Preheating the water before adding it to the moka pot can help ensure a consistent water temperature and prevent sourness.

Use filtered water

Using filtered water can help ensure that the water quality is consistent and can prevent hard water from affecting the taste of the coffee.

Clean the moka pot regularly

Cleaning the moka pot regularly can help prevent residue buildup that can affect the taste of the coffee.

Use the right amount of coffee

Using the right amount of coffee is crucial for preventing under-extraction or over-extraction. Use the recommended amount of coffee for your moka pot, and adjust the amount as needed based on your taste preference.

Experiment with different coffee beans

Try experimenting with different types of coffee beans to find the perfect balance of flavor and acidity for your taste preference.

Conclusion

In this article, we have discussed the common problem of sourness in moka pot coffee and provided practical solutions to help you prevent this issue. We identified the potential causes of sourness, such as incorrect grind size, overextraction, water temperature, and stale coffee. We also discussed how to troubleshoot and fix each of these issues.

We provided tips for selecting the right coffee beans for moka pot brewing and discussed common mistakes to avoid when brewing moka pot coffee. Additionally, we discussed small adjustments that can improve the taste of your coffee, such as preheating the water, using filtered water, cleaning the moka pot regularly, and experimenting with different coffee beans.

The key takeaways from this article are that achieving a well-balanced cup of moka pot coffee is all about finding the right balance between the brewing factors and personal taste preferences. It’s essential to adjust the grind size, brewing time, water temperature, and coffee bean selection to avoid sourness and achieve a delicious and satisfying cup of coffee.

We encourage readers to experiment with their brewing process and make small adjustments until they find the perfect balance of flavor and acidity for their taste preferences. With some patience and experimentation, anyone can enjoy a delicious and satisfying cup of moka pot coffee every time.

FAQs

What is the best coffee grind size for moka pot brewing?

The best coffee grind size for moka pot brewing is a medium-fine grind. This size will ensure that the coffee is extracted correctly and will prevent over-extraction and under-extraction, which can cause sourness.

How long does it take to brew coffee in a moka pot?

The brewing time for moka pot coffee can vary depending on the size of the pot and the heat source. Generally, it takes around 5-10 minutes to brew a cup of moka pot coffee.

What is the ideal water temperature for moka pot brewing?

The ideal water temperature for moka pot brewing is between 195-205°F (90-96°C). This temperature range will prevent over-extraction and sourness and will help to achieve a well-balanced cup of coffee.

How can I tell if my moka pot coffee is overextracted?

Overextracted coffee can taste bitter and sour. If your moka pot coffee has a harsh or unpleasant taste, it may be overextracted. Adjusting the brewing time or using a lower heat setting can help prevent overextraction.

Can I use any type of coffee bean for moka pot brewing?

While you can use any type of coffee bean for moka pot brewing, it’s best to use high-quality coffee beans that are freshly roasted and have a medium-fine grind. Using beans that are specifically labeled for moka pot brewing can also help ensure that the beans are roasted and ground to suit this brewing method.
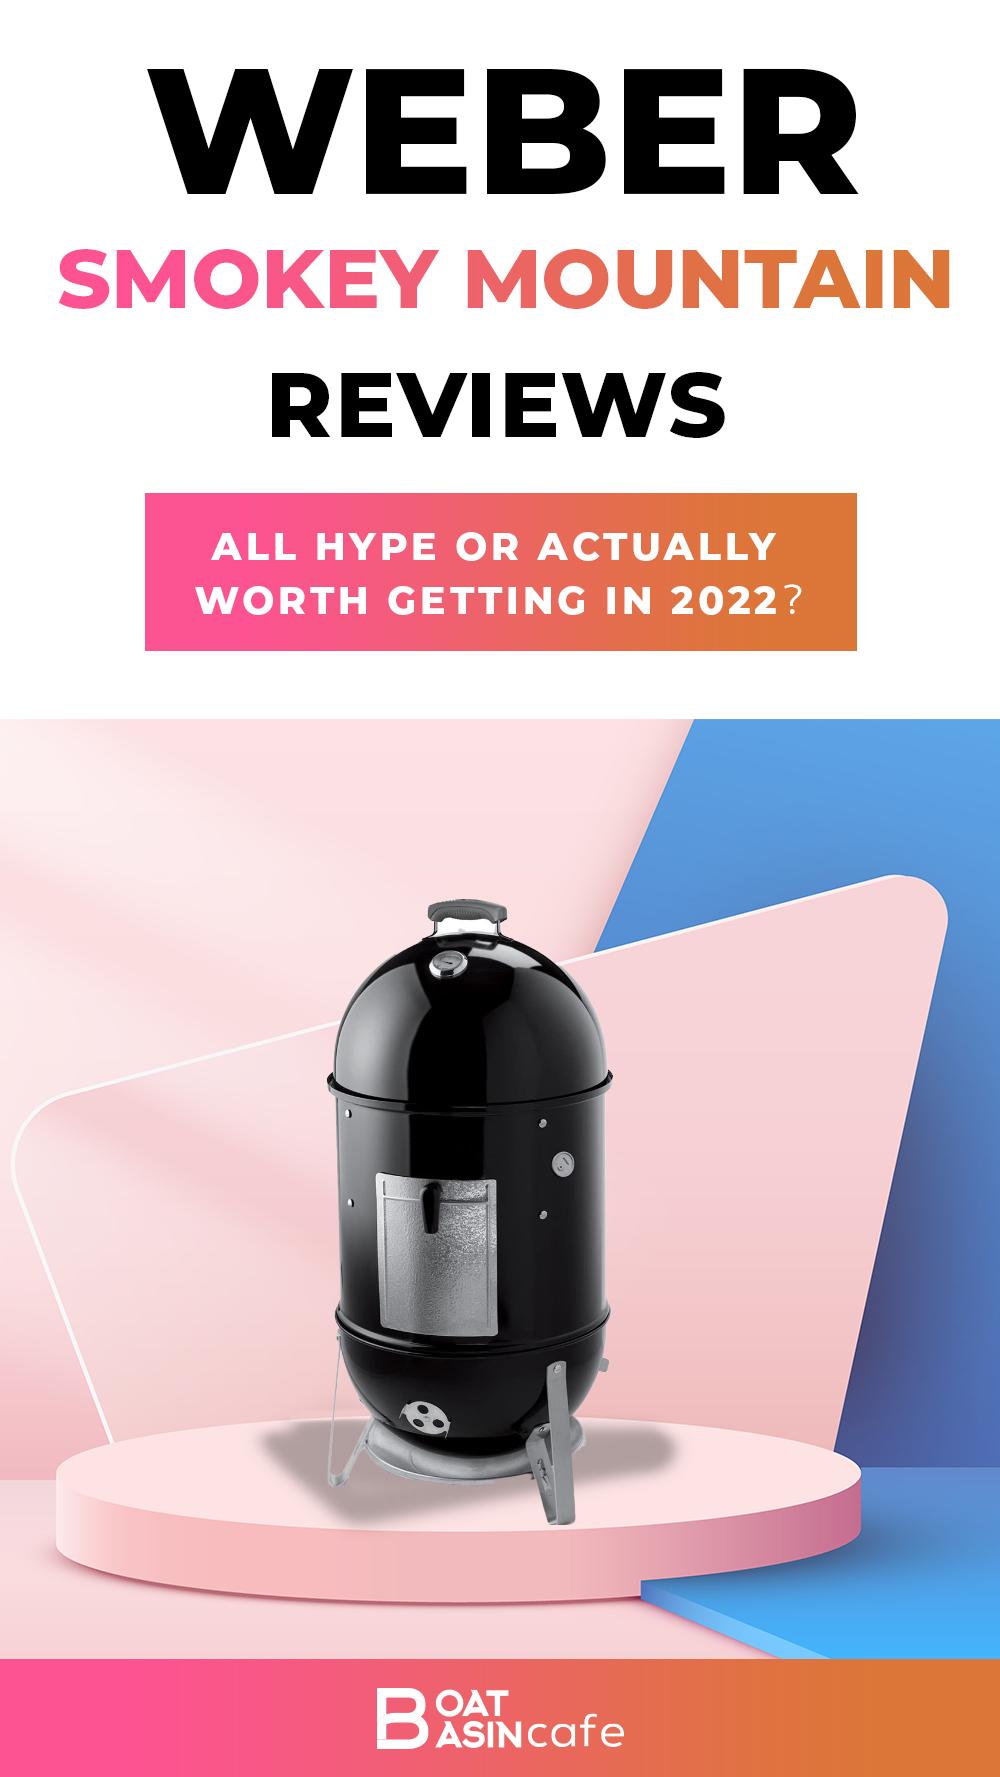
Weber Smokey Mountain Review: All Hype or Actually Worth Getting in 2022?

Want to smoke like a pitmaster pro? Find out whether the Weber ticks all the right boxes from this Weber Smokey Mountain review.

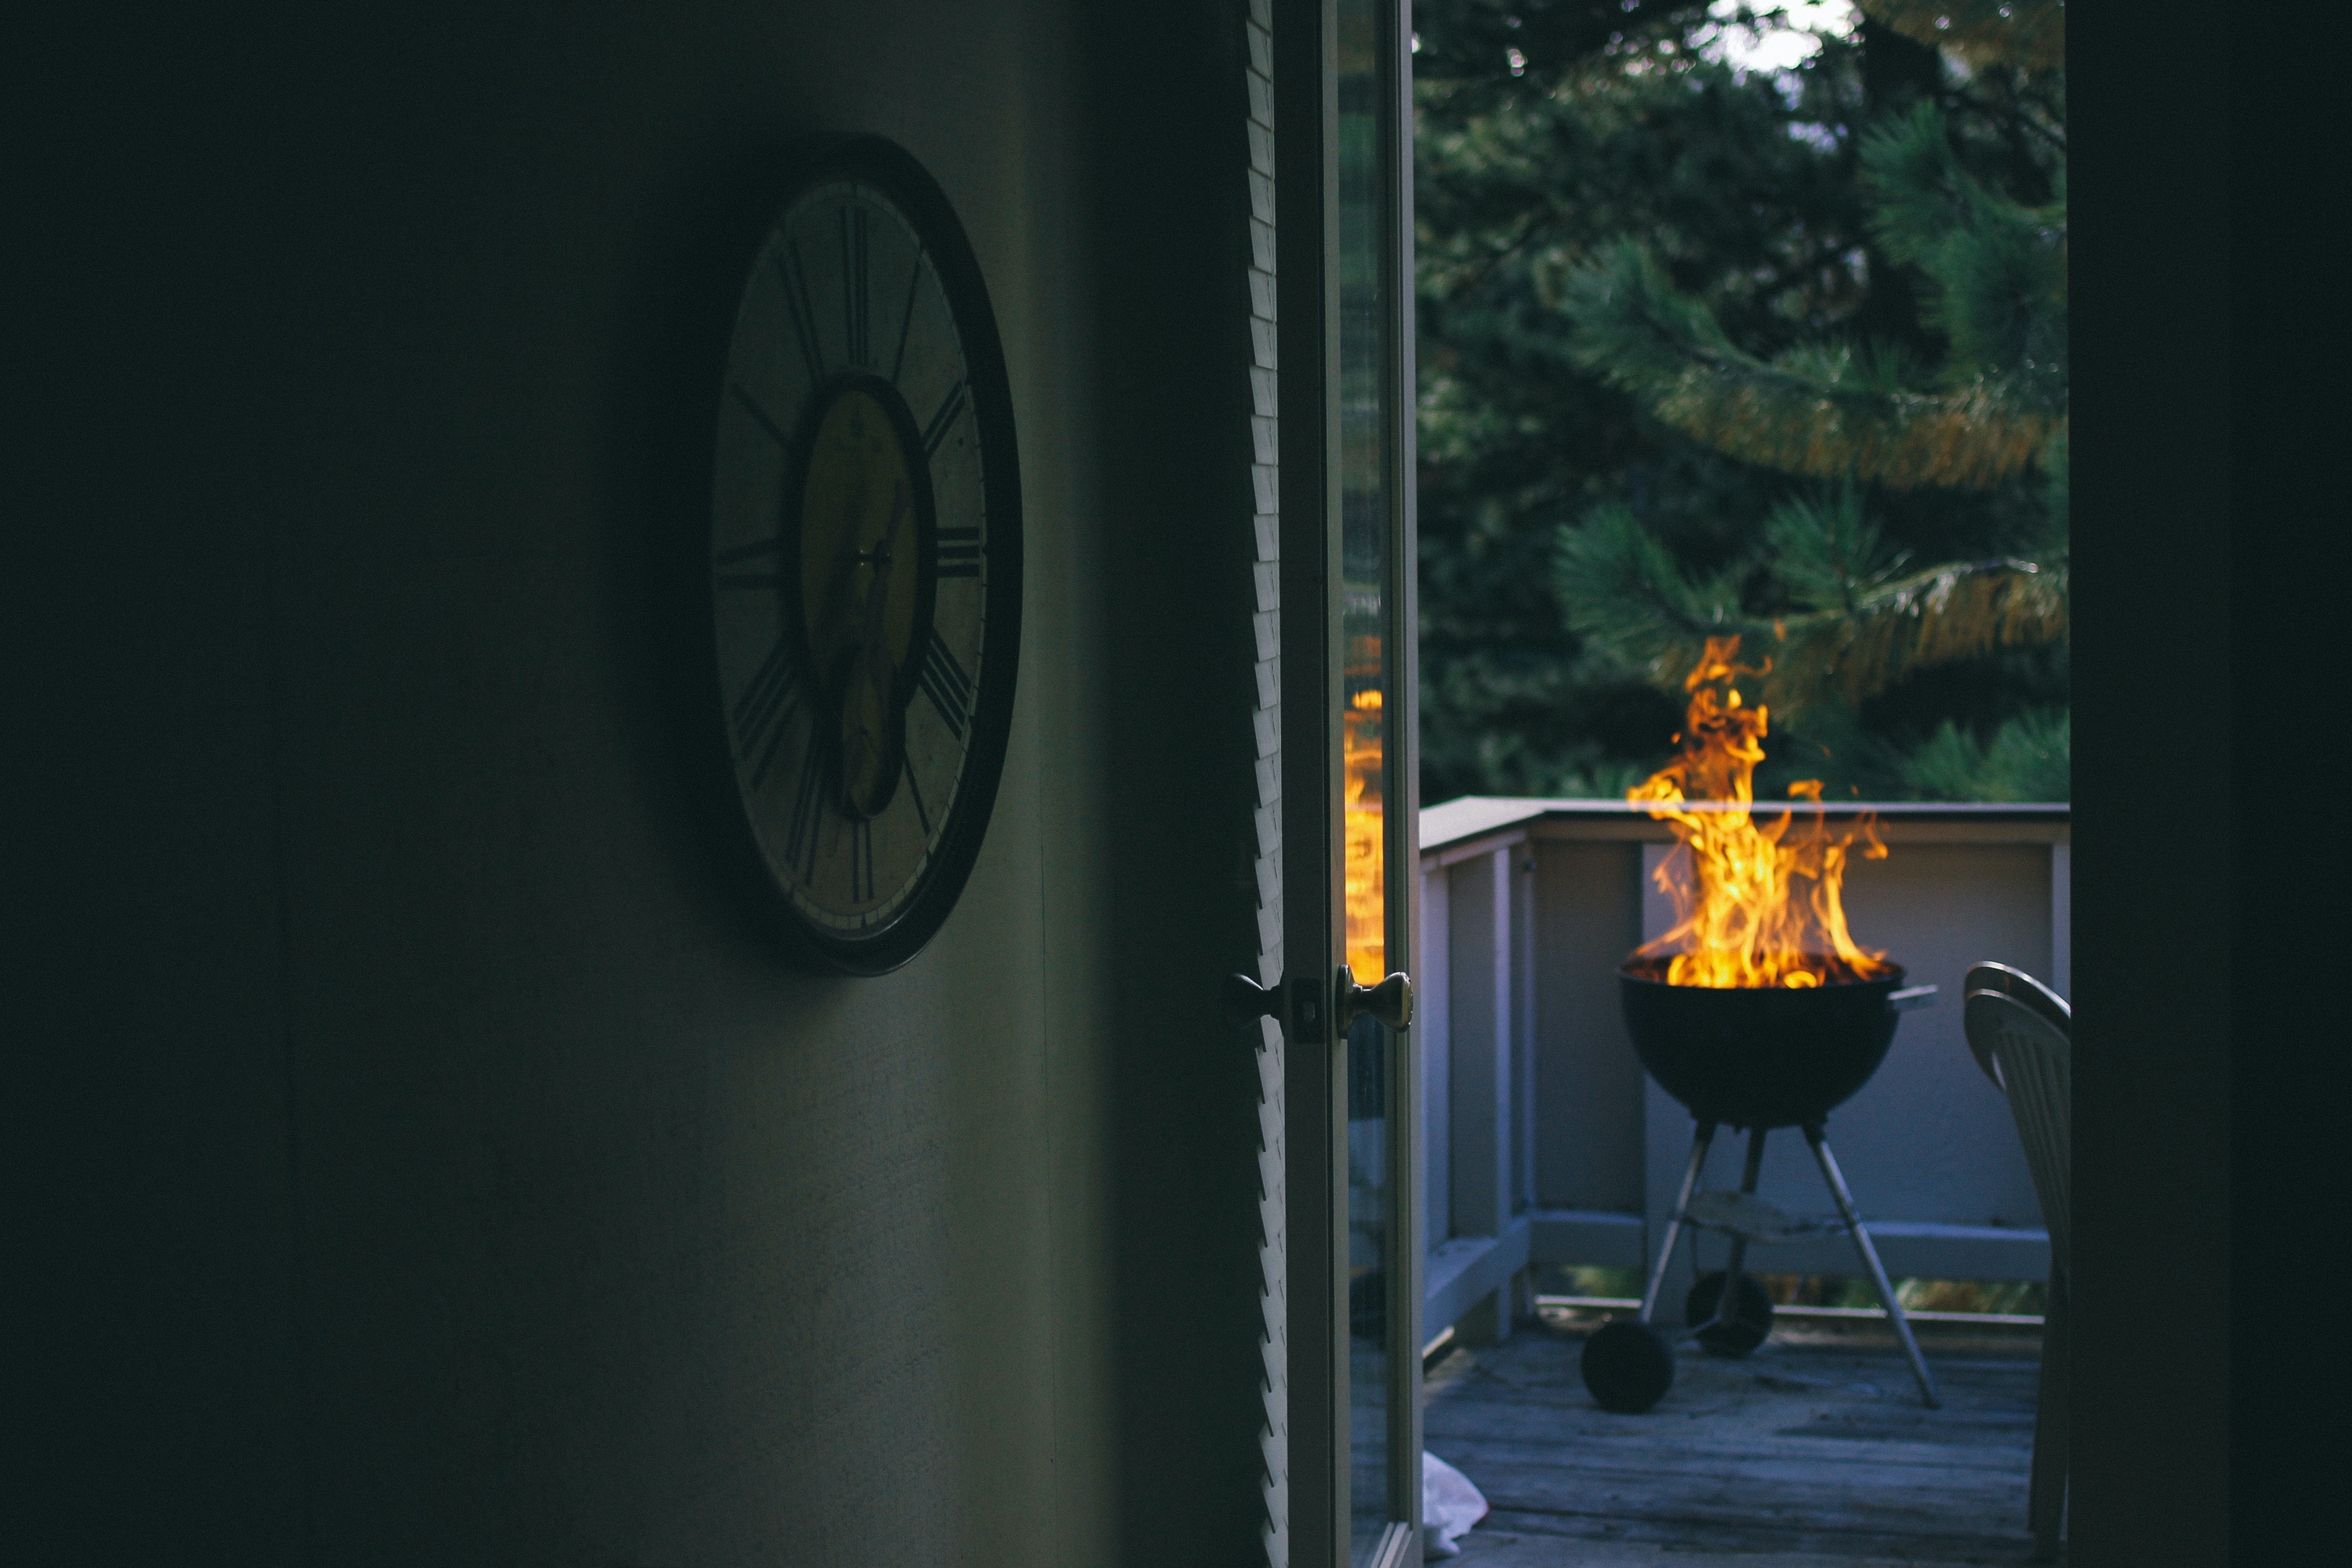
A smoker with fire against a backdrop of greenery.

Every culinary artist–whether you’re a professional or a home cook foodie–knows that smoking meat is an important skill to have in your cooking arsenal. And when it comes to smoking, your appliance and tools are just as important as the quality of your meat and your hands-on experience.

In today’s Weber Smokey Mountain review, I’m going to discuss what has been called the Number 1 smoker in current times. ThisSmokey Mountain Cooker and Charcoal Smoker has lots of cool features and is extremely popular among smoking and grilling connoisseurs. But is this appliance a result of worldwide hype or is it really as good as everyone makes it out to be?

My Weber smoker review aims to find out just that. I’ll be talking about its design, performance, setup, and things I liked about the smoker. And in case you’re new to smoking and grilling, I’ll answer questions that people tend to have about their smokers!

If you want to watch me (figuratively) dissect this fancy smoker, keep on reading!

Weber Smokey Mountain Cooker: An Overview

SALE

Weber 18-inch Smokey Mountain Cooker, Charcoal Smoker

Weber 18-inch Smokey Mountain Cooker, Charcoal Smoker$454.80 $379.00 Buy on Amazon

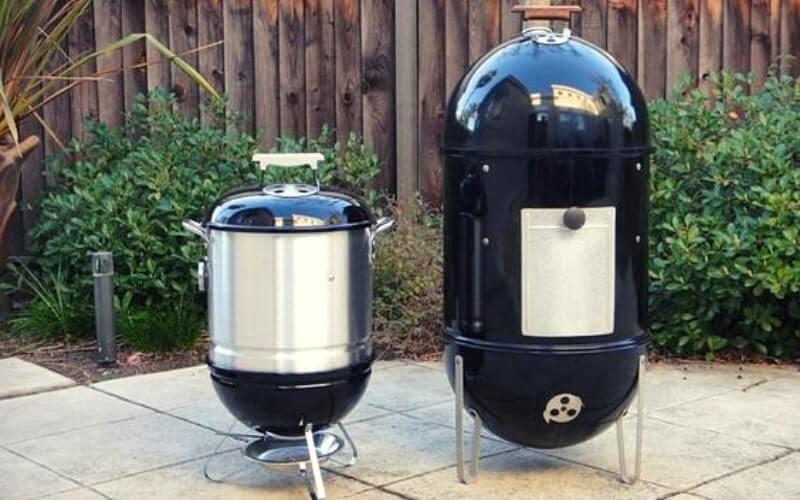
The Weber Smokey Mountain is a cylindrical smoker made of porcelain-enameled steel that comes in three sizes: 14-inch, 18-inch, and 22-inch. It has a water pan that sits between the charcoal chamber and the cooking grates, which helps regulate the temperature and keep the meat moist. Here are some of the key features of the Weber Smokey Mountain:

  • Two cooking grates: The 14-inch model has one cooking grate, while the 18-inch and 22-inch models have two grates, allowing you to smoke a large amount of meat at once.
  • Built-in thermometer: The lid of the smoker has a built-in thermometer that allows you to monitor the temperature without opening the lid.
  • Heat-resistant handles: The handles on the lid and bowl are made of glass-reinforced nylon, which stays cool to the touch even during high-temperature cooking.
  • Aluminum fuel door: The fuel door is made of rust-resistant aluminum, which makes it durable and easy to use.
  • Adjustable air vents: The smoker has two adjustable vents, one at the bottom and one on the lid, which allow you to control the airflow and temperature.
  • Easy to assemble: The Weber Smokey Mountain is easy to assemble, and the instructions are clear and concise.
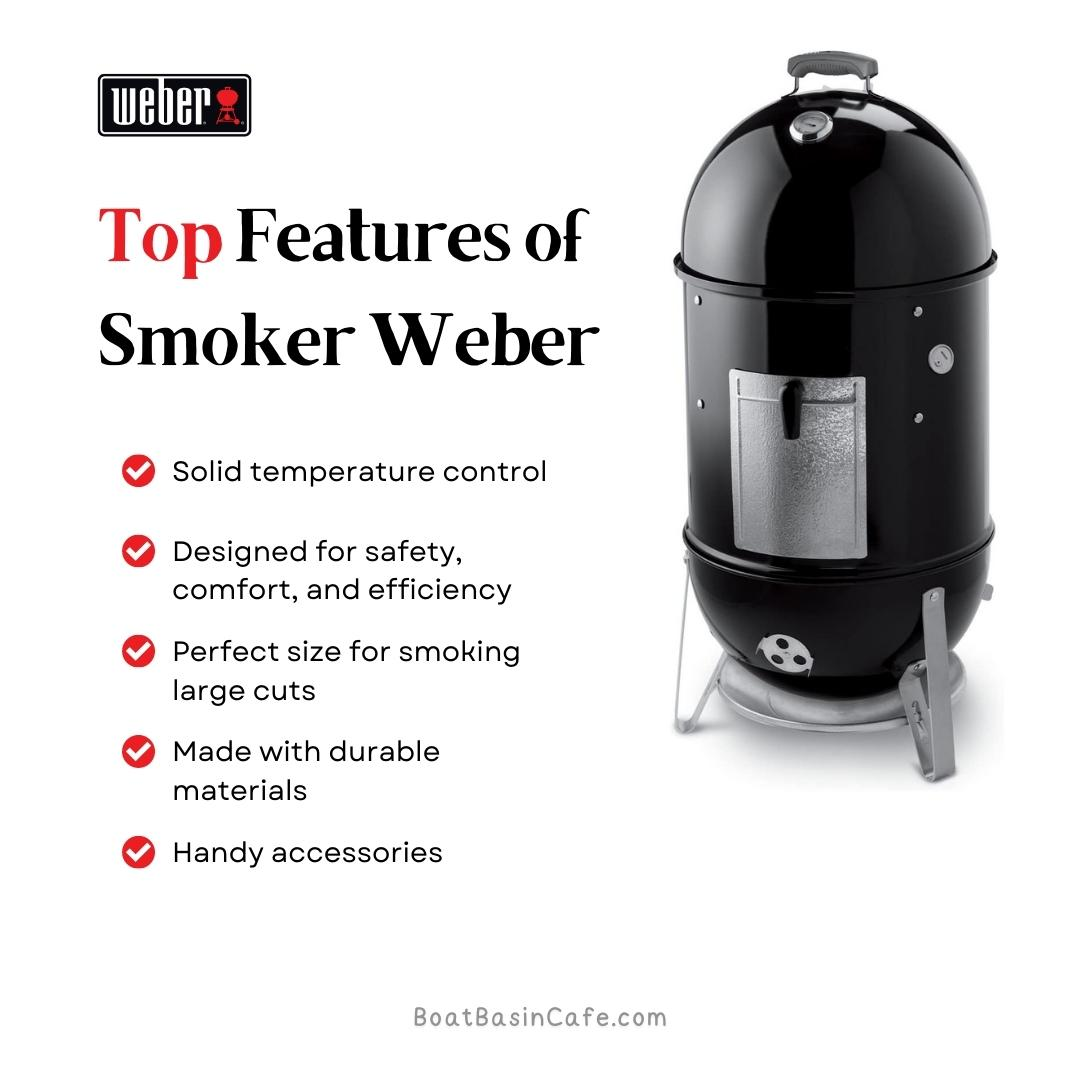
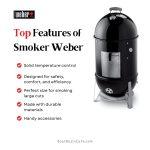
Top Features of Smokey Mountain Cooker

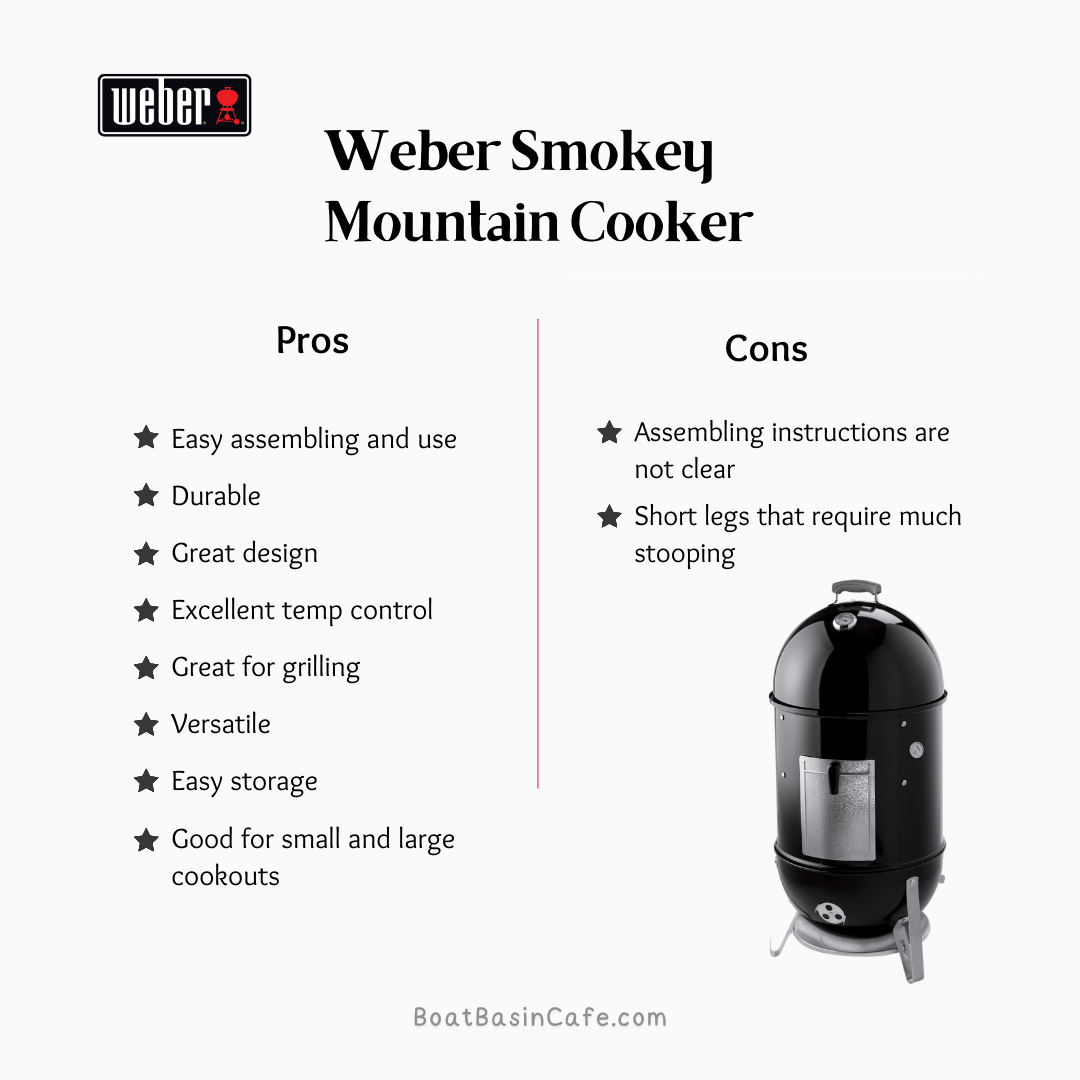
Pros of Weber Smokey Mountain

There are many reasons why the Weber Smokey Mountain is a top-rated smoker among BBQ enthusiasts. Here are some of the pros of this smoker:

  • Excellent heat retention: The porcelain-enameled steel construction and the water pan help the smoker retain heat efficiently, allowing you to cook meat at a consistent temperature.
  • Authentic smoky flavor: The smoker produces a rich and smoky flavor that is characteristic of traditional BBQ cooking.
  • Easy to use: The smoker is easy to set up and use, and you don’t need to be a seasoned pitmaster to get great results.
  • Versatile cooking capabilities: You can smoke, grill, and even bake in the Weber Smokey Mountain, making it a versatile tool for outdoor cooking.
  • Durable construction: The Weber Smokey Mountain is built to last, with high-quality materials and excellent craftsmanship.

Cons of Weber Smokey Mountain

While the Weber Smokey Mountain is an excellent smoker overall, there are a few drawbacks to consider. Here are some of the cons of this smoker:

  • Price: The Weber Smokey Mountain is more expensive than some other smokers on the market, which may not be feasible for some budget-conscious buyers.
  • Limited capacity: The 14-inch model has a relatively small cooking area, which may not be enough for large gatherings or parties.
  • Charcoal management: The Weber Smokey Mountain requires some effort to manage the charcoal, and you need to refill it periodically during long cooks.
  • No built-in WiFi or Bluetooth connectivity: Unlike some high-end smokers, the Weber Smokey Mountain does not come with built-in WiFi or Bluetooth connectivity, which may be a deal-breaker for some tech-savvy buyers.
Pros and Cons of Smokey Mountain Cooker Smoker

Why I Recommend the Smokey Mountain Cooker Smoker:

This smoker is unique because of how well designed it is. I loved the Weber cooker because it gives you exact control over the grilling temperature, making your meat smoke at the perfect temperature. You can even add things like apple cider to the water in the pan to give your meat a distinct flavor.

The versatility is another popular feature. You can smoke meat and BBQ the cuts of your choice. The size is just right and helps you cook in bulk. Above all, the Smokey Mountain cooker smoker is safe and easy to use and is great for new cooks and professionals alike.

What I Liked about This Smoker Weber

SALE

Weber 18-inch Smokey Mountain Cooker, Charcoal Smoker

Weber 18-inch Smokey Mountain Cooker, Charcoal Smoker$454.80 $379.00 Buy on Amazon

This part of my Weber Smokey Mountain smoker review takes a closer look at the things I enjoyed about the cooker.

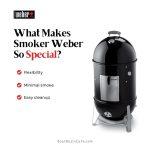
Flexibility:

This cooker is more than just a smoker. You can also use it as a grill or a barbecue. But what was impressive was that you don’t have to make any dramatic changes when using it as a grill.

Instead of the water pan, just place a fire grate and charcoal ring at the bottom. They should fit perfectly and not feel awkward. The top grate is placed in its usual area when grilling. And that’s it! Your smoker is now a grill that works just as well as any BBQ.

Minimal Smoke:

Smoke is inevitable when grilling but this Weber model produces less smoke than many cookers out there. This is helpful because you can grill for longer without being irritated by the smell of the smoke. Also, it doesn’t irritate your eyes or cause breathing difficulties.

The acrid smell of smoke tends to seep into our clothes and cling to the skin. This can be annoying, especially if you’re at a picnic or backyard cookout. Because of the little smoke, your grilling will be less likely to affect your guests.

Easy Cleanup:

Like I mentioned, the chrome-plated grates are easy to clean. But that isn’t all. Cleaning this smoker is extremely simple. Besides scrubbing the two cooking grates, you just need to clean out the water pan and get rid of the ashes and unused charcoal.

It is also advised to wipe down the interior with a damp cloth after the grill has cooled. This will prevent the accumulated smoke from flaking off and falling into your food. As far as external maintenance goes, you just have to wipe the outside of the cooker with a cloth after every use.

What Makes Smokey Mountain Cooker Special

Weber Smokey Mountain vs. Other Smokers

The Weber Smokey Mountain is not the only smoker on the market, and there are several other options that you may consider. Here are some of the key differences between the Weber Smokey Mountain and other popular smokers:

Weber Smokey Mountain vs. Traeger

Traeger is a well-known brand in the pellet smoker market, which uses wood pellets to generate smoke and heat. While Traeger smokers are more expensive than the Weber Smokey Mountain, they are easier to use and require less effort to maintain. However, some BBQ enthusiasts argue that pellet smokers don’t produce as authentic of a smoke flavor as charcoal smokers.

Weber Smokey Mountain vs. Pit Barrel Cooker

The Pit Barrel Cooker is a drum-style smoker that is relatively inexpensive and easy to use. While it doesn’t have the same level of heat retention and temperature control as the Weber Smokey Mountain, it is a good option for beginners or casual BBQ enthusiasts.

Weber Smokey Mountain vs. Kamado Joe

Kamado Joe is a high-end brand that makes ceramic charcoal grills and smokers. While Kamado Joe smokers are more expensive than the Weber Smokey Mountain, they offer excellent heat retention and temperature control, and are versatile enough to be used for smoking, grilling, and baking.


Weber Smokey Mountain Cooker 101: How to Use This Smoker

If you’ve never used a Weber grill or smoker before, you might feel intimidated by this cooker. But there’s absolutely nothing to worry about and I’ll show you how you can get the most out of your Smokey Mountain cooker.

  • Add lump charcoal to the charcoal bowl and add some Firestarter in the center. Ignite your flames using a lighter or match.
  • Let the fire smolder for a bit and build up steam. You can also make a small pile of charcoal around and above the flames to help it catch better. Once the flames catch on and get larger, place the middle section on top of the charcoal bowl.
  • Fill the water pan with almost 2 gallons of cold water and place it in the cooker. This functions as a heat sink to create a stable temperature inside the cooking space.
  • When you place your food on the grate, place a stick of wood or 4-6 fist-sized chunks of wood over the charcoal close to the center.
  • Put the lid on the smoker. When the temperature reaches 200 degrees, shut the access door and adjust the vents so that they are half-open
  • Once the temperature increases to 225 degrees, close the vents so that they are only a quarter open and adjust them so you can maintain your target temperature.
  • Keep an eye on the temperature gauge and the water level in the bowl. The temperature won’t fluctuate much but keep adjusting the vents to increase or decrease the intensity of the heat.

If you’ve never used a smoker before, it’s a good idea to start with a dry run. This will season your grill and help you calibrate it, as well as help you get used to handling it.

On the other hand, if you’re new to cooking, you might be overwhelmed by all the choices you have. If you’re looking for a Weber Smokey Mountain recipe list, this will have you covered. And if you still can’t decide what to make, remember, you can never go wrong with A Smoky Mountain barbecue!

Setting Up Your Smokey Mountain Cooker Smoker

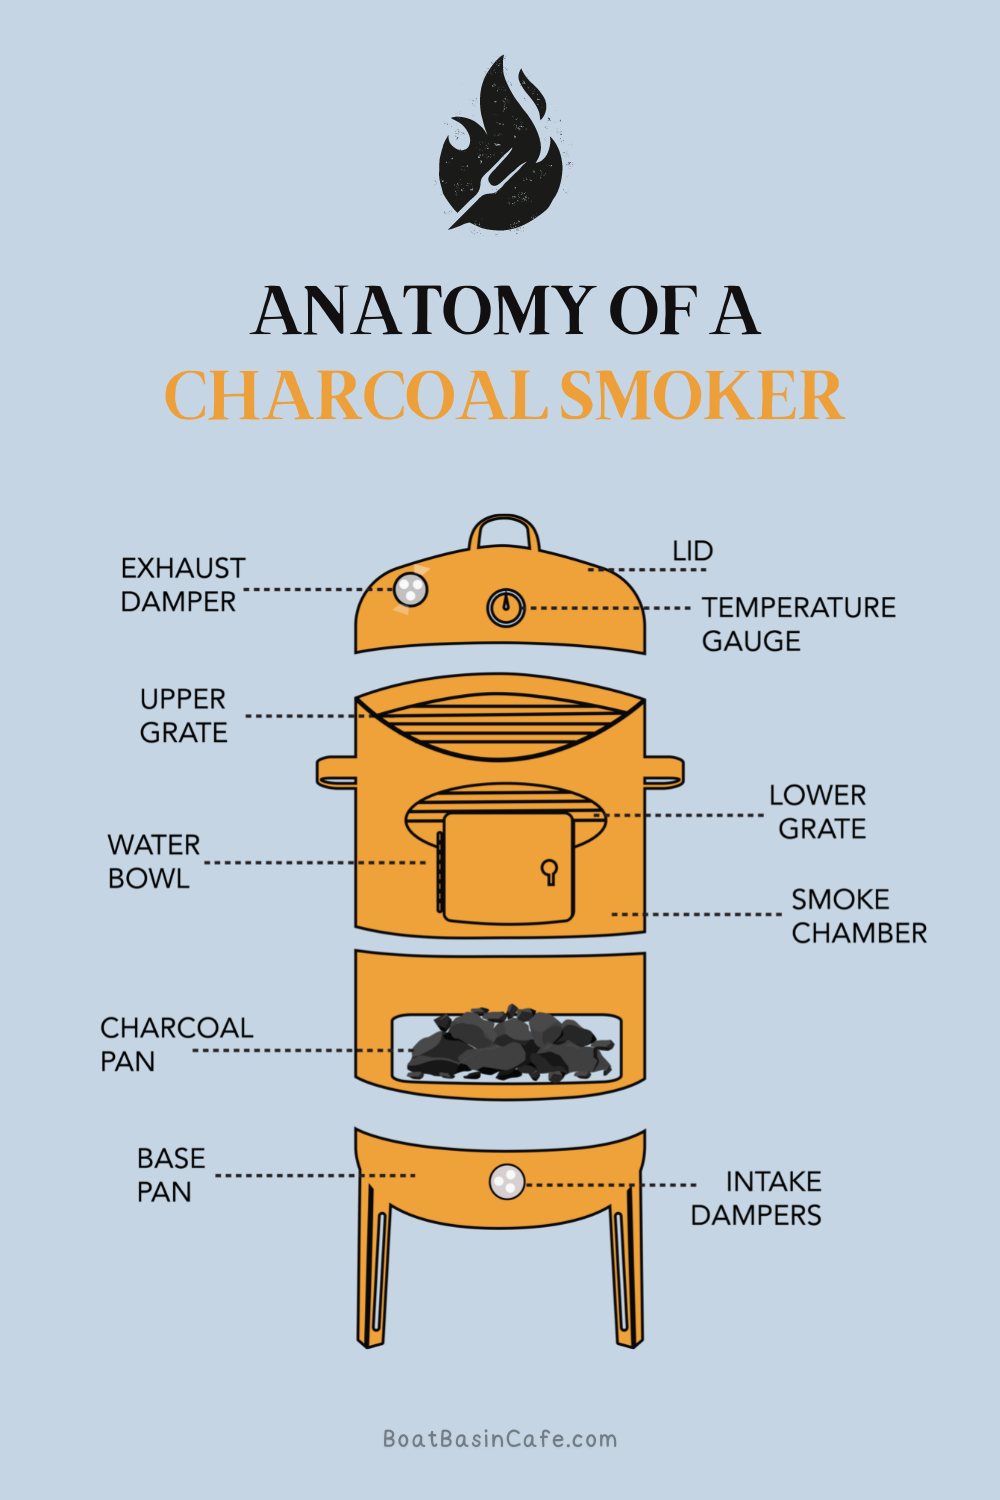
Anatomy of a charcoal smoker.

Assembling the cooker is way easier than it looks. What you have to understand is that the smoker has three main parts and so you have to put it together on three levels. Here’s what you need to do.

  • Take the bottom of the cooker and attach the legs to it. Set it on the ground upright. This is where the coal goes.
  • Next, place the middle section over the base. This section contains the water pan and two cooking grates. The water pan is set at the bottom of the middle section and the racks go over it.
  • Finally, the top section is the smoker’s lid. The lid is placed on top, and make sure it covers the racks completely. The lid has the vents and a thermometer to control the temperature of the smoker.
  • Once you get the hang of assembling and using the cooker, grilling and smoking will seem effortless to you.

If you want to convert your cooker to a griller, follow these steps.

  • Remove the water pan, and instead, put the charcoal grate and charcoal chamber on the flanges in the middle cooking section.
  • Place the top grate in the regular position.
  • Set the bottom or lower cooking aside, as you won’t need it for grilling.

If you want a really good sear on your steak, you can get a replacement charcoal grate and place it where you would normally place the bottom cooking grate.

That’s pretty much it! Now you can easily smoke and grill to your heart’s content.

Pro-Tip: Did you know you can grill fruit as well? If you want a light and fresh dessert and all that meat, you can grill stone-fruit like mangoes and peaches. Cut them in halves and sear them until the surface is caramelized. Serve with a drizzle of honey and impress your guests!

Smokey Mountain Cooker: A Crash Course in Grill Maintenance

Every grill needs basic maintenance to keep it working well. The good news is that the Smoky Mountain series electric smoker is pretty low maintenance and easy to store. If you follow these tips, your Weber cooker should stay happy and healthy for years.

  • Remove the ashes as soon as the smoker cools down.
  • Empty out the water bowl and make sure you clean it well.
  • Keep the cooking grates clean and spotless. Use a grill brush and warm water with detergent to get rid of all the gunk and residue.
  • Wipe off or brush away any kind of debris from the lid and cooking section. If you find something stuck, scrub it off with a soft damp cloth.
  • Using gloves, wipe the exterior of the grill while it is still hot. This works like a steam cleaner and should be done periodically. If you want to do this while the cooker is cold, use a glass cleaner like Windex.
  • Check the grates and other metal parts for rust. If the cooking grates get rusted, discard them, and get replacement ones.
  • From time to time, check your cooker for loose screws, and tighten them if needed.

Maintenance and Cleaning

Keeping the Weber Smokey Mountain clean and well-maintained is crucial for its longevity and performance. Here are some tips for maintaining and cleaning the smoker:

  • Empty the ash catcher and clean the cooking grates after each use.
  • Scrub the interior of the smoker with a wire brush or scraper to remove any buildup or residue.
  • Clean the water pan and charcoal grate with warm water and soap, and rinse thoroughly.
  • Check the vents and gaskets periodically, and replace them if they become damaged or worn out.
  • Store the smoker in a dry and sheltered place when not in use, and cover it with a weather-resistant cover.

Where Can I Get the Weber Smokey Mountain Cooker?

If you’re sold on the Smokey Mountain grill, there’s a good chance you want to get your hands on it right now. After all, there’s no time like the present! And with summer in full swing, why not take advantage of the weather and host your own cookout?

This cooker is available in many places. First of all, you can easily order it throughAmazon. It is also available at retailers like Target. And if all else fails, you can always order it throughWeber itself.

Wherever you choose to get yours from, make sure it is a trusted and reputable source. The cooker is on the pricier side, so it would be a shame to spend all that money on a damaged or secondhand smoker.

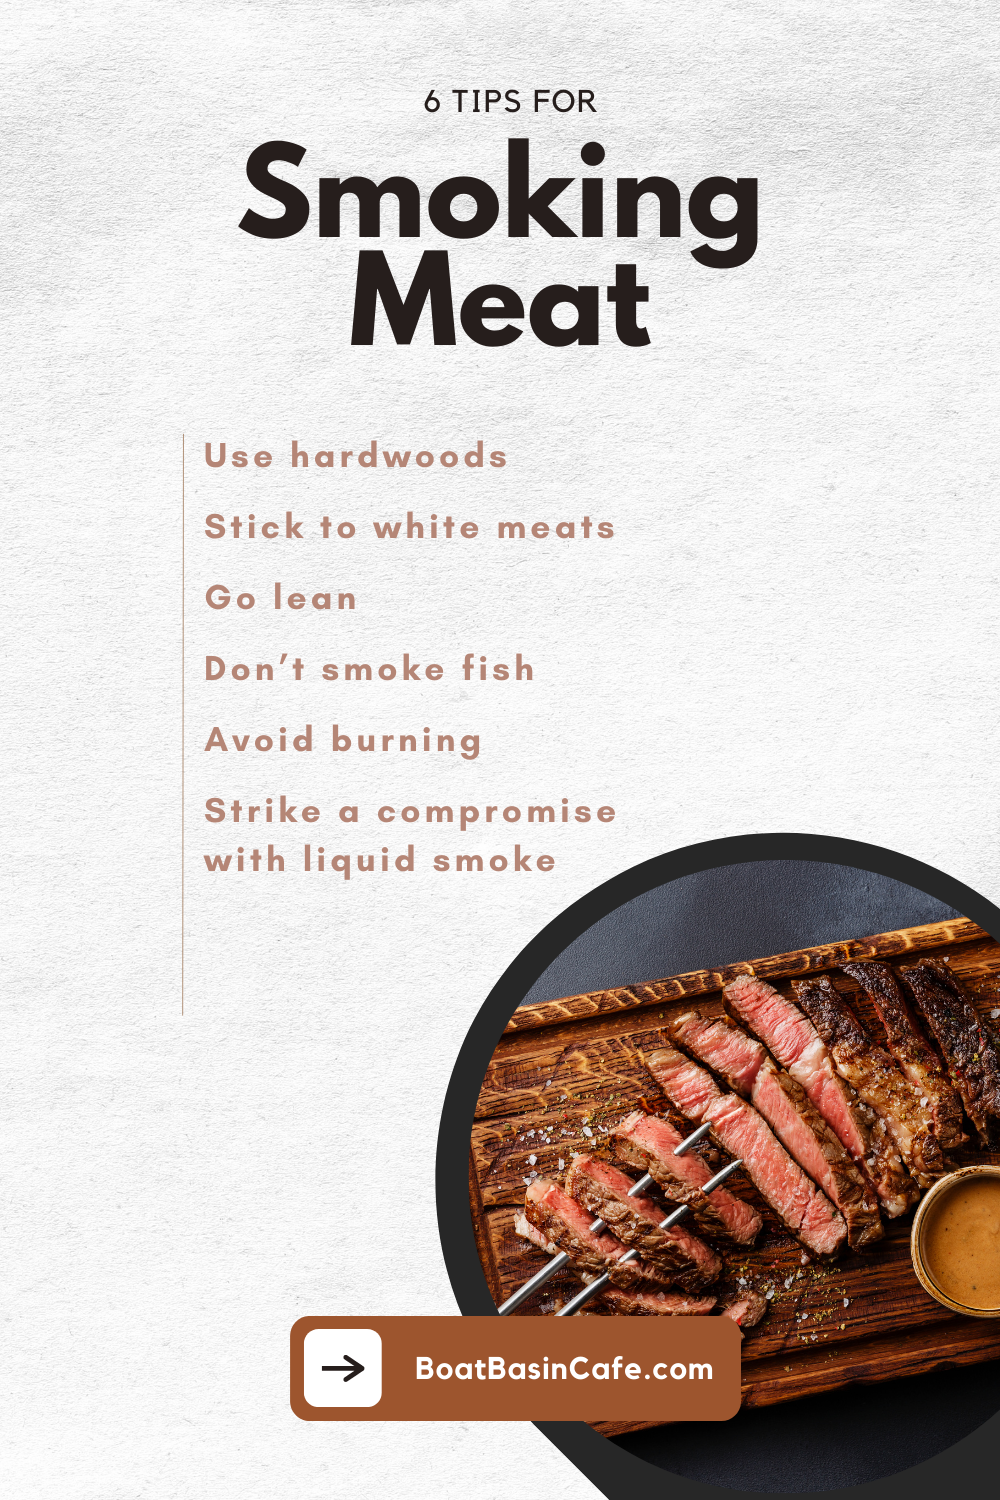
Bonus: 6 Tips for Smoking Meat and Staying Healthy

Since there’s some confusion about whether smoked meat is good for health or not, here are 6 tips on how to smoke meat to make sure it’s healthy.

6 Tips for Smoking Meat and Staying Healthy

Got Any Questions?

If you’ve got any questions about Weber or cookers in general, feel free to check this section of the review. I’ll answer questions people often have about smokers and grills!

Can A Weber Be Used As A Smoker?

Weber Smokey Mountain Review: All Hype or Actually Worth Getting in 2022? 6

Yes, a Weber can be used as a smoker by using some hard wood chips and water.
Soak the wood chips in water for roughly 30 minutes.
After the lump coal becomes grey from black, put them around the drip pan.
Remove excess water from the wood chips and place them on the coal.
You can now place your food on the grid and start cooking. Don’t open the lid too often as that would let out the smoke.

What Kind Of Smoker Is A Weber Smokey Mountain?

Weber Smokey Mountain Review: All Hype or Actually Worth Getting in 2022? 7

Weber Smokey Mountain is a charcoal smoker designed for slow cooking. Although you can use it as a grill, it’s not primarily meant for speed grilling.

Can I Use Wood In My Smokey Mountain Cooker?

Weber Smokey Mountain Review: All Hype or Actually Worth Getting in 2022? 8

It’s best not to use wood with your smokey mountain cooker. The smoker wasn’t designed for just wood burning, as a lot of air flow is needed when burning wood. Also, wood needs a much higher temperature to burn. Lump charcoal is a much better fuel for your smokey mountain cooker.

Can You Use A Weber Smoker As A Charcoal Grill?

Weber Smokey Mountain Review: All Hype or Actually Worth Getting in 2022? 8

You can totally convert your smoker into a grill without much trouble (btw, it has the same capacity as the Weber kettle grill). You just need to remove the water pan and the cooking grate on the bottom. Instead, place the charcoal grate and chamber on the bottom flange of your cooker. That’s it!

Do I Need To Season My Weber Cooker?

Weber Smokey Mountain Review: All Hype or Actually Worth Getting in 2022? 8

Unlike a cast iron skillet, there’s no need to season your smoker. Your new Smokey Mountain grill is made from steel with a porcelain enamel finish both inside and out. So, you don’t need to season it, as it won’t rust.

What Size Cooker Should I Get?

Weber Smokey Mountain Review: All Hype or Actually Worth Getting in 2022? 8

If you’re confused about which cooker size is right for you, there’s no need to be worried. It’s pretty simple; if you cook small amounts of meat for a few people, the 14-inch one is the one for you. The 18-inch cooker is best for backyard barbecues and cooking for an average-sized crowd.
On the other hand, if you find yourself cooking lots of meat for larger crowds, you’ll need the 22-inch smoker.

Do I Need To Flip The Meat When Smoking?

Weber Smokey Mountain Review: All Hype or Actually Worth Getting in 2022? 12

Do not flip the meat when smoking or roasting. The cooker uses a slightly lower temperature to slowly cook the meat. The indirect heat means that the whole of your meat will be cooked through on both sides. Also, opening up your smoker midway through cooking isn’t advised.

How Can I Lower The Temperature Of My Smokey Mountain Cooker?

Weber Smokey Mountain Review: All Hype or Actually Worth Getting in 2022? 8

If your smoker is at too high a temperature, you can bring it down by adjusting the air vents and reducing the supply of air. Close the vents around ¼ to ½ inch every couple of minutes to slowly lower the temperature until the fire is smaller.

What Is The Oily, Black Liquid Dripping From The Cooker While It Is Smoking?

Weber Smokey Mountain Review: All Hype or Actually Worth Getting in 2022? 8

The greasy black liquid isn’t a sign that your smoker is malfunctioning. It is a mixture of grease and smoke that drips down the inside walls of the cooker and leaks out of the lower vents. You can place a large and flat pan under the cooker to catch this liquid so that it doesn’t wreck your patio or backyard.

How Should I Clean Mold From The Inside Of My Cooker?

Weber Smokey Mountain Review: All Hype or Actually Worth Getting in 2022? 8

If you don’t use your cooker for a long time, it might grow mold. The best way to deal with mold is by ‘burning out’ your smoker. You need to run the smoker while it’s empty with the vents open. Let it get as hot as possible until the fire goes out.
Once the cooker is cold, get rid of the ashes and brush out the interior of the cooker. Anything that remains can be rinsed out with warm soapy water.

What is the price range of the Weber Smokey Mountain?

The price of the Weber Smokey Mountain ranges from around $200 for the 14-inch model to around $500 for the 22-inch model.

What is the warranty for the Weber Smokey Mountain?

The Weber Smokey Mountain comes with a 10-year warranty for the bowl, lid, and center ring, and a 5-year warranty for the plastic components.

Can I use wood chips instead of chunks in the Weber Smokey Mountain?

Yes, you can use wood chips instead of chunks, but you will need to soak them in water for at least 30 minutes before adding them to the smoker.

What is the maximum temperature that the Weber Smokey Mountain can reach?

The Weber Smokey Mountain can reach a maximum temperature of around 350-400°F, depending on the size and weather conditions.

Can I use the Weber Smokey Mountain in cold weather?

Yes, you can use the Weber Smokey Mountain in cold weather, but you may need to use more charcoal and adjust the air vents accordingly to maintain the temperature.

The Verdict

Smokers come in all shapes and sizes and it can be difficult figuring out which one is right for you. This 18-inch cooker is raved about everywhere, so I was a little skeptical about it before my Weber Smokey Mountain review. However, I was pleasantly surprised when I realized the hype was very much justified. This smoker is great–it is easy to assemble and use, versatile, and lasts for ages.

So why not get yourself a Smokey Mountain grill? You’re bound to love it, and your cookouts will be the talk of the neighborhood this summer!

More Related Product Review:

Pin Later

Weber Smokey Mountain Review: All Hype or Actually Worth Getting in 2022?

The Truth About Espresso Shots in a Venti-Sized Latte

We all need some ice with a splash of milk and some rich, smooth espresso all combined. Where do we go when we crave it? To Starbucks! 

As much as we love our iced coffee, we have always wondered exactly how much caffeine is in these sugary drinks. Some people choose a Venti Latte over espresso because they think it’s not as caffeinated. But is it the case in reality?

In this article, we explore everything there is to know about Starbucks classic Venti Latte. Let’s find out how many shots of espresso in a venti after all! 

What is a Venti

What is a Venti

Oh the endless confusion with Starbucks coffee sizes. What’s a Venti, a Grande, or Trenta? For now let’s talk about the most popular option on Starbucks, the Venti latte. 

Venti is Italian for “twenty” which was first named in 1986. The founder Howard Schultz visited Italy and enjoyed the coffeehouse tradition there. 

He wanted to bring back a part of Italy’s classic coffee culture to America. So when he got back, he changed the menu and added Italian terminologies to them. That’s when Venti was added. You might be wondering how big a venti is? 

So the venti Starbucks size is 20oz or 591 ml warm. But how many ounces in a venti iced coffee? Well a Starbucks iced venti has 24o and 709 ml. 

How Many Shots of Espresso are in a Venti?

Venti latte is made using two Starbucks espresso shots. This is a lot if you count all the sugar and fat in each Venti. 

Two Starbucks espresso shots can really mess up your system if you are not used to eating. Venti usually contains a lot of caffeine so you might get a glucose spike after drinking it. So 

Both Venti and Grande have the same amount of espresso. The main difference is, one has a higher milk level than the other. So it’s better to not spend the extra money!

How Much Caffeine is in a Venti?

So how much caffeine in a shot of espresso? A single Starbucks espresso shot contains around 75 mg of caffeine. So two shots of espresso would mean around 150 mg of caffeine in each Venti latte. 

If you order their Venti Blonde roast coffee, it even has higher caffeine than a double espresso. Caffeine in venti iced coffee can be much higher than you’ve imagined. 

Blonde roast is a lightly roasted coffee bean that contains a much higher caffeine level than espresso beans. So a double shot of blonde roast would give you around 475 mg of caffeine! Caffeine in venti iced coffee is quiet on the same level. Our advice: don’t do it! 

How Much Caffeine in Espresso Shot

The Truth About Espresso Shots in a Venti-Sized Latte 16

Espresso is generally thicker and more concentrated than other types of coffee and has higher caffeine content.

An espresso shot typically contains 64mg of caffeine, according to the US Department of Agriculture (USDA) data, while a regular cup (8 liquid ounces) of coffee has around 95mg. 

However, this can vary depending on the amount of coffee used, the type of coffee, the amount of pressure, and the brewing method. 
For example, a double shot of espresso may have twice the amount of caffeine as a single shot. Espresso made with a higher pressure has more caffeine than espresso made with a lower pressure. And a shot of espresso made with a larger amount of coffee will have more caffeine than a shot made with a smaller amount of coffee.

So, in general, the caffeine content of an espresso shot can range from 30 mg to 120 mg.

However, one question that may be lingering on your mind is, “why does it feel like a one-ounce espresso shot has more caffeine (gives you more kick) than an eight-ounce cup of coffee?”

Simple: You’re probably consuming the espresso much more quickly. Espresso is often sipped more slowly in Europe by coffee drinkers. In the USA? Not really. We typically savor our coffee while downing an espresso shot quickly.

In fact, espresso might be a great choice while trying to reduce your caffeine consumption (if you stick to one shot daily). 

How Much Caffeine Is 4 Shots of Espresso

A typical double espresso shot has about 120mg of caffeine, so four shots of espresso would have about 480mg of caffeine, which is way above the FDA-recommended 400mg a day.  

However, the actual amount of caffeine in four shots of espresso can vary greatly depending on the type of coffee beans used, the brewing method, the brewing time, and the quantity per serving. Also, every coffee shop and barista has its own equipment and filter basket sizes. 

For example, four espresso shots from Starbucks “quad” (often known as two double shots) would have 300mg of caffeine, while four espresso shots from Dunkin’ Donuts would have 472mg of caffeine.

Starbucks Shot of Espresso Caffeine

A lot of people are curious about the caffeine content in Starbucks shots of espresso. 

Want a simple way to figure out how much caffeine is in your favorite Starbucks coffee? Each espresso shot contains 75 mg of caffeine. For 150 mg, order a latte with two shots!

Here is a breakdown of the caffeine contents in Expresso shots at Starbucks:  

AmountWeightCaffeineTerm
1 Shot1 fluid oz75 mgSingle
1 Shot (Decaf)1 fluid oz3 mgSolo Decaf
1 Shot (Half-caf)1 fluid oz40 mgSolo Half-caf
2 Shots2 fluid oz150 mgDoppio/Double
3 Shots3 fluid oz225 mgTriple
4 Shots4 fluid oz300 mgQuad

Cup size is also important when it comes to the caffeine content of Starbucks. As you may know, Starbucks offers four standard cup sizes: Short, Tall, Grande, and Venti. There is also a kid-size cup and an extra-large Trenta available. 

However, contrary to popular belief, you won’t get an additional shot every time you increase the size of the cup. 

The caffeine content of Starbucks’ espresso-based beverages often goes like this: Grande and Venti’s sizes contain 150 mg (double); Short and Tall sizes have 75 mg (solo/single). 

Espresso has 75 mg of caffeine per shot if you order it straight. In other words, Solo (75), Doppio (150), Triple (225), and Quad (300). Therefore, a Triple latte has 225 mg of caffeine, which is more than a Venti latte does.

Comparing these numbers to a cup of coffee, which has about 95mg of caffeine, you can see that Starbucks shots pack quite a punch!

If you’re someone who is sensitive to caffeine, you might want to steer clear of Starbucks shots. But if you can handle your caffeine, then go ahead and enjoy a delicious Starbucks espresso!

Tips for Making Healthier Beverage Choices at Coffee Shops

The Truth About Espresso Shots in a Venti-Sized Latte 17

Coffee shops are a popular destination for many people, whether it’s for a morning pick-me-up or a mid-day break. However, many of the beverages offered at coffee shops can be high in calories, sugar, and unhealthy fats. If you’re trying to make healthier choices when visiting coffee shops, here are some tips to consider.

Choose Drinks with Less Sugar

Many coffee drinks are loaded with sugar, which can add up quickly and contribute to weight gain and other health issues. To reduce your sugar intake, opt for drinks that are naturally low in sugar, such as black coffee or unsweetened tea. If you prefer sweetened drinks, ask for less sugar or choose natural sweeteners like honey or stevia.

Consider Milk Alternatives

Many coffee drinks are made with whole milk, which can be high in saturated fat and calories. To make healthier choices, consider milk alternatives like almond milk, soy milk, or oat milk, which are lower in calories and saturated fat.

Watch the Syrups and Flavors

Syrups and flavorings can add a lot of calories and sugar to coffee drinks. To make healthier choices, opt for drinks that use natural flavors like cinnamon or vanilla extract, or ask for less syrup or flavoring in your drink.

Be Mindful of Portion Sizes

Coffee drinks can be high in calories and sugar, even in small sizes. To make healthier choices, consider downsizing your drink or sharing it with a friend.

Choose Drinks with Health Benefits

Some coffee drinks can provide health benefits when consumed in moderation. For instance, green tea or matcha lattes are high in antioxidants and can provide a boost of energy without the sugar and calories of many coffee drinks.

Make Your Own Drinks at Home

One of the best ways to make healthier choices when it comes to coffee drinks is to make your own drinks at home. This way, you can control the ingredients and choose healthier options like unsweetened almond milk and natural sweeteners like honey.

Recommended Daily Intake of Caffeine

The Truth About Espresso Shots in a Venti-Sized Latte 18

The recommended daily intake of caffeine varies depending on age, sex, weight, and other factors. According to the U.S. Food and Drug Administration (FDA), up to 400 milligrams of caffeine per day is generally considered safe for most healthy adults [1]. This equates to about four 8-ounce cups of coffee or 10 cans of soda.

However, pregnant women, individuals with certain medical conditions, and those who are sensitive to caffeine may need to consume less or avoid caffeine altogether. It’s important to consult with a healthcare professional to determine what amount of caffeine is safe for you to consume.

Potential Health Effects of Caffeine

Caffeine can have both positive and negative effects on health, depending on the amount consumed and the individual’s sensitivity to caffeine. Here are some potential health effects of caffeine:

Positive Effects

  • Improved Cognitive Function: Caffeine can enhance cognitive function, including memory, attention, and reaction time [2].
  • Increased Metabolic Rate: Caffeine can increase metabolic rate, which may aid in weight loss and weight management [3].
  • Reduced Risk of Certain Diseases: Regular coffee consumption, which contains caffeine, has been associated with a lower risk of certain diseases, including type 2 diabetes, liver disease, and some types of cancer [4].

Negative Effects

  • Anxiety and Nervousness: Excessive caffeine intake can cause feelings of anxiety, nervousness, and restlessness in some people [5].
  • Sleep Disturbances: Caffeine can disrupt sleep patterns, leading to insomnia and other sleep disturbances [6].
  • Dehydration: Caffeine is a diuretic, meaning it can increase urine production and lead to dehydration if consumed in excess [7].
  • Digestive Issues: Excessive caffeine intake can also lead to digestive issues like acid reflux, stomach irritation, and diarrhea in some people [8].

The Science Behind Espresso

Espresso is made by extracting the flavor and caffeine from coffee beans through a process called “percolation.” This process involves forcing hot water through the coffee grounds using high pressure, which extracts the soluble compounds in the coffee beans, including caffeine, oils, and flavors.

The resulting liquid, known as espresso, has a higher concentration of caffeine compared to regular brewed coffee due to the higher coffee-to-water ratio and the shorter brewing time. One shot of espresso typically contains around 75 milligrams of caffeine, while an 8-ounce cup of regular coffee contains around 95 milligrams of caffeine.

Health Benefits of Espresso

When consumed in moderation, espresso can have several health benefits. Here are some of the potential health benefits of espresso:

Improved Cognitive Function

Caffeine, the primary active ingredient in espresso, is a central nervous system stimulant that can improve cognitive function, including memory, attention, and reaction time [1].

Increased Metabolic Rate

Caffeine has also been shown to increase metabolic rate, which can aid in weight loss and weight management [2].

Antioxidant Properties

Espresso contains antioxidants that can help protect the body against oxidative stress and damage from free radicals [3].

Lower Risk of Certain Diseases

Several studies have linked regular coffee consumption, including espresso, to a lower risk of certain diseases, including type 2 diabetes, liver disease, and some types of cancer [4].

Potential Risks of Espresso

While moderate espresso consumption is generally considered safe for most people, excessive caffeine intake can cause adverse effects, including:

Anxiety and Nervousness

Excessive caffeine intake can cause feelings of anxiety, nervousness, and restlessness in some people [5].

Sleep Disturbances

Caffeine can also disrupt sleep patterns, leading to insomnia and other sleep disturbances [6].

Dehydration

Caffeine is a diuretic, meaning it can increase urine production and lead to dehydration if consumed in excess [7].

Digestive Issues

Excessive caffeine intake can also lead to digestive issues like acid reflux, stomach irritation, and diarrhea in some people [8].

How to Make Venti Latte at Home

how many shots of espresso in a venti

As much as we love the taste of a Starbucks Venti in the morning, it can get quite expensive if you plan to drink them every day. Why bother when you can make delicious iced coffee at home!

Here’s how you make Starbucks iced latte at home:

Things You’ll Need:

  • 1 cup ice
  • 4 shots of espresso
  • ¾ cup whole milk
  • Vanilla or classic syrup

Instructions:

  1. Fill your preferred Venti-sized glass with ice and pour your 4 shots of freshly brewed espresso in it. 
  2. Pour the milk and syrup into a mason jar. 
  3. Shake the milk until it starts to froth up.
  4. Gently pour the milk and foam into the ice-espresso glass. 
  5. Pick your favorite glass straw and enjoy your homemade Starbucks tall venti grande!

Frequently Asked Questions

Is 4 Shots of Espresso a Lot?

If you drink four shots of espresso throughout the day, then it’s not a lot. But if you consume them all in one drink or within a short period of time, it’s not good for your health. 
Overconsumption of caffeine at once can cause rapid heartbeat and unsteadiness which is actually the opposite of what you want from your coffee. Instead of giving an energy boost, it can cause you to crash. 

How Much Caffeine is in Starbucks 4 Shot Espresso?

t depends on what type of coffee beans and roasting level you are choosing. But in general, a single shot of espresso at Starbucks has around 75mg of caffeine in it. 
So four shots would mean 300 mg of caffeine. A Starbucks Caffe Americano can have one to four shots depending on your preference. 

Can 6 Shots of Espresso Kill You?

Six shots of espresso might not kill you instantly but it will have a serious impact on your health in the long run. If you happen to consume 6-7 shots of espresso each day, it can lead to heart problems, panic attacks, and insomnia. 
Drinking too much caffeine can cause muscle tremors and restlessness, something totally the opposite of what we want from coffee. Anything in moderation is good.
Coffee is no exception to that rule. Six shots of espresso become too much and can lead to early cases of heart disease and even heart attacks. 

Is Venti Bigger than Grande?

If you are confused with the Starbucks sizes then join the club. Starbucks has a very peculiar system of sizing their drinks. 
Venti is actually bigger than a grande. A grande consists of 16 ounces of coffee whereas a Venti has 20 ounces of coffee. 
Both Grande and Venti use two shots of espresso so there is no point in buying a venti unless you want some extra milk to dilute your coffee. A Grande is also more economical and good value for money.

How Do You Flush Caffeine Out of Your System?

If you consume too much coffee, you might notice muscle tremors and restlessness. Lack of sleep is another big issue with consuming too much caffeine. 
To flush the caffeine out of your system, the best thing to do is drink a lot of water. Water helps to remove the excess caffeine from your body. Caffeine can cause dehydration so staying hydrated is a priority. 
Another thing you can do is practice deep breathing. You might be noticing eye twitching and shaky hands. Close your eyes and take long and deep breaths until things start to feel better. 

Why Do I Feel Shaky after Drinking Coffee?

You might feel shaky after drinking coffee if you had an empty stomach prior to that. Coffee is a natural stimulant. 
But in order to stimulate your body, it requires energy. If you are not eating properly, your body is not getting enough energy to use the caffeine boost. 
This results in feeling shaky and dizzy. The best way to handle it is by sitting down somewhere and eating carbs. Now you see why they sell bagels right beside coffee carts?

Can You Sleep with Caffeine in Your System?

You can sleep with caffeine but it won’t have a normal sleep routine. Caffeine causes disruption in your sleep so you might end up waking several times in the middle of the night. When you finally wake up in the morning, you might find yourself more tired than you were last night.  
Caffeine can interfere with your body clock so you might find it hard to fall asleep in the first place. Many people tend to stay awake the whole night if they drink coffee in the afternoon or evening. 

How much caffeine is in a shot of espresso?

A shot of espresso typically contains around 75 milligrams of caffeine.

Can espresso help with weight loss?

Caffeine, the primary active ingredient in espresso, has been shown to increase metabolic rate, which may aid in weight loss and weight management.

How much caffeine is safe to consume daily?

Up to 400 milligrams of caffeine per day is generally considered safe for most healthy adults.

What are some low-sugar coffee drink options?

Some low-sugar coffee drink options include black coffee, unsweetened tea, and drinks sweetened with natural sweeteners like honey or stevia.

Are all coffee drinks high in calories and sugar?

Not all coffee drinks are high in calories and sugar, but many popular options like flavored lattes and frappuccinos can be high in calories, sugar, and unhealthy fats.

To Finish Off

Starbucks coffee is truly a part of our lifestyle at this point. It’s still a thing to wonder how good these highly caffeinated drinks are for our bodies. And let’s not forget the amount of sugar and calories you get from just one drink. 
Now that you know how many shots of espresso in a venti, do you think it’s worth it? Or should we shift to making our own coffee at home? Comment below to let us know!

The Truth About Uncured Meat: What You Need to Know

A large percentage of the world–most of the population, in fact– is in love with processed lunch meats. These include the assortment of deli meats and things like sausages and bacon; which make up 75% of our dream breakfasts and perfect sandwiches.

But while we do love our cured/processed meats, there is a little concern about these meats. The WHO has even classed the compounds in processed meats as carcinogens, or cancer-causing chemicals.

While most people are unwilling to give up their bacon and jerky, they do want to learn more about cured meats and what goes in them. People looking for the healthiest deli meat have often come across the term uncured meat. But what is uncured meat?

This article aims to find out exactly that. We look at the difference between cured and uncured meat, how uncured meat differs from fresh meat, and whether uncured ham lunch meat is a thing.

By the time you’re done with this article, you won’t ever be stumped when your butcher offers you an uncured lunch meat product, or when you see nitrate-free deli meat at the grocery counter.

What is Cured Meat?

Cured Meats

Cured meats are any meats that have been preserved using salts, nitrates, or nitrites. These compounds not only extend the shelf life of the meat but also add flavor and color to it. Curing is a traditional method of meat preservation that has been used for centuries, and it’s still widely used today.

How Cured Meats are Made

The process of curing meat involves several steps. First, the meat is rubbed with a mixture of salt, sugar, and nitrites. The meat is then allowed to rest for a specified amount of time, during which it absorbs the curing mixture. The meat is then hung to dry and cure for several weeks, depending on the type of meat and desired flavor profile.

During the curing process, the salt and nitrites help to prevent the growth of bacteria that can cause spoilage. Additionally, the curing process helps to break down the proteins in the meat, making it more tender and flavorful.

Types of Cured Meats

There are many different types of cured meats, each with its own unique flavor and curing process. Some popular types of cured meats include:

  • Prosciutto: A thinly sliced Italian ham that’s typically served as an appetizer or on sandwiches.
  • Salami: A cured sausage that’s often made with pork, beef, or a combination of the two. Salami is typically sliced and served as a snack or on sandwiches.
  • Bacon: Cured pork belly that’s sliced and fried or used as a flavoring in dishes.
  • Ham: A cured and smoked pork leg that’s often sliced and served as a main course or on sandwiches.
  • Pastrami: A cured beef brisket that’s seasoned with spices and served thinly sliced on sandwiches.

Health Risks of Cured Meats

While cured meats are delicious and have a long shelf life, they’re not without their health risks. The nitrates and nitrites used in the curing process have been linked to health issues, including an increased risk of cancer.

Additionally, many cured meats are high in sodium, which can lead to high blood pressure and other health issues. If you’re concerned about the health risks of cured meats, consider limiting your consumption or opting for uncured meats instead.

What is Cured Meat?

Uncured meat refers to meat that has not been treated with nitrates or nitrites during the curing process. Instead, it’s usually cured with natural substances like celery juice or celery powder, which contain naturally occurring nitrates.

These natural nitrates convert to nitrites during the curing process, giving the meat a pink color and curing it without the use of synthetic nitrates.

Production Process of Uncured Meat

The production process of uncured meat is similar to that of cured meat, but with a few key differences. Instead of using synthetic nitrates, natural nitrates from celery juice or celery powder are used to cure the meat.

The meat is first rubbed with a mixture of salt, sugar, and celery juice or powder, then allowed to rest for a specified amount of time. During this time, the natural nitrates from the celery juice or powder convert to nitrites, which cure the meat and give it a pink color.

The meat is then hung to dry and cure for several weeks, depending on the type of meat and desired flavor profile.

Health Risks of Cured Meats

Bacterial Contamination

Uncured meats are not treated with synthetic nitrates, which means they’re more susceptible to bacterial contamination. Bacteria like listeria and salmonella can cause serious illness, and they can grow on uncured meats if they’re not stored properly. It’s important to follow proper food safety guidelines when handling and storing uncured meats to reduce the risk of bacterial contamination.

Sodium Content

While uncured meats don’t contain synthetic nitrates, they can still be high in sodium. Many types of meat naturally contain sodium, and some uncured meats are still salted during the curing process. High sodium intake can lead to high blood pressure and other health issues, so it’s important to monitor your sodium intake and consume uncured meats in moderation.

Nitrate Content

While uncured meats don’t contain synthetic nitrates, they do contain natural nitrates from celery juice or powder. While these natural nitrates are considered safer than synthetic nitrates, they can still convert to nitrites during the curing process. Nitrites have been linked to health issues when consumed in large quantities, so it’s important to monitor your nitrate intake and consume uncured meats in moderation.

Cured vs. Uncured Meat

This brings us to several questions. Are uncured meats better than cured products? Are cured meats inherently unhealthy?  

Cured MeatUncured Meat
Preservation MethodPreserved using synthetic nitrates or nitritesPreserved using natural nitrates from celery juice or powder
Health RisksLinked to health issues when consumed in large quantitiesConsidered safer and healthier due to use of natural nitrates
TasteDistinct salty and smoky flavorMilder taste
Production ProcessMeat is rubbed with a mixture of salt, sugar, and nitrites, then hung to dry and cureMeat is rubbed with a mixture of salt, sugar, and natural nitrates from celery juice or powder, then hung to dry and cure
ExamplesBacon, ham, salami, prosciuttoUncured bacon, uncured ham, uncured salami, uncured prosciutto

Cured meat is any meat that has been preserved using salts, nitrates, or nitrites. Curing meat not only extends its shelf life but also adds flavor and color to it. It’s a traditional method of meat preservation that has been used for centuries. The curing process involves applying a mixture of salt, sugar, and nitrates to the meat, then allowing it to dry and cure for a specific amount of time.

One of the main differences between cured and uncured meat is the use of synthetic nitrates. Cured meat contains synthetic nitrates, which have been linked to health issues when consumed in large quantities. Uncured meat, on the other hand, uses natural nitrates, which are considered safer and healthier.

Another difference is the taste. Cured meat has a distinct salty and smoky flavor, while uncured meat has a milder taste. This is because the natural nitrates used in the curing process of uncured meat do not have the same impact on the flavor profile of the meat as synthetic nitrates do.

What is Uncured Ham?

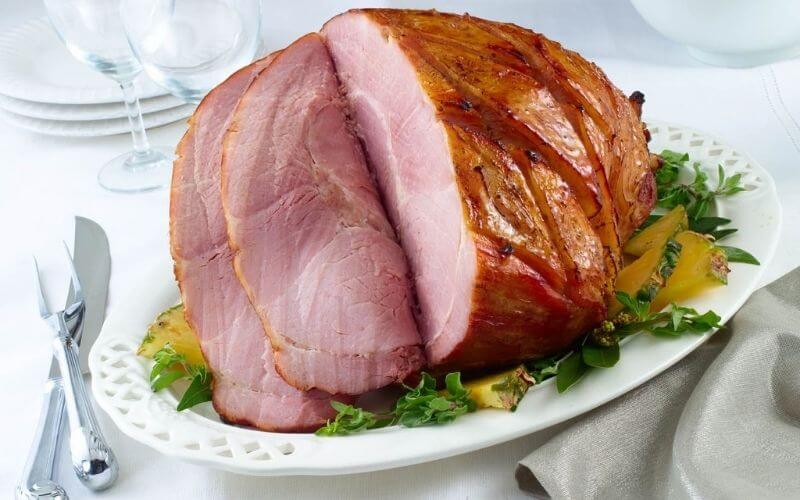
Uncured Ham

Uncured ham is also sometimes labeled as fresh ham. It is essentially the same cut as cured ham. So how are the two different?

Uncured ham is not injected with the chemical brine, smoke, or salt that are used when curing meat. When buying uncured ham, you might notice that it has a slightly different, yet naturally occurring color than the pink cured ham we are more used to.

This color difference is because the nitrates used in the brine of cured meat generally give cured meat a pronounced pink hue. Although it may sound contradictory, uncured meat is cured. The curing process contains natural ingredients instead of chemical ones.

In other words, the only difference between cured and uncured ham is the ingredient used to cure the meat. Uncured ham will use a brine made from salt and celery powder as a preservative, while cured ham will use a sodium nitrite brine instead.

Equipment for Cooking Uncured Ham

If you want to choose a healthier option, you can try making uncured ham right at home. This will be a safer option as you can control the amount of salt in the ham. Besides fresh ham, all you need is the following equipment:

  • Large bowl or dish for brining
  • Smoker or grill
  • A large cut of uncured and uncooked ham

How to Cook Uncured Ham

Follow these steps to make the best ever uncured ham right at home. This will cure a 5-pound hunk of ham and you can scale the recipe up for larger amounts of meat.

Ingredients

  • 2 liters of boiled and filtered water
  • 1/2-3/4 cup kosher salt
  • 1 cup turbinado sugar
  • 1/4 teaspoon ground cloves
  • 1 tablespoon pink salt
  • 1 heaping tablespoon of celery powder
  • Glaze of your choice
  • A plastic bowl or pot big enough to contain the ham while fitting in your fridge

Directions

1. Remove the skin from your ham, and trim off all the fat, if necessary.

2. Clean your bowl or container thoroughly and make sure it is almost sterile.

3. In the bowl, dissolve the salt, sugar, spice, and celery powder in the water until completely mixed in.

4. Scrub the surface of the ham to remove as much bacteria as possible. Submerge the ham in the brining solution, making sure every inch of it is underwater and nothing is sticking out.

5. Keep the submerged ham in the fridge for 3 days. The heavier the ham, the longer you need to brine it. After a day and a half, turn over the ham so that all its parts are equally brined.

6. Once the time is up, rinse the ham surface to remove some of the excess salt. You can pat it dry with kitchen towels and then rub it down with salt-free seasoning.

7. Then, smoke the ham at 325°F until it registers 145°F in the deepest part of the center. This can take up to 5 hours depending on the ham’s thickness. In the last hour of smoking, brush on the glaze of your choice.

This kind of ham will stay fresh in the fridge for a week. When vacuum sealed and frozen, it can last for months.

Have Any Other Questions?

Below you’ll find answers to questions we get asked often about uncured meat.

01. Can I Eat Uncured Meat When Pregnant?

While there is no danger to eating cured and uncured meat while pregnant, if you are concerned about your baby’s health, you can ditch deli meats altogether until your child is born.

02. Is Boar’s Head Meat Processed?

Boar’s Head offers meat products that don’t have chemical preservatives. Does Boars Head have nitrates? While they don’t contain sodium nitrite, they do have nitrates derived from celery and sea salt aka naturally occurring preservatives.

03. Is Deli Meat Bad for Health?

Processed meats are generally considered unhealthy because they contain plenty of salt, nitrites, and often fat. As a result, it is best to eat them in moderation.

04. Is Deli Meat Processed?

Deli meats are classed as processed products because they have added preservatives and curing agents to stop them from going bad.

05. What Does Uncured Meat Mean?

Uncured meats refer to the fact the meat isn’t cured with chemical additives like sodium nitrite and other nitrates. Instead, they are preserved with things like salt, sugar, and celery powder.

In Outline

Although there is a bit of health concern when it comes to lunch meat, it is evident that the world isn’t giving up bacon any time soon. But when you know the answer to ‘what is uncured meat?’ you will realize it opens up lots of options at the butchers.

If you want to avoid chemicals, you can opt for uncured meats for your bologna sandwich cravings. But whether you prefer uncured meats, or want to stick to the traditionally cured products, remember that moderation is the key for processed foods!

Understanding Shot Glass Sizes: How Many Ounces in a Shot Glass?

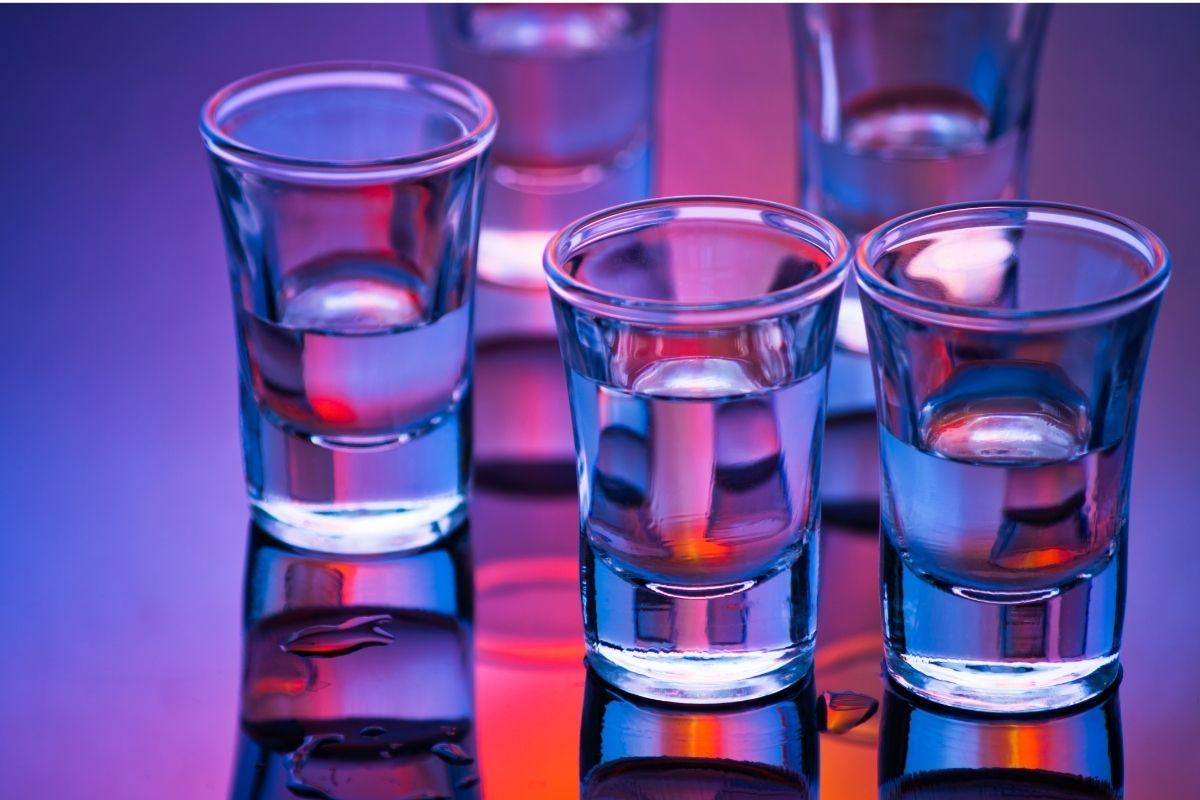
Are you looking for the answer to “How many ounces are in a shot glass”? Find out here.Shot glasses are a staple of bars. Shot glasses are small bar glasses used to measure small amounts of liquor. They come with different sizes, usually ranging from about 1/2 oz to over 2 oz.

Shot glasses are mostly used for drinking straight liquor, but can also be used to measure or serve personal dessert portions. People collect espresso for coffee drinks, and drink shots of espresso.

How Many Ounces In A Shot Glass

Shot Glass History

Shot glasses were first introduced in the US in 1930 when the prohibition era ended. Something like shot glasses were used during Prohibition. They had thin sides and a flat bottom. After prohibition, they were replaced by thick-bottomed glasses.

How Many Ounces In A Shot

There is no official standard size of a shot. But most shots range from 1.25 to 1.5 ounces. Utah is the only place that defines a shot as 1.5 ounces. 

Shots in other countries vary from 0.5 to 1.5 ounces, with the most commonly used size being 1.5 ounces.

A shot glass should be filled to the top with liquid.

How Many Oz In A Double Shot

A double shot is half as much alcohol as a regular shot. There is no standard size for shot glasses, so there is no standard measurement for a shot or a double shot.

How Many Tablespoons In A Shot

A shot glass should hold 1.5 ounces (45 ml) of liquid. So if you’re serving shots, you’ll need to use 45ml-sized shot glasses. But since shot glasses vary in size, you may want to double-check the measurements before serving customers.

Types of Shot Glasses

Type of Shot GlassSize (ounces)
Standard Shot Glass1.5
Pony Shot Glass1
Double Shot Glass3
Jigger Shot Glass1.5/1
Tall Shot Glass2
Fluted Shot Glass2
Mason Jar Shot Glass2
Test Tube Shot Glass1.5

Standard Shot Glass

The standard shot glass is the most common type of shot glass and is used to serve single shots of spirits and liqueurs. It typically holds around 1.5 ounces of liquid and has a simple, cylindrical design.

Pony Shot Glass

The pony shot glass is a smaller version of the standard shot glass, holding around 1 ounce of liquid. It is less commonly used but can still be found in some bars and restaurants.

Double Shot Glass

The double shot glass is a larger glass that can hold up to 3 ounces of liquid. It is used to serve larger shots or cocktails that require more than a single shot of liquor.

Jigger Shot Glass

The jigger shot glass is a two-sided glass used by bartenders to measure precise amounts of spirits and liqueurs. It typically has a 1.5-ounce side and a 1-ounce side.

Tall Shot Glass

The tall shot glass is a narrow glass that is taller than the standard shot glass. It is typically used to serve layered shots or drinks with multiple ingredients.

Fluted Shot Glass

The fluted shot glass is a decorative glass with a fluted design that adds visual interest to the glass. It typically holds around 2 ounces of liquid.

Mason Jar Shot Glass

The mason jar shot glass is a small glass that is shaped like a mason jar. It is often used for serving shots or small cocktails in a rustic or country-themed setting.

Test Tube Shot Glass

The test tube shot glass is a small, narrow glass that resembles a test tube. It is often used for serving novelty shots or drinks that require precise measurements.

Shot Menu

Shot Menu

Now that you’re familiar with the capacity of shooters and shot glasses, you can craft some unique drinks for your bar menu. These include:

Tequila Shots

Tequila is an alcoholic drink made from the agave plant. It is served as a shot, mixed with other drinks, or used to flavor foods.

Lemon and lime wedges are sour fruits found in citrus plants. They are often used to garnish dishes and drinks.

Whiskey Shots

These are some iconic shots using different types of whiskey. 

A Snake bite uses whiskey and lime. While a red snapper shot uses Crown royal whiskey, amaretto and cranberry juice. The list goes on – and of course, you can always drink your whiskey neat!

Vodka Shots

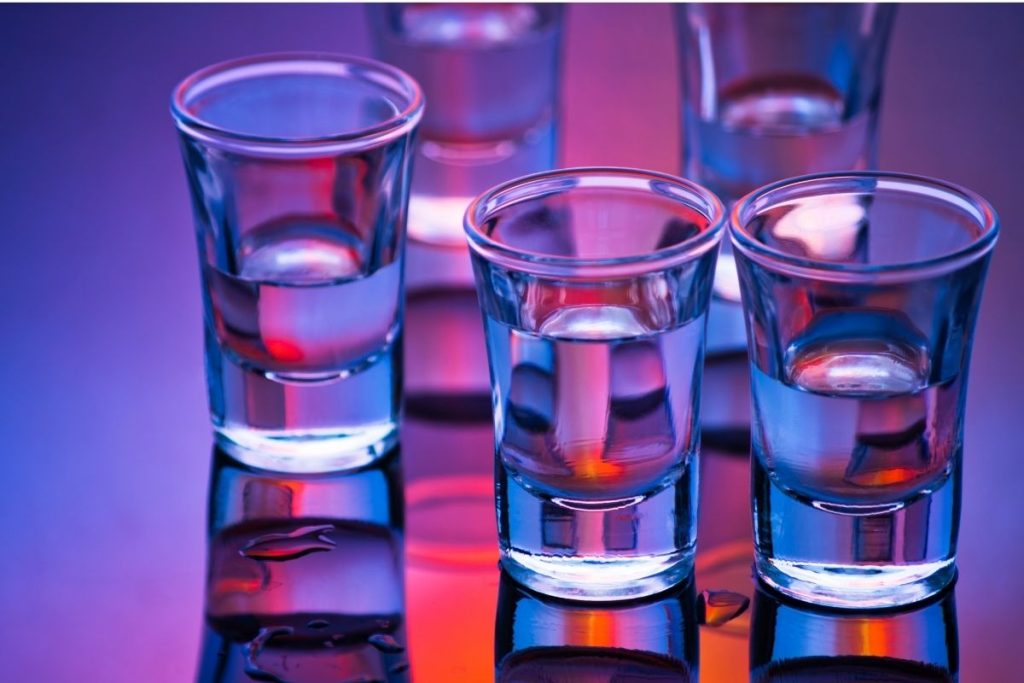
Vodka is a distilled alcohol with a fairly mild flavor. It is used as an ingredient in many mixed drinks. A kamikaze drink contains vodka, orange liqueur (such as Cointreau), and lime juice. 

A blue kamikaze drink includes vodka, blue Curaçao (a Dutch liquor made from bitter almonds), and lime juice. An insane drink includes vodka, raspberry syrup, hot sauce, and cucumbers. These are all great ways to use a shot glass!

Responsible Drinking

When it comes to responsible drinking, it’s important to remember that moderation is key. The National Institute on Alcohol Abuse and Alcoholism defines moderate drinking as up to one drink per day for women and up to two drinks per day for men. It’s also important to consider the size of the drink when measuring out your alcohol intake. Shot glasses can be a helpful tool for measuring out the amount of alcohol you’re consuming, but it’s important to remember that different types of shot glasses can hold different amounts of liquid.

In addition to moderating your alcohol intake, it’s important to always drink responsibly. This includes avoiding drinking and driving, staying hydrated, and never drinking alcohol if you’re under the legal drinking age.

Health Risks Associated with Alcohol Consumption

While moderate drinking can be a safe and enjoyable social activity, excessive alcohol consumption can have serious health consequences. In addition to impairing judgment and motor skills, excessive alcohol consumption can lead to a range of health issues, including liver disease, heart disease, and certain types of cancer.

It’s also important to note that certain groups of people may be more susceptible to the negative health effects of alcohol consumption. This includes pregnant women, individuals with certain medical conditions, and those taking certain medications.

Conclusion

Shot glasses are found in bars and homes everywhere! They’re the best way to drink strong liquor – and everyone should have a few of them on hand for parties!

Pin Later

How Many Ounces In A Shot Glass

Is Your Coffee Sour? Here’s Why and How to Fix It!

Coffee is a morning staple for many people, but nothing can ruin a good cup of coffee like a sour taste. If your coffee tastes sour, don’t worry – it’s not uncommon, and there are ways to fix it.

coffee is sour

In this article, we’ll explore the different reasons why coffee can taste sour and provide practical tips on how to make your coffee taste better.

Understanding Why Coffee is Sour

The Role of Acidity in Coffee

Acidity is a crucial element of coffee that can significantly impact its taste and flavor.

What is Acidity in Coffee?

Is Your Coffee Sour? Here's Why and How to Fix It! 19

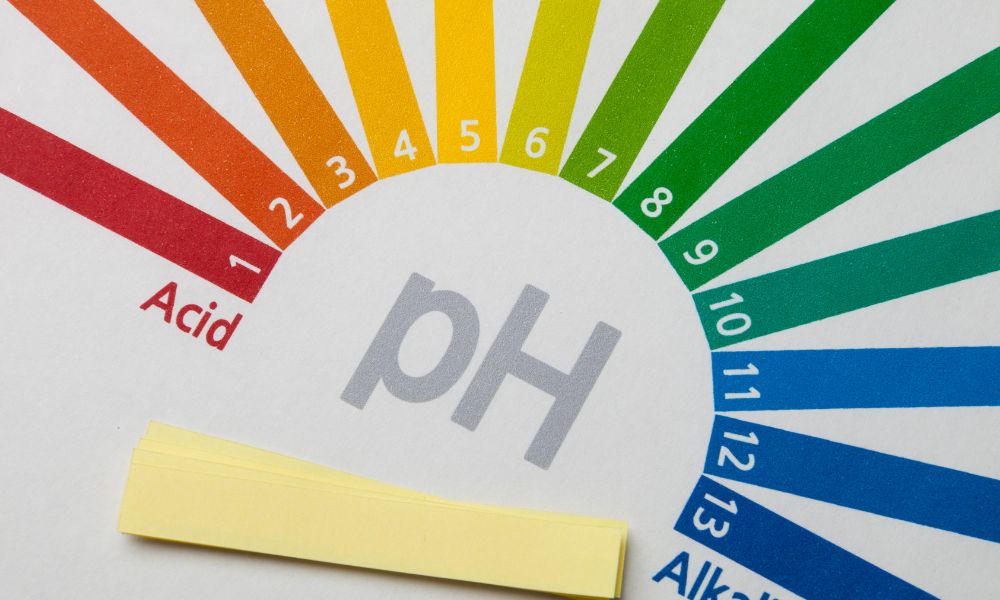
When we talk about acidity in coffee, we are not referring to the pH level of the coffee itself. Instead, we are referring to the flavor notes that give coffee its bright and tangy taste. Acidity in coffee is a desirable quality that can bring out the flavor and aroma of the coffee beans.

How Does Acidity Affect the Taste of Coffee?

Acidity can affect the taste of coffee in several ways. Firstly, acidity can give coffee a bright and tangy taste that can make it more refreshing and enjoyable to drink. Acidity can also bring out the fruitiness and floral notes of the coffee, giving it a more complex flavor profile.

On the other hand, too much acidity can make the coffee taste sour or bitter. It is crucial to strike the right balance of acidity in coffee to avoid ruining its taste.

What are Some Common Types of Acidic Coffee Beans?

Kenyan Coffee

Kenyan coffee is known for its bright and tangy taste. It has a high acidity level and often has notes of citrus and berry.

Ethiopian Coffee

Ethiopian coffee is another popular type of acidic coffee. It has a complex flavor profile that includes fruity and floral notes. It is often described as having a wine-like taste.

Colombian Coffee

Colombian coffee is one of the most popular types of coffee in the world. It has a mild acidity level and often has notes of chocolate, caramel, and nuts.

Costa Rican Coffee

Costa Rican coffee is known for its bright and tangy taste. It has a high acidity level and often has notes of citrus and honey.

The Role of Brewing Methods in Sour Coffee

How to Make Coffee in a Percolator

What Factors Influence the Sourness of Coffee?

Bean Quality

The quality of the coffee beans you use can impact the sourness of the coffee. Poor quality beans can taste sour and stale, while high-quality beans will have a more balanced taste.

Roast Level

The roast level can also affect the sourness of coffee. Over-roasting can cause the coffee to lose its natural sweetness, leading to a sour and bitter taste.

Water Temperature

The water temperature used to brew the coffee can affect its sourness. If the water is too cold, it can cause the coffee to taste sour. If the water is too hot, it can cause the coffee to taste burnt and bitter.

Extraction Time

The extraction time can also affect the sourness of coffee. If the coffee is under-extracted, it can taste sour and weak. If the coffee is over-extracted, it can taste bitter and sour.

How Can Over-Extraction Cause Sourness?

Over-extraction occurs when the coffee grounds are exposed to water for too long. This can cause the coffee to become bitter and sour. Over-extraction can happen when the grind size is too fine, or the water temperature is too hot.

How Can Under-Extraction Cause Sourness?

Under-extraction occurs when the coffee grounds are not exposed to water for long enough. This can cause the coffee to become sour and weak. Under-extraction can happen when the grind size is too coarse, or the water temperature is too cold.

The Role of Water in Sour Coffee

Is Your Coffee Sour? Here's Why and How to Fix It! 20

Water is a crucial element in coffee brewing and can significantly impact the taste of your coffee, including its sourness.

How Does Water Quality Affect Coffee Taste?

Water quality can have a significant impact on the taste of your coffee. Water that is too hard or too soft can affect the coffee’s acidity, leading to sour or bitter flavors. Additionally, water that has an unpleasant taste or odor can also affect the coffee’s taste.

What are Some Common Water Issues That Can Cause Sourness in Coffee?

Hard Water

Hard water has a high mineral content, particularly calcium and magnesium. These minerals can affect the coffee’s acidity, making it taste sour or bitter.

Soft Water

Soft water has a low mineral content and can make coffee taste flat or weak. Soft water can also cause over-extraction, leading to sourness.

Chlorine or Chloramine

Chlorine or chloramine is often used to disinfect municipal water supplies. However, it can affect the coffee’s taste, making it taste sour or chemically.

How Can You Fix Sour Coffee Caused by Water Issues?

If your coffee tastes sour due to water issues, there are several things you can do:

Use Filtered Water

Using filtered water can help to remove impurities that can affect the coffee’s taste. A water filter can remove minerals, chlorine, and other contaminants that can cause sourness.

Adjust Water Hardness

If your water is too hard, you can adjust the hardness by using a water softener or adding a small amount of vinegar to the water. If your water is too soft, you can add minerals using a water mineralizer.

Adjust Brew Time

If your coffee tastes sour due to over-extraction caused by soft water, you can adjust the brew time to shorten it. This can help to avoid over-extraction and reduce sourness.

Use Bottled Water

Using bottled water can help to avoid water issues that can cause sourness. However, make sure to choose water with low mineral content to avoid making the coffee taste flat or weak.

How to Fix Sour Coffee

Is Your Coffee Sour? Here's Why and How to Fix It! 21

Adjusting the Coffee-to-Water Ratio

The coffee-to-water ratio is a crucial element in coffee brewing that can significantly impact the taste of your coffee, including its sourness.

What is the Ideal Coffee-to-Water Ratio?

The ideal coffee-to-water ratio is subjective and depends on personal taste preferences. However, a general guideline is to use 1-2 tablespoons of coffee per 6 ounces of water. This ratio will result in a strong and flavorful coffee.

How Can You Adjust the Ratio to Fix Sour Coffee?

If your coffee tastes sour, you can adjust the coffee-to-water ratio to fix it. Here are some tips:

Increase the Coffee Amount

Increasing the amount of coffee can help to reduce the sourness. You can try adding an extra tablespoon of coffee for every 6 ounces of water.

Decrease the Water Amount

Decreasing the water amount can also help to reduce the sourness. You can try reducing the water by 1-2 ounces and see if it improves the taste.

Adjust Both Coffee and Water Amounts

You can also adjust both the coffee and water amounts to find the perfect ratio. Experiment with different ratios until you find the right balance.

How Do Different Brewing Methods Require Different Ratios?

Different brewing methods require different coffee-to-water ratios to achieve the ideal taste. Here are some general guidelines:

Brewing MethodGrind SizeIdeal Coffee-to-Water Ratio
French PressCoarse1:15 (1 part coffee to 15 parts water)
Drip CoffeeFine1:20
Pour OverMedium-fine1:17
EspressoFine1:2

Adjusting the Grind Size

The grind size is a crucial element in coffee brewing that can significantly impact the taste of your coffee, including its sourness.

Is Your Coffee Sour? Here's Why and How to Fix It! 22

What is Grind Size and How Does it Affect Coffee Taste?

Grind size refers to the size of the coffee particles that are produced when coffee beans are ground. The grind size can affect the coffee taste by influencing the surface area and extraction rate of the coffee.

A finer grind size will increase the surface area of the coffee, making it easier for water to extract the coffee’s flavors and aromas. This can lead to a more intense and flavorful coffee. A coarser grind size will decrease the surface area, resulting in a weaker and less flavorful coffee.

How Can Grind Size Cause Sour Coffee?

Grind size can cause sour coffee if the coffee is under-extracted. When coffee is under-extracted, it means that the water has not had enough time to extract the flavors and aromas from the coffee. This can cause the coffee to taste sour and weak. A too coarse grind size can cause under-extraction.

How Can You Adjust the Grind Size to Fix Sour Coffee?

Use a Finer Grind

Using a finer grind size can help to increase the surface area of the coffee, allowing the water to extract more flavors and aromas. Experiment with different grind sizes until you find the right balance.

Adjust Brew Time

If your coffee is sour due to under-extraction, you can adjust the brew time to give the water more time to extract the coffee’s flavors and aromas. Experiment with different brew times until you find the right balance.

Adjust the Water Temperature

If your coffee is sour due to under-extraction, you can also adjust the water temperature to improve extraction. The ideal water temperature for brewing coffee is between 195°F and 205°F.

Adjusting Brew Time and Temperature

The brewing time and temperature are crucial elements in coffee brewing that can significantly impact the taste of your coffee, including its sourness.

Is Your Coffee Sour? Here's Why and How to Fix It! 23

How Does Brew Time and Temperature Affect Coffee Taste?

Brew time and temperature can affect the coffee taste by influencing the extraction rate and the solubility of the coffee’s flavors and aromas. The ideal brew time and temperature will depend on the coffee-to-water ratio, the coffee grind size, and the brewing method.
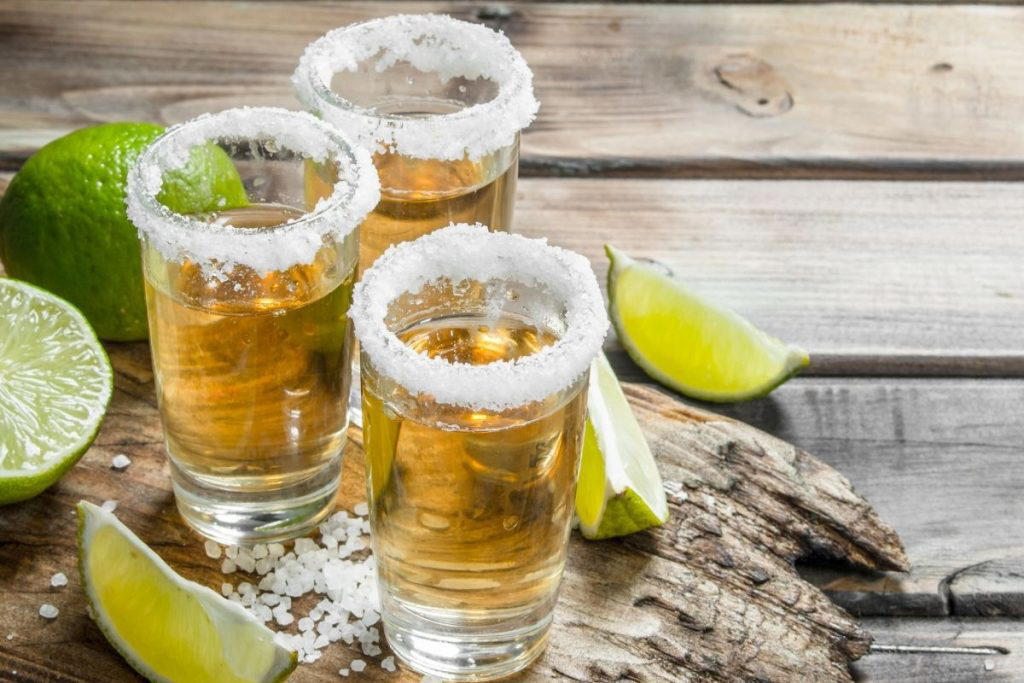
A longer brew time and higher water temperature will increase the extraction rate, resulting in a more intense and flavorful coffee. A shorter brew time and lower water temperature will decrease the extraction rate, resulting in a weaker and less flavorful coffee.

How Can Brewing Time and Temperature Cause Sour Coffee?

Brewing time and temperature can cause sour coffee if the coffee is under-extracted. When coffee is under-extracted, it means that the water has not had enough time to extract the coffee’s flavors and aromas. This can cause the coffee to taste sour and weak.

A too short brew time or low water temperature can cause under-extraction and result in sour coffee.

How Can You Adjust Brew Time and Temperature to Fix Sour Coffee?

Increase Brew Time

Increasing the brew time can help to improve extraction and reduce sourness. Experiment with longer brew times until you find the right balance.

Increase Water Temperature

Increasing the water temperature can also help to improve extraction and reduce sourness. The ideal water temperature for brewing coffee is between 195°F and 205°F.

Adjust Coffee-to-Water Ratio

If your coffee is sour due to under-extraction, you can also adjust the coffee-to-water ratio. Use more coffee or less water to improve extraction and reduce sourness.

Adjust Grind Size

If your coffee is sour due to under-extraction, you can also adjust the grind size. Use a finer grind size to increase surface area and improve extraction.

Preventing Sour Coffee

The freshness of coffee is a crucial element in coffee brewing that can significantly impact the taste of your coffee, including its sourness.

Is Your Coffee Sour? Here's Why and How to Fix It! 24

What is the Importance of Fresh Coffee?

Fresh coffee is important because coffee beans begin to lose their flavor and aroma soon after they are roasted. The longer coffee sits, the more it loses its freshness and flavor. Buying fresh coffee and grinding it just before brewing can help to ensure that you get the best possible taste from your coffee.

How Can You Tell If Coffee is Fresh?

You can tell if coffee is fresh by looking at the roast date. Coffee should be used within 2-3 weeks of the roast date for the best possible taste. Additionally, fresh coffee beans will have a strong and pleasant aroma, while stale coffee beans will have a dull and unpleasant smell.

How Can Buying Fresh Coffee Prevent Sourness?

Buying fresh coffee can help to prevent sourness because fresher coffee beans will have a higher acidity level. As coffee beans age, their acidity level decreases, which can lead to a sour taste. By buying fresh coffee, you can ensure that the coffee’s acidity level is at its optimal level, resulting in a better taste.

Additionally, buying fresh coffee and grinding it just before brewing can help to ensure that the coffee is not under-extracted. Under-extraction can cause sourness, and using fresh coffee beans can help to ensure that the coffee is properly extracted.

Proper Storage of Coffee

Proper storage of coffee is crucial to maintaining its freshness and flavor.

Is Your Coffee Sour? Here's Why and How to Fix It! 25

What are the Best Ways to Store Coffee?

The best ways to store coffee are in airtight containers away from heat, light, and moisture. Here are some tips for proper coffee storage:

  • Use an airtight container to prevent air from oxidizing the coffee and causing it to go stale.
  • Store coffee in a cool, dry, and dark place, away from heat, light, and moisture.
  • Do not store coffee in the refrigerator or freezer, as the moisture and odors can affect the taste of the coffee.
  • Do not grind coffee until just before brewing, as ground coffee goes stale much faster than whole bean coffee.

How Can Improper Storage Cause Sour Coffee?

Improper storage can cause sour coffee by allowing the coffee to become stale. When coffee beans are exposed to air, heat, light, or moisture, they begin to lose their freshness and flavor. This can cause the coffee to taste sour and weak.

Additionally, storing coffee in the refrigerator or freezer can cause condensation to form on the beans, which can lead to moisture and stale coffee.

How Can Proper Storage Prevent Sourness?

Proper storage can prevent sourness by keeping the coffee fresh and flavorful. Storing coffee in an airtight container away from heat, light, and moisture can help to ensure that the coffee stays fresh for longer. Using whole bean coffee and grinding it just before brewing can also help to ensure freshness.

Cleaning Your Coffee Equipment

Cleaning your coffee equipment is an important part of maintaining the quality of your coffee.

Is Your Coffee Sour? Here's Why and How to Fix It! 26

How Does Coffee Equipment Affect the Taste of Coffee?

Coffee equipment can affect the taste of coffee by leaving behind residue or affecting the brewing temperature. Dirty equipment can also lead to bacterial growth, which can affect the taste of the coffee.

Additionally, equipment that is not calibrated correctly can result in over-extraction or under-extraction, which can cause the coffee to taste sour or bitter.

How Can Dirty Equipment Cause Sour Coffee?

Dirty equipment can cause sour coffee by leaving behind residue that can affect the taste of the coffee. Additionally, bacterial growth can affect the taste of the coffee, leading to sourness.

Dirty equipment can also affect the brewing temperature, resulting in under-extraction, which can cause the coffee to taste sour.

How Can Cleaning Your Equipment Prevent Sourness?

Cleaning your equipment can prevent sourness by ensuring that it is free of residue and bacteria. Regular cleaning can also help to maintain the correct brewing temperature and prevent under-extraction, which can cause sourness.

Here are some tips for cleaning your coffee equipment:

  • Clean your equipment regularly with soap and water, following the manufacturer’s instructions.
  • Use a dedicated brush to clean hard-to-reach areas, such as the crevices of a grinder.
  • Use a descaling solution to remove mineral buildup in your coffee maker or espresso machine.
  • Clean your equipment after each use to prevent residue buildup.

Conclusion

Sour coffee can be a frustrating experience for coffee lovers. However, with a little knowledge and effort, it can be fixed and prevented. In this article, we have explored the main reasons for sour coffee, the main ways to fix sour coffee, and the main ways to prevent sour coffee.

Recap of Key Points

The main reasons for sour coffee are under-extraction, high acidity, and stale coffee beans. The main ways to fix sour coffee are adjusting the coffee-to-water ratio, adjusting the grind size, adjusting brew time and temperature, buying fresh coffee, and cleaning your equipment.

The main ways to prevent sour coffee are using fresh coffee beans, proper storage of coffee, and regular cleaning of coffee equipment.

FAQs

What is the ideal water temperature for brewing coffee?

The ideal water temperature for brewing coffee is between 195°F and 205°F.

How does underextraction affect the taste of coffee?

Underextraction can cause coffee to taste sour and weak.

How does over-roasting affect the taste of coffee?

Over-roasting can cause coffee to lose its natural sweetness and taste sour and bitter.

How can I fix sour coffee?

You can fix sour coffee by adjusting the coffee-to-water ratio, adjusting the grind size, adjusting brew time and temperature, buying fresh coffee, and cleaning your equipment.

What causes sour coffee?

Sour coffee can be caused by under-extraction, high acidity, and stale coffee beans.

How can I prevent sour coffee?

You can prevent sour coffee by using fresh coffee beans, proper storage of coffee, and regular cleaning of coffee equipment.

Can water quality affect coffee taste?

Yes, water quality can affect coffee taste. Hard water or water with high mineral content can affect the taste of coffee and cause sourness. Using filtered water or bottled water can help to improve the taste of coffee.

Nexgrill 4 Burner Gas Grill Review – Is It Worth Your Money and Time?

We all crave that restaurant-quality BBQ grills within the comfort of our own homes. Yet, we also know how expensive those can be!

Making at home also gets tiring and the results are just not up to the mark!

Today, let’s talk about a grill that lets you smoke perfectly grilled food every time right at home. Introducing to you one of the most raved grills in the market: Nexgrill 4 Burner Gas Grill!

It has its own way of making your life easy with the 5 burners on it and gives you grilled food as good as those premium picks!

We not only talk about its amazing features, pros, and cons but also compare it to one of the other most hyped gas grills.

Excited to know all about it?

Dig in!

Nexgrill vs Charbroil: Which is the One for You?

The Nexgrill 4-burner Gas Grill and the Charbroil 4-burner Liquid Propane Grill have been head-on-head for a long time. While some have sided towards Charbroil, others have taken the side of Nexgrill. Our Nexgrill 4 burner review thinks that they’re both special in their own ways, with the little similarities here and there.

Let’s find out what they are!

A Quick Look:

Features

Nexgrill 4-burner Propane Grill

Charbroil 4-burner Propane Grill

Dimensions

46 x 51 x 24.75 inches

50.4 x 24.5 x 45 inches

Cooking Area

462 square inches

425 square inches

Warming rack area

164.5 square inches

150 square inches

Build

Stainless steel

Stainless steel

Material of grates

Stainless steel

Porcelain-coated cast-iron

Grilling Area:

Featuring a primary cooking space of 462 square inches, Nexgrill Propane grill takes the edge over the 425 cooking surface of Charbroil. The difference might look almost negligible but the extra two burgers you can fit on the Nexgrill is worth it all!

Other than that, both have an extra secondary rack that you can pull down for use. Best known for the skewers and veggies, this rack has proved helpful for everyone!

Burners:

One aspect that both the grills have in common is the 4 burners plus the additional side burner. The only distinction lies in the size of the side warming rack. Nexgrill comes with a full 164.5 square inches while the Charbroil lies back at 150 square inches.

Both side burners come with a cover for them and can easily hold a standard sized plate. You can use it to get started on those delicious sides or some mouthwatering sauces!

Ergo, not much difference with the burners.

Movability:

The Nexgrill is a rather lightweight machine, making it easier to move around than most grills. Besides, the casters also add up to that convenience.

Contrarily, Charbroil has a more solid build, than Nexgrill, making it heavier. It does have two all-terrain wheels but it will still require some strength to maneuver.

If you’re someone who’s prone to backaches or other body strain, Nexgrill 4-burner grill is definitely the one for you in this aspect.

Cleanup Comfort:

Made of stainless steel, the grates on Nexgrill Gas Grill are easy to clean with any steel brush. Besides, most of the grease is transferred to the small jar below, which can be emptied effortlessly!

Although, what’s even easier to clean are the porcelain-coated cast-iron grates on Charbroil 4-burner Grill. They don’t let the food cling on to them for long and a quick swipe with a nylon-bristled brush is enough to get them off. On top of that, the removable grease tray makes cleanup a breeze!

All in all, both the grills have got the comfort of easy cleaning!

Ease of Use:

This is where the difference between the two powerful grills ends. They are both super easy to use and have got no complications whatsoever.

Get the temperature controls to work, use the thermostat on top of the lid to read the temperature, and fire up the grill with the electric igniter switch. And that’s it! Simple to use, no hassle!

Additionally, they come with side plates for easy storage. While the side burner is in use, there is another convenient plate on the other side where you can place your tools and any other belongings! Talk about full support!

However, they’re both pretty time-consuming to set up. It might take two people to get the work done in a quicker manner. The manuals can be quite complicated to read through, making the work harder.

The Final Verdict:

If the extra space of the cooking grill and the easy movability is something that you dig, then we’d suggest going for the Nexgrill Gas Grill with 4-burners. It comes at a modest price and is a good investment for anyone within a budget, looking for a great grill.

On the flip side, if the grilling space of a few inches more is not a big deal for you, then definitely go for the Charbroil 4-burner Stainless Steel Gas Grill. It’s more durable than Nexgrill and is likely to last longer if taken care of properly!

A Snippet of the Nexgrill 4 Burner Gas Grill

[amazon box=”B07CGJZ2PN”]

Before we move on to our Nexgrill BBQ review, here is an overview of what the product is all about!

Nexgrill 4-burner Propane Gas Grill in stainless steel with side burner is one of the classics in the huge line of Nexgrill grills. It doesn’t come with overly convenient features, but the ones it has are enough to get the splendid grilling experience!

Product Specs:

  • Cooking area: 462 square inches
  • Burners: 4
  • BTUs: 12000 each
  • Side burner area: 164.5 square inches

What We Like:

  • Provides sufficient grilling area to cook a good amount of food.
  • Evenly spreads heat over the grates.
  • Automated igniter reduces the hassle of lighting the grill.
  • Side warming rack is useful while grilling a lot all at once.
  • Easy-to-use temperature control settings.
  • Slanted flame tamers get rid of excess fat and grease.
  • Stainless steel grates and body make it easy to clean.
  • Fairly comfortable to move around.

What We Don’t Like:

  • Assembly is time-consuming: The instruction manual to assemble the Nexgrill Gas Grill comes in drawings rather than a set of instructions. That’s super convenient if you ask us but that wasn’t the case because they weren’t very clear.

If you are a pro at setting grills up, then this should be easy peasy for you. Nevertheless, new grillers on the block might have some difficulties with it. They say “the more, the merrier” and that’s definitely true when assembling this grill!

On the other hand, have a little patience while doing this part and you are good to go! For a visual representation, here’s a video on assembling it.

  • Rusts if not maintained properly: Like we mentioned, the stainless steel and metal used for this 4 burner grill aren’t that heavy. This does make it prone to rust if not kept properly. Albeit, if you take good care of it, we doubt it’ll rot away that easy!

Get a cover and hide this under it when not in use. If not, you can say goodbye to the paint on the metal grills and burner. Trust us, the veil will be a good investment!

Benefits of the Nexgrill 4 Burner Gas Grill

Durability

The stainless steel construction ensures that the grill will last for years to come.

Even Heat Distribution

The porcelain-coated cast-iron cooking grates distribute heat evenly, ensuring that your food is cooked perfectly.

Cooking Area

With a total cooking area of 557 square inches, the Nexgrill 4 Burner Gas Grill is perfect for small to medium-sized gatherings.

High Heat Output

The four burners provide a total of 48,000 BTUs of heat, ensuring that your food is cooked quickly and efficiently.

Versatility

The side burner adds versatility to your cooking options, allowing you to cook a variety of different dishes.

Ease of Use

The electronic ignition and built-in thermometer make it easy to start and monitor the grill, while the temperature gauge helps you determine when your food is done.

Value

The Nexgrill 4 Burner Gas Grill provides good value for its price, offering durability, even heat distribution, and good cooking performance.

Where to Buy Your New Nexgrill 4 Burner Gas Grill:

To summarize, if the Nexgrill Propane Grill is taken care of properly, it’s a great addition to your grilling sessions. Featuring the very convenient five burners, tilted tamer, and adaptable temperature controls, it makes its way to the hearts of many users.

If you want your very own Nexgrill, we wouldn’t recommend waiting around. Get it while it’s still in stock. Order here and get, set, grilling!

Nexgrill 4 Burner Gas Grill Review: Our Version of the Story!

[amazon box=”B07CGJZ2PN”]

Now that we’re done with the basics of the 4 Burner Grill, let’s dive into details. Find out if this one provides you with all the features you’ve been looking for in a grill.

Top Features:

The Nexgrill 4 Burner Propane Gas Grill had a lot to look forward to. Here are our favorites from all its fantastic features:

Ample Cooking Space:

For a fun grilling session with your friends and family, you definitely need a large grilling area on your grill. You wouldn’t wanna spend all your time grilling and not having fun, would you?

The 462 square inches’ cooking space on the nexgrill 4 burner propane gas grill lets you spend more time enjoying and less time grilling! Pop in up to 22 burgers at once and relax for the entire night. You could fit quite a lot of patties on the primary grill and utilize the top rack for those juicy veggies and skewers for the side dish!

Made of stainless steel, the grates ensure that the correct amount of heat reaches your food. Alongside that, you can rest assured that the spreading of heat will be even all throughout the grilling sesh!

Four Burners Allowing Convenient Cooking:

The most highlighted feature of this Nexgrill is obviously the four burners on it. Crafted with stainless steel, these burners give off a total of 48000 BTUs and guarantee even heating.

We believe this is also a great way to meet each of the guests’ requirements. Some like their food well-done while others prefer medium-rare and these let you keep all of their taste buds in check!

What if you’re not using all the burners?

Turn them off! Each of them has its designated control knob that lets you limit the number according to your needs.

Know what else that’s great for?

Saving gas!  Instead of wasting gas on unused burners, you get to save it by keeping the burners off.

Warming Rack:

There are lots of grills that come with a side plate, what’s unique about this? Why have most of the Nexgrill Gas Grill reviews hyped this up?

That’s because the side plate here comes with its own burner! You can place your cooked food on it while paying attention to the next food in the grill, and it’ll remain warm the entire time. Having an area of 164.5 square inches, it can comfortably accommodate a standard-sized plate.

Ignite the Flames!

Unlike traditional grills, you won’t have to worry about scorching your hand while lighting the grill up. Press down on the round button on the left side of the temperature controls and watch your grill fire up on its own!

Temperature Control:

There’s no hassle finding the temperature settings on this one. They sit right in front of you, waiting for you to turn them up. Adjust each burner’s heat with its own dial and relax while they BBQ your food.

Take the help of the thermometer attached to the lid, to get accurate readings. Bid adieu to guessing games!

Angled Flame Tamers:

Here’s one feature that hooked us up to this grill even more.

You know those nasty flare-ups that give you a near-death feeling?

With the tilted tamers, that’s a problem of the past. They’re angled in a way so that the grease doesn’t fall directly on the flames, rather shift to a bucket below. Phew!

Another advantage of this is the avoidance of burnt smell on your food. The fat or oil that finds their way to the flames aren’t usually very pleasant tasting ones, making it a relief that we don’t taste that in our food!

Portability:

We weren’t thoroughly convinced that Nexgrill Stainless Steel Grill would be more durable than its competitors because of its lightweight. That being said, the thin stainless steel material did make it easy to carry around! You could take it to and fro your lawn without straining your back.

If that doesn’t seem so delightful, the wheels on it might! To enhance the delicateness of this baby, Nexgrill added the casters that work together to make maneuverability a breeze.

Buying the Nexgrill 4 Burner Gas Grill: What You Need to Know

Knowing all the benefits and amazing features are great, but there are still aspects you need to be aware of when buying this traditional beauty!

Not an Everyday Grill:

With the stainless steel body, the Nexgrill 4-burner Propane Gas Grill in Stainless Steel might look all robust, but it’s not. Don’t get this wrong! You could use this for a long time only if you are ready to maintain it properly.

This grill is not for everyday use and here are some tips in keeping it clean:

  • Clean the grates after every use.
  • Empty the grease bin and rinse it.
  • If cleaning the bucket is not for you, use an aluminum foil over it to avoid getting it drenched in grease.
  • Give the entire grill body a good wash every wash in a while.

Compare to other similar products

ProductFeaturesBenefitsPrice
Nexgrill 4 Burner Gas GrillStainless steel construction, porcelain-coated cast-iron cooking grates, 557 square inches cooking area, 48,000 BTUs of heat, side burner, electronic ignition, built-in thermometer, temperature gaugeDurability, even heat distribution, versatility, ease of use, value$299
Weber Spirit II E-310Porcelain-enameled cast-iron cooking grates, 529 square inches cooking area, 30,000 BTUs of heat, built-in thermometer, open cart designEven heat distribution, built-in thermometer, durable construction$519
Char-Broil Performance 4-Burner Gas GrillStainless steel construction, porcelain-coated cast-iron cooking grates, 425 square inches cooking area, 36,000 BTUs of heat, side burner, electronic ignition, built-in thermometer, temperature gaugeDurability, even heat distribution, versatility, ease of use, value$249
Dyna-Glo 4-Burner Gas GrillStainless steel construction, porcelain-coated cast-iron cooking grates, 597 square inches cooking area, 60,000 BTUs of heat, side burner, electronic ignition, built-in thermometer, temperature gaugeDurability, even heat distribution, high heat output, versatility, ease of use$399

As you can see from the comparison table, the Nexgrill 4 Burner Gas Grill offers a good balance between price, features, and benefits compared to other similar products. While some of the other grills may have more features or a larger cooking area, the Nexgrill 4 Burner Gas Grill provides good value for its price and is perfect for small to medium-sized gatherings.

Safety

  1. Always operate the grill outdoors in a well-ventilated area.
  2. Keep the grill away from combustible materials, such as trees, shrubs, and buildings.
  3. Do not use the grill in a covered or enclosed area, such as a garage or porch.
  4. Never leave the grill unattended while it is in use.
  5. Keep children and pets away from the grill while it is in use.

Maintenance

  1. Clean the grill after each use to prevent buildup of grease and food residue.
  2. Use a grill brush to clean the grates and a damp cloth to wipe down the exterior.
  3. Check the gas connections for leaks before each use.
  4. Replace any damaged parts or components immediately.
  5. Cover the grill when it is not in use to protect it from the elements.

How to Clean Stainless Steel Grates?

Burn-out: The method for lazy folks:

This is the most recommended way of cleaning any grill plates. It doesn’t take much of your time and is very easy as well.

Let the grill heat up by turning the temperature to the highest. Next, turn the heat off and scrub at the hot grill with a brush to scour the remaining bits of debris. And you’re done!

The reason why it’s so easy is that the high heat burns off most of the debris from the grates, leaving you with minimum residue to clean.

Vinegar wash: The method for clean freaks

If you’ve already let your grill cool off and are now looking for a way to clean then this is the one! Vinegar is known to make your grates speckless!

First, mix equal amounts of vinegar and water in a spray bottle. Spritz the solution on the grill plates and let it sit for about 15 minutes or more. Lastly, use your grill cleaning brush to wipe off all traces of grime!

Friendly tip: If you don’t have a grill brush, use foil to get the closest cleaning results!

Soaking: The method for procrastinators:

For the most stubborn food bits or the procrastinators out there, your savior is here! You don’t have to clean the grill instantly with this method.

The first step is to find a large tub that will fit your grates and fill that up with hot detergent water. Soak the grates overnight or for at least two hours and take them out. Lastly, scrub with a brush or foil and hose it down to get it ready for the next session!

Friendly tip: Add a dash of baking soda or vinegar to the soapy solution to get that extra bit of cleanliness.

Heat Vents:

Nexgrill Stainless Steel Propane Grill is equipped with heat vents in its back, like most other grills. Keep in mind to place this away from your walls to avoid getting burnt marks on there.

Why are heat vents necessary?

Having the ability to heat up to 800 degrees, it’s essential that some of the heat passes out. After all, you don’t want burnt food when you’re not babysitting this, do you?!

FAQs (Frequently Asked Questions)

Got questions? So did other users. We answered the top queries for you!

Does Nexgrill 4-Burner Grill Have A Warranty?

Yes, it does! There’s a full one year warranty for you to claim over any of the issues you encounter with the product. Having an extra one year warranty, the grates prove to be super useful!

The part which covers the hectic task of burning themselves a.k.a the burners have a warranty of five years. Get grilling because Nexgrill got you covered!

Friendly tip: If you make modifications to the grill on your own and then claim warranty, Nexgrill won’t cover that for you. This also applies for fire hazards, accidents, and any other incident that doesn’t relate to the fault of the product.

What Are The Dimensions Of The 4-Burner Gas Grill Nexgrill?

It comes with a height of 46 inches, a width of 51 inches, and a depth of 24.75 inches, making it perfect for most backyards. Whether you have a small lawn or a big one, it will most likely fit right into it!

Is the Nexgrill 4 Burner Gas Grill easy to assemble?

Yes, the Nexgrill 4 Burner Gas Grill is easy to assemble. It comes with clear instructions and all the necessary hardware.

Can I use natural gas with the Nexgrill 4 Burner Gas Grill?

No, the Nexgrill 4 Burner Gas Grill is designed to use propane gas only.

Does the Nexgrill 4 Burner Gas Grill come with a cover?

No, the Nexgrill 4 Burner Gas Grill does not come with a cover. However, you can purchase a cover separately.

What is the warranty for the Nexgrill 4 Burner Gas Grill?

The Nexgrill 4 Burner Gas Grill comes with a one-year warranty.

How easy is it to clean the Nexgrill 4 Burner Gas Grill?

The Nexgrill 4 Burner Gas Grill is easy to clean. The porcelain-coated cast-iron cooking grates can be removed and cleaned separately, and the grill itself can be wiped down with a damp cloth.

Concluding Remarks:

Nexgrill Propane 4 Burner Grill might not be all that strong but it’s bound to last a long time if you maintain caution. Utilize the adjustable burners, igniter, and all other user-friendly traits of this grill at your own will!

With the modest price tag it comes with, it’s surely a steal. Besides, the traditional stainless steel look of it is a great addition to the aesthetics of your patio!

Do you already have a Nexgrill? Let us know what our Nexgrill 4 Burner Gas Grill review missed out!

If not, share your thoughts with us!

The Truth About Coffee and Salt: Can Adding Salt to Your Coffee Make You Sick?

After many years working in the coffee industry, I’ve come across numerous misconceptions and myths surrounding coffee. One of the most common beliefs is that adding salt to coffee can make you sick.

As an experienced coffee professional, I am excited to use my expertise to clarify this misconception and provide a thorough explanation of the topic.

coffee with salt gets you sick

What is Coffee with Salt?

Coffee with salt is a beverage that involves adding a pinch of salt to a cup of coffee. While this may seem like an unusual combination, it’s a practice that has been around for centuries.

The exact origin of coffee with salt is unknown, but it’s believed to have originated in countries where access to sugar was limited. People added salt to their coffee as a way to enhance its flavor and balance out its bitterness. Over time, this practice spread to other parts of the world, and today it remains a popular addition to coffee for some people.

The process of adding salt to coffee is simple. All you need is a cup of coffee and a pinch of salt. You can add the salt directly to the coffee grounds before brewing or sprinkle it on top of the finished cup of coffee. The amount of salt you add is up to personal preference, but it’s typically a small pinch or two.

While the idea of adding salt to coffee may seem strange to some, it’s a practice that has been enjoyed by many for generations.

Coffee with Salt Gets you Sick

The Truth About Coffee and Salt: Can Adding Salt to Your Coffee Make You Sick? 27

There is a common myth that adding salt to your coffee can make you sick. However, this claim is not supported by scientific evidence. While consuming too much salt can have negative health effects, adding a small amount to your coffee is unlikely to cause any harm.

The belief that coffee with salt can make you sick may have arisen due to confusion with the negative health effects of consuming excessive amounts of salt. It’s important to note that the amount of salt typically added to coffee is very small and unlikely to lead to negative health effects.

In fact, adding salt to coffee can actually have some benefits. A study published in the Journal of Food Science in 2010 examined the effects of adding salt to coffee on sensory attributes, such as taste, aroma, and mouthfeel. The study found that adding salt to coffee resulted in a reduction in bitterness and sourness, while also increasing sweetness and smoothness.

Some people add salt to their coffee as a way to reduce the acidity of the coffee, which can be harsh on the stomach. Adding a small amount of salt to your coffee can help neutralize some of the acidity and make it easier to digest.

While there is no scientific evidence to support the claim that coffee with salt can make you sick, it’s still important to be mindful of the amount of salt you consume. Consuming excessive amounts of salt can lead to health problems such as high blood pressure, which can increase the risk of heart disease and stroke.

The recommended daily intake of sodium for adults is 2,300 milligrams, which is equivalent to about one teaspoon of salt. Most people consume much more than this, and this can lead to health problems such as high blood pressure and increased risk of heart disease and stroke.

Potential Health Benefits of Coffee with Salt

While excessive salt intake can have negative health effects, adding a small amount of salt to your coffee may have some potential health benefits. Here are a few ways that coffee with salt could be beneficial:

Helps regulate fluid balance

Salt plays a key role in regulating fluid balance in the body. Adding a small amount of salt to your coffee can help ensure that your body stays properly hydrated.

May reduce acidity

Adding salt to your coffee can help reduce its acidity, making it easier on the stomach. This can be particularly beneficial for people who experience gastrointestinal issues after drinking coffee.

Can enhance flavor

Salt can help enhance the flavor of coffee by counteracting its bitterness. This can make the coffee more enjoyable to drink and may help reduce the need for additional sweeteners.

Risks and Side Effects of Coffee with Salt

While adding salt to your coffee may have some potential health benefits, it’s important to be aware of the potential risks and side effects as well. Here are a few things to keep in mind:

Excessive salt intake

Consuming too much salt can lead to health problems such as high blood pressure, which can increase the risk of heart disease and stroke. It’s important to be mindful of the amount of salt you consume, both in your coffee and in other foods and beverages.

Water retention

Excessive salt intake can also lead to water retention, which can cause swelling and bloating. This can be particularly problematic for people with heart or kidney problems.

Interference with medication

Some medications, such as blood pressure medication, can interact with salt and cause problems. If you’re taking any medications, it’s important to talk to your doctor before adding salt to your coffee or making any other changes to your diet.

Taste preferences

While some people enjoy the taste of salt in their coffee, others may find it unpalatable. It’s important to listen to your body and make choices that work for you.

These potential risks and side effects are supported by scientific evidence. While adding a small amount of salt to your coffee is unlikely to cause harm, excessive intake can have negative health effects.

If you’re looking to enhance the flavor of your coffee without the potential risks of excessive salt intake, there are a few alternatives to consider. Natural sweeteners like honey or maple syrup can provide a sweet flavor without the negative health effects of excessive salt intake. Flavored creamers can also be a tasty addition to your coffee without the added salt.

Conclusion

In summary, adding salt to coffee has been a long-standing practice in some parts of the world, and there is evidence to suggest that it can improve the flavor and sensory attributes of the beverage. While there is no conclusive evidence on the potential health benefits of coffee with salt, adding salt to coffee may have some potential benefits, such as reducing bitterness and enhancing sweetness.

However, it’s important to consume both coffee and salt in moderation and to be aware of the potential risks and side effects associated with each.

Key points

  • Adding salt to coffee has a chemical basis for improving its flavor and reducing bitterness.
  • Coffee itself has several potential health benefits when consumed in moderation.
  • Salt, when consumed in excess, can increase the risk of cardiovascular disease.
  • There is limited research on the potential risks and side effects of consuming coffee with salt.

FAQs

Is coffee with salt safe to drink?

Adding a small amount of salt to your coffee is generally safe. However, excessive salt intake can have negative health effects, so it’s important to be mindful of the amount of salt you consume.

Does coffee with salt really make you sick?

There is no scientific evidence to support the claim that coffee with salt can make you sick. Adding a small amount of salt to your coffee is unlikely to cause any harm.

Why do some people add salt to their coffee?

People add salt to their coffee as a way to enhance its flavor and balance out its bitterness. Salt can also help reduce the acidity of the coffee and make it easier on the stomach.

What are some alternatives to salt for enhancing the flavor of coffee?

Natural sweeteners like honey or maple syrup can provide a sweet flavor without the negative health effects of excessive salt intake. Flavored creamers can also be a tasty addition to your coffee without the added salt.

How much salt should I add to my coffee?

The amount of salt you add to your coffee is up to personal preference, but it’s typically a small pinch or two. It’s important to be mindful of the amount of salt you consume and to stay within the recommended daily intake of sodium.

How to Tell If Steak Is Bad – Tips for Food Safety

So, you bought a steak and tossed it into your fridge at the beginning of the week. The weekend is here and you are planning on a nice fancy dinner. Lo and behold, the steak seems slightly off. 

Tempted to cook it anyway and hope for the best?

Understanding how to tell if steak is bad can prevent you lots of pain, puking, and even a trip to the doctors. Tossing steak in the fridge for 10 days is definitely a risky move, but this article will tell you how to identify the signs that your steak needs to be thrown out.

If you want to know if the stuff in your fridge is moldy steak or perfectly safe to eat, keep reading. Besides showing you how to know if steak is bad, this article also looks at the best way to store steak and lengthen its shelf life.

5 Signs That Tell You Should Throw Out Your Steak

How to Tell If Steak Is Bad - Tips for Food Safety 28

These 5 signs will tell you when steak is bad. If your steak (or any kind of meat) displays any of these symptoms, it’s time to toss it out and not experiment to see if it is still edible.

01. It Feels Slimy:

Slime on food is never a good omen, but it’s extra nasty when it is found on meat.

If your steak has gone bad, it will sometimes look and feel slimy and slippery to the touch. The surface of the steak will glisten and have a layer of slime over it, and the layer might have a yellowish sheen when held in bright light.

This slimy layer is caused by a buildup of bacteria and thus confirms that your steak has gone rancid and should be put in the trash, not on your grill. When the slimy steak is left out, you will see mold growing on the surface in just a few days.

However, if your meat is just starting to go bad, the whole thing may not feel slimy. Because of this, it is best to examine the steak thoroughly for other signs as well.

02. It’s Past the Use-By Date:

Before tossing the steak in your fridge or freezer, check the use-by date. The meat needs to be thawed, cooked, and consumed before this date. If you’re freezing your steak, take it out to thaw at least two days before the use-by date.

Not sure how long your steak’s been sitting in your fridge? Get into the habit of writing the date it needs to be used before tossing it into your freezer.

Most steaks can be wrapped in plastic and left in the fridge for 3-5 days, any time exceeding this means your steak might make you sick. And if you can’t remember when you put it in the fridge/freezer, it’s been in there for too long.

03. It Feels Dry:

On the other side of the sliminess, dryness is another sign that your steak is no longer at its best. Does your steak feel dry or look rather shriveled and dehydrated?

If your steak is dry and juiceless, it doesn’t always mean that you will get an upset stomach if you cook it. But this will result in a tough and chewy steak without much flavor.

If you plan on keeping your steaks in the freezer, a good way to stop them from drying out is to store them in a vacuum-sealed bag first. These can be Ziploc or freezer bags. They will reduce the exposure to air (and bacteria), and stop the moisture in the steak from drying out.

Even if you want to store it in the fridge for a day or two, wrapping it cling film will stop it from going dry and leathery. But if your steak feels tough and leathery, it’s best not to cook it at all.

04. It’s Become Discolored:

This is one of the major indicators that your meat is past the point of saving and must be thrown out. Of course, green steak is rancid but what about a steak that looks just a little off?

However, if some parts of the steak turn a darker brown than the rest, then it’s time to toss it. Green steak or a very dark brown definitely needs throwing out. And if you think your steak looks yellow or gray, then it’s most probably a biohazard at that point.

05. It Smells Funny:

If steak smells sour, it’s basically telling you to throw it in the trash. While the smell of fresh meat isn’t great; it is distinct and has a slight metallic hint, it doesn’t smell extremely unpleasant either. The smell is also pretty faint, and not overpowering.

On the other hand, if your steak is old or expired, it will have a definitive odor that smells sour or a little like rotten eggs or ammonia. And unlike fresh meat, the smell is strong enough to make you feel nauseous.

However, certain dry-aged steaks will naturally have a mild cheese-like smell because of the lactic acid that is produced during the aging process. If you aren’t sure whether your steak has the aged smell or the rotten one, use your other senses to confirm whether or not it has gone bad.

Is brown steak bad?

Fresh meat generally has a bright red color because of the hemoglobin and myoglobin present in it. When the steak is first sliced, the meat will take on a reddish-purplish hue which is due to the myoglobin reacting to the oxygen. After this, the meat turns a dark red, around 30 minutes after exposure to air.

Finally, 3 days later, the myoglobin is fully oxidized and the meat turns brown. However, at this stage, the meat is still safe to consume. So, if the steak turned brown in the freezer, you can still eat it.

How to Cook Steak Safely

To ensure that your steak is cooked safely, it’s important to check for doneness. Here are a few methods:

Using a meat thermometer

Insert a meat thermometer into the thickest part of the steak to check the internal temperature. For medium-rare steak, the temperature should be 135°F, while medium steak should be cooked to 145°F.

Using the touch test

Press the center of the steak with your finger to check for doneness. For medium-rare steak, the center should feel slightly soft and springy, while medium steak should feel firmer.

How to Tell If Meat Is Bad After Cooking?

One of the most common questions we get asked is “how can you tell if meat is bad after cooking it?” While there are some obvious signs that meat has gone bad (like mold or an off odor), sometimes it can be tricky to tell.

Here are a few tips to help you out:

1. Check the Color

The first indicator that your meat is bad after cooking is how it looks; freshly cooked meat should be brownish in color because of the breakdown of myoglobin (at 170+ F) while cooking, according to an MCU study

It may turn red or pinkish-red color after being cooled down, which is perfectly safe to eat. However, if it’s starting to turn brown or has any green tinges to it, it’s probably not good anymore.

The color of your cooked steak is not always a sign of quality, rather it’s a sign 

2. Inspect the Texture

Bad meat will often look stringy or mushy, rather than firm and juicy. However, it’ll feel slimy or slippery once you run your fingers over the meat’s surface. It means bacteria have started to multiply on your steak. 

You may also see the green or black area, which is a sign of fungal development. 

3. Give It a Smell 

The simplest and quickest method to tell if meat has spoiled is probably this test. It applies to both cooked and raw ground beef/pork/lamb. 

If you’re eating your leftover steak after a day or two in the fridge, it’s a good idea to give it a sniff before you take a bite.

Cooked meat that has gone bad will usually have a very off, unpleasant odor. It will smell sour/acidic, somewhat like soured milk or rotten egg when the meat is bad. It’s a sign of bacterial development. 

You’ll know it immediately unless there is something wrong with your nose! Trust your instinct. It is no longer safe to consume after it has gone rotten.

4. Taste It

If all these tests don’t give you any satisfactory conclusion, you can always give it a try. In case you’re not a vegan or trying meat for the very first time (which is very unlikely!), you know what your usual meat tastes like. 

Rotten meat will taste extremely sour or bitter. You may think that you cooked wrong, but that may not be the case most of the time. Spit it out immediately to avoid food poisoning. 

If you’ve accidentally gulped down such meat, stick your fingers down your throat and throw up the whole steak. Believe me, it’s much better than the after-effects of eating bad meat.  

And if you’re ever in doubt, it’s better to err on the side of caution and throw the meat out. Better safe than sorry!

What Happens If You Eat Bad Steak?

If you eat bad steak, you may experience food poisoning. Symptoms of food poisoning from eating bad steak include nausea, vomiting, diarrhea, and stomach cramps, according to Mayo Clinic

If you experience these symptoms, it is important to drink plenty of fluids and you should be fine within 24 hours.

If you only have diarrhea or gas, you likely have a minor case of food poisoning. However, if you have a fever or blood in your stool, it’s an advanced case of food poisoning and you should see a doctor immediately. 

Caution: Some people think that if they thoroughly cook infected raw meat or heat up the badly cooked meat in the oven, bacteria will die, and it’ll be safe to eat. 

However, it probably won’t be a good idea. even after fully cooking your meal and eliminating any germs, you might still get unwell. This is brought on by the poisons that certain bacteria exude. The symptoms of food poisoning may also be caused by these poisons.

How Long Does Cooked Steak Last in Fridge?

Knowing how long your food will last is important. 

Cooked steak can last in the fridge (at 40°F or less) for up to four days, according to USDA. Refrigeration will slow down the bacterial growth that starts at room temperature but won’t stop completely. 

So, it is best to eat it within two days to ensure that it is fresh. 

If you do not plan on eating it within that time frame, you can always freeze it. It’ll last in the freezer for 2–6 months. Just make sure to wrap it tightly in plastic wrap or aluminum foil to prevent freezer burn.

When it comes to steak, fresh is always best. However, if you find yourself with leftover cooked steak, don’t let it go to waste. Enjoy it within four days or freeze it for later.

The Best Way to Store Steaks

how to tell if steak is bad

Before we get started on how you should store your steak to prevent it from going bad too quickly, let’s get this out of the way. How long can steak stay in the fridge? When wrapped tightly, you can keep your steak in the fridge for 2-5 days.

When it comes to the freezer, you can store it till the use-by-day. However, you can also store it in there for a few extra days-but checks to make sure there are no other signs of spoilage. Cooked meat will last for 3-4 days before freezing or throwing it out.

The best way to store steaks is in the freezer. They need to be wrapped in clingfilm so limit exposure to air. Then, pack them in Ziploc or freezer bags, pushing out the air before sealing the bags and placing them in the freezer.

The less exposure to air, the fresher the meat will stay. You can also ask your butcher to wrap or seal your steak which will slow down bacterial growth and extend its shelf life.

Let your steaks thaw in the fridge for 24 hours before cooking. You can also defrost your steaks on the counter or special defrosting trays.

Still Got Questions?

Here you will find answers to questions about identifying the freshness of your steaks.

How Long is Steak Good for?

When kept in the freezer, the steak will have a use-by date that lasts anywhere from 6 to 12 months. On the other hand, it will stay fresh in the fridge for 2-5 days.

How Can I Tell If Steak is Bad after Cooking?

Mold, discoloration, and strange smells are all signs that your steak has gone bad after it has been grilled or seared.

What Does Bad Steak Taste Like?

While it isn’t recommended to check for spoiled steak by tasting, meat that has gone bad will have a rancid taste.  If your steak tastes extremely sour or bitter, it’s definitely gone bad.

Are Brown Steaks Bad to Eat?

If your steaks are a regular brown in color, they are still safe to eat. Dark brown or green-yellow steaks have gone bad and need to be discarded.

How Long Can I Store Cooked Steak in the Fridge?

Once steak is prepared, it can be kept in the fridge for 3-5 days, before it goes bad.

Can you still eat steak if it’s brown on the outside?

If the steak has turned brown on the outside due to exposure to air, it may still be safe to eat. However, if the brown color is accompanied by a foul odor or slimy texture, the steak should be discarded.

How long does steak last in the refrigerator?

Raw steak can be stored in the refrigerator for up to five days. Cooked steak can be stored for up to four days.

Can you tell if steak is bad by looking at the expiration date?

The expiration date on the package can provide an estimate of when the steak should be consumed by. However, it’s important to rely on visual, olfactory, and tactile cues to determine if the steak has gone bad.

Can you get sick from eating bad steak?

Yes, consuming spoiled steak can lead to food poisoning, which can cause symptoms such as nausea, vomiting, diarrhea, and fever.

How do you properly dispose of spoiled steak?

To properly dispose of spoiled steak, wrap it tightly in plastic wrap and discard it in a sealed trash bag. This can help prevent the spread of harmful bacteria.

To Summarize

Once you know how to tell if steak is bad, you won’t ever have to risk eating rotten meat and getting sick. This guide will prevent you from losing track of your steak’s use-by dates, and teach you the correct way to store steaks to maximize their freshness. And once you figure out the gigantic tomahawk steak you’ve been saving is good to go, fire up your charcoal grill and enjoy one of the best meals the world has to offer!

Ideal Espresso Temperature: Tips and Tricks

As a passionate coffee lover and expert in the field, I know firsthand the importance of achieving the perfect espresso temperature. The temperature of the espresso shot can make or break the flavor, aroma, and crema, resulting in either a balanced and flavorful shot or a bitter and burnt-tasting one.

Through years of experience and experimentation, I have learned the best practices for achieving the ideal espresso temperature. In this article, I will share my knowledge and expertise on the science of espresso temperature, the factors that affect it, and how to achieve consistency in producing high-quality espresso shots.

Ideal Espresso Temperature: Tips and Tricks 29

The Science of Espresso Temperature

The extraction of espresso involves a complex chemical process that requires precise temperature control. During the extraction process, hot water is forced through finely ground coffee beans under high pressure, dissolving and extracting coffee oils, sugars, and flavors.

Temperature plays a critical role in the extraction process because it affects the chemical reactions that occur between the water and the coffee. At high temperatures, the coffee oils can become over-extracted, resulting in a bitter and burnt taste. At low temperatures, the coffee can be under-extracted, resulting in a weak and sour taste.

In addition to affecting the taste, temperature also affects the aroma and crema of the espresso. The crema is the frothy layer of coffee that forms on top of the espresso shot. It is created by the emulsification of oils and gases during the extraction process. The ideal temperature range for creating a rich and creamy crema is between 195°F to 205°F (91°C to 96°C).

It is important to note that the ideal temperature range can vary depending on the type of coffee bean, roast level, and brewing method. Therefore, it is crucial to adjust the temperature accordingly based on these factors to achieve the best possible taste and crema.

 Factors Affecting Espresso Temperature

Ideal Espresso Temperature: Tips and Tricks 30

Several variables can affect the temperature of an espresso shot, including water quality, machine calibration, and barista technique. Understanding these variables and how to control them is essential for ensuring consistent temperature in espresso shots.

Water Quality

Water quality can affect the temperature of an espresso shot. Hard water with high mineral content can result in a build-up of limescale, affecting the machine’s heating elements and temperature control. Using high-quality, filtered water can help to maintain the machine’s temperature and prevent limescale build-up.

Machine Calibration

The calibration of the espresso machine can affect the temperature of the shot. The machine’s heating elements must be calibrated correctly to ensure consistent temperature throughout the brewing process. It is essential to check and adjust the machine’s calibration regularly to maintain optimal temperature control.

Barista Technique

Ideal Espresso Temperature: Tips and Tricks 31

Barista technique can also affect the temperature of the shot. The barista must use the correct grind size, tamping pressure, and brewing time to achieve consistent temperature and extraction. It is essential to train the barista to ensure that they are using the correct technique and are aware of the variables that can affect the shot’s temperature.

Controlling these variables is essential for ensuring consistent temperature in espresso shots. Some tips for controlling these variables include:

  1. Use high-quality, filtered water to maintain the machine’s temperature and prevent limescale build-up
  2. Calibrate the machine’s heating elements regularly to ensure consistent temperature throughout the brewing process
  3. Train the barista to use the correct technique and to be aware of the variables that can affect the shot’s temperature
  4. Use a thermometer to measure the temperature of the shot and adjust the temperature accordingly
  5. Pre-heat the equipment before use to ensure that it is at the same temperature as the coffee

By controlling these variables, baristas can ensure that they are brewing espresso shots at the optimal temperature for a balanced and flavorful taste.

Best Practices for Achieving the Ideal Espresso Temperature

Baristas can take several steps to achieve the ideal espresso temperature, ensuring a balanced and flavorful taste.

Preheating Equipment

Preheating the equipment is crucial for achieving the ideal espresso temperature. Preheating ensures that the equipment is at the same temperature as the coffee, allowing for consistent extraction. To preheat the equipment, run hot water through the portafilter, cup, and machine before brewing.

Using the Right Water Temperature

Using the right water temperature is essential for achieving the ideal espresso temperature. The water temperature should be between 190°F to 205°F (88°C to 96°C) to ensure optimal extraction. Using a thermometer to measure the water temperature can help to ensure consistency.

Adjusting Grind Size

Adjusting the grind size is also essential for achieving the ideal espresso temperature. The grind size should be adjusted based on the desired extraction time and the machine’s temperature. A coarser grind will require a higher temperature, while a finer grind will require a lower temperature.

Troubleshooting Temperature Issues

 If the temperature of the espresso shot is not consistent, there may be an issue with the machine’s calibration, water quality, or barista technique. To troubleshoot temperature issues, check the machine’s calibration, use high-quality, filtered water, and train the barista to use the correct technique.

Conclusion

In conclusion, the ideal espresso temperature is between 195°F to 205°F (90°C to 96°C). By understanding the science of espresso temperature, the factors that affect it, and how to achieve it, baristas and coffee enthusiasts can create a balanced and flavorful shot of espresso every time.

FAQs

Why is temperature so important in making espresso?

Temperature is essential in making espresso because it affects the chemical reactions that occur between the water and coffee. The ideal temperature range allows for optimal extraction of coffee oils, sugars, and flavors while ensuring that the coffee does not become over-extracted or burnt.

What is the ideal temperature range for making espresso?

The ideal temperature range for making espresso is between 195°F to 205°F (90°C to 96°C).

How can I achieve consistent temperature in my espresso shots?

To achieve consistent temperature in your espresso shots, it is essential to use an espresso machine with temperature control, preheat the equipment, use high-quality water, use freshly roasted coffee beans, adjust the grind size and tamping pressure, and maintain consistent brewing time.

Can the type of coffee bean affect the ideal espresso temperature?

Yes, the type of coffee bean can affect the ideal espresso temperature. Darker roasts require higher temperatures for optimal extraction, while lighter roasts require lower temperatures.

How can I troubleshoot temperature issues with my espresso shots?

If you are experiencing temperature issues with your espresso shots, you may need to check the machine’s calibration, use high-quality, filtered water, and train the barista to use the correct technique. It is also important to adjust the temperature based on variables such as water quality, roast level, humidity, and altitude.