10 Best Oils You Can Use as Peanut Oil Substitutes

Deep frying.

We love eating deep-fried goodies, but deep frying at home is nothing short of terrifying. Especially if you are a new cook. 

Sometimes you have to deal with unexpected hot oil spills and splatters. Sometimes your oil gets too hot and starts to burn.

Peanut oil is hailed as one of the best oils for deep frying due to its high smoke point. It is also one of the few oils that smell and taste great, which makes your cooking taste even better. But not everyone has access to peanut oil.

Maybe your local grocery store is out of peanut oil. Maybe you’re just allergic to peanuts. Either way, you need a peanut oil substitute. That’s why this article sums up all the possible cooking oil replacement options you can ever hope for.

These replacements are great for deep frying, sautéing, making confits, and basically every other culinary use for cooking oil. With all that being said, let’s help you find a great substitute for peanut oil.

A Quick Rundown on Peanut Oil
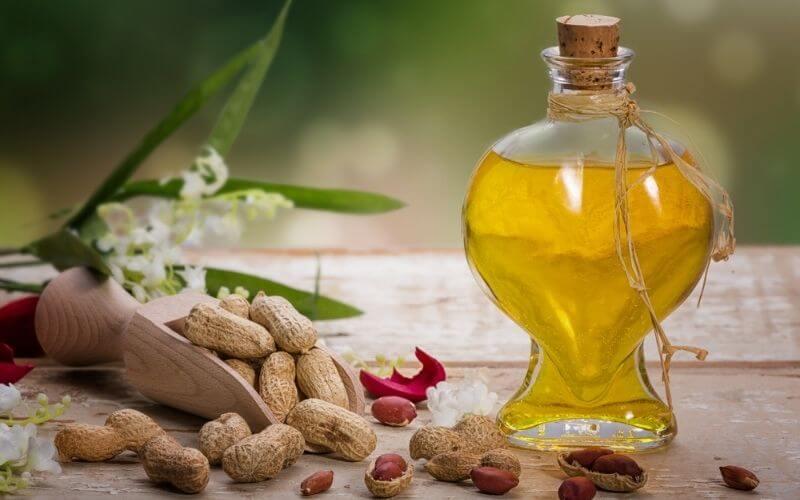
refined peanut oil
refined peanut oil

Peanut oil is also known as groundnut oil. It is a light yellow, sweet-smelling oil with a slightly nutty taste. 

It is made from pressing the seeds of the peanut plant to extract the oil. Peanut oil is very popular among Chinese and other Asian cuisines.

As mentioned before, it has a high smoke point of 225C (437F). This makes it ideal for deep frying, as the oil won’t burn. It is also commonly used for sautéing and stir-frying. Peanut oil is also special because it doesn’t retain the flavor of the food cooked in it, so it is great for reusing.

This kind of oil is rich in Vitamin A and E, as well as monounsaturated fats. It also has lots of antioxidants and ‘good’ fats that are great for your skin, hair, and nails.

There are four main variants of this oil:

Cold-Pressed Peanut Oil:

This kind of oil involves using crushing peanuts to produce the oil. The process uses very little heat, so the oil retains a lot of the signature nutty flavor. 

It also has most of its vitamins and nutrients intact. Is this peanut oil healthy? More so than many other oils.

Refined Peanut Oil:

Refined peanut oil is bleached and deodorized, a process that removes the allergenic parts of the oil. This makes it a safe option for people with peanut allergies. It is also commonly used for deep frying things like fries and fried chicken in restaurants.

Roasted or Gourmet Peanut Oil:

With a rich deep color, this kind of oil is made from roasting and isn’t refined. This gives it a more intense and complex flavor. As a result, it is used in stir-fries and confits to kind of infuse the peanutty flavor into foods.

Peanut Oil Blends:

Since peanut oil can be rather pricey on its own, some manufacturers mix it with cheaper oils like safflower or soybean. This kind of peanut oil isn’t as good as cold-pressed or roasted peanut oil as far as taste and quality go, but it is a good option for deep-frying in bulk.

10 Best Substitutes for Peanut Oil
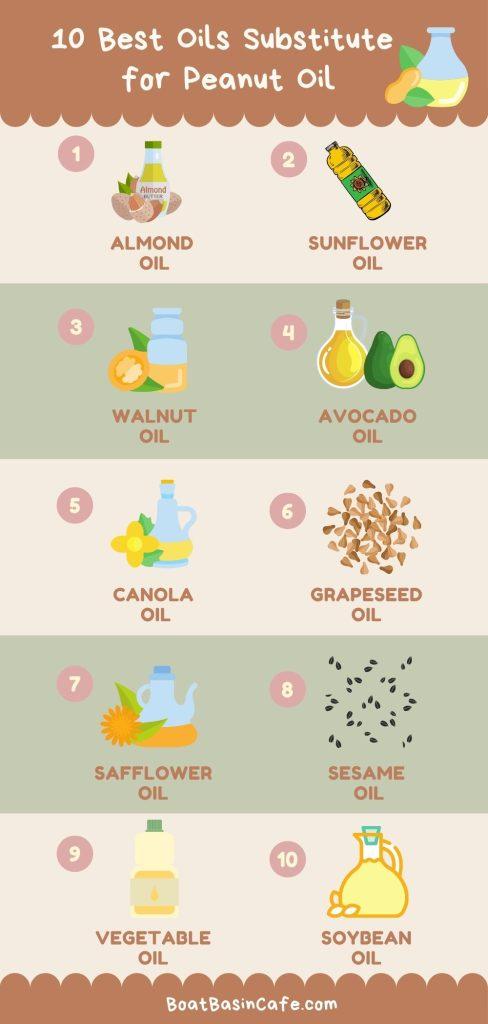
10 Best Oils You Can Use as Peanut Oil Substitutes 1

In this section, you will find the best peanut oil substitutes, what they are best used for, and the products I suggest using for ideal results. So, let’s find out which peanut oil substitute you need in your pantry!

01. Almond Oil:

[amazon box=”B0199B2BXO”]

Want something very rich in antioxidants, vitamins, and healthy fats? Almond oil is the ingredient of your choice. It is chock full of Omega-6 and Omega-9 fatty acids so it is pretty food for the heart as well.

Like peanut oil, it has a high smoke point (215C) so it is great for roasting, deep-frying, and stir-fries. Similarly, it also has a mild nutty taste, which adds excellent flavor to many dishes. Besides its use in cooking, it is also used in dressings and is drizzled over food as a finishing touch.

As well as cooking, almond oil is also used in skincare. The oil is light, which makes it a great moisturizer. It is also used as a hair oil as it softens and conditions the hair and scalp. 

When used in masks it softens and moisturizes dry skin on the face and body. It is also a carrier oil for more potent essential oils like tea tree or peppermint.

However, almond oil is pretty expensive and not accessible to anyone. It is available in both refined and cold-pressed forms.

Best for: Frying, sauteing, salad dressings, and roasting

Not Recommended for: People with nut allergies and those on a budget

Product Recommendations: La Tourangelle Almond Oil and BetterBody Foods Non-GMO Avocado Oil

02. Sunflower Oil:

[amazon box=”B07CJ1R2MZ”]

Sunflower oil is made by pressing the seeds of the sunflower plant to extract the oil. There are four kinds of sunflower oil and they are all high in linoleic or oleic acid. Also, this oil is rich in Vitamin E and Omega-6 fatty acids.

Once again, it is a good option for deep frying due to a very high smoke point (232C). It has a pretty neutral taste, which makes it good for all kinds of cooking, including baking, roasting, and sauteing.

Some research suggests that sunflower acid can reduce levels of blood cholesterol. However, studies are inconclusive and there isn’t much evidence to confirm this hypothesis. 

Also, although it has a high smoke point, sunflower oil isn’t stable at high temperatures. It may release toxic compounds when heated to high temperatures repeatedly, so reusing it for deep frying is a bad idea.

Unlike peanut or almond oil, sunflower is a neutral oil and doesn’t really have much of a flavor of its own. This makes it great for light and quick frying, as well as a substitute for melted butter in baking. 

Moreover, using it in cooking won’t alter the flavor of the food at all, so it is used in quick dressings and making mayonnaises.

Best for: Everyday cooking, baking, light frying, and sauteing

Not Recommended for: Deep frying

Product Recommendations: Safya 100% Pure Sunflower Oil and Baja Precious High Oleic Sunflower Oil

03. Walnut Oil:

[amazon box=”B0792F75T8″]

Walnut oil is a near-perfect substitute for peanut oil, in terms of flavor and taste. Made from walnuts, you can buy this oil in refined and cold-pressed varieties. Walnut oil has many health benefits and contains lots of healthy fats.

At the same time, it has Vitamin E, C, B1, B2, B3, and Niacin. It is also rich in minerals like magnesium, selenium, zinc, and phosphorus. 

These factors make it great for the body, as well as the skin and hair. As a result, cold-pressed walnut oil is used in many cosmetics and skincare products.

Because walnut oil is incredibly expensive, it isn’t wise to use it in things like deep frying or bulk cooking. Instead, it works best in salad dressings, drizzled over dips, and added to things that are already cooked or are eaten raw.

It has a rich and unique flavor, brushing over roasted fish or meat will give it a nutty and delicate flavor. Walnut oil is also great in dipping sauces and works particularly well in desserts and fruit-based dishes.

When heated to high temperatures this complex and pleasant flavor becomes quite bitter. As a result, it is best used raw or lightly warmed.

Best for: Dips, dressings, desserts, and brushed over freshly baked bread, fish, or meat

Not Recommended for: Deep frying and long cooking processes

Product Recommendations: Erbology Organic Cold-Pressed Walnut Oil and Naturevibe Botanicals Walnut Oil

04. Avocado Oil:

[amazon box=”B07WMQXDXN”]

This kind of oil is super trendy at the moment. Extracted from the pulp of the avocado fruit, it is crammed with healthy fats like oleic acid. As a result, it reduces the cholesterol levels in the blood and improves overall heart health.

Avocado oil also has lots of antioxidants, which makes it good for eyesight, hair, and skin as well. Like extra virgin olive oil, it is unrefined and has a mild taste. It has a very high smoke point, so it is good for things like roasting and frying.

Because it isn’t very flavored, it is close to a neutral oil, which means you can cook things like stir-fried noodles, vegetables, and tempura without changing any delicate tastes. Moreover, it is also good for dressings and sauces.

Avocado oil has a very rich and creamy texture, without being thick or cloying. It has an extremely high percentage of monounsaturated fats and Vitamin E. It is great for making things like mayonnaise, Hollandaise, and similar things. However, it is really pricey.

Best for: Deep and shallow frying, roasting, barbecues, dressings, sauces

Not Recommended for: Baking and flavored oils (like chili crisp or garlic oil)

Product Recommendations: BetterBody Foods Refined Non-GMO Cooking Avocado Oil and Primal Kitchen Avocado Oil

You may also like: Can You Freeze Olive Oil?

05. Canola Oil:

[amazon box=”B000QV1PR0″]

Canola oil is one of the most common oils when used in cooking. Another name for this oil is rapeseed oil. It has a neutral flavor and is rich in monounsaturated fats, making it a relatively healthy option.

It has a lower smoke point when compared to peanut oil, but is still good for frying and roasting. Canola oil is highly processed, which makes many people think it is a rather unhealthy choice. 

The light flavor makes it very good for making infused or flavored oils. It holds onto flavors remarkably well, like garlic, rosemary, and chili flakes.

You can quite easily use canola oil in baking things like carrot cakes, as well as spongy castella cakes. This oil is very similar to conventional vegetable oil, especially in terms of flavor, smoke point, and use in cooking.

Also, canola oil is relatively inexpensive and can be found in almost any grocery store. If you want a more affordable alternative to peanut oil for frying, this is a great option.

Best for: Deep frying, regular cooking, baking, and dressings

Not Recommended for: Confits and vinaigrettes

Product Recommendations: Spectrum Organic Canola Oil and Mazola Canola Oil

06. Grapeseed Oil:

[amazon box=”B00J4B0S4O”]

With a pretty high smoke, grapeseed oil is a great substitute for peanut oil in most cases. This makes it a great option for deep frying, as well as things like pan-frying and everyday cooking. The oil is extracted from grape seeds that are a byproduct of wine-making.

Grapeseed oil is low in nutrients but has a pretty high level of Omega-6 fatty acids. Cold-pressed grapeseed oil is a better option as it involves minimal processing and oxidation. Also, grapeseed oil has lots of Vitamin E, which gives it a few health benefits.

Compared to many other oils mentioned in this list, it isn’t a very healthy option. However, it is a good option for cooking because it can withstand high temperatures and a pretty neutral taste.

However, grapeseed oil is pretty expensive, so using it for deep frying is pretty wasteful.

Best for: Pan-frying, sauteing, and regular cooking

Not Recommended for: Deep frying, sauces, and salad dressings

Product Recommendations: Pompeian 100% Light Grapeseed Oil and La Tourangelle Grapeseed Oil

07. Safflower Oil:

[amazon box=”B0082B7P16″]

This is yet another perfect replacement for peanut oil. It has an extremely high smoke point of 266C. 

To make this oil, the seeds of the safflower are crushed and the oil is extracted. It has a neutral taste, which makes it ideal for several different cuisines and recipes.

There are two main varieties of safflower oil, the high oleic and high linoleic variants. The monounsaturated variant of safflower oil is great for deep frying and stir-frying at high temperatures as the oil is pretty stable and can withstand high temperatures.

It is also a good ingredient for regular cooking and even baking. For every ½ cup of solid butter or shortening, use 1/3rd cup of the oil. This is a good choice for cakes and some kinds of bread.

The polyunsaturated form of safflower is a better option in salad dressings and other raw recipes. Because the oil has no flavor of its own, it is good for light and delicate dishes as there won’t be a clash in flavors.

Best for: Deep drying, everyday cooking, baking, and salad dressings

Not Recommended for: Mashed potatoes and dipping sauces

Product Recommendations: Hollywood Safflower and Daana Organic Safflower Oil

08. Sesame Oil:

[amazon box=”B06Y2DMLQ8″]

If that dense, nutty taste is what you are after, sesame oil is a good alternative. The flavor profile is very similar to that of peanut oil, and sesame oil is very popular in East Asian cuisines.

Sesame oil comes in light and dark varieties. Light sesame oil has a high smoke point, making it good for cooking and frying. 

Dark sesame oil, made from roasted sesame seeds, has a more intense flavor and a low smoke point. It loses flavor when heated, so it is unsuitable for high-temp frying.

Instead, it is best for quick stir-fries, Asian-style salads, dipping sauces, or drizzled over dumplings and fried meats. Because the flavor can get lost in complex dishes cooked over a long time, it is best to use sesame oil in raw or lightly heated form.

Unlike many of the other oils mentioned here, sesame oil doesn’t have much to offer in terms of vitamins and minerals. However, it contains lots of fatty acids and antioxidants, as well as phytosterols.

Best for: Salads, stir-fries, dipping sauces, and raw dishes

Not Recommended for: Deep frying and desserts

Product Recommendations: Kadoya Sesame Oil and OTTOGI Premium Roasted Sesame Oil

09. Vegetable Oil:

[amazon box=”B07MK2XKKV”]

Widely used in cooking, vegetable oil is inexpensive and available pretty much everywhere. Vegetable oil is actually a blend of oils extracted from different plants or vegetables. 

Because of this, the ratio of monounsaturated, polyunsaturated, and saturated fats differs depending on the blend used by different brands.

To keep things somewhat healthy, avoid using vegetable oil with over 20mg of saturated fats per 100 grams. Either way, vegetable oil isn’t as healthy as canola or safflower. However, it is super convenient to use for pretty much all kinds of cooking, especially frying and roasting as it has a high smoke point.

This oil also has a very neutral taste, which makes it great for everyday cooking. However, vegetable oil is hard to reuse after deep frying as it retains a lot of the smells and flavor of the food you just fried.

The main disadvantage of using vegetable oil is that you have no idea what is in it. As a result, you can’t control exactly what you are consuming. There are also great alternatives to vegetable oil for cooking.

Best for: Frying, regular cooking, baking, and salad dressings

Not Recommended for: Any recipe that requires an oil with its own flavor

Product Recommendations: Amazon Happy Belly Vegetable Oil and WESSON Pure Cholesterol Free Vegetable Oil

10. Soybean Oil:

[amazon box=”B01ETVH4I6″]

If you need to deep fry large batches of chicken or things like fritters and don’t want to use peanut oil, soybean oil is your next best bet. It is heat stable and has a high smoke point (238C) so it can withstand super-hot temperatures without any change in flavor.

The oil is extracted from the seeds of the soybean plant and doesn’t have much of a strong flavor on its own. Combined with the high smoke point, these features make soybean oil extremely versatile so you can use it for all sorts of cooking.

Soybean oil has also been linked to benefits for the teeth, bones, and even the heart. However, it is also a very rich and refined oil that has lots and lots of Omega-6 fats, so it should be consumed in moderation.

It also has plenty of Omega-6 fats, which reduces inflammation and can prevent chronic diseases. Soybean oil can be easily used to replace sunflower, safflower, canola, and vegetable oil and used for cooking and baking.

Best for: Frying, regular cooking, baking, and sauteing

Not Recommended for: Salads and dipping sauces

Product Recommendations: Healthy Harvest Non-GMO Gourmet Soybean Cooking Oil and Wellsley Farms Soybean Oil
peanut oil substitute

Peanut Oil vs. Canola Oil

While canola oil is a decent stand-in for peanut oil, there are a couple of key differences between the two, besides how they are sourced and extracted. We’ll look at a few of these differences here.

Smoke Point:

Peanut oil has a pretty high smoke point of 225C (437F). On the other hand, canola oil has a slightly lower smoke point of 205C (400F). Either way, both can be safely used for deep frying and sauteing.

Fat Content:

Canola oil has a very high percentage of monounsaturated fat. It is 62% monounsaturated fat, along with 31% polyunsaturated fat, and just 7% saturated fat. This makes it comparatively healthy, as far as oils go.

However, peanut oil has a higher proportion of saturated fat. In total, it has 18% saturated fats, making it a tad bit unhealthier than canola oil. It also contains 48% monounsaturated fat and 34% polyunsaturated fat.

Flavor:

Peanut oil has a roasted, deep peanut flavor that is pronounced but not very strong or overpowering. This makes it a great choice for sauteing, stir-fries, and even deep-frying, as it adds a bit of dimension to fried goodies, without altering the taste.

Peanut oil is also good for salads, and in dipping sauces and marinades, as it adds flavor to vegetables and raw ingredients.

On the other hand, canola oil has a neutral flavor so it can be used in pretty much any kind of cooking. It works best for deep frying, braising, grilling and roasting, and everyday cooking. You can even use it for baking.

Frequently Asked Questions

Below you’ll find answers to questions home cooks tend to have about peanut oil substitutes.

01. Is Peanut Oil Healthy?

Although peanut oil has a significant amount of saturated fats, it also has lots of monounsaturated fats. It is also rich in vitamins and minerals, so it is pretty healthy when consumed in moderation.

02. Is Peanut Oil Bad for Me?

Peanut oil is unhealthy when eaten frequently, as it can result in inflammation and high cholesterol levels.

03. Can I Substitute Peanut Oil for Vegetable Oil?

Yes, peanut oil is a good alternative for vegetable oil, especially as there won’t be any noticeable change in flavor for most cooking.

04. Can I Substitute Olive Oil for Peanut Oil?

Olive oil only works as a peanut oil substitute for stir-fries, shallow or pan-frying, and regular cooking. It isn’t a good idea to use olive oil for deep frying as it has a lower smoke point.

05. Can I Substitute Peanut Oil for Butter?

If a recipe calls for melted butter, you can replace it with peanut oil.

06. How Can I Make Peanut Oil from Scratch?

  • Start with a couple of cups of fresh peanuts, with their shells and peels removed.
  • Put the peanuts in a bowl and fill with boiled warm water and soak for 15 minutes.
  • Drain water and then blend peanuts in a blender until very smooth.
  • If the paste gets too stiff, add 1-2 tbsp of warm water.
  • Pour the paste into a sterilized airtight container, cover it, and put it in the fridge.
  • Let it sit, undisturbed for one or two days to let the oil rise to the top.
  • Strain through a fine sieve a couple of times to separate the oil from the peanut paste. There should be no trace of solid peanuts in the oil. Store in a dark container and keep it in a cool and dry place.

07. Does Peanut Oil Have Taste?

Cold-pressed peanut oil has a very mild nutty flavor, while roasted peanut oil has a stronger flavor.

08. Is Peanut Oil Good for Baking?

Using a touch of peanut oil for baking will infuse your baked goods with a nutty taste. However, you shouldn’t replace softened butter with peanut oil when baking.

09. Which Peanut Oil is Best?

For deep frying, cold-pressed peanut oil is the best. But if you are looking for something to drizzle over dumplings, fritters, salads, or dipping sauces without cooking, roasted or gourmet peanut oil is a better option.

Epilogue

Peanut oil is a great cooking ingredient, especially in Asian cuisine. It has lots of vitamins and minerals, a high smoke point, and great flavor which makes it ideal for cooking. However, a lack of peanut oil shouldn’t stop you from deep frying or making fancy salad vinaigrettes.

So the next time you don’t feel like making a trip to the other side of town, just use a peanut oil substitute mentioned here. No one will know the difference!
Pour Over vs French Press: Which One’s Your Favorite?

Have you had enough of the nasty swamp water coffee from the old coffeemaker you pinched from your parent’s house?

Want to set up a home café at an affordable price? Yes, I said affordable. You don’t need a fancy espresso machine to make good coffee at home. There are plenty of other ways to make a great-tasting cup of joe.

What you do need are great coffee beans, whole milk or plant-based creamers, syrups and sweeteners, and optional toppings like sweet foam, chocolate shavings, and sauces. 

A high-quality coffee grinder is also necessary. You also need some kind of brewer that will extract the most caffeine and flavonoids from your coffee.

The last point is where most people go wrong. Because most people can’t afford an espresso machine, they stick to subpar drip coffee makers, not realizing there are lots of great inexpensive brewers.

In today’s article, I’m going to look at two of these brewing methods. I will examine pour over and French press brewers, how they work, the quality of their brew, and which method is better. Once you’re through, you will be sure to pick the right brewer for your home!

Pour Over Brewing

Pour Over Brewing
Pour Over Brewing

The idea of pour over coffee involves pouring hot water over coffee grounds and allowing it to steep. The grounds are placed in a cone-shaped component (a lot like a funnel). 

The grounds are then wet in 2 or 3 additions. There is a filter in the cone-shaped component which allows the grounds to be soaked in a circular motion, which removes constant contact with the grounds.

The result? A much smoother coffee without bitterness or overwhelming notes. The best temperature for pour over coffee falls within 195 to 205F, as anything above this temperature can over-extract the coffee, making it taste bitter.

Want to know the best way to make pour over coffee? Start with light roast coffee beans. The best coffee grind for pour over brewing is a medium-fine grind. Then follow these instructions:

  1. Heat your water to 205F. To do this, bring it to a boil in a goose-neck kettle and let it sit for 30 seconds.
  2. Then unfold a coffee filter, fold it into a 3-sided cone shape and insert it on top of your brewer.
  3. Pour a little hot water around the inside of the filter for about 5 seconds. Keep the filter in place and discard the water. This step seals the filter to the brewer and prevents your coffee from tasting like paper.
  4. Pour 5-7 tablespoons of ground coffee into the filter and gently shake the brewer once or twice to get the grounds to settle in the filter.
  5. Slowly pour just enough water over the grounds to wet them evenly, around 70 grams or just over half a cup. Let it sit for 45 seconds (use a timer for the best results). This step ‘blooms’ the coffee.

    Hot water forces the coffee to release trapped gases, which causes the grounds to expand, bubbling at the surface, and infusing the air with that lovely coffee aroma we all love.
  6. Next, keep pouring water slowly in a circular motion. Avoid pouring the water right in the center or around the edges of the filter.

    If you think the filter will overflow, stop for a few seconds and wait for the water level to subside. Pour water for 2 minutes or until you add 2.5 cups to the brewer.
  7. Let all the water drain through the filter. Remove the filter from the brewer and throw away the grounds. The total brewing time for the pour over coffee method is 3 minutes.

Amazon Product Recommendations:

Not sure where to start getting pour over coffee equipment? I’ve got you covered!

  • Bodum Pour Over Coffee Maker: This is a good option if you want to make enough coffee for just 2 people. It is sturdy, brews rich and flavorful coffee, and will look great in your kitchen!
  • CHEMEX Pour-Over Glass Coffeemaker: Want to make coffee for a crowd? Chemex never fails to please, and this brewer will concentrate on the best flavor. Best of all, it will last for ages.
  • Hario V60 Ceramic Coffee Dripper: If you end up making a single cup of coffee pour over like me, this brewer will be an indispensable tool. Besides that, it looks cute, comes in many different colors, and can be set over your coffee cup, minimizing clean-up.

The Pros:

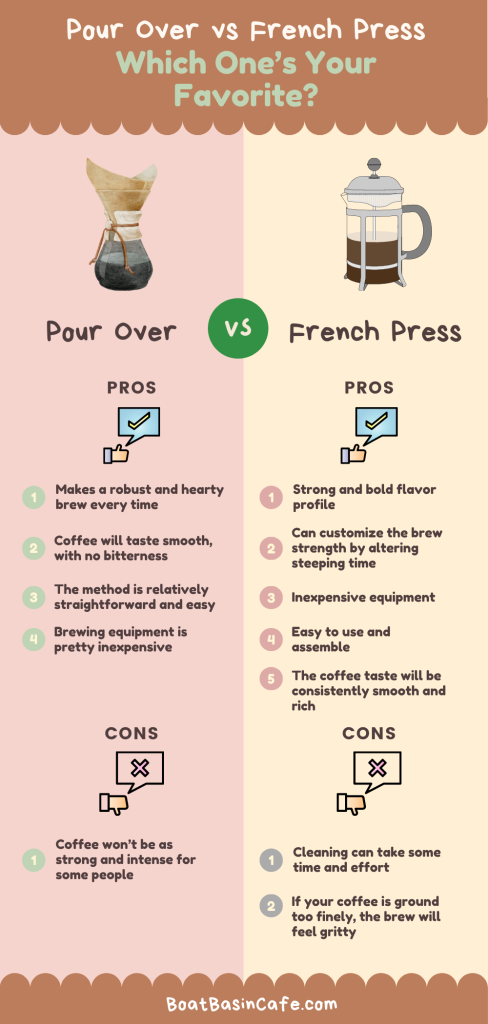
  • Makes a robust and hearty brew every time.
  • Coffee will taste smooth, with no bitterness.
  • The method is relatively straightforward and easy.
  • Brewing equipment is pretty inexpensive.

The Cons:

  • Coffee won’t be as strong and intense for some people.

French Press Brewing

Pour Over vs French Press
French Press Brewing

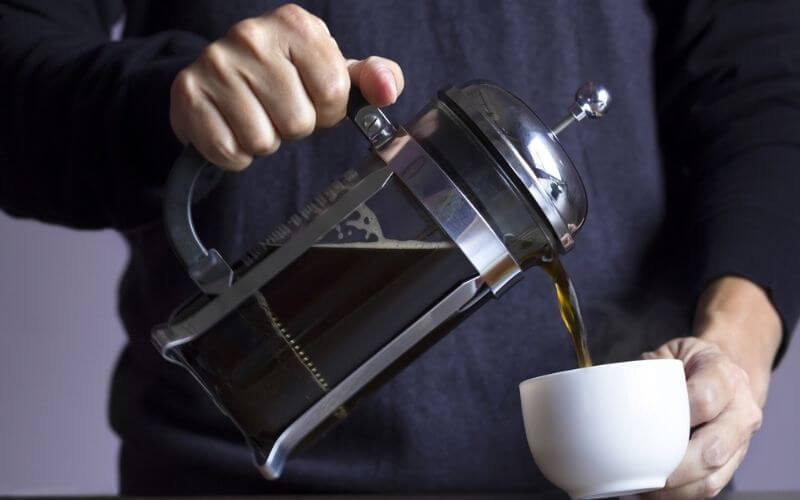
This method is a personal favorite. A French press (also known as a cafetiere/coffee press), is made of 3 parts: the open-topped carafe, a stainless-steel filter, and a plunger. It has an extremely simple brewing method; simply add your coffee grounds to the carafe and pour hot water letting it steep.

Then, push down the plunger, separating the brewed coffee from the used grounds. After that, you just need to pour the coffee into your cup and add whatever you want to it. The ideal water temp for the French press is 195F.

When brewing with a French press, use a coarsely ground medium-dark roast coffee for a cup of joe that is rich and intense. 

Why use a French press? It makes a strong cup of coffee that tastes amazing every single time. In fact, French press coffee is pretty comparable to the stuff brewed in an espresso machine!

Follow these steps to make a wonderful cup of French press coffee:

  1. Preheat your French press. Add your boiling hot water to the carafe, let it sit there for a minute, and swirl it around a little. Then discard the water.
  2. Weight or measure out your ground coffee. You will need a large tablespoon (around 8 grams) of coffee for 200ml of water.
  3. Add your coffee grounds and hot water to the carafe.
  4. Cover the carafe with the lid and set a timer for 4 minutes. The French press time to brew shouldn’t exceed this time, or else your coffee will taste bitter.
  5. Once this time has passed, slowly push the plunger down. Make sure you push it down all the way, or your coffee will be over-extracted.

    If there is a lot of resistance when you push, then the grounds are too fine. If it is pushed down too easily, then they are too coarse.
  6. Transfer the brewed coffee into another carafe or coffee pot. Then, serve individual cups and add your sweetener and dairy.

How long to French press? Some people suggest blooming the coffee first, for 30 seconds. Others say it’s alright to skip this step. Either way, try to keep the total brewing time to 4 minutes.

Amazon Product Recommendations:

This little guide will set you in the right direction when buying French presses. Whether you are new to this kind of brewing, or you’ve been doing it for ages, you can’t go wrong with these brewers!

  • Bodum Brazil French Press Coffee: This brewer can hold 34 ounces of coffee and looks sleek and elegant. But what sets it apart is that it is easy to clean and use. You can also use it for steeping tea.
  • Mueller Double Insulated French Press: It is one of the best French presses out there, and gives you a great brew at an affordable price. Best of all, the double insulation will keep your joe nice and hot as it brews.
  • KONA French Press Coffee Maker: Want a snazzy brewer to make your coffee? This attractive brewer extracts all the lovely essential oils from your coffee grounds and makes a strong and aromatic cup of coffee. Best of all, it will last for years!

The Pros:

  • Strong and bold flavor profile.
  • Can customize the brew strength by altering steeping time.
  • Inexpensive equipment.
  • Easy to use and assemble.
  • The coffee taste will be consistently smooth and rich.

The Cons:

  • Cleaning can take some time and effort.
  • If your coffee is ground too finely, the brew will feel gritty.

Pour Over vs. French Press: How are They Different?

Pour Over vs French Press: Which One’s Your Favorite? 2

Now that you know all about these two methods, let’s see how they differ.

Brew Time:

While the two have similar brew times, the total brew time for pour over coffee is 3 minutes. On the other hand, you should brew coffee in a French press for 4 minutes in total.

Brew Method:

Pour over coffee extracts coffee from the grounds through infusion, a bit like steeping tea. However, French presses use immersion to extract the coffee compounds from the ground beans.

Taste:

Because the two brewers use different methods to extract the coffee, the resulting brew will also taste different. Pour over coffee has a lighter flavor profile and is milder in terms of strength. In contrast, French presses produce a stronger brew, with a robust and full-bodied profile.

Kind of Coffee Used:

The two brewing methods also work best with different kinds of coffee. Pour over coffee makes the best cup of joe with a light roast coffee that is ground to a medium-fine consistency.

French presses work best with a darker roast, ground to a coarse texture. This is because a fine coffee grind can escape the filter and leave a gritty taste in your beverage.

While the 2 methods are different, in the end, it is a matter of personal preference and lifestyle. If you don’t mind a slow and leisurely brewing method that you have to keep an eye on, you will prefer the pour over method.

On the other hand, if you don’t want to babysit your brewer, using a French press is a better option. As long as you don’t mind a bit of extra cleanup!

Where to Buy Pour Over Brewer and French Presses

[amazon box=”B01LQ2PZDW,B000KEM4TQ”]

The good news is that the tools to make pour over coffee and French presses can be found anywhere. The most common place to start looking is with online retailers like Amazon. You can also find them in chain stores like Target, Home Depot, Walmart, and others like it.

If you look around, you will also find coffee shops that sell brewing equipment. Even places like thrift shops often have high-quality brewing equipment at a very affordable price.

Got More Questions?

Below you will find answers to questions people often have about pour over and French press coffee.

01. Does Pour Over Coffee Better Taste Than French Press Coffee?

Pour over coffee is smoother and lighter than French press coffee, so people who like a milder brew will prefer it to coffee brewed by a French press.

02. Why is French Press Coffee Bad for Me?

French press coffee is seen as unhealthy as it doesn’t filter out cafestol which is a kind of ‘bad’ cholesterol. However, you can use paper filters to get around this issue or limit the amount of coffee you consume.

03. Is Pour Over Coffee Really Better?

If you like your coffee black, you will prefer pour over coffee as it has a smooth and clean taste. This method of brewing also allows the more delicate notes of the coffee to shine through.

04. Does French Press Coffee Have More Caffeine?

French press coffee is among the strongest caffeinated drinks out there, with 107.5mg of caffeine per 8 ounces. This makes it even more caffeine-dense than espresso.

05. What Is So Special about French Press Coffee?

Most French presses use stainless steel filters, which preserve many of the flavors and notes. Paper filters also trap a lot of the essential oils which give coffee its flavor. French press brewing also allows these oils to filter into the brew.

06. Is French Press Coffee Smoother?

Thanks to the immersion process, the coffee extracted from a French press will be richer, stronger, and smoother.

07. Should I Stir French Press Coffee?

After adding the hot water to the coffee grounds in the French press, you need to stir the mixture to make sure all the grounds are soaked and there are no clumps.

08. How Does a French Press Work?

A French press works by brewing the coffee in the carafe and using the plunger to separate the brewed coffee from the used grounds.

09. What Is the Best Pour Over Coffee Water Temp?

The best temperature for brewing pour over coffee falls within the 195 to 205F range.

At the End of the Day

Coffee is a pretty subjective topic as two people can have wildly differing tastes when it comes to their cup of joe. This article tries to give you a balanced view of two brewing methods, how they work, and the kind of coffee you can get from them.

Which side of the pour over vs. French press debate you end up in depends on many factors; most notably how you like your coffee, and how much effort you want to put in the brewing process. 

With all that being said, are you planning on buying a French press or a pour over brewer?

How to Test Auger Motor in Pellet Stove: Fixing Your Grill’s Auger Motor Made Easy

If you’ve never used a pellet stove before, getting used to it can take some time. After all, most of us are more used to gas grills. If there’s a pellet stove auger not working, you may need to check the motor to make sure it is in good shape. 

Sounds freaky? Trust us, it’s actually pretty straightforward!

This article will show you how to discover pellet stove auger motor problems by bench testing it. But before that, we will also go into how auger motors work, and the signs that they may be malfunctioning.

If you want to learn more about troubleshooting your pellet grill’s auger motor, keep reading to find out!

What are Auger Motors and How Do They Work?

pellet stove auger not working

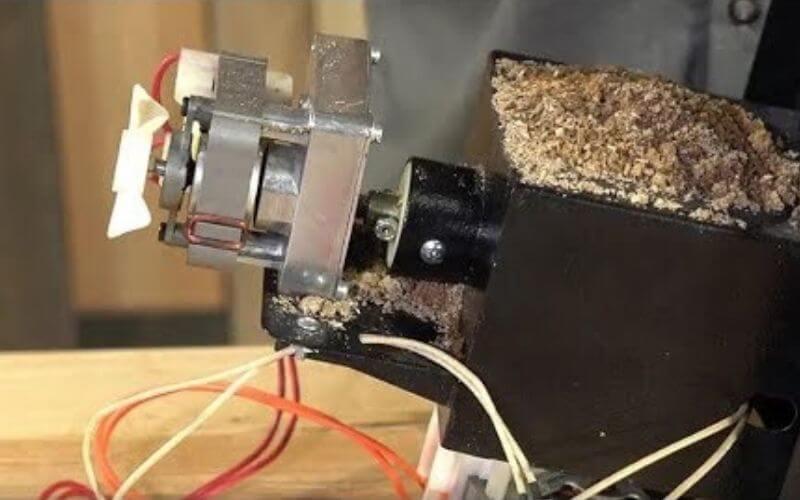
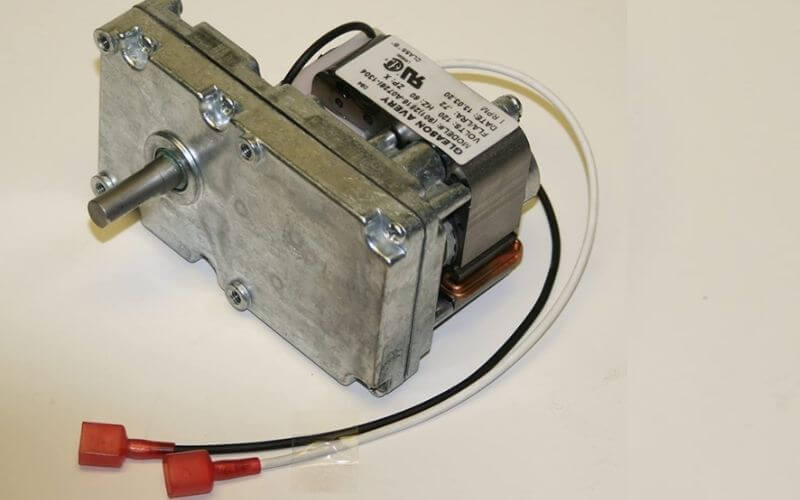
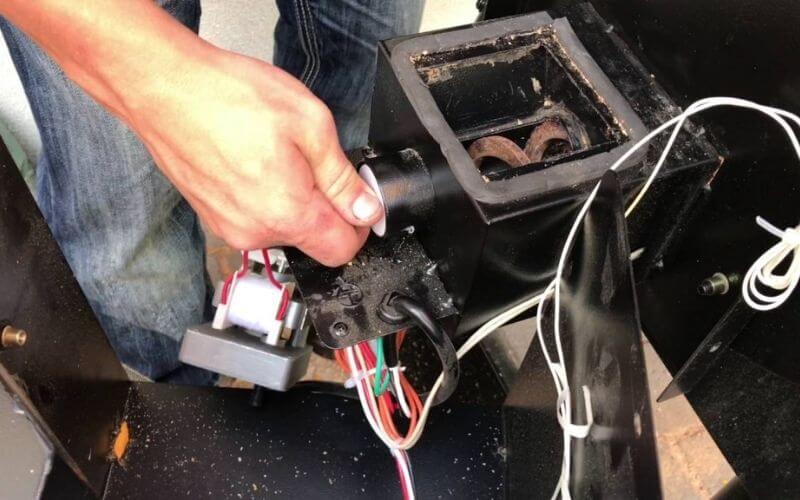
The term auger motor describes a device that consists of an electric motor and a reduction gearbox. These components turn an auger shaft at a set speed to deliver fuel (aka the wood pellets) from the hopper to the firepot in a pellet grill or stove.

After analyzing the data delivered from various switches and sensors in the stove, the control board completes the electrical circuit to the auger motor. 

There are different types of auger motors used in the pellet grill. However, the two most popular auger motors in North America are the shaded pole and the synchronous varieties.

Shaded Pole Auger:

This kind of motor uses a standard C-frame electric motor, turning at a high speed, to rotate a set of gears that turn the auger at a constant, slower rate with a much higher force.

The torque of this auger motor can be tested with a pair of channel lock pliers to try and prevent the turning of the motor shaft. If you can stop the motor shaft from turning without much effort, the motor is weak and needs replacing. These kinds of auger motors generally have a torque output of between 16 to 20 feet/pound.

Synchronous Auger Motor:

A synchronous motor rotates at a rate directly proportional to the frequency of the AC input. They are much more efficient and quieter than standard C-frame motors. These motors are usually mounted on a smaller gearbox and put out between 5 and 10 feet/pound.

Signs That Your Pellet Grill Auger is Malfunctioning

If you have an auger on the pellet stove not working, you might notice some symptoms on your grill. There may be a few hiccups when you are grilling or cooking on it. Here’s what you need to look out for:

  • Low pressure on your auger, so that the pellets feed more slowly into the firepot.
  • Wildly stove fluctuating temperatures.
  • The auger stops feeding the firepot altogether.
  • The auger stops turning and seems stuck.
  • The auger motor gets really hot pretty quickly.
  • The Pellet stove auger stops feeding halfway during the grilling process.

How to Test an Auger Motor in a Pellet Grill

how to test auger motor in pellet stove
pellet stove auger motor problems

This part of the article will show you how to test the auger motor in your pellet stove. Whether you have a Traeger or any other kind of grill, this bench test will work for any kind of pellet stove. 

Whether you have a QuadraFire pellet stove auger not turning, or you’ve planned an American Harvest pellet stove troubleshooting session, this is a foolproof method!

What You Need:

  • Your pellet stoves auger motor
  • An adapter
  • A test wire
  • Power Source
  • Channel-lock pliers

Instructions:

  1. Start by making sure your grill or stove is completely cool. Unplug the wire and disassemble the grill/stove.
  2. Remove the auger motor from the appliance.
  3. Connect your auger motor to the test wire, using the adapter if needed. (Find out how to make a test wire here!)
  4. Make sure the surge protector is switched off. Connect the test wire to the surge protector.
  5. Turn the surge protector on. The motor should begin to rotate immediately.
  6. Next, use a pair of channel lock pliers to try and stop the output shaft from turning. If your motor is working as it should, you won’t be able to stop it, because it has enough torque to keep it turning.
  7. After you switch off the surge protector, you shouldn’t be able to turn the output shaft by hand, or with a pair of pliers. If you find that you can rotate it by hand, the motor has gone bad and needs to be replaced.

This video will help you understand how to test your auger motor more clearly.

How Else Your Auger Motor Might be Creating Trouble

A faulty auger motor doesn’t mean you have to throw out your motor or control board. Sometimes a faulty auger motor can point to trouble in the other components of your grill. This can include:

A Faulty Vacuum Switch:

Vacuum switches are generally in line with the power to the auger motor. The vacuum switch senses back pressure within the stove. 

As a result, if the chimney hasn’t been cleaned in a while, it fills up with debris and ash. This means that the airway will be blocked.

This will trigger the vacuum switch to turn on, shutting off the auger motor. In this case, cleaning out the chimney and ‘resetting’ the vacuum switch will get the auger motor of your pellet stove to start running again as usual.

A Broken Pressure Switch:

If the chimney is clear, but your motor still isn’t working, the vacuum switch may have broken due to lots of pressure, resulting from heavy usage. 

In this case, you can pull the wires off the vacuum switch, and connect them together again. This can be done with a paperclip, safety pin, or any other metal that connects the wires so they can conduct electricity.

After that, put the switch back, reassemble your stove and see if the auger is working as it should.

Malfunctioning Plugs or Sockets:

Sometimes the wiring of your stove can be shot. In some cases, your power socket may be faulty, so that the auger motor isn’t receiving any current. 

To find out if this is the problem, follow the steps mentioned above to bench test your auger motor by connecting the motor directly to your power source.

If your motor rotates when hooked up to the power, then your plug or grill cords are faulty. If it still doesn’t work, try another outlet or power source. 

If it works when hooked up to a different outlet, then your motor is fine. However, if not, then you need to get a new motor.

Frequently Asked Questions

Below you will find answers to questions people tend to have about testing the auger motor in pellet motors.

01. Why is My Traeger Auger Not Turning?

An auger motor can stop turning for a number of reasons. The auger can be blocked by debris or even external objects falling into the motor by mistake. 

The motor can also fail due to age or even overheating. Sometimes the auger will not work because the vacuum switch is broken.

02. Why Does My Pellet Stove Auger Keep Jamming?

An auger can be jammed because the vacuum switch is triggered to open due to excessive pressure, blocked airways, or any other reason. Sometimes the auger can be blocked by knives or utensils falling in by accident.

03. Why Has My Auger Stopped Feeding Pellets into the Stove?

Besides a faulty motor, the auger may have stopped feeding wood pellets because the hopper door is open or jammed for any reason. It may also be that the hopper doesn’t have enough pellets. If these aren’t the reasons, check the auger motor, chimney, and vacuum switch to make sure they are working properly.

04. How Can I Manually Light a Pellet Stove?

While this isn’t recommended, you can light your pellet stove by yourself. After filling the hopper with pellets, open the fire pot and add an accelerant to the pellets in it. Light the pellets with a long-reach butane lighter.

Then wait for the fire to reach the other pellets and start burning before adding more fuel to your stove or grill. The fire is hot enough once the pellets turn red and start glowing.

05. Can I Reset My Pellet Stove?

If your pellet stove has a reset button, you can use that to restart the stove and see if the auger motor functions normally. If not, you can reset the stove by letting it burn out all the pellets in the hopper. Once all the pellets are burned through, the stove will go out and you can add more and restart it.

To Finish Off

It can be annoying and nerve-racking when your pellet stove or grill starts malfunctioning out of the blue. There’s nothing worse than planning a lovely cookout, only to have your auger motor act all weird at the last possible minute. 

Instead of freaking out and asking your guests ‘How do you test an auger motor?’, follow this guide instead!

Knowing how to test an auger motor in a pellet stove or grills will help you keep a cool head and methodically figure out what is wrong with it. This in turn will make it easier for you to find a solution and get your stove working as usual in no time at all!

How to Start a Traeger Grill: A Complete Beginner’s Guide

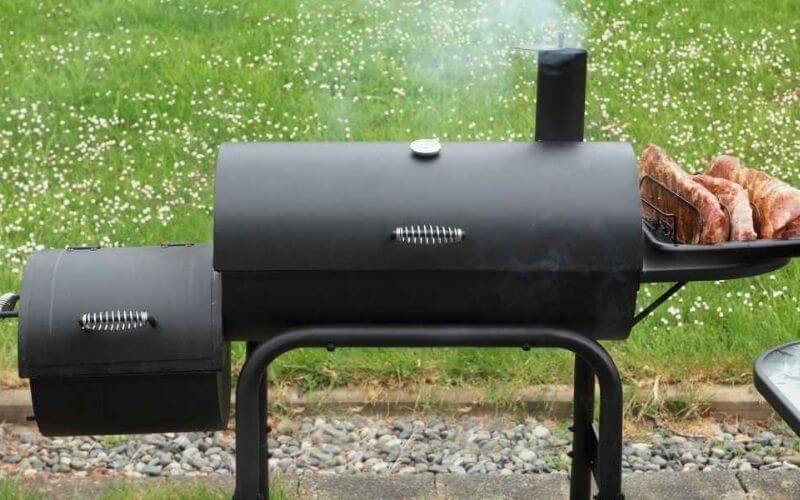
Bought a brand new Traeger grill, but don’t know how to fire it up? If you are new to grilling or are more used to gas or charcoal or traditional wood burning grills, switching to a Traeger can be a little nerve-wracking. But while you might find starting a Traeger pellet grill difficult, these appliances are among the best out there.

Besides using a Traeger grill for preparing burger patties, cooking juicy ribs, and grilling steaks, you can also use them to smoke sausages, cheese, and even herbs and spices. But before getting that far, you need to know the 101 on Traeger startup and assembly.

In case you’ve never used this kind of grill before, let this article be your Traeger grill manual. We will show you how to start a Traeger pellet grill, use it the right way, and take care of it for the long haul. Since there’s a lot of ground to cover, let’s get started!

You may also like: What is Medium Heat on a Grill: Cracking the Temperature Code of Your BBQ

What is a Traeger Grill?

how to start a traeger grill
Traeger Grill

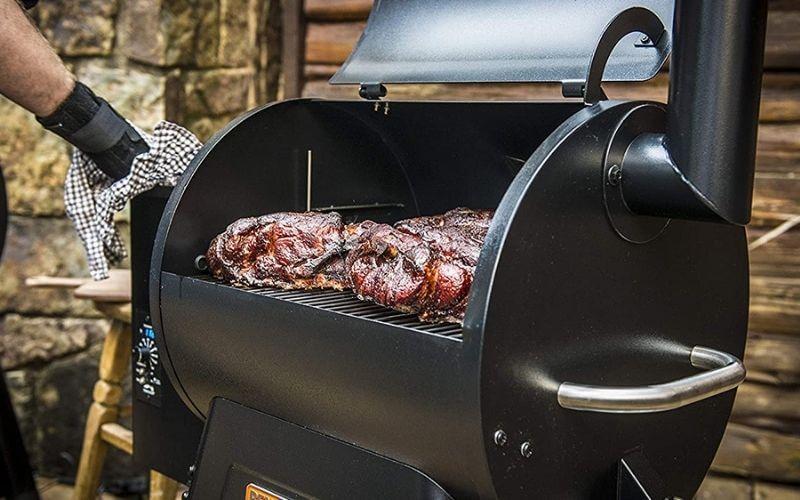
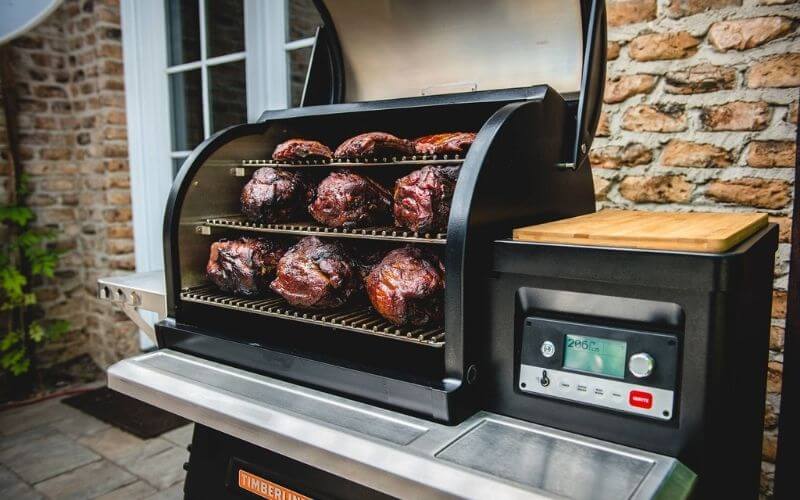
Let’s start with the introductions. The Traeger is a wood pellet grill. 

To use it, pellets are drawn from a side-mounted hopper to a central burn chamber using an auger, then lit by a hot metal rod. This mechanism runs on electricity, so you need to plug it in before use.

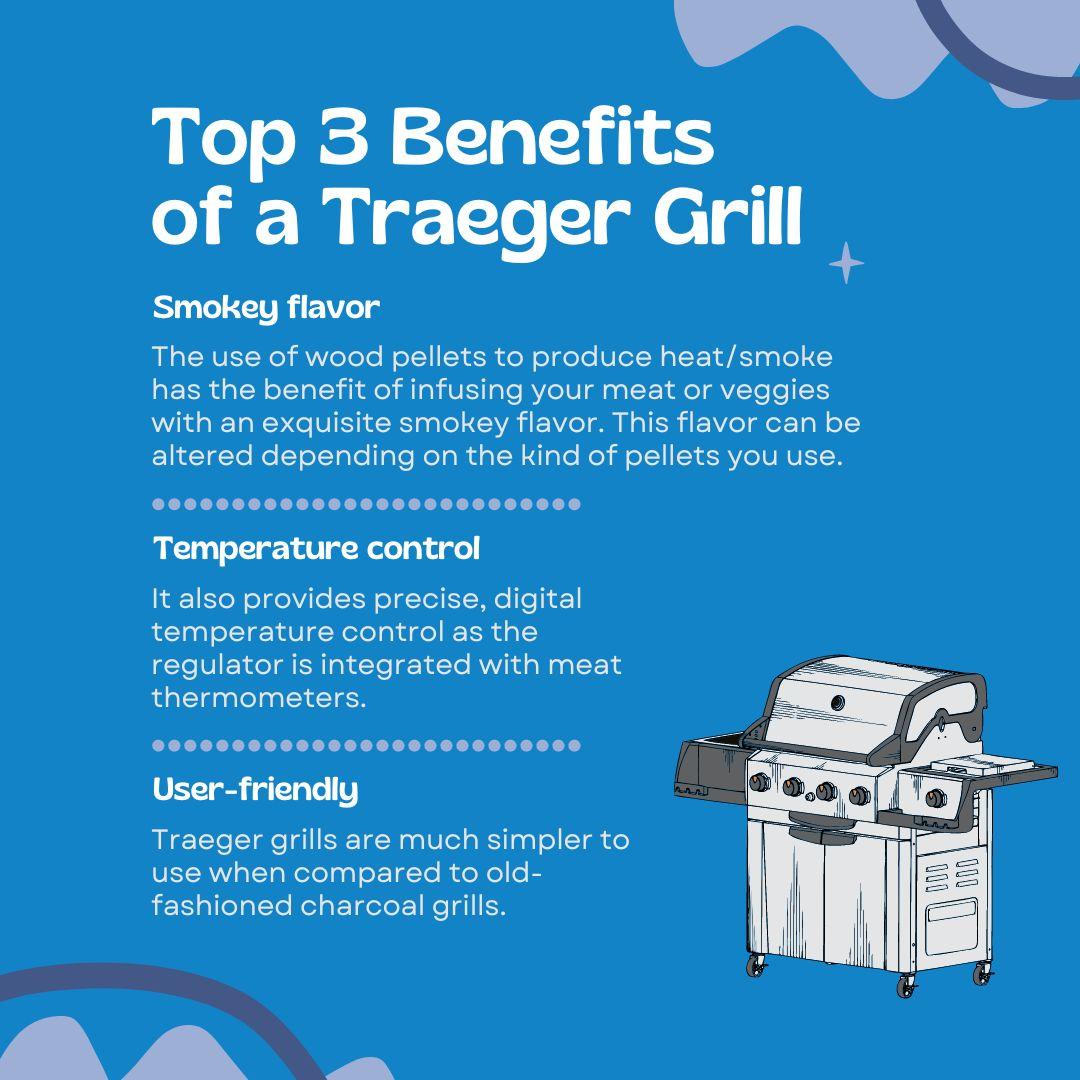
Top 3 Benefits of a Traeger Grill

There are several benefits of using a Traeger pellet grill. 

Top 3 Benefits of a Traeger Grill
  1. Smokey flavor

The use of wood pellets to produce heat/smoke has the benefit of infusing your meat or veggies with an exquisite smokey flavor. This flavor can be altered depending on the kind of pellets you use (check out any Traeger pellets guide!).

  1. Temperature control

It also provides precise, digital temperature control as the regulator is integrated with meat thermometers. This means that you can set the desired temperature easily by choosing a setting on the dial. At the same time, Traeger pellet grill assembly instructions are easy to follow.

  1. User-friendly

Traeger grills are much simpler to use when compared to old-fashioned charcoal grills. You can control the desired cooking temperature and smoke plus, the different flavored Traeger wood pellets are easy to use to lend different smokey flavors to your food. 

These benefits make a Traeger pellet grill a great choice for grill novices!

How to Start a Traeger Grill

starting traeger
starting traeger

There are two main ways to start a Traeger wood pellet grill, depending on the model you are using. A Traeger not igniting can be fixed by following these steps.

For Closed-Lid Models:

This may be the simplest way to set up your grill. Check your grill model number to see if this model applies to your Traeger pellet grill.

  1. When you are ready to grill or smoke, just set your Traeger pellet grill to the desired temperature, using the knob on the control panel.
  2. Preheat the wood pellet grill for 15 minutes with the lid closed to bring it up to temperature.
  3. Then open your grill lid and add food, as the unit is ready for use!

For Open-Lid Models:

  1. To start, assemble the grill according to the make and grill model, as instructed by the manufacturer in the manual. If you are igniting your grill for the first time, take out the grill grates, grease drain pan, and heat baffle. This will make any Traeger grill troubleshooting and other start-up issues easy to deal with.
  1. Start by plugging your grill into an electrical socket or outlet. This is because the internal fan, thermostat, and igniter are all powered by electricity.
  2. Add the wood pellets to your grill’s hopper. This is the large metal box attached to the main body of the grill. If your Traeger ran out of pellets while cooking, you can add more from the hopper.
  3. Then, preheat your grill. To do this, open the grill’s lid and switch it on. This can be done by toggling the power switch found on your unit’s control panel to the On setting.
  4. Then, look for the Traeger smoke setting. There is a small temperature dial on the grill’s control panel. For instance, the Traeger Pro 780 smoke setting.
    Turn the knob on the dial to the Smoke setting. If your grill doesn’t have this option, set the Traeger smoke setting temp to between 160°F (71°C) and 200°F (93°C).
  5. Let the grill come up to temperature by letting it sit for around 5 minutes.
  6. Once the grill starts making a lot of noise, it is a sign that it has reached the target temperature. At this point, shut the lid until you are ready to start adding food to preserve heat and smoke.
  7. You can also increase the temperature at this stage, before adding meat if you want to sear your food.
  8. Don’t forget to hang a grease bucket by the side of the grill to collect all the grease from grilling or smoking. 
  9. If your Traeger won’t turn on, check the auger, fan, or hotrod for malfunctioning. If any debris or dust is clogging up these components, your grill won’t be able to start properly.

Using a Traeger Pellet Smoker:

These steps will help you make sure that smoking on your Traeger grill is a success every time.

  1. Start by plugging in your Traeger and selecting the smoke setting. Or set the temperature dial to 190°F (90°C).
  2. Make sure the auger is spinning. The auger feeds the pellets from the pellet hopper into the burner.
  3. Ensure that air is blowing out of the burner and that it is heated through.
  4. You should be able to feel the air blowing out of the pellet smoker with your hand. The fire pot will smoke a little, and then begin to glow red as it heats up.
  5. Replace the baffle, grease pan, and grill trays into the smoker, and then pour the pellets into the pellet hopper.
  6. Shut the lid, and then set the smoker temperature to high.
  7.  Allow it to smoke on high, with the lid closed, for 45 minutes if using it for the first time to season the smoker.
  8. If you have a Traeger not smoking, the temperature might be too high, or the pellets not hard enough.
  9. Then add your meat to the grill body, lowering the temperature to your desired heat. For the best results, follow the Traeger meat temperature probe instructions as this will give you even better temperature control.
  10. Check if the grease bucket is there to catch the grease from all the cooking. 

If you want to smoke food perfectly, use a pellet smoker tube to convert your grill into a Traeger electric smoker to better infuse the smoke into the meat or cheese.

Just cram it full of pellets, light one end with a blowtorch or lighter, and set it on the grate in your Traeger. It will then burn for around 4 hours. Yup, smoking with a Traeger is really that easy.

How to Turn Off a Traeger Grill

After you’re smoking or grilling your food on the Traeger grill, follow the steps below to turn it off properly. 

1. Turn the dial to the Shut Down Cycle setting on the grill. This step helps to stop the auger and speed up the fan and increase the hot rod temperature so that the leftover pellets are burned up. 

This is important so that the pellets don’t continue to smolder. Moreover, once you’ve used these wood pellets, they can’t be reused. So, it’s better to burn them up. 

The Shut Down Cycle setting on the Traeger grill makes sure that the next time you’re about to use it, you don’t come across a fire pot full of unusable pellets. 

2. Keep the power switch on otherwise, it won’t work. 

3. After about ten minutes, the fan will turn off automatically. Now, unplug the Traeger pellet grill after moving the dial to Off. 

4. Wait until the grill grates have cooled down completely. Then, empty the wood pellet auger and the hopper. Put these pellets away in a resealable bag or bucket. 

Pro Tip: Don’t be tempted to leave the pellets in the hopper as they will absorb moisture and won’t be ignitable. Plus, they could lead to mold formation in the hopper, adding an unnecessary chore for you. 

How to Clean a Traeger Pellet Grill

Keeping your Traeger clean is the best way to make sure it keeps working properly for a very long time. It also prevents your food from tasting odd and also stops unexpected charring and even fires.

  1. Start with a cold or slightly warm grill. Take the grates apart and separate the other internal components.
  2. Use a strong degreasing grill cleaner to get rid of remnants of food, debris, and grease from the cooking grates. Don’t use a wire brush as this can scratch the enamel.
  3. Once the grill is cold, remove the drip tray, porcelain grates, and heat baffle. After 3-5 grilling sessions, use a vacuum attachment to remove excess ash from the firepot, and then replace the drip pan and other parts.
  4. Take out the grease pan and use something like a spatula or wooden spoon to scrape the congealed grease from the bucket. Clean the drip pan the same way. Then, clean the remaining oil with paper towels.
  5. Every couple of months, clean the smokestack and get rid of any debris stuck there.
  6. Do not use liquid cleaners on the inside of your grill. Either use a vacuum attachment to get rid of charred bits and ash, or use a cloth to wipe down the inside.
  7. Spray a mild degreaser on the outside of the grill and allow it to soak through, before wiping it away with a cloth.
  8. Reassemble the grill as specified by the manufacturer.

Maintenance Tips for Your Traeger

How to Start a Traeger Grill: A Complete Beginner's Guide 3
Maintenance Tips for Your Traeger

Besides cleaning your grill after each use, and spring cleaning it every grilling season, you also need to focus on maintaining it. This will prevent serious issues from taking over your Traeger and even slow down rusting, corrosion, and exposure.

  1. Invest in a grill cover, and use it to cover the Traeger whenever it isn’t in use.
  2. Keep your grill grates clean by removing grease and debris after each use. Once in a while, fire up the grill and keep it going on high for 10 to 15 minutes, burning out any bits of food and debris. Once it has cooled down again, vacuum the ash out from the grill.
  3. Store your grill in a cool and dry place during the winter. Make sure it isn’t kept in humid or damp conditions.
  4. Use a grill mat to minimize mess and simplify cleanup.
  5. Periodically get rid of old aluminum foil lining the drip trays and other components.
  6. To keep your grill grates looking new and shiny, wipe down the exterior of your grill after each cooking session.
  7. Make sure the wiring isn’t frayed and that the plug has all the screws attached. Replace worn-out wiring as soon as possible.
  8. Avoid using bleach, steel wool, wire brushes, and other harsh and abrasive materials when cleaning your Traeger.

Frequently Asked Questions

Below you’ll find answers to questions we get asked the most about starting and using a Traeger grill properly.

01. How Does a Traeger Grill Work?

Traeger units are pellet grills, which means they work by burning wood pellets that are lit by a HotRod. The wood pellets are placed in the hopper and are then moved to the fire pot by an auger. The entire unit needs to be connected to an electrical outlet for it to work.

02. Why Doesn’t My Traeger Turn On? 

If your Traeger doesn’t start, it may be due to a blown fuse, a faulty plug or socket, or even because the firepot doesn’t have enough wood pellets. Follow the troubleshooting methods in the instruction manual to identify why your grill won’t light up.

03. How Long Does It Take to Warm Up a Traeger Grill?

After turning on the grill and setting it to the desired temperature, it should take your grill 10-15 minutes to get it to warm up completely.

04. How Does a Traeger Ignite?

When the Traeger is switched on, a HotRod ignites the wood pellets, causing them to smolder and produce heat and smoke.

05. How Do I Get My Traeger To Produce More Smoke?

Using lots of dry wood pellets and grilling at a slightly lower temperature is the best way to build up more smoke in your Traeger pellet grills.

06. Is There a Fuse on a Traeger Grill?

Like most electrical devices, Traeger grills have a fuse added for safety. This fuse can be found on the back of the grill’s controller board.

07. Can I Use My Traeger Grill in the Rain?

Yes, contrary to popular belief, you can use this grill in the rain. Just make sure your pellets don’t get dampened in the rain and that your food doesn’t end up soaked.

08. Do I Have to Season Traeger Pellet Grills?

Before using your grill for the first time, you need to season your grill. This involves burning off the empty grill at high temperatures to get rid of any chemicals, cleaners, debris, and other residues on the inside of the grill.

09. Can I Leave My Traeger Outside in the Winter? 

While you can use your Traeger in winter, you shouldn’t leave it outside, as moisture can get into the pellet hopper and this can cause your grill to malfunction.

Conclusion

A Traeger is a unique sort of grill, as it combines the efficiency of an electric grill with the flavor and smokiness of an old-fashioned charcoal grill. Whether you use hickory, maple, or applewood, you can be sure that your food will have a fantastic smoked-out flavor with Traeger brand pellets.

The first step to getting all this done is knowing how to start a Traeger grill. Once you get that out of the way, you can take your grilling to the next level with this amazing unit!

Pin Later

How to Start a Traeger Grill Like a Pro
How to Start a Traeger Grill

How to Clean Rusty Grill Grates: Keeping It Clean and Rust-Free

Has this ever happened to you?

It’s the beginning of summer and you want to bust out the gas grill for an idyllic BBQ. But on closer inspection, you notice that your grill grates are covered in rust. Turns out, you didn’t store them properly throughout winter.

You might think that the only solution is to trash them and buy new grates. After all, rusty surfaces aren’t appealing to cook on, and rust can cause serious problems if accidentally consumed.

But the good news is that you can transform your rusty grill grates into sparkling clean, brand-new looking ones with just a bit of patience and legwork. The best part? Most of the things you need can be found in your pantry, and cost pennies!

If you want to learn how to clean rusty grill grates, this article has all the details you need to know. So let’s get you started on the path to clean and rust-free grill grates.

How to Remove Rust from Grill Grates

how to clean rusty grill grates
remove rust from grill grates

To remove rust from grill grates and other parts of your grill, you need something that cuts through the rust and breaks it down. While you can choose professional rust busters for your grill, using more natural products is seen as safer, as they lack overly strong chemicals.

Removing Rust with Salt and Vinegar:

You may have seen people clean old jewelry by soaking them overnight in acidic solutions like white vinegar and Coke. The idea to remove rust with vinegar is simple as the acid in vinegar dissolves the rust. Salt speeds up the process and helps break down rust.

Combine two cups of vinegar with one cup of salt in a bowl. Put your rusty grill grates in a big heavy-duty garbage bag. Pour the vinegar-salt mixture into the bag and tie it shut. 

Lay the bag flat and let the grill soak in the mix overnight. Then, wipe the rust off with a cloth. The salt acts as a mild abrasive that scrapes off the rust.

Removing Rust with Baking Soda and Vinegar:

Like salt, baking soda can also be used as an abrasive. Add enough vinegar to the baking soda to form a sort of loose paste. 

Then, apply the paste to the areas covered in rust. Let the baking soda and vinegar do their thing for 30-40 minutes. After that, rinse off the paste with warm water and wipe down the grates with a dry cloth.

Removing Rust with Lemon Juice:

Mixing lemon juice with detergent powder is also a good way to clean rust from your grill. Combine the two until a kind of soapy paste is formed and apply it to the grill grates. Leave the grate overnight and then rinse to remove the paste.

Removing Rust with the Wire Brush Method:

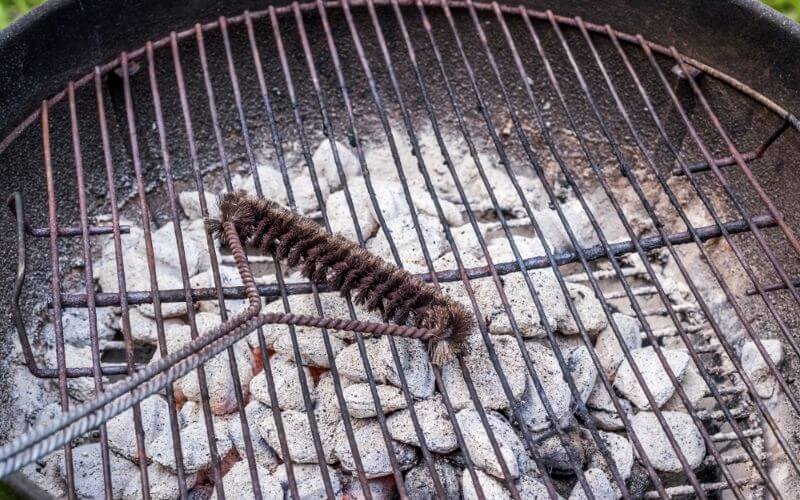
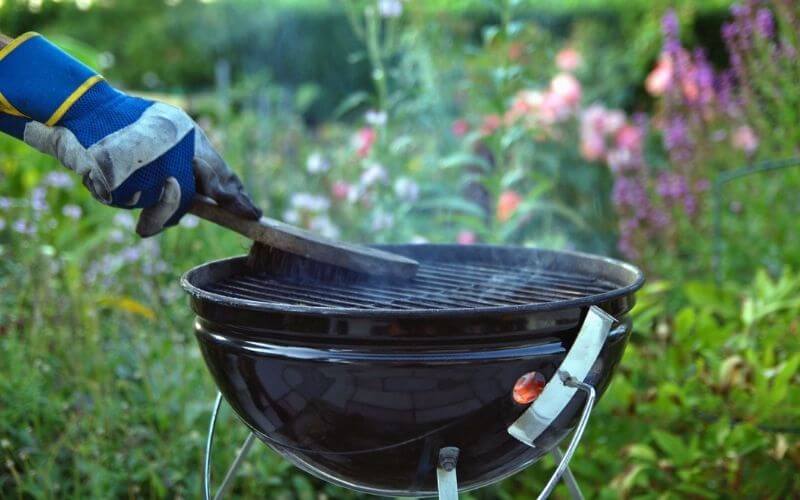
If you don’t mind a little elbow grease, using a wire brush is a good way to get rid of rust on your grill grate. Take the grate off your barbecue and set it flat on the ground on a concrete patio or driveway.

Use a stiff wire brush to brush the rust off. Start with one side of the grill grate and then turn it over and brush the rust away from the other side. 

Prop the grate on its side and then brush between each of the metal rungs. When you’re done, wipe the extra residual rust off the grill with a rag.

Removing Rust with Store-Bought Rust Removers:

If you want something that works quickly and effectively, go for a commercial rust remover. These usually work well but contain toxic chemicals that need to be rinsed thoroughly afterward.

It is important to choose a commercial rust remover that is meant for cleaning grill grates. A safe rust remover can be used on cooking tools without damaging surfaces and won’t contain harsh acids or solvents.

Removing Rust with Vegetable Oil:

This is a good way to remove tiny bits of rust that can be removed quickly. Brushing on some oil to these areas and letting it rest will get rid of the rust. This can be combined with a wire brush to spot treat rust.

Removing Rust with Sandpaper:

Sounds pretty shocking, right? While unconventional, the method definitely works. Wrap a sheet of sandpaper around the rung of the rusty grill grate, rub the sandpaper along the length of the grate. 

While this will remove the rust effectively, it can also scratch the surface of the grate, so keep track of how much you are sanding off.

Removing Rust from Grill Grates Quickly

Removing Rust from Grill Grates

The important thing about removing rust, regardless of the method used, is to give the grates time. The cleaning material needs to reach all parts of the grates, and get to work dissolving the rust.

However, if you don’t have time, you can apply the vinegar/salt or vinegar/baking soda (or any other solution) to the grates and place it back in the grill. The turn on your grill. The mixture will start bubbling. This bubbling will dissolve the rust much more quickly.

It also gives your grates a more thorough cleaning. If you don’t want to wait 12 hours to let the rust break down, this is a good alternative. However, make sure you are wearing heat-resistant gloves when handling the hot grate.

Maintenance Tips for Your Grill Grates

Preventing rust from taking over your grill grates is much easier than getting rid of rust once it has set in. These tips will keep your grates working well and keep them in good shape for years to come.

  • When not in use, protect your grill and grates with a grill cover to prevent moisture from seeping in and starting the process of rusting.
  • Use a good grill cleaner to lean your cooking grates after each use. Moisture from food left on a grill can speed up the formation of rust.
  • Try to use porcelain-coated grill grates, as they are less likely to get rusty.
  • After cleaning and drying your grill grates, brush a tiny bit of oil on the grates. This forms a barrier between the surface and the moisture in the environment around it, preventing it from rusting.
  • Before putting away your grill for the winter, inspect it carefully and clean it. This will allow you to treat any rust starting out, instead of allowing it to fester and grow throughout the winter months.
  • In winter, periodically take out your grates and other grill parts and then check them for rust. This will also allow you to treat minor spots of rust quickly, instead of dealing with a grate that is mostly covered with rust and needs a whole day to clean.

Frequently Asked Questions

Have more questions about eliminating rust from your grill grates? You might find the answer here.

01. Can I Pressure Wash My Grill Grates?  

Gas or electric power washers can be used to pressure wash grills and get rid of caked-on grime and debris. It can even clean smaller spots of rust from grill grates.

02. Can I Use Steel Wool on My Grill Grates?

While you can use steel wool to clean grill grates, this can be too abrasive and should be used as a final measure. If power washing, overnight soaking, and high temperatures don’t clean your grill grates properly, you can use steel wool to scrub off dirt and rust.

03. What is the Easiest Way to Remove Rust from Grates?

Soaking your grill grates in a tub or container of undiluted white vinegar may be the easiest and most hands-off approach to cleaning rusty grill grates. Just leave the grate to sit in the vinegar for 12 hours and the rust will slowly dissolve.

04. Can I Use Acetone to Remove Rust?

Acetone can be used to remove rust quickly, and acetone evaporates quickly, requiring minimal cleanup afterward.

Closing Thoughts

It can be disheartening to expect a delicious grilling exploit, only to be thwarted by rusted grill grates. But on the bright side, knowing how to clean rusty grill grates will just delay your BBQ instead of putting it off indefinitely.

Besides this, you will also understand the importance of protecting your grill grates and preventing rust from forming in the first place. In short, you will be able to enjoy a cookout any time you want without being held back by pesky rust. Happy grilling!

How to Clean Cast Iron Grill Easily: Banish Dirt Forever

If you went out and purchased a pricey cast iron grill pan without much research, you likely had no idea how to maintain it. While cast iron cookware is well-loved and praised by professionals and home cooks alike, it isn’t easy to deal with.

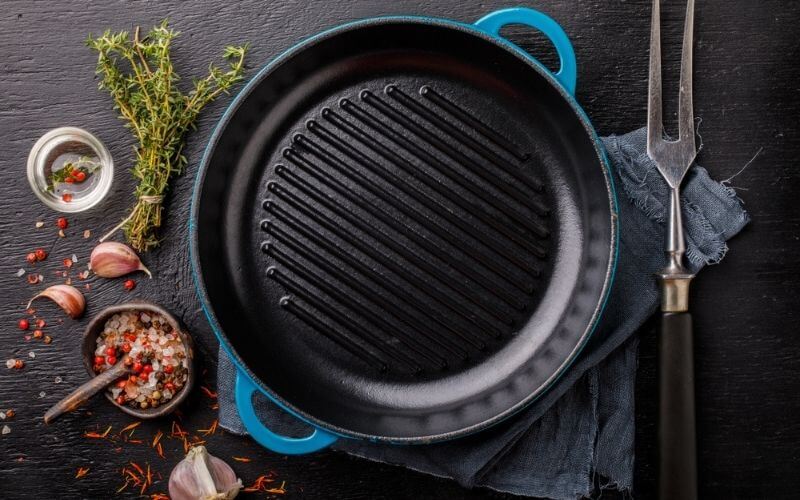
So if you messed up your cast iron cookware, whether it’s the classic cast iron skillet or a cast iron grill pan, you’ve come to the right place. This article will show you how to clean cast iron grill pans and utensils easily. You can even use these methods to clean cast iron grill grates!

Besides showing how to clean your cast iron cooking pans, you will also learn how to season and maintain your cast iron grill pan/skillet to keep it in great shape for much longer.

So without further ado, let’s look at how you can clean your cast iron cookware!

The Best Ways to Clean a Cast Iron Grill Pan

how to clean cast iron grill
clean cast iron grill grates rust

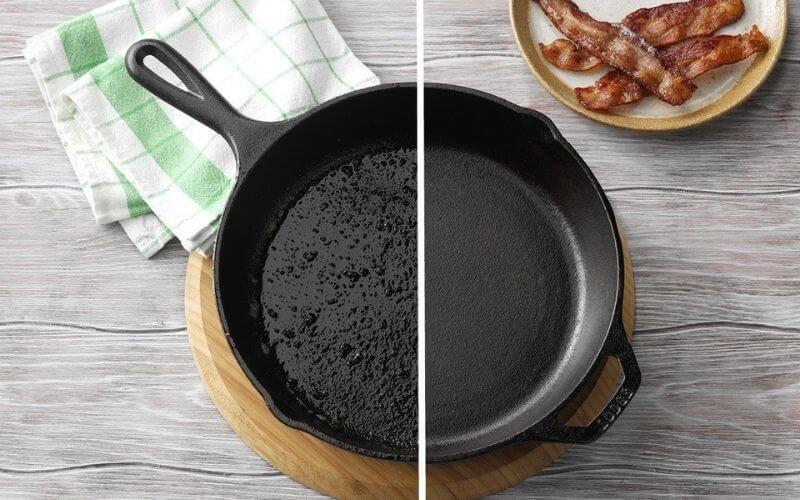
Because cast iron has a seasoned surface, it is very important to make sure that the cleaning process doesn’t damage this protective coating. If this layer is scratched off, the pan loses its nonstick surface and will need to be seasoned intensively, which is labor and time-consuming.

Instead, work gently and use substances that are very mildly abrasive to remove the gunk and debris from your cast iron grill pan. Although the process may take longer, it is worth it as it will be better for your cookware in the long run.

Here’s what you will need:

  • Salt
  • Dish detergent
  • Hot/Boiling water
  • Spatula
  • A soft cloth or dish sponge

Cleaning a Cast Iron Grill Pan with Just Hot Water:

This is the gentlest and most effective way to remove small bits of burnt food, grease, and debris from your pan. It is also particularly useful for pans with tall sides. All it needs is a little elbow grease.

Instructions:

  1. Boil some water in your grill pan on the stovetop. The water needs to be 2-3 inches in depth.
  2. Once the water starts to boil, the bits of food and debris will gradually loosen up and rise to the water surface.
  3. Use a spatula to gently scrape larger or more stubborn bits of debris stuck to the pan.
  4. Then, allow your grill pan to cool and drain the water and debris/residue into your sink.
  5. Once the cast iron pan is emptied out, rinse it with clean hot water and then dry it off with a soft dish towel.

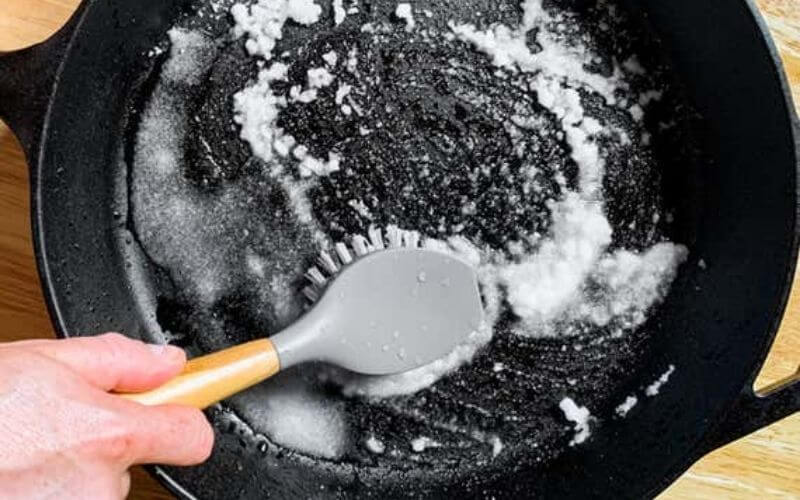
Cleaning a Cast Iron Grill Pan with Just Salt:

Grill Pan cleaning Salt
Grill Pan with Salt

Many cooks prefer a ‘dry’ method to clean their cast iron cookware. The good news is that salt is mildly abrasive and can clean a slightly dirty cast iron pan on its own.

Instructions:

  1. Cover the pan’s surface with a thick layer of salt.
  2. Use a napkin or small dishcloth to gently scrub the cast iron grill pan with the salt. As you rub the surface, you will notice the salt dislodging the pieces of food and residue from cooking.
  3. Add more salt if needed, and keep scrubbing until all the burnt bits of food have been loosened from the pan surface.
  4. Discard the salt and use a clean cloth to remove the bits of salt and loosened debris in the pan, until it is completely cleaned.

Cleaning a Cast Iron Grill Pan with Salt and Hot Water:

If your cast iron grill pan is dirtier than expected, using salt and hot water together will work well to scrape bits of food without scratching the cast iron surface.

Instructions:

  1. After use, allow the cast iron pan to cool down a little.
  2. Once the pan is just warm, pour some coarse salt into the grill pan, making sure the entire surface is covered.
  3. Then, pour a small amount of hot water into the salt. This will turn the salt into a sort of paste.
  4. Use your dish sponge to scrub the salt-paste into the grill pan surface. Clean between the ridges, as well as the sides as these areas often have hardened residue.
  5. Once all the gunk is loosened up, rinse the salt mix and debris off with hot water, then dry with a kitchen towel or paper napkin.

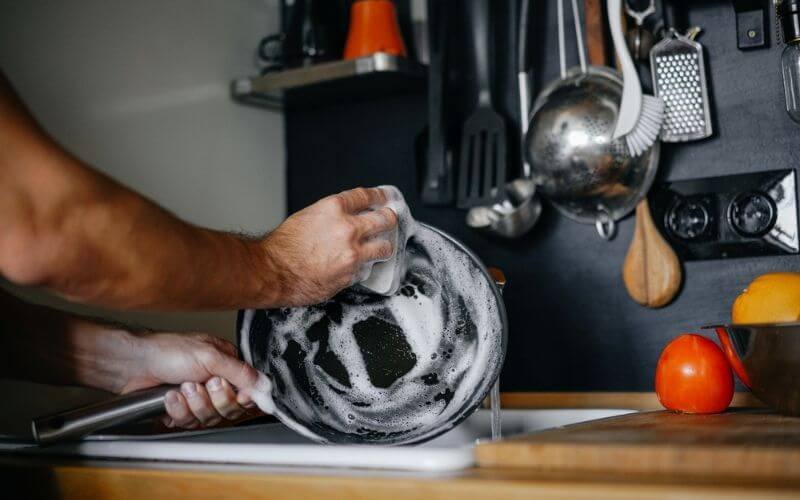
Cleaning a Cast Iron Grill Pan with Soap and Water:

Cast Iron Grill Pan with Soap and Water

Using dish detergent and water may be the most common way to clean dirty cast iron grill cookware. It is also a good way to clean a pan that is dirty but doesn’t have stubborn bits of burnt food stuck to it.

However, harsh soaps can affect the seasoning of your pan, so use this method sparingly and make sure you use a very mild detergent.

Instructions:

  1. Start by adding a tiny amount of mild dish detergent in the middle of your grill pan.
  2. Then add a bit of hot water to the pan to make a lather.
  3. Use a soft scrubber or sponge to gently scrub the surface and sides of the cast iron pan.
  4. Once all the gunk has been cleaned off and the surface of the pan is smooth, rinse off thoroughly, making sure no soap remains in the pan.
  5. Dry completely with a dish towel or any other soft cloth.

Seasoning a Cast Iron Grill Pan

This is an important part of maintaining all kinds of cast iron cookware like griddles and pans. 

Even if you haven’t scratched your cast iron grill pan while cleaning, seasoning it afterward is still necessary. This will keep your pan in good shape for much longer, and make cooking in it absolutely pain-free.

Here’s the quick and easy way to season your cast iron pan:

  1. After cleaning your pan, dry it carefully with a towel or napkin.
  2. Then set it on the stovetop on high heat for a minute, until any lingering moisture has evaporated.
  3. Once the pan is cool enough to work with, use a paper towel to rub any kind of neutral oil (vegetable, sunflower seed, peanut) across the entire cooking surface, as well as the bottom of the pan. Don’t forget to oil the sides! This will also protect glass cooktops.
  4. Use another napkin to wipe off any excess oil. The whole pan just needs to be coated with a thin layer of oil.
  5. Then set the pan back onto the stove and heat until it starts smoking just a bit.
  6. Wait for the pan to cool down again before storing it in a dry place.

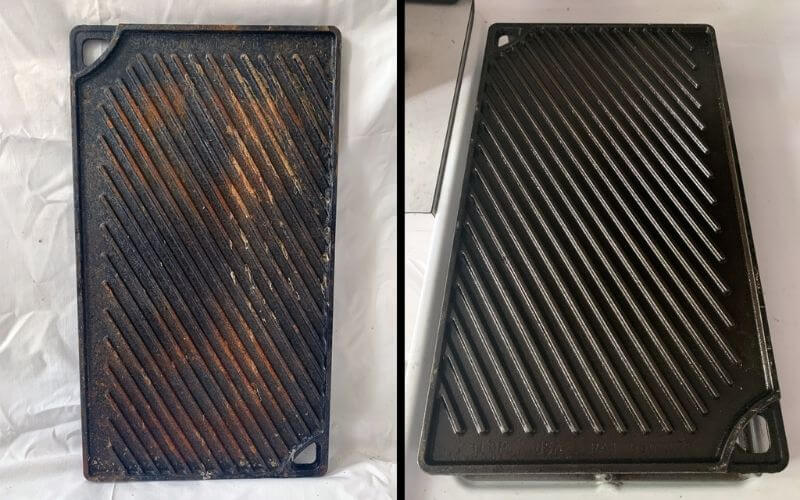
Removing Rust from a Cast Iron Grill Pan

Removing Rust from Grill Pan

If you’ve left your cast iron cookware in a damp space, and the coating has been compromised, rust will set in immediately. Here’s how you can fix all that:

Step One: Removing the Rust

First things first, get rid of the rust. There are two ways to do this: soaking and scrubbing.

You can either soak your pan in a bucket or sink filled with white vinegar diluted with an equal amount of water. The important thing to remember is that you need to remove the pan immediately after the rust dissolves and flakes away.

This is because the pan has no coating and the unseasoned surface will be totally rusted. This kind of rust can not be fixed so you need to be careful.

Or you can gently scrub the rust away with steel wool. While this is more labor-intensive, it is safer for your pan. You can also use soapy water. The important thing is to dry your pan completely afterward with a towel, or by placing it over medium heat on the stove.

Step Two: Season the Pan

Then re-season the pan from scratch. This takes more time than your regular seasoning.

Preheat your oven to 350˚F and place a large sheet of aluminum foil on the bottom rack. Rub a neutral oil all across the entire pan. Then, put the pan upside-down in the oven over the foil, as this will catch any oil drips.

Let the pan bake in the oven for an hour, cooling afterward for at least 45 minutes before using it. Make sure you dry your pan completely when cleaning, and season lightly as mentioned before to keep it working well.

To prevent rusting, store the cast iron cookware in a low-humidity environment. Always wipe it down with a bit of oil that has no taste and a high smoke point.

Maintaining Your Cast Iron Grill Pan

If you’ve been dealing with rust and other issues with your cast iron cookware, these tips will help avoid them in the future.

  • Avoid using soap or detergent as much as possible when cleaning your grill pan.
  • Avoid using metal utensils and stick to wooden or silicone spatulas and spoons.
  • Store your cast iron grill pan in a clean, cool, and dry place.
  • Don’t store any food in your pan, especially when cooking things like sauces that have tomatoes, vinegar, lemon juice, or other acidic ingredients.
  • Always keep your cast iron pan coated with a light layer of neutral oil.
  • Clean your cast iron pan immediately after each use, and do not leave it to soak overnight, as this encourages rusting.
  • Never use a steel wool scrubber to clean your pan after cooking-instead use a gentle scrubber or dish sponge to dislodge bits of food.

Frequently Asked Questions

Here you will find answers to questions we get asked the most about cast-iron grill pans.

01. Is Cast Iron Good for Grilling? 

Yes, grilling steaks on a cast iron pan will allow the meat to brown evenly, and will also contain any drippings from the meat, which adds more flavor.

02. Is It Healthy to Cook in Cast Iron?

Because you can steam, broil, and even ‘fry’ without oil in a well-seasoned cast-iron pan, it is a pretty healthy option to cook in.

03. What is a Cast Iron Grill Pan Good for?

These grill pans are best for grilling veggies, searing steaks, pork chops, and cuts of meat.

04. Why is Cast Iron Better for Grilling Steak?

Cast iron heats very evenly, which means the steak will be cooked uniformly with even browning. It also keeps the meat nice and juicy without drying out.

05. What are the Disadvantages of Cast Iron?

Cast iron cookware is a little tricky to use, as the seasoned surface needs maintenance and cannot be scratched off. You also need to be careful when cleaning and storing your pan.

06. Is Cast Iron Better Than Non-Stick?

Although cast iron is pricier than non-stick cookware, cast iron is better for cooking because it conducts heat more effectively and evenly than non-stick.

Also, the non-stick surface wears off over time and the pan will need replacing, while a cast iron pan can be re-seasoned and used for decades.

In Brief

While cast-iron seems scary for first-time cooks, it is one of the best investments for your kitchen. You can grill, fry, steam, and even bake in one of these, which makes it a great tool for cooking. 

Once you learn how to clean cast iron grill pans, you can maintain your cookware indefinitely, using it without damage. As you can see, cleaning the pan will just take a bit of extra effort and time. Once you get your pan nice and clean, you can cook almost anything out there. So what will it be? Will you use your pan to cook some burgers, or grill a mighty Tomahawk steak?