Definitive Comparison: Mayo vs. Miracle Whip – Which is Healthier?

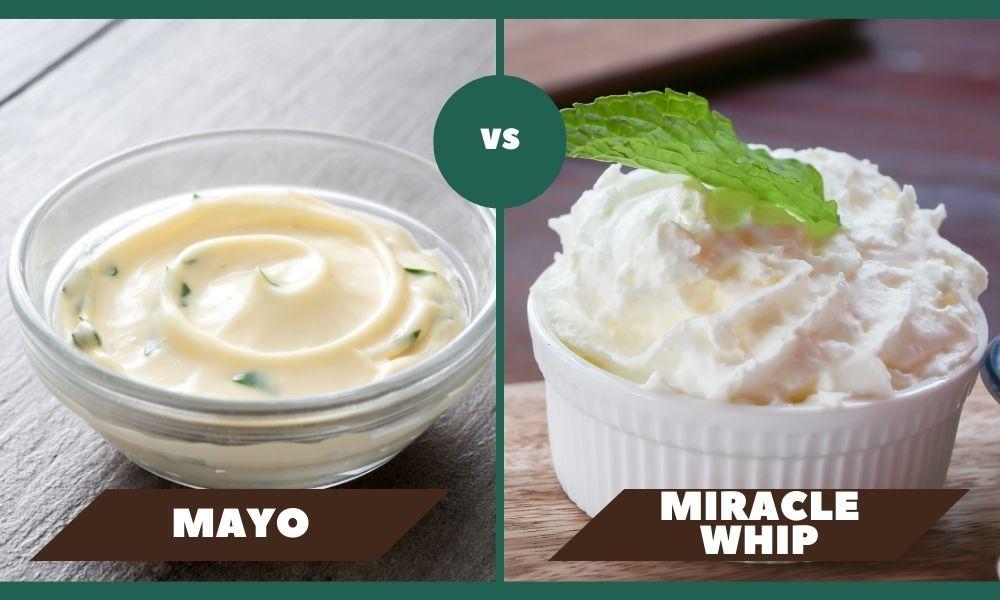
Choosing a condiment for your sandwich or salad can be a tough call, mainly when the contenders are mayo vs Miracle Whip. Today we’ll breakdown this epic battle, critically analyzing their ingredients, nutritional value, and health factors.

Understanding Mayo’s Nutrients

<strong>Definitive Comparison: Mayo vs. Miracle Whip – Which is Healthier?</strong> 1

Mayonnaise’s starring role comes from oil, generally soybean or canola oil. It makes 80% of the condiment’s weight and is an excellent source of monounsaturated and polyunsaturated fats, which are known for promoting heart health. Complementing the oil, mayo often includes whole eggs or egg yolks, rich in essential vitamins and minerals.

However, mayo’s high caloric count can be a potential drawback. An average tablespoon contains approximately 90 to 100 calories, primarily from fats. While these fats are healthier, excessive consumption can lead to weight gain.

Diving into Miracle Whip’s Composition
<strong>Definitive Comparison: Mayo vs. Miracle Whip – Which is Healthier?</strong> 2

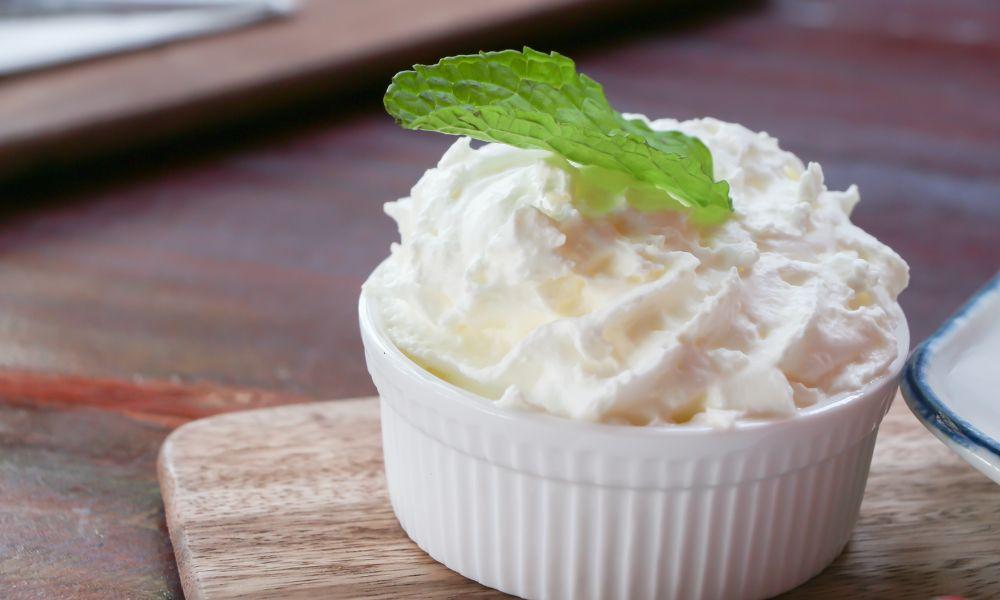
Essentially a mayo “cousin,” Miracle Whip was introduced as a less costly alternative. It’s formulated with lower oil and higher water levels, resulting in fewer calories per serving (approximately 50 calories per tablespoon).

But, Miracle Whip ingredients also include additives like modified food starch, high fructose corn syrup, and flavor enhancers that contribute to its distinctive tangy taste. While these additions make it appetizing, they also increase the sugar content. Hence, treating Miracle Whip as a healthier option could be misleading.

Independent Health Aspects

The comparison boils down to individual health factors. Mayo is high in fat, but these fats are healthy unsaturated fats mostly from oil. It is rich in vitamins A, D, E, and K, primarily if made with whole eggs.

Contrarily, Miracle Whip’s fat content is lower, but it contains considerably higher sugars and sodium. According to Nutritionist Joy Dubost, Ph.D., RD, the type of fat is critical, not necessarily the quantity. She states, “The type of fat you consume is more impactful on health than the amount. Unsaturated fats, found in plant oils and fish, are beneficial for heart health.”[^1^] Hence, mayo seems better-suited for heart health than Miracle Whip due to its healthier fat source

Nutritional Face-Off: Mayo vs Miracle Whip

For a more precise breakdown, let’s take a look at these nutritional facts per tablespoon:

NutrientMayonnaise(per tbsp)Miracle Whip(per tbsp)
Calories90-10050
Total Fat10g5g
Sodium90mg125mg
Sugar0g2g

Although mayo packs more fat and calories, it compensates by containing no added sugars. Conversely, Miracle Whip is lower in fat and calories, but higher in sodium and sugar.

Based on an American Heart Association study that reveals detrimental effects of sodium and added sugars on heart health[^2^], mayo appears to have a slight edge.

Making the Right Dietary Choice – which is healthier mayo or miracle whip?

So, which condiment reigns supreme? Here are some factors to help you decide.

If your focus is on heart health and healthy fats, mayo is the right choice. However, it isn’t ideal for weight loss due to high calorie and fat content.

If you’re under a strict low-fat and low-calorie diet, Miracle Whip can fulfill your purpose. But cut down on other dietary sugars and sodium to avoid excessive consumption.

Remember, it’s all about balance. Both condiments can find a place in your diet if used in moderation and based on your individual health needs.

Consumers should know that no condiment or food is “bad” if incorporated in a balanced diet. Ensuring you have all your nutritional facts straight will go a long way in maintaining a healthy lifestyle.

Conclusion

The spectrum between mayo and Miracle Whip varies significantly based on their composition and nutritional profile. While many regard mayo as a source of healthy fats and Miracle Whip as a lower calorie alternative, always consider overall dietary patterns before making a choice.

Ultimately, both can be part of an enjoyable and balanced diet. Moderation and balance are key here — remember this lesson as we navigate through the ever-buzzing world of dietary choices.

FAQs

Is mayonnaise healthier than Miracle Whip?

Is mayonnaise healthier than Miracle Whip?

Is Mayo suitable for a low-fat diet?

Mayonnaise is high in fats, albeit healthy ones, so it may not be the best choice for a strict low-fat diet. Miracle Whip contains less fat per serving, which might be more suitable for a low-fat diet.

Does Miracle Whip have more sugar than mayo?

Yes, Miracle Whip contains added sugars, whereas traditional mayo typically contains zero grams of sugar.

Why should I consider the type of fat in mayo and Miracle Whip?

The type of fat is crucial when considering heart health. Mayo contains mostly unsaturated fats, which are known to be beneficial for heart health.

Should I completely avoid eating mayo or Miracle Whip?

There’s no need to completely avoid mayo or Miracle Whip. Both can be part of a balanced diet when consumed in moderation. It’s essential to consider other aspects of your diet and maintain a balance.

References

[^1^] :Joy Dubost, Ph.D., R.D. (Consulting Nutritionist)
[^2^] :American Heart Association

How to Tell If Mayo is Bad? How to Store It Right!

10 Best Substitute for Mayo That Tastes Better and are Healthier!
Exploring Coconut Oil Alternatives: Substitutes for Various Cooking Needs

Welcome to the wonderful world of culinary experimentation! Whether you’re a seasoned home cook or a connoisseur of concocting flavors in the kitchen, you’ve likely encountered coconut oil in a recipe or two. It’s renowned for its tropical flavor, versatility, and utilized for everything from frying to baking. However, there are times when you might find yourself searching, perhaps due to dietary restrictions, personal preferences, or simply for a fun flavor twist, for a coconut oil alternative.

If you’ve ever been in this particular culinary predicament, you’re not alone. Back when I was working at Boat Basin Cafe downtown New York years ago before it closed down, coconut oil was all the rage. It was the go-to for most of our dishes, but occasionally, we’d run out (those were the wild days!) or have to cater to customers with specific dietary needs. And so, my journey of exploring healthy substitutes began.

coconut oil alternative

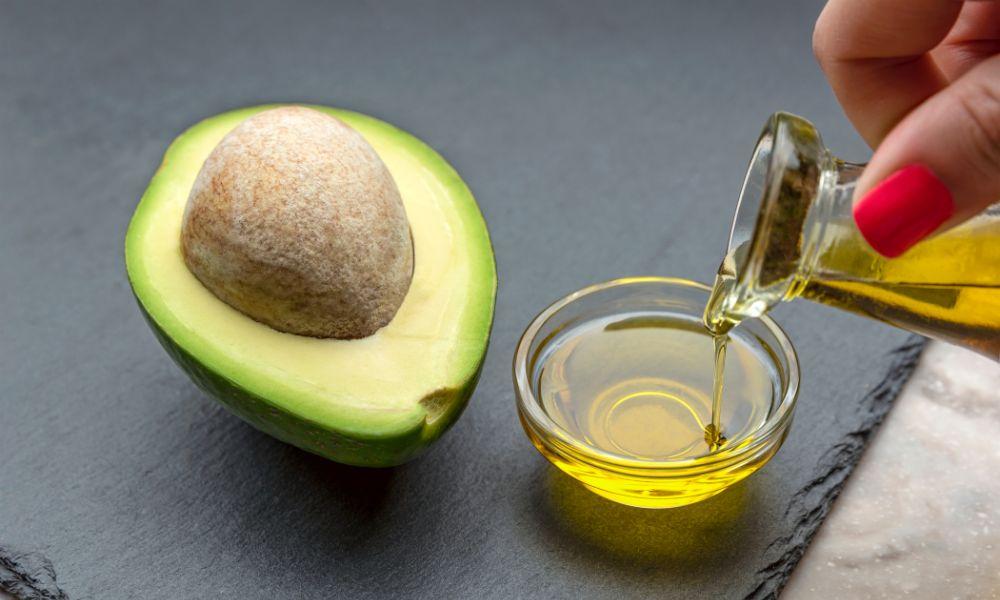
01 Avocado Oil – A Healthy All-Rounder

Exploring Coconut Oil Alternatives: Substitutes for Various Cooking Needs 3

Let’s kick things off with possibly the most wholesome all-rounder in the culinary world – avocado oil. This healthy coconut oil substitute has been gaining traction in the culinary sphere for its multitude of beneficial properties. It boasts a very high smoke point, making it perfect for sautéing, frying, and grilling. Plus, its mild, neutral flavor doesn’t overpower your dishes like some other oils can.

Back in the Boat Basin Cafe, we swapped coconut oil for avocado oil in our famous downtown grilled chicken. For a while, we kept this change a secret. Imagine our delight when customers praised the “new” recipe, highlighting the crispiness of the chicken skin and the subtle flavor enhancement. From that day on, avocado oil became a staple in our kitchen litany.

02 Vegetable Oil – Affordable and Versatile

Exploring Coconut Oil Alternatives: Substitutes for Various Cooking Needs 4

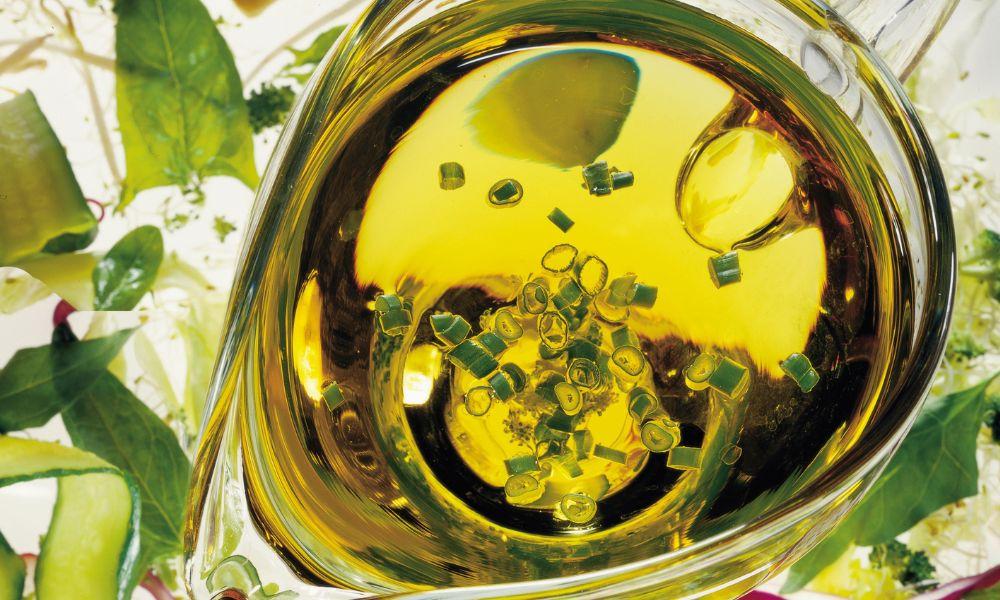
Next up on our list of coconut oil alternatives is the humble vegetable oil. This incredibly versatile oil, which is often a blend of different plant oils such as soybean, canola, or corn, is an excellent, wallet-friendly substitute for coconut oil. With a high smoke point like avocado oil, vegetable oil can handle a lot of heat, making it ideal for various cooking methods.

One memorable Boat Basin Cafe moment involved a colossal birthday cake order. Midway through, we realized we were out of coconut oil. An emergency coconut oil run was out of the question. So we rolled up our sleeves and experimented with vegetable oil instead. The result? An incredibly moist and tender cake that had everyone asking for seconds and thirds.

03 Extra Virgin Olive Oil – Delicate Flavor for Light Cooking

Exploring Coconut Oil Alternatives: Substitutes for Various Cooking Needs 5

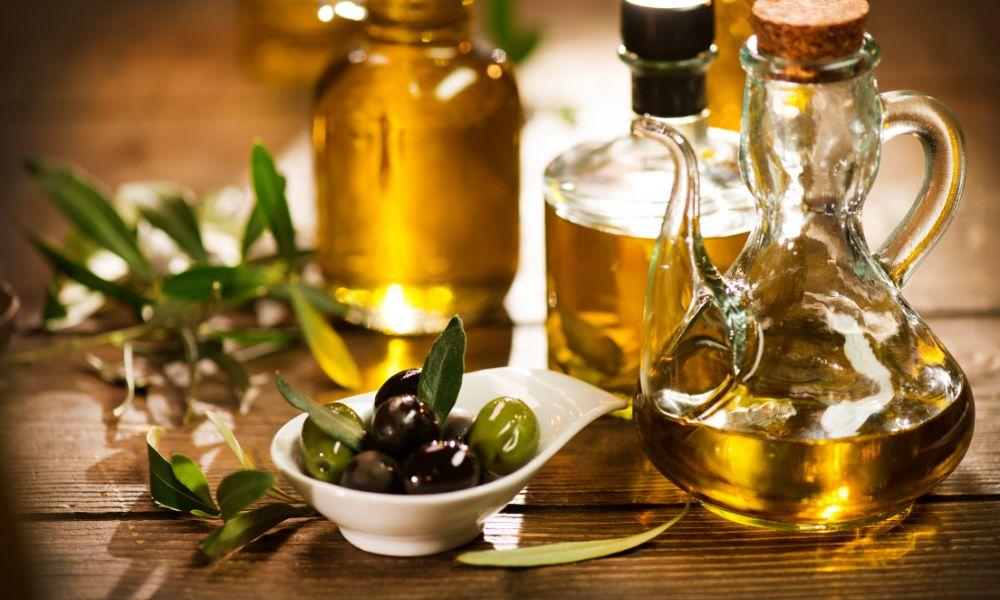
If you’re looking for a coconut oil substitute for light cooking, consider extra virgin olive oil. This oil is arguably one of the best for low-heat cooking due to its delicate flavor and well-documented health benefits. In the Boat Basin Cafe, we often used extra virgin olive oil in our salad dressings and light sautés, and it was a hit every time.

One particular instance stands out. We were catering to a group of vegan customers who wanted a plant-based alternative to our popular pesto. Swapping coconut oil with extra virgin olive oil resulted in a lighter, more aromatic pesto that was nothing short of a revelation. This little experiment just goes to show the power of vegan-friendly options and the incredible versatility of extra virgin olive oil.

And that, friends, is our half-time whistle. We’ve explored three fabulous coconut oil substitutes so far, and there’s more in store. So whether you’re baking, frying, or sautéing, remember that you have a world of healthy substitutes and neutral oil options at your disposal.

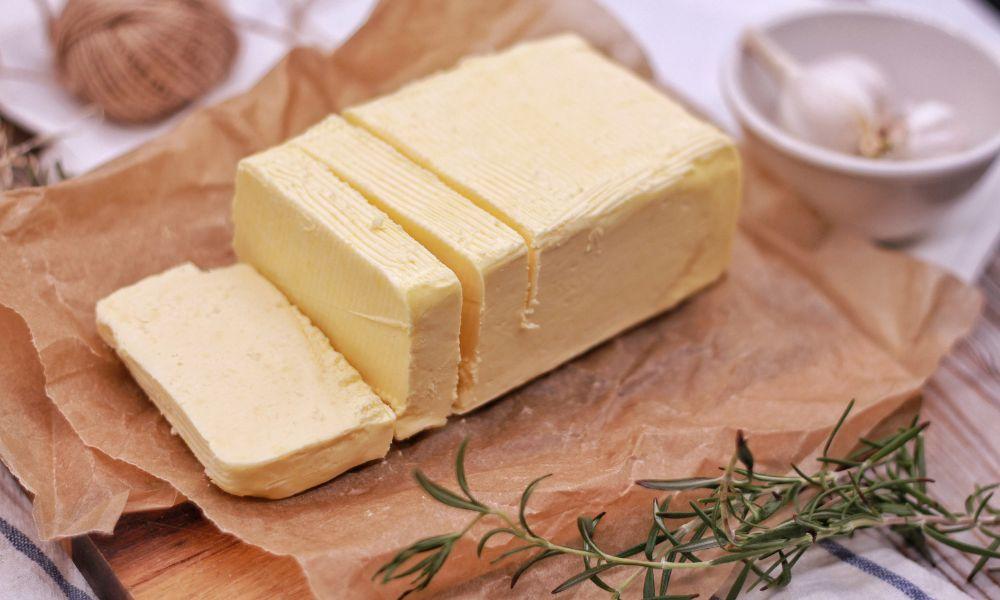
04 Butter – Perfect for Baking

Exploring Coconut Oil Alternatives: Substitutes for Various Cooking Needs 6

In some situations, the best coconut oil substitute comes from an all-time kitchen favorite—butter. Particularly when it comes to baking, butter shares a similar fat content and melting point with coconut oil, creating a texture in baked goods that’s hard to beat.

Back in the day at the Boat Basin Cafe, we tried substituting coconut oil with butter in our best-selling chocolate chip cookies. What resulted was a batch of cookies with a richer, more pronounced flavor than usual. Although different from our original recipe, they were a delightful treat that our customers couldn’t resist.

Of course, if you’re a vegan or are removing dairy from your diet, butter won’t work as your coconut oil substitute. But not to worry, the next section has you covered!

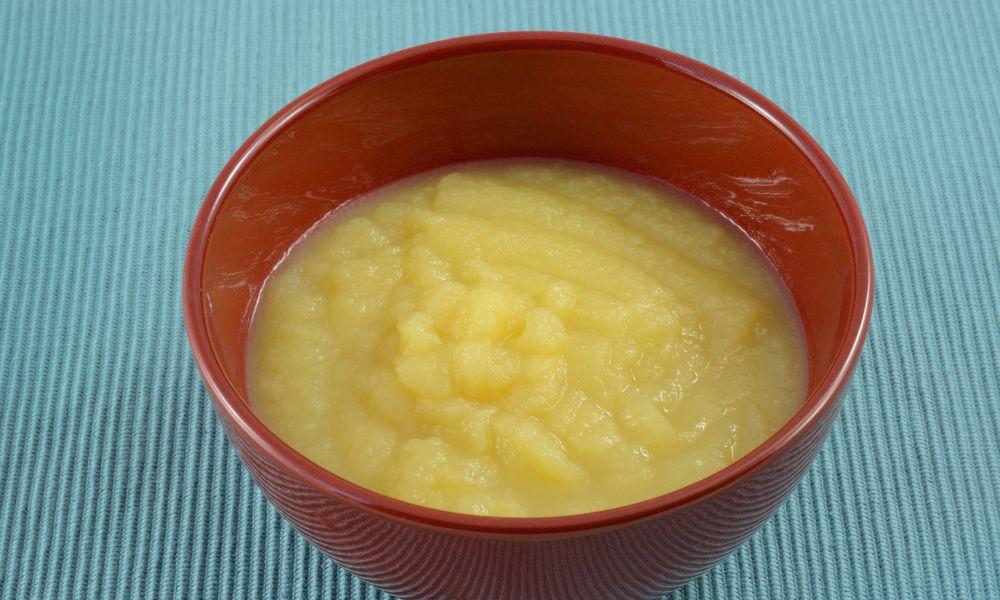
05 Applesauce – Healthier and Vegan Baking

Exploring Coconut Oil Alternatives: Substitutes for Various Cooking Needs 7

If you’re looking for a healthier or vegan-friendly coconut oil alternative for baking, then applesauce might just be what you need. With its high moisture content, applesauce is often used as a substitute for fats in baking.

When we first tried using applesauce at the Boat Basin Cafe, we were skeptical. We decided to test it out in our muffins and to our surprise, the results were phenomenal! The muffins were still fluffy and moist, with just the right touch of natural sweetness. To this day, it’s one of my favorite plant-based alternatives for baking.

Choosing the Right Oil for Your Needs

Now that we’ve explored various coconut oil alternatives, it’s essential to remember that the right substitute for you would depend on your specific needs and the flavor profile you’re after. For those who are after a neutral oil that closely resembles coconut oil, avocado, grapeseed, and sunflower oils are your best bet.

In my experience at the Boat Basin Cafe, we found that while olive oil is a great coconut oil substitute, its distinct flavor could alter the end result of the dish. So if you’re after culinary creations that taste as originally intended, opt for the more neutral oil options.

Conclusion

And there you have it! A universe of coconut oil substitutes right at your fingertips! From avocado oil to applesauce, you have a plethora of options to suit your cooking and baking needs. Whether you’re looking for vegan-friendly optionsneutral oils, or simply a fun way to shake things up in the kitchen, these coconut oil alternatives have got you covered.

As we concluded our culinary adventures at the Boat Basin Cafe, we found that sometimes, the most exciting part of cooking is the chance to experiment with different ingredients. So, in your journey of finding the perfect coconut oil alternative, remember – don’t be afraid to experiment and have fun.

Happy Cooking and remember, the world of cooking is yours to explore!

References:

  1. Healthline: Best Coconut Oil Alternatives
  2. Medical News Today: Coconut oil alternatives
  3. VegNews: Best Vegan Alternatives to Coconut Oil
  4. Olive Oil Times: Can Extra Virgin Olive Oil Be a Substitute for Coconut Oil?

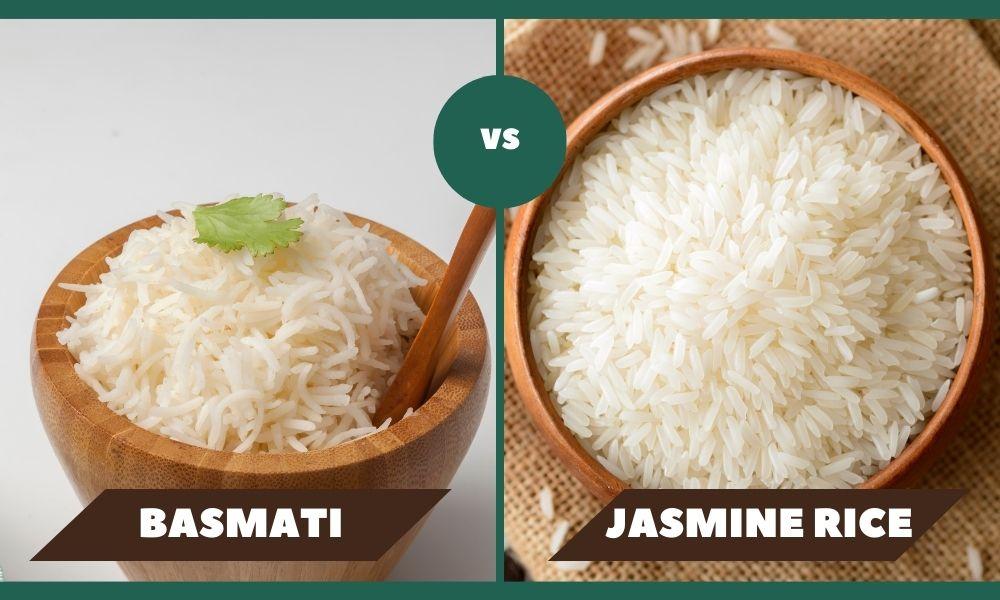
Delving into the Flavors: Basmati Vs. Jasmine Rice

As a culinary enthusiast, I’m always intrigued by the myriad of rice varieties used in cuisines worldwide. Today, we’re exploring two beloved long-grain types of rice – Basmati and Jasmine, celebrated for their unique aromas and flavors.

rice jasmine vs basmati

The Elegance of Basmati: A Nutty Aroma from the Himalayas

Originating from the Sanskrit word for “fragrant,” Basmati rice hails from the Indian subcontinent. Cultivated in the foothills of the Himalayas, Basmati stands out for its distinctive nutty and floral aroma.

During my time at the Boat Basin Cafe in Downtown New York, I was introduced to this type of rice. Its tempting aroma wafting from every dish piqued my interest. High-quality Basmati rice is identified by long, slightly tapered grains that elongate as they cook, resulting in a fluffy, aromatic, and flavorful offering.

Jasmine RiceBasmati Rice
OriginThailandIndian Subcontinent
AromaPlant-like; similar to Jasmine flowerNutty and floral
FlavorSlightly sweetSubtle and nutty
TextureSoft and slightly stickyFluffy and separate grains
Cooking Water-to-Rice Ratio1:12:1
Requires Soaking Before CookingNoYes
Best Used InThai cuisine, dishes with robust flavors, and stir-friesIndian/Pakistani dishes, Pilau, and Biryani
Glycemic IndexHigherLower

Cooking and Usage of Basmati Rice:

The secret to cooking the perfect Basmati lies in the techniques. Whether you’re boiling, steaming, or using a double boiler, never skip the rinse. Rinsing washes away any surface starch and prevents the grains from sticking together.

For optimal results, soak the rice in cold water for 30-60 minutes before cooking. This step hydrates the grains for an even cook and impressive elongation without breaking. Additionally, maintain a water-to-rice ratio of 2:1 to achieve the desired fluffy texture.

Culinary Uses of Basmati:

Basmati forms the backbone of many traditional dishes from the Indian subcontinent, including the fragrant pilau and the layered, spice-laden biryani. The ability of the grains to remain separate when cooked makes it an irreplaceable choice for these flavorful layered dishes.

Jasmine Rice: An Aromatic Delight from Southeast Asia

Delving into the Flavors: Basmati Vs. Jasmine Rice 8

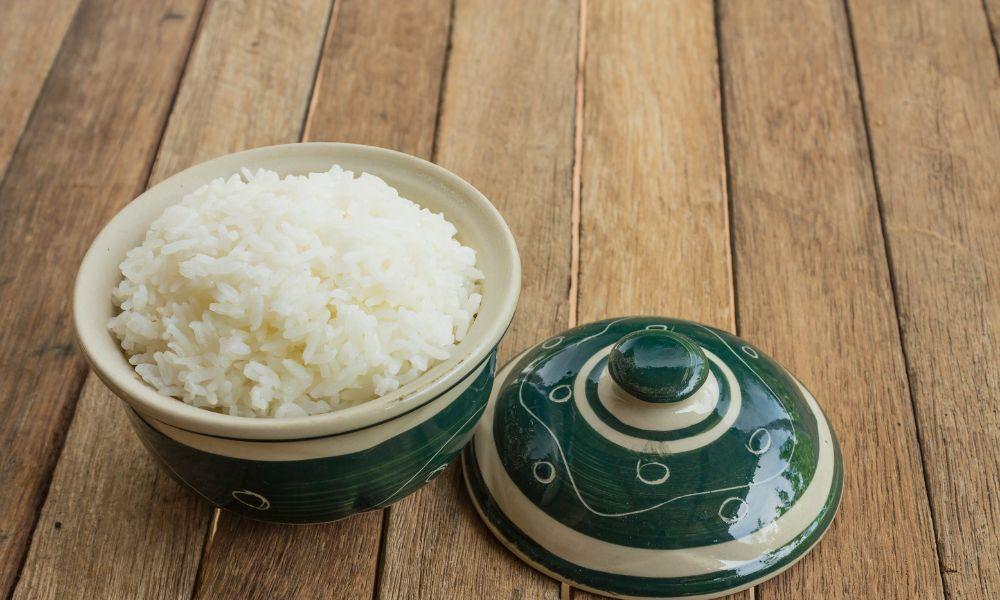
Contrary to Basmati, Jasmine rice is a native of Thailand. This aromatic long-grain rice, named after the fragrant jasmine flower, is renowned for a unique plant-like aroma and slightly sweet flavor. The grains are a bit shorter and stickier compared to Basmati.

As a fan of Thai curry, I find pairing the dish with Jasmine rice genuinely elevates the dining experience. The rice’s aroma complements the strong flavors of the curry, creating a sublime flavor harmony.

Cooking and Usage of Jasmine Rice:

Steaming is the preferred method of cooking Jasmine rice. When cooked at a 1:1 ratio of water to rice, you end up with slightly sticky grains with a soft yet chewy texture. However, like Basmati, Jasmine rice benefits from a good rinse before cooking to prevent grain clumping.

Culinary Uses of Jasmine:

Used in a variety of Southeast Asian dishes, you’ll find Jasmine rice in everything from savory fried rice dishes to sweet sticky rice desserts. Its subtle stickiness makes it perfect for dishes that require the grains to stick together, such as fried rice.

Differences Between Basmati and Jasmine Rice:

Despite being celebrated for their fragrant qualities, Basmati and Jasmine rice’s cooking methods and flavors vary significantly.

Basmati requires meticulous preparation – rinsing and soaking before cooking – and a higher water-to-rice ratio. On the other hand, Jasmine rice requires rinsing but usually doesn’t need to be soaked.

Flavorwise, Basmati carries a subtle, nutty flavor with a floral fragrance, while Jasmine rice is slightly sweet with a plant-like aroma. As for texture, Basmati grains are less sticky and remain distinct after cooking – ideal for dishes where grains need to remain separate. Conversely, Jasmine rice has a slightly chewy texture, and the grains stick together, making it perfect for stir-fries and dishes with robust flavors.

Nutritional Values of Basmati and Jasmine Rice:

When it comes to the nutritional aspect, both Basmati and Jasmine rice have similar caloric content. However, Basmati rice has a lower glycemic index compared to Jasmine rice, meaning it causes a slower rise in blood sugar levels. So, for those monitoring their blood sugar levels, Basmati might be a healthier choice.

Interchangeable Use and Substitution:

While both types of rice have unique properties, they can occasionally be used interchangeably, although this may slightly alter the original dish’s taste and texture. For example, a biryani made with Jasmine rice would yield a slightly stickier dish with a different but equally enjoyable flavor profile. Experimenting with culinary choices can be fun, so don’t hesitate to try something new in your kitchen. However, remember that replacing these types of rice may not necessarily yield the traditional flavor or texture associated with specific dishes.

FAQs

1. What is the difference between Jasmine and Basmati rice?

Both Jasmine and Basmati are types of long-grain rice, but they differ in aroma, flavor, and texture. Jasmine rice, originating from Thailand, has a sweet, slightly plant-like aroma and a stickier texture. Basmati rice, native to the Indian subcontinent, has a nutty and floral aroma with fluffy and separate grains when cooked.

2. How does the cooking method vary between Basmati and Jasmine rice?

Basmati rice requires rinsing and soaking before cooking, and it’s usually cooked at a higher water-to-rice ratio of 2:1. Jasmine rice, on the other hand, needs rinsing before cooking but usually doesn’t need soaking. It’s typically cooked at a 1:1 water-to-rice ratio.

3. Can you substitute Jasmine rice for Basmati rice and vice versa?

Although you can substitute one for another, keep in mind it will alter the dish’s texture and flavor. Jasmine rice is stickier and has a slightly sweet flavor, while Basmati rice has a more nuanced, nutty flavor with distinct and less sticky grains.

4. Which type of rice is healthier: Jasmine or Basmati?

Both types of rice have similar caloric contents. But Basmati rice has a lower glycemic index compared to Jasmine rice, meaning it causes a slower rise in blood sugar levels. Thus, for individuals monitoring their blood sugar levels, Basmati might be a better choice.

5. What cuisines traditionally use Jasmine and Basmati rice?

Jasmine rice is a staple in Southeast Asian dishes, particularly Thai cuisine, while Basmati rice is commonly used in Indian and Pakistani cuisines.

Conclusion:

Whether you’re planning a fragrant pilau, a spicy biryani, a comforting bowl of Thai curry, or a quick fried rice dish, understanding the different properties and culinary uses of Basmati and Jasmine rice can enhance your dining experience. So, dive into the world of these aromatic rice varieties and discover the flavors and textures that make each one unique. Remember, the joy of cooking lies in experimentation. You might just end up discovering your new favorite dish!

The Ketchup Chronicles: A Dip into Catsup, Ketchup and Their Global Influence

If you’ve ever wondered about the origins of that familiar red sauce that’s slathered on your favorite burger or fries, you’re not alone. With a history that’s as flavorful as the condiment itself, ketchup, or should we say ‘catsup,’ often ignites a heated debate.

From the days of its origin to its widespread use in contemporary cuisine, ketchup has embarked on quite a remarkable journey. So, let’s dive into understanding the evolution of this iconic condiment. And a quick reminder: It’s not just a tale about a sauce—it’s a tale dipped in cultural exchange, culinary innovation, and linguistic transformation too!

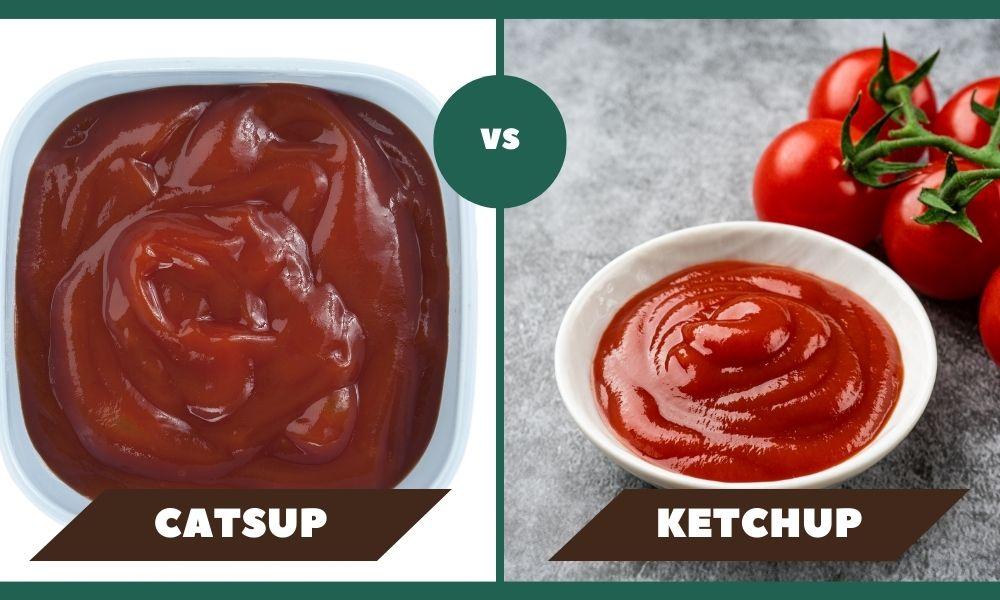
catsup vs ketchup

Origin and Historical Journey

The term ‘ketchup’ is believed to have originated from the Chinese fish sauce Ke-Chiap. But wait—there’s a twist. The early ketchup had nothing to do with tomatoes! Yes, that’s right. The original recipe was a far cry from the sweet, tangy delight we’re familiar with today.

Back in the day, European traders were significantly intrigued by Asian condiments—and Ke-Chiap was no exception. They brought this unique sauce back home in the 17th century, giving it a warm European embrace. Ketchup’s name may also have found its roots in Indonesian sauces such as kicap and kecap contributing to the name, thereby paving the way for a rich, multi-cultural culinary inheritance.

Early Forms of Ketchup

Early variations of ketchup bore no resemblance to our beloved condiment. It was made from various ingredients such as mushrooms, walnuts, oysters, and even fruits. Murky, briny, and tangy—the early versions of ketchup were worlds apart from today’s perfectly balanced blend of sweet and sour.

A melody of words, including ‘catchup’ and ‘catsup,’ was used to refer to these sauces. The Irish author and cleric Jonathan Swift mentioned ‘Catsup’ in a poem in 1730, thereby adding to the growing popularity of the alternative spelling. If you stumbled upon the query ‘origin of catsup’—well, now you know!

Incorporation of Tomatoes

The Ketchup Chronicles: A Dip into Catsup, Ketchup and Their Global Influence 9

The journey of ketchup took an adventurous turn when tomatoes were introduced into the recipe. Prior to this, tomatoes were considered poisonous—not exactly the kind of ingredient you’d want in your food, right?

However, things took a turn, and in the 19th century, recipes began incorporating these vibrant red fruits, giving birth to a sauce that was remarkably similar to the ketchup we know and love. Tomato-based ketchup soon became a staple in American households, capturing the hearts of culinary enthusiasts with its rich flavor profile and versatility.

Why was this version more popular, you ask? Catsup vs ketchup flavor differences played a big part. The tomato version brought with it a sweet tanginess that wasn’t prevalent in the older versions. Plus, the vibrant scarlet hue made it aesthetically pleasing.

The Rise of Commercial Ketchup

The Ketchup Chronicles: A Dip into Catsup, Ketchup and Their Global Influence 10

The transition from homemade condiment to commercially produced ketchup started with local farmers. They prepared and bottled their ketchup for their community, sowing the seeds of what would soon become a booming industry.

Then, in 1876, the H. J. Heinz Company threw its hat in the ring and started producing ketchup. Fun fact for all the Ketchup history buffs out there: Heinz opted for the spelling ‘ketchup’ to differentiate itself from competing products labeled ‘catsup.’ It seems like the catsup vs ketchup saga had started creating ripples in the business world too!

Ingredients and Variations

The Ketchup Chronicles: A Dip into Catsup, Ketchup and Their Global Influence 11

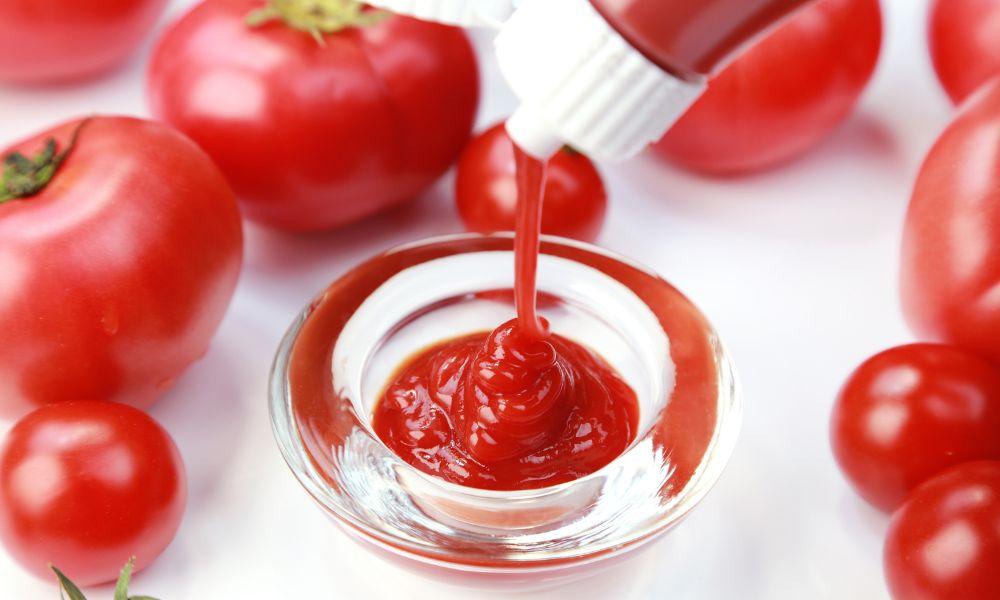
The core ingredients of ketchup are quite simple—tomatoes, vinegar, sugar, and a blend of spices. These, when cooked down, create the smooth, rich condiment we know today. However, the variations in the recipes are only limited by imagination, with options to add vegetables like onions and celery for extra flavor.

These differences in ingredients often lead to catsup vs ketchup: taste differences. While traditional ketchup tends to have a sweet and tangy flavor, catsup is often slightly less sweet and a bit spicier, depending on the region.

To give you an anecdote from my personal experiences – back in the day when I, John Bird, was working at the Boat Basin Café in downtown New York (before it closed down), we used to have endless debates about catsup vs ketchup: Best for burgers! Some of us swore by the slightly spicier note of catsup, while others couldn’t dream of parting from the sweet tanginess of ketchup.

The debate is timeless, but it all boils down to personal preference. Some might even say that the ‘catsup vs ketchup: regional preferences’ play a part. So, no matter where you are or what you prefer, remember to enjoy your ketchup or catsup as you like it!

The journey of ketchup is indeed fascinating, rich with historical context and nuances. But that’s not all. Stay tuned as we take a deeper look into the prevalence of “ketchup” over “catsup” today, its continued popularity, and the role it plays in culinary culture worldwide in the second part of this article.

And remember, whether you’re weighing up ‘catsup vs ketchup: health benefits’ or exploring the role these sauces play in your culinary adventures, the world of ketchup and catsup is filled with more than just flavor—it’s a tale of food, culture, and linguistic evolution!

Ketchup Today

Despite the historical skirmishes in the naming, the term ‘ketchup’ has steadily overshadowed ‘catsup’ in contemporary times. As per the linguistic experts, the reason ketchup is more prevalent than catsup could be attributed to the influence of high-profile brands like Heinz using the term ‘ketchup’. This has led to ‘ketchup’ being universally recognized and used more commonly than ‘catsup’ across the globe.

When it comes to its culinary applications, ketchup retains its superstar status. From being a dipping sauce for fries to a key ingredient in numerous Eastern and Western dishes, you’ll find ketchup almost everywhere. In fact, the ketchup of today is considered a staple in most American households.

Let’s not forget that ‘catsup vs ketchup: regional preferences’ still exist. Certain regions in the Southern United States and some parts of Latin America still use ‘catsup.’ It’s fascinating to see how geographical locations and cultural nuances play a role in which term is preferred!

Catsup vs Ketchup: The Great Debate

KetchupCatsup
OriginDerived from Chinese fish sauce Ke-Chiap, introduced to Europe in the 17th centuryMentioned in a poem by Jonathan Swift in 1730
Early FormsMade from mushrooms, walnuts, oysters and fruitsSimilar to ketchup with varied ingredients
Tomato IncorporationIncorporated in the 19th century, making ketchup sweeter and tangierSimilar to ketchup, may be less sweet and slightly spicier
Commercial ProductionH. J. Heinz Company started production in 1876, chose ‘ketchup’ for differentiationLabeled as ‘catsup’ by some rival companies
IngredientsMade from tomatoes, vinegar, sugar, and a blend of spices. Variations may include onions or celeryLikely very similar to ketchup
Usage TodayGlobally more common due to high-profile brands like HeinzPreferred in some regions of Southern US and Latin America
FlavorSweet and tangySlightly less sweet and a bit spicier
Health BenefitsLow in calories and fat, high in sodium and sugarSimilar to ketchup, with minor differences in nutritional content
Culinary ApplicationsUsed as a dipping sauce and ingredient in numerous dishes across culturesSimilar to ketchup, usage might vary based on region and personal preference

Amid the ketchup and catsup conundrum, you might wonder if there are any significant differences between the two, aside from their names. In terms of flavor, catsup is often described as tangier and spicier compared to ketchup. However, the flavor differences are usually subtle.

The debate goes beyond mere flavor though. From the health benefits to the best-suited culinary applications—there are many different factors to consider. For instance, catsup vs ketchup: health benefits is a topic frequently brought up by health-conscious consumers. While there are minor differences in nutritional content, both sauces are relatively low in calories and fat but high in sodium and sugar.

Perhaps you’re more interested in which is best on your burger. The choice between ‘catsup vs ketchup: best for burgers’ is, again, a subjective one and completely comes down to personal preference and regional influences.

Conclusion:

The journey of ketchup is a testament to the evolution of food culture and the power of language. From its origin as a fish sauce to its present-day status as a beloved worldwide condiment, ketchup—or catsup, depending on who you ask—has a rich and vibrant history that adds to its charm.

Whether you’re exploring the ‘catsup vs ketchup: history and evolution’, comparing ‘catsup vs ketchup: taste and usage’, or simply curious about the ‘catsup vs ketchup: naming debate’, it’s clear that this condiment is a lot more than just a tangy addition to your fries.

While ketchup and catsup might differ in name and slight nuances in taste, one thing unites them—their ability to elevate the flavor profile of a wide array of dishes. So, the next time you squeeze that bottle of ketchup or catsup onto your plate, take a moment to appreciate the dish’s storied journey that transcends continents, cultures, and centuries!

Unlocking Perfect Fried Chicken: The Art of Oil Temperature Control

The pursuit of the perfect fried chicken is a culinary journey many of us embark on. A tantalizing dish, the perfect fried chicken offers a crispy, golden crust enveloping juicy, flavorful meat inside. But to make this a reality, mastering one crucial aspect is needed: oil temperature control.

In my early cooking days at the Boat Basin Cafe in Downtown New York, I learned that frying chicken isn’t just about the recipe. There are several subtleties to consider, with maintaining oil temperature topping the list.

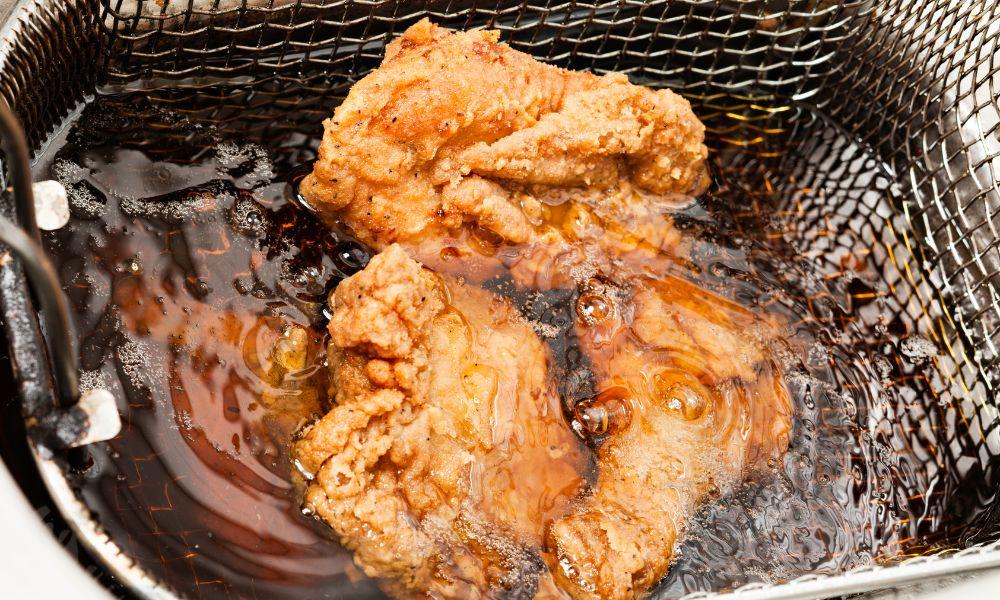
best temp to deep fry chicken

The Significance of Oil Temperature

So, why does oil temperature play such an important role in achieving the best-fried chicken? Well, temperature is everything in deep frying because it regulates the heat transfer from the surface of the chicken to its center.

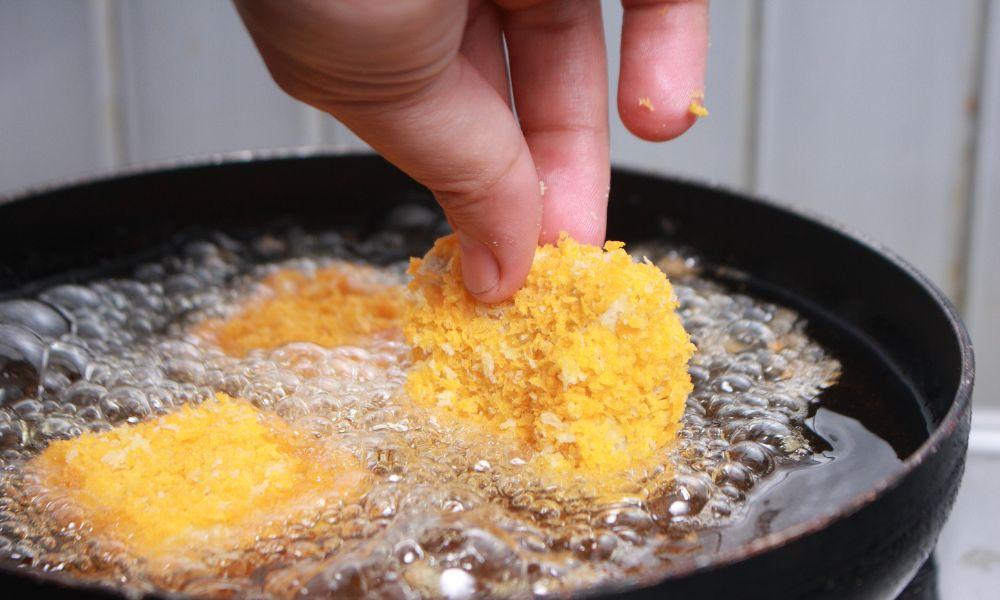
When the oil temperature is just right, it flash cooks the chicken’s surface, sealing in the juices and forming a crispy crust. If the oil is too cool, however, the chicken absorbs the oil, resulting in a greasy, soggy crust. Too hot and the surface burns before the inside cooks.

Ultimately, choosing the right frying oil and keeping it at the right temperature helps achieve not only the desired crispy texture but also ensures the chicken is cooked safely through.

The Sweet Spot: Ideal Oil Temperature

The oil temperature sweet spot for frying chicken is between 300 to 325 degrees Fahrenheit. According to both my experience and reputable sources like Southern Living, this range ensures a crispy crust while letting the chicken cook all the way through without burning the outside.

This specific range has been obtained through countless rounds of deep frying, adjusting heat levels, and noting the results. Each round, whether a success or failure, has contributed to this knowledge.

Achieving Perfection: The Cooking Process

Unlocking Perfect Fried Chicken: The Art of Oil Temperature Control 12

Having established the ideal frying temperature, let’s delve into the process of achieving that mouthwatering fried chicken we all yearn for.

The key here is to pre-heat the oil to approximately 360 degrees Fahrenheit before adding the chicken. This allows for the inevitable temperature drop that happens when you place the chicken in the oil.

The primary aim of deep frying is to maintain the oil temperature within the range of 300 to 325 degrees Fahrenheit. Constant vigilance and accurate heat adjustments are necessary, which is why investing in a reliable kitchen thermometer is crucial.

Marinating chicken in a flavorful mix before frying is a great way to make it even more delicious. The marinade acts as a buffer, helping regulate oil temperature, and ensures the chicken is evenly cooked and moist.

Always remember to heat the oil back to its pre-frying temperature before adding the next batch of chicken. This consistency in maintaining the temperature is key to avoiding soggy or burnt chicken.

Expert Opinions

Veterans in deep frying agree that 300 to 325 degrees Fahrenheit is the ideal range for frying chicken. As per Cook’s Country, the oil should be heated to a higher temperature before the chicken is added. This accommodates for the decrease in temperature that occurs when the chicken is inserted.

Common Mistakes to Avoid

Here are a few common pitfalls that you should avoid while frying chicken:

  1. Skipping Pre-heating: Never add chicken to cold oil. Always pre-heat the oil to around 360 degrees Fahrenheit.
  2. Not Using a Thermometer: A thermometer is key to achieving perfect fried chicken. It helps maintain the correct oil temperature.
  3. Overcrowding the Pot: Frying too many chicken pieces at once lowers the oil temperature drastically. Leave enough space in the pot for the chicken to fry evenly.
  4. Adding Cold Chicken to Hot Oil: This causes a sharp drop in oil temperature. Always let your chicken reach room temperature before you start frying.
  5. Choosing the Wrong Oil: The choice of oil matters when it comes to deep frying. Peanut or vegetable oil, with their high smoke points, are ideal.

Conclusion

The quest to create the perfect fried chicken hinges on mastering oil temperature control. By following the tips and techniques discussed here, you’re well on your way to creating a culinary delight that’s sure to impress.

Remember, the perfect fried chicken is not just a dish; it’s a harmonious symphony of flavors and textures – one which requires practice and precision.

So, are you ready to embark on the journey of frying the perfect chicken? As any great culinary quest, it’s the first sizzle that counts. Here’s to you recreating the tantalizing aroma and mouth-watering sizzle of perfectly fried chicken at home. Bon appétit!

Pressing Garlic: Your Ultimate Guide to Elevated Flavors

Anyone who has ever experimented with the delicate art of cooking knows the magic of garlic. But do you know the difference a pressed garlic clove can make to your dishes? Let’s embark on a flavorful journey to unravel the mysteries and benefits of using pressed garlic.

Pressing Garlic: Your Ultimate Guide to Elevated Flavors 13

What is Pressed Garlic?

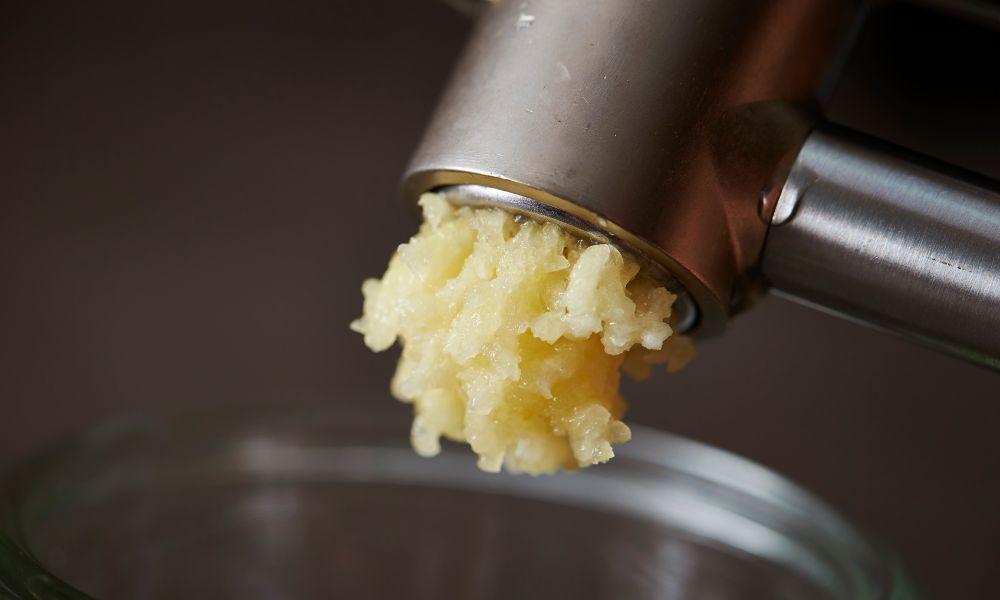
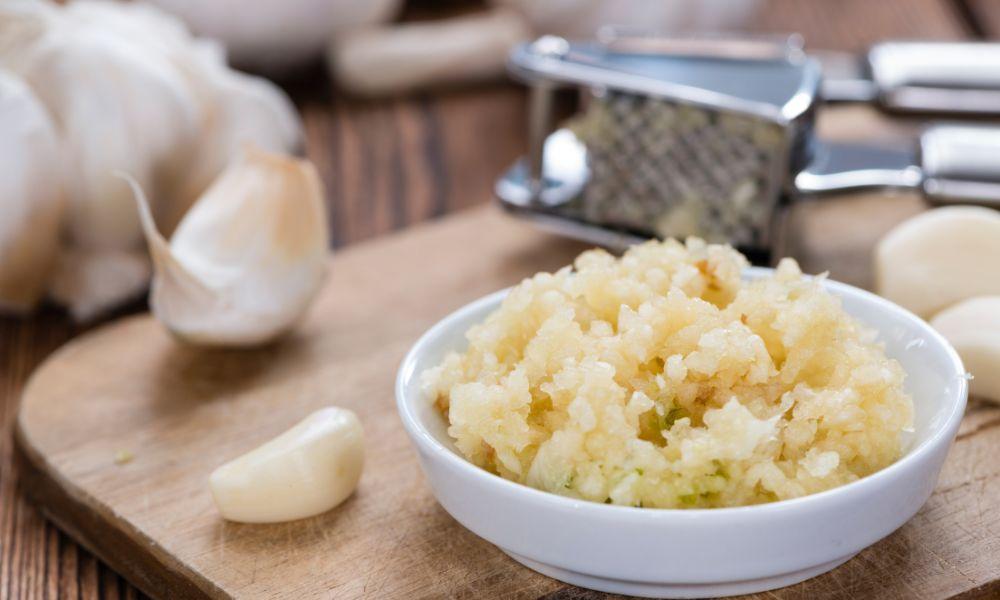
Pressed garlic, in its simplest form, refers to fresh garlic cloves that have been crushed to release their juices, resulting in a pulp-like substance. By pressing a garlic clove, you’re able to extract more of its oils and flavors, thus enhancing flavors in dishes more effectively compared to slicing or chopping. So, next time you’re cooking, rather than reaching for your knife, grab a garlic press and treat yourself to a taste sensation!

Pressing Techniques: From Basics to Pro

Remember my days at the Boat Basin Cafe Downtown, New York, before it closed down, there was a specific pressing technique we followed for optimal flavor. Yes, how to press garlic is an art in itself and requires just the right touch.

The garlic press is your friend here, but make sure it’s clean before you use it – you don’t want any residual flavors messing with your dish! For those who value practicality, don’t worry, there are quick and simple garlic press cleaning tips that save time and keep your tool in top shape.

The basic technique involves peeling the garlic cloves, placing them in your garlic press, and applying a firm squeeze. The resulting pressed garlic cloves have an intense flavor that can animate any dish. But the pro-level move is to press your garlic directly into the pot or pan where you’re cooking. This technique ensures that no flavor is lost in transit and your dish receives the full benefits of pressed garlic.

Benefits of Using Pressed Garlic in Cooking

Pressing Garlic: Your Ultimate Guide to Elevated Flavors 14

Garlic has a unique flavor profile, and pressing it can amplify these tastes, giving your dishes a richer and more robust flavor. As we used to say back in the Boat Basin Cafe, “Enhancing flavors with pressed garlic isn’t just a technique, it’s a culinary revelation.”

Pressed garlic is also easier to incorporate into sauces, dressings, and marinades. It emulsifies beautifully, creating a smooth texture. Plus, it disperses more evenly throughout your dish, ensuring every bite is as flavorful as the last.

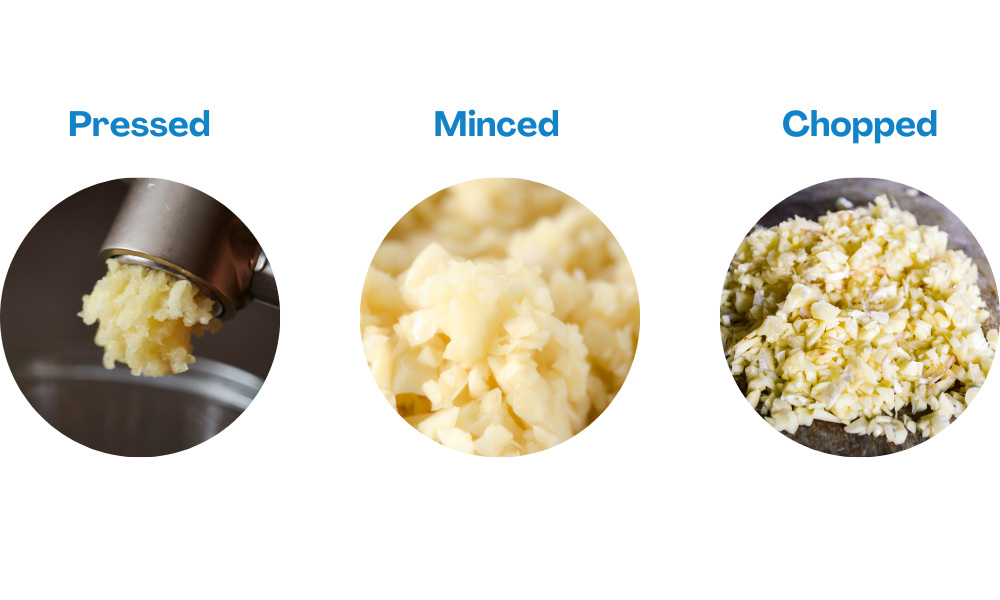
Pressed vs. Minced vs. Chopped: What’s the Difference?

Pressing Garlic: Your Ultimate Guide to Elevated Flavors 15

Now, this can be a tripping point for many. The difference between pressed, minced, and chopped garlic isn’t just in the technique; it impacts the flavor, texture, and use of garlic in your cooking.

Chopping and mincing garlic with a knife results in bigger, more substantial pieces. These are great for dishes where you want a noticeable garlic bite, like a hearty bolognese or a tangy salsa.

On the other hand, pressed garlic has a much smoother texture and tends to infuse more effectively into your dishes, making it perfect for dressings, marinades, and sauces. Remember those delicious recipes using pressed garlic at the Boat Basin Cafe? You’ll be able to replicate them in no time by mastering the art of pressing garlic!

Storing Pressed Garlic: Tips and Tricks

Pressing Garlic: Your Ultimate Guide to Elevated Flavors 16

Pressed garlic is best used fresh, but we all know that sometimes, life happens, and we need to store it. Here’s where my pressed garlic preservation techniques come into play.

To store pressed garlic, simply transfer it to an airtight container and refrigerate it. It should last for up to two days. However, remember that the longer it sits, the more flavor it loses. So, for the freshest, most vibrant flavor, press your garlic cloves just as you’re about to use them.

Can You Freeze Pressed Garlic?

You can maximize your kitchen efficiency by pressing a large amount of garlic at once and then freezing it for future use, just ensure it’s in an airtight container. Freezing may slightly alter the texture, but the flavor remains intact, making it a great option!

The Art of Pressing Without a Garlic Press

Pressing Garlic: Your Ultimate Guide to Elevated Flavors 17

We’ve all been there – suddenly realizing you don’t have the tool you need in the middle of cooking. An unexpected culinary adventure, right? But fear not, garlic press or not, you can still have your pressed garlic and eat it too.

If you don’t have a garlic press, you can use the flat side of a chef’s knife to crush your cloves. Make sure to give it a good whack – you want to really smash that garlic. Once crushed, you can mince it finely to create a similar texture to pressed garlic. It takes a bit more effort but can deliver a similar, flavor-enhancing result.

Nutritional Deep Dive

The humble garlic bulb is celebrated worldwide not just for its culinary uses, but for its numerous health benefits as well. When you press garlic, it releases a compound called allicin, which is responsible for most of these benefits, including immune boosting properties and heart health enhancement.

Interestingly, chopping or mincing garlic does not release as much allicin as pressing, so to get the maximum health benefits of consuming raw pressed garlic, consider pressing your cloves!

Pressed Garlic and Health: Potential Side Effects

While pressed garlic has many health benefits, it may not agree with everyone. Some people might experience heartburn, upset stomach, or even allergic reactions. It’s always best to consult with your healthcare provider before making significant changes to your diet.

Remember allicin, that magical compound we mentioned? It’s indeed the heart of garlic’s health benefits. It exhibits anti-inflammatory, antioxidant, and even antimicrobial properties. So next time you press a garlic clove, know that you’re not just preparing a flavorful meal, but a health-enhancing one too!

Recipe Spotlight: Homemade Marinara Sauce

Pressing Garlic: Your Ultimate Guide to Elevated Flavors 18

Ready to put your new knowledge to the test? Here are some delicious recipes using pressed garlic that will make you a fan, indeed. Try your hand at homemade marinara sauce, where pressed garlic blends perfectly with ripe tomatoes and fresh basil. Or whip up a creamy aioli – a delightful dip made with mayonnaise, lemon juice, and of course, pressed garlic. Remember, enhancing flavors with pressed garlic is all about balance. You want to add just enough to elevate the dish, not overpower it.

Common Mistakes in Pressing Garlic

No journey is complete without a few bumps in the road, and the same holds true in the culinary world. Over my years in the kitchen, I’ve come across some common mistakes people make when pressing garlic.

Firstly, avoid pressing your garlic too early. Garlic can become bitter if it’s pressed and then left to sit before being cooked. Also, be mindful of your cooking temperature. High heat can cause pressed garlic to burn and become bitter.

Measurement Guide: Garlic Conversions

When it comes to cooking, measurements are crucial. But, translating garlic measurements from cloves to teaspoons can be a puzzle. Here’s a quick guide: one clove of garlic roughly equates to one teaspoon of pressed garlic. However, this could vary based on the size of the clove.

Market Guide: Best Garlic Press Brands

Picking the right garlic press can make your garlic pressing adventure a smoother ride. While I can’t endorse any brands, garlic press reviews could be a good place to start when choosing a press that suits your needs and budget.

Conclusion

Pressed garlic is indeed a culinary gem. In my time at the Boat Basin Cafe and beyond, I’ve seen how this simple technique can elevate a dish, adding depth and flavor that leaves people asking for more. The next time you’re in the kitchen, don’t just reach for your garlic – press it, and unleash culinary excellence!

References:

  1. Garlic Press Techniques
  2. Cooking with Pressed Garlic
  3. Benefits of Pressed Garlic

Master the Art of Frying Chicken – Select the Best Oil & Perfect Crispy Results

Everyone loves a good piece of crispy and flavorful fried chicken. The heart of achieving this delicacy lies not just in your skillet but also in the cooking oil you use. As a former worker at the Boat Basin Cafe in Downtown New York, I’ve learned a few secrets for making the perfect fried chicken. The right oil can make all the difference!

best-oil-for-frying-chicken-cast-iron

Choosing the Right Oil for Frying: Flavor, Smoke Point and Health

When it comes to frying chicken in a cast iron pan, there are several factors to consider in your oil selection. It’s not as simple as just reaching for the nearest bottle of oil in your kitchen cabinet. These factors include flavor transfer, smoke point, and, more importantly, the types of fats found in the oil which contribute to its nutritional value.

  1. Flavor Transfer: Some oils have a stronger flavor that can heavily influence the taste of the chicken, while others are more neutral. At the Boat Basin Cafe, we primarily used neutral oils like vegetable and canola oils to avoid competing with the flavor of the chicken and spices.
  2. Smoke Point: The temperature at which the oil starts smoking and breaking down is known as its smoke point. High smoke point oils, such as peanut and canola oils, are ideal for frying chicken as they can withstand high temperatures without smoking or imparting a burnt flavor to your chicken.
  3. Nutrition Information: It’s important to understand that not all cooking oils are created equal, especially when it comes to their nutritional values. Canola oil and coconut oil, for instance, are known to contain healthier fats and could be a better option for health-conscious individuals.

Top Oils for Frying Chicken and Their Nutritional Values

Here are the top oils I’d recommend for frying chicken, along with their approximate nutritional information per tablespoon:

OilCalories per TablespoonFat per TablespoonSmoke PointFlavor
Vegetable Shortening12013.6 gHighMild
Lard11512.8 gHighRich
Peanut Oil12013.5 gHighNeutral
Canola Oil12414 gHighLight
Coconut Oil11713.6 gModerateCoconut
  • Vegetable Shortening: Although not the healthiest option, it’s a classic choice due to its high smoke point and mild flavor. It contains about 120 calories and 13.6 grams of fat.
  • Lard: For a truly authentic, southern-style fried chicken, lard is the best bet. It has a high smoke point and imparts an unbeatable richness. Lard has around 115 calories and 12.8 grams of fat.
  • Peanut Oil: Many chefs favor this oil for its high smoke point and neutral taste. Peanut oil has roughly 120 calories and 13.5 grams of fat.
  • Canola Oil: Known for its light flavor and high smoke point, canola oil also has a better nutritional profile with about 124 calories and 14 grams of fat, including a good amount of monounsaturated fats.
  • Coconut Oil: If you’re adventurous and want a slight coconut flavor to your chicken, use coconut oil. It has a moderate smoke point, so monitor your temperature. Coconut oil has approximately 117 calories and 13.6 grams of fat, but it also contains medium-chain triglycerides which can offer some health benefits.

Maintaining the Right Oil Temperature and Cooking Times

Master the Art of Frying Chicken - Select the Best Oil & Perfect Crispy Results 19

Oil temperature is just as critical as oil selection when frying chicken in a cast iron skillet. Aim for a temperature range of 350-375°F. Too low, and your chicken might absorb too much oil and become greasy. Too high, and your chicken may end up burnt on the outside, undercooked on the inside.

Cooking times will vary depending on the chicken part. For instance, chicken wings typically require around 10-12 minutes, whereas chicken breasts, thighs and drumsticks may need anywhere from 12-15 minutes, depending on their size.

Frying Chicken Step by Step: From Prep to Plate

Here’s a simple step-by-step guide for frying chicken. Remember, the most important thing is to maintain a steady oil temperature throughout the cooking process:

  1. Pat the chicken dry with a paper towel. This helps prevent oil splatter and aids in even browning.
  2. Season the chicken as desired and let it reach room temperature. Cold chicken can reduce the temperature of the oil, leading to uneven cooking.
  3. Heat the oil in the cast iron pan to the appropriate temperature.
  4. Add the chicken pieces carefully, without overcrowding the pan.
  5. Fry until the chicken is golden brown and has reached an internal temperature of 165°F.
  6. Remove the chicken from the oil and let it rest on a wire rack. Resting the chicken allows the juices to redistribute, making it succulent and juicy.

Let’s Talk! Share Your Thoughts and Experiences

Over to you! Do you have a favorite oil for frying chicken? Have you tried any of these techniques before? How was your experience? I’d love to hear your thoughts and ideas. Don’t forget to share and leave your rating for the article as well. Your feedback can help me make this guide even more useful. Happy frying!

FAQs

Why is the choice of oil important in frying chicken?

The oil you choose impacts the flavor, texture, and nutritional value of your fried chicken. Some oils have a strong flavor that can affect the taste of your chicken, while others have a high smoke point suitable for frying. The nutritional content also varies among different oils.

What is a smoke point and why does it matter?

The smoke point refers to the temperature at which the oil starts smoking and breaking down. An oil with a high smoke point is desirable for frying as it doesn’t smoke or burn at high temperatures, thus preserving the taste and nutritional value of the oil.

Which oil is the healthiest for frying chicken?

Canola oil and coconut oil are generally considered healthier options due to their healthier fat content. However, remember that frying itself is a high-calorie cooking method, regardless of the oil used.

How can I make sure my chicken comes out crispy but not greasy?

The key to achieving a crispy exterior without making the chicken greasy is maintaining the right oil temperature, between 350-375°F. If the oil is too cool, the chicken may absorb too much oil. If it’s too hot, the chicken can burn before cooking through.

How long should I fry chicken?

The cooking time depends on the size and type of the chicken part. Generally, chicken wings take about 10-12 minutes, while larger parts like breasts, thighs, and drumsticks may need between 12-15 minutes.

Why do I need to let the chicken rest after frying?

Letting the chicken rest after frying allows the juices to redistribute within the meat, keeping it juicy and flavorful. If you cut into it right away, those tasty juices will spill out, leaving your chicken drier.

Conclusion

There you have it, a comprehensive guide to mastering the art of frying chicken in a cast iron skillet. From selecting the best oil with a high smoke point, managing the correct temperature, to following professional frying techniques, perfecting fried chicken is a combination of science and art.

From my experience working at the Boat Basin Cafe in Downtown New York, I can confidently say that selecting the right oil and managing the frying temperature plays a huge role in achieving the desired results. Be it vegetable shortening, lard, peanut oil, or the healthier oils for frying such as canola or coconut, your choice depends on your flavor preference and health considerations.

Remember, the ultimate goal is to achieve that flavorful, golden-brown, crispy fried chicken that makes your taste buds dance with joy. So, go ahead, heat up that cast iron pan, and let’s make some mouth-watering fried chicken!

References:

  1. The Serious Eats Guide to Frying at Home
  2. Smoke Points of Different Cooking Oils
  3. The Science Behind Cooking with Oils
  4. How to Reuse Cooking Oils Safely After Frying

10 Best Canned Oysters: Reviews And Buying Guide

If you’re a fan of oysters but can’t always get your hands on fresh ones, canned oysters are the next best thing. They’re a great source of protein, iron, and vitamins, and they’re available in most grocery stores at affordable prices.

In this buying guide, we’ll be reviewing the 10 best canned oysters on the market, looking at their pros and cons, and offering tips on what to look for when buying canned oysters.

BrandProsCons
Crown Prince Natural Smoked OystersHigh in nutrients, sustainable, gluten-free, Kosher certified, Non-GMO certifiedPricey
Ekone Original Smoked OystersLow in fat, cholesterol, and calories, high in nutrients, sustainably farmed, long shelf lifeExpensive
Otter Kingdom Premium Smoked OystersHigh in protein and iron, ISO-certified, BPA-free packagingAbove average price
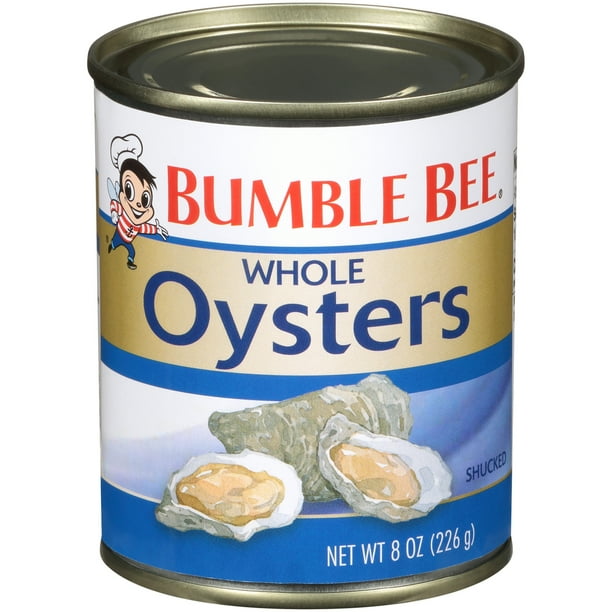
Bumble Bee Whole OystersHigh in protein, iron, and selenium, responsibly-managed fisheriesSmaller in size, tough texture
Reese Large Smoked OystersHigh in protein and iron, versatilePreserved in cottonseed oil
Geisha Fancy Smoked Oysters In Sunflower OilAffordable, high in nutrientsCalorie-dense, occasional shell fragments
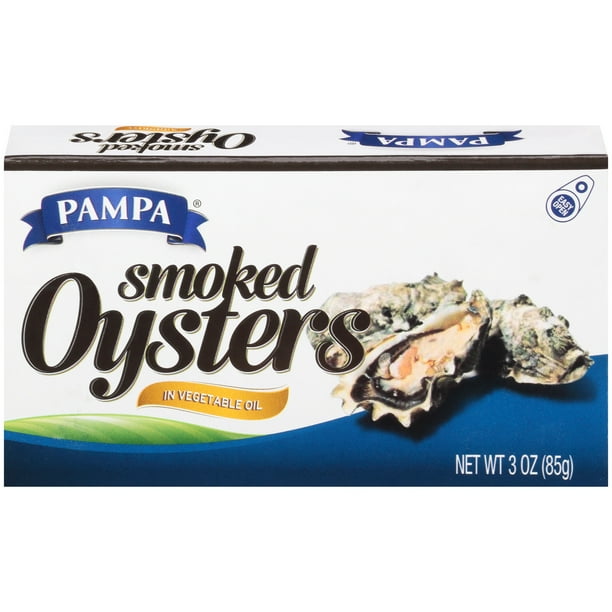
Pampa Smoked OystersAffordable, high in ironMay contain shell fragments
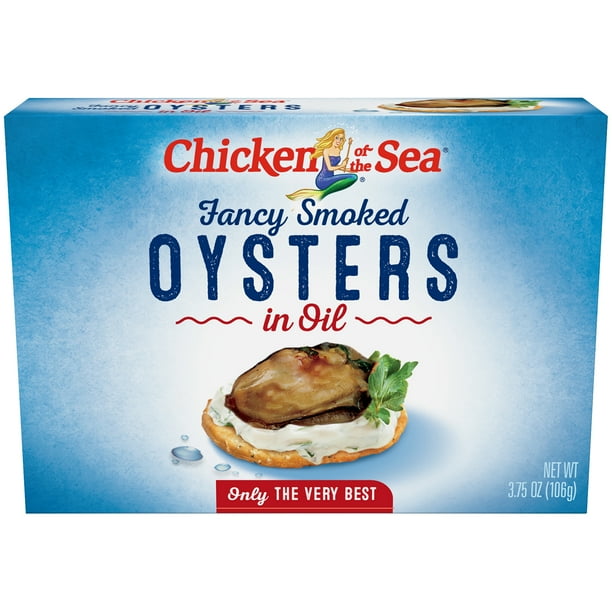
Chicken Of The Sea Smoked OystersAffordable, sustainably farmed, gluten-free, Non-GMO certifiedContains some saturated fat
Roland Premium Smoked OystersLow in calories, sustainably wild-caughtLower iron content
Pacific Pearl Whole OystersAffordable, high in nutrientsMay contain fragments of shell

01 Crown Prince Natural Smoked Oysters In Pure Olive Oil

10 Best Canned Oysters: Reviews And Buying Guide 20

Crown Prince Natural Smoked Oysters are a top pick for many, thanks to their high nutrient content and sustainable farming practices. These oysters are packed in olive oil, smoked over oak, and are free from unnecessary preservatives or additives. They’re also gluten-free, Kosher certified, and Non-GMO certified, making them a healthy choice.

Pros:

  • High in Omega-3 fatty acids and other nutrients
  • Low in sodium
  • Zero-trans fat, zero sugars
  • Hand-packed in pure olive oil
  • Smoked over oak for a natural flavor
  • Gluten-free
  • Kosher Certified
  • Non-GMO certified
  • No unnecessary preservatives

Cons:

  • Pricey

Check price on Amazon.


02 Ekone Original Smoked Oysters

Ekone Original Smoked Oysters are sustainably farmed in the USA and are known for their large size and unique flavor. They’re low in fat, cholesterol, and calories, and high in nutrients. These oysters are smoked with maple for a unique flavor and have a shelf life of 4 years.

Pros:

  • Low in fat, cholesterol, and calories
  • High in vitamins, minerals, and omega-3 fatty acids
  • Large size with a slightly chewy texture
  • Sustainably farmed in the USA
  • Maple smoke
  • No preservatives
  • 4 years of shelf life

Cons:

  • Expensive 

03 Otter Kingdom Premium Smoked Oysters

10 Best Canned Oysters: Reviews And Buying Guide 21

Otter Kingdom Premium Smoked Oysters are sourced from Korea and are hand-packed in pure olive oil. They’re high in protein, iron, and other nutrients, and don’t contain any sugar or trans fats. These oysters are also ISO-certified and come in BPA-free packaging, ensuring their safety and quality.

Pros:

  • Hand-packed in pure olive oil
  • Easy-open lids of 3-ounce cans
  • Clean oysters with no additives
  • Natural wood smoke for the best flavor
  • High in protein, iron, and other nutrients
  • No sugar or trans fats
  • ISO-certified
  • BPA-free packaging

Cons:

  • Above average price

Check price on Amazon.


04 Bumble Bee Whole Oysters

10 Best Canned Oysters: Reviews And Buying Guide 22

Bumble Bee Whole Oysters are sourced from responsibly-managed fisheries and are stored in brine, making them a healthier choice compared to those stored in oil. They’re high in protein, iron, and selenium, and don’t contain any added sugars or trans fats. However, they’re smaller in size and have a tougher texture compared to other brands.

Pros:

  • Stored in water
  • Whole oysters that can be served as an appetizer or main course
  • Sourced from responsibly-managed fisheries
  • Hand-shucked and properly graded
  • High in protein, iron, and selenium
  • No added sugars or trans fats
  • Very reasonable price

Cons:

  • Smaller in size
  • Tough texture
  • Less juicy

Check price here


05 Reese Large Smoked Oysters

10 Best Canned Oysters: Reviews And Buying Guide 23

Reese Large Smoked Oysters are high in protein and iron and are smoked in cherry wood for a rich flavor. They’re versatile and can be used in various dishes. However, they’re preserved in cottonseed oil, which contains saturated fat.

Pros:

  • High in protein and iron
  • Easy to open cans for convenience
  • Cherry wood smoked for a deep flavor
  • Versatile for various dishes
  • Responsibly farmed for sustainability 

Cons:

  • Cottonseed oil contains saturated fat

Check price on Amazon


06 Geisha Fancy Smoked Oysters In Sunflower Oil

10 Best Canned Oysters: Reviews And Buying Guide 24

Geisha Fancy Smoked Oysters are affordable and come in easy-open cans. They’re firm and plump, and are high in calcium, iron, potassium, and protein. However, they’re also calorie-dense and may contain occasional shell fragments.

Pros:

  • Easy-open 3.75-ounce cans
  • Affordable 
  • Firm and plump
  • Healthy

Cons:

  • Occasional shell fragments
  • Calorie-packed 

Check price on Amazon.


07 Pampa Smoked Oysters

10 Best Canned Oysters: Reviews And Buying Guide 25

Pampa Smoked Oysters are an affordable option packed in sunflower oil. They’re high in iron and don’t contain any sugars or trans fats. However, they may contain shell fragments.

Pros:

  • High in iron content
  • Very cheap
  •  No sugars or trans fats

Cons:

  • Shell fragments may be present

Check price here


08 Chicken Of The Sea Smoked Oysters

10 Best Canned Oysters: Reviews And Buying Guide 26

Chicken Of The Sea Smoked Oysters are sustainably farmed and are 97% fat-free. They’re gluten-free and non-GMO certified, making them a healthy choice. However, they do contain some saturated fat.

Pros:

  • Low-priced for greater affordability
  • Sustainably farmed
  • Fresh taste
  • 97% fat-free
  • Gluten-free 
  • Non-GMO certified 

Cons:

  • Contains some saturated fat

Check price here


09 Roland Premium Smoked Oysters

10 Best Canned Oysters: Reviews And Buying Guide 27

Roland Premium Smoked Oysters are sustainably wild-caught and are low in calories. They’re smoked with cherrywood for a mild flavor and are versatile. However, they have a lower iron content compared to other brands.

Pros:

  • Only 70 calories
  • Wild caught sustainably
  • Cherrywood smoke for a mild flavor
  • Versatile 
  • Medium-priced 

Cons:

  • Lower iron content compared to other brands

Check price at Amazon


10 Pacific Pearl Whole Oysters

10 Best Canned Oysters: Reviews And Buying Guide 28

Pacific Pearl Whole Oysters are healthy and affordable. They’re high in nutrients and are stored in brine instead of oil. However, they may contain fragments of shell.

Pros:

  • Healthy at 150 calories per can
  • A high content of nutrients
  • Brine instead of oil 
  • Good value for money

Cons:

  • Fragments of shell may be present

Check price on Amazon

How To Choose The Best Canned Oysters?

10 Best Canned Oysters: Reviews And Buying Guide 29

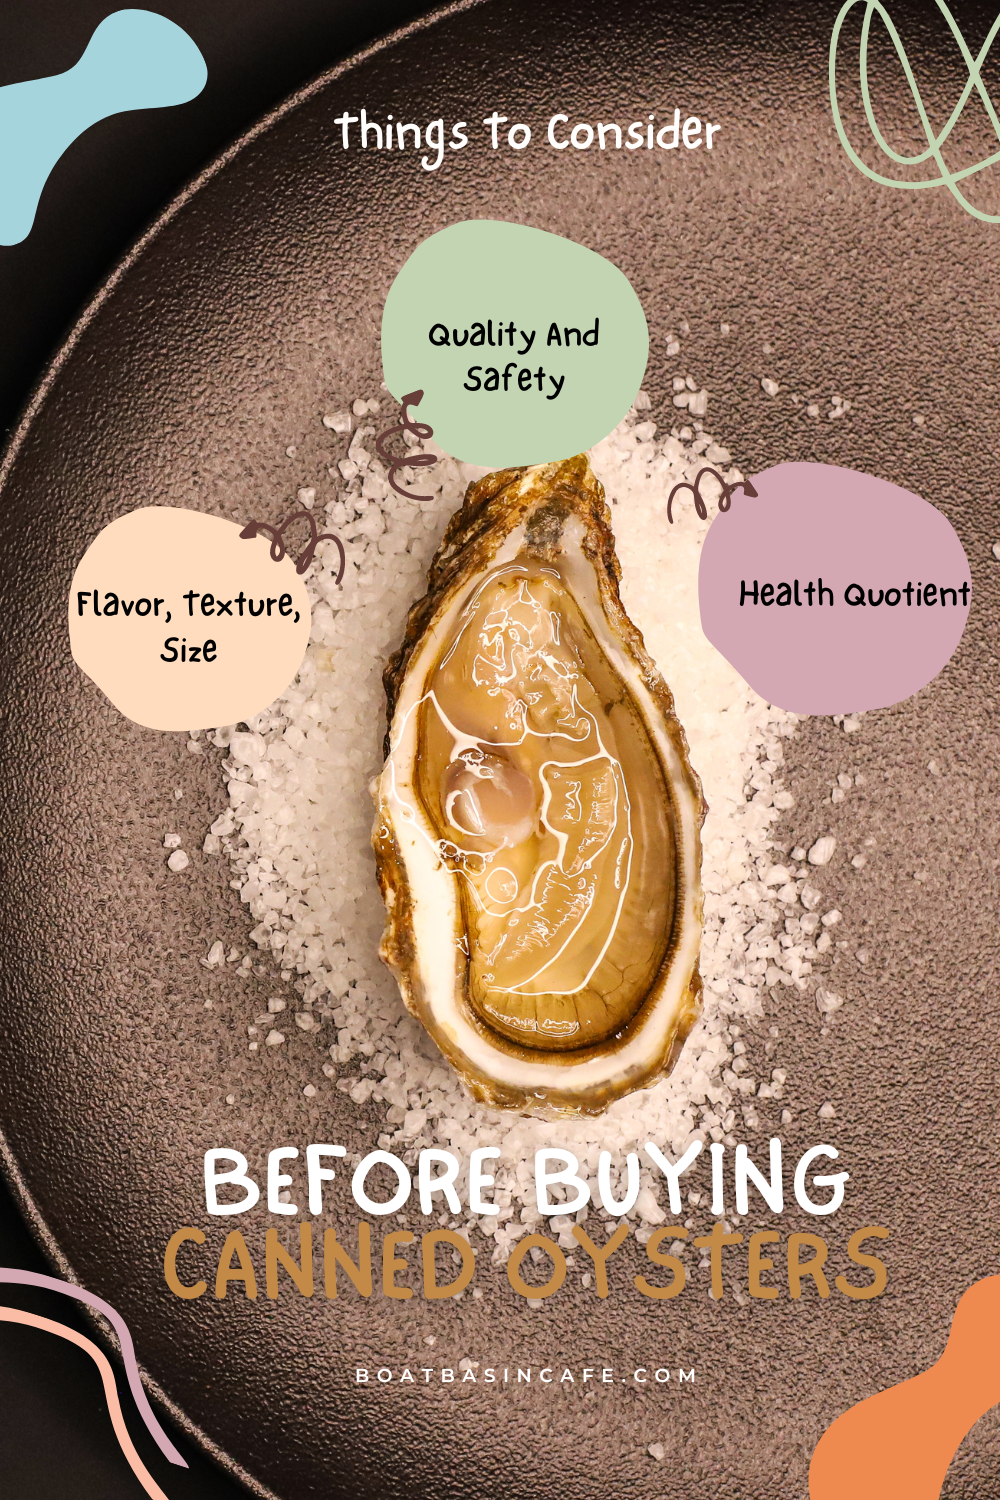
When choosing canned oysters, consider their flavor, size, and texture, as well as their health quotient and quality. Look for oysters that have been hand-packed and hand-shucked, and those that are high in nutrients. Also, consider whether they’re suitable for any particular diet you may be following.

Are Canned Oysters Good For You?

Canned oysters are a great source of nutrition and are an excellent option for those looking for a quick bite. They provide healthy omega-3 fats and minerals, such as selenium and zinc, and vitamins B12 and D.

Do Canned Oysters Go Bad?

Do Canned Oysters Go Bad?

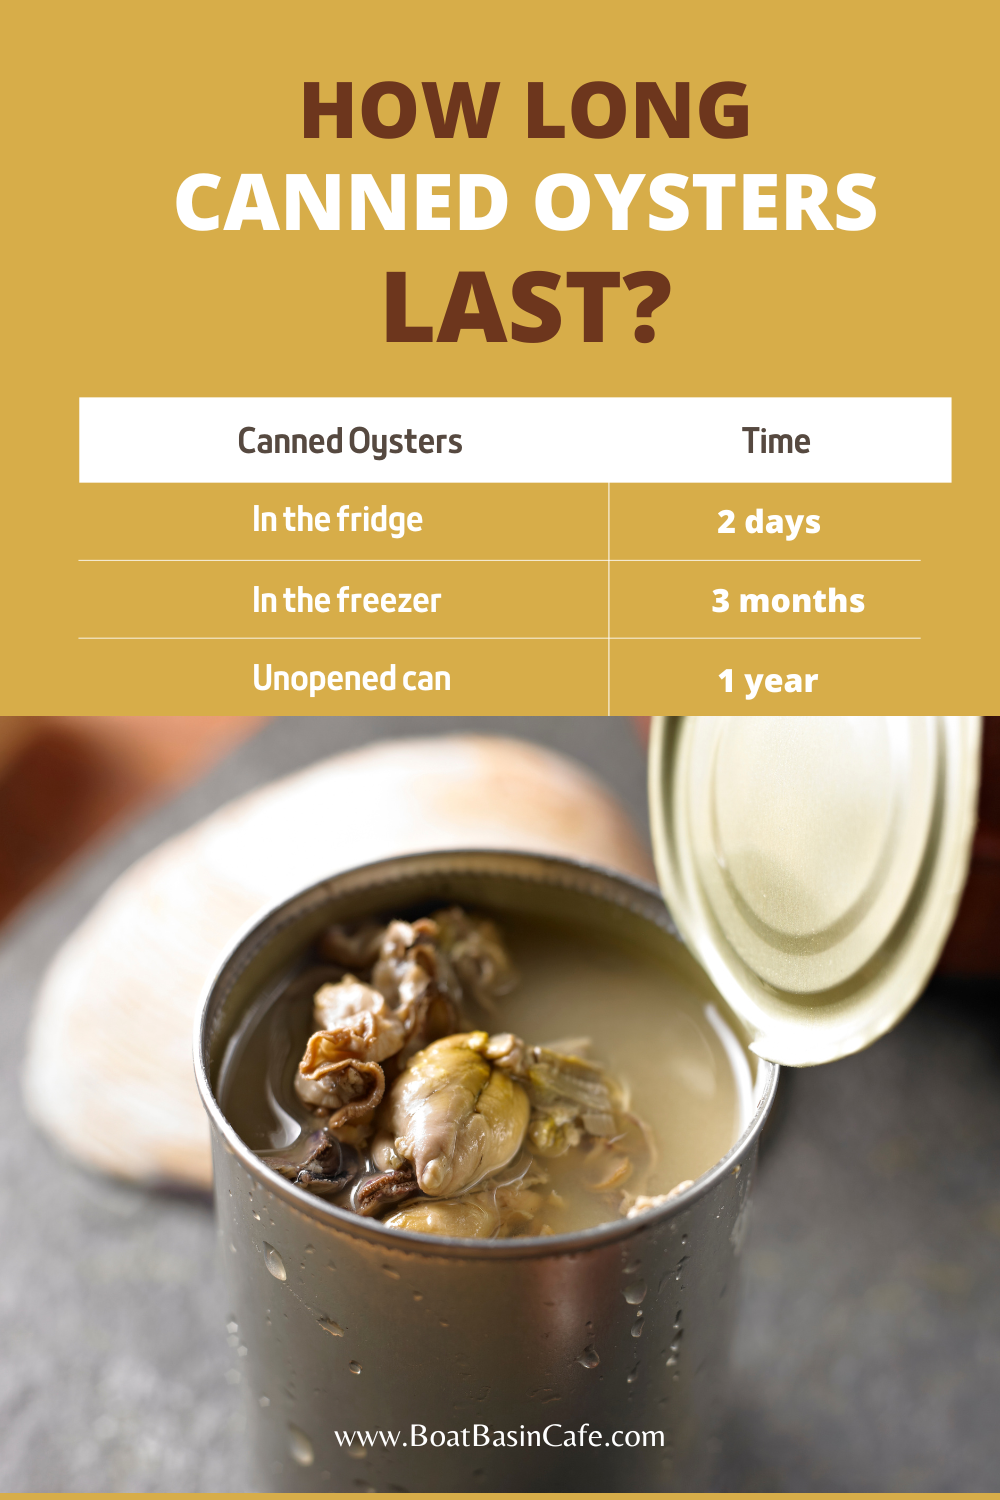
Canned oysters should last for one year if kept in a dry and cool place away from direct light. However, do check the can for the expiry date. Some canned oysters even last 3 to 5 years if stored properly. To store leftover canned oysters, put them in a glass or food-grade plastic container and cover them with a lid. Stored like this, the canned oysters should remain edible for two days. It’s better not to refrigerate them in the can as the metal can react and affect the taste of the canned oysters. 

If you have leftover canned smoked oysters, you can freeze them. Empty the can and put the smoked oysters in a freezer bag or airtight container. These canned oysters will last for three months in the freezer.

FAQs

What Do Canned Oysters Taste Like?

Oysters that have been seasoned with smoke are delectable, and the type of smoke you used makes a huge difference. Fruit woods, like apple or cherry wood, give a warmer taste, while nut woods have stronger, sharper characteristics.

Are Canned Oysters Cooked?

Yes, canned oysters are either boiled or smoked.

Conclusion

In conclusion, canned oysters are a convenient and nutritious option for those who love this seafood. The best canned oysters are those that are sustainably sourced, high in nutrients, and free from unnecessary additives. Whether you prefer them smoked, boiled, or raw, there’s a canned oyster option out there for you.

Discover the Best Oranges for Juicing: A Comprehensive Guide

Learn all about the best oranges for juicing, when they are available, tips to make the freshest OJ, and how to store them so that they won’t spoil.

9 Best Oranges For Juicing

Oranges are a popular fruit worldwide, best known for their high Vitamin C content. They’re not just a delicious snack, but also a key ingredient in a refreshing glass of juice. But did you know that not all oranges are created equal when it comes to juicing? In this guide, we explore the best oranges for juicing, their availability, and tips for making the freshest orange juice.

Some Fun Facts

  • The first orange originated in Southeast Asia in ancient times. Oranges are a man-made fruit!
  • There are more than 600 types of oranges!
  • It is actually a hybrid made from Pomelo and Mandarin.
  • Around 85% of all oranges are produced for juice!
  • Orange peels are a great slug repellent!

The Health Benefits of Freshly Squeezed Orange Juice

Discover the Best Oranges for Juicing: A Comprehensive Guide 30

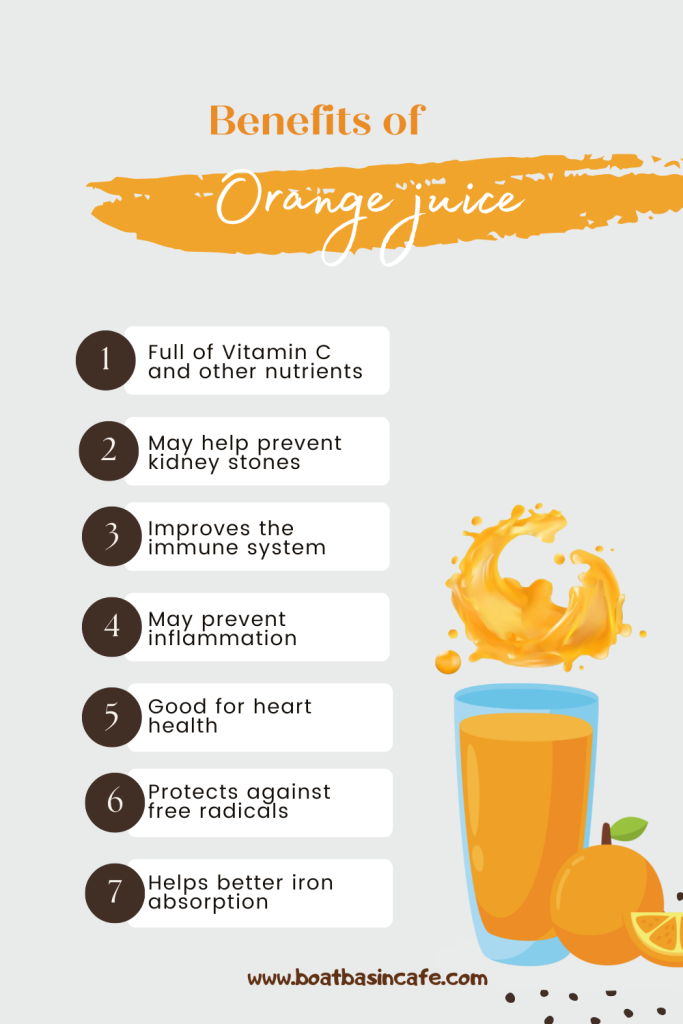
Freshly squeezed orange juice is not just a refreshing drink, but also a powerhouse of nutrition. Oranges are rich in Vitamin C, potassium, fiber, and other minerals and nutrients that protect us from diseases, aid in weight loss, protect our heart, and boost our immune system.

Making your own orange juice at home is much more affordable than buying from a juice bar. Plus, you are not losing out on any of the nutrients. On the other hand, bottled orange juice often contains preservatives and added sugar, which can be harmful to our health.

The Best Oranges For Juicing

Let’s explore the best oranges for juicing, their unique characteristics, and why they are a great choice for your next glass of OJ.

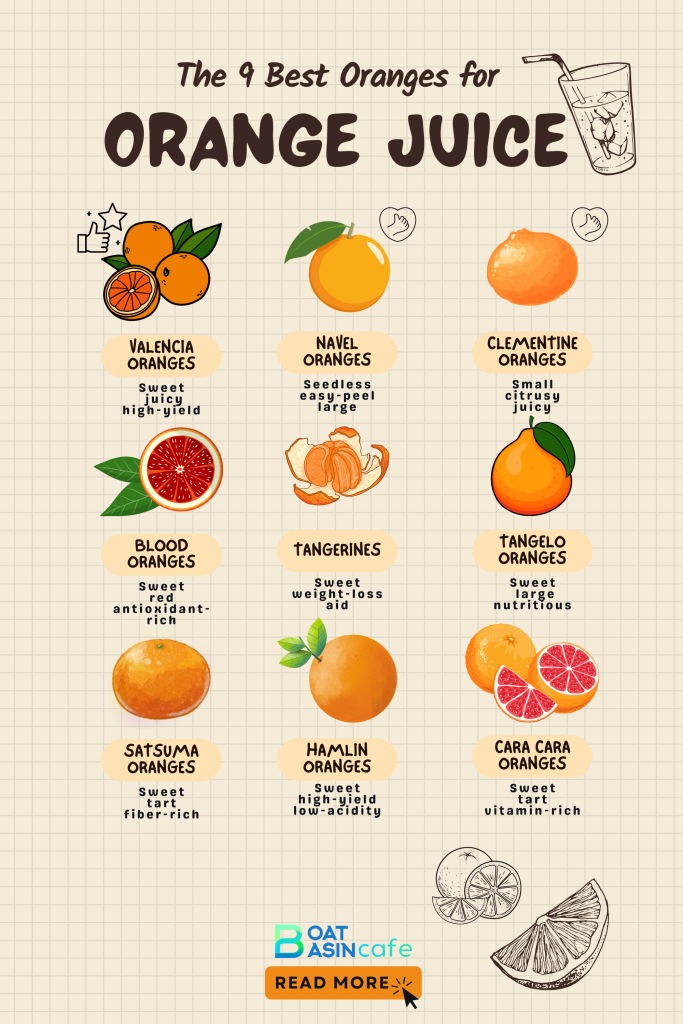
Orange VarietyTasteYieldUnique Characteristics
ValenciaSweetHighUsed commercially, high in potassium and fiber
Blood OrangesVery sweetHighHigh in antioxidants, unique red color
Navel OrangesSweetHighLarge size, seedless, easy to peel
TangerinesSweetMediumHigh in synephrine, aids in weight loss
Clementine OrangesCitrusyMediumSmall size, juicy, some varieties are seedless
Tangelo OrangesSweetHighLarge size, high in Vitamin A, calcium, magnesium, and potassium
Satsuma OrangesSweet with a hint of tartnessMediumHigh in fiber, good for the digestive system
Hamlin OrangesSweetHighWidely grown in Florida, low in acidity
Cara Cara OrangesSweet and tart with undertones of cherries and berriesMediumHigh in vitamins A and C

Valencia Oranges

Discover the Best Oranges for Juicing: A Comprehensive Guide 31

Valencia oranges are the sweetest oranges for juicing and are used commercially for their taste and wide availability. They are packed with potassium and fiber, making them great for your immune system. Valencia oranges have a low LARL because they remain on the tree for a longer period of time than other oranges, which means they don’t become bitter over time.

Blood Oranges

Discover the Best Oranges for Juicing: A Comprehensive Guide 32

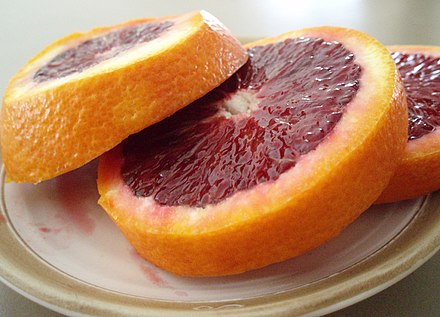
Blood oranges are very sweet and juicy and have the highest amount of antioxidants among all oranges. They are perfect for your Christmas parties due to their unique red color. However, they ferment fast, so it’s best to consume the juice immediately after juicing.

Navel Oranges

Discover the Best Oranges for Juicing: A Comprehensive Guide 33

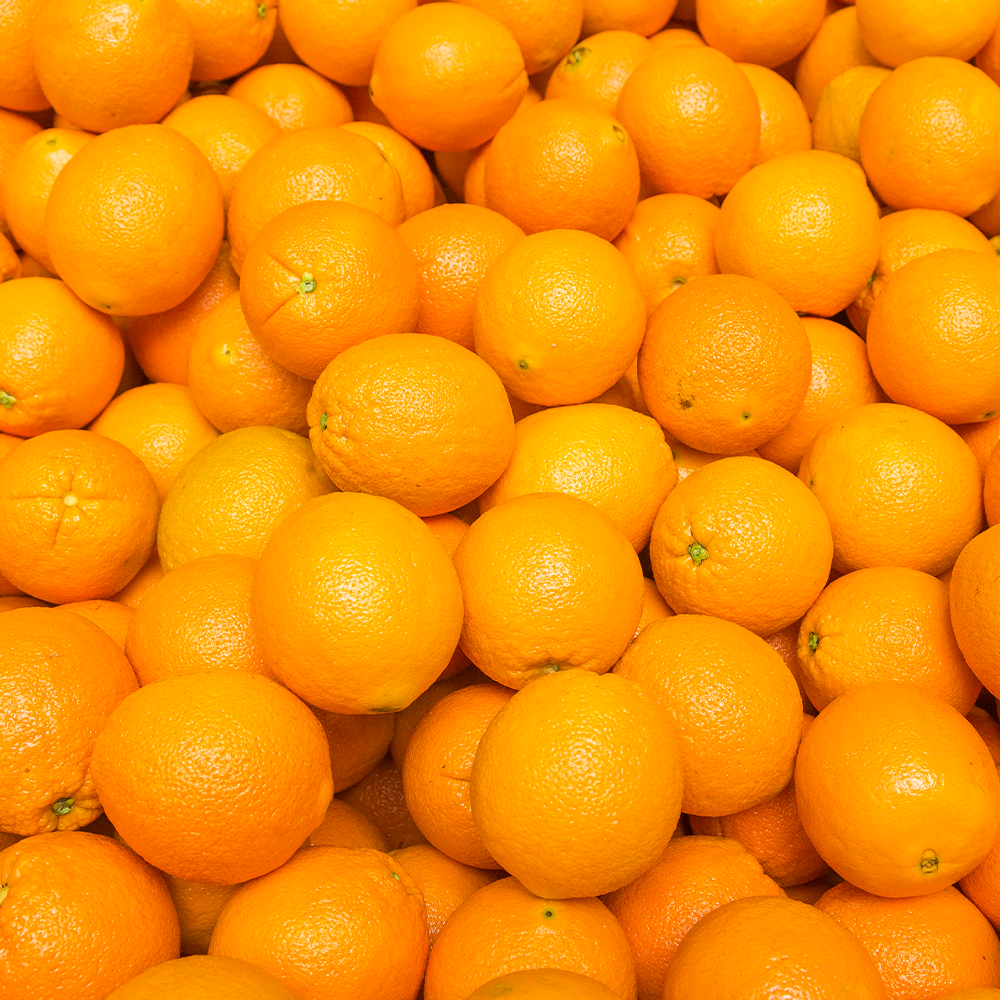
Navel oranges are a great option for juicing due to their large size, which yields more juice per orange than any other variety. They are also seedless and easy to peel, making them a convenient choice for juicing.

Tangerines

Discover the Best Oranges for Juicing: A Comprehensive Guide 34

Tangerines are high in synephrine, a compound that aids in weight loss. They are generally sweet, and most tangerines come without seeds, making them easy to juice.

Clementine Oranges

Discover the Best Oranges for Juicing: A Comprehensive Guide 35

Clementine oranges are small but pack a delicious citrusy flavor. They are quite juicy and some of the varieties come without seeds, making them one of the best oranges for juicing.

Tangelo Oranges

Discover the Best Oranges for Juicing: A Comprehensive Guide 36

Tangelo oranges are one of the sweetest oranges for juicing and also produce a lot of juice, thanks to their large size. They are high in Vitamin A, calcium, magnesium, and potassium, making them a healthy choice for juicing.

Satsuma Oranges

Discover the Best Oranges for Juicing: A Comprehensive Guide 37

Satsuma oranges contain high amounts of fiber that are good for the digestive system. They are small in size, but the wonderful mix of sweet orange juice with just a hint of tartness brings a very balanced and refreshing flavor to the glass.

Hamlin Oranges

Discover the Best Oranges for Juicing: A Comprehensive Guide 38

Hamlin oranges are widely grown in Florida and have a high yield of juice per fruit. They have low acidity and are very juicy, making them a great choice for juicing.

Cara Cara Oranges

Discover the Best Oranges for Juicing: A Comprehensive Guide 39

Cara Cara oranges have a unique taste that is a combination of a sweet and tart flavor with undertones of cherries and berries. They are high in vitamins A and C, making them a healthy choice for fresh squeezed juice.

How To Choose The Best Juicing Oranges

Discover the Best Oranges for Juicing: A Comprehensive Guide 40

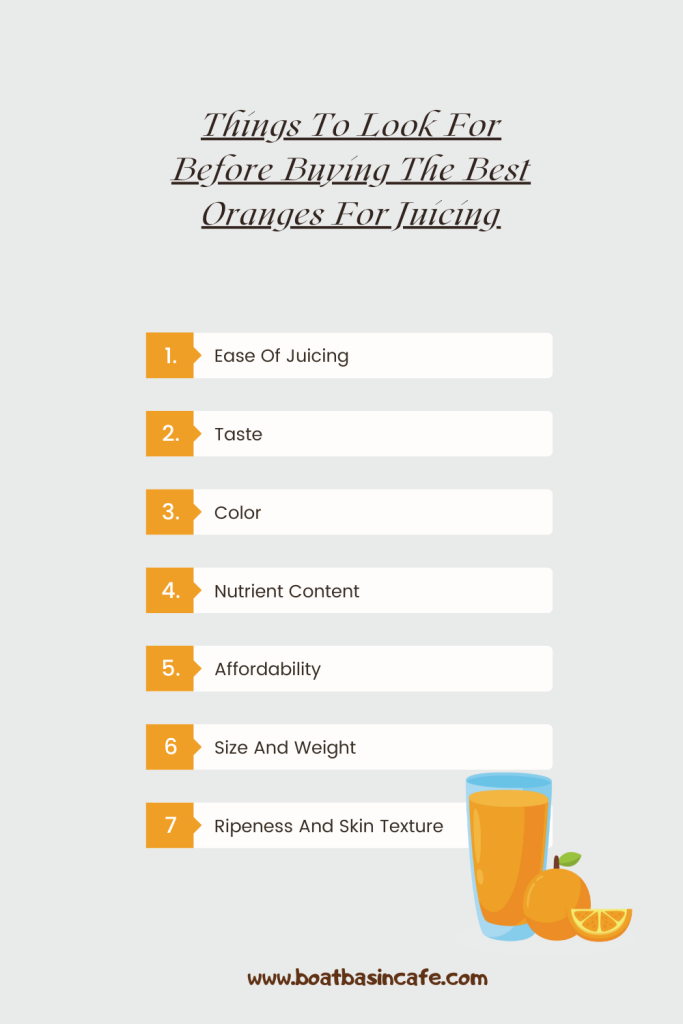
As you have just seen, not all oranges are not made equal. So, how do you choose the best oranges for making orange juice? Well, here are some of the things that you should consider before going bonkers over the cascades of oranges that you see in the supermarket. 

Ease Of Juicing 

If you don’t have the time to do a lot of prepping before squeezing a fresh glass of OJ, look for oranges with fewer seeds like Valencia. Or, go for navel oranges as they are seedless and easier to juice. Easy peeling also cuts down on your prep time so look for varieties that are easier to peel like tangerines and satsuma oranges. 

Taste 

In my family, half of us like our orange juice sweet while the other half like a more tangy, sour taste. Valencia oranges are more popular with most people because they are sweet and juicy. So are navel oranges that are sweeter than their tart counterparts. However, I need to buy blood oranges or tangerines too to juice oranges and satisfy those who want more tangy orange juice. Therefore, you need to keep your taste preference in mind before buying oranges for juicing. 

Color Of The Juice

As there are varieties of oranges with different colors, fresh orange juice is also not the same shade of orange. Some are very light in color – like juice from tangerines – while others have a tinge of red in them, for example, blood oranges. Hence, the name. I like to have a deeper reddish-orange color in my orange juice so I make the most of blood oranges when they are in season.

Nutrient Content

Besides having orange juice just as a refreshing drink, you can choose to have it for various health benefits. If you’re looking for plenty of potassium and fiber to amp your immune system, then Valencia oranges are the best oranges for orange juice. For high fiber content, you can also go for satsuma oranges. Blood oranges have the highest content of antioxidants that protect you from free radicals that can cause cancer and other diseases.

Affordability

Don’t forget to check out the price of the oranges your mind is set on. Sometimes you may like a variety that is higher in price as it might be available in a rare season, for example, tangerines. Navel oranges score high on affordability.

Size And Weight

Before buying the best oranges for juicing, check out the size and weight of the fruit. A large size variety like the navel oranges yields more juice. However, don’t expect the same from clementines as they are small and will not yield as much juice although they are quite juicy. Satsuma oranges are also small and you will need to juice a few to get fresh squeezed orange juice. When you pick an orange and it feels heavy, then you will get more juice out of it.

Skin Texture

Look for oranges with a firm and smooth texture. Those that have blemishes on their skin won’t give you the best freshly squeezed orange juice. Also, feel the skin to check how ripe the oranges are. Oranges that are overripe will be difficult to juice. 

Tips To Make The Best Orange Juice

  1. Pick the right orange variety as per your taste preference. 
  2. Make a small batch and taste before juicing a larger batch. 
  3. Get a citrus juicer like this to make juicing more convenient. 
  4. Refrigerate leftover orange juice for a longer shelf life. 
  5. Stir the orange juice after taking it out of the fridge.

FAQs

What Are The Best Oranges For Juice?

Valencia, navel, tangelo, cara cara, and blood oranges are the best oranges for juice because of their large size which yields a high amount of juice. They are also easy to peel, leading to shorter prep time. 

Are Navel Oranges Good For Juicing?

Navel oranges for juicing are the best as they have no seeds and are easier to peel, making them some of the best oranges for juicing. Moreover, they are sweet, easy to peel, and have a higher juice yield compared to other types of oranges. They are also readily available and more affordable. 

Can You Juice Oranges In A Juicer?

Yes, you can juice oranges in a juicer. However, it’s recommended to peel the oranges before juicing as the skin can make the juice taste bitter. A citrus juicer is especially designed for juicing citrus fruits and can make the process easier and more efficient.

How Many Oranges Does It Take To Make A Glass Of Juice?

On average, it takes about 2-4 medium-sized oranges to make a glass of juice. However, this can vary depending on the size and variety of the orange. For example, larger oranges like navel or Valencia oranges may yield more juice than smaller varieties.

Is It Better To Drink Orange Juice Or Eat An Orange?

Both drinking orange juice and eating an orange have their own benefits. Orange juice allows you to consume a large amount of vitamin C and other nutrients quickly and easily. However, eating an orange provides you with fiber and other nutrients that may be lost during the juicing process. It’s best to incorporate both into your diet for maximum health benefits.

Conclusion

In conclusion, the best oranges for juicing are those that are sweet, juicy, and easy to peel. Valencia, navel, tangelo, cara cara, and blood oranges are particularly popular for juicing due to their taste and high juice yield. However, the best orange for you will ultimately depend on your personal taste preferences. So, why not try juicing different varieties and find your favorite? Happy juicing!

References

  1. “Orange Varieties for Juicing.” Citrus.com. Accessed on 20th March, 2022.
  2. “The Best Oranges for Juicing.” Healthline.com. Accessed on 20th March, 2022.
  3. “The Health Benefits of Orange Juice.” MedicalNewsToday.com. Accessed on 20th March, 2022.

While exploring the best oranges for juicing, we also delved into the organic vs. non-organic debate; find out more in our detailed guide on [Organic vs. Non-Organic Coffee and Grilled Foods: What’s the Real Difference?].

Pin Later

Discover the Best Oranges for Juicing: A Comprehensive Guide 41

Revealing the Caffeine Content in Health-Aid Kombucha

Kombucha, the delightfully tart and fizzy beverage that has become a staple in health food stores, yoga studios, and reality TV show confessionals, has won the hearts of the health-conscious generation. As flavors and varieties of this fermented tea continue to surge, many wellness warriors wonder about one thing – “Does Kombucha have caffeine?” The insatiable curiosity around the caffeine content of Kombucha is a hot topic these days, particularly with the rising interest in caffeine-content awareness among health-conscious individuals.

So, allow me, John Bird, your resident Kombucha expert, to quench your thirst for knowledge on this topic. Buckle up your seatbelts; we’re diving deep into the caffeine content in Kombucha and how it stands in comparison to your daily cup of joe or tea.

health aid kombucha caffeine

Understanding Kombucha and Caffeine

Kombucha is a wonder brew. But what exactly is it? For the uninitiated, Kombucha is a fermented beverage typically made from black or green tea. The magic happens when a SCOBY (Symbiotic Culture of Bacteria and Yeast) is added to the concoction, kicking off a unique process of fermentation. This process is responsible for Kombucha’s characteristic tangy taste and potential health benefits.

One might think that since Kombucha is tea-based, it must contain a good amount of caffeine, right? Well, yes and no. Although it’s true that Kombucha derives from tea, which naturally contains caffeine, the fermentation process changes the game. It’s a fascinating process, trust me! The length of fermentation essentially nibbles away at the caffeine, leaving about 1/3 of the original amount.

Comparing Kombucha’s Caffeine to Coffee and Tea

DrinkCaffeine Content per 8 ounces
Coffee95mg
Black Tea40 – 70mg
Green Tea25 – 45mg
Kombucha10 – 25mg
Health-Aid Kombucha (Est.)10 – 25mg

Let’s put things into perspective, shall we? The average 8-ounce cup of coffee packs a whopping 95mg of caffeine, whereas your typical black tea contains around 40 to 70mg. Green tea, on the other hand, has much subtler levels, averaging around 25 to 45mg per 8 ounces.

So where does Kombucha fit into all this? An 8-ounce serving of this bubbly brew usually contains between 10 to 25mg of caffeine. Yes! That might be even less than the caffeine in your green tea! Isn’t it fascinating how the fermentation process and Kombucha caffeine levels go hand in hand?

Factors Affecting Kombucha’s Caffeine Content

Now that we know that Kombucha does contain caffeine, albeit a lesser amount than your average cup of coffee or tea, it’s essential to understand what factors influence these levels. Believe me, interesting elements are at play here:

Factors Affecting Caffeine ContentDescription
Steeping time of the teaThe longer the tea is steeped, the more caffeine is extracted. However, fermentation reduces the final caffeine content.
Fermentation durationLong Fermentation time reduces caffeine as SCOBY snacks on caffeine.
Brand variationsCaffeine content can vary among Kombucha brands due to different brewing and fermentation processes.
  1. Steeping time of the tea: The longer the tea is steeped, the more caffeine is extracted. However, as I mentioned earlier, the fermentation process comes to the rescue to lower the ultimate caffeine content.
  2. Fermentation duration: The SCOBY used in brewing Kombucha indeed loves to snack on caffeine. So, the longer your batch ferments, the lower the caffeine content gets. It’s all about playing the waiting game!
  3. Brand variations: Just as every brewer has a unique process, the caffeine content can also vary among Kombucha brands. Fascinating, isn’t it?

So, if you’re jonesing for a fizzy drink but also want to keep tabs on your caffeine intake, longer steeping and fermentation processes can be your best friends in the quest for a healthier beverage.

Benefits of Low-Caffeine Kombucha

Revealing the Caffeine Content in Health-Aid Kombucha 42

Offering a tart yet fruity flavor, this probiotic-rich beverage does more than just tantalize your tastebuds. A benefit of low-caffeine Kombucha is that it offers a great way for those interested in cutting back on caffeine while keeping their beverage choice interesting. Kombucha provides you with an energy boost, a fermentation motherload, and unique flavors without sending you bouncing off the walls!

However, remember moderation is crucial. If you’re pregnant, trying to conceive, or breastfeeding, consulting with a healthcare professional about the safe caffeine intake during breastfeeding or pregnancy is always a good idea.

Health-Aid’s Approach

Now let’s talk about a brand that has been making waves in the Kombucha world – Health-Ade. Health-Ade’s unique kombucha flavors are prepared using a small batch process, which primarily uses a blend of organic black and green tea.

Chances are, the caffeine content in Health-Aide Kombucha varies between 10mg to 25mg per serving, depending on the flavor and batch. Each sip packs the perfect balance of tangy, sweet, and fizzy. For someone wanting to try a refreshing, low-caffeine alternative to sugary drinks, Health-Aid’s Kombucha might just hit the spot!

Don’t forget to check out my previous blog post where I embark on a journey exploring the mighty Health Benefits of Kombucha and how it can aid you sexually.

Managing Caffeine Levels through Fermentation

Revealing the Caffeine Content in Health-Aid Kombucha 43

The relationship between fermentation and Kombucha caffeine levels is a mutual love affair. The time-dependent process reduces the caffeine content, making it an excellent option for the caffeine-sensitive. The key to controlling caffeine levels in your Kombucha lies in the duration of both brewing and fermentation.

Longer brewing times extract more caffeine from the tea leaves, but the next stage, fermentation gobbles up a good portion of the caffeine. So a lengthy fermentation period can do wonders to achieve low-caffeine Kombucha options. It’s all about balance and patience, my friends.

Reducing Caffeine with Kombucha Fermentation

One can’t help but marvel at nature’s genius ways of achieving balance. The brewing and fermentation process of Kombucha serves as a perfect example of this magical equilibrium. Kombucha starts its journey as a simple mixture of tea, and the fermentation process gradually transforms it into a vibrant, fizzy, and low-caffeine beverage.

The energy fluctuations throughout the day can be challenging, especially when you are sensitive to caffeine. Here, Kombucha comes to your rescue as the ultimate superhero, providing an energy boost minus the jittery side effects. Anyone asking how is caffeine reduced in Kombucha; the answer is in the balance of brewing and fermenting.

Kombucha Vs Coffee Caffeine

When it comes to the caffeine showdown between Kombucha and coffee, Kombucha is a clear winner for those seeking less caffeine. Your average home-brewed coffee has almost 10 times the caffeine level of Kombucha. This makes Kombucha an excellent beverage alternative for those wanting to cut down on their caffeine intake without losing out on a delightful drink experience.

The fact that Kombucha contains less caffeine doesn’t downplay the ongoing dialogues on caffeine’s impact on health. It’s essential to be aware of the caffeine content in our dietary consumption as the effects vary from person to person. And finding pregnancy-safe Kombucha options are an important part of this conversation.

Conclusion

Dive into the wonderfully fizzy world of Kombucha while keeping your caffeine preferences in mind. If you’ve been a member of the nocturnal club solely because of caffeine-induced insomnia, Health-Aid Kombucha could be your new best friend. With the right balance, Kombucha shows that you can have it all– a delicious drink that is flavorful, healthy, and doesn’t leave you pacing around your kitchen at 3 am.

As I conclude this explorative Kombucha adventure, let’s remember the importance of being informed about the beverages we consume. Remember, knowledge is power; knowing how to leverage it is the key to a healthier lifestyle. So why wait? Hop on the bandwagon and experiment with this effervescent goodness today.

Author’s Note

Back in the day, I, John Bird, was a part of the team at the ever-hustling Boat Basin Cafe Downtown New York. I managed to learn much more than just making the perfect latte foam there. The exposure to the culinary world there piqued my interest in food, beverages, and overall wellness.

This Kombucha journey has been an enlightening experience for me. I hope it’s been the same for you. For more refreshing tales straight from Boat Basin Cafe and beyond, stay tuned & keep sipping!

References: