Almost all coffee enthusiasts have a Keurig or dream of owning one someday. They are one of the most popular coffee machines in the world. The way Keurig is able to prepare delicious coffee at the press of a button, explains why people love it so much.
While Keurig is an absolute legend in its performance, you might find yourself struggling from time to time with it. It can be because the machine is leaking, or because it’s not pouring coffee at all. You have cleaned and washed the whole thing and still, no change.
Maybe the problem is not in the machine at all, maybe it’s the needle. In this article, we will tell you how to clean a Keurig 2.0 needle in 7 easy steps!
What is a Keurig Needle?

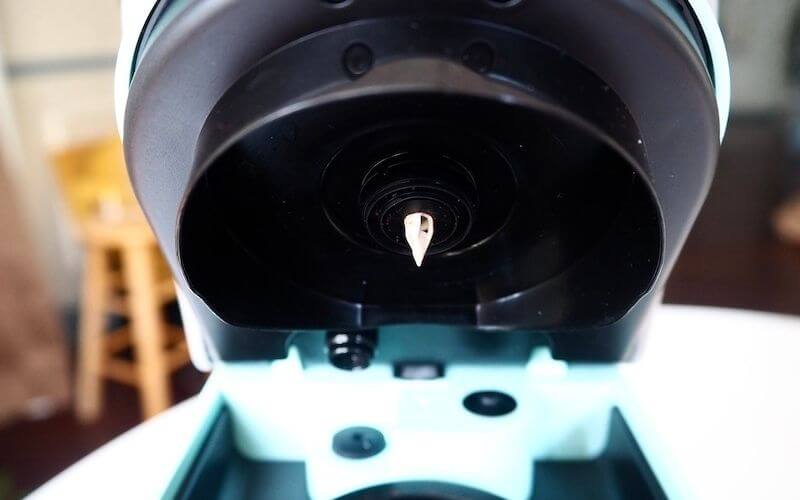
This might come as a surprise to some but there is a needle inside your coffee machine! The first time I read about it, I was shocked. But it makes sense. Ever wondered how the coffee pod gets punctured to release your favorite espresso?
The needle punches a hole in the pod which then is filled with hot water. This process is one of the most common ways of making coffee at home.
Not all of us have time to roast the beans, grind them and then make fresh coffee each morning. So you see, the Keurig needle plays an essential role in your daily caffeinated life. This makes maintenance on a Keurig needle just as important.
How to Clean Keurig Needle: In 6 Simple Steps!
Cleaning up your Keurig needle is one of the easiest things to do. People don’t clean it often because most don’t know we have to clean it. Here are our six easy steps on how to clean Keurig needle:
Step 1: Unplug Your Keurig
First thing’s first, you have to unplug your Keurig coffee machine. Before handling any electrical devices, this is crucial. Otherwise, you might get an electric shock.
Step 2: Remove the Parts
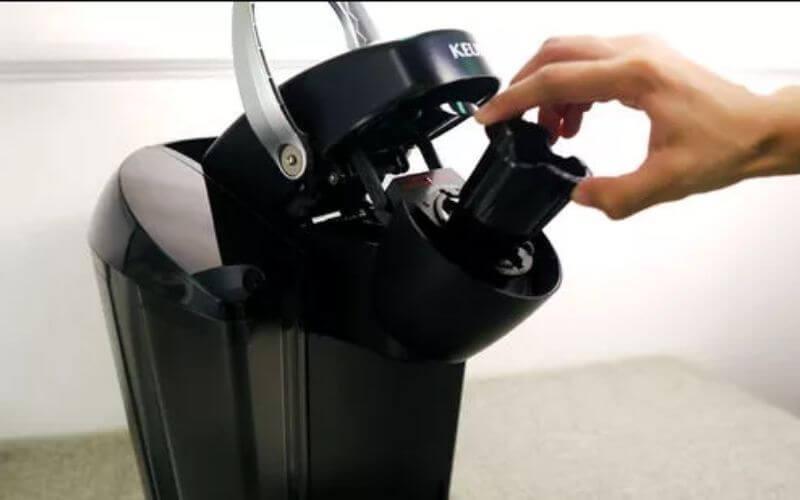
This includes removing the pod holder and the funnel inside it. To remove the pod holder, lift the handle of your Keurig and grab the pod holder.
Use your other hand to push it from underneath. After removing the pod holder properly, bring out the funnel form inside of the holder.
Step 3: Bring Out Your Toothpick
It’s time to use your toothpick or paperclip. Clean the exit needle and then flip your pod holder to insert the toothpick inside the tube.
Then move it around to reach all the places inside. Do this for 30 seconds to remove any hidden dirt or debris. This process also eliminates clogs.
Step 4: Time for Rinsing
This is the part where you rinse the pod holder and funnel under running water. Make sure to properly clean it.
Use a sponge and dish soap to remove any buildups and grimes. Be careful not to poke yourself with the needle inside.
Step 5: Clean the Entrance Needle
After you are done cleaning the pieces, set them aside to dry and life the brewer handle. This is where you insert your K-cups.
The needle can be found on the underside of the top half. Be careful while you are trying to clean it. The needle is made to be very sharp.
You can use a toothpick or a paperclip to clean the entrance needle. Take your time to remove any grimes and dust from it.
Step 6: Reassemble It All!
This is the final part of the cleaning process! Now that everything is well-cleaned and dry, put the pod holder back together with the funnel. Then reinsert the pod holder into your Keurig coffee machine.
After resetting all the necessary parts back together, run two/three brew cycles using only water. That will remove any loose up dust from it. And this is how you clean Keurig 2.0.
Why is It Necessary?
The needle on your Keurig pokes a hole into the coffee pod. So over time, it can gather a lot of coffee residue and oil.
These things build up and clog the needle. When this happens, you can not use the Keurig until it’s properly cleaned again.
The place where the needle sits is a very convenient place for bacteria and molds to form. It’s wet, dark, gathers food crumbles, and stays damp. This is why maintenance on a Keurig needle is so essential.
If you don’t clean the needle, each time you make a cup of coffee, you will be consuming a small number of bacteria and dirt. Now, who wants that every morning?
How Often Should You Clean Keurig Needle?
This depends on how often you use your Keurig coffee machine. If you are a regular coffee drinker, cleaning the Keurig needle once a month is a necessity. Otherwise, you risk ruining the integrity of the taste and hygiene of your coffee.
Most people regularly clean their coffee machine but not their Keurig needle. This is because most of us are unaware that we have to clean the needle too. I’ve even met people who were oblivious of the existence of any needle in their coffee machine!
Keurig is a premium coffee maker that deserves more care and maintenance than simple spot cleaning. So take care of your device so it gets a long life.
They also have Keurig needle cleaning pods for easy usage. Now that you know how to perform needle maintenance on a Keurig, hopefully, you will do it more often.
How to Maintain a Keurig Needle
To maintain your Keurig, you need to clean both the entrance needle and exit needle. You can perform the needle cleaning and maintenance steps we included above, or invest a few dollars into a Keurig’s brewer maintenance kit. This specialized kit comes with disposable rinse pods and a brewer maintenance tool as well!
Simply use the brewer maintenance tool and disposable rinse pods together on the needle. After a while, you should see remnants of coffee grounds and debris in the rinse pods. Make sure you put on at least three water cycles for the Keurig to completely rinse itself out.
Cleaning and Maintenance Tips for Your Keurig

As you are in the process of cleaning your Keurig needle, maybe it’s time for deep cleaning of the whole machine. Don’t worry, it’s not hard to do at all. Here are our bonus tips on how to clean your Keurig coffee machine:
To descale Keurig coffee machine, you will need:
- White vinegar or baking soda
- Large ceramic mug
- Fresh tap water
Instead of vinegar, you can also use Keurig descaling solution. As it’s their customized cleaning product, you will get a better result.
Here are the simple steps to properly descale your Keurig coffee machine:
- Prepare Your Keurig:
Before you start to clean your Keurig, it is again important to unplug it properly. As we have mentioned before, we don’t want anyone to get electrocuted. At this point, remove the water reservoir and water filter as well.
- Fill the Reservoir:
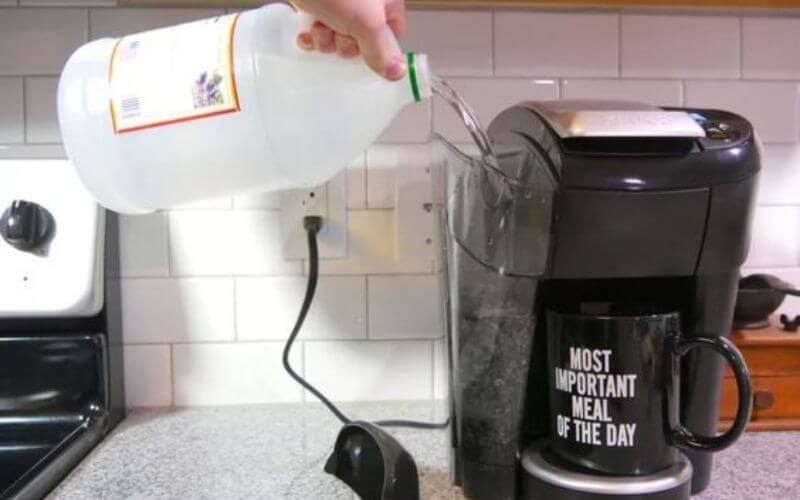
Add a mixture of 1:1 ratio of water and vinegar to the reservoir. If you are using baking soda, use 1-2 tablespoons of it.
Then fill the rest with fresh water. For the Keurig cleaning solution, use it according to the instructions on the bottle.
- Start Brewing:
Here comes the fun part. Turn on the mache and start your usual brewing cycle. The hot water and the vinegar will break down all the water buildups and grips from the machine.
Repeat this process until you feel satisfied. After around 3 cycles, the water should look clean. If not, do it one more time.
- Let It Rest:
Let your machine rest for 20-40 minutes so the inside stays wet. This helps to soften the leftover grimes.
- Final Rinsing
Remove the water reservoir and rinse it out properly. Then fill it up with freshwater and run a few more cycles.
This is important to remove the vinegar smell from the machine. You don’t want your coffee to taste like vinegar.
For the Keurig descaling solution, you will be needing to run it for at least 12 more cleansing brews before you can make a coffee for yourself. This is to ensure all the chemicals are out of the system properly.
Ideally, it is better to descale your Keurig once every 4 months. Otherwise, you compromise the taste of your coffee.
After spending so much money on such a fancy machine, this slight maintenance is well worth it. There are Keurig brewer care kits to make this experience very comfortable for your busy lifestyle.
Conclusion
Cleaning your Keurig needle is a very fast task that takes only five minutes to do. But the difference in the performance is drastic. So why not just do it regularly?
When was the last time you cleaned your Keurig needle? Let us know in the comments!
Pin Later

