How to Thicken Alfredo Sauce: Secrets to Achieving Perfect Consistency

Pasta, it’s not just food. It’s an experience. An entity that has tied cultures, tales, and traditions. From a small street in Italy to a bustling city center in New York, its presence is undeniable. But let’s not forget what makes pasta stand out: the sauce. Alfredo sauce, creamy and rich, stands as the crown jewel of Italian cuisine. However, crafting that impeccable consistency can be akin to chasing perfection. Fret not, for we’ll embark on a journey, exploring secrets and diving into the nuanced art of perfecting Alfredo sauce.

What is Alfredo Sauce?

how to thicken alfredo sauce
thicken cream sauce

Nestled in the heart of Italy, Alfredo sauce was birthed. A humble beginning, with just butter and cheese, the sauce rapidly took the culinary world by storm. Now, it’s an entity with multiple identities. For instance, the Olive Garden might serve you a creamier, Americanized variant. But true purists know that in the cobbled streets of Rome, it’s a different story. Here, tradition champions a lighter version, sprinkled with parmesan and delicately fused with pasta water.

Did you know? The ever-popular Americanized Alfredo variant isn’t what the Romans had in mind. Theirs was a symphony of minimalism – butter, salt, and Parmigiano-Reggiano.

8 Ways to Thicken Alfredo Sauce

mozzarella alfredo sauce

What’s more erratic and unpredictable than a toddler? Sauces, my friend. The mood, the weather, the alignment of the stars, anything could make your sauce too runny. But armed with the right thickening methods, one can achieve the Holy Grail of sauces – the right consistency:

1. A Dance of Reduction:

Boiling and simmering. It’s a rhythm. When the sauce has a little too much zest, or in layman’s terms, too much liquid, simmer it down. The moisture, feeling the heat, decides to evaporate. What you’re left with is a thicker, more delectable version. Plus, it thickens further as it cools. Talk about after-effects!

2. Flour Power:

Who would’ve thought? Flour, an inconspicuous powder, can change the destiny of your sauce. Craft a slurry, which is just a fancy term for flour mixed with water. Introduce this slowly to the bubbling cauldron of sauce, and voilà! Thickness achieved.

3. Roux – The Silent Guardian:

Originating from the French, a roux is an elegant concoction of butter and flour. It’s an unsung hero in the world of white sauces. While a bechamel might loudly proclaim its presence, an Alfredo, thickened with roux, silently achieves perfection.

4. The Egg Yolk Saga:

Who knew that the humble yolk, often overshadowed by its white counterpart, can bring such luxury to a sauce? However, one must be careful. Temper it right, with the grace and patience of a maestro, by slowly integrating the sauce. Then reintroduce it to the main dish.

5. Cream Cheese Chronicles:

Ah, the tangy and creamy lovechild of milk. Cream cheese, when softened and whisked into the sauce, transforms it. Ensuring the flame kisses the base lightly, one can avoid a grainy tragedy.

6. Cornstarch Concoction:

Much like its cousin, flour, cornstarch too can wave its magic wand and thicken your sauce. Always remember to pair it with water first. Clumps are the nemesis we don’t need.

7. The Cheese Whisperer:

A sprinkle of shredded cheese, mozzarella perhaps, and the sauce thickens. The key? Freshly shredded delights introduced slowly, embracing the warm sauce.

8. Veggie Tales:

Roots and tubers, the underground wonders. Vegetables like cauliflower or potatoes, when mashed and mixed, not only bring thickness but a health badge to the sauce.

Fun Twists on Basic Alfredo Sauce Recipes
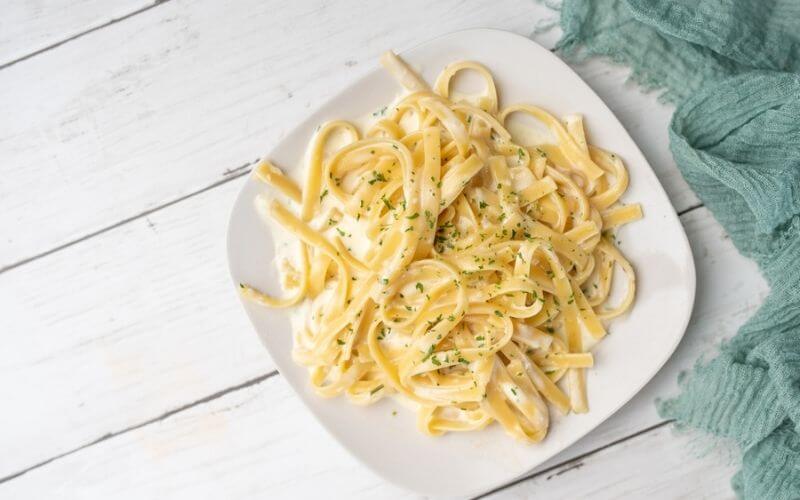
alfredo sauce without cream

Tired of the same old alfredo sauce? Want to jazz things up a bit? We have just the thing for you. These little changes will transform your sauce and come together in just a few extra minutes:

Meaty Alfredo:

When melting your butter in a saucepan, add some bacon, summer sausage, or even fancier add-ons like prosecco, pancetta and other Italian smoked meats.

Alfredo Pizza:

Instead of adding the sauce to pasta, use it as a base for your pizza. Then, load on toppings like olives, pepperoni, bell peppers, and chilli flakes. This is a much more interesting take on the basic bechamel pizza.

Alfredo Shrimp Bake:

This fun casserole is a hearty and indulgent dish. Season the shrimp with salt, pepper, and paprika before sauteing in butter. Then, place them in a casserole dish with some parboiled rice, before topping with alfredo sauce and bake until the top is lightly browned and bubbling.

Lasagna:

Instead of a basic cheese sauce, use a traditional alfredo sauce for a lighter and somewhat healthier lasagna. Trust me on this, you’ll never go back to the regular lasagna again.

Any More Questions?

Here you’ll find answers to some common issues people face when trying to thicken alfredo sauce.

01. How Can I Thicken Alfredo Sauce without Parmesan Cheese?

If you don’t want to thicken your sauce without using parmesan cheese, you can use cream cheese or shredded provolone instead. Adding flour or cornstarch slurries, as well as roux, are also effective thickeners.

02. How Long Does Alfredo Sauce Last in the Fridge or Freezer?

When kept in the fridge, alfredo sauce can be safely stored for 3-5 days. On the other hand, this sauce can also be stored in the freezer for up to eight months.

03. What to Add to Alfredo Sauce for Better Flavor?

Adding things like fresh garlic, thyme, oregano, parsley, and basil can give your alfredo sauce a massive flavor boost. Seasoning it with salt, pepper, and other spices is also a good option.

04. Can I Use Whipping Cream Instead of Heavy Cream for Alfredo Sauce?

Yes, you can use heavy whipping cream instead; however, use a slightly smaller amount as it contains a much higher percentage of fat.

05. How Do I Make Alfredo Sauce without Heavy Cream?

Instead of using heavy cream, you can use Parmigiano Reggiano and butter to make a thick sauce. Add the grated cheese to the melted butter, then whisk in some pasta water and stir to emulsify into a creamy, smooth sauce.

So the Point Is…

The art of Alfredo sauce, with its tantalizing creaminess and velvety texture, isn’t just a culinary skill, it’s a rite of passage for many. Whether you’re paying homage to the Roman tradition or crafting a richer American version, these myriad tips and techniques will elevate your Alfredo game. So, grab that spoon, twirl that pasta, and let your taste buds embark on an Italian soiree.

Diverse Egg-Free Breakfast Recipes for Nutritious Mornings

Learn how to make breakfast without eggs for a quick and healthy meal idea that’s full of nutrition, flavor, and taste that your entire family will love.

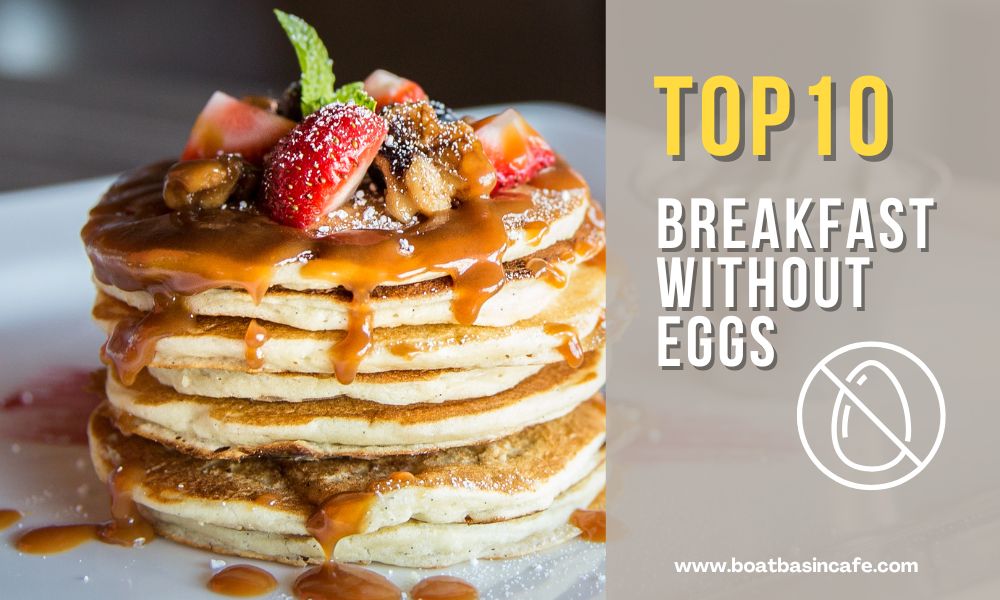
Top 10 Breakfast Ideas Without Eggs To Make Your Day

When it comes to breakfast ideas, there are plenty of possibilities that don’t require eggs.

Whether you’re allergic to eggs or don’t like them or have run out of fresh eggs, you can have a hearty no eggs breakfast that will keep you going.

All you need is a bit of imagination. You can create both sweet and savory breakfast recipes without eggs using oatmeal, yogurt, cereal, waffles, and pancakes.

Whatever you choose, make sure that it is nutritious and gives you the energy to start your day. My favorite is anything with oats, which keeps me fuller for longer. 

Top 10 Breakfast Ideas Without Eggs To Make Your Day
Top 10 Breakfast Ideas Without Eggs To Make Your Day pin

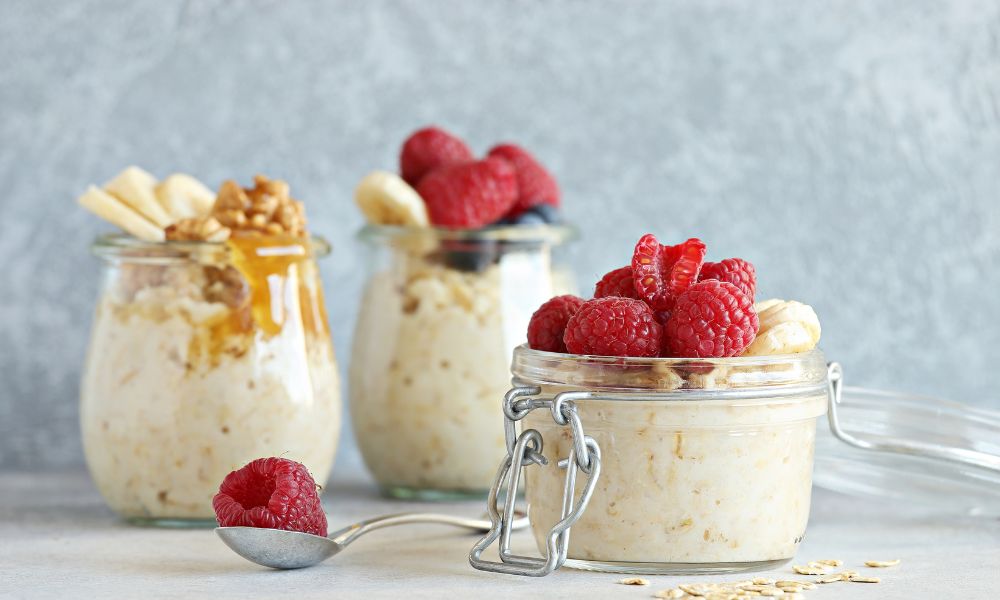
01 Overnight Oats

Diverse Egg-Free Breakfast Recipes for Nutritious Mornings 1
Overnight Oats

Overnight oats are one of the easiest and most popular healthy breakfast ideas without the use of eggs or bread. They are highly customizable and can be packed with nutrients, making them a fantastic way to start your day.

Oats are gluten-free and full of nutrients. 

Just put oats and milk in a jar before you call it a day and add toppings according to your choice – a handful of your favorite berries like raspberries, blueberries, and strawberries. Or add chopped dried fruit and nuts and chia seeds

You can make thousands of combinations with overnight oats to create your own eggless delicious breakfast ideas.

👩‍🍳How to Prepare: Before you hit the hay at night, fill a jar with oats and your choice of plant-based milk. You can then add toppings to your liking. These might include fresh berries like raspberries, blueberries, and strawberries, chopped dried fruit and nuts, or chia seeds. Pop your jar into the fridge and by morning, your breakfast is ready to eat! If you want to switch things up, [check out our varied list of overnight oat combos for inspiration](hyperlink here).


02 Power-Packed Healthy Smoothies

Diverse Egg-Free Breakfast Recipes for Nutritious Mornings 2
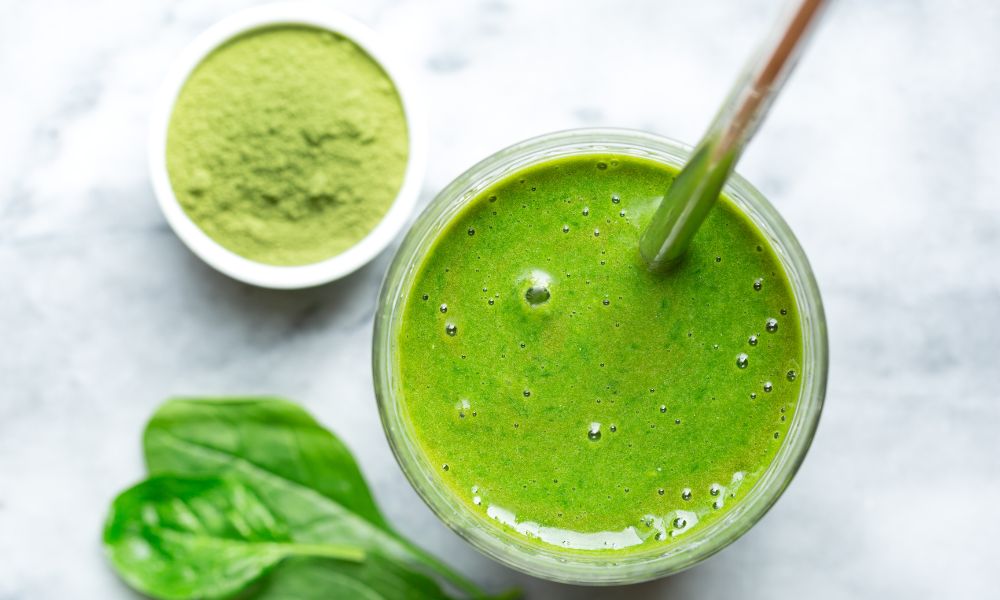
Healthy Smoothies

Smoothies are a versatile breakfast option that you can whip up in a few minutes. They’re excellent for busy mornings and provide a solid dose of nutrients.

  • Green Machine:
    • Ingredients: 1 medium banana, 1/2 an apple, 2 cups of spinach or kale, 2 cups of pineapple chunks, and a teaspoon of chia seeds.
    • Instructions: Blend all these ingredients together and enjoy a refreshing, nutrient-rich green smoothie.
  • Peanut Butter Banana Bliss:
    • Ingredients: 1 banana, 1-2 tablespoons of peanut butter, 1 teaspoon of vanilla extract, 1 cup of almond or cashew milk, and optional flax seeds or chia seeds.
    • Instructions: Blend all these ingredients together and satisfy your cravings with this sweet, creamy delight.

03 Herbed Tofu Scramble: A Vegan Delicacy

Diverse Egg-Free Breakfast Recipes for Nutritious Mornings 3
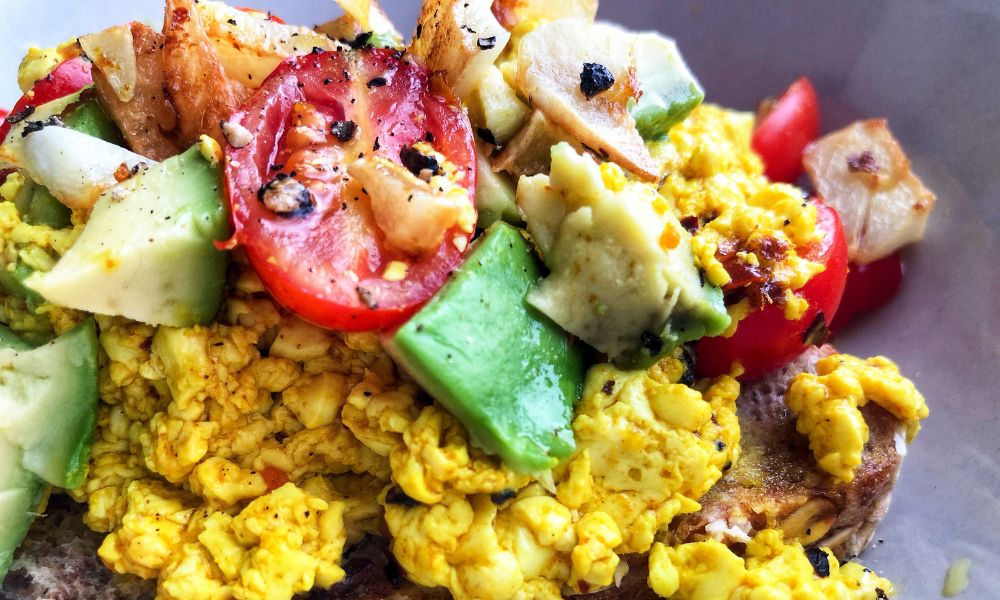
Herbed Tofu Scramble

Finding egg-free and vegan breakfast ideas can be tricky. However, a delicious and filling option is the scrambled tofu – a great alternative to scrambled eggs and a wonderful source of plant-based protein.

It’s one of the savory breakfast ideas without eggs that you can make quickly and it’s going to be one of the filling breakfast recipes too, I promise.

And the great news is that it also doubles as one of the brunch recipes without eggs. 

Blend or whisk ¼ cup of nutritional yeast, a tablespoon of garlic powder, half a teaspoon of turmeric, one teaspoon each of sea salt and pepper, ½ cube of no-chicken bouillon cube, and one cup of water until there are no lumps.

In a skillet, heat a tablespoon of coconut oil over medium heat. Add one small chopped onion and sauté until translucent. Crumble two packs of firm, drained tofu into the pan and cook for about 3 minutes. Add the blended or whisked mixture into the pan and cook without stirring for 4 minutes. 

Continue cooking for another 5 to 8 minutes, stirring occasionally until all the liquid has dried. 

Top with 2 chopped green onions, a tablespoon of finely chopped fresh dill or its substitute, a cup of fresh spinach, and any everyday seasoning. 

Remove from heat after about 3 minutes and garnish with chopped fresh coriander leaves or dill.  


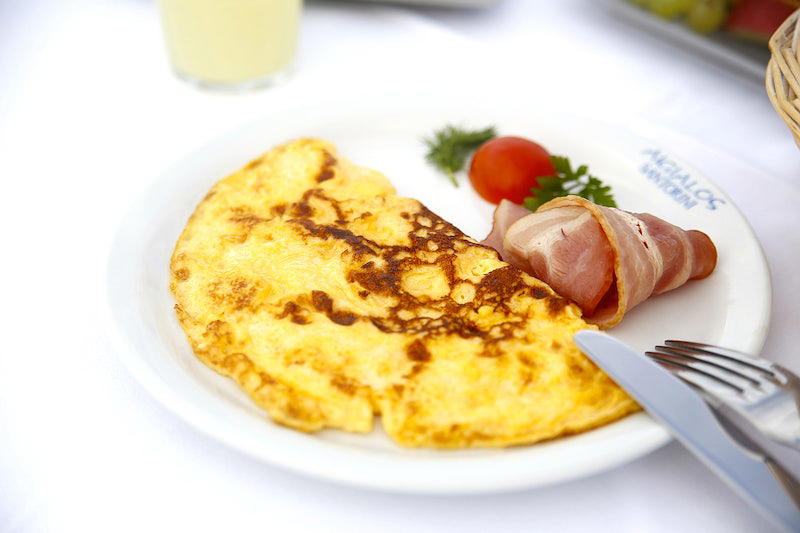
04 Chickpea Omelet: A Hearty Breakfast

Diverse Egg-Free Breakfast Recipes for Nutritious Mornings 4
Free omlettes and ham image, public domain food CC0 photo.

Chickpea omelets are a great option for a hot breakfast on a cold day. Using chickpea flour as the base, this recipe is wholesome and bursting with flavor.

Or, it could be one of your healthy breakfast recipes. Don’t worry about cooking chickpeas or mashing them as this recipe uses chickpea powder. 

One of the easy breakfast recipes without eggs, all you need is chickpea flour, ¼ cup of chopped veggies for every omelet, nutritional yeast, some oil, vegan cheese, salt, and water. 

Mix chickpea flour with water and stir until smooth to get the egg-like base.

Sauté the veggies in oil, add to the chickpea batter, and simply proceed as you would with the omelet. Add the cheese before folding. 

One of the many easy breakfast ideas no eggs!


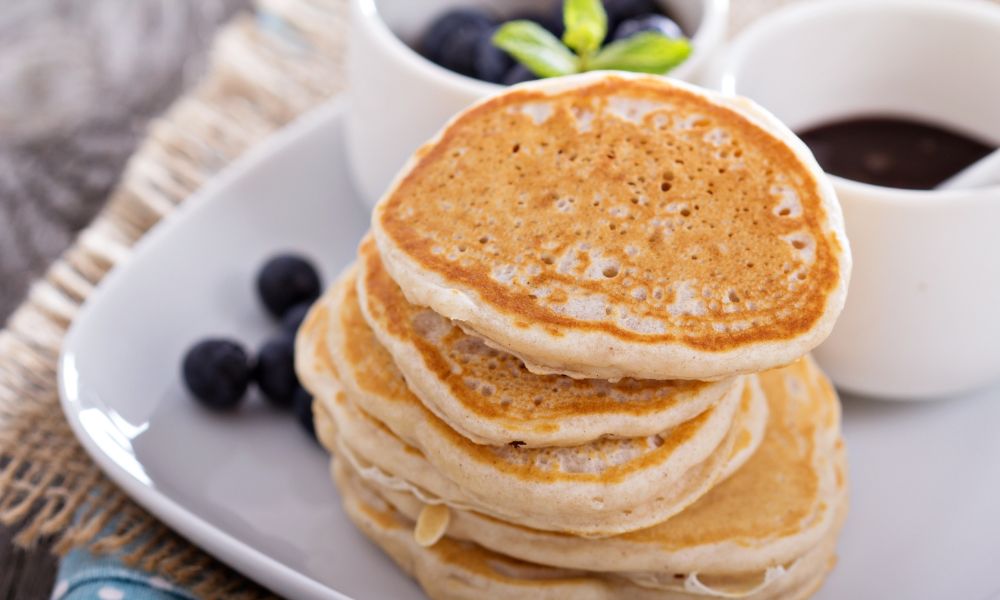
05 Eggless Pancakes and Waffles: Sweet Indulgence

Diverse Egg-Free Breakfast Recipes for Nutritious Mornings 5
Eggless Pancakes And Waffles

Who doesn’t love pancakes and waffles for breakfast? With a few tweaks, you can prepare these breakfast classics without using any eggs. The resultant eggless pancakes and waffles are just as fluffy and delicious.

To make vegan waffles, combine 1½ cups of bread flour, ½ teaspoon of baking soda, ½ tablespoon of baking powder, 1 tablespoon of granulated sugar, ½ teaspoon of Cream of Tartar, and ¼ teaspoon of sea salt and set aside. 

In another bowl, combine ¾ cup of almond milk, 3 tablespoons of apple sauce, ¼ cup of carbonated water, and 1 teaspoon of vanilla extract. 

Add the wet ingredients to the dry ingredients until well combined. Pour the required amount of batter into your waffle maker and cook according to the instructions. 

Or make eggless pancakes by pouring the same batter into a hot skillet on low heat. 

Top waffles with maple syrup drizzle and fruits that you like. This also makes one of the best brunch recipes without eggs. 


06 Toasted Sweet Potatoes: A Vitamin-packed Breakfast

Diverse Egg-Free Breakfast Recipes for Nutritious Mornings 6
Toasted Sweet Potatoes

Sweet potatoes make a nutritious and delicious egg-free breakfast option. They’re packed with vital vitamins and can be made sweet or savory to your preference.

Highly versatile, you can add your favorite toppings to make it sweet or savory. 

Just cut the potatoes into ¼-inch thick slices and toast them in one of the top 10 best toaster ovens. Shredded cheese can be an option if you’re craving something savory or for a sweet treat, you can always grab some PBJ and smother them on the sweet potato toast.


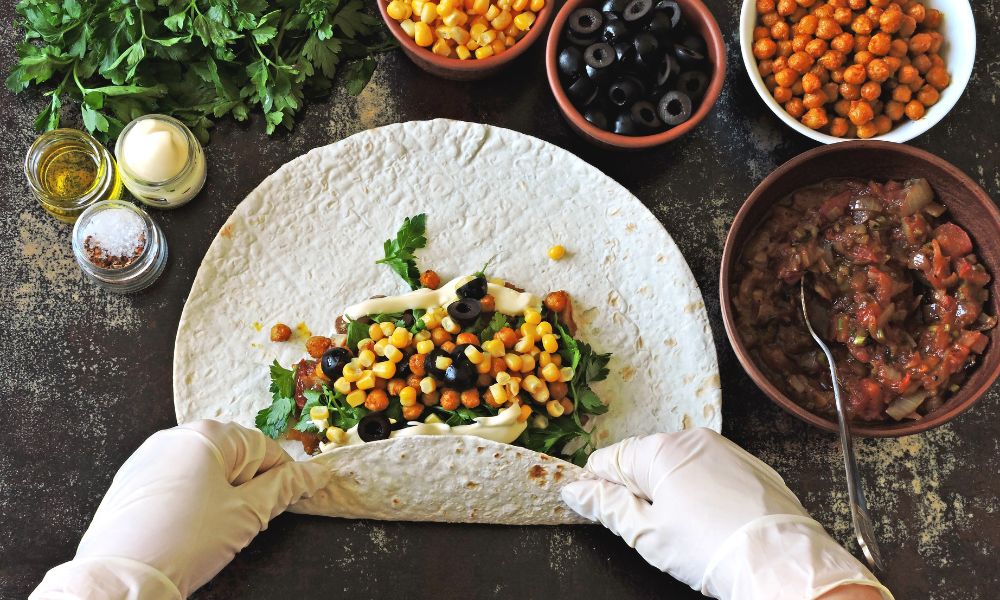
07 Dairy-Free Breakfast Burritos: An Exciting Twist

Diverse Egg-Free Breakfast Recipes for Nutritious Mornings 7
Dairy Free Breakfast Burritos

Who said burritos were just for lunch or dinner? Breakfast burritos without eggs are filling, flavorful, and packed with essential nutrients. Follow our detailed recipe to prepare your homemade breakfast burrito.

Take 4 jalapeno peppers, wash and dry them, then place them in a pan on medium-high heat. Cook each side for 3 to 5 minutes until they get a char. Then remove from the pan, chop, and set aside. 

Make a herbed tofu scramble (recipe above). 

Take a can of black beans, drain, and put in a saucepan over medium-high heat. Add taco seasoning and mash with a fork so that half of the black beans are mashed. Keep warm. 

Cook tortillas according to package instructions. 

Now build the breakfast burritos by placing the tortilla on a dry skillet over medium heat. Add some vegan cheese, two tablespoons of beans, avocado slices, tofu scramble, salsa, chopped jalapenos, cilantro, and a hot sauce if you like. Then roll up the burritos and toast both sides.


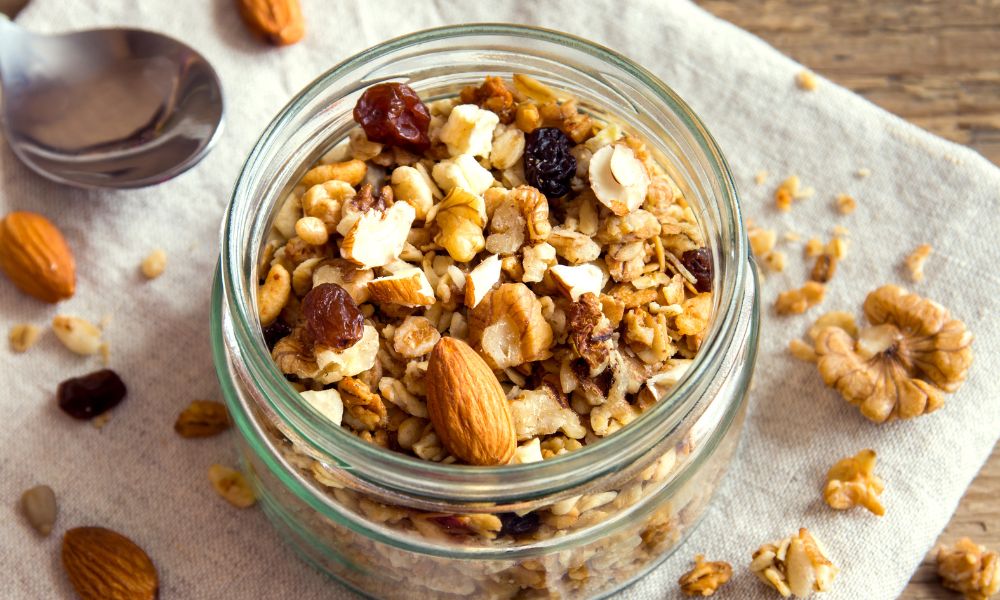
08 Homemade Granola

Diverse Egg-Free Breakfast Recipes for Nutritious Mornings 8
Homemade Granola

Homemade granola is an easy, healthy, and delicious breakfast option that will provide quick energy to start your day. It’s packed with healthy fats and proteins, thanks to abundant nuts and seeds.

Protein packed with nuts and seeds, homemade granola will give you a shot of morning energy to face the day. 

To make this butter pecan homemade granola, preheat your oven to 325°F (163°C). Then mix 2½ cups of oats, ¾ cup chopped pecans, a cup of shredded coconut, a teaspoon of ground cinnamon, and ¼ cup of brown sugar in a bowl. 

In a saucepan, melt ¼ cup of butter. Once melted, remove from the heat and add ½ cup maple syrup, ¼ teaspoon salt, and 1 teaspoon vanilla extract. Pour this over the oats mixture and combine well. 

Spread the mixture on a lined baking sheet, and bake in the oven for 30 minutes or until golden brown. Stir it every 10 minutes. Once it’s cooled down, store it in a mason jar. 


09 No-Bake Granola

Diverse Egg-Free Breakfast Recipes for Nutritious Mornings 9
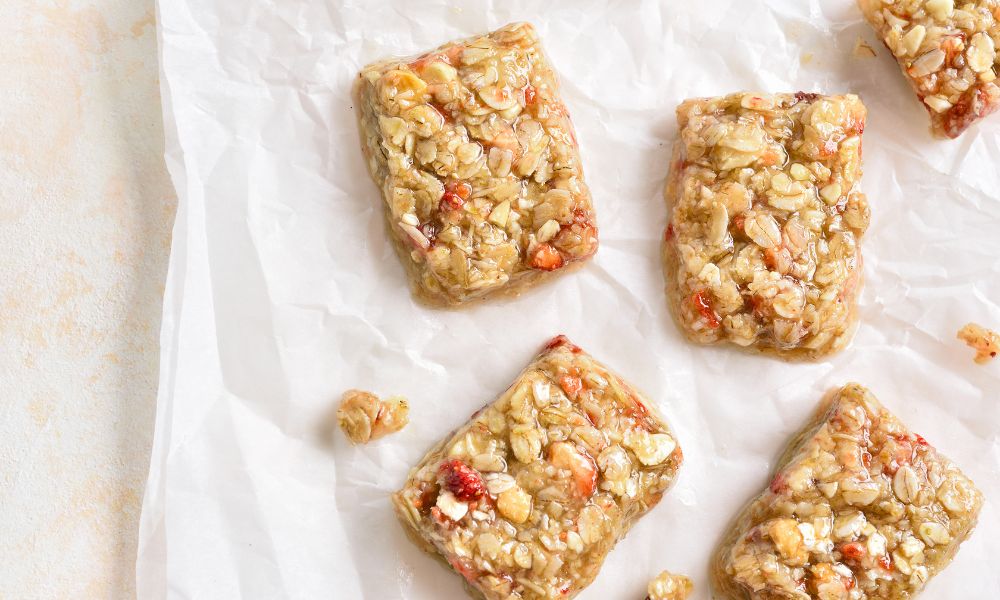
No Bake Granola

No-bake granola bars are an excellent breakfast option for those mornings when you’re in a rush. These easy-to-make bars can be stored in bulk for quick meal-prep.

Prepare an 8-inch lined baking pan. 

Over a medium flame cook 1 cup of almond butter, ¼ cup of maple syrup, ½ teaspoon cinnamon powder, and ¼ teaspoon salt for 30 seconds or until smooth. 

Pour this mixture over the cereals and oats, combine, and place in the prepared baking tray. Press to form a tight layer and chill for 30 minutes before cutting into bars. 


10 Biscuits and Gravy Casserole: The Hearty Breakfast

No-bake granola bars are an excellent breakfast option for those mornings when you’re in a rush. These easy-to-make bars can be stored in bulk for quick meal-prep.

To make this weekend brunch or breakfast, start by preheating your oven to 400°F (204°C). Then spray some cooking oil along the sides and bottom of a casserole dish. 

Take a can of Grande biscuits, cut them, arrange them at the bottom of the dish, and bake for 10 minutes. 

Crumble and cook 1 pound of breakfast sausage over medium heat. Add 3 tablespoons of flour to the cooked sausage and mix. Now add 2¼ cups of milk, 1 teaspoon of black pepper, and ½ teaspoon of salt and bring the mixture to a boil.

Pour the gravy over the biscuits in the pan, cut the second can of Grande biscuits to layer on top of the gravy, and bake for 10 minutes. Cover with foil and bake for another 15 minutes. 

FAQs

What Are Some Breakfast Ideas Without Eggs Or Oatmeal?

Some eggless breakfast recipes without oatmeal are breakfast burritos, eggless pancakes and waffles, scrambled tofu, and toasted sweet potatoes. 

What Are Good Breakfast Ideas Without Eggs Or Bread?

Good eggless breakfast ideas without bread include breakfast burritos, chickpea omelets, homemade granola bars, and smoothies. 

What Are Some Of The Breakfast Ideas Without Eggs Or Milk Products?

Some of the eggless breakfast ideas without milk products are toasted sweet potatoes, homemade granola, breakfast burritos, and smoothies. 

Mastering Air Fry Sesame Balls: A Culinary Journey!

Ah, the Boat Basin Cafe, a culinary treasure nestled in the heart of Downtown New York. I remember my exhilarating days as a chef there, creating mouthwatering marvels under the iconic neo-classical rotunda overlooking the Hudson River. Among the delectable delights that drew food lovers far and wide, were the irresistibly crunchy, incredibly delicious sesame balls!

As time has passed and the beloved Boat Basin Cafe has closed its doors, my love for cooking these delightful morsels persisted. And hey, what’s cooking without a dose of innovation, right? Combining my fond memories with contemporary cooking techniques birthed today’s star recipe- the remarkable air fry sesame balls!

air fry sesame balls
Boat Basin Cafes Secrets Unveiled Your Guide to the Perfect Air Fry Sesame Balls

Merging Culinary Memories with Modern Cooking Techniques

Maintaining our food fresh, healthful, and flavorful was always our commitment at Boat Basin Cafe. Keeping in line with this, I decided to revisit our famous sesame ball recipe with a twist—air frying. If you haven’t already jumped on the air fryer bandwagon, trust me, you’re missing out! Air frying is a healthy, quick, and cleaner alternative to traditional frying, making it the perfect partner for our sesame balls.

The Beauty of Air Frying

Air frying has revolutionized modern kitchens. By employing super-heated air to cook food uniformly, it ensures a crispy exterior and juicy interior, all without the mess and calories of traditional frying. For dishes crispy on the outside yet soft within, like sesame balls, air frying achieves a wonderful balance. Mastering the air fryer settings for sesame balls can create an unmatched crunch that’ll leave you longing for more.

From Traditional Frying to Air Frying

Transitioning from traditional frying to air frying impacts the timeless sesame balls, both texturally and healthily. While traditionalists might scoff, the taste and texture of air-fried sesame balls are sure to change their minds. Let’s explore the core ingredients for sesame balls and see how the magic happens.

Must-haves for Perfect Air Fry Sesame Balls

Essential ingredients for our sesame balls include glutinous rice flour, brown sugar, and sesame seeds. The chewy mochi-like texture of glutinous rice flour, combined with brown sugar’s caramel sweetness and sesame seeds’ crunch, come together beautifully in the air fryer. The charm of our dish, however, lies in a special ingredient – the Boat Basin Cafe’s signature red bean paste.

Boat Basin Cafe’s Signature Add-ons

Mastering Air Fry Sesame Balls: A Culinary Journey! 10
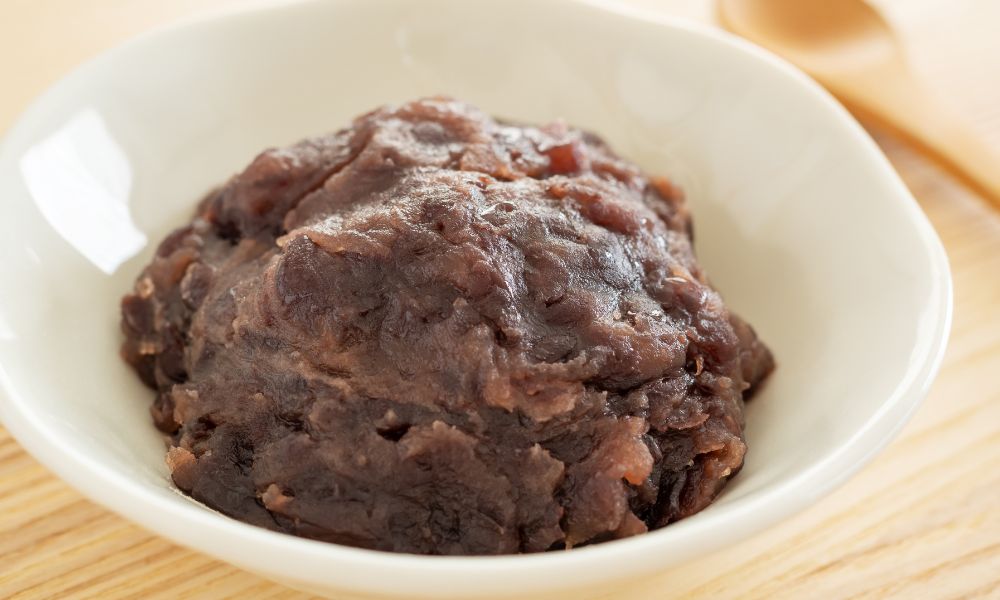
red bean paste

The Boat Basin Cafe’s sesame balls were often referred to as ‘New York’s best-kept secret,’ largely owing to our signature add-ons. One such beloved addition was red bean paste. This sweet, slightly earthy paste was handmade from scratch, elevating the sesame balls to a unique culinary experience. Alternatively, health-centric individuals can opt for air fried sesame balls with fillings containing chia seeds or flaxseeds, providing extra crunch and nutritional benefits.

Step-by-Step Recipe for Boat Basin Cafe’s Iconic Air Fry Sesame Balls

Once your ingredients are in order, it’s time to create the Boat Basin Cafe’s iconic Air Fry Sesame Balls. Crafting these delights is just as enjoyable as relishing them, transporting you back in time to the bustling kitchens of the Boat Basin Cafe!

Crafting the Dough and Preparing Your Ingredients

Mastering Air Fry Sesame Balls: A Culinary Journey! 11
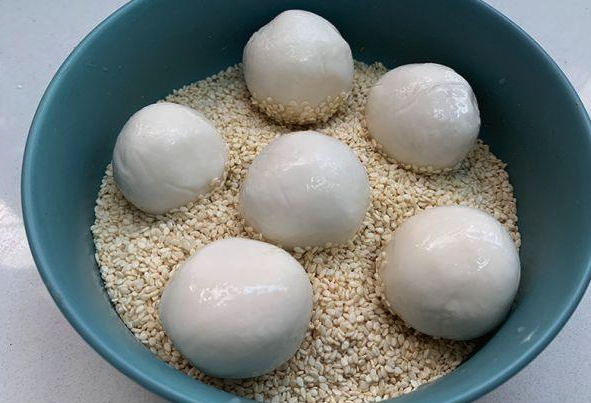
sesame balls

To start, prepare your red bean paste. With beans soaked overnight, cooked until soft, and blended into a smooth paste, the result is well worth the effort. Next comes mixing the core ingredients for sesame balls – glutinous rice flour, water, and brown sugar, until they come together as a dough.

Air Frying to Perfection

Mastering Air Fry Sesame Balls: A Culinary Journey! 12
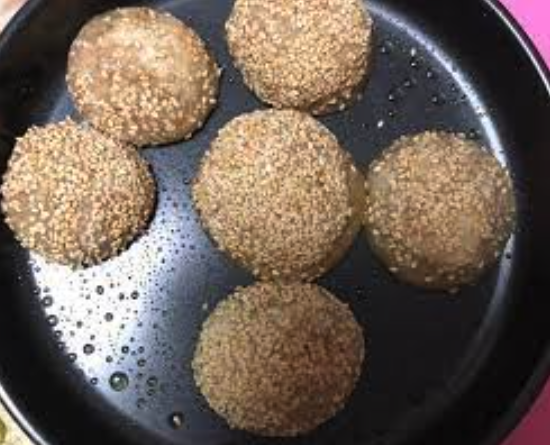
air frying sesame balls

Once the dough is ready, roll it into balls, stuff them with our delectable red bean paste, and coat them in sesame seeds. These prepped sesame balls are now ready for the air fryer. Balance your air fryer settings for sesame balls so they turn out crispy without burning. A temperature of about 180°C for 15 minutes should do the trick!

Tips & Tricks from Boat Basin Cafe Days

If your sesame balls are cooking quicker on the outside than the inside, lower the temperature and increase the cooking time. Finding the best parameters for the most mouth-watering results adds to the joy of experimenting in the kitchen—the essence of the Boat Basin Cafe essence.

Serving Suggestions for Boat Basin Cafe’s Air Fry Sesame Balls

Presentation is key when it comes to serving your sesame balls. Deck out a simple yet elegant platter, garnish with some mint, and voila, you’ve got a table ready to impress. Pair your sesame balls with a hot cup of jasmine tea or a cool mango lassi. The contrast between the crunchy air-fried sesame treats and the smooth, creamy drink certainly packs a punch!

Reflecting on the Boat Basin Cafe Legacy

The Boat Basin Cafe may no longer dominate New York’s landscape, but its culinary delight lives on. This easy air fry sesame ball recipe combines traditional baking wisdom with modern-day cooking techniques, bringing a slice of New York’s iconic past into your kitchen.

Conslusion

By sharing this recipe with you, I aim to preserve the spirit of the Boat Basin Cafe. After all, the kitchen is a place where creativity and passion come alive. Here’s to creating iconic delights of your own! Until then, happy cooking and savouring some air fry sesame balls today!

How to Make a Cortado: Discover This Great Coffee Beverage!

One of my favorite past times is trying out different coffee-based beverages, working my way through different variations, flavors, and ingredient ratios. 

Besides exploring different flavors, you learn so much more about how different ingredients work together, and you never get confused at the coffee shop!

If you are experimenting with various espresso drinks, you might have come across the cortado. Confused about what this drink is all about? This article will look at cortados and how it is different from beverages like cappuccinos and lattes.

You will also learn how to make a cortado at home with an easy cortado recipe. If you want to learn all about the cortado espresso drink, you’ve come to the right place!

What is a Cortado?

how to make a cortado
cortado recipe

The cortado coffee drink is a small beverage, generally served in metallic or glass cups. This beverage is made by combining espresso and steamed milk in a 1:1 ratio. Sounds super simple right? It is a no-fuss drink that is much simpler than lattes and cappuccinos.

Unlike many other drinks we’re used to, cortados don’t have much foam, and baristas don’t make foam art with this drink. Instead, the drink uses creamy steamed milk to cut through the espresso, making a well-balanced beverage that is light and almost airy.

In this vein, the term ‘cortado’ comes from the Spanish word ‘to cut’. It was first made in Spain and spread across the country quickly as it grew in popularity. Like other Spanish drinks, it has nearly almost no foam, instead, the texture of the drink itself is light and well-blended.

The particular ratio of the cortado is meant to reduce its overall acidity. The fact that it is served in small cups means that you can’t customize the size in cafes or coffee shops. They are generally made with 2 shots of espresso and 2 ounces of milk.

Unlike the frothy and heavy milk found in cappuccinos, the steamed milk in cortados is thinner and lighter and is closer to that used in lattes. The cortado is also called a Gibraltar in some places.

What are the Benefits of Consuming Cortado Coffee?

Cortado coffee, like all coffees, has numerous health benefits. It has a lot of antioxidants, which can help protect your cells from free radical damage. Coffee has also been demonstrated to improve mental function and alertness, which can help you stay focused throughout the day.

Caffeine is also present in cortado coffee, which can help to stimulate your metabolism and aid in weight loss. It is crucial to note, however, that excessive caffeine use can have detrimental side effects, which we will explore later in this article.

What are the Risks of Consuming Cortado Coffee?

While there are numerous advantages to drinking cortado coffee, there are also hazards and negative effects to consider. The high caffeine concentration is one of the key problems. Caffeine is a stimulant that in certain people can produce jitters, restlessness, and anxiety. Caffeine can also cause dehydration because it is a diuretic that increases urine output.

The milk component of cortado coffee is another possible concern. Cortado is made with equal parts espresso and steamed milk, which might be problematic for people who are lactose intolerant or allergic to milk. Those who are lactose intolerant may experience digestive troubles such as bloating, gas, and diarrhoea after drinking cortado coffee.

In addition to the concerns listed above, drinking too much cortado coffee might cause insomnia due to the high caffeine level. Consume cortado coffee in moderation and be mindful of your body’s caffeine response.

How to make a cortado at home

how to make a cortado at home

Want to know how to make a cortado at home? This section will show you two easy cortado recipes: one hot and one iced. As long as you have a few simple ingredients and tools, this drink is super easy to make!

Classic Cortado:

The classic cortado is a simple and straightforward drink, with no frills or hard-to-find additions in the recipe.

Ingredients:

Instructions:

  1. Grind your coffee beans and then use a good espresso machine to pull 2 shots of espresso. Extract the espresso to a cup that can hold 4 to 4.5 ounces of liquid.
  2. Then, use a milk frother to steam or froth your milk. Since smaller amounts get scorched quickly, it is best to steam 4 ounces of milk. You only need to steam/froth until the milk is silky and airy, there’s no need to keep going until there’s lots of foam.
  3. Pour 2 ounces of the milk into your cup of espresso.

That’s it! You can add the sweetener you want, as well as any syrups or sauces for flavoring when serving. A popular variant of this drink is made by replacing the dairy with condensed milk, which makes for a thicker, sweeter, and more indulgent beverage.

Iced Cortado:

Want to beat the heat on a sweltering day? This chilly version of the Spanish cortado is the perfect drink for the summer.

Ingredients:

  • 2 shots of freshly brewed espresso
  • (Or use 2 ounces of coffee brewed in a Moka pot or percolator)
  • 2 ounces of steamed milk
  • Ice
  • Caramel or butterscotch syrup (Optional)

Instructions:

  1. Brew your coffee, or pull shots of espresso from your coffee machine.
  2. Steam 2 ounces of milk until silky.
  3. Combine the milk and coffee.
  4. Fill a separate glass with ice. Then pour the coffee over the ice. As cortados are small portion-wise and are pretty strong, the ice will chill it quickly without watering it down.
  5. Drizzle extra syrup on top if needed. You can also drizzle the syrup around the glass before adding the ice and coffee for a more Starbucks-ish look.

Pro-Tip: Try a shaken iced cortado instead of the regular one! Add the coffee and ice to a cocktail shaker and give it a few good shakes.

The shaking ‘expands’ the coffee and makes it creamier and gives it more body. It also has more foam on top when poured into a glass.

How to make a cortado with nespresso

If you own a Nespresso device, you can use it to make an easy cup of cortado at home. This is a good option if you want a quick drink without any extra equipment. Here is how to make a cortado Nespresso:

Ingredients:

  • Coffee capsule
  • Cold milk
  • Sweeteners/syrups/sauces (Optional)

Instructions:

  1. First, brew the coffee in your Nespresso machine using the capsule. Add the coffee to your cup.
  2. Froth your milk and then heat it in a microwave for 20-30 seconds.
  3. Pour the milk into your coffee, making sure the amounts are in a 1:1 ratio.
  4. Add sweeteners and flavorings if you want and voila! You have a Nespresso cortado.

Cortado vs. Latte:

Cortados are often confused with lattes, as the texture of the milk in both drinks is similar. They also contain the same amount (2 shots) of espresso.

The difference? Lattes contain much more milk, which dilutes the drink. As a result, it is much less potent when compared to cortados.

Also, lattes include lots of silky milk foam, as well as latte art. Cortados are much simpler and have very little foam.

Cortado vs. Cappuccino:

Cortados always have 2 shots or 2 ounces of espresso, whereas cappuccinos have 1-2 shots. Furthermore, while cortados have 2 ounces of milk, cappuccinos will have 4-5 ounces of milk. The milk is more textured and lighter than that of a cortado as it is steamed for much longer.

A cappuccino also has a thick and luxurious amount of micro-foam on top. In contrast, cortados have a very thin layer of foam that isn’t very textured.

Cortado vs. Macchiato:

Macchiatos and cortados have the same amount of espresso, so the only difference lies in the milk. While cortados contain 2 ounces of lightly steamed milk, macchiatos contain 1 ounce of milk that is heavily frothed.

This makes macchiatos smaller in volume than cortados. Because they are more concentrated, you will also get more of a caffeine kick from a macchiato. In comparison, cortados are slightly larger and a little less potent.

Cortado vs. Flat White:

cortado coffee vs flat white

Flat whites are also similar to cortados and contain the same amount of espresso. However, like lattes, flat whites contain more milk which makes it more diluted. The milk is also frothed until it’s very silky and textured, so flat whites have a creamier mouthfeel than cortados.

Flat whites are also much thicker and larger than cortados. They are also more elaborate when compared to cortados because flat whites have more foam on top, with often extensive and fancy foam or latte art.

Best Desserts to Pair Up with a Cortado

While cortados make a killer drink for your morning coffee, or as an afternoon pick-me-up, it is also great with desserts. Serving this beverage with a number of desserts will cement your reputation as the perfect host among your friends:

Cheesecake: We love any excuse to stuff cheesecake into our faces, but this decadent dessert pairs well with this simple coffee. The tanginess is counteracted by the low acidity of the cortado and the creaminess of the cheesecake is matched by the velvety texture of the coffee.

Tres Leches Cake: This dessert isn’t too sweet but it is extremely rich-soaked in a combination of 3 different kinds of milk and frosted with whipped cream. It’s no surprise that it complements the creamy, yet strong nature of the cortado.

Coffee Cake: The classic coffee cake with a cinnamon filling and crunchy streusel topping will taste great with any kind of coffee drink, and the cortado is no exception.

Biscotti: A combination of biscotti and cortado is a fun spin on the traditional Italian breakfast of this cookie and a cappuccino. Almond biscotti is an especially great partner when paired with cortado made with non-dairy milk.

Tiramisu: If you can’t get enough of the delectable coffee flavor in your food and drinks, pairing tiramisu with a strong cortado will give you your caffeine fix. As with cheesecakes, the creamy, tangy, and rich mascarpone in the tiramisu is balanced by the strong, smooth cortado.

Got Any Questions?

Have more questions? Head over to the next portion where you will find answers to questions people often have about cortados.

01. Does Starbucks Offer Cortados?

Starbuck doesn’t have an official cortado, but you can still get one by asking for two shots of espresso with 2 ounces of silky steamed milk on top.

02. Are Cortados and Flat Whites the Same Drink?

Although cortados and flat white are similar, a flat white is different because it contains more milk and is topped with lots of micro-foam.

03. Are Cortados Stronger Than Flat Whites?

Because cortados contain less milk, they are more concentrated and stronger than flat whites.

04. How Does a Cortado Taste?

Cortados are strong, but rather balanced. It is less acidic and the milk added is enough to just cut through the espresso without diluting it. As a result, they have a strong espresso flavor and a creamy and light mouthfeel.

05. Can I Make a Cortado with Almond Milk?

Yes, cortados can be made with plant-based milk like almond, coconut, and soy.

06. How Many Shots are There in a Cortado?

A cortado contains 2 shots of espresso.

07. Is cortado coffee safe to drink during pregnancy?

While moderate coffee consumption is generally considered safe during pregnancy, it’s recommended to limit caffeine intake to 200 mg per day. Cortado coffee, like other types of coffee, contains caffeine, so it’s important to consume it in moderation during pregnancy.

In a Nutshell

As you can see cortados might just be the easiest coffee drink as there isn’t any guesswork of complex ratios involved. Simply combining equal parts of espresso and steamed milk will give you a perfectly balanced and smooth drink.

Once you know how to make a cortado, you easily customize the drink to your preferences. You can even experiment with things like cream, half-and-half, and even evaporated milk! 

Moreover, the combinations of syrups and flavoring that you can play around with. You’ll be sure to love this drink as much as your favorite latte!

Easy Dutch Oven Corned Beef and Cabbage Recipe

No Dutch oven corned beef and cabbage recipe is complete without talking about the origin of this dish and its connection to St. Patrick’s Day.

The Origin of Dutch Oven Corned Beef and Cabbage 

Celebrated on March 17th, St. Patrick’s Day is a religious festival that marks the passing of the Irish patron saint. The Irish immigrants in the US turned St. Patrick Day from a purely religious celebration to one that commemorates everything Irish. Down to the corned beef and cabbage meal that’s part and parcel of this special day although among the immigrant population only. Back home in Ireland, the preferred meat is bacon or lamb. 

The Irish were not traditionally beef-eaters. They raised cattle for working the farms and for milk. They did not kill their cattle for food unless they stopped giving milk or became too old. 

Ireland used to export live cattle to England as the latter loved to eat beef. But this came to an end with the Cattle Acts of 1663 and 1667. Ireland had a surplus of cattle. Fortunately, the salt tax in Ireland was 1/10th times lower than that in England. 

This meant that top-quality salt was used to preserve the premium quality Irish beef. The salt crystals were the size of corn kernels and so, the term “corned beef” stuck. 

And that’s how the Irish corned beef came into being. As far as cabbage is concerned, it was the only affordable vegetable that the Irish immigrants could afford. Torn by war and famine, the Irish were forced to flee their land and settle in the USA. 

Their fate was similar to that of the Jewish immigrants in the USA. Both the Jewish and the Irish communities forged friendly relations and the recipe of corned beef and cabbage has some Jewish influence. 

Now that we know the origin of the dish, let’s move on to the more important part – how to cook corned beef and cabbage in the oven!

How Long does it Take To Cook Dutch Oven Corned Beef 

All good things take some time and so does corned beef and cabbage in a Dutch oven.

Since we’re talking about the meat from the front part of the cattle, it takes some time to penetrate through the brisket and make it tender, flavorful, and forkable. And nothing short of 5 hours of slow cooking does the job. 

Ingredients 

  •  2 to 4 pounds of flat or point-cut beef brisket.3.5 pounds is enough for a family of five. 

While it’s easier to fork a point-cut, you’ll find it more convenient to slice through a flat cut of brisket. 

  • 1 tablespoon Steak seasoning. 
  • Seasoning packet that comes with the beef brisket. 
  • 2 bay leaves.
  • 1 large onion, cut into quarters.
  • 4 large carrots, cut into chunks.
  • 1 cabbage head, cut into wedges.
  • 6 large potatoes, quartered. 
  • 2 bottles (12 oz) dark beer or light beer.
  • 10 cups beef or vegetable broth or water for 4 pounds of corned beef. You need to adjust the amount of liquid depending on whether you’re going to add beer or not. 

Preparation

person slicing green vegetable on brown wooden chopping board

You can reduce the prepping time for the Dutch oven corned beef and cabbage in the oven recipe.

While you preheat the oven, you can tackle the brisket by washing, drying, and removing excess fat. 

While the brisket is being boiled in the first hour, you can use that time to chop the vegetables. 

So overall, the prep time is:

  • Washing and trimming the fat from the beef brisket – 10 minutes.
  • Peeling and chopping vegetables – 10 minutes.

Dutch Oven Corned Beef with Cabbage Recipe

beef slices

This traditional recipe of the Irish-American meal served on St. Patrick’s Day is a finger-licking experience for the whole family. Just one serving of corned beef with cabbage and other vegetables will make your heart and your tummy very happy!

Step-By-Step Instructions

If you’re wondering how to cook corned beef in the oven, the following steps will help you make this dish for St. Patrick’s Day or any other day. 

  1. Take out the corned beef brisket piece from its packaging and allow it to reach room temperature. 
  1. Trim off excess fat but if it’s a pointcut with some fat cap, you should leave it as fat adds flavor to this one-pot dish.
  1. Wash thoroughly and pat to dry.
  1. Preheat the oven to 350 degrees Fahrenheit. 
  1. Layer the bottom of the Dutch oven with the quartered onions. You can add the potatoes and carrots at this point or add them to the pot after three hours of cooking. 

If you’re a fan of herbs, add some rosemary at the bottom of the pot with the onions. Choose a sprig of the herb to place on the beef brisket. 

  1. Place the corned beef brisket on the onion layer and sprinkle seasoning from the packet and the bay leaves over it. 

In case you don’t get a seasoning packet with the brisket, use pickling spices.

  1. Add water or broth or beer until everything is submerged well. 
  1. Put in the oven and let cook for an hour until the corned beef is boiled. 
  1. If you see scum rising to the top of the Dutch oven, remove it with a spoon and refill it with liquid. 
  1. After one hour, reduce the heat to 300 degrees Fahrenheit and let it cook for two hours. 
  1. Turn over the corned beef piece and add to the pot carrots and potatoes with more seasoning like salt and pepper or the seasoning that came with the brisket. 
  1. Add the cabbage wedges and cook for another 30 minutes to one hour without the lid. 
  1. Remove the Dutch oven corned beef and cabbage wedges and other vegetables and wait for a few minutes. 
  1. Single-serve in bowls with your choice of a side dish. Remember to remove the bay leaves before serving. 

Top Ten Tips

Follow these tips to cook a great Dutch oven corned beef with cabbage. 

  1. Use a 7-quart Dutch oven so that all the ingredients are well covered by the liquid. 
  1. If you want to shred the corned beef, choose a point-cut beef brisket as the fat in this cut makes it easier to shred. 
  1. Instead of water, you can use beef broth or light or dark beer. Beer also acts as a tenderizer.
  1. To know if the corned beef is done, put a fork in the center. The meat should feel tender. 
  1. Don’t make the potato pieces too small as they will become mushy. If you have cut them into small cubes, add them in the last one hour of cooking. 
  1. It’s best to leave the potatoes whole but make sure to pierce them from all sides with a fork so that they absorb all the juices and flavors. 
  1. For the cabbage to be crispy, add the pieces in the last hour of cooking in the Dutch oven. 
  1. You can cook corned beef and cabbage in a crockpot but in that case, you should slow cook for 10 hours. Otherwise, the meat won’t be done to perfection. 
  1. Don’t throw away the broth after serving the Dutch oven corned beef and cabbage. Use it to make soup or stew later. 
  1. Cut slices against the meat grain to make it fork-tender. 

Traditional Recipes

Traditional recipes didn’t use corned beef at all but boiled bacon. However, with the change in circumstances, there was a birth of a new traditional way of making corned beef with cabbage. 

It has become a tradition to use red potatoes as these retain their texture and shape unlike the other types of potatoes. It’s important to prevent the potatoes from getting mixed and mashed into the beef brisket broth and losing their taste. 

Although you can add any vegetables you want, the traditional Irish recipe added carrots. Both potatoes and carrots are ingrained in the Irish diet. 

Nowadays you get the ready-to-cook beef brisket from stores. But to follow a traditional recipe, you need to brine the beef brisket at home with pink curing salt, salt, warm water, and brown sugar. 

To neutralize the sharp salty taste of corned beef, some recipes add brown sugar to make the beef sweet. However, if you prefer not to have the veggies taste sweet, you can leave out the brown sugar. 

Modernized Recipes

Sandwich, Julesandwich, Svinekam, Roast Pork

You can give a twist to the basic recipe of Dutch oven corned beef and cabbage to make it more modernized. 

For example, you can stir up corned beef and red cabbage sandwiches.

Corned Beef and Red Cabbage Sandwich Recipe

Here are the ingredients you’ll need to make 8 corned beef and red cabbage sandwiches::

  • 16 slices of bread of your choice.
  • Softened butter as required.
  • 8 slices of cheese.
  • 7.9 oz of red cabbage, thinly sliced.
  • 35.3 oz corned beef.
  • 1 cup red wine vinegar. 
  • 1 teaspoon sea salt flakes. 
  • Freshly ground black pepper as per taste.
  • 1/4 cup brown sugar. 

Step-by-Step Process 

Just follow the steps mentioned below for a yummylicious corned beef and red cabbage sandwich. 

  1. Preheat a slow cooker with 1½ cups water, vinegar, brown sugar, salt, and pepper in it. 
  1. Put the beef brisket in the center of the pot and arrange the red cabbage slices.
  1. Cook for 6 hours with the lid covered. 
  1. After the beef is done, put it on a large plate, wait for 10 minutes, and cut it into slices. 
  1. Strain all the liquid from the cabbage. 
  1. Spread butter on the bread slices and grill each side for a minute. 
  1. On each of the 8 pieces of bread, put a slice of cheese and grill until the cheese melts. 
  1. Top the melted cheese side with slices of corned beef. 
  1. Add the red cabbage slices and top with the remaining 8 slices of bread.

Side Dishes to Enjoy with Dutch Oven Corned Beef and Cabbage 

If you’re thinking about which side dishes go perfectly with your corned beef and cabbage meal, here are a few ideas. 

  • Dutch oven bread
  • Beer bread
  • Irish soda bread
  • A dipping sauce of spicy mustard

Conclusion 

Once you have made Dutch oven corned beef and cabbage, you’re likely to make it a few more times throughout the year. 

The tenderest and juiciest block of beef brisket along with the flavorful veggies is sure to win the hearts of everyone in the family. 

You have the option to make the dish in a Dutch oven or a crock pot or a pressure cooker. 

Plus, you can tweak the traditional recipes and make a more modern version that would appeal to everyone. 

All in all, it’s a flexible meal, both in terms of ingredients and the cooking method and you can’t go wrong with it!

How to Make Summer Sausage: Unlocking the Secrets of Easy Homemade Sausages

Weather warming up? The first days of summer are a great time for making jams, compotes, and preserves! 

But did you know that sweet and fruity goods aren’t the only things you can make and store at home? Have you considered the possibilities of using preserving meat by making sausages at home?

If you have a surplus of meat that you can’t get through, turning them into summer sausage is a scrumptious and money-saving solution. Your meat will last for much longer, and you will have a supply of sausage without needing to run to the store for a new supply every week.

If the prospect of making sausages at home is intimidating, have no fear. We’ve come up with the ultimate smoked summer sausage recipe. Whether you want to smoke homemade sausage or you are considering smoking store-bought sausage, we got you covered.

We will show you how to cook summer sausage in the easiest way possible and provide pointers for making the best-smoked sausage ever. Keep reading and you will learn how to make summer sausage like a pro in no time at all!

You may also like: How to store homemade bread

Summer Sausage 101 : How to Make Summer Sausage?

How to Make Summer Sausage

Summer sausage is an American invention, semi-fermented dry sausage, seasoned with spices and smoked or baked in dry conditions. Depending on the kind and cut of meat used, summer sausage made traditionally can be very flavorful and is great because it isn’t very fatty.

The addition of smoke improves the flavor and also preserves the meat for longer by keeping bacterial activity at bay. Also, the name ‘summer sausage’ refers to the fact the sausages were made in winter and were meant to be eaten during the summer months.

You can smoke summer sausage using pretty much any kind of meat. You can make it from a mix of ground beef and pork, or just ground beef alone. You can try smoking deer sausage and even give an elk summer sausage recipe if you go hunting often.

Equipment Needed for Smoking Summer Sausage

Before you start gathering your ingredients, make sure you have all the equipment you will need:

  • An electric smoker, or any kind of smoker or grill
  • Thermometer
  • Sausage Casings
  • Wood pellets or charcoal
  • Cooking grates or racks
  • Meat grinder
  • Curing mix (Store-bought or made from scratch)

What are the Best Kinds of Sausages to Smoke?

Most cooking experts agree that summer sausages are pretty easy and forgiving to smoke. This means that you can get away with making any kind of summer sausage with most kinds of ground meat and get pretty satisfying results.

That being said, these are the best summer sausages to smoke:

  • Beef sausages (especially those made with chuck)
  • Pork sausages (made from the backside and hindquarters)
  • A mix of beef and pork
  • Venison (the low fat and gaminess translate to a great and flavorful sausage)

If you are particularly adventurous, you can even get deer summer sausage kits and give them a try!

How to Make Smoked Sausages

With these recipes, you will be able to try smoking summer sausage in electric smokers. If you are used to smoking meat on your grill, you can try that as well. 

You can use this recipe to make sausages with almost any kind of meat, so if you want to learn how to make smoked venison summer sausage, give this a read!

Summer Sausage Ingredients:

Here are the things you need for the tastiest summer sausage:

  • 2 pounds of ground meat (You can use plain pork or beef, or a combination of meat for venison and pork summer sausage recipe.

    This also works for smoked beef summer sausage recipe or pork summer sausage recipe. You can get creative, so use any kind of lean meat!)
  • Summer sausage seasoning (Store-bought mixes are fine but you can make your own with a tablespoon of mustard seeds, a teaspoon of garlic and black pepper, and even a touch of coriander powder).
  • ¾ cup of water
  • 2 tablespoons of curing mix, like Morton Tender Quick
  • 1-2 tablespoons of liquid smoke

Making Summer Sausage in an Oven

This is a quick and simple way to prepare summer sausage in an oven, without any smoking or grilling equipment.

  1. In a large bowl, mix the ground beef and water until well blended.
  2. Season with mustard seeds, pepper, garlic powder, curing salt, liquid smoke, and other spices and mix thoroughly. It is best to use your hands for this – like meatloaf.
  3. Shape the mixture into two rolls, and wrap them with aluminum foil. Refrigerate for 24 hours.
  4. Preheat the oven to 350F.
  5. Remove foil from the beef, and poke a couple of holes in the bottom of the meat rolls.
  6. Place them on a roasting rack in a shallow roasting pan to catch the drippings.
  7. Bake for 1 hour, or until the internal temperature reaches 160F.
  8. Cool to room temperature, then wrap in plastic or foil, and refrigerate until cold before slicing and storing.

Making Summer Sausage in a Smoker

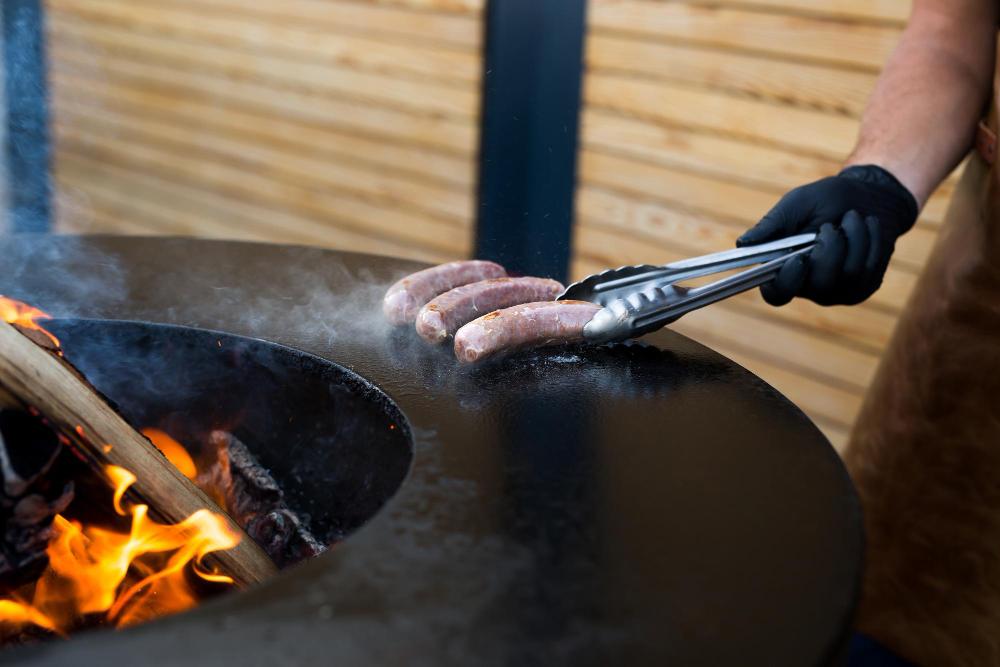
sausage-barbeque-smoker-grill-hot-smoked-sausage-food-festival

This recipe is meant for smoking summer sausage in a Masterbuilt electric smoker or something similar.

  1. Mix the water, seasoning, liquid smoke, and curing mix with the ground meat.
  2. Stuff into sausage casings that are around 60mm in diameter.
  3. Leave them at 86F (30C) and 85-90% humidity for 24 hours.
  4. Put the sausages in the smoker and smoke at 110F and 70% humidity for 6 hours. Slowly increase the temperature until the internal temperature of the sausages registers at 140F.
  5. For a drier sausage, dry for 3 days at 60-70F and 65-75%. These steps will make summer sausage more traditionally, and for this reason, the meat needs to be fermented at high humidity for a whole day.

Smoking Store-Bought Sausages:

If you don’t want to go through the trouble of making summer sausage from scratch, you can just buy ground meat and take it from there. You can even buy sausages and smoke them at home, adding flavor and depth to an otherwise plain sausage.

1. Put the fresh sausages next to each other on smoker racks, making sure they are not touching each other.

2. Start up the smoker, using wood briquettes of choice (hickory and maple work very well together). Heat the smoker to a temperature of 250F.

3. Place the sausages in the smoker and smoke them until their internal temperature reaches 150 F. The overall time can differ based on the thickness and size of the sausages. This generally takes from 2.5 to 4 hours.

Recipes Using Summer Sausage:

Summer sausages work well with a cheese platter and eaten with bread and condiments. You can use them in recipes that call for regular sausage. These include sandwiches, meat sauces, pasta, casseroles.

Summer sausages work well with summer-style pasta salads, bruschetta, sliders, and even as toppings for salads and pizzas.

Cook Time and Temperature for Summer Sausage:

Maintaining summer sausage’s internal temp is important as this determines the texture and dryness of the resulting sausage.

Depending on the kind of meat you will need to smoke the meat for 2-3 hours, gradually increasing the temperature.

You need to smoke the sausages until a meat probe or thermometer reads 140-150F for the sausage’s internal temp. The overall smoking sausage time also depends on the kind and cut of meat used.

Frequently Asked Questions

01. Is Summer Sausage Cooked or Raw?

Although summer sausages aren’t cooked in the traditional sense, they aren’t raw either. The combination of heat, smoke, seasoning, and curing mix alters the meat, preserving it, and this ‘cooks’ the meat. As a result, you can eat the sausage as it is, without needing to cook it down.

02. At What Temperature is Sausage Done?

Sausages are generally ready to be taken off the smoker once they reach an internal temperature of 150-165F. To stay on the safe side, smoke until the sausages register 160F on a thermometer so you don’t have to worry about any microbial activity.

03. How Long Do I Have to Smoke Summer Sausage?

This generally depends on the size of your sausages and the cut of meat used. But you need to smoke most summer sausages for 2.5 to 4 hours for them to be properly dried out and infused with the smoke.

04. Do I Have to Cook Summer Sausage?

Summer sausages don’t have to be cooked and you can easily throw some into a sandwich or add it to your cheeseboard to nibble on. At the same time, you can cook them into meat sauces or casseroles, or just fry some up to go with your breakfast eggs.

05. Can I Freeze Summer Sausages?

When summer sausage is stored properly, it can last for 10 months with the best quality. However, even past this time, you can still eat them safely. When smoked properly and stored in airtight packaging, dry summer sausage that is kept frozen at 0°F will be safe to consume indefinitely.

06. What is the Best Pork Sausage Cooking Temperature?

Smoking or grilling temperature should aim for an internal temperature of 160F. You can smoke them at 110F for 6 hours, or at 250F for 2-4 hours.

To Round Off

Traditional summer sausage is a fun project that yields a lot of meat that you can store in the freezer for more than a year. The sausage is a great choice as it is mild, yet flavorful and has just the right amount of fat without being heavy or greasy.

Now that you know how to make summer sausage, the possibilities are endless. Your charcuterie board will have a vibrant and wholesome touch, you have enough breakfast sausages to last forever, and you may never need to resort to store-bought sausages. 

Best of all, you can pack these sausages into cheese, jam, and homemade bread baskets for the most thoughtful gift ever!

Pin Later

Want to give DIY sausages a try? We’ll show you the process of how to make summer sausage.
How to Make Summer Sausage