LG Ice Maker Not Working? Fix It FAST With These DIY Hacks

Is your LG refrigerator ice maker not making ice? As a former restaurant chef, I know firsthand the frustration of a faulty ice maker.

But fear not! I’ve compiled an ultimate DIY LG ice maker troubleshooting guide to help you get those cubes flowing again in hours, not days.
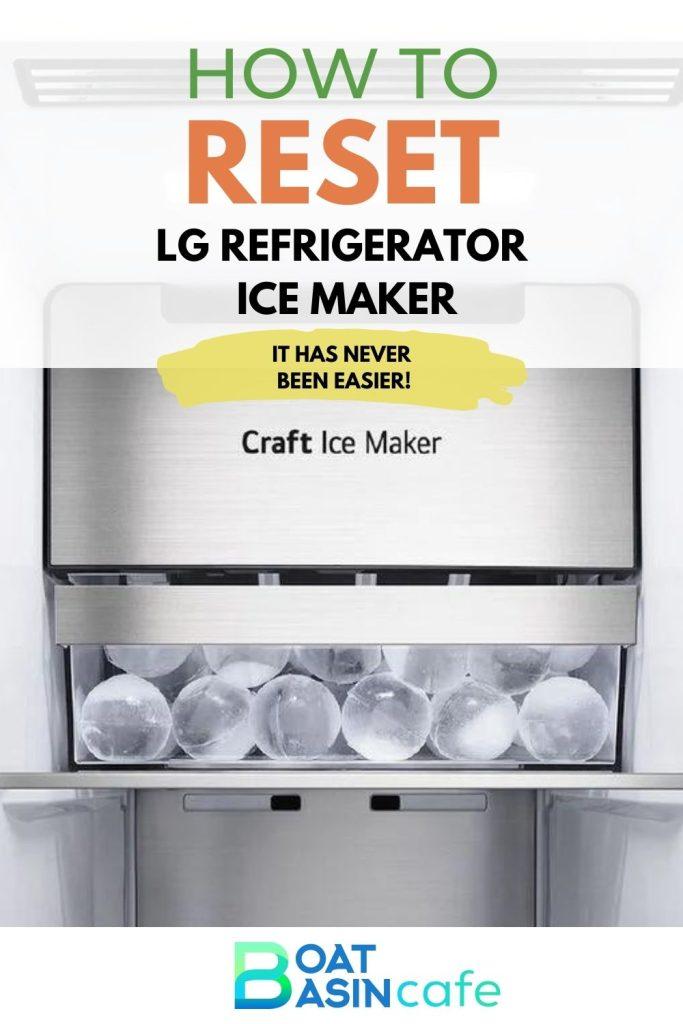
How to Reset LG Refrigerator Ice Maker in 4 Easy Steps
How to Reset LG Refrigerator Ice Maker

Quick Fix Table: Common LG Ice Maker Issues

Before we dive into detailed solutions, check out this handy table for a quick glance at common LG ice maker problems and their speedy fixes:

ProblemPossible CausesFix Steps
LG refrigerator ice maker not making ice– On/off switch accidentally bumped
– Water filter clogged
– Water line kinked or frozen
1. Check the ice maker’s on/off switch and ensure it’s in the “on” position.
2. Replace the water filter if it’s more than 6 months old.
3. Inspect the water line for kinks or signs of freezing, and straighten or thaw as needed.
Ice dispenser jammed– Large ice clumps blocking the chute
– Dispenser switch faulty or stuck
1. Use a hairdryer to melt any ice clumps in the dispenser chute.
2. Test the dispenser switch and replace it if it’s not working properly.
Slow ice production– Freezer temperature set too high
– Low water pressure
1. Adjust the freezer temperature to 0°F (-18°C) or lower.
2. Check the water pressure and ensure it’s between 20 and 120 psi. Install a pressure regulator if needed.

The 60-Second LG Ice Maker Reset That Works Like Magic
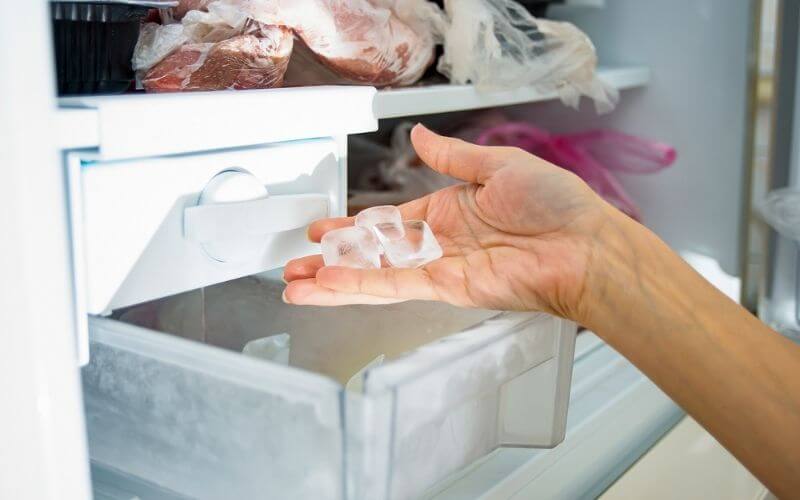
Ices

Before we roll up our sleeves and start tinkering, let’s try the fastest fix of them all: the good old-fashioned reset.

You’d be surprised how many LG ice maker problems can be solved with a simple on/off switch toggle.

💁🏻‍♂️Just follow these quick steps:

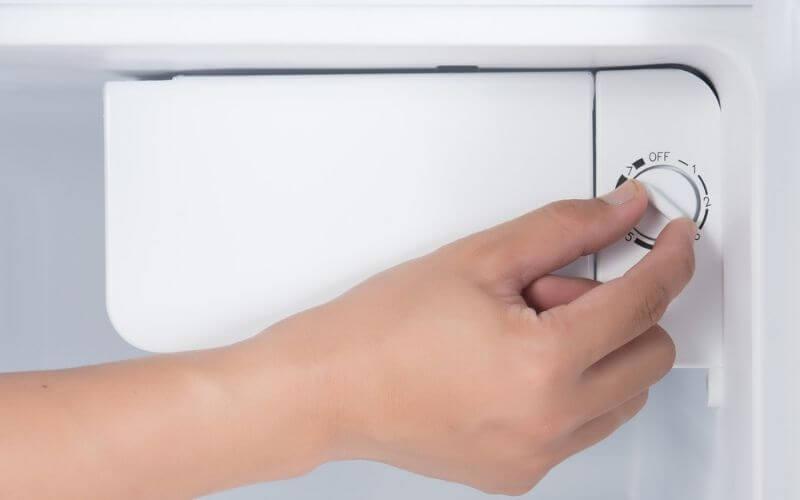
  1. Locate the on/off switch on your ice maker (usually found in the freezer compartment).
  2. Flip the switch to the “off” position, wait 5 seconds, then flip it back to “on.”
  3. Keep an eye out for the reset indicators: the ejector blades should start turning, water should begin to fill the mold, and fresh ice should drop into the bin.

Voila! If your ice maker springs back to life, congratulations – you just saved yourself a whole lot of time and trouble.

If the reset didn’t do the trick, don’t worry. We’re just getting started. But first, let’s eliminate a few common culprits:

  • Is your freezer temperature too high? Aim for 0°F (-18°C) or lower for optimal ice production.
  • Is the water line kinked or frozen? Gently straighten any kinks and thaw frozen sections with a hairdryer.
  • Is the water filter clogged? If it’s been more than six months since your last filter change, swap in a fresh one.

Fixing Common LG Ice Maker Jams Like a Pro
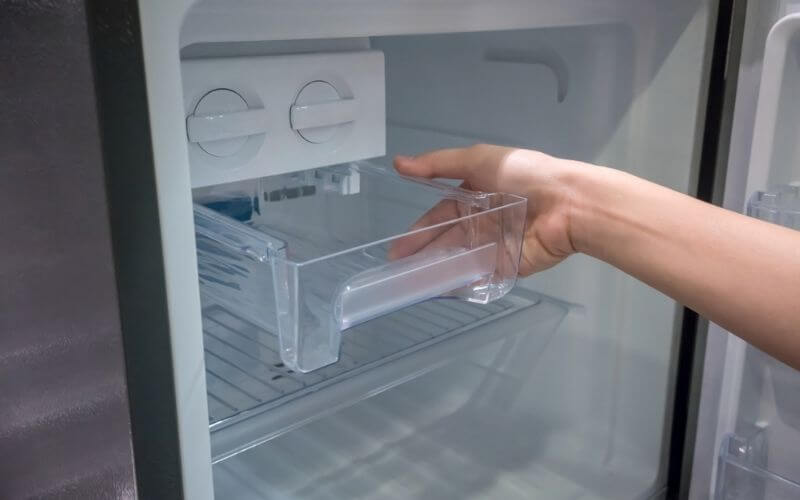
LG Ice Maker Not Working? Fix It FAST With These DIY Hacks 1

As a chef, I’ve tackled my fair share of ice maker jams. From clogged dispensers to funky-tasting cubes, I’ve seen (and fixed) it all.

Here are some of the most common LG ice maker issues and my go-to solutions:

Problem 1: Ice Dispenser Jammed

There’s nothing quite like the disappointment of reaching for ice, only to find your dispenser chute clogged with a giant, immovable clump. To break through the ice jam:

  1. Grab your trusty hairdryer and aim it at the clogged chute. The gentle heat should melt away the blockage.
  2. If the ice proves stubborn, use a plastic utensil to carefully chip away at the edges of the clog, then try the hairdryer again.
  3. Once the ice is clear, test the dispenser switch. If it’s stuck or unresponsive, you may need to replace it.

Problem 2: Ice Tastes Like Last Week’s Leftovers

Is your LG ice maker producing cubes that taste more like the back of your fridge than fresh, clean water? The likely culprits are:

  1. Freezer odors: Ice is incredibly porous and readily absorbs any funky smells lingering in your freezer. To banish the stench:
    • Remove all food items and thoroughly clean the interior with a baking soda solution.
    • Toss any old or expired items that might be causing the odor.
    • Store pungent foods in airtight containers to prevent future ice contamination.
  2. Old or dirty water filter: A past-its-prime water filter can introduce all sorts of unpleasant tastes and odors to your ice. For a quick fix:
    • Replace the filter with a fresh, LG-approved model.
    • Run a few cycles and discard the first batches of ice to flush any residual funk.

Problem 3: Slow Ice Production

Is your LG ice maker’s output more trickle than torrent? Two sneaky culprits could be to blame:

  1. Freezer temperature set too high: As any chef worth their salt knows, ice needs a brisk environment to form properly. Ensure your freezer is set to 0°F (-18°C) or lower for optimal production.
  2. Low water pressure: Your ice maker requires a steady flow of water to work its magic. If your home’s water pressure is below 20 psi, it may struggle to fill the mold in time. You can:
    • Test your water pressure with a simple gauge from the hardware store.
    • If it’s below 20 psi, consider installing a pressure boosting system to get your flow back on track.

💁🏻‍♂️ You may also like: Common LG Refrigerator Problems: Fix Them Like a Pro

When to Bring in the Big Guns (Or, When to Call a Pro)

While most LG ice maker issues can be resolved with a little DIY know-how, some problems are best left to the experts. If you’ve exhausted all troubleshooting avenues and your ice maker is still on the fritz, it might be time to call in a pro.

Here are a few surefire signs it’s time to throw in the towel and dial up an appliance repair technician:

  • Your ice maker is making scary noises that sound more like a haunted house than a kitchen appliance.
  • You’ve got a leak that’s threatening to turn your kitchen into an impromptu swimming pool.
  • Your once-cubed ice is now a surrealist sculpture that Salvador Dali would envy.
  • You’ve replaced every part but the kitchen sink (twice), and still no dice.

The Wrap-Up: Keeping Your Cool with a Well-Oiled Ice Maker

As a veteran of the Cafe industry, I know the importance of a reliable ice maker. Whether you’re serving up frosty margaritas or just trying to keep your iced tea chilly, a steady supply of clean, fresh ice is non-negotiable.

By following the tips and tricks in this guide, you’ll be well-equipped to tackle the most common LG ice maker issues with confidence and ease. And if all else fails, don’t hesitate to call in the cavalry – even the most seasoned DIYers need a little backup sometimes.

So go forth, intrepid ice maker troubleshooters, and may your freezer always be full of perfectly formed, crystal-clear cubes. And if you’ve got a quirky ice maker issue that’s got you stumped, drop a comment below – I’m always happy to lend my chef’s expertise to a fellow culinary adventurer.
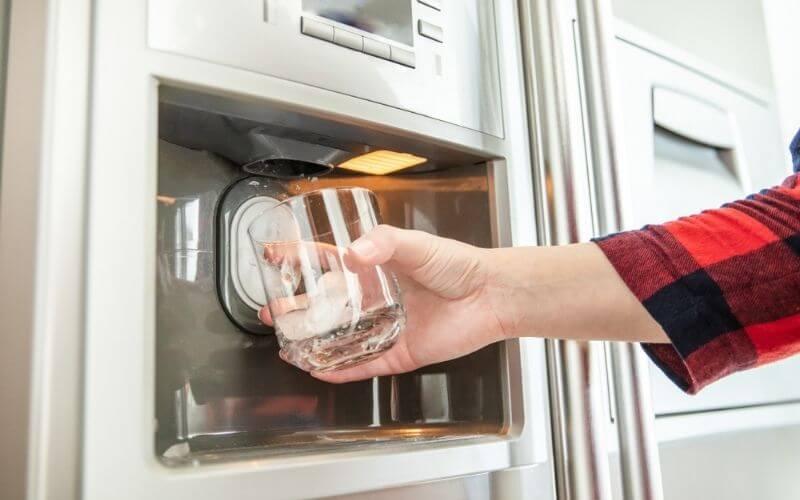
Why Does My Fridge Temperature Keep Changing? (And How You Can Fix This)

If your fridge temperature keeps changing, it’s more than an annoyance—it’s a risk to your food’s safety.

The ideal fridge temperature should be 40°F (4°C) or lower to prevent bacterial growth and food spoilage 🦠.

Multiple factors like frequent door opening and seasonal changes can affect it, but the good news is, they can be managed 🔄.

What is the Ideal Normal Fridge Temperature?

why does my fridge temperature keep changing
fridge temperature keep changing
ConditionTemperatureConsequences
Too Cold ❄️Below 40°F/4°CFreezes veggies and changes their texture.
Optimal 🟢40°F/4°CPrevents bacterial growth and spoilage.
Too Warm 🔥Above 40°F/4°CFood spoils easily.

Why Does My Refrigerator Temperature Keep Fluctuating?

A fluctuating fridge temperature is both annoying and risky. The constant rise and fall in temperature can result in bacterial growth and spoil your food quickly.

CauseImpactSolution
Frequent Door Opening 🚪Affects steady temperatureOpen only when necessary
Altered Thermostat Setting 🌡️Changes in coolingCheck and reset the thermostat
Faulty Cooling System 🛠️Fridge temperature can reach 50°F overnightCall a technician
Electrical Issues ⚡Voltage spikes affect temperatureCheck electrical setup
Blocked Thermostat Sensors 🍲Makes the fridge too cold or too warmDon’t place food near the thermostat
Blocked Vents 🌬️Warm air builds up, heating the fridgeEnsure proper ventilation
Dirty Compressor Coils 🌀Causes wild temperature fluctuationsClean the coils

You Keep Opening the Fridge Door🚪

If the fridge door is opened and closed repeatedly or is kept open for a long time, the fridge will be unable to maintain a steady and constant temperature.

The Thermostat Setting was Altered🌡️

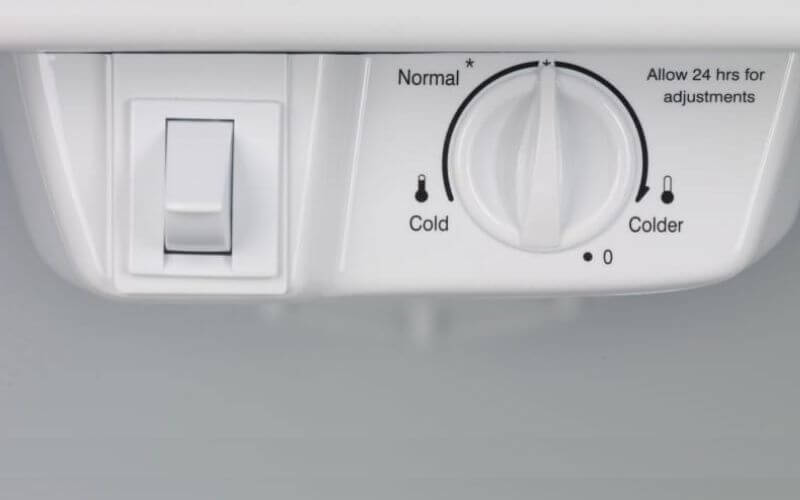
Check the thermostat if your refrigerator has a bad temperature sensor, you may need to contact the manufacturer for a replacement.

The Problem with a Refrigerator Temperature at 50 Degrees

Why Does My Fridge Temperature Keep Changing? (And How You Can Fix This) 2
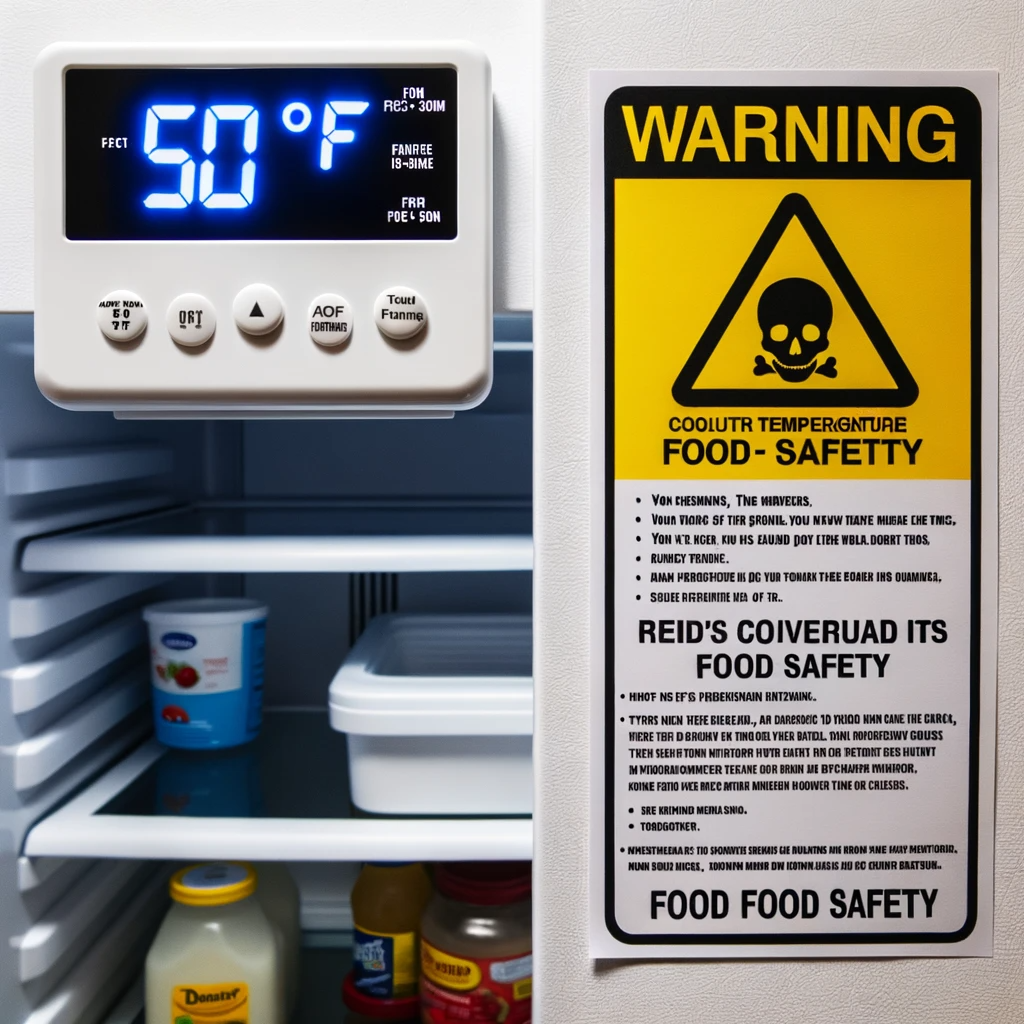
50 degrees Fahrenheit

Keeping your refrigerator at the right temperature is crucial for food safety. When your fridge is consistently at 50 degrees, you put yourself at risk of foodborne illness.

  • 50 degrees is not a safe temperature for food storage. At this temperature, bacteria can grow quickly, leading to foodborne illness.
  • To fix the issue, first check the thermostat setting. If the temperature is correct, but the fridge is still at 50 degrees, you might need to call a technician.

Importance of the Temperature Danger Zone

Normal Fridge Temperature

Why You Should Be Concerned Understanding the temperature danger zone is important for food safety. This range is usually between 40 and 140 degrees Fahrenheit. When food is in this zone, it is more susceptible to potentially harmful bacteria growth.

How to Avoid Risks

  • Store foods below or above the temperature danger zone to minimize the risk of bacterial growth.
  • Use a calibrated food thermometer to ensure your fridge and freezer are set at the correct temperatures.
  • Always keep hot and cold foods cold, and don’t leave food at room temperature for extended periods.

👩‍🍳 Read More: Refrigerator Maintenance Tips

FAQs

Below, you’ll find answers to questions we get asked the most about why is my refrigerator temperature not constant.

01. What is the Best Refrigerator Temperature?

The optimum temperature for a fridge is between 0°C and 4°C or 40°F and 32°F.

02. How to Test a Refrigerator Thermostat?

Put a glass of water with a thermometer in it in the middle rack of the fridge. Wait 5-6 hours before measuring to see what temperature the thermostat is set to.

03. What Would Make a Refrigerator Stop Getting Cold?

Food blocking the thermostat sensor, a dirty compressor coil, or even opening and closing the fridge door too often.

04. How to Check Fridge Temperature without the Thermometer?

You can put a glass or bottle of water in the fridge to estimate the temperature. After 5-6 hours, take it out of the fridge and look at the water container. 
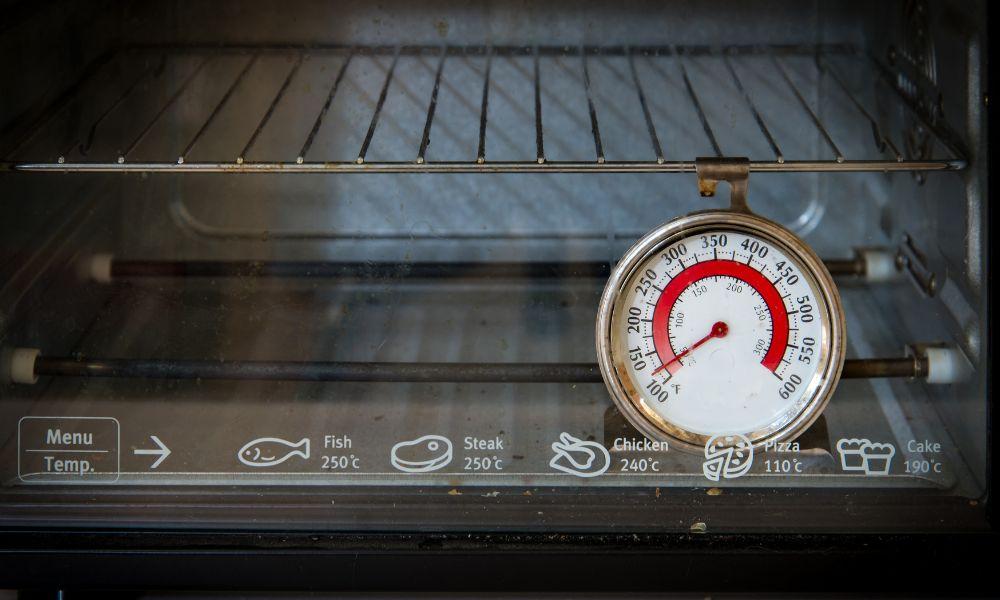
Keep an eye out for condensation; the faster it appears on the surface, the colder the temperature.

05. Why is My Fridge Not Cold?

Ensure no food is at the back of the fridge, blocking any sensors. Also, blocked vents and coils can cause fridges to heat up.

06. How Do I Find the GE Profile Refrigerator Troubleshooting Temperature?

If your fridge isn’t cooling properly, ensure the thermostat and sensors are working properly, and the temperature is set to the correct number. If this doesn’t work, contact customer service.
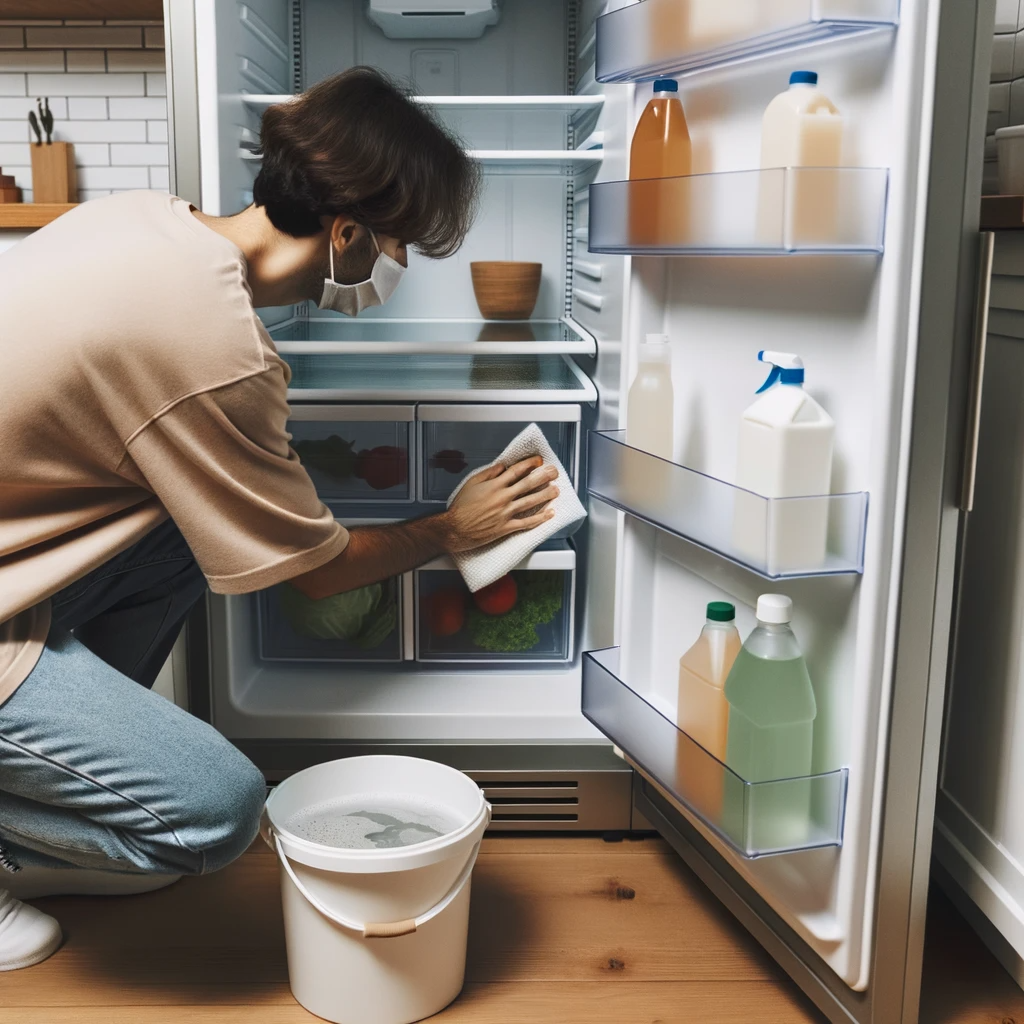
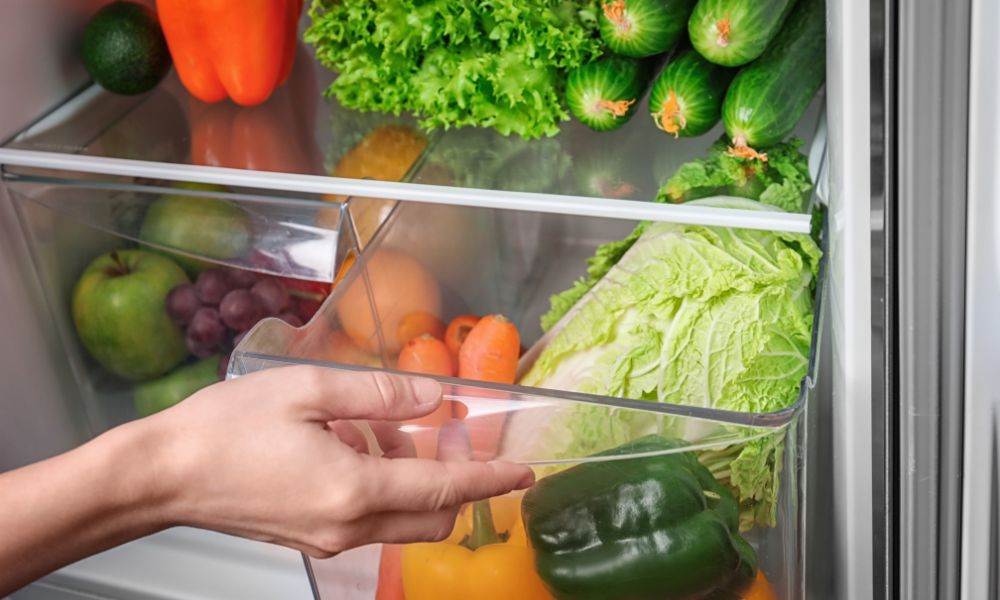
07. What Should the Internal Temperature of My Fridge Be?

The internal temperature of your fridge should ideally be between 0C and 4C or 40F and 32F. Anything outside this range could lead to food spoilage.

08. What Is the Hot Holding Temperature for Foods in My Fridge?

While your fridge is not designed for hot holding, if you are storing cooked foods, the hot holding temperature should not exceed 140 degrees Fahrenheit to minimize bacterial growth.

09. Why Does My Fridge Temperature Exceed 140 Degrees Fahrenheit?

If your fridge temperature ever exceeds 140 degrees Fahrenheit, it is a sign of a serious malfunction and you should seek immediate professional help. This temperature is unsafe for food storage and could lead to foodborne illnesses.

In All

The next time your cold brew is too warm for your liking, you won’t have to ask yourself: why does my fridge keep changing temperature? You’ll know just what to do.

Burnt Popcorn Funk? Fishy Smell? Odor Solutions!

Ugh, microwave smells are the WORST! From lingering fishy odors to that haunting burnt popcorn scent, microwaves can trap some seriously unpleasant stenches. But don’t worry – we’re tackling it all.

Whether it’s a week-old garlic explosion or a mysterious lingering funk, we’ve got the solutions to banish those odors and get your microwave smelling fresh again.

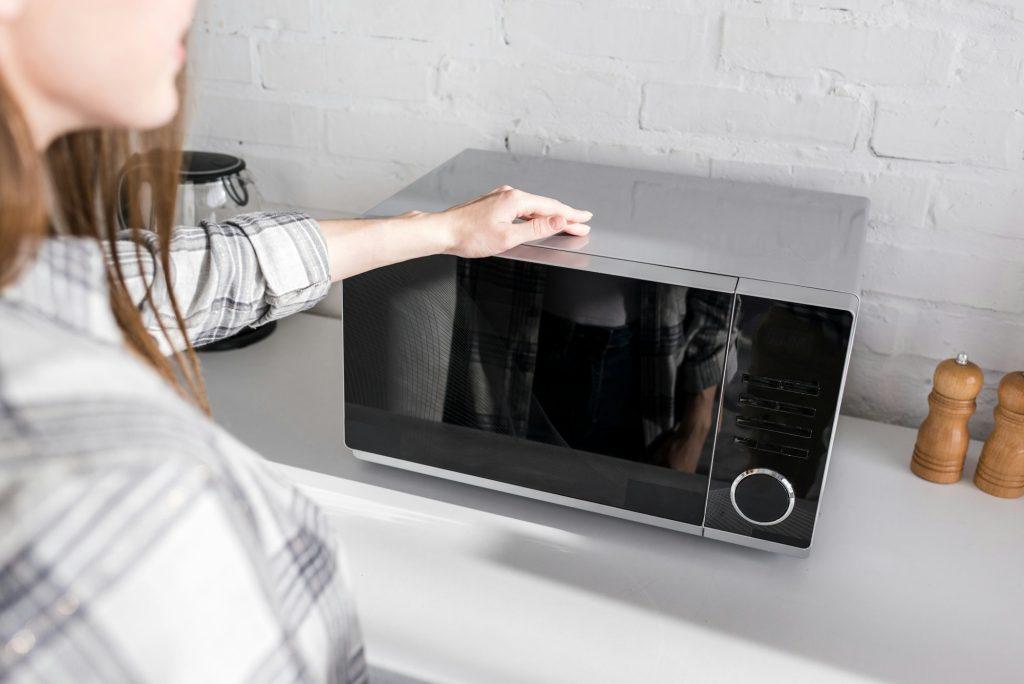
cropped view of woman looking at microwave in kitchen

😫 “What’s That Smell?!?” Common Culprits & Why They Linger

The most common microwave stinks usually come from leftovers, burnt food, or ingredients that have a naturally strong smell. These smells linger for a few reasons:

  • Grease=Smell Magnet: Tiny food particles covered in grease get splattered inside your microwave. Grease traps and amplifies odors!
  • Humidity Haven: Microwaves create a warm, humid environment – perfect for smelly stuff to grow.
  • The Nose Knows(Less): Our noses get used to smells quickly. You might not notice that microwave funk, but a guest sure will!

Behind the Stink: The Science of Smells

Understanding why things smell is the first step to making your microwave fresh again.

Here’s a quick science lesson to help you fight those funky smells:

  • Our Noses Adapt: We quickly become used to the same smells, and that’s why we might not notice an ongoing smell, but a visitor will. It’s an evolutionary mechanism to protect us from being overwhelmed by our environment!
  • Bacteria Loves Moisture: Microwaves make a warm, damp place that odor-causing bacteria love. That’s why it’s key to clean and dry your microwave often.

How to Get Rid of Microwave Smells: The Basic Toolkit

Before we bust out the big guns, let’s start with the cleaning basics. Even mild smells need a good wipe-down to get rid of the source.

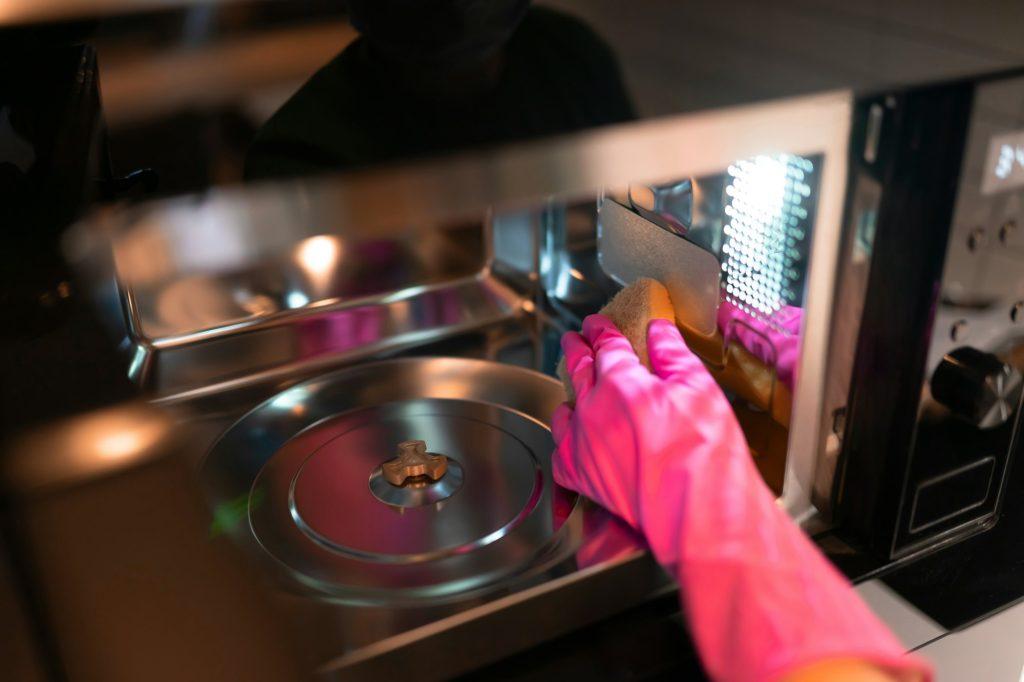
Hand in glove wipes the microwave inside
hand in glove wipes the microwave inside

💨 Step Zero: Clean It Out!

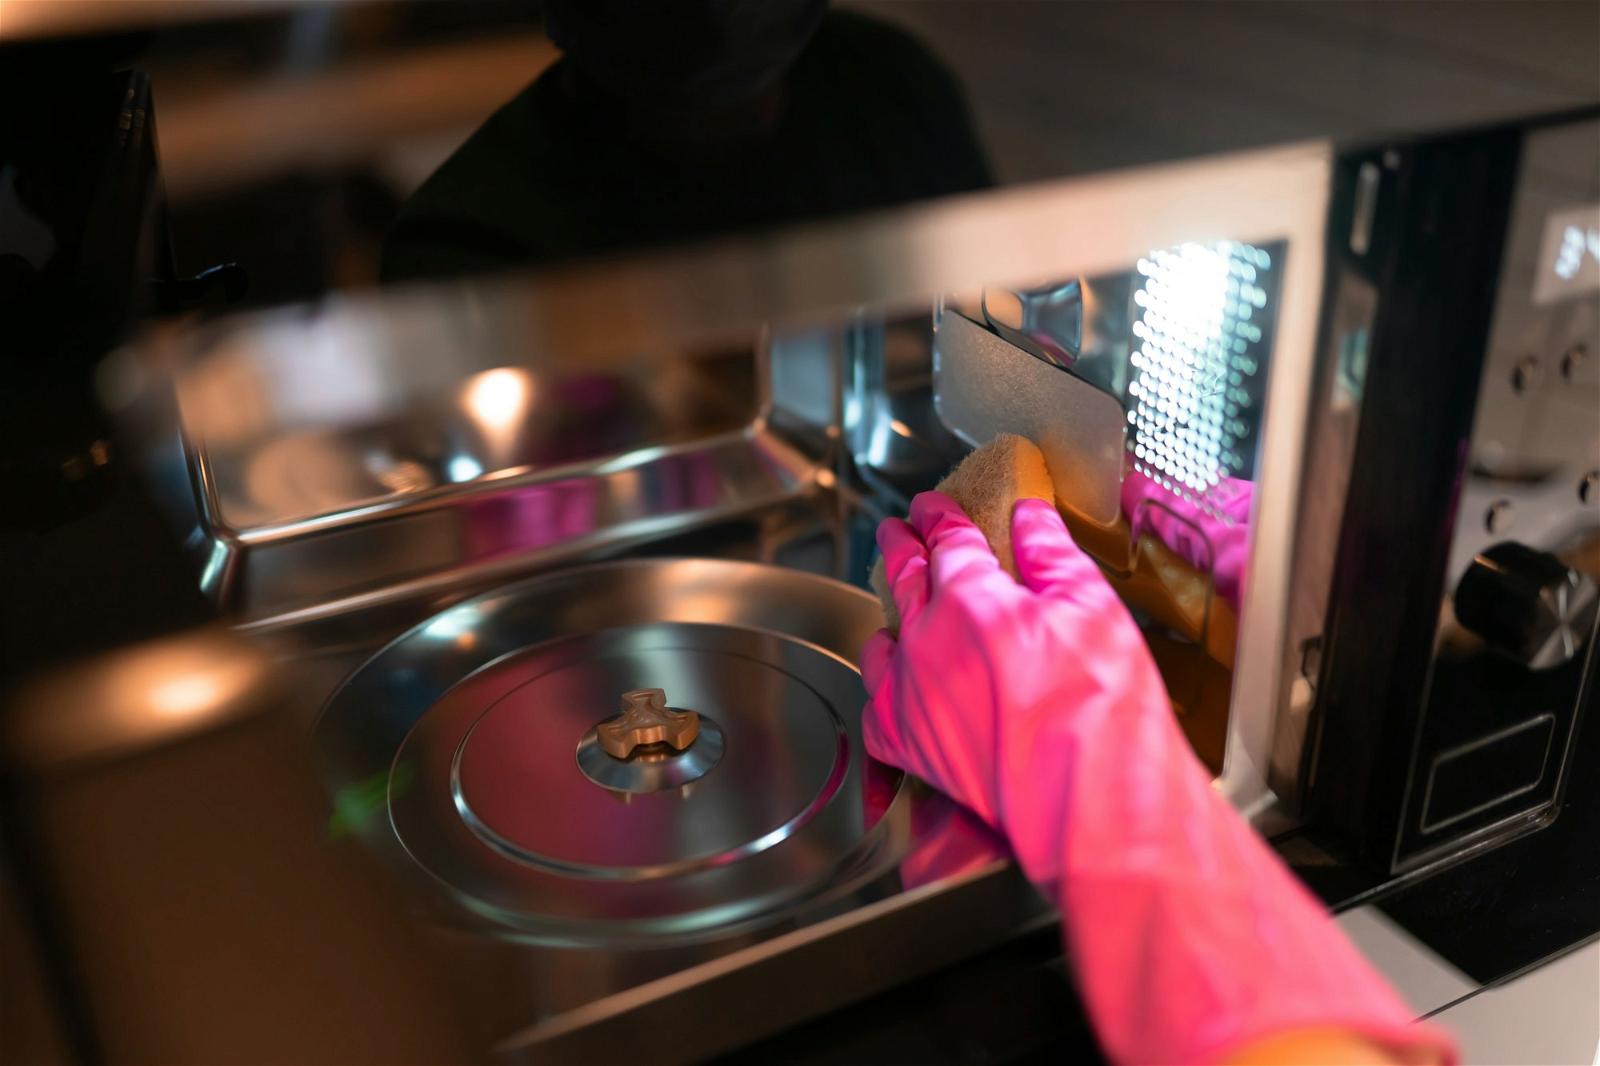
Before busting out the big odor removal guns, do a basic wipe down of the microwave’s interior and exterior.

  • Remove the turntable and any other removable parts. Wash these in hot, soapy water.
  • Wipe out the whole microwave interior with a damp cloth and a mild all-purpose cleaner. Don’t forget the top, sides, and door!

Pay special attention to the window, walls, turntable, and the underside of the microwave, where splatters and spills accumulate but often get missed.

Microwaves should be given a regular basic cleaning like this anyway to keep things hygienic – doing so prevents odors from getting out of control.

🍋 Household Heroes: Vinegar, Baking Soda & Lemon

As a chef and chef and barista at Boat Basin Cafe for years, I often had to deal with strong smells in the kitchen from cooking ingredients like fish, and spices, or accidents burning food in the oven.

The same principles apply to getting odors out of microwaves!

My top odor-fighting heroes are common household staples: distilled white vinegar, baking soda, and lemon.

But hey, not everyone keeps those on hand. If you need alternatives, try citrus peels for freshness or even a splash of hydrogen peroxide for its odor-busting action.

Let’s take a look at how each can help banish smells and refresh your microwave:

Cleaning AgentHow It WorksIdeal For
Distilled White VinegarAcid in vinegar breaks down odor molecules and dissolves grimeTough grease splatters, fish smells, general odor cleansing
Baking SodaAbsorbs and neutralizes odors naturallyBurnt popcorn smells, absorbed smokey and burnt food smells
Lemon (juice or peels)Pleasant citrus smell overpowers musty odorsFreshening up microwave, leaving a clean scent behind

Vinegar is the go-to choice for tackling microwave smells, praised for its grease-cutting and anti-odor properties.

Enhancing its effectiveness, combining absorbent baking soda and fresh lemon creates a powerful trio for neutralizing odors.

According to cleaning experts like Melissa Maker, author of Clean My Space, these simple ingredients can tackle almost any lingering smell. They effectively combat odors from burnt bagged popcorn to reheated fish dinners, all without the need for harsh chemical fumes.

Vinegar: The All-Purpose Odor Buster

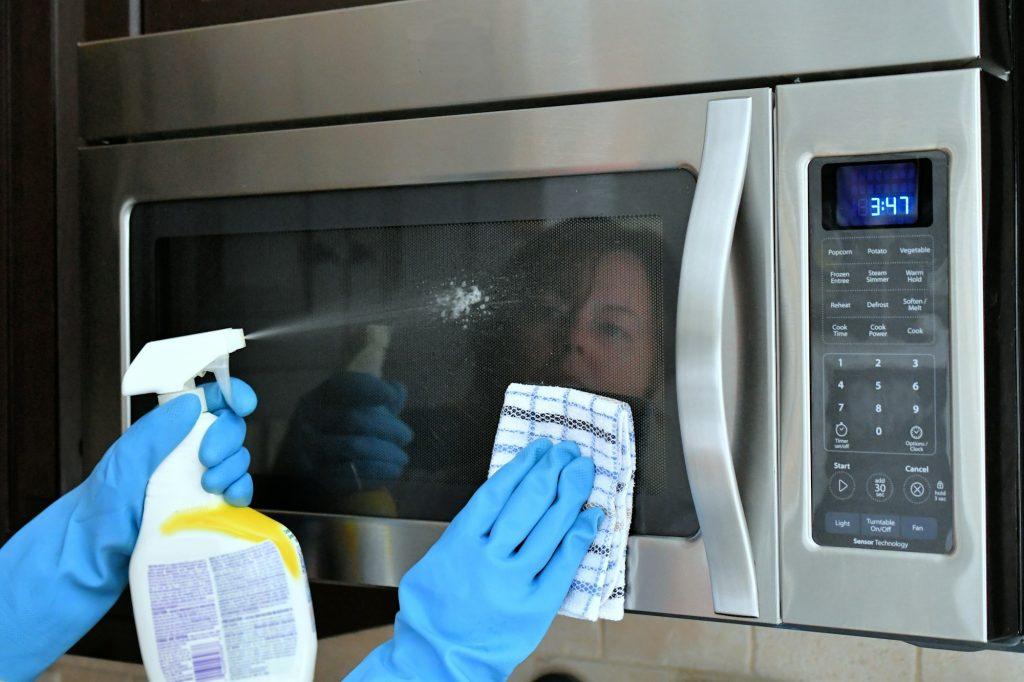
Doing housework chores by cleaning the microwave in the kitchen
doing housework chores by cleaning the microwave in the kitchen

My go-to microwave cleaner:

  • Plain distilled white vinegar with some water in a spray bottle (equal parts each).
  • Spray the vinegar solution liberally inside your microwave.
  • Let it soak for 2-5 minutes.
  • Wipe clean with a soft cloth.

💁🏻‍♂️Why it works: The acid in vinegar dissolves grease and breaks down odor molecules, cutting through nasty burnt or rotting food smells.

For tougher odors and stains:

  • Fill a microwave-safe bowl with undiluted vinegar.
  • Microwave on high for 5 minutes, letting it simmer. (This creates steam for extra cleaning power!)
  • Carefully remove the hot bowl.
  • Wipe the inside of your microwave – smells should be gone!

Baking Soda to the Rescue

baking soda
baking soda

Baking soda is a natural odor absorber and neutralizer – perfect for banishing microwave smells. Its porous texture soaks up odor molecules like a sponge.

How to Use Baking Soda in Your Microwave:

  • Paste Power: Mix baking soda and water into a paste. Apply it with a sponge to the smelly spots in your microwave.
  • Microwave Boost: Place baking soda in a microwave-safe bowl and microwave for 1-2 minutes. This helps it absorb even more odors.
  • Let it Work: After applying (either way), leave the baking soda for several hours or overnight before wiping it away.

💁🏻‍♂️Expert Tip (from Melissa Maker): Baking soda paste is THE solution for stubborn burnt popcorn smells and even lingering fish odors.

Quick and Easy Prevention:

  • Place an open box of baking soda in your microwave while cooking to stop smells before they start.
  • Some people leave a box in their microwave all the time as a constant odor absorber. Replace it every 3 months.

Lemon or Citrus for Freshness

Cleaning products flat lay, baking soda, lemon vinegar and bamboo brush
cleaning products flat lay baking soda lemon vinegar and bamboo brush

Citrus fruits like lemons are amazing microwave fresheners because they:

  • Smell Fresh: Their natural scent masks unpleasant odors.
  • Chemically Neutralize: The citrus acid breaks down odor molecules.

How to Use Citrus in Your Microwave

  • Lemon Rubdown: Cut a lemon in half and rub it all over the inside of your microwave, squeezing out some juice. Zest the peel and let the bits fall inside for extra freshness.
  • Citrus Simmer: Add leftover peels to a bowl of water with vinegar or baking soda. Microwave on high to release a powerful, clean scent.

💁🏻‍♂️Quick Tip: Throw leftover lemon or orange halves in your microwave with some baking soda while it’s heating to get rid of food smells.

Smell-Busting Beyond the Basics

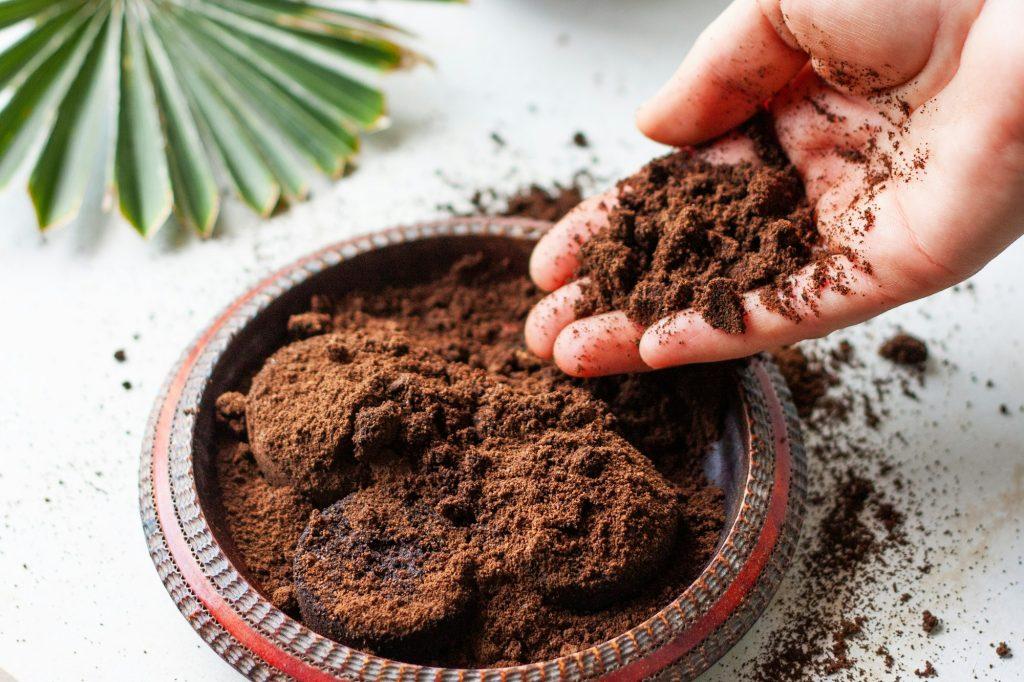
Woman's hand crumbles coffee grounds into wooden bowl.
woman s hand crumbles coffee grounds into wooden bowl

☕️ Cafe Owner’s Secret: Fight Odors with Coffee Grounds

Their intense, smoky aroma makes coffee grounds surprisingly effective at overpowering bad smells in microwaves and even ovens!

How it Works:

  • Place fresh or slightly used coffee grounds in a microwave-safe bowl.
  • Microwave for 1-2 minutes. This releases oils and aromatic compounds that neutralize other odors.

Pro Tip: Leave a bowl of used grounds inside your microwave for several hours after heating them for lasting odor protection. Especially helpful for lingering fish or curry smells!

Real-Life Rescue (from my Cafe):

“Burnt fish smell took over our oven? Espresso grounds to the rescue! Sprinkled them inside, left overnight – smell gone!”

Why Coffee Grounds are Awesome:

  • Budget-friendly and all-natural
  • Clean the air while leaving a pleasant coffee scent
  • Perfect for microwaves and other kitchen appliances

💪 Activated Charcoal: When Things Get Serious

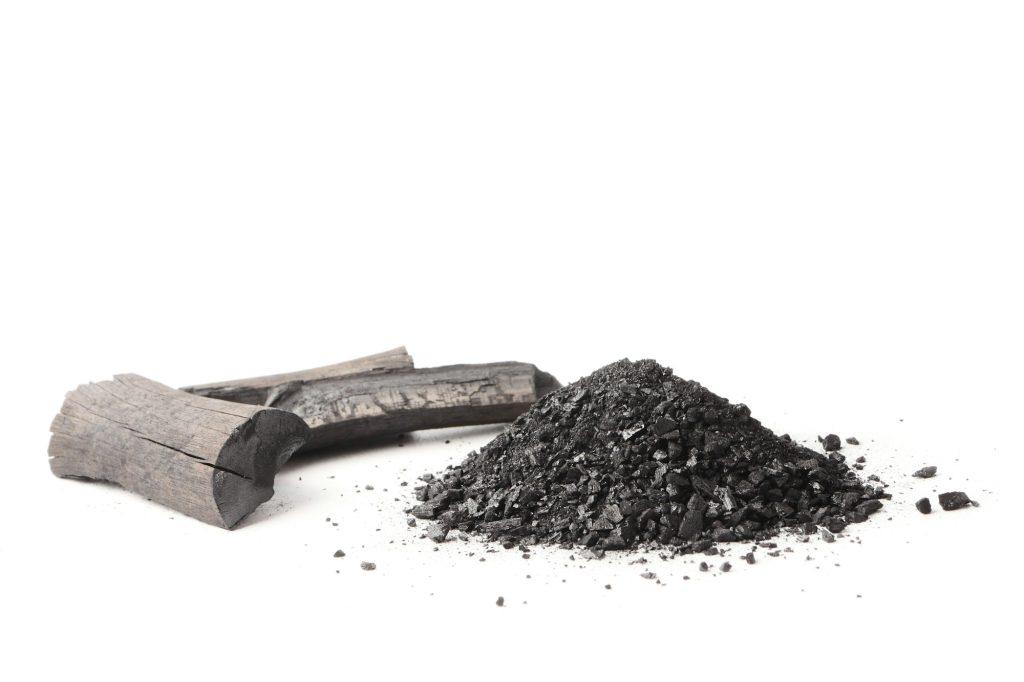
Charcoal and powder (activated carbon) on white background.
charcoal and powder activated carbon on white background

Sometimes, even vinegar and baking soda aren’t enough – that’s when it’s time for activated charcoal!

Why it Works: Activated charcoal is ultra-absorbent, with a huge surface area that traps odors and stains. Think of it like a super-powered sponge for smells.

How to Use It:

  • Paste Power: Mix activated charcoal powder with water or vinegar for a targeted attack on smelly stains. Let it sit, then wipe away.
  • Airborne Assault: Place some powder in a microwave-safe container. Heat briefly, then leave it inside to absorb odors over time.

Cafe Rescue Story:

“Badly burnt popcorn filled our cafe with a lingering smell. Activated charcoal saved the day, absorbing those stubborn smoky molecules!”

📝 Key takeaway: Activated charcoal is a must-have tool for serious microwave odor battles.


💨Restaurant Kitchen Secret: The Power of Drying Out Your Microwave

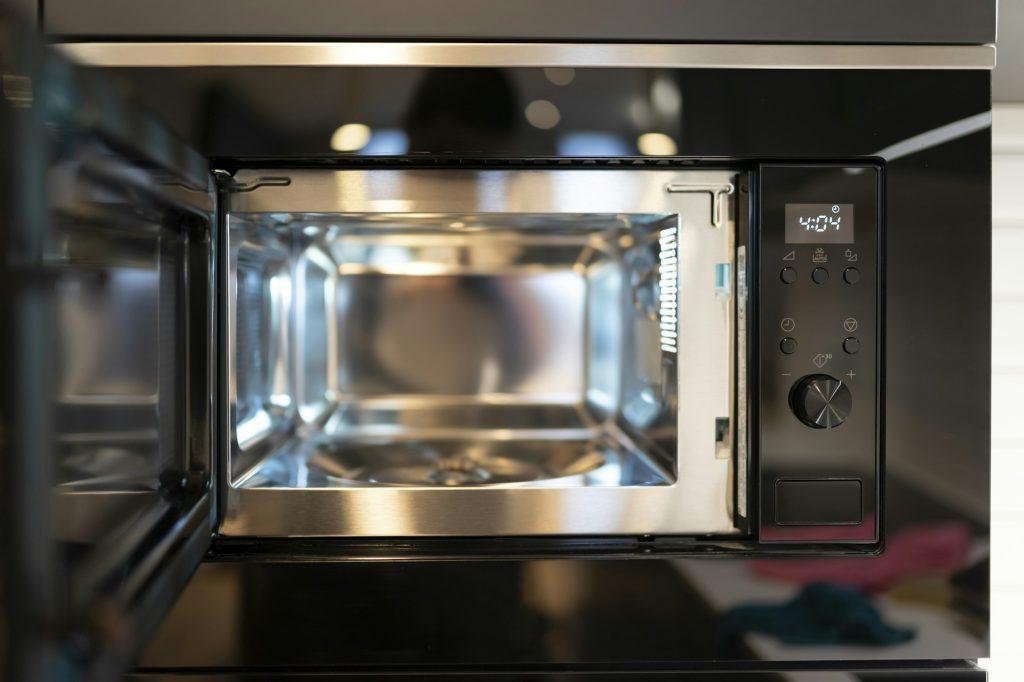
Modern built-in microwave microwave oven with open door. Empty microwave concept
modern built in microwave microwave oven with open door empty microwave concept

Moisture is the enemy of a fresh-smelling microwave! Here’s why:

  • Trapped moisture + food particles = lingering odors
  • Even after cleaning, the remaining water helps those smells stick around

How to Dry & Deodorize:

  • After cleaning, prop the microwave door open overnight (or for several hours).
  • Place it near a window or vent to increase airflow.
  • This allows full drying and helps push smelly molecules out.

📝 Pro Tip: I air out my microwave weekly after cleaning – prevents smelly buildup!

Speed Drying Option:

  • After cleaning, place a fan in front of the open microwave for 30 minutes.
  • Wipe away any condensation. This quick boost of airflow makes it harder for smells to linger.

❓ The Burning Plastic Panic – Is My Microwave Ruined?

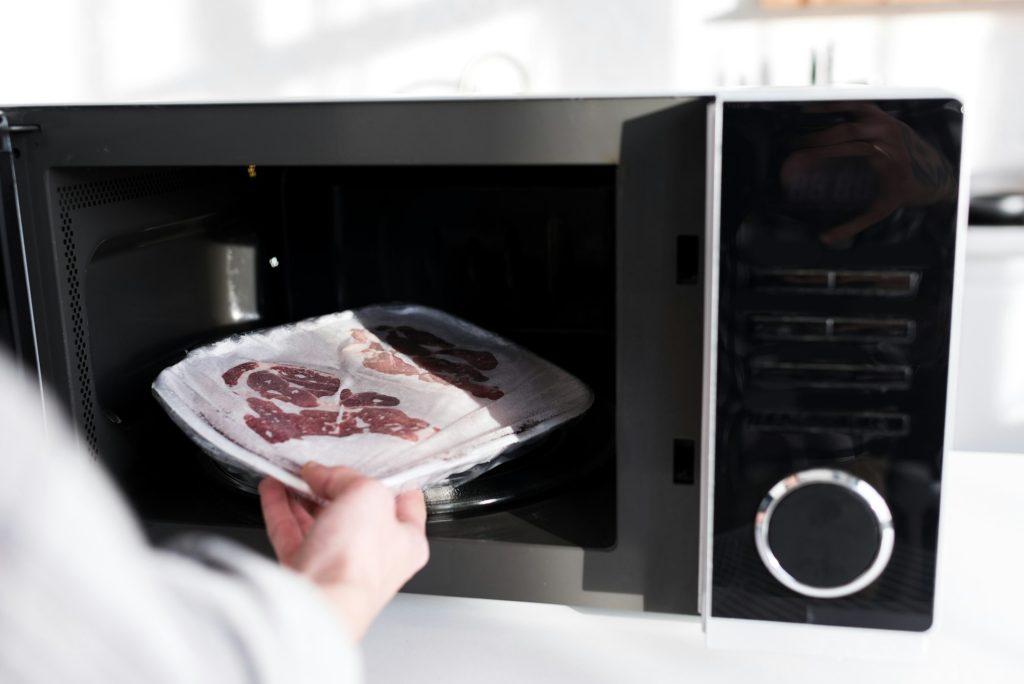
cropped view of woman putting meat into microwave in kitchen

One smell scenario that can set off alarm bells for microwave owners is the disturbing stench of burning plastic.

This usually happens if a plastic container touches the interior walls while cooking. The high heat warps and melts the plastic, leaving behind a nasty chemical odor.

As soon as you detect that harsh melted plastic smell, stop the microwave immediately!

Make sure to carefully ventilate the area if possible. It’s not a healthy scent to be breathing in. The pungent odor tends to stubbornly cling to the cavity too.

That harsh, chemical smell of burnt plastic is alarming!

Here’s what to do:

  1. Safety First:
    • Stop the microwave immediately.
    • Ventilate your kitchen well.
    • Inspect the microwave closely for damage or leftover burning plastic. Check your manual or get it professionally inspected if you’re unsure. In the worst-case scenario, you might need to consider if your microwave is beyond repair.
    • Our guide on [how to dispose of a microwave] can help with that difficult decision.
  2. Tackle the Smell:
    • Burnt plastic odors are stubborn. You’ll need:
      • Activated charcoal (for serious absorption)
      • Lemon steam (intense cleaning power)
      • Plenty of drying time
    • You might need to repeat these cleaning steps several times.

Good News: Even bad burnt plastic smells can usually be removed!

📝Key Points:

  • Don’t panic – Your microwave might be salvageable.
  • Focus on safety first – then address the odor.

🐟 Banishing the Fishy Funk: Chef Tips

Grits with fried fish
grits with fried fish

Fishy smells are among the worst microwave offenders.

Here’s why:

  • Fish oils and compounds cling to surfaces when heated.
  • These oils are tough for regular cleaners to fully remove.

Solutions:

  • Vinegar Power: Diluted vinegar dissolves those stubborn fish oils. Spray, let it soak for 5+ minutes, then wipe away.
  • Activated Charcoal Attack: For intense smells, make a paste with charcoal and vinegar. Apply it to the worst areas, then wipe clean. Or leave a small container of charcoal inside to absorb odors over time.

💁🏻‍♂️Personal Experiment: Coffee vs. Fish

As a chef who has cooked hundreds of pounds of fish over the years, I know firsthand how pungently fish odors cling to surfaces, clothes, and yes – microwaves!

Reheating leftover salmon, tuna or sardines is convenient but almost guarantees a lingering stench.

And if all else fails, set out a bowl of fresh coffee grounds or used espresso grinds in the microwave for an hour.

The intense coffee aroma overpowers lingering whiffs of fish! It becomes a battle of smells – and in my experience, coffee always wins.


🔥 The Burnt Smell Battle: Pro Tips (especially for burnt popcorn!)

Caramel Popcorn in rustic bowl. Black background. Top view
caramel popcorn in rustic bowl black background top view

The Problem: Burnt popcorn leaves a particularly stubborn odor. Carbon molecules cling to the microwave interior.

Solution 1: Activated Charcoal:

  • Make a thick paste with activated charcoal and hot water.
  • Coat the entire microwave, especially the ceiling vent.
  • Let it sit for at least 1-2 hours to absorb those deep-set odors.

Solution 2: The Coffee Ground Surprise:

  • Microwave a bowl of used coffee grounds to release steam.
  • This targets burnt popcorn molecules specifically!

💁🏻‍♂️Chef’s Note: I’ve used this coffee trick countless times to combat burnt food smells in my ovens. It works in microwaves too!

📝Quick Tip (from Melissa Maker): Keep an activated charcoal odor absorber inside your microwave at all times to prevent burnt popcorn smells. Replace it every 3-6 months.


🌶️ The Curry Conundrum (and other strong spices)

Delicious chicken curry
delicious chicken curry

Strong spices like curry and chili leave lingering smells that basic cleaning can’t always fix.

Here’s how to fight back:

  • Secret Weapon #1: Hydrogen Peroxide
    • Dilute hydrogen peroxide and spray it inside your microwave.
    • Let it sit for a few minutes, then wipe clean. The bubbling action helps loosen spice stains and odors.
  • Secret Weapon #2: Baking Soda Paste
    • Make a thick paste with baking soda and water.
    • Coat the entire microwave interior and leave it overnight.
    • Baking soda is especially good at absorbing stubborn spice smells.

As a lover of bold, highly-seasoned dishes, I rely on my microwave to reheat leftovers like curries, chili, and Cajun spices regularly.

But pungent flavors like cumin, turmeric, and cayenne pepper can be surprisingly stubborn, leaving lingering scents behind no matter how vigorously I scrub with lemon or vinegar.

The smell seems to seep into the plastic and metal lining itself!

For extra-stubborn cases: Follow up with activated charcoal to conquer those spice smells!


🧄 Banishing Garlic and Onion Odors

Organic garlic and onion on wooden table
organic garlic and onion on wooden table

Garlic and onion add delicious flavor… but their smells are stubborn! Here’s how to fight back:

  • Lemon Power: Rub the inside of your microwave with lemon slices to combat oniony aromas.
  • Vinegar Soak: Diluted vinegar water helps loosen garlic and onion residue – follow up with a wipe-down.
  • Coffee to the Rescue: For serious garlic situations, place a small bowl of coffee grounds inside your microwave for an hour. Coffee’s powerful aroma helps mask stubborn smells.

Pungent alliums like garlic and onion make tasty additions to meals, but their strong scents stubbornly cling to surfaces.

Rubbing down the microwave interior with either lemon slices or diluted vinegar water helps lift these clinging smells from repeated garlic bread or onion ring reheats.

For heavy garlic duty, try leaving a small bowl of coffee grounds inside for an hour after heating – coffee overpowers almost any food aroma surprisingly well!


🍲 Burnt Food: Activated Charcoal to the Rescue

Burnt food leaves a nasty, complex odor that lingers in your microwave. For this, you need heavy-duty absorption power:

  • Activated Charcoal Paste: Mix activated charcoal powder with water to form a paste.
  • Apply Generously: Coat the inside of your microwave, especially stained areas.
  • Let it Work: Leave the paste for at least 1-2 hours to absorb those deep-set burnt odors.

💁🏻‍♂️As a chef, I’ve burnt my fair share of dishes! Activated charcoal is my secret weapon for getting that harsh, smoky smell out of ovens. It works just as well for microwave mishaps.


🔑Prevention is Key

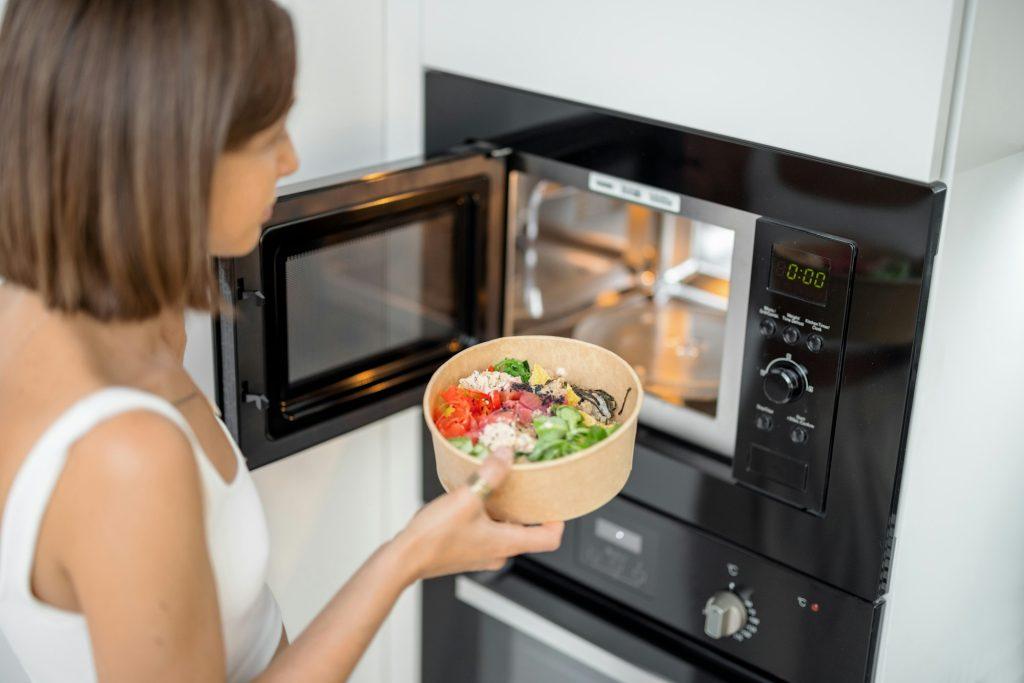
Woman heating food with microwave machine
woman heating food with microwave machine

💦 Regular Wipe-Downs Win

  • A quick wipe with hot, soapy water after each use goes a long way.
  • Target corners, the ceiling vent, and the turntable.
  • For extra freshness, add a spritz of diluted vinegar to your cleaning routine.

✨I learned that regular wipe-downs make a world of difference compared to letting messes build up over time.

👃 Don’t Forget the Filter!

  • Many microwaves have a removable filter above the door. This traps grease and food particles that cause odors.
  • Check your manual for cleaning instructions. Usually, it’s a simple soak in soapy water.
  • Clean your filter every 2-3 months to prevent it from circulating smells.

💡 Splatter-Free Strategies

  • Use microwave covers or vented plastic wrap to reduce splatter and contain smells.
  • Avoid overcooking or scorching foods.
  • Ventilate your kitchen well after heating up strong-smelling dishes.

❄️ Proper Placement With Airflow

Where you put your microwave affects how well it airs out between uses. Here’s why airflow is important:

  • Under Cabinets = Trapped Smells: Enclosed spaces restrict airflow, so odors hang around longer.
  • Open Counter with Ventilation: This is the best spot! It allows smells to dissipate quickly.
  • Window Bonus: Fresh air whisks away food odors even faster.
  • Above the Stove (if possible): This provides ventilation if your stove has a powerful exhaust fan.

😌 Conclusion: Sweet Smelling Success

  • We tackled those microwave smells with everyday kitchen staples!
  • The key is cleaning quickly before odors set in.
  • Baking soda and activated charcoal are your heavy hitters for tough smells.
  • Vinegar, lemon, and coffee are also powerful deodorizers.

💁🏻‍♂️Chef’s Tip: Stay ahead of the game!

  • Regular wipe-downs
  • Air drying
  • Splatter prevention
  • Clean that filter!

As a chef, keeping kitchen appliances fresh is a point of pride.

Sometimes, though, appliances do reach the end of their lifespan. I’ve dealt with problem of broken microwavesin my kitchens before, and it’s not always an easy fix.

Whether it’s burnt popcorn, reheated fish, or mysterious grime smells, I’ve learned that strategic cleaning pays off for sweet-smelling success.

Now you have the tools to banish those microwave odors. Enjoy your tasty leftovers without the stinky side effects!

FAQs

How do you get a bad smell out of your microwave?

The most effective way to get bad odors out of your microwave is to thoroughly clean the interior with diluted white vinegar. Spray vinegar solution over all surfaces and let it soak for 2-5 minutes to break down grime and odor molecules. Then wipe clean. You can also boil a vinegar-water mix inside to release cleaning vapors. For extra heavy duty odors, make a baking soda or activated charcoal paste and coat heavily soiled areas.

How do you freshen the inside of a microwave?

The best way to freshen up a microwave is to wipe down the interior with lemon juice. Simply rub half a lemon all over the walls, squeezing a bit as you go, then scrape over it with a lemon zester. The citrus oils in lemon rinds help neutralize odors chemically, leaving behind a clean, fresh scent. You can also place lemon peels and baking soda in a microwave-safe bowl, then heat for 1-2 minutes. This releases fresh and deodorizing steam.

How do you get a burnt smell out of a microwave?

Burnt food smells are extremely stubborn inside microwaves. To tackle them, make a thick paste with activated charcoal powder and hot water. Coat all interior surfaces, especially the ceiling vent, then let it set for 1-2 hours minimum to absorb those complex smokey and carbonized molecules. You can also microwave used coffee grounds or espresso grinds in a bowl for 1-2 minutes – the strong coffee aroma helps overwhelm and neutralize burnt food smells surprisingly well.

Does baking soda get rid of smells in the microwave?

Yes, baking soda is highly effective at absorbing odors inside microwaves. To use it, mix baking soda with a bit of water to form a spreadable paste. Coat the interior of the microwave, focusing on stained or smelly areas. Let it set for several hours, up to overnight, then wipe away. You can also microwave baking soda in a bowl for 1-2 minutes to activate the powder’s deodorizing properties. The natural porous structure of baking soda traps smelly particles.

How to get rid of smell in microwave with lemon?

Lemon is a great odor eliminator for microwaves. Rub half a lemon all over the interior cavity, squeezing some juice out as you scrub. Then take the zested side of a grater and scrape it over the peel, letting the aromatic yellow bits spread. The citric acid in the juice breaks up grime and smelly residue while the strong lemon scent overpowers unwanted odors. For an extra kick, place leftover used lemon halves in a bowl with some baking soda and microwave for 1 minute.

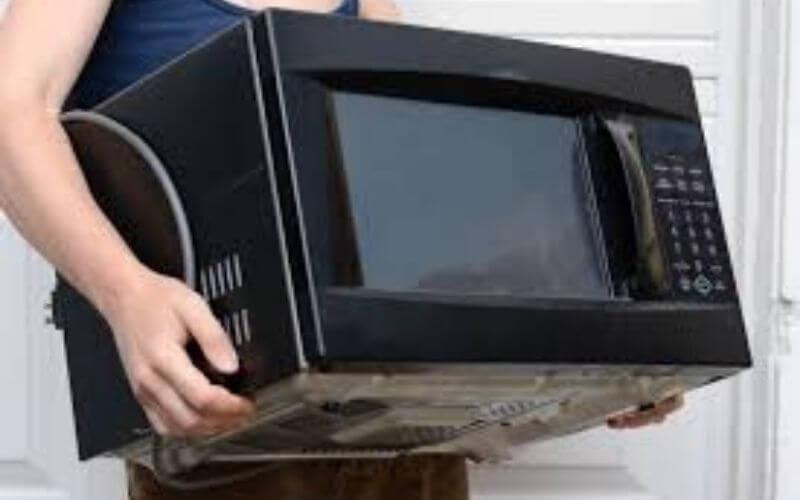
Need to Get Rid of a Microwave? Here’s How to Do it Right


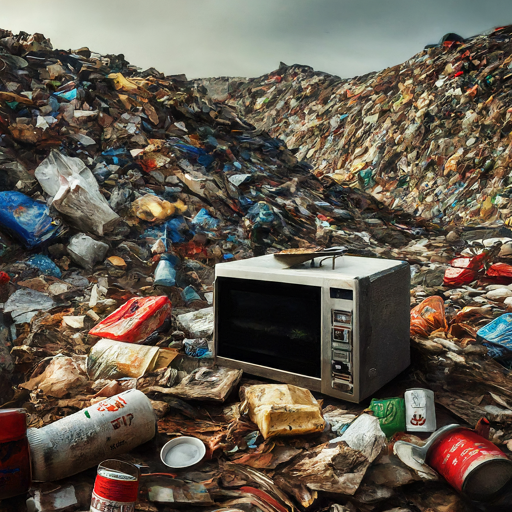
Imagine your trusty microwave transformed into a rusty, chemical-leaking time bomb buried in a landfill. Scary, right? Yet, in 2022, we tossed out an insane 50 million tons of e-waste, poisoning the same earth that grows our food. It’s time to break this toxic cycle!

If you’ve got an outdated microwave collecting dust, let’s ditch it the right way – and maybe even unleash some DIY creativity along the way.

But before throwing it away, why not try to fix it? You might be surprised at how simple the solution is!

how to dispose of a microwave
Get Rid of a Microwave

How to Dispose of a Microwave at Recycling Centers

Ever wondered what happens to your old microwave when you upgrade? If it ends up in a landfill, it’s not just taking up space – it could be leaking chemicals into the environment. Let’s make sure that doesn’t happen!

Here’s how to recycle that microwave the right way:

Step 1: Know the Rules

New York has a great website for e-waste info. Bookmark it for what you can recycle and where to find drop-off spots.

Step 2: Find Your Local Recycling Options

Don’t just rely on general recycling websites. Check these New York-specific resources too:

  • NYC Sanitation’s “What to Recycle” Page
  • Your County’s Website: if you are in New York, Search for “[Your County Name] + e-waste disposal.”
  • Manufacturer Take-Back: Does the company that made your microwave have a recycling program?
  • Online Tools: Tools like RecycleSearch are helpful, but always double-check information with these New York specific resources:

👉Quick Tips:

  • Call ahead! Some recycling places might charge a small fee for microwaves.
  • Still working? Consider donating it. Charities and thrift stores often accept electronics.
  • Don’t even think about tossing it in the regular trash – New York’s got e-waste laws!

Need more help? Your local recycling experts or the NY DEC website can answer all your questions.

Microwave Disposal Laws: What You Need to Know ⚠️

Need to Get Rid of a Microwave? Here's How to Do it Right 3
Microwave Disposal Laws

Okay, maybe this isn’t the most exciting topic ever… but trust me, a few minutes here could save you a headache (and some cash in fines!). New York takes e-waste seriously, so let’s break down the basics:

YES, you need to:

  • Check official sources: The NY State E-waste website is your go-to for the latest rules.
  • Find the right drop-off: Your town/county website has the scoop on locations and fees.
  • Ask the maker: Your microwave’s company might have a free recycling program.
  • Donate if it works! Charities and thrift stores love working electronics.

NO, you can’t:

  • Toss it in the regular trash! Microwaves have nasty stuff that doesn’t belong in landfills.
  • Assume curbside pickup is okay. Even tiny microwaves need special recycling.

Why Dispose of Your Microwave Responsibly? 🌍

Need to Get Rid of a Microwave? Here's How to Do it Right 4
Microwave Responsibly

Imagine your kitchen if the microwave never went away. Now picture that multiplied a million times – that’s what landfills are turning into with all our discarded electronics.

To learn more about the environmental impact of microwaves, check this out here.

It’s not just an eyesore – it’s a danger.

  • What happens in the landfill? Microwaves rust, break down, and release toxic chemicals into the soil and the water we all rely on. That’s the water we drink and grow food with… the water that sustains communities here and across the globe.
  • The Global Crisis: Our planet is choked with e-waste, poisoning the same land and water our families depend on. In many countries, this waste is handled dangerously, harming entire communities.
  • Can recycling make a difference? Absolutely! Microwaves contain valuable metals that don’t need to be mined from the earth. It means less pollution, less destruction of precious habitats around the world.

A Story to Remember:

Maria’s village used to get drinking water from the river. Now, it’s filled with chemicals seeping from an illegal e-waste dump. Her children get sick, and she fears for the future.

Every time we recycle responsibly, we help prevent stories like Maria’s.

Expert Insight: “Taking the time to dispose of my old microwave properly makes me feel good. I know I’m doing my small part to keep our waterways clean and protect the environment for future generations.” – John Bird, Boat Basin Cafe

Creative Ways to Repurpose Your Old Microwave 💡

Need to Get Rid of a Microwave? Here's How to Do it Right 5
Creative Ways to Repurpose Your Old Microwave 💡

Ready to get your DIY on? Let’s turn that busted microwave into something awesome! Safety first, of course – if it’s sparking or seriously broken, it’s time to recycle.

But if it just won’t heat up anymore… it’s time for a makeover!

Can I sell parts from my old microwave?

Sell Those Spare Parts: Believe it or not, there might be someone out there looking for parts from your exact microwave model! (Hey, we all have our quirks.) Get some cash back and help someone else keep their appliance alive.

Upcycling ideas for the crafty folks

Do you have a DIY streak? Here are some fun upcycling projects to consider:

  • Mini-Greenhouse: Got a green thumb? With some tinkering, your microwave could be a perfect little plant starter.
  • Unique Storage: Clean it out, pop in some shelves, and voila! Quirky storage for anything your heart desires.
  • Themed Planter: Succulents would look awesome in a microwave-turned-planter. Bonus points if you paint it a funky color!

Cafe Inspiration: Okay, I never repurposed a whole microwave, but at the cafe, we loved giving old stuff new life. A beat-up food processor became the coolest display for vintage buttons! It’s all about seeing the potential.

Not the DIY type? No worries! You can still responsibly ditch that microwave. Search “free e-waste drop-off near me” to get started.

FAQs

Got questions? It’s normal! Here are some of the most common ones people ask about getting rid of old microwaves:

Can I just toss my old microwave in the recycling?

Nope! E-waste (that’s electronics, for the uninitiated) needs special handling. Sorry, no curbside pickup for this one.

Do scrap metal places want my busted microwave?

Heck yeah! They love the metal inside. You might even make a few bucks.

Can I throw a microwave in a skip?

Most skip companies will take it, but always call ahead – some charge extra for appliances.

Ugh, I live in an apartment. How do I get rid of this giant microwave?

Check if the company who made it has a take-back program. Also, some charities offer pick-up services – score! Your city might even have e-waste disposal events with pick-up options.

Conclusion

So there you have it! Ditching a microwave the right way is easier than you think. New York has clear rules and tons of resources to make it happen.

Remember, it’s not just about decluttering your kitchen – responsible disposal keeps our environment safer and healthier for everyone. Whether you recycle, donate, or try a little upcycling magic, you’re doing a good thing.

Keurig Won’t Turn On? Try These Quick Solutions

As a long-time barista, I’ve brewed my share of piping hot cups over the years. And when my own trusty Keurig kaps out at home, I feel that desperate, coffee-less panic creep in. But this caffeine-craving chef knows a trick or two for troubleshooting!

I’ll never forget the fateful day last year when my trusty Keurig K55 started flashing cryptic error codes instead of brewing my precious morning elixir. After some frenzied Googling and digging through manuals, I realized there was a clog in the intake tube filter from mineral buildup.

Some meticulous dismantling and cleaning later, I nursed my beloved brewer back to perfect health! You can read more about diagnosing mysterious coffee maker error codes on this CoffeeFolk blog.

While I may not have the European flair of Nespresso or high-tech specs of Breville’s spaceship appliances, this barista can strategically diagnose those frustrating Keurig errors and degunk with the best of ‘em. Consider yours truly your personal coffee coach!

Inside this fun yet practical guide, you’ll discover my foolproof troubleshooting advice from embarrassingly simple to ingeniously unconventional fixes. Apply these customized tips to resuscitate your K-Supreme or wake your K-Classic from its caffeine-less coma!

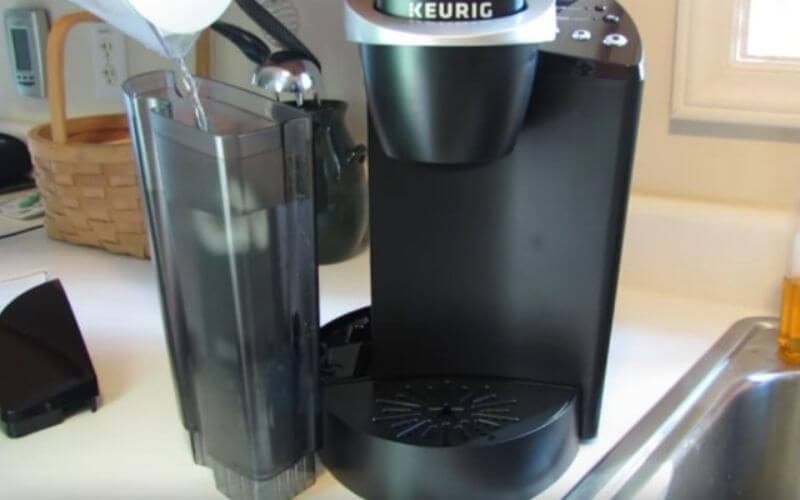
how to turn on keurig without power button
keurig

☕️🛠️ Keurig Troubleshooting Quick Guide

IssuePossible CauseSolution
Not brewingUnpluggedCheck power connections
Won’t turn onPower button jammedCarefully loosen button
Leaking waterMisaligned water reservoirReposition reservoir
Weak coffeeClogged filter basketClean/replace filters
Flashing lightsDescale neededRun descaling solution

🔍Troubleshooting Guide: Decode the Coffee Conundrums

As any coffee kitchen alchemist knows, desperate times call for Caffeinated measures. When your brewer starts acting up, stay calm and break out your homemade barista bat-belt! We’ll confront these coffee crises with gusto.

First up in our troubleshooting training, let’s start simple and investigate the…

☕️Coffee Catastrophe Basics: Oopsie-Daisy Disasters

We’ve all been there – stumbling half-asleep to our precious coffee pot, only to be cruelly doused with…nothing. Just sad silence from our suddenly stubborn steamer. Before you panic, let’s break down the blunders of coffee calamity 101:

Troubleshooting StepActionNote
Check Power ConnectionMake sure the brewer is plugged in.A common oversight with an easy fix.
Power Button CheckPress the power button firmly but gently.Power button location varies by model; consult the manual.
Test the OutletUse another device to test the outlet.Determines if the issue is with the brewer or the power supply.
Morning Blurry-Eye Syndrome CheckDouble-check all actions taken.Simple mistakes are more common when half-asleep.
  • Is it even on?? Make sure your brewer is securely plugged into the wall. I know it seems silly, but with blurry morning eyes those squints at the outlet can betray. Take a second look! My neighbor Jason once urgently called me to investigate why his Keurig K-Slim had mysteriously stopped working. After 20 minutes disassembling and scrutinizing internal parts, I noticed the power cord plug lying askew on the counter… Whoops!
  • While you’re checking cords, firmly prod the power button on the back or top right of your machine model. Consult manuals if unsure – location varies! Be assertive but gentle, coaxing your machine to gurgle to life.
  • If lights stay dark, grab a nearby device and plug it into the same outlet. Did someone forget to pay the electric bill or is there a sneaky wiring issue? Better sort that before diagnosis continues!

Have no fear mistaking these morning mishaps for full-on equipment expiry. Once solved, you can revel in the amusing realization that your java genie was indeed ok, just a bit…clueless without caffeinated guidance!

💁🏻‍♂️Intermediate Interventions: Strategic Troubleshooting

Alright, no silly slip-ups with buttons or plugs. Time to get down to some strategic problem-solving! When your brewer starts playing games, don’t get mad – get investigating! Here are some sneaky issues that may be thwarting that magical caffeine flow:

  • Water Woes: Lift the lid of your water reservoir and peer down intensely. Is there enough fluid in there to brew the divine nectar? Check the fill line – you need to play by the rules!While inspecting H2O levels, ensure the reservoir is seated properly in place.
  • Overzealous cleaning can bump it out of alignment. Shove it decisively back into position with authority!Feeling lazy? If there’s questionable grime in your water tank, do like I once did in college and toss in a handful of uncooked rice then swish vigorously to scrub those walls! Gets the job done in a pinch.
  • Filter Fiascos: Mineral deposits from water can clog up filters over time. Lift out the water filter cage and inspect closely. See any scale, residue, or debris? Rinse clean or plop in a fresh filter.
  • Descale or Die: The dreaded descaling demon! Mineral buildup is no joke, coating your machine’s innards with crusty calcium obstacles. Combat scaling with descaling solutions or good ol’ white vinegar. Follow instructions closely – then flush thoroughly.

Now, let’s organize this information into a table for clarity:

IssueWhat to Look ForSolution
Water Woes– Not enough water in the reservoir.- Reservoir not seated properly.– Ensure the fill line is met.
– Realign the reservoir.
– Use uncooked rice for cleaning.
Filter Fiascos– Scale, residue, or debris in the filter.– Rinse the filter or replace it.
Descale or Die– Mineral buildup inside the machine.– Use descaling solution or white vinegar.
– Follow descaling instructions and flush thoroughly.

Advanced Alchemy: Become the Brewer Whisperer

keurig drain brewer
keurig drain brewer

Uh oh, you’ve tried all the usual troubleshooting tricks but your brewer still won’t brew. Before you rage quit coffee forever, break out your artisan brewer decoder ring! Let’s confront those cryptic flashing lights and error codes to revive your finicky machine.


I’ll never forget the time my roommate Daisy’s Keurig K-Compact started violently flashing red. After consulting coffee machine technician expertise on typical causes, I studied the advanced manuals for her exact model number.

A-ha, those 7 ominous flashes indicated a bad thermal fuse! With some masterful dissembling, cleaning out trapped grounds, and installing a replacement fuse, I single-handedly defeated the despicable descaling demon and freed that fateful brewer from the error code time loop it was trapped in!

When your brewer starts angrily blinking like a Vesuvian discotheque, don’t freak – get researching! Each brand has a special diagnostic language to understand. Once decoded, you can strategize targeted fixes.
Scan model numbers, then head online to access official manuals

And here’s a simple table format to organize the troubleshooting steps mentioned:

StepActionPurpose
1Identify flashing lights or error codesUnderstand the issue
2Consult advanced manuals for specific model numberFind exact cause
3Disassemble and clean out trapped groundsClear any blockages
4Replace bad thermal fuseRepair the hardware issue
5Decode the diagnostic language of the brandStrategize fixes
6Access official manuals onlineGet detailed instructions

🌿Brew an Eco-Friendly Cup

Want to lighten your environmental impact while delighting your tastebuds? As a proud partner with Grounds for Change coffee company, I’m excited to offer readers an exclusive 15% off your first order of their carbon-neutral, Fair Trade certified coffee pods!

Experience the smooth, guilt-free flavor that only shade-grown, bird-friendly beans can deliver while aligning with your values. Support sustainable coffee farmers with every aromatic cup.

Brew your favorite roast in a reusable pod to reduce waste even further! Check out these handy resources for responsibly disposing of traditional K-Cups:

  • Keurig® Recycling Program
  • K-Cup Recycling Guide

And be sure to compost those grounds to nurture your garden or houseplants! Let’s nourish our bodies and the planet, one conscious cup at a time.

And here’s a table summarizing the key points and resources for a clearer presentation:

Key PointDescriptionResource
Exclusive Discount15% off first order of carbon-neutral, Fair Trade coffee pods.Grounds for Change
Environmental BenefitsShade-grown, bird-friendly beans. Sustainable farming support.
Waste ReductionUse of reusable pods.
Responsible DisposalGuides for recycling traditional K-Cups.Keurig® Recycling Program, K-Cup Recycling Guide
CompostingEncouragement to compost used coffee grounds.

🎉 Customer Service

You have most probably busted the spooky Keurig trouble by now, but if you could not, then the problem with your device is more complicated. It is a great idea to call Customer Care and let the manufacturer have a look. They are just a call away.

📞 Contact Information

Dial the toll-free number 1-866-901-BREW (2739) to reach Keurig Support.

🎁 Bonus Just For You

Don’t worry; here is a bonus just for you — Some of the best K-cups coffee makers!

Have a happy coffee day! ☕


FAQs

How do you reset a Keurig that won’t turn on?

If your Keurig won’t power on, try unplugging from the power outlet for 30 seconds, then firmly plug back in. Press the POWER button on top to turn it back on. This resets the machine. If still not turning on, inspect the plug connections, try another outlet.

What causes a Keurig to not turn on?

Common reasons a Keurig won’t turn on include unplugged cord, loose plug connections, faulty outlet, stuck Power button, or internal fuse/wiring issues. Check each part systematically to determine root cause. Don’t immediately assume device is broken.

Why is my Keurig suddenly not working?

If a previously functioning Keurig stops working, suspect water flow blockages like k-cups jammed in chambers or inlet needles clogged from mineral buildup. Descale buildup inside lines. Check reservoir alignment. Inspect all parts involved in brew process.

When I press the button on my Keurig nothing happens?

If Power button doesn’t respond, unplug and firmly reconnect cord. Still unresponsive? Gently pry around edges of button in case internal mechanisms are jammed. Contact Keurig if button is damaged.

How long do Keurigs last?

With proper maintenance like descaling, cleaning, using filtered water, Keurigs can last 5-7 years depending on model. Budget models average 2-3 years lifespans. Quality and care are key for longevity!

How do you tell if your Keurig is clogged?

Signs of clogged Keurig include weak coffee output, full pods not puncturing, leaking water from machine, odd noises, and error codes. Inspect inlet needles and chambers for grounds trapped around entry points blocking water flow.

Blackstone Griddle Seasoning 101: A Step-by-Step Guide for Beginners

To season a Blackstone griddle, first clean the griddle. Next, apply oil with a high smoke point, such as canola oil. Finally, heat the griddle until the oil starts to smoke.

But here’s a twist: your local climate can impact the seasoning process. 🌦️

Blackstone Griddle Seasoning 101: A Step-by-Step Guide for Beginners 6
Blackstone Griddle Seasoning 101 A Step by Step Guide for Beginners

What is Seasoning?

👩‍🍳 Seasoning isn’t just for taste; it’s a vital part of griddle care. Through the Polymerization process, oil changes into a strong layer. Say goodbye to food sticking to the surface!

🔨 Necessary isn’t strong enough; a seasoned griddle becomes a reliable partner in your kitchen.

🛡 Beyond ease of cleaning and fighting off rust, seasoning adds years to your griddle’s life, making it important for long-term use.

Process StepWhat HappensImportance
Breaking Down OilFatty acids in the oil oxidizeForms a new layer
PolymerizationThe new layer binds togetherActs as a shield

🍳 Each cooking session improves this shield. It’s like leveling up your griddle each time you use it.

🔥 Don’t forget proper seasoning does more than make tasks more manageable; it enhances your overall culinary adventure.

Why is Seasoning a Blackstone Griddle Important?

🥘 Griddle care begins with proper seasoning. Your griddle isn’t just another pan; it’s an investment.

👨‍🔧 Maintenance seasoning keeps the griddle in top shape. It’s not just about the first seasoning; it’s about keeping that layer robust.

🤑 Imagine saving money on costly replacements. Seasoning extends the life of the griddle, making it a financially wise choice.

🍳 Every dish comes out better on a seasoned griddle. From my days at Boat Basin Cafe, I can attest that a well-seasoned surface can make or break a dish.

Blackstone Grill Seasoning Basics and Tools

Blackstone Griddle Seasoning 101: A Step-by-Step Guide for Beginners 7
Materials and Tools Needed

Materials and Tools Needed

📋 To get started on maintenance seasoning, gather these essentials.

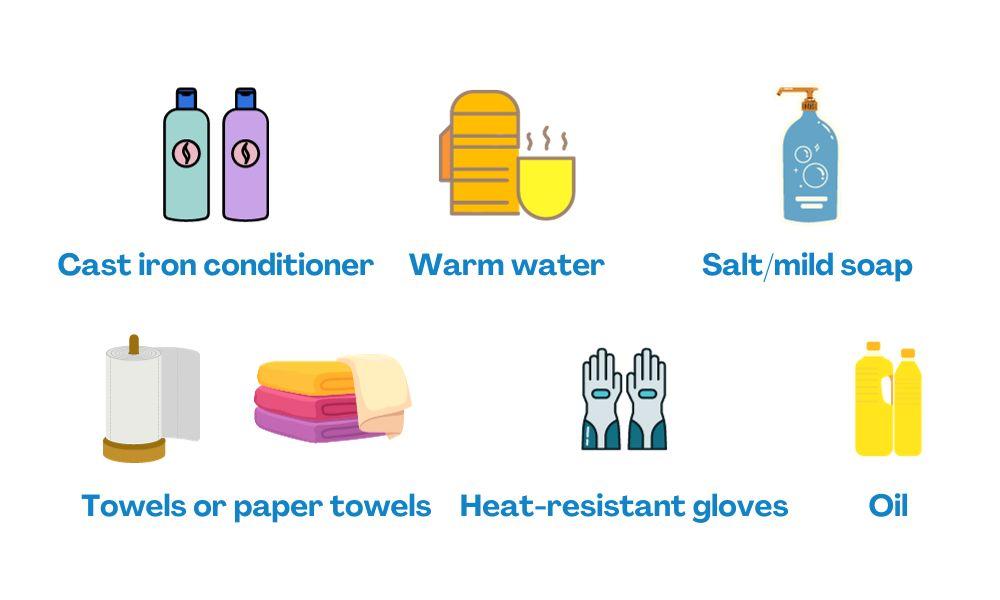
  • Blackstone griddle seasoning and cast iron conditioner: The cornerstone for a durable, non-stick surface.
  • Warm water: Prepares the griddle surface for seasoning.
  • Salt/mild soap: Ensures a clean start by removing existing residues.
  • Towels and paper towels: Gets the griddle ready for oil application and ensures an even coating.
  • Heat-resistant gloves: Safety first when handling the hot griddle.
  • Crisco shortening or cooking oil: These oils and shortening have unique properties that make your seasoning stand out.

How to Season a Blackstone: Step-by-Step Guide

How to season a blackstone griddle
How to Season a Blackstone Step by Step Guide pin

Step 1: Clean the Griddle

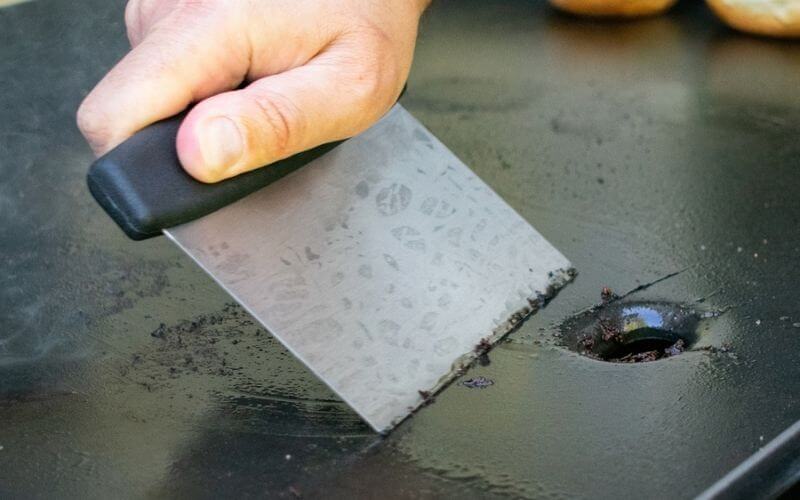
Make sure you start with a clean slate. Cleaning the griddle surface removes dirt and debris.

This step also preps the surface for better oil penetration. Use warm water and mild soap for a deep clean. Rinse and dry it fully. Why is this so crucial? A clean griddle is like a blank canvas for a painter—essential for the masterpiece to come.


Step 2: Apply Oil to the Griddle

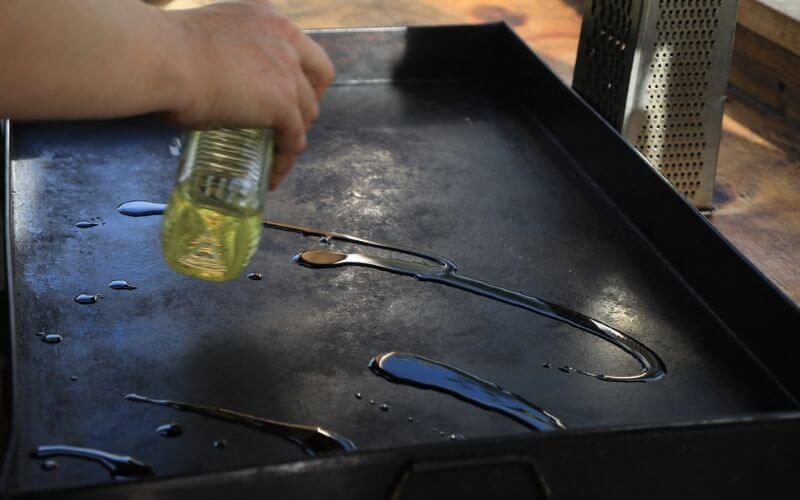
Now comes the fun part—oiling the griddle. Apply a thin oil layer to the surface.

This creates a protective barrier. It prevents food from sticking and makes cleanup easier.

You may want to use high-smoke-point oils like canola or avocado oil. These oils handle high heat well. Propane griddles get extremely hot, so choosing the right oil is vital.


Step 3: Heat the Griddle

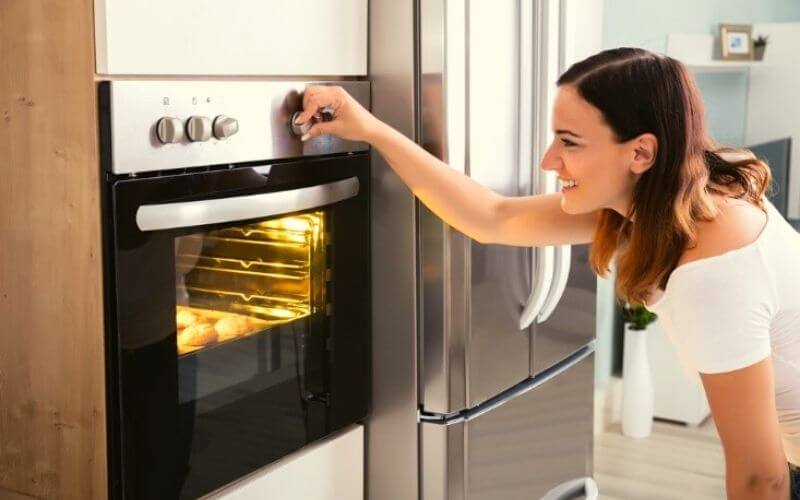
Turn on the griddle and crank up the heat.

This step helps you bond the oil to the griddle, forming a non-stick layer. Heat it for 15-20 minutes or until the oil smokes.

Ever noticed how a hot pan makes that sizzling sound when you add oil? That’s the sound of a good bond forming.


Step 4: Spread the Oil

With heat-resistant gloves, spread the oil evenly.

Avoid missing any spots to prevent hot spots on the griddle. A uniform layer is the goal here. The griddle’s heat works its magic, bonding the oil to the surface.

So, why gloves? Imagine trying to spread jelly on hot toast with bare hands. Not a good idea.


Step 5: Repeat the Process

Repeat steps 2-4 two or three more times.

The oil bonds more strongly each time. A black, glossy surface means success. It indicates a hard, durable layer that will last.

[su_note note_color=”#22CCCE”]Fact: Using overly thick layers of oil during seasoning can lead to chipping and a sticky surface.[/su_note]


Do these steps for Effective Flat Top Grill Seasoning. Clean the griddle after each use and store it in a dry, cool place.

This keeps the griddle in top shape for your next culinary adventure.

Best Oil to Season Griddle

So, what is the best oil to season a Blackstone griddle?

After much experimentation and trial, I recommend canola oil. It offers a solid balance of a high smoke point and neutral flavor, making it versatile for all kinds of cooking.

Canola oil is fascinating because it’s a Canadian invention—combining “Canada” and “ola,” meaning oil. It’s made from the seeds of a plant that’s a relative of the cabbage and turnip family. Not something you’d expect to be the cornerstone of your grilling, right?

Here’s a quick list of best oils for seasoning a Blackstone griddle:

  • Canola Oil: High smoke point, neutral flavor
  • Avocado Oil: High smoke point, slightly nutty flavor
  • Grapeseed Oil: High smoke point, also neutral

What’s interesting is that the smoke point isn’t just a random number. It’s the temperature at which the oil starts to break down and produce smoke, losing its seasoning qualities. It’s a bit like the boiling point for water, but for oils.

[su_note note_color=”#22CCCE”]”Smoke Point” refers to the temperature at which an oil begins to produce visible smoke.[/su_note]

How Different Climates Can Affect Seasoning 🌦️

Blackstone Griddle Seasoning 101: A Step-by-Step Guide for Beginners 8
BBQ

Humid Climates: The Moisture Challenge 🌧️

Humidity is an enemy of seasoning. Moist air can make it difficult for the oil to adhere properly to the griddle’s surface. The result? An inconsistent layer that might require more frequent touch-ups.

Dry Climates: The Heat Factor ☀️

In dry, hot conditions, the oil tends to dry quicker. While this sounds good, it can actually lead to an uneven seasoning layer if you’re not careful. Frequent checks during the process are key.

Cold Climates: Patience Required ❄️

Cold air can prolong the seasoning process. The oil takes longer to reach its smoking point, making it a test of patience to achieve that perfect non-stick surface.

Temperate Climates: The Ideal Condition? 🌤️

A moderate climate with low humidity is often considered ideal for seasoning. The oil adheres well, and you’re less likely to face the challenges posed by extreme conditions.

Troubleshooting Common Issues When Seasoning a Griddle

best oil to season blackstone griddle
oil to season blackstone griddle

Seasoning a Blackstone griddle usually goes off without a hitch. But what about those times when things don’t go as planned? Here’s a quick troubleshooting guide to keep the seasoning process smooth.

Oil Is Not Sticking 🛑

Ever wipe oil on the griddle only to see it bead up and roll away? Oil Is Not Sticking to the surface can be frustrating. Ensure the griddle is spotless and bone-dry. High-smoke-point oils like canola are your friend here.

In fact, spreading the oil evenly with a cloth can make all the difference.

Excessive Smoking 💨

A little smoke is part of the game, but a smoke show means trouble. Excessive Smoking is often a heat issue. Dial down the heat and let the griddle catch its breath for a few minutes.

Lack of Black and Glossy Finish

Hoping for that sleek black finish but ending up with something dull? Lack of Black and Glossy Finish often means the seasoning process isn’t complete. Multiple layers of oil and consistent heating can bring that sought-after sheen.

Rust Formation 🍂

Seeing orange? Rust Formation is a sign of neglect. A wire brush or scraper can remove rust spots. After that, a good seasoning session is in order. Keep the griddle clean and oiled to avoid future rust.

Long-term Griddle Care

how to season a blackstone griddle

So you’ve seasoned your griddle and are ready to take on the culinary world. But wait, the job isn’t over yet. Long-term care is a Must-have for any griddle owner. 🛠

Storage Tips 🌦

Outdoor griddles are especially susceptible to weather conditions. Store your griddle in a dry, cool place. If possible, invest in a quality cover for added protection against rain and snow. A covered griddle is like a parked car in a garage—safe and sound.

Cleaning: Less Is More 🧼

Contrary to popular belief, excessive scrubbing can do more harm than good. Mild soap and warm water usually do the trick. An interesting tip? Use coffee grounds as a natural abrasive for stubborn stains. Yes, the same coffee grounds that wake you up can wake up your griddle!

Routine Checks 📆

Mark your calendar for a monthly “Griddle Check-up.” Look for any signs of rust, warping, or wear and tear. Early detection of these issues can save you from bigger problems down the line. Think of it as a regular doctor’s visit but for your griddle.

Wondering when it’s time to re-season your griddle? Stay tuned; we’ll dive into that in a dedicated section coming up next. 📌

How Do You Know When to Re-season a Griddle? 🤔

Notice that sizzling steak isn’t sizzling anymore? It could be that the griddle isn’t pulling its weight. The most overlooked reason for this drop in performance is often the need for reseasoning.

🍳I once tried cooking eggs on an old griddle, only to find them sticking like glue. Lesson learned!

Signs It’s Time to Re-season 🚨

  • Griddles speak: They show signs, not in words but in performance changes.
  • The most common?: Food sticking to the surface is a red flag.
  • Color Change: A once black and shiny griddle turning grey and ashy needs attention.
  • Rust Spots: If you see these, your griddle is screaming for a reseasoning session.

Stick to a Schedule 🗓

Regular seasoning isn’t just an option; it’s a lifeline for your griddle. Consistency is key.

For example, if you grill on weekends, a bi-monthly seasoning keeps the surface in top shape. It’s like a spa day for your griddle but with oil instead of facemasks. 💆‍♂️

The Hidden Perks 🌟

Beyond the obvious need for a non-stick surface, regular seasoning also enhances the flavor of your food. Think of it as the griddle’s way of saying thank you, by making every dish a hit. 🥘

Common Mistakes to Avoid While Seasoning 🚫

Choosing Low Smoke Point Oils 🛢️

It’s tempting to reach for whatever oil is in the pantry, but not all oils are created equal for seasoning. High smoke point oils are essential. I once tried coconut oil; the result was less than ideal. Stick to canola or vegetable oil for a smooth seasoning process. Read more on

Impatience in the Process

A quick job won’t yield that non-stick griddle you’re aiming for. Time and patience are crucial. A rushed seasoning once led me to a griddle top that was anything but non-stick.

Neglecting the Initial Clean 🧼

The importance of starting with a clean griddle top can’t be overstated. I’ve seen a hasty seasoning over a dirty surface; the end result compromised the whole Blackstone griddle care process.

Inconsistent Heating 🔥

For effective flat top grill seasoning, a consistent medium-high heat across the steel griddle is key. Inconsistent temperatures can result in uneven seasoning, something I learned the hard way.

Overlooking After-Care 🧽

Seasoning isn’t the end. Regular care keeps your griddle in top shape. Skipping the after-care might not show immediate issues, but over time, it does add up. Keep it clean and dry for long-term happiness with your griddle.

Frequently Asked Questions (FAQs)

01. What Can You Cook on a Griddle?

Griddles are one of those versatile cooking surfaces that can do it all. From a simple grilled cheese with some scrambled eggs to seafood and burgers.

Having a flat top griddle like Blackstone opens so many opportunities. As the surface is very large, they are good for preparing party foods as you can cook 15+ burgers at the same time.  

02. How Long Does It Take to Season a Blackstone Griddle?

Seasoning your griddle is not much work at all as all you have to do is sprinkle some oil and let it burn. But the whole process can be a bit time-consuming. Each seasoning layer takes 15-20 minutes to come to the smoke point. 
You have to do multiple coatings of seasoning. Ideally, each griddle should have 4 coatings of seasoning to have a solid finish.

You can guess the whole thing can take a few hours to complete. So do this on a lazy Sunday afternoon with some cold beverages and snacks! 

03. Can You Use Butter on a Blackstone Griddle?

Never use butter to season your griddle as it can not create the strong, durable coating we are looking for in a good seasoning. They are great to use while cooking but for the initial seasoning, use something with a high smoke point like canola oil

04. Is a Blackstone Griddle Worth It?

If you are looking for a griddle, there really isn’t anything better than a Blackstone griddle. They are an industry classic for durability and functionality.
The sturdy construction makes them excellent to use on a regular basis. Most of the models come with rollers so moving around is not an issue either. 
Yes, they are very prone to rusting as the whole thing is made with cold-rolled steel. But regular seasoning makes it feel almost non-stick.

Despite its huge size, the griddle gets hot very fast. So overall,  Blackstone griddle is definitely worth every penny. 

05. How often should I season my Blackstone griddle?

It’s recommended to season your griddle after every use, especially if you’re cooking with acidic or sugary foods that can damage the surface. Over time, you may need to re-season your griddle to maintain its non-stick properties.

06. Can I use butter to season my Blackstone griddle?

No, butter has a low smoke point and can burn quickly, leaving a sticky residue on the surface of the griddle. It’s best to use high smoke point oils like canola or vegetable oil for seasoning.

07. Can I use soap and water to clean my seasoned Blackstone griddle?

Yes, you can use soap and water to clean your griddle. Just be sure to rinse it thoroughly and dry it completely to prevent rust and other forms of damage.

08. What should I do if my Blackstone griddle starts to rust?

If you notice rust on your griddle, you can remove it by scrubbing the surface with a wire brush and then re-seasoning the griddle. To prevent rust in the future, be sure to clean and oil your griddle regularly and store it in a dry place.

Final Checklist for Seasoning Your Blackstone Griddle 📝

  • Clean the Griddle: Remove all dirt and debris for an effective seasoning.
  • Choose the Right Oil: High-smoke-point oils like canola or avocado are recommended.
  • Apply a Thin Oil Layer: This forms the initial protective barrier.
  • Heat the Griddle: 15-20 minutes or until the oil begins to smoke.
  • Spread the Oil Evenly: Use heat-resistant gloves for safety.
  • Check for a Glossy Finish: If not, repeat the process.
  • Store Properly: Keep the griddle in a dry, cool place after use.

How Long to Preheat an Oven to 400°F?

Hey there, fellow baking enthusiasts and casual cooks alike! John Bird here, former chef at the beloved Boat Basin Cafe in NYC.

Today, we’re tackling a kitchen conundrum that’s stumped us all at some point: the preheat puzzle.

We’ve all been there, staring at our ovens, wondering, “How long does it take to preheat to 400°F?” The general rule of thumb is 10-15 minutes, but as I’ve learned from my years in the kitchen, there’s more to it than meets the eye.

how long to preheat oven
oven preheat time

Gas, Electric, Convection… Your Oven Impacts Preheat Time

First up, let’s talk oven types. The kind of oven you have can majorly impact your preheat time.

Here’s a quick breakdown:

Oven TypePreheat Time to 400°F
Gas5-10 minutes
Electric10-15 minutes
Convection8-12 minutes

As food science guru Harold McGee puts it, “Gas responds more quickly than electric coils or hot air to changes in the thermostat setting.

My advice? Invest in a cheap oven thermometer. It’s your preheat BFF, helping you navigate your oven’s quirks.

It’s Not Just the Temperature – Size, Contents & More

But wait, there’s more! Oven size, what’s inside, and even altitude can all impact your preheat time.

A bigger oven cavity? Longer heat-up time.

Trust me, my industrial beast at Boat Basin Cafe took forever and a day to preheat.

And if you’ve got pans or bakeware hanging out in there, especially thick ones, they’ll soak up that heat like a sponge, slowing things down.

Even your elevation plays a role – if you’re higher up, expect a slightly longer preheat. It’s like the oven version of hiking a mountain!

Why Is My Oven Taking Forever?

How Long to Preheat an Oven to 400°F? 9
Oven Thermometer

Now, if your preheat is dragging on longer than a Netflix binge, it might be time for some oven TLC.

Faulty heating elements, a damaged temperature sensor, or worn-out seals letting all that precious heat escape could be the culprit.

FAQs

My cookies always burn on the bottom, is it the preheat?

It could be! An oven that’s not fully preheated can lead to uneven baking. Give your oven a little more time to preheat and try rotating your cookie sheet halfway through baking.

How does preheating affect delicate items like meringue or puff pastry?

Oh, preheating is non-negotiable for these finicky treats! Meringue needs that gradual, steady heat to stabilize the sugar and achieve its cloud-like texture. And puff pastry? A properly preheated oven is key for the butter to work its magic, creating steam and those irresistible flaky layers.

Can I put bread dough in to proof while the oven preheats?

I wouldn’t recommend it. Most ovens have hot and cool spots during preheating, which can mess with your proofing or even create a premature crust. Proof separately, then bake in a fully preheated oven for that perfect oven spring.

The Preheat Takeaway

So, my fellow baking warriors and kitchen casuals, remember: preheating times are guidelines, not gospels. Get to know your oven’s unique quirks, use the tips we’ve talked about, and your baking game will be forever changed.

And hey, while you’re waiting for that preheat, sit back, relax, and enjoy the anticipation. It’s like watching bread rise – slow, but oh-so-worth it for those perfect, drool-worthy results. Happy baking!

Refrigerator Maintenance Tips: How to Keep Your Fridge Running Smoothly

Ever find your morning juice lukewarm and leftovers spoiled? Your fridge needs regular care to work well. Good maintenance saves you money and hassle.

[su_box title=”Essential Fridge Care for Longer Life

” style=”default” box_color=”#1383C8″ title_color=”#FFFFFF” radius=”3″]Coil Clean: Vacuum condenser coils twice a year. Helps the fridge run better.

Seal Test: Wipe and check door seals. Replace if damaged.

Temperature: Keep fridge at 37-40°F for best performance.

Stay Stocked: A full fridge uses less energy.

Quick Cleanup: Wipe spills right away to prevent mold and bad smells.[/su_box]

Essential Refrigerator Cleaning Practices

Refrigerator Maintenance Tips: How to Keep Your Fridge Running Smoothly 10
Refrigerator Cleaning

Your refrigerator needs regular cleaning to work well and stay hygienic. Not cleaning it can lead to higher energy use, a shorter lifespan, and even health risks.🌡️

For example, clean up spills like soup or eggs right away. Quick action saves time and prevents bacterial growth.

One study shows that bacteria like Listeria can grow fast in unclean fridges. This can cause serious health problems.🦠

A monthly deep-cleaning is also helpful. Remove all food and toss expired items. Check for moldy produce. Wipe the inside with warm water and mild soap.

Rinse and dry it well. Deep-cleaning reaches spots that daily cleaning might miss. It’s like going to the dentist for a thorough clean, even if you brush every day.😁

Now, let’s focus on why quick cleaning matters.

Quick Response to Spills and Stains

Immediate attention to spills is crucial because it impacts both hygiene and fridge performance. Spills can block proper airflow in the fridge. The longer spills sit, the harder they are to clean. 🌬️

Spilled sugary drinks can be a problem. These spills can attract ants and other insects. They also interfere with the fridge’s temperature settings and could even attract termites over time. 🐜

Stains on wire racks are hard to remove if left unattended. These stains can block air circulation, leading to higher energy use and potentially spoiled food. 🍲

Being busy is no excuse for neglecting quick cleaning. A fast response doesn’t mean scrubbing every corner; a quick wipe with warm soapy water will do. 🕒

The next section will cover monthly deep-cleaning routines. These will help keep your fridge free from grime and moldy spots. More on this later. 😷

Monthly In-Depth Cleaning

Cleaning your fridge monthly is essential for its longevity and efficiency. Monthly cleaning prevents odors, stains, and bacterial growth. If you skip regular cleaning, you risk mold, unsafe food, and appliance breakdowns.

Steps for monthly cleaning start with emptying the fridge. Remove all items and throw away spoiled foods. Wipe down shelves, bins, and trays with warm soapy water. Focus on crevices where spills and crumbs may hide.

Don’t forget the door seals. A damaged seal can cause air leaks, more energy use, and less effective cooling. Clean the seal with a baking soda and water mix.

For hard-to-reach spots, use small tools like toothbrushes or cotton swabs. This gets rid of tough stains and grime. Monthly deep cleaning prevents issues between regular check-ups.

After monthly cleaning, regular check-ups are next. These keep your fridge in optimal condition.

Regular Check-ups for Optimal Refrigerator Performance

Refrigerator Maintenance Tips: How to Keep Your Fridge Running Smoothly 11
Refrigerator drawer

Regular check-ups are important in addition to routine cleaning. These check-ups focus on three core areas for proper appliance functioning.

Temperature levels are critical for performance. The ideal range is 37-40 degrees Fahrenheit for the fridge and 0 degrees for the freezer. A thermometer can help maintain this. Incorrect temperatures can lead to more energy use or spoilage.

Replacing filters is another key step. Change the water filter about every six months. Even if you have concerns about built-in filtration systems, keeping filters updated is essential.

Cleaning refrigerator coils is crucial. Think of these coils as the fridge’s lungs. When clogged, they reduce efficiency and can even cause breakdowns. Keeping coils clean ensures optimal performance.

In summary, regular practices keep your fridge efficient. Monthly cleanouts, temperature checks, filter monitoring, and coil cleaning make a difference. Following these steps will keep your fridge running well for years.

  • The U.S Department of Energy estimates that proper refrigerator maintenance can reduce energy consumption by up to 15%, based on average household usage.
  • According to a study published in the Journal of Applied Energy, regular cleaning of refrigerator coils can increase efficiency by around 30%.
  • A report from the Food and Drug Administration advises that refrigerators should maintain a steady temperature of 40 degrees Fahrenheit or below to minimize bacterial growth, something that recurrent checks and maintenance can ensure.

Maintaining Ideal Temperature and Humidity Levels

Your fridge has an ideal temperature range of 37-38 degrees Fahrenheit, and the freezer should be at 0 degrees. Staying in this range is key for food safety and appliance performance.

Regular temperature checks are needed, especially after power outages or adding lots of new groceries. A thermometer can help you monitor this.

Controlling humidity is also important for food quality. Different foods need different humidity levels. Use crisper drawers for fruits that need higher humidity and regular shelves for others.

Keep ethylene-emitting fruits separate. Apples and bananas release ethylene gas. Store them away from vegetables and delicate fruits to avoid wilting.

Don’t overcrowd your fridge. Too many groceries block air circulation, causing uneven cooling and higher humidity.

Clean filters for optimal performance. This is as important as keeping the right temperature and humidity levels.

Monitoring and Replacing Filters as Needed

Air filters in modern fridges are important. They use activated charcoal to remove impurities and odors. Regular checks for dirt or poor air quality help keep them effective.

Change filters when dirty or every six months. Neglecting this can result in bad smells and mold growth inside the fridge.

Consult your user manual for specific guidelines. Different fridge models have different filter replacement intervals.

Consider additional air quality measures. An air purifier or plants near the fridge can further improve air quality and add to indoor aesthetics.

Don’t neglect filters even if they seem optional. While some fridges function without them, maintaining filters is important if your unit has them.

Regular filter changes save energy and extend fridge life. A clogged filter makes the fridge work harder, using more electricity. This simple task minimizes costly repairs in the long run.

Maintaining Your Refrigerator’s Energy Efficiency

defrosting refrigerators

Refrigerators consume the most energy among household appliances. Proper maintenance is key for optimal energy efficiency. Here are some checks and adjustments for your fridge.

Maintaining door seals boosts energy efficiency. Check the seals twice a year and keep them clean. A dollar-bill test can help you know when to replace them.

Keeping your fridge stocked saves energy. An empty fridge loses cold air faster, making it work harder. Stock it with water jugs, fruits, or vegetables that retain moisture.

Think of your fridge like a leaky bucket. Just as water escapes from holes in a bucket, cold air escapes from an empty fridge. Keeping it full makes it more efficient.

Refreshing thermal mass reduces energy usage. This helps maintain low temperatures inside your fridge. More on this in the next section.

Checking and Maintaining Door Seals

Door seals affect more than just energy efficiency. Poor seals can also cause moisture buildup, leading to bacteria growth and bad smells. Here’s how to ensure a tight door seal.

Cleaning with baking soda and water helps. Scrubbing the seals with this mixture prevents food debris and stains from affecting the seal.

Watch for physical damage on the seals. Cracks or tears mean it’s time to replace them. Ignoring this can lead to costly repairs.

Even minor damages are a problem. Small tears in the seals can severely impact their effectiveness. They are designed to create an airtight seal, so never underestimate even minor damage.

Proper care of door seals is just a part of fridge maintenance. More tips on keeping your fridge running smoothly will follow.

Importance of Refreshing Thermal Mass

Refreshing thermal mass is key for energy efficiency. Thermal mass refers to the amount of food and drinks in your fridge. A filled fridge maintains low temperatures with less energy use.

An empty fridge works harder. When the fridge is nearly empty and you open the door, cold air escapes easily. This makes the fridge work more to keep the temperature low.

Energy Star confirms a full fridge is efficient. A full fridge balances the temperature and eases the workload on the compressor, reducing energy use.

Thermal mass is like home insulation. Just as insulation keeps your home warm and saves energy, a filled fridge does the same.

Refreshing thermal mass is easy. Fill empty spaces with water jugs, fresh produce, or leftovers. This not only improves fridge efficiency but also promotes healthier eating and reduces food waste.

Maintaining the Refrigerator’s Exterior Mechanisms

Don’t Neglect the Exterior of Your Fridge Cleaning the inside of your fridge is important, but don’t forget about the exterior mechanisms. These include condenser coils, fan blades, and the compressor. They keep your fridge running efficiently.

The Cost of Dirty Coils and Fans If coils or fans are dirty, your fridge has to work harder. This uses more energy and increases your bills. For example, pet fur in fan blades can slow down airflow, causing overheating and potential breakdowns.

Is It Too Time-Consuming? Some people avoid this task because it seems hard or time-consuming. But ignoring it can cost more in the long run.

How to Maintain Exterior Mechanisms To clean these parts, unplug your fridge and move it away from the wall. Use a vacuum with a brush attachment to clean dust, dirt, or pet hair from coils and fan blades. You might need to remove grates or covers for better access. Do this cleaning every six months or as needed.

Regularly Cleaning Refrigerator Coils

Importance of Cleaning Exterior Coils

The exterior components of your fridge, specifically the condenser coils, are crucial for efficient performance. Dirty coils reduce cooling capacity and increase energy consumption, possibly leading to mechanical failure.

What Do Condenser Coils Do?

Located either at the bottom front or back of your fridge, these coils help remove heat from the inside. When clogged with dust or debris, they can make your fridge work harder, raising your energy bills and shortening the fridge’s lifespan.

How to Clean Coils

To clean the coils, pull your fridge away from the wall and unplug it. Use a vacuum cleaner with a brush attachment to remove dust and dirt. Handle the coils gently to avoid damage.

Think of Your Fridge Like a Car Engine

Just as a car needs regular maintenance to run well, so does your fridge. Cleaning the coils is a key part of this upkeep. Aim to do it twice a year to keep your appliance running smoothly.

Tips to Reduce Limescale Buildup

What is Limescale?

Limescale is a white, alkaline substance that forms from hard water evaporation. It can accumulate around your fridge’s water dispenser or ice maker. Over time, limescale can affect your appliance’s performance and energy efficiency.

Prevention Steps

To prevent limescale, promptly clean any spills or leaks inside the fridge. Leftover moisture can evaporate, leaving minerals that contribute to limescale.

How to Remove Limescale

For existing limescale, use a mixture of equal parts water and vinegar. Spray it on the affected areas and wipe down. The vinegar’s acidity will dissolve the mineral buildup and sanitize surfaces. Avoid using abrasive cleaners that could damage your fridge.

Is Limescale a Big Deal?

While limescale may not affect the quality of food stored, it can lead to appliance malfunctions and increase repair costs. Therefore, it’s important to address it.

Additional Prevention Method

If you live in an area with hard water, consider investing in a water softener. This can significantly reduce mineral buildup and prolong the life of your appliances.

Importance of Limescale Prevention

Preventing limescale is part of a broader maintenance strategy for your fridge. Along with cleaning exterior coils and regular internal cleaning, it helps extend the lifespan of your appliance, improve energy efficiency, and save you money in the long run.

Troubleshooting Broken Microwaves: Common Issues and How to Fix Them

A broken microwave can disrupt daily routines. It can stop you from quickly heating meals or making perfect popcorn. Before you spend money on an expensive technician, read on. This post covers common microwave issues and how to fix them. Get your tools ready. With the tips in this post, you can fix common household issues yourself.

Common problems that cause microwaves to break include issues with the plate guide roller, coupler, or drive motor, problems with the wall plug, door latch assembly, door switch, thermal fuse or ceramic fuse. The door not closing properly could be due to problems with the door latch assembly or hinges. The microwave may not shut off after the timer runs out because of the door interlock switch or smart board. If a microwave is not heating, there could be issues with the door switch, voltage diode, or magnetron. And lastly, when it comes to above-the-range microwaves, you must ensure that air filters and moving parts remain clean and functioning properly.

the problem of broken microwaves

🛠️ Identifying Common Microwave Issues

Microwaves have become an essential appliance in many households, providing convenience and efficiency in heating or cooking food. However, like any electronic device, they are prone to malfunctions. By identifying common microwave issues, you can troubleshoot and potentially resolve them before resorting to costly repairs or replacements.

🔄 Issue: Microwave Plate Not Turning

One prevalent issue is when the microwave plate fails to turn during operation. This can be frustrating, as it hinders even cooking or heaing and may result in unevenly cooked food.

  • Possible Causes: There are several potential causes for this problem, which we’ll explore in the following section.

🕵️ Closer Look at the Problem

Let’s look closer at the possible reasons behind a microwave plate not turning and how you can address them effectively.

📊 Market Insights

  • Microwave Market Size: According to Grand View Research, the microwave oven market size was valued at USD 10.5 billion globally in 2020.
  • Repair Costs: Home Advisor states the average cost to repair a microwave in the United States is between $50 to $400, with some repairs costing more than a new unit.
  • Performance Issues: A Consumer Reports survey found that over a four-year span, approximately 25% of microwave ovens will either break or have a performance issue.

🔄 2023 Update on Microwave Issues

In 2023, microwaves continue to be a popular appliance in households for their convenience and efficiency in heating and cooking food. However, common issues can arise with their use, such as the microwave plate failing to turn during operation. Identifying the potential causes behind this problem and troubleshooting them can potentially save on costly repairs or replacements.

🛠️ Troubleshooting a Stationary Microwave Plate

When you start your microwave and notice that the plate remains stationary instead of rotating, several components could be responsible for this malfunction. It’s important to investigate each possibility systematically to determine the root cause.

🎯 Possible Causes for a Stationary Plate

  • Plate Guide Roller: One possible culprit is the plate guide roller. Over time, these rollers can wear out or get damaged.
    • Action: Inspect the guide roller for any signs of damage or wear. If necessary, replace it with a new one.
  • Faulty Coupler: Another potential cause is a faulty coupler, which connects the motor shaft to the plate.
    • Action: Examine the coupler for any visible damage and replace it if needed.
  • Drive Motor: If both the guide roller and coupler appear to be in working order, the drive motor may be at fault.
    • Action: Test the motor for power and functionality. If it fails these tests, replacing it should resolve the issue.

⚠️ Safety First

Remember to disconnect your microwave from its power source before attempting any repairs, as this will ensure your safety.

💡 Example Scenario

Let’s imagine you’ve identified the guide roller as the culprit. You purchase a replacement roller online and follow a step-by-step video tutorial to install it yourself. After the repair, you test the microwave, and voila! The plate starts turning smoothly once again.

📌 Other Microwave Issues

Now that we’ve explored the common issue of the microwave plate not turning and possible causes, it’s important to note that other complications can arise with microwaves. One example is when the microwave fails to heat food properly or at all.

🔥 Why Your Fails to Heat Properly

Troubleshooting Broken Microwaves: Common Issues and How to Fix Them 12

A common and frustrating issue many people encounter with their microwaves is when it fails to heat food properly or doesn’t heat at all. This can be incredibly inconvenient, especially when you’re relying on your microwave for quick and easy meal preparation. However, let’s explore some potential causes and solutions for microwave heating failure.

🎯 Common Causes and Solutions

  • Malfunctioning Door Switch: One possible culprit could be a malfunctioning door switch.
    • Action: Inspect the door switches for any visible damage or irregularities and replace them if necessary.
  • Faulty Magnetron: Another potential cause could be a faulty magnetron, responsible for generating the microwaves.
    • Action: Consult a professional technician or consider replacing the microwave altogether.
  • Voltage Issues: Voltage irregularities can also lead to inadequate heating.
    • Action: Check if other appliances on the same electrical circuit are functioning normally. Try plugging your microwave into a different outlet.
  • Defective Diode: A faulty diode can disrupt the flow of electricity.
    • Action: Conduct a continuity test with a multimeter. If faulty, replace the diode.

⚠️ Safety Reminder

Before attempting any repairs, always unplug the microwave to ensure your safety.

🛠️ DIY Solutions for Common Microwave Problems

Now that we’ve explored some possible causes of microwave heating failure, let’s move on to discuss DIY solutions for common microwave problems.

Continue reading “Troubleshooting Broken Microwaves: Common Issues and How to Fix Them”

The Environmental Impact of Microwaves: Exploring Sustainability and Energy Consumption

In future kitchens, shiny microwaves will be both helpful and a topic of debate. These useful devices are key in daily life but raise questions about green living 🌿. This post will explore how microwaves affect the environment, focusing on their energy use and impact on sustainability. Get ready. The hidden effects of the ‘ding’ when your food is done will change how you see your microwave.

  • Manufacturing Impact:
    • Natural Resources and Climate Change: The manufacturing process of microwaves contributes significantly to the depletion of natural resources and climate change.
      • 🌍 Stat Alert: More than 20% of the impact is contributed by microwaves.
  • Waste Concerns:
    • Fast-Growing Waste Stream: Used microwaves are often discarded and have become one of the fastest-growing waste streams worldwide.
  • Consumer Awareness:
    • Energy Efficiency: Consumers should be made more aware of the environmental impact of microwaves.
      • 💡 Pro Tip: Learn how to use microwaves in the most energy-efficient way possible to minimize environmental negative effects.

The environmental impact of microwaves

Carbon Emissions and Energy Consumption of Microwaves

Microwaves have become an indispensable kitchen appliance in many households, offering convenient and quick cooking. However, it’s essential to consider their environmental impact, particularly concerning carbon emissions and energy consumption. By understanding these aspects, we can make informed choices about our appliance usage and take steps toward a more sustainable future.

Energy Source and Carbon Emissions

  • Fossil Fuels 🛢️: If your microwave runs on electricity generated from fossil fuels, such as coal or natural gas, it contributes to carbon dioxide (CO2) emissions.
  • Renewable Energy ☀️🌬️: If your electricity comes from renewable energy sources like wind or solar power, the environmental impact is significantly reduced.

To put things into perspective, let’s consider that the average microwave consumes around 1,200 watts of electricity per use. This means the amount of CO2 emitted during operation will vary based on your location and the energy grid’s composition.

📍 Location Matters: For instance, if you live in an area where coal is the primary source of electricity generation, your microwave’s usage would contribute to more significant carbon emissions than regions with a higher percentage of renewable energy sources.

🔍 Mitigation Strategies: While it may seem disheartening to acknowledge this aspect of microwaves’ environmental impact, it’s important to remember that there are ways to mitigate their carbon footprint.

  • Switch to renewable energy providers
  • Install solar panels on your property

Yearly Energy Usage

  • Another significant factor to consider when assessing the environmental impact of microwaves is their yearly energy usage.

Microwaves are a convenient kitchen appliance, but it’s important to consider their environmental impact in terms of carbon emissions and energy usage. The source of electricity used to power the microwave significantly affects its carbon footprint, with renewable sources contributing less to emissions.

Yearly energy usage is another important factor to consider when assessing the environmental impact of microwaves. Ultimately, making conscious choices about energy consumption, such as switching to renewable energy providers or installing solar panels, can help mitigate the overall emissions of using a microwave and contribute towards a more sustainable future.

Yearly Energy Usage of Microwaves

Is Pyrex Microwave Safe

Understanding the yearly energy usage of microwaves can shed light on their overall efficiency and help you make more informed decisions regarding sustainability.

  • 📅 On average, microwaves are used for around three minutes per day, amounting to approximately 18 hours of usage each year. This relatively low energy demand compared to other appliances makes microwaves an energy-efficient option.
  • 💡 Let’s dive deeper into the numbers. If a microwave consumes 1,200 watts per use and is used for three minutes daily, it would require about 655 kWh (kilowatt-hours) of electricity over the course of a year. Considering the average cost of electricity in the United States is approximately $0.12 per kWh, the yearly energy cost to run a microwave would be around $79.

While these figures may vary based on your usage patterns and the wattage of your specific microwave model, it helps illustrate that microwaves are relatively energy-efficient appliances. Compared to traditional ovens or stovetops, which consume more power and take longer to cook meals, microwaves provide a more sustainable alternative.

  • 🍳 It’s worth noting that incorporating other energy-efficient cooking methods alongside microwaves can further reduce energy consumption in the kitchen. Using air fryers, Instant Pots, or multicookers can provide additional options for preparing meals while minimizing environmental impact.

Emissions Contributed by Microwaves

Microwaves have undoubtedly revolutionized how we cook and reheat food, providing convenience and speed. However, it’s crucial to evaluate these appliances’ environmental impact, particularly in terms of emissions.

  • 🌍 As microwaves operate, they draw electricity from the power grid. In many regions, this electricity is generated by burning fossil fuels such as coal or natural gas. Burning these fuels releases CO2 into the atmosphere, contributing to the global carbon footprint.
  • ♻️ Moreover, it’s important to consider the entire lifecycle of a microwave, including manufacturing, distribution, and disposal. These stages also generate emissions.

Various steps can be taken to mitigate and reduce the emissions contributed by microwaves.

  • 🌿 Using energy-efficient models can help minimize energy consumption during operation.
  • 🌞 Opting for renewable energy sources to power your microwave can also significantly reduce CO2 emissions associated with its use.

Environmental Implications of Microwave Manufacturing

recycle microwave oven

The manufacturing process of microwaves has significant environmental implications that extend beyond just emissions.

  • 🌳 The extraction and processing of raw materials required for microwave manufacturing can deplete natural resources and generate other forms of pollution.
  • 🏭 The production of metals used in microwaves, such as steel and aluminum, requires substantial amounts of energy and finite resources like iron ore and bauxite. The extraction process often leads to habitat destruction and ecosystem disruption.
  • 🛢️ Additionally, producing plastic components found in microwaves relies on fossil fuel-derived materials like petroleum. The extraction and processing of petroleum contribute to environmental degradation and pose risks to ecosystems, such as oil spills.
  • 🗑️ Furthermore, the manufacturing process itself can produce waste and pollution. Harmful chemicals and solvents used in various stages of production require proper management and disposal to prevent water and soil contamination.

To address these environmental implications, manufacturers can adopt sustainable practices and materials.

  • ♻️ This includes using recycled materials, reducing energy consumption during production, and implementing eco-friendly manufacturing processes.

By understanding the emissions contributed by microwaves and the environmental implications of their manufacturing process, we gain insights into the challenges we face in promoting sustainability. However, exploring potential solutions that can help mitigate these impacts and steer us toward a more environmentally conscious future is essential.

Depletion of Natural Resources 🌍

The proliferation of microwaves in households worldwide has led to significant demand for materials and resources during their manufacturing process.

  • 🛠️ From the production of electronic components to the manufacturing of plastic casings, microwaves rely on a multitude of raw materials. These contribute to resource depletion and environmental degradation.
  • 🏔️ The extraction and processing of natural resources, such as minerals and metals, have their own set of consequences.
    • 🌿 Mining for minerals like copper, aluminum, and silicon requires extensive energy and can lead to habitat destruction, soil erosion, and water pollution.
    • 💨 Furthermore, manufacturing involves chemicals and fossil fuels, releasing greenhouse gases.
  • 🌱 These practices not only deplete non-renewable resources but also contribute to the overall ecological footprint of microwaves.

Let’s consider an example:

  • 🛢️ The case made from plastic surrounding a microwave is typically derived from petroleum or natural gas.
    • 🌫️ The extraction and refining of these fossil fuels have well-documented negative impacts, including air pollution, water contamination, and habitat destruction.

By continuously demanding new microwaves and discarding old ones without proper recycling, we indirectly contribute to the ongoing depletion of natural resources.

🌳 It is crucial for consumers to be aware of the environmental impact associated with the life cycle of microwaves. By understanding these implications, we can make more informed decisions and support environmentally friendly alternatives.

Now that we have explored the depletion of natural resources caused by microwaves, let’s delve into another critical aspect: the ecological impact of discarded microwaves.

Ecological Impact of Discarded Microwaves 🌳🗑️

dispose of microwave ovens

In addition to their manufacturing phase, microwaves also pose serious ecological challenges when it comes to their disposal at the end of their lifecycle.

  • 📉 Shorter Lifespan: As technology evolves and consumer preferences shift, the average lifespan of a microwave has decreased from 10-15 years to 6-8 years.
    • 🗑️ This shorter lifespan increases waste and raises concerns about proper electronic waste management.

When discarded wrongly, microwaves add to electronic waste or e-waste, a growing global issue.

  • 🌊 Environmental Hazards: Improper disposal releases toxic materials like lead, mercury, and flame retardants.
    • 🐟 These chemicals can harm ecosystems and affect both wildlife and human health.

Consider a scenario where an old microwave ends up in a landfill:

  • 🌧️ Over time, its parts break down, releasing harmful substances.
    • 💧 Rainwater can carry these toxins into the soil, rivers, or groundwater.
    • 🌱 This can affect plants, animals, and humans relying on these resources.

To mitigate this impact, proper e-waste management is crucial.

  • ♻️ This involves recycling or reusing microwave parts instead of adding them to landfills.
    • 🌍 By doing this, we reduce pollution and recover valuable materials for future use.

Having explored the ecological impact of discarded microwaves, let’s focus on electronic waste growth and management.

Electronic Waste Growth and Management

In today’s fast-paced world, the reliance on technology has led to a concerning surge in electronic waste generation. As new gadgets and devices flood the market, older ones are quickly discarded, leading to significant environmental consequences. In 2019 alone, approximately 54 million metric tons of electronic waste were generated globally. The situation is exacerbated by increased spending power and the availability of electronics, contributing to e-waste becoming the fastest-growing waste stream.

Let’s take a closer look at some statistics related to e-waste generation per capita in different regions:

Region E-Waste Generation Per Capita (Kg/Year)
Europe >16
Asia >5
Africa >2.5

Wealthier countries tend to produce more e-waste per capita compared to developing nations. This highlights the urgent need for effective management strategies to tackle this growing concern.

Unfortunately, not all e-waste ends up being properly disposed of or recycled. Only about 20 percent of e-waste is documented, collected, and recycled globally. Most e-waste often finds its way into landfills or is improperly handled, leading to pollution and potential health hazards due to the hazardous materials found in electronics.

Energy-Efficient Alternatives to Microwaves 🌿💡

The Environmental Impact of Microwaves: Exploring Sustainability and Energy Consumption 13

Microwaves have become a staple in many households due to their convenience and quick cooking capabilities. However, their energy consumption and impact on the environment are often overlooked. If you’re looking for more sustainable alternatives without sacrificing convenience, here are some energy-efficient options worth exploring:

  • Toaster ovens:
    • 🍞 These versatile appliances can be an excellent substitute for microwaves.
    • 🌡️ They use a similar heating technique but are more efficient and require less space.
    • 🍽️ Whether it’s reheating leftovers, baking, or broiling, toaster ovens offer a wide range of functionalities to suit your cooking needs.

Imagine being able to replace your microwave with a toaster oven that not only saves energy but also opens up a whole new world of culinary possibilities. You can toast, bake cookies, or even roast a small chicken in an energy-efficient manner. It’s like having a mini oven at your disposal!

  • Steamers:
    • 🥦 If you’re looking for a healthy way to cook vegetables, steaming is the way to go.
    • 💧 Steamers use hot water steam to gently cook your veggies while preserving their nutrients.
    • 🍲 They are easy to use, require minimal energy, and ensure that your meals are both delicious and environmentally conscious.
  • Popcorn makers:
    • 🍿 For those movie nights or snack cravings, popcorn makers offer a dedicated solution for producing light and fluffy popcorn.
    • 🌽 No need for microwavable bags or excess packaging waste.

By exploring these energy-efficient alternatives to microwaves, you can not only reduce your environmental impact but also broaden your cooking horizons. So why not give them a try and embark on a journey towards greener and more sustainable living?