Is Your Coffee Sour? Here’s Why and How to Fix It!

Coffee is a morning staple for many people, but nothing can ruin a good cup of coffee like a sour taste. If your coffee tastes sour, don’t worry – it’s not uncommon, and there are ways to fix it.

coffee is sour

In this article, we’ll explore the different reasons why coffee can taste sour and provide practical tips on how to make your coffee taste better.

Understanding Why Coffee is Sour

The Role of Acidity in Coffee

Acidity is a crucial element of coffee that can significantly impact its taste and flavor.

What is Acidity in Coffee?
Is Your Coffee Sour? Here's Why and How to Fix It! 1

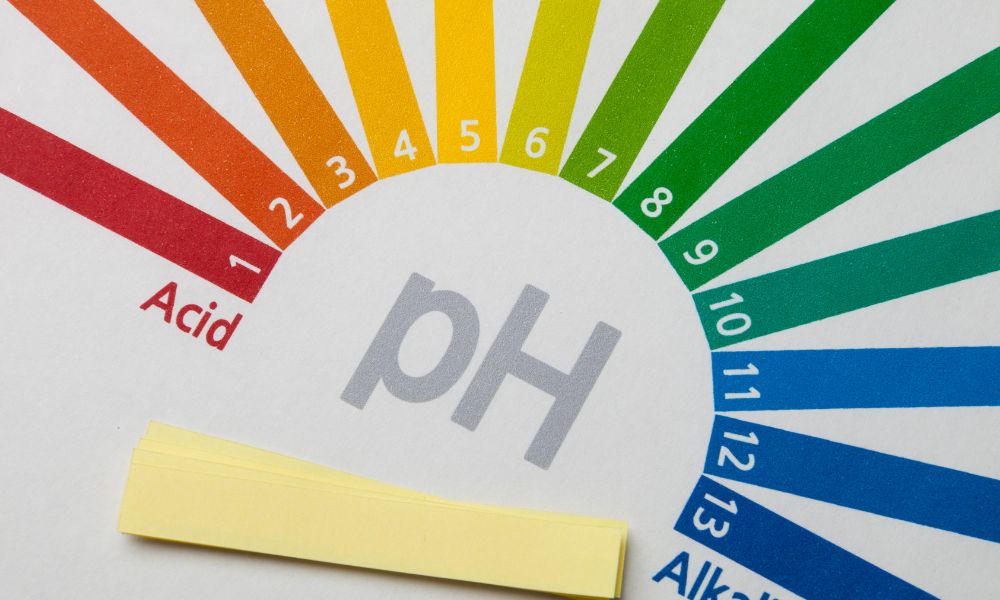
When we talk about acidity in coffee, we are not referring to the pH level of the coffee itself. Instead, we are referring to the flavor notes that give coffee its bright and tangy taste. Acidity in coffee is a desirable quality that can bring out the flavor and aroma of the coffee beans.

How Does Acidity Affect the Taste of Coffee?

Acidity can affect the taste of coffee in several ways. Firstly, acidity can give coffee a bright and tangy taste that can make it more refreshing and enjoyable to drink. Acidity can also bring out the fruitiness and floral notes of the coffee, giving it a more complex flavor profile.

On the other hand, too much acidity can make the coffee taste sour or bitter. It is crucial to strike the right balance of acidity in coffee to avoid ruining its taste.

What are Some Common Types of Acidic Coffee Beans?

Kenyan Coffee

Kenyan coffee is known for its bright and tangy taste. It has a high acidity level and often has notes of citrus and berry.

Ethiopian Coffee

Ethiopian coffee is another popular type of acidic coffee. It has a complex flavor profile that includes fruity and floral notes. It is often described as having a wine-like taste.

Colombian Coffee

Colombian coffee is one of the most popular types of coffee in the world. It has a mild acidity level and often has notes of chocolate, caramel, and nuts.

Costa Rican Coffee

Costa Rican coffee is known for its bright and tangy taste. It has a high acidity level and often has notes of citrus and honey.

The Role of Brewing Methods in Sour Coffee
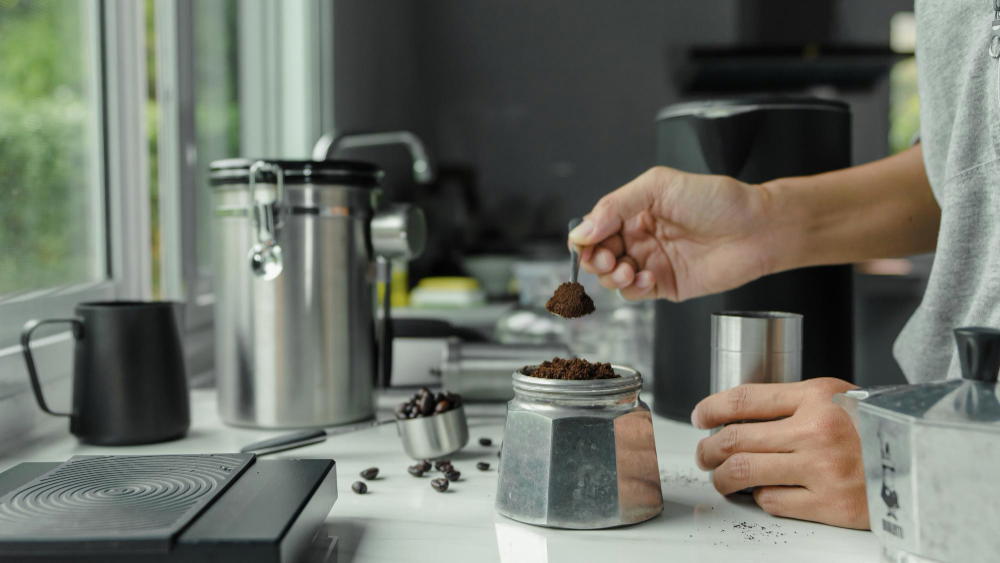
How to Make Coffee in a Percolator

What Factors Influence the Sourness of Coffee?

Bean Quality

The quality of the coffee beans you use can impact the sourness of the coffee. Poor quality beans can taste sour and stale, while high-quality beans will have a more balanced taste.

Roast Level

The roast level can also affect the sourness of coffee. Over-roasting can cause the coffee to lose its natural sweetness, leading to a sour and bitter taste.

Water Temperature

The water temperature used to brew the coffee can affect its sourness. If the water is too cold, it can cause the coffee to taste sour. If the water is too hot, it can cause the coffee to taste burnt and bitter.

Extraction Time

The extraction time can also affect the sourness of coffee. If the coffee is under-extracted, it can taste sour and weak. If the coffee is over-extracted, it can taste bitter and sour.

How Can Over-Extraction Cause Sourness?

Over-extraction occurs when the coffee grounds are exposed to water for too long. This can cause the coffee to become bitter and sour. Over-extraction can happen when the grind size is too fine, or the water temperature is too hot.

How Can Under-Extraction Cause Sourness?

Under-extraction occurs when the coffee grounds are not exposed to water for long enough. This can cause the coffee to become sour and weak. Under-extraction can happen when the grind size is too coarse, or the water temperature is too cold.

The Role of Water in Sour Coffee
Is Your Coffee Sour? Here's Why and How to Fix It! 2

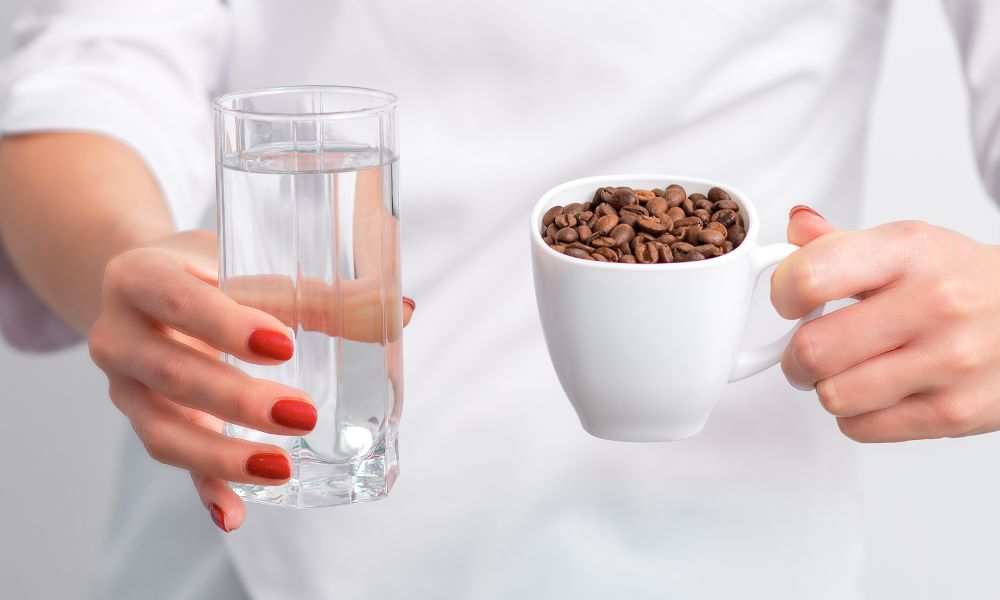
Water is a crucial element in coffee brewing and can significantly impact the taste of your coffee, including its sourness.

How Does Water Quality Affect Coffee Taste?

Water quality can have a significant impact on the taste of your coffee. Water that is too hard or too soft can affect the coffee’s acidity, leading to sour or bitter flavors. Additionally, water that has an unpleasant taste or odor can also affect the coffee’s taste.

What are Some Common Water Issues That Can Cause Sourness in Coffee?

Hard Water

Hard water has a high mineral content, particularly calcium and magnesium. These minerals can affect the coffee’s acidity, making it taste sour or bitter.

Soft Water

Soft water has a low mineral content and can make coffee taste flat or weak. Soft water can also cause over-extraction, leading to sourness.

Chlorine or Chloramine

Chlorine or chloramine is often used to disinfect municipal water supplies. However, it can affect the coffee’s taste, making it taste sour or chemically.

How Can You Fix Sour Coffee Caused by Water Issues?

If your coffee tastes sour due to water issues, there are several things you can do:

Use Filtered Water

Using filtered water can help to remove impurities that can affect the coffee’s taste. A water filter can remove minerals, chlorine, and other contaminants that can cause sourness.

Adjust Water Hardness

If your water is too hard, you can adjust the hardness by using a water softener or adding a small amount of vinegar to the water. If your water is too soft, you can add minerals using a water mineralizer.

Adjust Brew Time

If your coffee tastes sour due to over-extraction caused by soft water, you can adjust the brew time to shorten it. This can help to avoid over-extraction and reduce sourness.

Use Bottled Water

Using bottled water can help to avoid water issues that can cause sourness. However, make sure to choose water with low mineral content to avoid making the coffee taste flat or weak.

How to Fix Sour Coffee
Is Your Coffee Sour? Here's Why and How to Fix It! 3

Adjusting the Coffee-to-Water Ratio

The coffee-to-water ratio is a crucial element in coffee brewing that can significantly impact the taste of your coffee, including its sourness.
What is the Ideal Coffee-to-Water Ratio?

The ideal coffee-to-water ratio is subjective and depends on personal taste preferences. However, a general guideline is to use 1-2 tablespoons of coffee per 6 ounces of water. This ratio will result in a strong and flavorful coffee.

How Can You Adjust the Ratio to Fix Sour Coffee?

If your coffee tastes sour, you can adjust the coffee-to-water ratio to fix it. Here are some tips:

Increase the Coffee Amount

Increasing the amount of coffee can help to reduce the sourness. You can try adding an extra tablespoon of coffee for every 6 ounces of water.

Decrease the Water Amount

Decreasing the water amount can also help to reduce the sourness. You can try reducing the water by 1-2 ounces and see if it improves the taste.

Adjust Both Coffee and Water Amounts

You can also adjust both the coffee and water amounts to find the perfect ratio. Experiment with different ratios until you find the right balance.

How Do Different Brewing Methods Require Different Ratios?

Different brewing methods require different coffee-to-water ratios to achieve the ideal taste. Here are some general guidelines:

Brewing MethodGrind SizeIdeal Coffee-to-Water Ratio
French PressCoarse1:15 (1 part coffee to 15 parts water)
Drip CoffeeFine1:20
Pour OverMedium-fine1:17
EspressoFine1:2

Adjusting the Grind Size

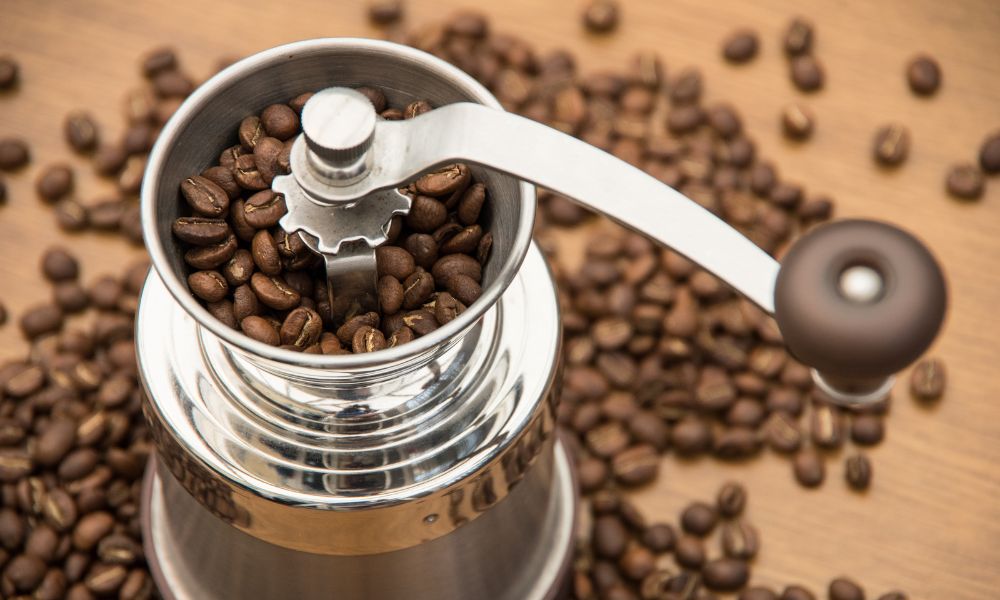
The grind size is a crucial element in coffee brewing that can significantly impact the taste of your coffee, including its sourness.

Is Your Coffee Sour? Here's Why and How to Fix It! 4

What is Grind Size and How Does it Affect Coffee Taste?

Grind size refers to the size of the coffee particles that are produced when coffee beans are ground. The grind size can affect the coffee taste by influencing the surface area and extraction rate of the coffee.

A finer grind size will increase the surface area of the coffee, making it easier for water to extract the coffee’s flavors and aromas. This can lead to a more intense and flavorful coffee. A coarser grind size will decrease the surface area, resulting in a weaker and less flavorful coffee.

How Can Grind Size Cause Sour Coffee?

Grind size can cause sour coffee if the coffee is under-extracted. When coffee is under-extracted, it means that the water has not had enough time to extract the flavors and aromas from the coffee. This can cause the coffee to taste sour and weak. A too coarse grind size can cause under-extraction.

How Can You Adjust the Grind Size to Fix Sour Coffee?

Use a Finer Grind

Using a finer grind size can help to increase the surface area of the coffee, allowing the water to extract more flavors and aromas. Experiment with different grind sizes until you find the right balance.

Adjust Brew Time

If your coffee is sour due to under-extraction, you can adjust the brew time to give the water more time to extract the coffee’s flavors and aromas. Experiment with different brew times until you find the right balance.

Adjust the Water Temperature

If your coffee is sour due to under-extraction, you can also adjust the water temperature to improve extraction. The ideal water temperature for brewing coffee is between 195°F and 205°F.

Adjusting Brew Time and Temperature

The brewing time and temperature are crucial elements in coffee brewing that can significantly impact the taste of your coffee, including its sourness.

Is Your Coffee Sour? Here's Why and How to Fix It! 5

How Does Brew Time and Temperature Affect Coffee Taste?

Brew time and temperature can affect the coffee taste by influencing the extraction rate and the solubility of the coffee’s flavors and aromas. The ideal brew time and temperature will depend on the coffee-to-water ratio, the coffee grind size, and the brewing method.

A longer brew time and higher water temperature will increase the extraction rate, resulting in a more intense and flavorful coffee. A shorter brew time and lower water temperature will decrease the extraction rate, resulting in a weaker and less flavorful coffee.

How Can Brewing Time and Temperature Cause Sour Coffee?

Brewing time and temperature can cause sour coffee if the coffee is under-extracted. When coffee is under-extracted, it means that the water has not had enough time to extract the coffee’s flavors and aromas. This can cause the coffee to taste sour and weak.

A too short brew time or low water temperature can cause under-extraction and result in sour coffee.

How Can You Adjust Brew Time and Temperature to Fix Sour Coffee?

Increase Brew Time

Increasing the brew time can help to improve extraction and reduce sourness. Experiment with longer brew times until you find the right balance.

Increase Water Temperature

Increasing the water temperature can also help to improve extraction and reduce sourness. The ideal water temperature for brewing coffee is between 195°F and 205°F.

Adjust Coffee-to-Water Ratio

If your coffee is sour due to under-extraction, you can also adjust the coffee-to-water ratio. Use more coffee or less water to improve extraction and reduce sourness.

Adjust Grind Size

If your coffee is sour due to under-extraction, you can also adjust the grind size. Use a finer grind size to increase surface area and improve extraction.

Preventing Sour Coffee

The freshness of coffee is a crucial element in coffee brewing that can significantly impact the taste of your coffee, including its sourness.

Is Your Coffee Sour? Here's Why and How to Fix It! 6

What is the Importance of Fresh Coffee?

Fresh coffee is important because coffee beans begin to lose their flavor and aroma soon after they are roasted. The longer coffee sits, the more it loses its freshness and flavor. Buying fresh coffee and grinding it just before brewing can help to ensure that you get the best possible taste from your coffee.

How Can You Tell If Coffee is Fresh?

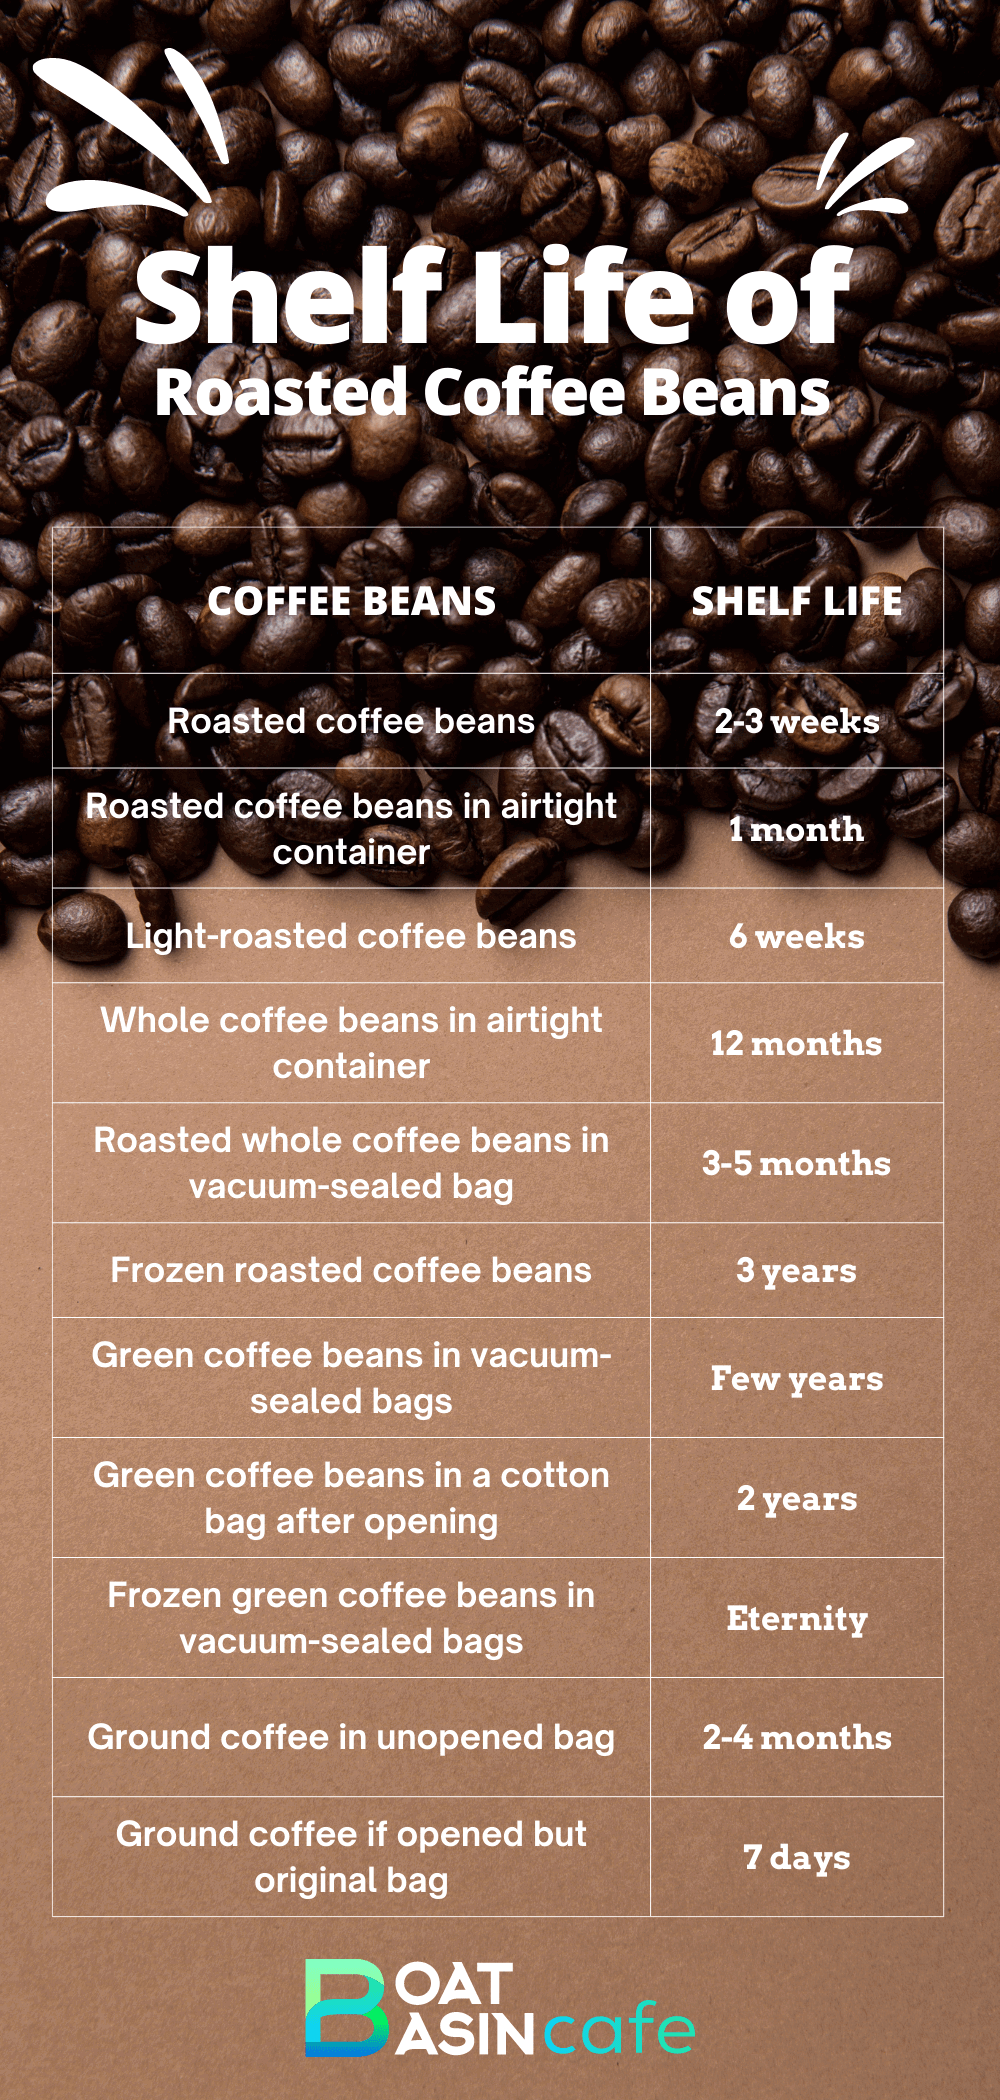
You can tell if coffee is fresh by looking at the roast date. Coffee should be used within 2-3 weeks of the roast date for the best possible taste. Additionally, fresh coffee beans will have a strong and pleasant aroma, while stale coffee beans will have a dull and unpleasant smell.

How Can Buying Fresh Coffee Prevent Sourness?

Buying fresh coffee can help to prevent sourness because fresher coffee beans will have a higher acidity level. As coffee beans age, their acidity level decreases, which can lead to a sour taste. By buying fresh coffee, you can ensure that the coffee’s acidity level is at its optimal level, resulting in a better taste.

Additionally, buying fresh coffee and grinding it just before brewing can help to ensure that the coffee is not under-extracted. Under-extraction can cause sourness, and using fresh coffee beans can help to ensure that the coffee is properly extracted.

Proper Storage of Coffee

Proper storage of coffee is crucial to maintaining its freshness and flavor.
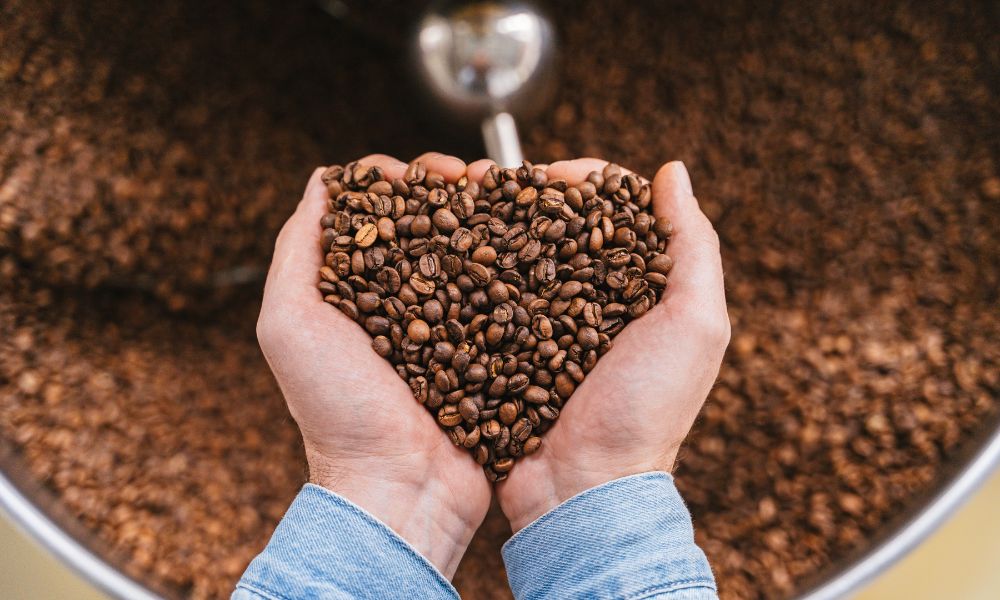
Is Your Coffee Sour? Here's Why and How to Fix It! 7

What are the Best Ways to Store Coffee?

The best ways to store coffee are in airtight containers away from heat, light, and moisture. Here are some tips for proper coffee storage:

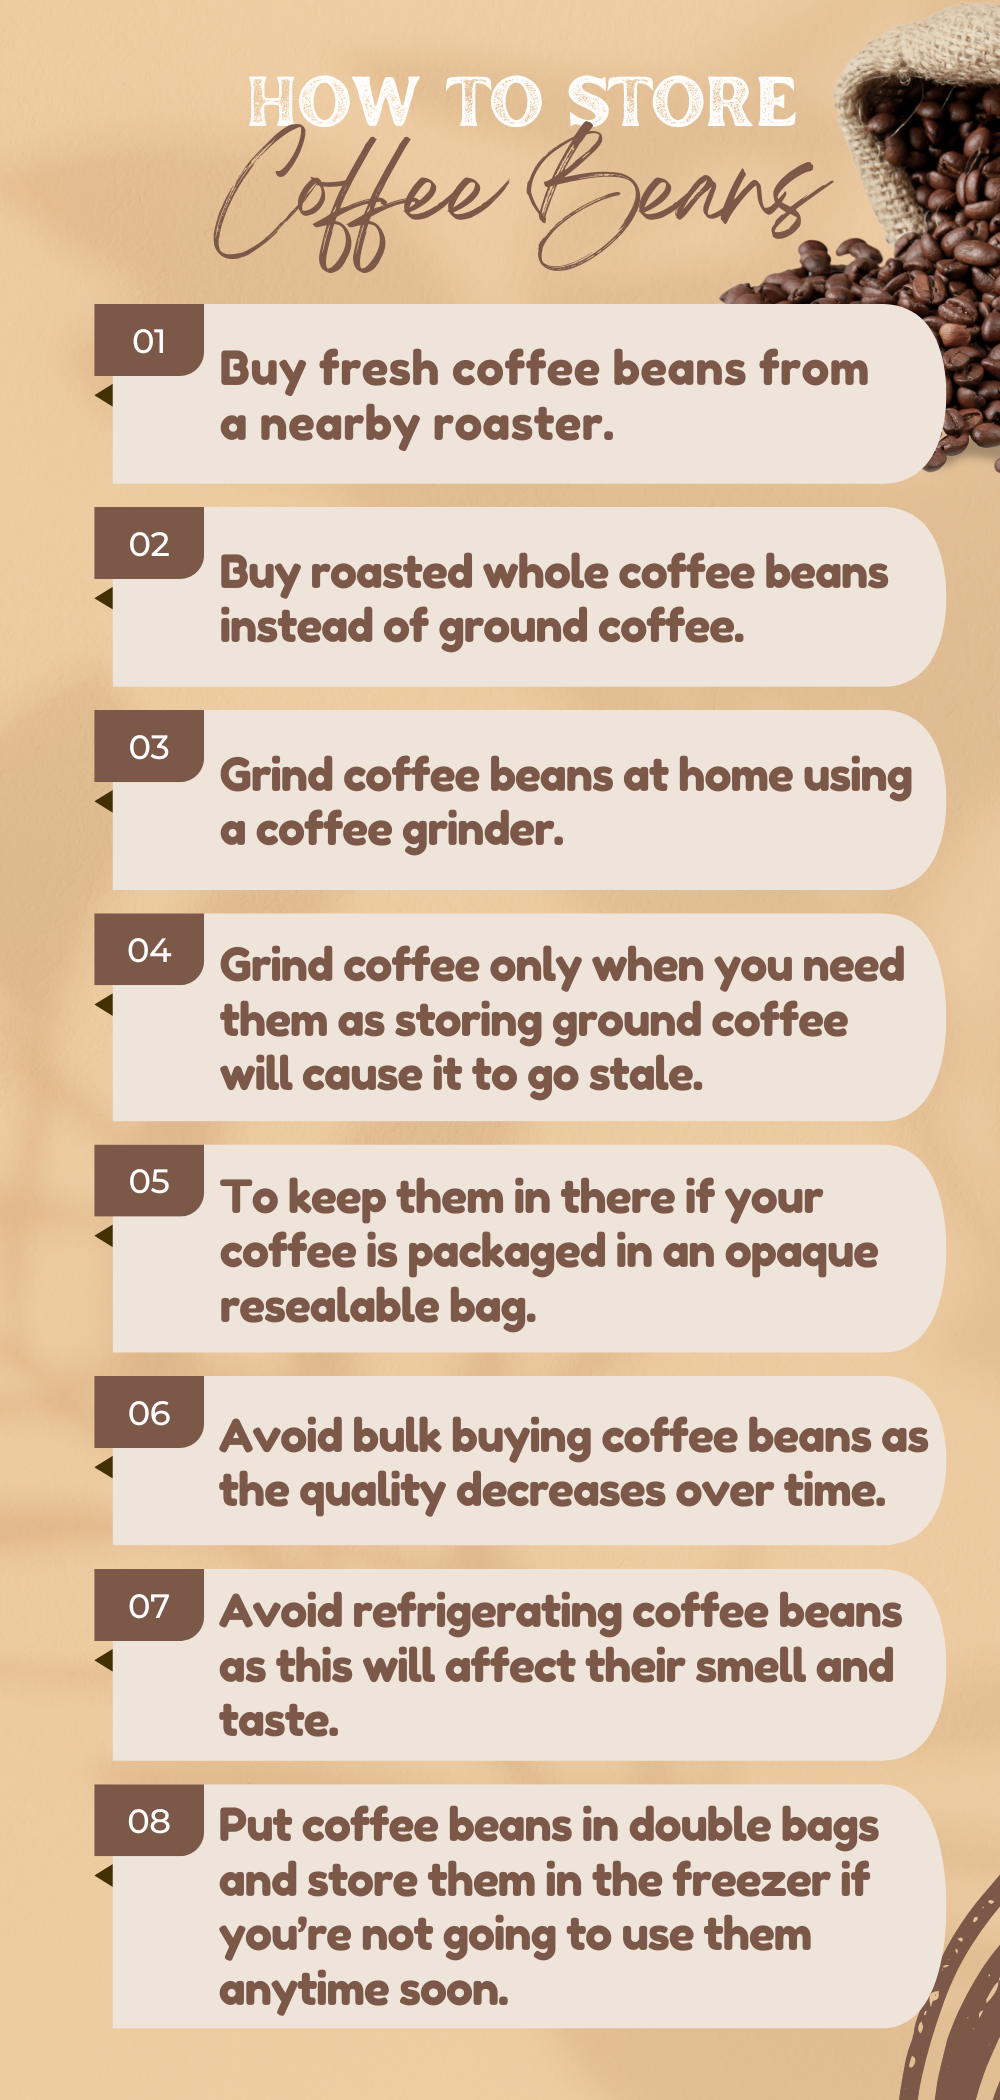
  • Use an airtight container to prevent air from oxidizing the coffee and causing it to go stale.
  • Store coffee in a cool, dry, and dark place, away from heat, light, and moisture.
  • Do not store coffee in the refrigerator or freezer, as the moisture and odors can affect the taste of the coffee.
  • Do not grind coffee until just before brewing, as ground coffee goes stale much faster than whole bean coffee.

How Can Improper Storage Cause Sour Coffee?

Improper storage can cause sour coffee by allowing the coffee to become stale. When coffee beans are exposed to air, heat, light, or moisture, they begin to lose their freshness and flavor. This can cause the coffee to taste sour and weak.

Additionally, storing coffee in the refrigerator or freezer can cause condensation to form on the beans, which can lead to moisture and stale coffee.

How Can Proper Storage Prevent Sourness?

Proper storage can prevent sourness by keeping the coffee fresh and flavorful. Storing coffee in an airtight container away from heat, light, and moisture can help to ensure that the coffee stays fresh for longer. Using whole bean coffee and grinding it just before brewing can also help to ensure freshness.

Cleaning Your Coffee Equipment

Cleaning your coffee equipment is an important part of maintaining the quality of your coffee.
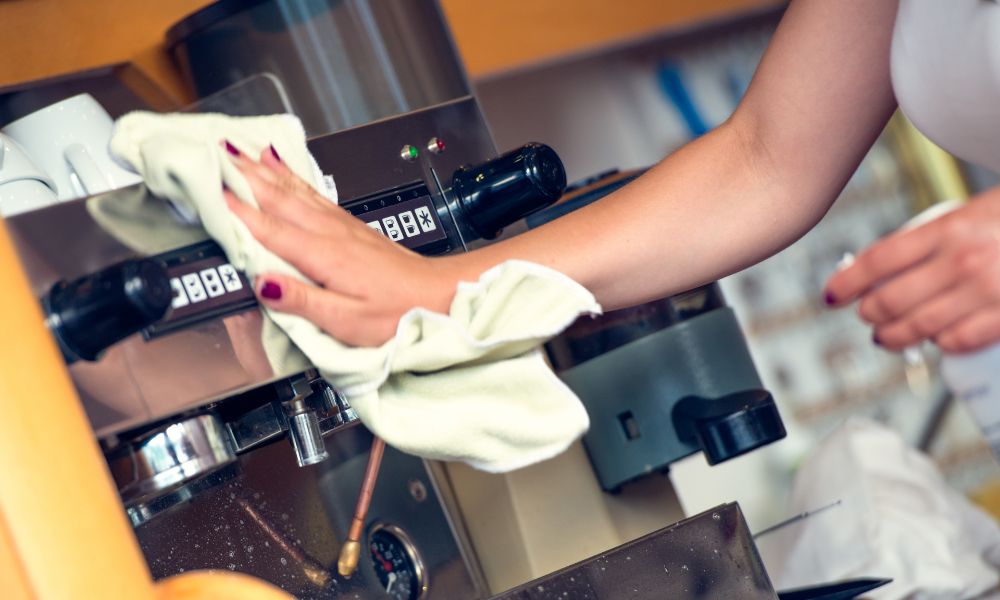
Is Your Coffee Sour? Here's Why and How to Fix It! 8

How Does Coffee Equipment Affect the Taste of Coffee?

Coffee equipment can affect the taste of coffee by leaving behind residue or affecting the brewing temperature. Dirty equipment can also lead to bacterial growth, which can affect the taste of the coffee.

Additionally, equipment that is not calibrated correctly can result in over-extraction or under-extraction, which can cause the coffee to taste sour or bitter.

How Can Dirty Equipment Cause Sour Coffee?

Dirty equipment can cause sour coffee by leaving behind residue that can affect the taste of the coffee. Additionally, bacterial growth can affect the taste of the coffee, leading to sourness.

Dirty equipment can also affect the brewing temperature, resulting in under-extraction, which can cause the coffee to taste sour.

How Can Cleaning Your Equipment Prevent Sourness?

Cleaning your equipment can prevent sourness by ensuring that it is free of residue and bacteria. Regular cleaning can also help to maintain the correct brewing temperature and prevent under-extraction, which can cause sourness.

Here are some tips for cleaning your coffee equipment:

  • Clean your equipment regularly with soap and water, following the manufacturer’s instructions.
  • Use a dedicated brush to clean hard-to-reach areas, such as the crevices of a grinder.
  • Use a descaling solution to remove mineral buildup in your coffee maker or espresso machine.
  • Clean your equipment after each use to prevent residue buildup.

Conclusion

Sour coffee can be a frustrating experience for coffee lovers. However, with a little knowledge and effort, it can be fixed and prevented. In this article, we have explored the main reasons for sour coffee, the main ways to fix sour coffee, and the main ways to prevent sour coffee.

Recap of Key Points

The main reasons for sour coffee are under-extraction, high acidity, and stale coffee beans. The main ways to fix sour coffee are adjusting the coffee-to-water ratio, adjusting the grind size, adjusting brew time and temperature, buying fresh coffee, and cleaning your equipment.

The main ways to prevent sour coffee are using fresh coffee beans, proper storage of coffee, and regular cleaning of coffee equipment.

FAQs

What is the ideal water temperature for brewing coffee?

The ideal water temperature for brewing coffee is between 195°F and 205°F.

How does underextraction affect the taste of coffee?

Underextraction can cause coffee to taste sour and weak.

How does over-roasting affect the taste of coffee?

Over-roasting can cause coffee to lose its natural sweetness and taste sour and bitter.

How can I fix sour coffee?

You can fix sour coffee by adjusting the coffee-to-water ratio, adjusting the grind size, adjusting brew time and temperature, buying fresh coffee, and cleaning your equipment.

What causes sour coffee?

Sour coffee can be caused by under-extraction, high acidity, and stale coffee beans.

How can I prevent sour coffee?

You can prevent sour coffee by using fresh coffee beans, proper storage of coffee, and regular cleaning of coffee equipment.

Can water quality affect coffee taste?

Yes, water quality can affect coffee taste. Hard water or water with high mineral content can affect the taste of coffee and cause sourness. Using filtered water or bottled water can help to improve the taste of coffee.
Hamilton Beach BrewStation Troubleshooting: Simple Solutions!

Picture this: It’s morning, and you’re groggy, stumbling into the kitchen for your daily dose of caffeine. But instead of the comforting gurgle of your Hamilton Beach FlexBrew, you’re met with a hiss, a sputter, or worse – total silence. Panic sets in. Is your beloved coffee maker on the fritz?

Don’t despair! This comprehensive troubleshooting guide is here to help you tackle the most common Hamilton Beach coffee maker problems, from leaks and clogs to error codes and subpar coffee.

We’ll arm you with expert tips, simple DIY fixes, and real-world success stories so you can get back to brewing your perfect cup with minimal frustration. Whether you’re a FlexBrew fanatic, a BrewStation devotee, or a Single-Serve sipper, we’ve got you covered. Let’s dive in and brew up some solutions!

Before You Brew-bleshoot: A Pre-Fix Checklist

hamilton beach brewstation troubleshooting

Before we get into the nitty-gritty of specific issues, always start with these basic checks:

  1. Is your coffee maker securely plugged into a functioning outlet? (No judgment – we’ve all forgotten to plug in our appliances at least once!)
  2. Have you checked the water reservoir? Is it filled to the proper level with fresh, cool water?
  3. Is the filter basket properly in place and free of old coffee ground buildup?
  4. Have you given your machine a good cleaning recently? A quick wash of removable parts can work wonders.

Ticking off this simple checklist can often resolve issues without further fuss. But if your coffee maker is still misbehaving, fear not – we’re just getting started!

🛠️ Conquer Common Conundrums: FlexBrew & BrewStation Troubleshooting

Help! My Hamilton Beach FlexBrew 47950 Won’t Turn On! If your FlexBrew is playing dead, try these resuscitation tips:

Hamilton Beach BrewStation Troubleshooting: Simple Solutions! 9
  1. Check that the machine is properly plugged into a functioning outlet. Borrow your phone charger and test the outlet – if your phone starts charging, the outlet is A-OK.
  2. Inspect the power cord for any signs of fraying or damage. If it looks worn, it might be time for a replacement.
  3. Peek inside the machine for any signs of water damage or leaks. If you spot trouble, it’s best to call in reinforcements (a.k.a. professional repair).

Conquer the Drips: Fixing a Leaky Hamilton Beach BrewStation

Puddles under your coffee maker? No thanks. Here’s how Michelle T. from Seattle tackled her leaky BrewStation:

“I thought I was going crazy when I kept finding coffee drips on my counter. Turns out, my carafe just wasn’t properly aligned with the drip tray. A little nudge to the left, and voila – leak solved! If only all my problems were this easy to fix.”

If a carafe adjustment doesn’t do the trick, try these tips:

  1. Check for cracks in the carafe or lid. Even hairline fractures can cause major drips.
  2. Clean the spray head and surrounding area to remove any buildup or debris.
  3. Inspect the filter basket for proper insertion and any signs of overflow.
  4. Run a descaling cycle to clear out any sneaky mineral deposits that could be gumming up the works.

The Slow Flow Woe: How to Speed Up Your Hamilton Beach Single-Serve

If your Single-Serve coffee maker is more of a slow drip, try these tips from Joe M. in Chicago:

“I was this close to pitching my Single-Serve when it started taking forever to fill my mug. But then I tried running a descaling cycle with plain white vinegar, and it worked like a charm! Turns out, all that built-up gunk was clogging the flow. Lesson learned – I’m a devoted descaler now.”

In addition to descaling, give these fixes a go:

  1. Clean the piercing needle to remove any trapped coffee grounds.
  2. Give the water reservoir a good rinse and make sure it’s properly seated.
  3. Experiment with a slightly coarser grind – fine grinds can clog the filter.
  4. Check that the brewing mode is set correctly – certain modes are meant to brew slower.

💁🏻‍♂️ Pro Tip: Still experiencing sluggish flow? There might be a hidden blockage in the internal tubing. Try this advanced fix: blow air through the tube with a straw to dislodge any stubborn debris. (Just make sure the machine is unplugged and cooled down first!)

Decoding the Beeps and Boops: Hamilton Beach Error Code Master Class

Hamilton Beach Coffee Maker Maintenance Tips

There’s nothing more frustrating than a nonsensical error code interrupting your morning brew. Never fear – we’ve cracked the code!

Consult this chart to diagnose and fix common FlexBrew, BrewStation, and Single-Serve error messages:

Error CodeMeaningHow to Fix
ERRWater reservoir issueFill reservoir with cool water. If error persists, clean reservoir and check valve.
E03Brewing interruptedMake sure carafe is securely in place and press START/RESET.
E05Overheated heating elementUnplug machine, let cool fully (at least 30 min.), restart.

Prevent and Protect: Easy Maintenance for Happy Coffee Makers

An ounce of prevention is worth a pound of dark roast! Keep your BrewStation or FlexBrew humming with these simple maintenance musts:

  • Monthly descaling (more often if you have hard water)
  • Weekly cleaning of removable parts (carafe, lid, filter basket)
  • Daily wipe-down of exterior and warming plate
  • Quarterly filter basket replacement
  • Filtered water for optimal coffee taste and machine health

Bonus tip from Lisa R. in Miami: “I set a recurring ‘Clean me!’ note in my phone calendar so I never forget to descale. It’s oddly satisfying to start each month with a fresh, clean coffee maker.”

Brew Victory! Real Troubleshooting Triumphs

From BrewStation blunders to FlexBrew fixes, these Hamilton Beach owners shared their hard-won wisdom:

“My FlexBrew 47950 was on the fritz, barely squeezing out a trickle of coffee. I tried all the standard fixes – descaling, cleaning the needle, checking the reservoir. No dice. But then I found a forum post suggesting to check the internal tubing for clogs. I grabbed a straw and blew into the tube, and out popped a rogue coffee ground! It was like magic – full flow restored!” Steve B. – Denver, CO

“I thought my BrewStation 47900 carafe was a goner when it started leaking from a hairline crack. But then I discovered Hamilton Beach sells replacement carafes specifically for the 47900 model, and for a fraction of the cost of a new machine. Installation was a breeze, and now it’s like having a brand new coffee maker!” Tanya M. – Brooklyn, NY

“My Single-Serve 49980 was slower than molasses, taking nearly 10 minutes to brew a single cup. I was ready to throw in the towel, but then I tried running a 50/50 vinegar and water descaling solution through it. The difference was night and day! Turns out, all that built-up calcium was the culprit. Lesson learned – I’m a devoted descaler now.” Rachel T. – Portland, OR

Below you will find answers to questions people tend to have about Hamilton Beach troubleshooting.

What’s the best way to descale my Hamilton Beach FlexBrew?

For a natural and affordable descaling solution, fill the reservoir with equal parts white vinegar and water, then run a full brew cycle. Repeat with fresh water until the vinegar smell dissipates. For extra descaling power, let the vinegar solution sit in the reservoir for up to 30 minutes before brewing.

Why does my BrewStation 47950 coffee taste bitter?

Bitter coffee is often a sign of over-extraction. This can happen if your coffee is ground too finely, your water is too hot, or you’re using too much coffee. Try a coarser grind, cooler water, or a slightly lower coffee-to-water ratio. Cleaning your machine regularly also helps keep flavors fresh.

Help! My Single-Serve 49999 is stuck in ‘Add Water’ mode, but the reservoir is full.

A phantom “Add Water” alert often points to a malfunctioning water sensor. Begin with a thorough descaling to clear any mineral buildup that might be tricking the sensor. If the issue persists, you may need to replace the sensor – consult your product manual or contact Hamilton Beach customer support for guidance.

How do I keep rogue coffee grounds out of my cup?

Gritty coffee is no fun. If you’re seeing grounds in your cup, check your filter basket for holes or tears and replace if needed. Using a coarser grind can also help keep grounds from sneaking through. Finally, make sure you’re not overfilling the basket – loosely scooped grounds should reach just below the basket’s rim.

My machine is clean and working properly, but my coffee still tastes ‘meh’. What’s the secret to a knockout cup?

Even with a flawless machine, subpar ingredients will yield subpar coffee. For the best possible brew, start with freshly roasted, high-quality beans. Grind them just before brewing for maximum flavor and aroma. And don’t skimp on the water – use cold, filtered water for purity and taste. With a little experimentation and some insider tips from [link to coffee connoisseur blog post], you’ll be sipping barista-level coffee in no time!

Conclusion 

That’s a wrap, folks! We hope this guide has armed you with the knowledge and confidence to conquer any coffee maker catastrophe that comes your way.

Remember, every brewing challenge is an opportunity to learn, experiment, and become a savvier sipper.

More Related Articles:

How to Grind Coffee Beans (With or Without a Grinder!)

The aroma and taste of coffee can lift up anybody’s mood. And if it’s lightly-roasted freshly-ground beans, there is nothing comparable to it. 

We all go for easy options like store-bought grounded coffee that taste bland and dull. It’s not that we don’t want to do it at home, the process seems a bit too much to do! Or so we think. 

In reality, grinding your own coffee is super easy and much more affordable. You don’t even need a fancy coffee grinder to do that. 

In this article, we will explore all the ways there are to grind coffee beans easily at home. We have gathered the easiest methods to answer how to grind coffee beans very efficiently. 

The History and Science of Coffee Grinding

Coffee grinding began in Ethiopia in the 15th century. As coffee consumption became widespread, a more effective method was needed to smash coffee beans.

First came the 17th-century coffee grinder. Two crank-operated stones smashed the coffee beans. The metal-roller roller grinder enhanced it.

Steam-powered grinders revolutionised coffee in the 19th century. This mass-produced ground coffee, making it more accessible.

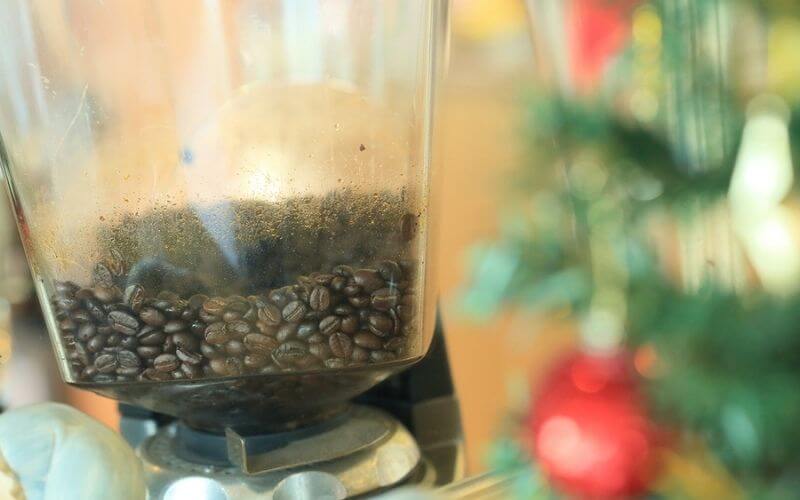
Blade, burr, and electric coffee grinders are available nowadays. Burr grinders smash the beans between abrasive surfaces, whereas blade grinders cut them. The most common grinders are electric.

Coffee grinding science concerns particle size and coffee extraction. Water extracts coffee taste and fragrance faster depending on grind size. Finer grinds extract quicker, whereas coarser grinds extract slower. Choosing the correct grind size for different brewing procedures is crucial.

Overall, coffee grinding has evolved. Technology and knowledge have improved coffee bean grinding. Understanding the coffee grinding process will improve your morning cup, whether you’re a coffee expert or not.

Types of Coffee Grinders

Coffee grinders have been around since the Greeks ruled the world. Not just the Greeks, almost every ancient civilization had some sort of grinders to make a fine powder out of dry herbs and spices. Those versions were manual and took a lot of time and muscle power to use. 

Nowadays, we have many different options both manual and electrical. In terms of popularity, there are three main types of coffee grinders:

Blade Grinder:

How to Grind Coffee Beans

Blade grinders are the most common and inexpensive type of coffee grinders. They use a blade piece to basically chop the beans into smaller pieces. 

When you press the button, the blade starts to rotate at a very fast speed which causes the beans to rotate as well. This motion causes chopping the beans into smaller and smaller pieces. 

You can control the grind size by monitoring the amount of time you grind it for. If you want coarse pieces, grind it for 10-15 seconds. For finer pieces, you will need to spend 40-50 seconds. It can be tricky to understand when to stop but after a few tries, you will get the gist of it. 

Burr Grinder:

Burr Grinder

Burr grinders are made using two abrasive surfaces that revolve in a circular motion. The coffee beans fall in between them and get crushed into fine, uniform sizes. Those two abrasive circles are called burr, hence the name. 

This is one of the oldest methods of grinding coffee. Even though so many different types of grinders have been invented in the last decade, coffee lovers tend to always favor burr grinders over anything else. 

This is because of how uniformed the grounds look when you use them. There are no chunky coffee pieces in the middle of a fine powder. Each time it comes out perfect. Needless to say, it’s our favorite type of coffee grinder as well.

Manual Grinder:

Manual Grinder

Most burr grinders are electrically powered which makes them super easy to use. But there are still some manual options available.

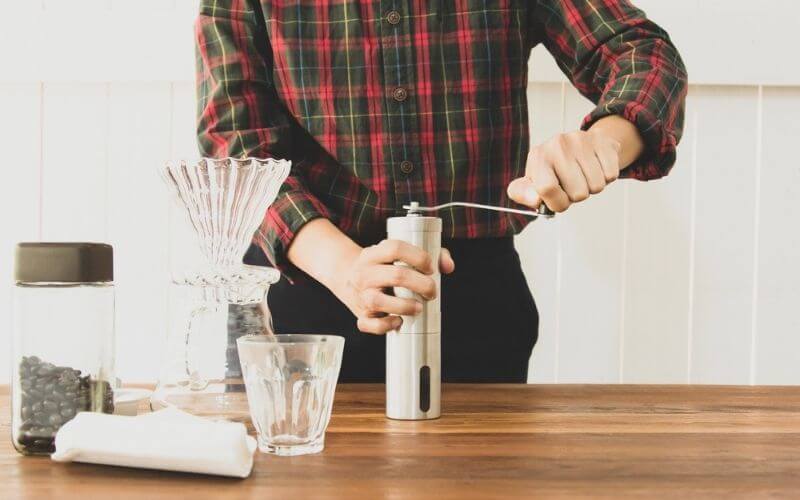
Manual grinders are great as you can carry them anywhere with you. So if you plan to travel a lot or go camping, you can take your manual grinder. It requires no power or fuel which is economical and environmentally friendly. 

They also look vintage and stylish. Old-fashioned things have a certain charm that makes anything feel very luxurious and elegant. Manual grinders look very attractive compared to our modern electrical options.

The Different Brewing Methods

To achieve the best results, different brewing methods necessitate different grind sizes, and a grind size that is too fine or too coarse can affect the taste and quality of the coffee.

Understanding the various brewing methods and how to select the appropriate grind size can assist you in making the perfect cup of coffee.

Brewing MethodGrind SizeCoffee Taste and Quality
Drip CoffeeMedium to fine grindWell-balanced, smooth, flavorful
French PressCoarse grindFull-bodied, rich flavor
Pour-OverMedium grindClean, crisp
EspressoVery fine grindStrong, bold

Coffee Beans Grinder Machine: How to Use

We have gathered all the different ways there are to grind your coffee beans using many different instruments. You will also find how to grind coffee beans without a grinder. 

Grinding Coffee Beans in Vitamix:

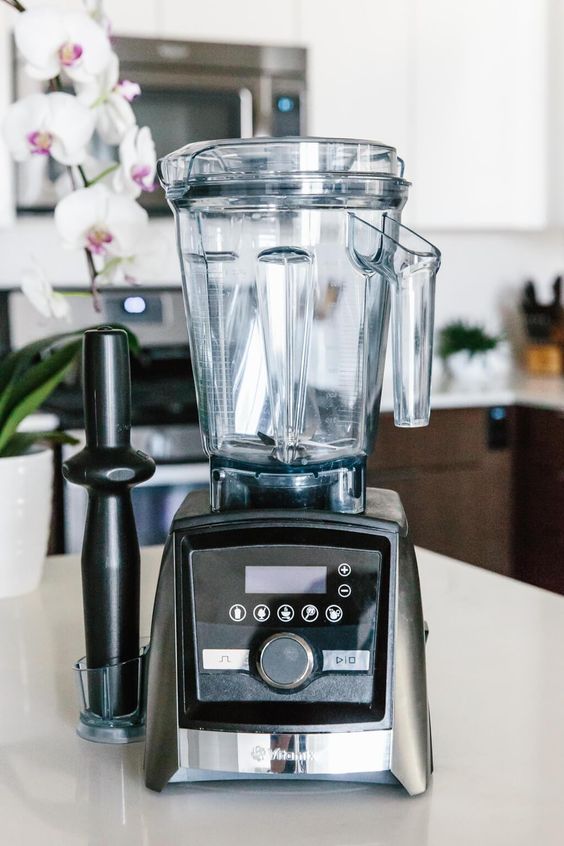
Grinding Coffee Beans in Vitamix

Vitamix is one of the most reliable and well-known blenders/grinders. Due to its high-efficiency, it has become a household name for many. 

They claim that your Vitamix can blend everything. But can it grind coffee grinds though?

We tried and discovered it is really good for grinding coffee beans! Of course, it’s not going to perform like a proper coffee grinder! 

The ground coffee from a Vitamix is not as precise or consistent. So you can get a mixture of smooth and coarse ground beans. However, for an easy, quick option, it’s comparable to basic, low-end coffee grinders on the market. 

Here is how to grind coffee beans in a Vitamix:

  1. Use the dry blade container to get better results. Start by measuring out 2 cups of roasted coffee beans. 
  2. Check the user manual to find out the best settings for grinding. Set the left switch to “variable” and turn the dial to number 3. This setting varies depending on which model of Vitamix you have.
  3. Add the beans to the container and close the lid.
  4. Turn on the machine and let it grind for 15 seconds. This is enough for any standard drip coffee. The longer you do it, the finer the grind will be. Finer grind is ideal for Turkish style coffee or espresso. 
  5. Grind for 5 seconds and take a break. Shake the container if necessary. This helps to create a more uniform blend. 

Nutribullet Coffee Grinder:

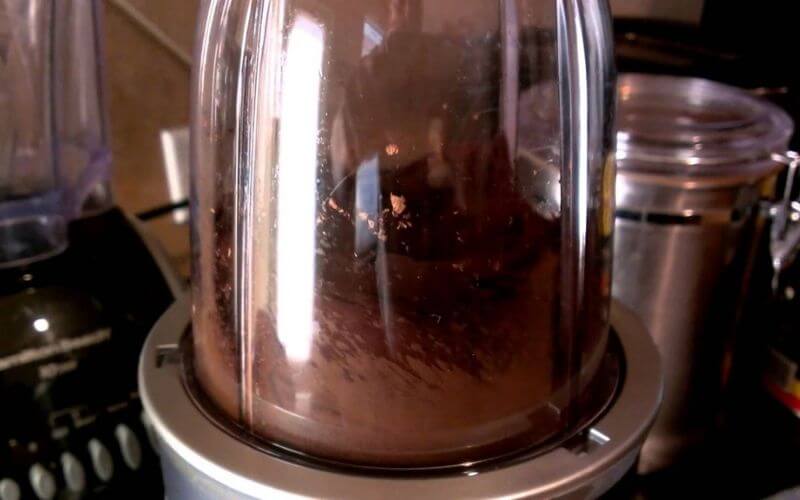
Nutribullet Coffee Grinder

Nutribullet is known for its versatile functionality and convenient design. You can use it for a wide variety of items including coffee beans. 

This is probably the easiest way to grind your coffee beans. Here’s how to grind coffee beans in a Nutribullet coffee grinder:

  1. Always check the manual as the first step. If there are any instructions, follow that. 
  2. Use the flat blade for coffee beans. Fill up the container with as many beans as you need. We would recommend keeping a little bit of space inside.
  3. Start the blender and let it grind for 10 seconds without interruptions. 
  4. Shake the container and grind again for 5 minutes. Keep doing this until you’re satisfied with the blend. 
  5. Shaking it helps to help the large particles go down toward the blade. 
  6. Unplug your Nutribullet and put the ground beans into an airtight container. This is perfect for easy morning coffee. And it takes less than a minute to do so! 

Grinding Coffee Beans in a Blender:

Grinding Coffee Beans in a Blender

If you have no kitchen appliances, chances are you have a basic blender and a microwave. We all do. That’s why it makes sense to use one for coffee beans. 

But the process is not as simple as just tossing them inside and pressing a button. Here’s how to grind coffee beans with a blender:

  1. Check if your blender has a “grinder” setting. If it has one, select it. If not, look for the “medium-high” setting. 
  2. Pour around ½ cup of beans into the blender and close the lid firmly. 
  3. Use the pulse setting to grind your beans. Grind them for 5 seconds and then take 3 seconds to break. Then grind again for 5 seconds. 
  4. Repeat this at least 7-8 times. You should grind for a total of 30 seconds. To make sure it’s grinding consistently, tilt the blender sideways in the middle of grinding. 
  5. Pour it all into an airtight container to store it for longer.

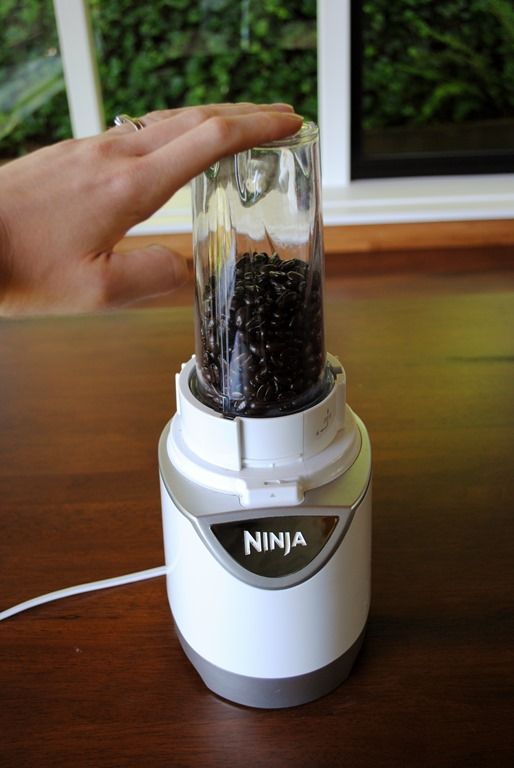
Ninja Blender Coffee Grinder:

Ninja Blender Coffee Grinder

Ninja Blender is a very known kitchen appliance used by millions of people. They have a wide range of models. For this particular task, having a single-serve cup is the most preferable. 

So here’s how to grind coffee beans with a Ninja blender:

  1. It’s important to clean up your ninja blender very well. If you previously used it for spices or garlic, then it would have a strong scent that can ruin the smell of the coffee. 
  2. Put a cup of coffee beans on your Ninja Blender or until there is 3 inches empty space left on the container.
  3. Plugin your blender and pulse up to 8-10 times depending on the texture you want. If you want it coarse, pulse less. For finer ground, you can pulse up to 12 times. 
  4. And that’s about it. Your coffee is ready to brew!

How to Grind Coffee Beans without a Grinder/Blender

If you don’t have a grinder or a blender, there are still ways to grind your coffee beans to desired consistency. We will tell you how to grind coffee beans for espresso without any electronic kitchen gadgets. 

These steps might need some elbow grease and patience to follow as some of them are not as simple as pressing a button!

Rolling Pin:

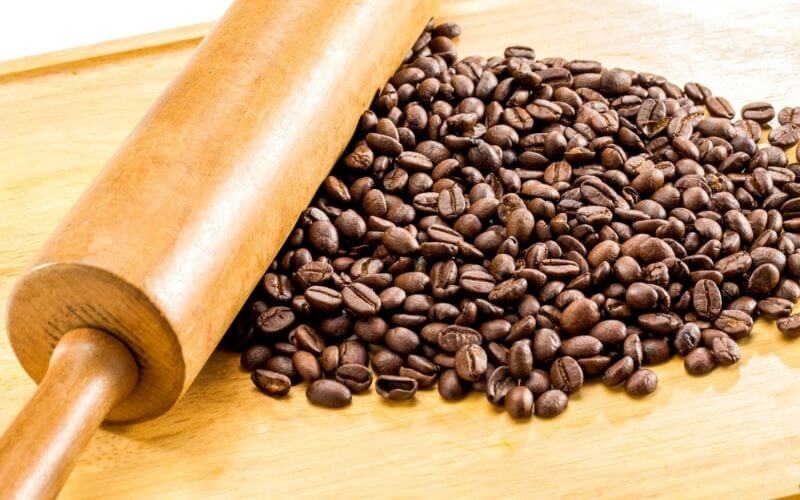
Rolling Pin

You might not think about it, but a rolling pin is a very easy way to make coarse grind without any machine. All you need is a ziploc bag and of course, a rolling pin, and you are set for grinding your own coffee.

Even though it’s pretty self-explanatory, here’s how you can grind your coffee beans using a rolling pin:

  1. Put your desired amount of roasted coffee beans in a ziploc bag. It is ideal to not overfill the bag. Less is more for this process.
  2. Grab your rolling pin and gently press all over the bag. This will lightly crush the beans. Sue your rolling pin like a hammer for this step. 
  3. Now start to drive the rolling pin front and back applying light pressure. Keep doing it until all the beans are evenly crushed.
  4. Move around the larger pieces to the middle and repeat the process. This can take a bit of time but be patient with it.

Mortar and Pestle:

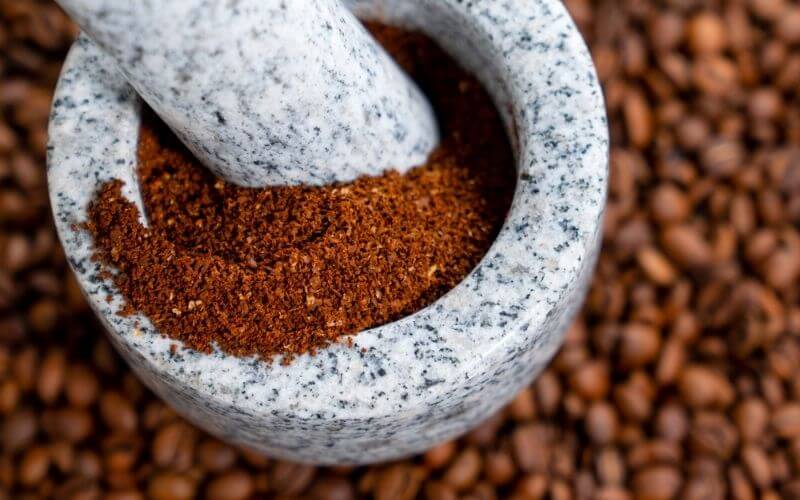
Mortar and Pestle

We don’t recommend using this method for larger batches as mortar and pestle is quite labor-intensive. But if you are trying to grind coffee for only 1-2 cups, this is very useful. 

For finer ground, mortar and pestle is ideal. You can also control how coarse or how fine you want your beans to grind. 

Here’s how to use mortar and pestle for coffee beans:

  1. Use around ¼ cup of coffee beans to fill up your mortar. This obviously depends on how big the mortar is. Ideally, you should always have enough space left to move the pestle around. 
  2. Hold the pestle with your dominating hand and put the other one on the pestle to make sure it doesn’t move. For a stone pestle, you might not need to do that as they are quite heavy. 
  3. Force the pestle down and use it as a hammer to break the beans into tiny pieces.
  4. When all the beans are crushes, move the pestle in a circular motion so the beans start to grind into a finer consistency. Keep doing it until you reach your desired level.
  5. Use a spoon to move around the beans so no part of it can escape the grinding motion of the pestle. 
  6. When you are done, remove the grounds and repeat from step 1 for more coffee.  

Troubleshooting Tips

Grinder Not Grinding Beans


If you find that your coffee grinder is not grinding beans, it could be due to several reasons. The first thing you should check is the power source. Make sure the grinder is plugged in and the power source is working. If the grinder is working but not grinding beans, check the blades. They may be dull or broken and need replacement. Another cause could be an accumulation of coffee oils and residue that clogs the grinder. Cleaning the grinder with a brush or a dry towel can help remove this buildup.

Uneven Grinding


Uneven grinding can occur if the grinder blades are dull or unevenly worn. It could also be a result of too many or too few beans in the grinder. If you are experiencing uneven grinding, check the blades and ensure they are sharp and evenly spaced. Also, make sure that you are using the correct amount of coffee beans for the desired consistency. Overloading or underloading the grinder can lead to uneven grinding.

Grinder Jamming


Grinder jamming is a common problem that can occur when beans get stuck in the grinder. If you are experiencing jamming, try cleaning the grinder and blades thoroughly to remove any blockages. If this does not solve the problem, check for any damaged or bent parts that may need replacement.

Coffee Grounds Clumping Together


Coffee grounds clumping together can be a result of static electricity. To reduce static, try using a different container or cup to catch the coffee grounds. You can also try adding a small amount of salt to the coffee beans before grinding. Another solution is to use a grinder with an antistatic coating.

Inconsistent Grind Size


Inconsistent grind size can be caused by various factors, including dull or unevenly spaced blades, too many or too few beans in the grinder, or an incorrect grind setting. If you are experiencing inconsistent grind size, try adjusting the blades, using the correct amount of beans, or changing the grind setting.

FAQs

01. Is Grinding Coffee Beans Worth It?

If you are a passionate coffee drinker, you have to grind your own coffee beans. Not only does it taste hundreds of times better than pre-ground coffee, but it also has a better aroma. There is nothing nicer than the smell of freshly-ground coffee beans. 

Pre-ground coffee beans lose a lot of natural oil and moisture in the process. This results in a dull, bland brew that does not feel very strong. With your own ground coffee, you won’t need as much to get the same kick. It’s very economical as well!

02. Does a Finer Grind Make Stronger Coffee?

The size of your grinding does not dictate how strong or weak your coffee will taste. The ground size matters in terms of brewing time. 

If your coffee ground is coarse, it would take longer to brew in comparison to if it were fine powder. But finer grind does help to bring out the aroma and natural oil from within. This makes your coffee taste better and balanced. 

However, if you overdo it, your coffee will taste very bitter and unpleasant. 

03. How Many Coffee Beans Should I Grind?

This totally depends on how much coffee you want to make. You can batch grind a lot of them to store ro you can just grind every day to get the freshest brew possible. 

Passionate coffee enthusiasts will tell you to grind coffee beans every day. And why not? You will only have to use 2 tablespoons of coffee beans to make 2 cups. 

It’s so little that it takes literally seconds to do! But the result is a refreshingly strong coffee each time. 

As it was freshly grounded, all the flavors stay inside it rather than evaporating in the air. So the aroma is stronger and smoother than store-bought ones.

You can also take a cup of beans to grind them for batch storing. A cup of coffee beans will make around 10 oz of ground coffee. 

Inference

We tried to add a wide range of ways to grind your coffee beans at home. Hopefully one of them suited your needs and preferences. Now you know exactly how to grind coffee beans at home both with or without a grinder!

Which one are you going to try? Let us know in the comments down below!

Pin Later

How to Grind Coffee Beans (With or Without a Grinder!)

How to Make a Cold Brew Coffee in a French Press? Step-By-Step

Watch any cooking show, and you will likely see a French press sitting on the counter. A French press is an exceptional coffee brewer that can elicit a flavorful cup of coffee at home without you having to spend a lot of money on equipment. It’s convenient and financially beneficial. 

These coffee brewers are worth the hype and are becoming the flagship of every kitchen. Today, the internet shows various techniques for making cold coffee, each with distinct benefits. But, here at Boat Basin Cafe, we believe that the French press is the clear winner. Why? Keep on reading to find out!

This elegantly designed coffee brewer is easy to use and maintain. In addition, a French press is portable, robust, and more self-contained than other models, making it a great cold brew coffee maker.

Learning how to make cold brew in a French press (the way was meant to be) is easy. To ensure you are making cold brew correctly, this article will elaborate on every step of the process.

But first, let’s talk a bit about cold brew coffee!

Cold-Brew-Coffee

Cold Brew Coffee

Coffee is a sophisticated blend of flavorful dried beans and natural aromas that taste amazing and give you a caffeine boost when you need it. Over the past few years, cold brew coffee has achieved widespread popularity.

The fact is that this trend is not going anywhere anytime soon. Cold brew coffee is smoother, stronger, richer, and lacks bitterness, drawing more people towards it. It is less bitter than iced coffee and is considered healthy for your body.

The Benefits of Cold Brew

One of the key advantages of cold brew is its lower acidity. The study was published in the journal Scientific Reports in 2018 and was conducted by researchers at Thomas Jefferson University in Philadelphia. The study found that cold brew coffee has up to 67% less acidity than hot brewed coffee and may be a better alternative for people with acid reflux or sensitive stomachs.

Another advantage of cold brew coffee is its adaptability. Cold brew can be served hot or cold and as a base for a number of coffee drinks. It’s a terrific way to savour the flavour of coffee without the bitterness and acidity that hot brewed coffee may occasionally have.

Types of Beans to Use

When brewing cold brew, the type of beans you use is critical. While any type of coffee bean can be used, certain varietals work better than others. The following are some of the best coffee beans for cold brew:

  • Arabica beans are distinguished by their smooth, sweet flavour and low acidity. Because of their natural sweetness and the way they compliment the brewing process, they are a favourite choice for cold brew.
  • Colombian: Because to their smooth, full-bodied flavour, Colombian beans are another popular choice for cold brew. They have a slightly nutty flavour and a mild acidity, making them an excellent choice for cold brew.
  • Brazilian beans are popular for their low acidity and nutty, chocolaty flavour. Because of their natural sweetness and mild flavour, they are an excellent choice for cold brew.

Best Coffee Grinds for Cold Brew

The grind of your coffee beans is also important when making cold brew. For best results, you’ll want to use a coarse grind. The coarser the grind, the less surface area there is for the water to extract flavor and acidity from the beans. This results in a smoother, less acidic cup of coffee.

When choosing a coffee grinder for cold brew, look for one that allows you to adjust the grind size. This will give you more control over the flavor and acidity of your coffee. A good starting point for cold brew is a grind that is similar in size to raw sugar or sea salt.

Steps for Making Cold Crew in a French Press

Look no further if you want a fast and effortless way to prepare a cold brew coffee. Try French press cold brew to create your favorite coffee drink quickly and easily.

A French press makes the cold brewing process simple. The ingredients are easy to find, all you need is coarsely ground coffee, water, and a French press. Now, let’s see how it is done!

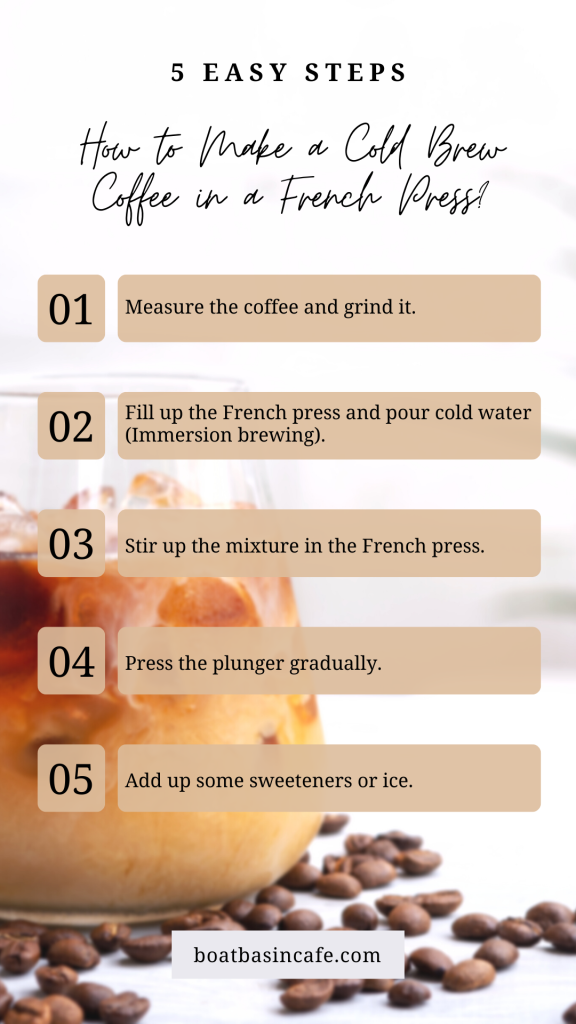
How-to-Make-a-Cold-Brew-Coffee-in-a-French-Press-5-Easy-Steps

Step 1: Measure the coffee and grind it.

First off, if you’re starting with whole coffee beans, soak them in the water before preparing French press coffee. Then, take the whole beans and grind them in a burr grinder. A burr grinder gives you an even grind with consistent particle sizes. Coarse ground coffee is generally better for a French press cold brew, but finer grounds produce a stronger cold brewed coffee. If you prefer not to grind your own coffee beans, just make sure you choose the right type of pre ground coffee when you shop.

Some people double the caffeine content by using twice the coffee grounds, which is fine if you like strong coffee. Alternatively, you can try finer grounds.

Use fresh and evenly ground coffee for a great taste. With uneven coffee grounds, the little particles are over-extracted (bitter), while the large ones are hardly extracted at all, ruining your brew recipe.

Step 2: Fill up the French press and pour cold water (Immersion brewing).

Place the coffee grounds and cold water in the base of your French press. Then, place it in a cold dark place for 16 to 20 hours before pressing down the plunger. We recommend putting the French press in the refrigerator for this part. 

Step 3: Stir up the mixture in the French press.

To uniformly soak the grounds, stir them with a spoon or simply swirl them so that it moves and extracts evenly.

Making Cold Crew in a French Press

Step 4: Press the plunger gradually.

After your chosen brew time of 16 to 20 hours, remove the lid and any excess grounds floating at the top. You can ruin the coffee texture or taste if you do not remove the crust properly. 

Plunge the filter gradually until it is just above the resting coffee. Once the plunger reaches the bottom, start pouring your regular coffee gradually from the French press.

Step 5: Add up some sweeteners or ice.

Your strong and rich cold brew coffee is ready! You can add some liquid sweeteners, milk, almond milk, or ice cubes to strengthen the taste according to your preferences.

Why Is Cold Brew an Ideal Pick-Me-Up Beverage?

Cold press coffee makes your digestive system work better, reduces inflammation, and has other health benefits. Coffee is good for your body since it includes antioxidants and other beneficial chemicals, and cold brew is a delightfully fresh drink you can make year-round. This coffee has been boosting the moods of coffee drinkers with its rich flavor profile shining through.

This ready-to-drink beverage has been around for a long time. Beyond its benefits, this coffee gives a traditional and convenient vibe of drinking coffee how it was meant to be enjoyed.

Why Is Cold Brew an Ideal Pick-Me-Up Beverage

Pros

  • It’s fairly portable and compact.
  • Offers coffee a beautiful viscosity or thickness. There is more coffee flavor and less watery texture than a drip machine.
  • A French press can help determine the exact amount of time needed to extract the grounds.
  • No filters are required. As a result, the taste is enhanced.
  • Cold brew is sustainable, so it is easy to store when made in the French press.
  • Brewing with French press results in a perfectly balanced drink.
  • In a French press, the ability to control the extraction enhances the flavor of your coffee, unlike the drip coffee maker.
  • French press machines use a metal filter that allows natural/essential oils and fine particles from the ground coffee to pass in your cold brew. That’s what makes your coffee rich and smoother.

Cons

  • Over-extraction of the grounds can happen, which can ruin the coffee.
  • The coffee sludge left in the cup is a significant drawback. Without a good quality filter, you end up with some minute particles because you’re steeping ground coffee with water.

Conclusion

Despite some cons of using the French press, the benefits are impressive. It is convenient to carry and offers a deep flavor for your daily cup of coffee. It is no secret that brewing a coffee can be messy if not done with proper care. So, with these steps, get ready to say goodbye to old methods of brewing and hello to organized and efficient cold brew coffee.
Frequently Asked Questions

How long should I brew my cold brew coffee?

For best results, you’ll want to let your cold brew steep for 12-24 hours. This will allow the coffee to fully infuse into the water, resulting in a stronger and smoother flavor.

Can I use flavored coffee beans for cold brew?

Yes, you can use flavored coffee beans for cold brew. However, keep in mind that the flavors may be more subtle due to the lower acidity levels of cold brew.

How should I store my cold brew coffee?

Cold brew can be stored in an airtight container in the refrigerator for up to two weeks. It’s best to consume it within this time frame for optimal flavor.

Hassle-Free Guide to Frothing Almond Milk at Home | Boat Basin Cafe

Whether you’re vegan or lactose intolerant, the restriction of full-fat dairy milk can stand in the way of the perfect cup of coffee. While regular milk steams beautifully, easily transforming to the frothy silkiness that melts into espresso like a dream, plant-based milk is a whole different story.
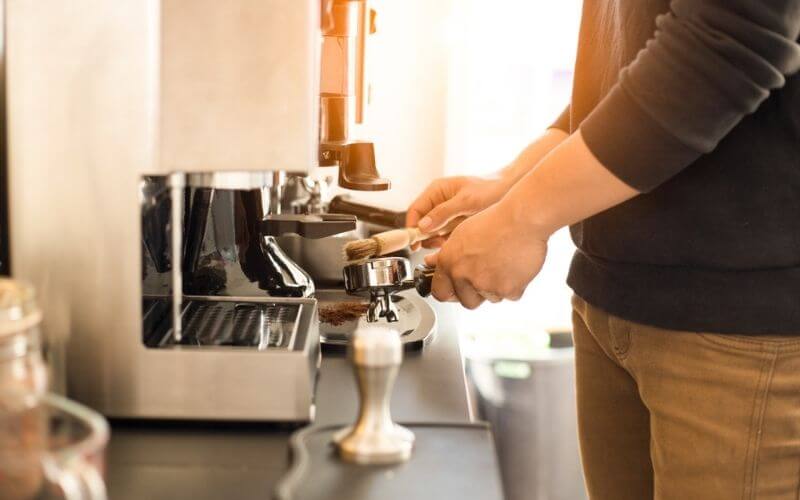
Vegan alternatives, like almond milk, are much harder to froth. Sometimes the milk will be too watery and refuse to foam at all. 

At other times, the milk will froth up weakly, with just a few bubbles and not the luxurious micro-foam that we know and love.

Can you froth almond milk? Yes, but you need to know how to do it right.

If you are tired of drinking subpar cappuccinos or bland lattes, you’ve come to the right place. This article will show you how to froth almond milk perfectly, creating the perfectly textured milk and foam to top off your coffee drinks.

You will learn how to identify the best almond milk for frothing, as well as the factors that determine the quality of your frothed almond milk. If you want to make a perfect latte with almond milk, keep reading to learn more!

Can you use almond milk in a frother?

Hassle-Free Guide to Frothing Almond Milk at Home | Boat Basin Cafe 10

You can use almond milk in a frother to make the perfect cup of coffee. Almond milk has been known for its ability create beautiful, rich foam that is often used by baristas who want their customers’ drinks tastes just how they like them without having any animal products added into it!
The Benefits of Almond Milk

Almond milk is a healthy and nutritious alternative to cow’s milk. It has a low calorie and fat content, making it a good choice for weight loss. It also contains a lot of calcium, vitamin D, and other elements that are good for your bones.

It is also high in antioxidants, which can help prevent cell damage and lower the risk of chronic disease.

Frothing Almond Milk

Frothing almond milk is the technique of adding air into the milk to create a creamy texture. This can be accomplished using a variety of instruments, such as a frother, blender, or whisk.

It is simple and simple to foam almond milk at home. It’s a terrific method to give your coffee or tea a thick, velvety feel.

Best Ways to Enjoy Frothed Almond Milk

Coffee: Adding frothed almond milk to coffee creates a thick and creamy texture. It can be used to prepare a variety of coffee beverages, including lattes, cappuccinos, and macchiatos.

Hot Chocolate: Delicious hot chocolate can be made with frothed almond milk. It imparts a creamy and velvety texture to the drink, enhancing its flavour.

Smoothies: Smoothies can be made with frothed almond milk. It gives the smoothie a creamy texture, making it more delicious and filling.

How to Steam Almond Milk

In the beginning, alternative, plant-based milk may seem complicated to try and steam in comparison to regular cow’s milk. We’re here to tell you that’s not the case! Here are three ways to steam almond milk at home: 

With A Steamer

The most straightforward way to steam almond milk is to use the steamer attached to your espresso machine. Simply pour the milk into a jug and use the attached steaming wand, making sure you get a good froth from the bottom until the surface of the milk. 

However, if a steamer isn’t an option for you, we completely understand! There are other alternatives we will jump into. 

With a Microwave

For steaming milk in a microwave, you should use a microwave-safe jar. Pour the milk into the jar and give it a good, hard shake. Shake for at least 30 seconds to get everything frothy and bubbly. Now, put it in the microwave on low heat to warm it up. The foam will stay and you have the frothy milk you need for a nice latte!

With A Saucepan  

Another easy way to steam almond milk is by using a saucepan. Set your stovetop to a low heat before adding the saucepan with milk in it. Leave it on low heat for a few minutes as you use a hand frother to get the bubbly texture! 

The Science of Frothing Milk

how to froth almond milk

While we rarely stop and think of the mechanics of frothing milk, there is a science that determines how well the milk in question will froth. Certain factors decide whether your milk will froth properly and hold its shape or not at all.

To put it simply, the following will determine the way your almond milk will froth:

Protein and Fat Content:

Any kind of milk, dairy, or plant-based, has 3 main components: proteins, fats, and carbohydrates. The amount of fat and protein (and their ratio) is what determines the frothiness of your steamed milk.

Milk containing more fat and protein will froth much more easily than low-fat milk types. Because of this, you should try to buy coffee almond milk with higher fat content.

Milk Quality:

The quality of milk is crucial when using non-dairy variants. Use the freshest almond milk you can find, as milk close to expiring will barely froth at all. Also, some cheaper brands of almond milk use very little almonds, making the milk ultra-thin and watery that won’t even froth.

Even the kind of almonds used is important. Use a brand that uses quality almonds that yield almond milk with a good amount of fat, protein, and sugar. A smooth and rich almond milk will give you the best kind of froth for your coffee.

If you make your own almond milk at home, use good almonds and don’t water it down too much.

Temperature:

Dairy milk is notorious for being finicky; it splits or curdles at high temperatures and goes brown quickly-stuff you wouldn’t want in your cappuccino. Vegan milk also needs to be monitored when heating, as it can curdle as well.

When it comes to almond milk, you need to be extra careful. Almond milk scorches and burns very quickly, so warming in a pan is risky as the milk can boil and burn. 

Can you boil almond milk in a microwave? It’s unlikely, so this is the safest route.

The wrong temperature can mess with the froth and cause your milk to lose its texture.

According to a study by the Journal of Food Science and Technology, heating your almond milk to around 65°C (or 150-155°F) is the sweet spot for achieving a great froth.

Can you microwave almond milk without it splitting? Yes, but you have to keep an eye on it.

How to Froth Almond Milk

best almond milk for frothing

This section will look at how to make froth milk using almond milk. Whether you have an espresso machine with a steaming wand or just an old microwave, or single frother unit, you will be able to make steamed almond milk that is textured and velvety.

Using A Steaming Wand:

This may be the most common way to steam milk and is used by baristas and coffee shop workers. Steaming wands come with espresso machines and work by infusing the milk with steam, creating bubbles and texture that give rise to lots of foam.

Here’s how this works:

  1. Add cold almond milk to the steaming pitcher or any steel pitcher.
  2. Hold the pitcher at an angle and place it under the steaming wand.
  3. Insert the steaming wand into the milk, holding just below the surface of the almond milk. Use the steam output dial to give off a steady stream of steam.
  4. Hold the tip of the wand to the side of the pitcher, making a sort of vortex in the milk.
  5. Move the pitcher around the wand, then up and down, as this incorporates more air into the almond milk which splits larger bubbles.
  6. Over time, the bubbles will get smaller and the milk will double in size. Once this happens, your milk is done steaming.  Turn off the dial and remove the pitcher from under the wand.

Your almond milk is done steaming and is ready to use! The thick and frothy milk will smoothly mix with the espresso and has lots of foam that you can use to make latte art.

Using a Handheld Frother:

Battery-operated handheld frothers are the easiest and most accessible way to make steamed milk if you don’t have a home café with an espresso machine and steaming wand attachment. They are cheap, easy to use, and froths milk quickly.

  1. Pour your almond milk in a large jar, mug, or pitcher.
  2. Insert the tip of the frother into the milk, just below the surface.
  3. Turn on the frother and froth the milk for 30 seconds.
  4. Then, move the wand up and down and froth for another 30 seconds.
  5. Finally, swirl the wand around the pitcher and continue frothing until the milk is silky and increases in volume.
  6. Microwave the milk for 30 seconds, as this heats up the milk and stabilizes the foam, giving you a little more time to worth with the textured milk.

Using a Jar:

If you are desperate for a good latte but don’t own a conventional frother, this method is for you. Here is how to froth milk without frother-all All you need is a sturdy jar!

  1. Fill half or a third of a jar with your almond and make sure the lid is screwed on tightly.
  2. Then shake the jar vigorously. This will take a bit of time so don’t lose patience. Keep shaking the jar until the milk almost doubles in size. The process takes around 5 minutes, so consider it an arm workout!
  3. Then, remove the lid and microwave the milk for 30 seconds. This will stabilize the foamed milk and give it a smooth and even texture.
  4. Pour the frothy milk into your coffee, or spoon the foam over your drink.

Tips for Perfectly Frothy Almond Milk

Heating almond milk is tricky, and frothing it is even harder, especially if you are new to the art of whipping up coffee beverages. Combining the two can be intimidating, but these tips will make the whole thing seem much easier!

Use Fresh Milk:

As mentioned earlier, your almond milk needs to be as fresh as possible. Make sure your milk has 5-6 days before it expires, as milk at this stage will yield the most foam and smooth, textured milk. Freshly made almond milk can hold its shape when steamed and is less likely to curdle when heated.

Keep Things Chilly:

When frothing almond milk, make sure the milk is very cold and taken right out of the fridge. Almond milk froths better when cold. Can you warm almond milk before frothing? Yes, but it won’t foam up as well as cold milk.

Use a Smaller Container:

The pitcher you steam or froth your milk should be rather small, just large enough to hold the volume of the milk when it doubles. This will give your frothed milk a nice and even texture, with microbubbles instead of larger ones.

Frequently Asked Questions

Here you will find answers to questions or issues that arise when frothing almond milk.

01. Can I Heat Almond Milk?

Heating almond milk is doable, but the milk overheats and burns very quickly. As a result, you have to be careful and heat it in a microwave or double boiler.

02. Is It Possible to Froth Flavored Almond Milk?

As long as the almond milk has the right levels of fat and protein, it will froth just fine. However, if you don’t want to risk messing the milk up, add flavored syrups and sauces after assembling your coffee.
03. Which Non-Dairy Milk is the Best for Frothing?

When it comes to frothing plant-based milk, coconut milk and oat milk is the best option.

04. Which Almond Milk Froths the Best?

Almond milk that has more protein will froth better. It is also important to make sure that the milk has lots of fat as well.

05. Why Does My Almond Milk Curdle When I Add It to My Coffee?

Almond milk curdles very easily. The extreme temperature between freshly brewed hot coffee and frothy almond can cause it to curdle. However, while unappealing, the coffee will still be safe to drink and won’t affect the flavor.

In a Nutshell

Almond milk is one of the most popular plant-based milk out there. Adding it to coffee beverages will give your drink a nutty undertone that adds lots of flavors. Frothing almond milk the right way will help you make a coffee that tastes like stuff made by baristas at a fraction of the price.

Once you know how to froth almond, you can tweak lots of latte and cappuccino recipes to your own liking. Or you can continue using a range of great non-dairy creamers in your coffee. The choice is yours, as long as you make vegan coffee that makes your heart sing!

How to Make a Cortado: Discover This Great Coffee Beverage!

One of my favorite past times is trying out different coffee-based beverages, working my way through different variations, flavors, and ingredient ratios. 

Besides exploring different flavors, you learn so much more about how different ingredients work together, and you never get confused at the coffee shop!

If you are experimenting with various espresso drinks, you might have come across the cortado. Confused about what this drink is all about? This article will look at cortados and how it is different from beverages like cappuccinos and lattes.

You will also learn how to make a cortado at home with an easy cortado recipe. If you want to learn all about the cortado espresso drink, you’ve come to the right place!
What is a Cortado?

how to make a cortado

The cortado coffee drink is a small beverage, generally served in metallic or glass cups. This beverage is made by combining espresso and steamed milk in a 1:1 ratio. Sounds super simple right? It is a no-fuss drink that is much simpler than lattes and cappuccinos.

Unlike many other drinks we’re used to, cortados don’t have much foam, and baristas don’t make foam art with this drink. Instead, the drink uses creamy steamed milk to cut through the espresso, making a well-balanced beverage that is light and almost airy.

In this vein, the term ‘cortado’ comes from the Spanish word ‘to cut’. It was first made in Spain and spread across the country quickly as it grew in popularity. Like other Spanish drinks, it has nearly almost no foam, instead, the texture of the drink itself is light and well-blended.

The particular ratio of the cortado is meant to reduce its overall acidity. The fact that it is served in small cups means that you can’t customize the size in cafes or coffee shops. They are generally made with 2 shots of espresso and 2 ounces of milk.

Unlike the frothy and heavy milk found in cappuccinos, the steamed milk in cortados is thinner and lighter and is closer to that used in lattes. The cortado is also called a Gibraltar in some places.

What are the Benefits of Consuming Cortado Coffee?

Cortado coffee, like all coffees, has numerous health benefits. It has a lot of antioxidants, which can help protect your cells from free radical damage. Coffee has also been demonstrated to improve mental function and alertness, which can help you stay focused throughout the day.

Caffeine is also present in cortado coffee, which can help to stimulate your metabolism and aid in weight loss. It is crucial to note, however, that excessive caffeine use can have detrimental side effects, which we will explore later in this article.

What are the Risks of Consuming Cortado Coffee?

While there are numerous advantages to drinking cortado coffee, there are also hazards and negative effects to consider. The high caffeine concentration is one of the key problems. Caffeine is a stimulant that in certain people can produce jitters, restlessness, and anxiety. Caffeine can also cause dehydration because it is a diuretic that increases urine output.

The milk component of cortado coffee is another possible concern. Cortado is made with equal parts espresso and steamed milk, which might be problematic for people who are lactose intolerant or allergic to milk. Those who are lactose intolerant may experience digestive troubles such as bloating, gas, and diarrhoea after drinking cortado coffee.

In addition to the concerns listed above, drinking too much cortado coffee might cause insomnia due to the high caffeine level. Consume cortado coffee in moderation and be mindful of your body’s caffeine response.

How to make a cortado at home

how to make a cortado at home

Want to know how to make a cortado at home? This section will show you two easy cortado recipes: one hot and one iced. As long as you have a few simple ingredients and tools, this drink is super easy to make!

Classic Cortado:

The classic cortado is a simple and straightforward drink, with no frills or hard-to-find additions in the recipe.

Ingredients:

Instructions:

  1. Grind your coffee beans and then use a good espresso machine to pull 2 shots of espresso. Extract the espresso to a cup that can hold 4 to 4.5 ounces of liquid.
  2. Then, use a milk frother to steam or froth your milk. Since smaller amounts get scorched quickly, it is best to steam 4 ounces of milk. You only need to steam/froth until the milk is silky and airy, there’s no need to keep going until there’s lots of foam.
  3. Pour 2 ounces of the milk into your cup of espresso.

That’s it! You can add the sweetener you want, as well as any syrups or sauces for flavoring when serving. A popular variant of this drink is made by replacing the dairy with condensed milk, which makes for a thicker, sweeter, and more indulgent beverage.

Iced Cortado:

Want to beat the heat on a sweltering day? This chilly version of the Spanish cortado is the perfect drink for the summer.

Ingredients:

  • 2 shots of freshly brewed espresso
  • (Or use 2 ounces of coffee brewed in a Moka pot or percolator)
  • 2 ounces of steamed milk
  • Ice
  • Caramel or butterscotch syrup (Optional)

Instructions:

  1. Brew your coffee, or pull shots of espresso from your coffee machine.
  2. Steam 2 ounces of milk until silky.
  3. Combine the milk and coffee.
  4. Fill a separate glass with ice. Then pour the coffee over the ice. As cortados are small portion-wise and are pretty strong, the ice will chill it quickly without watering it down.
  5. Drizzle extra syrup on top if needed. You can also drizzle the syrup around the glass before adding the ice and coffee for a more Starbucks-ish look.

Pro-Tip: Try a shaken iced cortado instead of the regular one! Add the coffee and ice to a cocktail shaker and give it a few good shakes.

The shaking ‘expands’ the coffee and makes it creamier and gives it more body. It also has more foam on top when poured into a glass.

How to make a cortado with nespresso

If you own a Nespresso device, you can use it to make an easy cup of cortado at home. This is a good option if you want a quick drink without any extra equipment. Here is how to make a cortado Nespresso:

Ingredients:

  • Coffee capsule
  • Cold milk
  • Sweeteners/syrups/sauces (Optional)

Instructions:

  1. First, brew the coffee in your Nespresso machine using the capsule. Add the coffee to your cup.
  2. Froth your milk and then heat it in a microwave for 20-30 seconds.
  3. Pour the milk into your coffee, making sure the amounts are in a 1:1 ratio.
  4. Add sweeteners and flavorings if you want and voila! You have a Nespresso cortado.

Cortado vs. Latte:

Cortados are often confused with lattes, as the texture of the milk in both drinks is similar. They also contain the same amount (2 shots) of espresso.

The difference? Lattes contain much more milk, which dilutes the drink. As a result, it is much less potent when compared to cortados.

Also, lattes include lots of silky milk foam, as well as latte art. Cortados are much simpler and have very little foam.

Cortado vs. Cappuccino:

Cortados always have 2 shots or 2 ounces of espresso, whereas cappuccinos have 1-2 shots. Furthermore, while cortados have 2 ounces of milk, cappuccinos will have 4-5 ounces of milk. The milk is more textured and lighter than that of a cortado as it is steamed for much longer.

A cappuccino also has a thick and luxurious amount of micro-foam on top. In contrast, cortados have a very thin layer of foam that isn’t very textured.

Cortado vs. Macchiato:

Macchiatos and cortados have the same amount of espresso, so the only difference lies in the milk. While cortados contain 2 ounces of lightly steamed milk, macchiatos contain 1 ounce of milk that is heavily frothed.

This makes macchiatos smaller in volume than cortados. Because they are more concentrated, you will also get more of a caffeine kick from a macchiato. In comparison, cortados are slightly larger and a little less potent.

Cortado vs. Flat White:

cortado coffee vs flat white

Flat whites are also similar to cortados and contain the same amount of espresso. However, like lattes, flat whites contain more milk which makes it more diluted. The milk is also frothed until it’s very silky and textured, so flat whites have a creamier mouthfeel than cortados.

Flat whites are also much thicker and larger than cortados. They are also more elaborate when compared to cortados because flat whites have more foam on top, with often extensive and fancy foam or latte art.

Best Desserts to Pair Up with a Cortado

While cortados make a killer drink for your morning coffee, or as an afternoon pick-me-up, it is also great with desserts. Serving this beverage with a number of desserts will cement your reputation as the perfect host among your friends:

Cheesecake: We love any excuse to stuff cheesecake into our faces, but this decadent dessert pairs well with this simple coffee. The tanginess is counteracted by the low acidity of the cortado and the creaminess of the cheesecake is matched by the velvety texture of the coffee.

Tres Leches Cake: This dessert isn’t too sweet but it is extremely rich-soaked in a combination of 3 different kinds of milk and frosted with whipped cream. It’s no surprise that it complements the creamy, yet strong nature of the cortado.

Coffee Cake: The classic coffee cake with a cinnamon filling and crunchy streusel topping will taste great with any kind of coffee drink, and the cortado is no exception.

Biscotti: A combination of biscotti and cortado is a fun spin on the traditional Italian breakfast of this cookie and a cappuccino. Almond biscotti is an especially great partner when paired with cortado made with non-dairy milk.

Tiramisu: If you can’t get enough of the delectable coffee flavor in your food and drinks, pairing tiramisu with a strong cortado will give you your caffeine fix. As with cheesecakes, the creamy, tangy, and rich mascarpone in the tiramisu is balanced by the strong, smooth cortado.

Got Any Questions?

Have more questions? Head over to the next portion where you will find answers to questions people often have about cortados.

01. Does Starbucks Offer Cortados?

Starbuck doesn’t have an official cortado, but you can still get one by asking for two shots of espresso with 2 ounces of silky steamed milk on top.

02. Are Cortados and Flat Whites the Same Drink?

Although cortados and flat white are similar, a flat white is different because it contains more milk and is topped with lots of micro-foam.

03. Are Cortados Stronger Than Flat Whites?

Because cortados contain less milk, they are more concentrated and stronger than flat whites.

04. How Does a Cortado Taste?

Cortados are strong, but rather balanced. It is less acidic and the milk added is enough to just cut through the espresso without diluting it. As a result, they have a strong espresso flavor and a creamy and light mouthfeel.

05. Can I Make a Cortado with Almond Milk?

Yes, cortados can be made with plant-based milk like almond, coconut, and soy.

06. How Many Shots are There in a Cortado?

A cortado contains 2 shots of espresso.

07. Is cortado coffee safe to drink during pregnancy?

While moderate coffee consumption is generally considered safe during pregnancy, it’s recommended to limit caffeine intake to 200 mg per day. Cortado coffee, like other types of coffee, contains caffeine, so it’s important to consume it in moderation during pregnancy.

In a Nutshell

As you can see cortados might just be the easiest coffee drink as there isn’t any guesswork of complex ratios involved. Simply combining equal parts of espresso and steamed milk will give you a perfectly balanced and smooth drink.

Once you know how to make a cortado, you easily customize the drink to your preferences. You can even experiment with things like cream, half-and-half, and even evaporated milk! 

Moreover, the combinations of syrups and flavoring that you can play around with. You’ll be sure to love this drink as much as your favorite latte!

How to Counteract Caffeine: What to Do When You’ve Drunk Too Much Coffee

Shaky hands, cramps, and an overall jitteriness. If you ever drank too much coffee you know the feeling. Sometimes, when people have trouble sleeping, they make up for the incoming drowsiness by drinking an extra cup or two of coffee or tea.

But instead of keeping you awake and alert, this might cause a number of issues. Too much caffeine can give you unpleasant symptoms, the most notable being caffeine nausea and having the jitters.

If you’ve drunk two (or three or even four) cups of strong coffee, and you’re feeling unwell, you will have to flush out the caffeine. This article looks at the ways how to counteract caffeine safely and get back to feeling normal again.

How to Counteract Caffeine

caffeine nausea

A cup of tea or coffee can energize you when you’re feeling sluggish, but too much can bring forth a myriad of nasty symptoms. These range from palpitations and shaking hands to headaches, nausea, and diarrhea.

While a cup or two of coffee every day is fine for most people, it is important that you stay within the limits and not overdose on caffeine. While tolerance levels may differ from person to person, it is generally agreed that 400mg (about 4 cups of strongly brewed coffee) is the cutoff point.

Because of this, it is recommended that you drink no more than 3 cups of coffee a day, as exceeding the 400mg limit will leave you feeling sick. But if you’ve gone overboard with your favorite cold brew, you can do these things to counteract all the caffeine you consumed.

Drink Water:

Teas and coffee are known to have slightly drying properties and can cause dry mouth for many people. Because of this, caffeine and nausea are often seen going hand in hand. This can also cause headaches and dizziness. To counteract these effects, drink lots of water.

The caffeine will eventually leave your system but in the meantime, keep sipping from a large bottle of water. This will reduce the feelings of nausea and keep you feeling too sick.

Get Moving:

No, we aren’t talking about a full workout. But walking and even jogging can help deal with caffeine jitters. A gentle workout will get your blood flowing and help you feel less unsettled. If you don’t like the idea of walking or exercise, you can try something like yoga or Pilates.

Meditate:

Looking for how to reverse the effects of caffeine? If you want something more calming than yoga, meditation can help combat nausea and anxiety, soothing jitters and antsy feeling in your hands and feet.

Combining meditation with the deep breathing exercises mentioned below is also useful for many people. Meditating for 5-10 minutes will increase the supply of oxygen to the brain, calming your thoughts and making you feel alert, and soothe your nerves.

Take a Deep Breath:

Besides the jitters, too much caffeine symptoms can also manifest in anxiety. Deep breathing exercises or techniques are the easiest ways to counter caffeine. This will reduce feelings of anxiety and stress, making you feel much more relaxed.

A quick breathing exercise involves lying down, then breathing through your stomach as deeply as possible. Once your chest rises, hold your breath for a few seconds and then slowly exhale through your chest then your stomach.

Replenish Your Electrolytes:

If all that caffeine upset your stomach, drinking water alone won’t help. You need to make up for the electrolytes that your body has lost, as well as water. 

You can drink something like Pedialyte to restore your body’s electrolyte imbalance. You can also drink smoothies, milkshakes, juice, or Gatorade to stave off dehydration.

Alternative Methods for Counteracting Caffeine

As someone who is knowledgeable on the topic of reducing caffeine intake, let me share my thoughts on the matter. For those who seek to lower their caffeine consumption or alleviate the consequences of caffeine, there are several options available.

For example, herbal remedies such as chamomile tea, passionflower, and valerian root have been found to have a relaxing effect on the nervous system, potentially mitigating symptoms like anxiety and restlessness that can be brought on by caffeine.

Additionally, lifestyle changes such as stress-reduction through exercise and relaxation techniques, getting enough sleep, and maintaining a nutritious diet can help to counteract the effects of caffeine.

Finally, replacing caffeinated drinks with decaf options or choosing caffeine-free energy sources such as herbal tea or water can also aid in reducing overall caffeine intake.

How to Get Caffeine Out of Your System

drank too much coffee

One way to counteract caffeine is to flush it out of your body. If you’re trying to get your shaking hands and throbbing headache under control, knowing how to get rid of caffeine can help you out. Try one or a combination of these methods for quick relief:

Stop Consuming Caffeine:

And we mean all kinds of caffeine. This includes things like green tea, chocolate, chocolate-covered coffee beans, soda, energy drinks, and even certain desserts or ice creams. 

This might seem like a no-brainer but you might feel like snacking to feel better, introducing more caffeine into your system.

Stay Hydrated:

Drinking lots and lots of water will help you feel better as you wait for the caffeine to leave your body. It can even help speed up the process slightly while counteracting the diuretic effects of caffeine. So, if you feel like you’ve drunk too much coffee, drink a few glasses of water.

Eat Fiber-Rich Food:

There is some evidence that consuming foods with lots of fiber will absorb some of the caffeine in your system. Others suggest that it will slow down the release of caffeine. 

Either way, grabbing a piece of fruit will help you wait out the caffeine wave. You can also consume lentils, starchy vegetables, whole-grain baked goods, and even snack on nuts and seeds.

Wait It Out:

Sometimes, the best thing you can do is just ride out the effects. A caffeine overdose is a bit like a hangover; you just have to wait for it to go away. This can last anywhere from 4 to 6 hours, but this will depend on the strength and amount of coffee consumed, your weight, and overall caffeine tolerance.

If you are caffeine sensitive, this can take even longer. So bear down, grit your teeth and just wait for the caffeine to leave your body by itself. In the meantime, stay hydrated, get your blood pumping, and try to relax with some deep breathing exercises and meditation.

Having a light, but healthy meal will also slow down or decrease the effects of caffeine. Best of all, get some exercise to use up that jittery, nervous energy that comes with a caffeine overdose.

The Long-term Impact of Caffeine on the Body


Caffeine, a stimulant that affects the central nervous system, increases attentiveness and energy. However, excessive caffeine use may have a number of detrimental consequences on the body, including increased heart rate/blood pressure, anxiety, sleep disturbance, and an increased risk of osteoporosis. It may also cause dependence and withdrawal symptoms in rare cases.

It is important to recognise that caffeine’s effects vary from person to person and may be influenced by factors such as body weight, tolerance, and heredity.

Recommended Daily Intake of Caffeine

Age/GroupRecommended Daily LimitEquivalent to
Adults400 mg4 cups of coffee
Pregnant Women200 mg2 cups of coffee
Children (4-6 years old)100 mg1 cup of coffee
Children (7-9 years old)2.5 mg/kg body weightDepends on weight

The recommended daily caffeine consumption varies depending on individual parameters such as age, weight, and general health.

According to the Mayo Clinic, the usual safe limit for most individuals is 400 mg, which is similar to 4 cups of coffee. Caffeine use should be limited to 200 mg per day for pregnant women owing to correlations with increased miscarriage risk and other harmful consequences.

The suggested limit for children and teens is significantly lower, with a ceiling of 100 mg for 4 to 6-year-olds and 2.5 mg/kg of body weight for 7 to 9-year-olds.

Got More Questions?

Below you’ll find answers to questions we get asked the most about counteracting caffeine.

01. How Long Does the Effects of Caffeine Last? 

The effects of caffeine last for 4-6 hours after the compound is absorbed into the bloodstream.

02. How Can I Counteract Caffeine to Sleep?

Drinking plenty of water, having a filling meal, exercise, and meditation can all help minimize the effects of caffeine. Deep breathing techniques, meditating, and yoga can help you sleep after a caffeine overdose.

03. What Foods Counteract Caffeine?

Food with high water content (like watermelon or cucumbers) helps reduce the effects of caffeine. Fiber-rich foods, such as apples, celery, and whole grains also help. You can also quell coffee-induced headaches with things with a high potassium content, like bananas.

04. How Can I Cure Caffeine Sensitivity?

This can be dealt with by consuming lower levels of caffeine. Swap out your coffee for things like green or white tea. Herbal teas will also energize you without all the caffeine. You can also eliminate coffee from your diet entirely.

05. What are the Symptoms of a Caffeine Overdose?

According to medical professionals, the common symptoms of too much caffeine include things like:

  • nervousness or jitters
  • headache
  • shaking hands
  • dizziness
  • irritability
  • diarrhea or an upset stomach
  • irregular heartbeat or heart palpitations

In a Nutshell

Overdoing the coffee can spell disaster, and have you feeling worse than the exhaustion of little sleep. It can be difficult to focus at work or school with a pounding heart and shaking hands. Knowing how to counteract caffeine in advance means that you will be prepared to counteract the effects.

So the next you realize your fourth cold brew will cause you misery in 30 minutes, fill up your water bottle, get something to eat, and put on your running shoes. It’ll be a tough couple of hours, but these tips will help you face the worst of it. 

The good news? In around 5 hours you’ll start to feel like yourself again.

How to Clean Breville Espresso Machine – Tips and Precautions

What’s the point of spending hundreds of dollars on a premium espresso machine like Breville only to have mediocre and bland coffee? 

The reason why you are having a hard time making great coffee is probably that your espresso machine is filthy! The problem with espresso machines is, you can not tell whether they need a thorough cleaning or not. So having a routine helps a lot. 

A proper process is also important to get the best cleaning result. In this article, we will discuss how to clean the Breville espresso machine the best way!

You will find an easy guide on how to clean breville espresso machines as well as some tips and tricks to maintain its quality over time!

You may also like: Best way to clean a coffee maker without vinegar

Best Way to Clean a Breville Espresso Machine

how to clean breville espresso machine

Descaling Breville Espresso Machine:

If you want to keep your Breville espresso machine in its best condition, descaling is essential. You have to descale once a month to get a steady water flow and tasty coffee.

You might be wondering what descaling is and how it’s different from regular cleaning. Regular cleaning removes dirt and grimes whereas descaling removes buildups. 

Whether you use tap water or filtered one, the water contains many minerals. Over time these minerals build up inside and create a thick, tough layer. Usually, it’s calcium and can be removed quite easily. Breville barista express manual is very helpful for this.  

All you need is vinegar and water. Keep in mind that vinegar can cause a bad smell that tends to linger for a few days. You can buy descaling solutions that do the same job without any bad odor. 

How to descal Breville espresso machine

[amazon box=”B00CH9QWOU”]

  1. Set your Breville Espresso machine to “stand by” mode. Then unplug the machine from its electrical outlet. 
  2. The next thing you need to do is fill the water tank with water and your preferred descaling liquid. In our case- vinegar. Use a 50:50 ratio of water and vinegar if you have hard water.
  3. The next thing you have to do is place a container in the drip pan. This will catch any water and vinegar mix. 
  4. Plug your Breville espresso machine and turn it on. When you see the orange temperature light glowing, it’s time to brew. 
  5. Select the “Espresso” mode and let the machine run that vinegar-water mixture through its system. 
  6. Position the steam over your container and press the “Steam” option. At this point, the solution will start coming out of the wand. 
  7. As the liquid comes out, it will bring all the grimes and buildups with it. 
  8. Repeat this process a few times if you are not satisfied yet. Then run three to six more cycles with clean water to remove the vinegary smell. And that’s how you descale Breville espresso machine.

Regular Cleaning:

breville espresso machine cleaning

Remove Filter:

We all forget to do this everyday but we need to remove the filter holder right after brewing. Empty the used coffee grounds in the trash and then clean it under running water. Use a scrubbing brush if necessary. This takes only 2 minute but keeps your machine pristine for years. 

Brew Plain Water:

After you have put the empty filter in the machine, brew with pain water for ten to fifteen seconds. Then gently dispose of the hot water into the sink. This step helps to remove coffee residue from the brewer. 

Wash Froth Enhancer:

One of the appeal of a home espresso machine like Braville is its froth enhancer. You need to clean it regularly too. Always pull out the froth enhancer right after using it to clean. Use warm water to rinse it. 

Clean The Drip Tray:

Yes, you need to clean the drip tray regularly. Empathy it into the sink and give a gentle wash with warm water. If necessary, you can use dishwashing liquid too. Always let the tray dry completely before putting it back inside the Breville espresso machine. 

Wipe the Exterior:

Use a damp cloth or paper towel to wipe down the exterior. As you touch the espresso machine every day, dirt and bacteria sit on top of it. Each time you touch the machine, you get exposed to them. So wiping the machine every day keeps it clean and new. 

😷 Safety Precautions

  • Unplug the machine from the power source before cleaning.
  • Wear protective gear such as gloves, eye protection, and a dust mask.
  • Avoid using any harsh chemicals such as bleach or ammonia.
  • Use mild detergent solutions instead.
  • Keep the machine away from water to avoid any water damage.
  • Dry the machine completely after cleaning.

How Do You Make Coffee in a Breville Espresso Machine?

breville espresso cleaning instructions

We could write dozens of different recipes you can do with your Breville Espresso machine. But for now, let’s stick to the basics. Here’s how you make a striking, sharp espresso with Breville Barista Express:

01. Select Coffee Beans:

No matter how fancy and expensive your espresso machine is, without good coffee beans, the whole effort is basically a waste of time. Don’t use basic options. Instead, go for Robusta beans in a blonde roast. You can use Arabica beans in a darker roast for a smooth and nutty flavor. 

There are honestly so many different coffee beans to choose from and each has its unique flavor profile. So pick something that you really love. 

02. Choose Grind Size:

Whether you want a fine grind or a coarse one, you need to decide first. Finer grind provides a more intense flavor with higher caffeine content whereas coarse grind is smoother. Ideally, you need a very finely ground to make a great espresso. For a single shot of espresso, you need between 7-9 grams of coffee. Everything is about weight and timing in espresso making.  

03. Bring out the Portafilter:

Fill the portafilter and level it gently with your hand. It should be evenly distributed. Then place it on a countertop and apply even pressure with your tamper. This is one of the most satisfying steps of espresso making.

04. Start the Brew:

Now it’s time to make the espresso. Run the machine without the portafilter to purge the group head. Then lock it in place and start the brew. You might not get it on the first try but the more you do, the better you get at it. The first shot usually looks light caramel brown. It should look viscous and voluminous. Taste it to see if it’s sour or not. If the shot tastes a bit sour, grind the beans for next time. 

And that’s it! Your single-shot espresso is ready to enjoy!

You may also like: Can Ground Coffee Go Bad?

Breville Espresso Machine Maintenance Tips

Some routine upkeep might prevent problems with your Breville espresso machine. Be cautious to descale the equipment on a regular basis to avoid mineral buildup. Use a microfiber cloth to wipe off the steam wand and other moving parts.

If you don’t use a filter on your Breville espresso machine, it will have heavy calcium and magnesium buildup from your water. 

Most of our tap water is actually hard water with a high acidic level and is filled with many minerals. These miners can create a layer inside the machine causing it to get clogged. 

Adding a filter slows down that process. With a filter, you will have to descale your Breville Barista Express once a month. But without it, you might have to do that 2-3 times a month. That’s just a lot of work for something that can be fixed easily. 

[amazon box=”B00CH9QWOU”]

To flush your Breville espresso machine, all you have to do is press the 2 CUP button. This will run hot water through the group head for 30-35 seconds. Then activate the steam for 10 seconds. 

Repeat this cycle a few more times until the water tank is totally empty. Your Breville machine will be properly flushed. 

FAQs

How Often Should I Clean My Breville Espresso Machine?

If you drink coffee every single day, you should clean your Breville espresso machine once every three weeks. If you drink coffee more than once a day, you need to clean more frequently. 
The calculation is simple. The more you use your espresso machine, the more you have to clean it. Breville espresso machine cleaning should be a regular thing and not something you only do when it’s malfunctioning. If you drink coffee sparsely then clean your Breville espresso machine once a month.

How Long Do Breville Espresso Machines Last?

Breville is known for its premium quality construction and durable materials. Each of their espresso machines and Barista Coffee maker is built to survive years and years of abuse. If you take care of your Breville espresso machine and clean it on a routine basis, it can serve you easily for more than 6-10 years! Breville is a reliable brand for passionate coffee lovers. They don’t create disposable products. 

How Do You Flush A Breville Coffee Machine?

To flush your Breville espresso machine, all you have to do is press the 2 CUP button. This will run hot water through the group head for 30-35 seconds. Then activate the steam for 10 seconds. 
Repeat this cycle a few more times until the water tank is totally empty. Your Breville machine will be properly flushed. 

Why Is My Breville Espresso Not Working?  

There can be many reasons why your Breville espresso machine is not working properly. One of the most common reasons is a blockage in the water reservoir. When the water can not travel properly in front of the reservoir to the espresso machine, it does not work. 
This can happen due to not cleaning the machine on a regular basis. Sometimes air bubbles get stuck and cause a disruption in the water flow. 
To avoid this from happening, always let the machine rest for 15-20 minutes after each use. Remove old water and add clean, filtered water every day. You can try back-flushing the machine to remove any blockage. 

How Do I Descale My Breville Grind Control? 

One of the many unique things about the Breville espresso machine is its grind control system. With this, you can adjust the grinding size depending on your preference. The customizable grind size and coffee volume are ideal to suit anybody’s taste. 
When it’s time to descale your machine the message, “dESC ” appears on the LCD screen. It’s ideal to descale as soon as you see that message. 
To descale all you have to do is press the carafe button and select a strength level. Use a pre-ground level for the best result. 
Use a mixture of vinegar water and pour it into the water tank. The display usually says “4 CUPS”. Then press the carafe button and rotate the dial to 12 cups. 
Press the “Strength” button until the descaling process begins. When the process completes, the screen will send a message saying “READY”. This is how you know your Breville Grind Control has been cleaned thoroughly. 

Takeaway

If your espresso machine is dirty, there is no chance of making a single cup of good coffee in it. The Breville espresso machine is not a simple kitchen gadget. It’s a commitment for the most passionate coffee enthusiasts. To them, cleaning and maintaining this beast of a machine is a part of the joy. 

As espresso machines like Breville are made to last you years after years, taking care of it is an investment in itself. Hopefully, with our easy guide, you now know how to clean breville espresso machine properly

Have some tips for us? Let us know in the comments down below!

Do Oily Coffee Beans Affect the Taste of Coffee?

When you’re in the market for good coffee, you may have noticed that some coffee beans are more “oily” than others.

But what is the real reason behind the oiliness of some coffee beans? Does it change the taste of your coffee?

In this article, we’ll break down why is your coffee beans oily, as well as the impact that oiliness has on the flavor of your coffee.

From the effects of the coffee roasting process to the type of coffee bean used, we’ll examine the various factors that contribute to the oily sheen of coffee beans.

Some Common Reasons Behind the Oiliness of Coffee Beans

Do Oily Coffee Beans Affect the Taste of Coffee? 11

Coffee beans are the seeds of a fruit, and like other fruits, their appearance can vary from one variety to another.

Whether the coffee beans are oily or not is determined by their variety, their growing conditions, and the roasting process.

Naturally Oily Coffee Bean

Different varieties of coffee beans have different levels of oiliness. For example, Arabica beans are more oily than Robusta beans.

This is because Arabica beans are grown in higher altitudes, where the air is cooler and drier. This environment results in less oil production in the beans.

Coffee Beans Roast Level

When coffee bean is harvested, farmers cover them in a protective layer of surface oil. This layer of oil helps protect the bean from the elements while processing, and the coating also helps to preserve the flavor of the green coffee bean.

As the green oily coffee beans are roasted, the oil is cooked off, leaving the bean dry and crunchy (initially).

However, coffee beans contain oils inside them where all the flavors, amino acids, antioxidants, and caffeine contents reside. This coffee oil starts coming out as it is roasted from the endosperm to the surface of the coffee bean.

Dark roast beans tend to be more oily than light or medium roast beans, as the higher temperatures and long roasting times cause more oil to be released from the beans.

Dark Roast vs Dark Beans

When it comes to dark beans, the oils are not released during the roasting process, but rather during the brewing process.

The oils in dark coffee beans are released when the beans are ground and exposed to hot water, which causes them to “bloom” and release their oils.

The oils in dark beans are what give them their deep, rich flavor.

Processing Techniques

How the coffee roasters process beans can also affect the level of oiliness in coffee beans.

Wet-processed coffee beans, for example, tend to be oilier beans than dry-processed beans, as the wet-processing method leaves more of the oils intact.

Storage Conditions

Coffee beans that are stored in warm, humid environments will release more oils, according to a study on Molecules Journal, resulting in oily coffee beans.

Also, the oils in your coffee bean will begin to leak if they have been stored on a shelf at the store for a long period. This is why we suggest buying recently roasted coffee.

The Chemistry Behind Oily Coffee Beans

Oily coffee beans are the result of the coffee roasting process, and the chemistry behind it is fascinating.

When coffee beans are roasted, the bean’s outer layers undergo a chemical reaction called Maillard Reactions.

This reaction occurs when the heat from the roaster causes the proteins and sugars present in the bean to break down, forming new compounds and producing the characteristic aroma and flavor of the coffee roasts.

During the roasting process, oils are released from dark roast coffee beans, which is what gives coffee beans their trademark oily texture.

The oils are composed of triglycerides, which are fatty acids that are responsible for the coffee’s flavor and aroma. These triglycerides are broken down by the heat of the roaster, and the oils are released.

The oils released during the roasting process also contribute to the unique flavor of the coffee. The oils contain compounds called esters which provide coffee with its characteristic flavor.

These compounds also interact with the proteins and sugars present in the beans and contribute to improving flavor.

It is important to note that the oils released during roasting can be harmful if they are not handled properly. They need to be stored in an airtight container and kept away from heat and light, as these will cause the oils to break down.

If the beans are not stored or handled properly, they can contain rancid oil, leading to off-flavors and a less-than-ideal cup of coffee.

Are Oily Coffee Beans Good or Bad?

Do Oily Coffee Beans Affect the Taste of Coffee? 12

Now that we understand the underlying reasons behind shiny coffee beans, the question comes “is this a good thing or bad?”

Oily coffee beans have been a subject of debate among coffee aficionados for some time now.

On one hand, some believe that the residual oil on the beans helps to improve the flavor and texture of the final cup. On the other hand, some say that oil can ruin the flavor and make the coffee taste unpleasant.

The truth is that ideal coffee depends on how you prefer it.

Many people find that the added coffee oil on the over-roasted beans can give a more intense flavor to the final cup of coffee, making it more robust and full-bodied. This is especially true for dark-roasted coffee beans and espresso blends.

Some people don’t like the oily texture of roasted coffee beans and may find that it detracts from the flavor of the coffee.

Another factor to consider is the freshness of the beans. If the beans are fresh, the oil on them will help to lock in the flavor, ensuring that the coffee tastes better for longer.

However, if the beans are old and the oil has had time to oxidize, the flavor of the coffee will be affected.

For some people, oily coffee is difficult to digest. So, you may want to start with a light roast if you’re not accustomed to drinking coffee oils from long roast.

What Are Some Problems with Oily Beans?

Do Oily Coffee Beans Affect the Taste of Coffee? 13

Oily coffee beans can sometimes cause weird problems:

Bitter Taste

The first issue with oily coffee beans is that they can produce a bitter taste. This is because the oils can interact with the acids in the beans, creating a bitter flavor.

While some people may prefer the taste of a bitter cup of coffee, it isn’t for everyone.

Also, the bitter taste can be intensified if the beans are over-extracted. Therefore, it’s important to use the right burr grinders and water temperature when brewing coffee.

Clog Filters

Another problem with oily beans is that they can clog filters.

This can be a particular issue with metal filters, as the oils can get stuck in the small holes and block the flow of water. This can result in a weak, watery cup of coffee.

If you’re using a paper filter, the oils may not block the flow of water, but they can still affect the taste of the finished product.

Damaged Equipment

Oily beans can put extra strain on your grinder or espresso machine.

This is because the oils can collect in the brewing chamber and other parts of the espresso machine, making it difficult for the water to pass through.

If this happens, the automatic coffee machines may need to be taken apart and cleaned. This can be a time-consuming process and can also lead to expensive repairs.

When Should You Pay More Attention to Oily Beans?

If you have a fully automated expresso maker!

The machine grinders inside the espresso machine might be fussier. Oily bean tends to adhere to the walls of the grinder which will gradually impair the performance of your machine.

Continued usage of oily beans may result in exorbitant maintenance costs (regular cleaning) and equipment downtime. It may also alter the flavor of your espresso and result in an unpleasant aftertaste.

That’s why we don’t recommend using very dark roasts (more oily) for espresso machines. You can instead use a French press with medium-dark roasts.

How Can I Prevent Oily Coffee Beans Problems?

Here are some tips on how to prevent oily coffee beans:

Choose the light to medium roast coffee – The darker the roast, the more surface oil will be released. Choose a light-roasted coffee or medium-roasted coffee for the best flavor and the least amount of oil.

Buy fresh coffee grounds Older coffee beans start to lose their flavor and oils as soon as they are roasted. Buy freshly roasted beans or coffee grounds from a reputable source.

Use pre-ground dark roast – Pre-ground dark roast coffee beans can be used as an alternative to freshly roasted coffee beans. Grinding your beans just before brewing will help to keep the oils locked in the beans and not released during the brewing methods.

Clean your coffee makerOils can build up in your coffee maker over time. Regularly cleaning your coffee machine with vinegar or a special cleaner will help to remove any built-up oils. Or you can instead use a manual burr grinder.

Store properly – It’s important to store your beans in a cool, dry place to keep the oils from going rancid or becoming low-quality coffee beans. An airtight container is best. You can read this article on storing coffee beans for more advice on this.

Don’t use flavored coffee beans – Flavored coffee beans tend to have added oils and other ingredients that can increase the risk of oily beans. If you want a flavored coffee, it’s best to purchase unflavored beans and add the flavor yourself.

Use the appropriate amount of coffee-Using too much coffee will result in more oils being extracted, so measure out the appropriate amount of coffee for your brew.

Experiment with different brewing methods– Some brewing methods, like as French press, extract more oils than others, so experiment with different methods to determine which produce less oily coffee.

Experiment with different coffee blends- Some coffee blends are inherently less oily than others, so experiment with different blends to find one that suits your taste and is less oily.

You may limit your consumption of oily coffee beans and enjoy a less greasy, more flavorful cup of coffee by following these steps.

FAQs

Are Starbucks Beans Too Oily?

Starbucks coffees tend to be more on the oily side. This is because the roasting process used to create Starbucks coffee beans is “dark roasting,” which leaves an oily residue, but has a stronger, more intense flavor. However, Starbucks also offers light roast and medium roast coffee beans.

How to Dry Oily Coffee Beans?

To dry oily coffee beans, you can either spread them out on a baking sheet and bake them in the oven at a low temperature (200 degrees Fahrenheit or lower) for 15-20 minutes, or you can use a food dehydrator set to the same temperature. Make sure to stir the beans occasionally to ensure even drying.

How Long To Store Coffee Beans: Everything You Need To Know!

Learn how long to store coffee beans and whether they are raw or roasted and the type of storage to ensure they retain maximum freshness and shelf life.

How Long To Store Coffee Beans: Everything You Need To Know!

Coffee is one of the most beloved beverages in the world. The USA tops the list as the country that drinks the most coffee in the world. 

Did you know that coffee beans are the main ingredient in coffee? They are the seeds or berries that are used to make coffee. 

Coffee lovers prefer to grind coffee beans to make their coffee freshly. But coffee beans are expensive and difficult to store. They may lose their flavor and aroma if not kept properly after a few days.

In this article, we will provide you with an introduction to how long coffee beans last.

Factors That Affect The Shelf Life Of Coffee Beans

Factors That Affect The Shelf Life Of Coffee Beans

You’ve spent a good amount of money on buying the best coffee beans. 

But if you are not careful about how you store them, you’ll be disappointed with the results. 

So, let’s run through the factors that affect the shelf life of coffee beans. 

According to the National Coffee Association, the main factors that affect the quality and taste of coffee beans are:

  1. Heat

Coffee beans are best stored at room temperature or even in a cooler place like in a kitchen cabinet. 

Put them too close to the stove or oven, the heat will affect the beans and cause them to lose their flavor and aroma.

  1. Air

When air seeps through the packaging, oxidation occurs where oxygen reacts with the coffee beans and makes them lose their fresh aroma and taste.

That’s why invest in airtight packaging like opaque containers or resealable bags with air valves. 

These bags help keep oxygen from entering and reacting with the coffee beans while making a vent for the carbon dioxide to escape from the beans. 

  1. Moisture

Water content from the air or humidity can cause coffee beans to become stale and moldy. 

Once moisture comes in contact with coffee beans, the flavor will lose its original intensity. 

You should not only use airtight containers to store coffee beans but also keep the container in a dry place, away from any source of moisture. 

  1. Light

Direct light also affects the quality and shelf life of coffee beans by triggering photodegradation whereby molecules are broken down and the taste and aroma of the coffee beans change.

When light contacts the coffee beans, the oxidation process takes place faster and disintegrates the aroma oils from the coffee beans, resulting in a loss of flavor. 

What’s The Shelf Life Of Whole Roasted Coffee Beans?

What’s The Shelf Life Of Whole Roasted Coffee Beans

Roasted coffee beans last a long time. Because the whole roasted coffee beans are dry, there is very little chance of mold growth, unless you keep the beans in a moist place.

Freshly roasted coffee beans remain fresh for two to three weeks

If you store them in an airtight, opaque container with a one-way valve, you can extend their freshness window to one month.

That said, roasted coffee beans won’t last forever even if you store them in airtight canisters and keep them in a dark and dry space. Beyond a specific time, they will lose their flavor and aroma. 

Light vs Dark Roasted Coffee Beans

The freshest state of whole roasted coffee beans varies from bean to bean. Compared to light-roasted coffee beans, dark-roasted coffee beans stale faster. 

That’s because dark roasted beans have been roasted for a longer time, cracking them open, making them more porous, and releasing more oils to the surface that react with the oxygen in the air faster. This makes them lose their fresh aroma and taste sooner. 

Lightly roasted coffee beans last up to six weeks after the roasting date. Due to a shorter roasting time, lightly roasted coffee beans have a longer shelf life since the coffee pods are not cracked and can seal in all the aroma and flavor. 

Different Coffee Storage Methods (Impact on Coffee Flavor)

Storage MethodImpact on Coffee Flavor
Room TemperaturePoor flavor preservation, coffee can become stale and develop off-flavors
RefrigerationCan extend the shelf life of coffee, but can also lead to moisture buildup and loss of flavor
FreezingCoffee can last for several months, but the quality will deteriorate due to freezer burn and loss of aroma
Vacuum SealingEffective at preserving flavor, as it removes air and prevents moisture from entering the bag
Airtight ContainerGood for short-term storage, but can lead to buildup of moisture and gases that can alter the taste of the coffee

✍️ Note: It’s best to store coffee in a cool, dark place and to consume it within 2-3 weeks of roasting for the best flavor.

The storage method has a lot to do with retaining the freshness of roasted whole coffee beans. 

Within 12 months after the roast date, whole coffee beans will still be fresh if stored in a one-way valve nitrogen-flushed bag or a simple pouch with a valve.

Nitrogen flushing is a process by which oxygen is replaced by nitrogen from food product packaging. Since nitrogen doesn’t react with food or change its texture, flavor, or taste, they stay fresher for a longer period. 

Moreover, nitrogen is a denser gas than oxygen and surrounds the food products and protects them in transit or on the shelf. 

On the other hand, vacuum sealing simply removes the air from the packaging before it’s sealed. Nitrogen or any other gas is absent from such sealing. 

The shelf life of roasted whole beans can be extended to three to five months when they are vacuum-sealed. You can do this at home with the help of a vacuum sealer.

If properly frozen, roasted coffee can have up to three years of shelf life.

However, these should be used within a week after taking them out of the freezer.

How Long To Store Green Coffee Beans?

Green Coffee Beans

Green coffee beans are unroasted coffee beans that come in hessian sacks to the coffee roasters. 

These unroasted coffee beans stay fresher for a longer time than roasted or ground coffee. This is why many prefer to buy green coffee beans and roast them at home

These raw coffee beans can last for up to a few years if stored inside a vacuum-sealed bag and at room temperature. 

Always store coffee in an airtight, opaque container in a place away from heat, light, air, and moisture, preferably in a kitchen cabinet. 

When green coffee beans are exposed to the elements, they lose their flavor. 

Stored properly, green coffee beans last up to two years after being opened and stored in a cotton/burlap bag in a cool, dry place. Avoid placing the beans in direct sunlight. 

If green coffee beans are frozen in vacuum-sealed bags, they will last for eternity. That’s because the beans are protected from oxidation or exposure to light or other odors – the ideal condition to keep your raw coffee beans fresh for years.

But it’s difficult to keep your freezer space occupied for so long. 

Moreover, if you keep all the green coffee beans in the same bag in the freezer, thawing them and then refreezing them will take a toll on the aroma and taste. 

Instead, divide smaller portions of the coffee per week and put them away in small freezer bags. This way, you will use them up at the right them without having to worry about the freshness of the beans. 

24 hours before you roast the raw coffee beans, take out one bag from the freezer and roast them for the whole week. 

Pro Tip: If you’re planning to buy green coffee beans for home, don’t buy more than a year’s worth of them to retain maximum freshness. 

How To Keep Ground Coffee Fresh

How To Keep Ground Coffee Fresh

There are many people like me who don’t have a coffee burr at home and prefer to buy fresh ground coffee. 

Ground roasted coffee lasts approximately 2 to 4 months if stored in an unopened bag.

It can lose its flavor within 15 minutes when exposed to air as ground coffee has a larger surface area through which it loses its oils and aroma. 

If maintained in its original packaging after opening, ground coffee should ideally be consumed within a week.

By keeping ground coffee in an airtight container, you may extend its freshness.

You may also like: Do Coffee Grounds Go Bad? Find Out the Truth!

How Does Coffee Degassing Affect Shelf Life?

Did you know that during and right after the process of roasting coffee beans a chemical reaction takes place that releases carbon dioxide from the freshly roasted beans?

Degassing is the process where all the carbon dioxide from the roasted beans is released over a period of time. 

This not only has an impact on the taste of the brew but also on the shelf life of the coffee beans.

Coffee beans emit gases more quickly in the early days after roasting.

The newly roasted grounds release CO2 gas throughout the brewing process, creating bubbles.

These bubbles may interfere with the water’s ability to contact the ground beans, which could result in uneven extraction.

That’s why it’s advised to wait for a few days for the coffee to degas after roasting before you proceed to grinding it and making a cup of coffee. 

This time frame could range from one to five days, depending on the brewing method.

For instance, if you use a French press to brew your coffee, your coffee beans are ready for use one to two days after roasting.

Wait for five to seven days following the roasting date before using the beans for espresso.

And if you are into pour-over coffee, bubbles from the freshly roasted coffee are a sign of freshness and should be appreciated.

😀 Fun Fact: Coffee beans tend to lose their flavor slower after roasting and during degassing.

So, if you want to know if the pack of roasted coffee beans you just got is fresh enough, simply put them in a plastic Ziploc bag and press out as much air as possible. 

Seal the bag and leave it overnight. 

If you find out in the morning that the plastic bag has filled out with air, that means the coffee beans are freshly roasted and still degassing. 

With your mind at ease, it’s best to store your roasted coffee beans in a coffee bean container with a CO2 valve

Tips To Store Coffee Beans

Tips To Store Coffee Beans

If you want to find out how long to keep coffee beans after opening, follow the tips below.

  1. Buy fresh coffee beans from a nearby roaster that roasts in small batches. 
  2. Buy roasted whole coffee beans instead of ground coffee. 
  3. Grind coffee beans at home using a coffee grinder. This way, the coffee beans stay fresh for longer.
  4. Grind coffee only when you need them as storing ground coffee will cause it to go stale.
  5. The simplest solution is just to keep them in there if your coffee is packaged in an opaque resealable bag. Otherwise, use an opaque, airtight container to store the coffee beans to prevent exposure to light. 
  6. Avoid bulk buying coffee beans as the quality decreases over time.
  7. Avoid refrigerating coffee beans as this will affect their smell and taste. 
  8. Put coffee beans in double bags and store them in the freezer if you’re not going to use them anytime soon. This will prevent moisture from coming in contact with the coffee beans.

How To Detect Stale Coffee Beans

How To Detect Stale Coffee Beans

These are the top telltale signs that your coffee beans have gone stale.

  1. Residue

Take some coffee beans in your hands. If you see residue on your hands, that’s a sure sign they have become stale. 

  1. Smell

If the coffee beans don’t give off their usual aroma, they are not fresh anymore. 

  1. Taste

A cup of coffee that leaves a bitter aftertaste and smells nothing of the caramel, toffee, or nutty flavors that you were expecting is most likely stale. 

  1. Looks

By just looking at the coffee beans, you can tell if they’re fresh or not. 

Fresh coffee beans release oil that gives them a sheen. 

If the sheen is missing, the coffee beans are not fresh anymore.

Moreover, if you notice mold on coffee beans, you need to throw them out. 

  1. Packaging

Coffee beans need to release gas after they have been roasted. So, look for air valves or holes in the packaging. 

If there are none, the coffee beans inside have indeed gone stale.

The Bottom Line

The key to keeping coffee beans fresh is to store them well. 

Even beyond the expiration date on the bag, you can safely use coffee beans if you have stored them in an airtight container. 

Remember that any contact with light, air, heat, and moisture will cause coffee beans to lose their fresh taste and even become moldy. 

Or, if you bought coffee beans in bulk, freeze them in freezer bags and they’ll be fine. 

FAQs

How Do You Store Whole Coffee Beans Long Term?

You can either use a vacuum-sealed bag or store whole coffee beans long term in an airtight and opaque container. 
Vacuum-packed roasted whole coffee beans will last for three to five months.
Roasted coffee beans, if frozen properly in vacuum-sealed bags, will last for at least two to three years.

How Long Do Raw Coffee Beans Last?

Raw coffee beans in a vacuum-sealed bag will last for a few years. 
They last for up to two years after opening and storing in a burlap or cotton bag in a dry, cool place. 
Frozen raw coffee beans in vacuum-sealed bags will last forever. 

Do Coffee Whole Beans Go Bad?

No, coffee whole beans do not go bad like for example, fruit or other foods that contain moisture and will get moldy. 
Coffee beans are dry and although they might lose their sheen, aroma, and taste due to oxidation, they don’t go bad. 

Why Do Coffee Beans Last Longer Than Ground Coffee?

Coffee beans release oil and aroma when they are roasted.
When coffee beans are ground, the surface area expands, releasing more flavors and aroma. 
Because these come more in contact with the air in ground coffee, it lasts for up to a few weeks or a month. 
On the other hand, the oils and aroma are trapped inside freshly roasted coffee beans, making these last longer – up to 3 months. 

Can I Freeze Fresh Coffee?

It is not advisable to freeze coffee since it may occasionally result in a flat profile and may lessen the intensity of the fragrance, oils, and flavor.
Choose a small batch roaster that freshly hand roasts coffee daily so that your cup of coffee has the freshest taste and fragrance possible.
Store fresh coffee in an airtight container and keep it in a cool, dry place.