Learn what is chirashi sushi, how to make it with various toppings, its history, the main types, chirashi bowl ingredients, and all about this Japanese dish.

I’m always on the lookout for Japanese cuisine and one of my latest finds has been the chirashi bowl. So, I researched a bit and thought I’d share with you all about this healthy meal. Chirashi sushi is a type of sushi that is a mix of colorful ingredients arranged on top of vinegared sushi rice.
This dish combines traditional sushi flavors with a modern twist. It is often served as part of a special occasion like Doll’s Day or Hinamatsuri that celebrates the daughters in the family. The vibrant colors and flavors make chirashi an ideal dish for any occasion. Read on to learn more about this popular dish and how to make it at home.
What Is Chirashi?
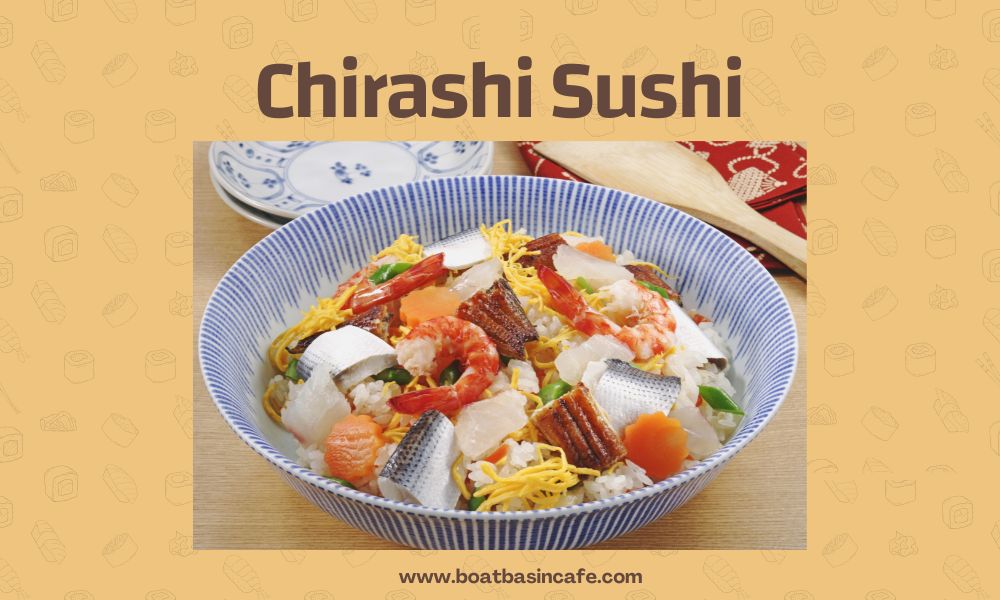
Chirashi is a classic Japanese dish of sashimi pieces over a bed of vinegar rice. The toppings are scattered across a bowl of sushi rice, hence the name chirashi (散らし), a literal translation of “scattered sushi.” In general, it is vegetarian, but when it isn’t, unagi (eel) or other cooked dishes are used in place of raw fish.
Although raw seafood may be used as toppings, many Chirashi Sushi variations lack raw ingredients and some don’t even contain seafood. The essence of the Chirashizushi is the rainbow of colors, flavors, and textures from various toppings that create a visual masterpiece.
Depending on the locale, Chirashizushi is also known as Gomoku Sushi, Gomoku Chirashi, or Barazushi. To differentiate it from traditional chirashizushi, this is referred to outside of the Tokyo area as Edomae Chirashizushi or Kaisen Chirashizushi.
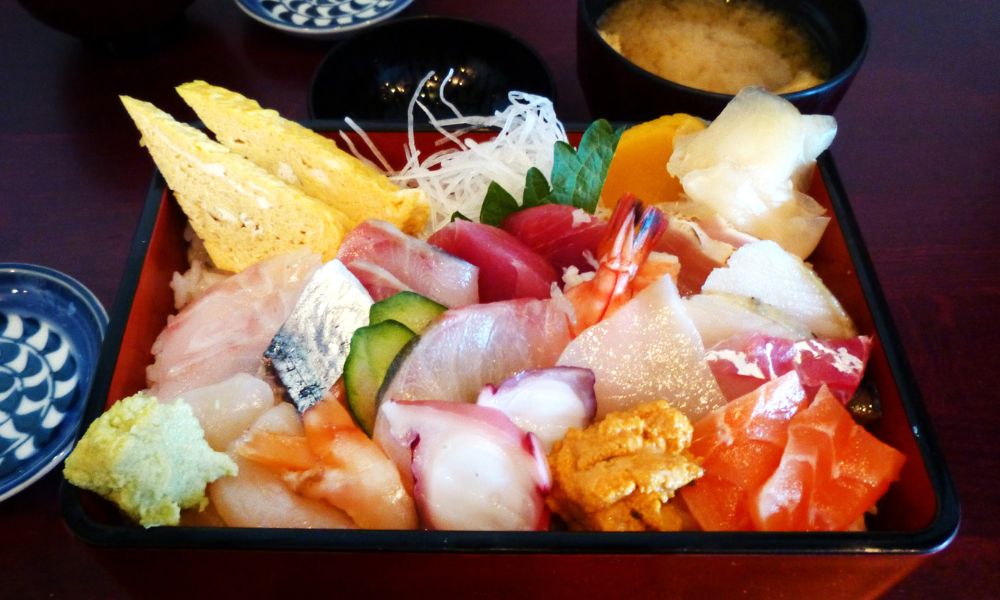
Fun Fact: Kaisen Don is sashimi which is typically served over traditional steamed rice instead of vinegared sushi rice.
Check out the difference between sushi vs sashimi vs nigiri if you’re getting confused!
History Of Chirashi Sushi

The original purpose of chirashi was to get rid of excess, unappealing portions of fish after using the good parts to make perfect sashimi plates or nigiri. There are two types of chirashi: the first is the upscale sashimi variety that can be purchased at sushi bars or for takeout in supermarkets throughout Tokyo. The second is a more basic form called bara chirashi that uses cooked rather than raw components.
The bara chirashi, a meal that the common people created for special occasions, first appeared in the early Edo era (1600–1800). The government at the period closely controlled social order and spending, and it would not tolerate any extravagance. As a result, when preparing the chirashi rice, folks would place all of the garnishes and fish pieces in the bottom of the huge plate, leaving only the rice visible. They would just flip the plate over and dig in when it was time to eat.
Nutritional Information of Chirashi Sushi
Chirashi Sushi’s nutritional value varies based on the ingredients used, but it’s a nutritious dinner option because of all the protein from the fish and complex carbohydrates from the rice.
Typical Nutritional value per 100g of Chirashi Sushi
| Nutrient | Amount |
|---|---|
| Calories | 200-250 |
| Protein | 18-20g |
| Fat | 5-7g |
| Carbohydrates | 30-35g |
| Fiber | 2-3g |
| Sodium | 500-600mg |
Types Of Chirashi Sushi
| Type Of Chirashi | Key Toppings |
| Kanto | Tamagoyaki, shrimp, cockles as toppings |
| Kansai | Eel and thin omelet |
| Tokyo | Raw fish as topping |
You can get two main types of chirashizushi (ちらし寿司) and the toppings vary according to the region in Japan.
Kansai Chirashi
In Kansai, chirashizushi is made by combining vinegar sushi rice with stewed carrots, shiitake mushrooms, tofu skin, and other ingredients, and then sprinkling various items like Japanese rolled omelet or tamagoyaki and lotus root on top. In contrast to Kanto chirashi, which resembles seafood bowls, Kansai chirashi uses heavier foods and is more careful about how they are sliced, how each ingredient should taste, and the temperature at which they are cooked.
Kansai chirashi is also referred to as Gomoku sushi or five-ingredient sushi and bara zushi. The ingredients are spread throughout the rice. Usuyaki, a thin omelet, and eelare typical components of Kansai-style chirashi.
Kanto Chirashi
In the Kanto region, the chirashizushi is composed of a base made from vinegared white rice with toppings like pickled ginger, omelet, seafood, shiitake mushrooms, minced fish, and other ingredients. The Kanto-style chirashi gets a bold look from the thick and large cut toppings. If you use regular rice instead of vinegar rice in the typical Kanto chirashi, it’s called a seafood bowl. Common toppings include tamagoyaki, kanpyo, and raw fish like Japanese snapper, tuna, squid, and other seafood.
There are more specialized varieties of chirashi sushi within these two general categories, like edomae (Tokyo-style) chirashi, which has slices of sashimi (raw fish) on top of the sushi rice.
Main Types Of Chirashizushi Toppings
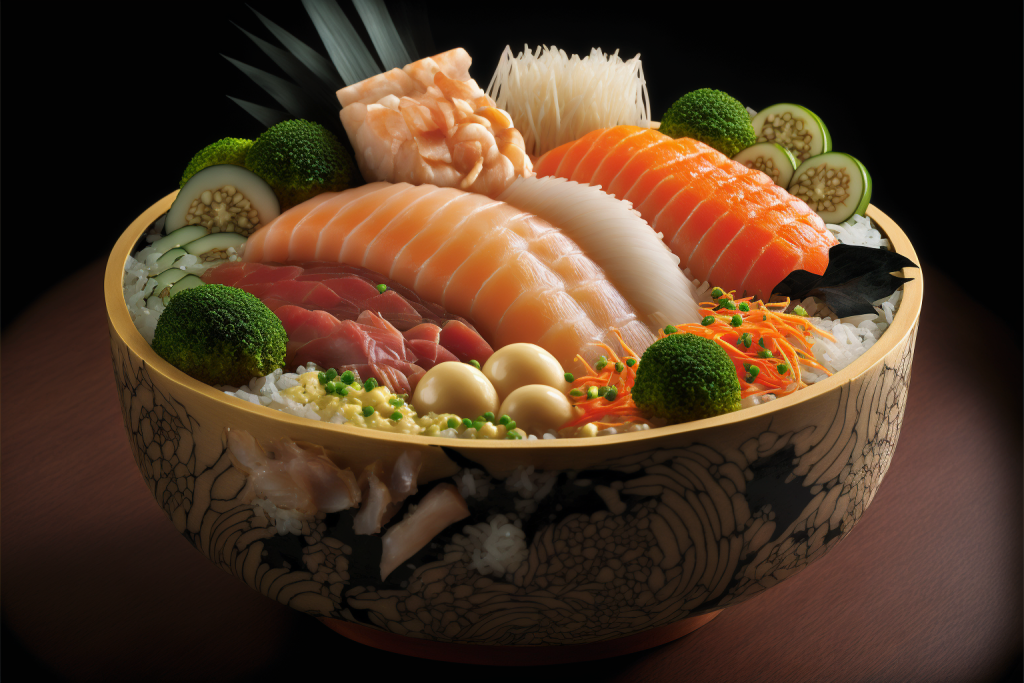
Seaweed, cucumber, cooked or raw fish, crab, octopus, or prawns, tobiko, seasoned mushrooms, shiso or microgreens, shredded or thinly sliced carrot and daikon, edamame, lotus root are the most common chirashi sushi bowl ingredients in a traditional Japanese recipe style.
Some of the more modern ingredients include avocado, cabbage, or fresh herbs like mint or cilantro as toppings. You can utilize it all at once if you want to, or just pick your favorite few. The typical protein choice is an egg, occasionally one type of seafood, three vegetables, and some seaweed for decoration. Use a Japanese sushi knife to make thin slices of the ingredients and arrange them in the chirashi bowl to make it look attractive and appetizing.
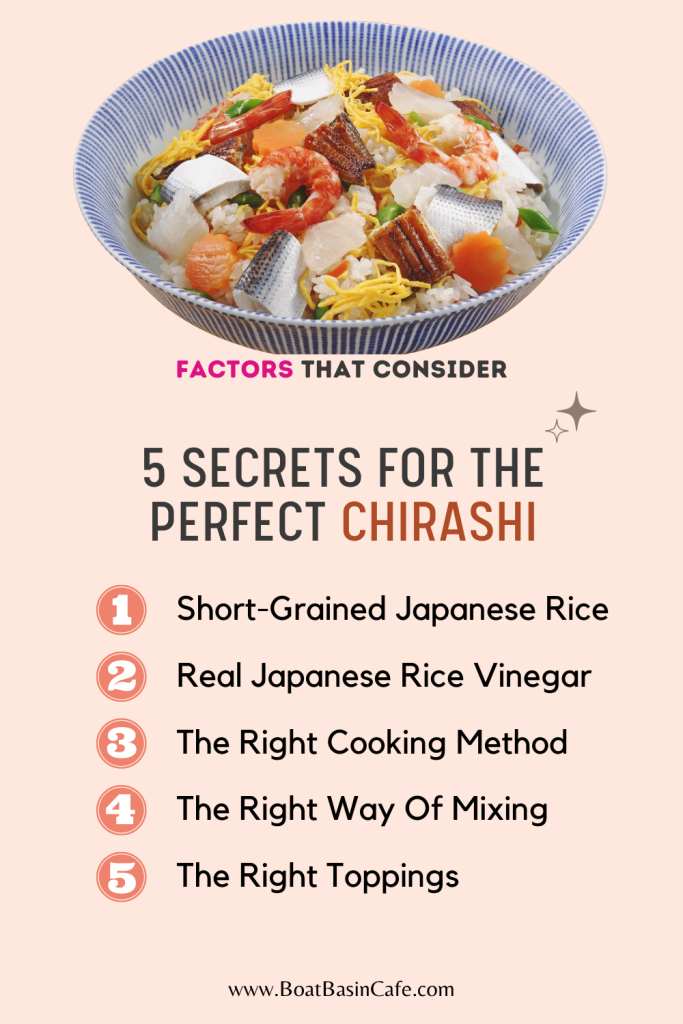
5 Secrets For The Perfect Chirashi Sushi Bowl

Before I get into the ingredients list and detailed methods to prepare a chirashi sushi salad or bowl, there are five important points you need to know to make a great chirashi.
01 To reiterate, it’s not raw fish that qualifies a chirashi roll as sushi. The key ingredient is the sushi rice that knits all types of sushi in the same thread. Because of this, choosing the proper sushi rice is crucial. If you’re in a quandary, you can decide after going through the 10 best sushi rice brand reviews.
02 The secret to preparing excellent sushi rice is to use authentic Japanese rice vinegar in addition to superb Japanese short-grain rice. On a side note, if you have excess rice left, now is a good time to find out how long does sushi rice last.
03 Getting the right rice grains isn’t enough. The rice must be cooked thoroughly as well. The rice is washed to remove any extra starch, given a brief soak in water to rehydrate the grains, and then cooked and steamed.
04 When combining the rice and sushi vinegar, it’s important to coat each grain of rice with the seasoning without breaking the grains. Then cool the seasoned sushi rice quickly to prevent the rice from becoming mushy.
05 Last but not least is what you use as toppings. The rainbow of colors, textures, and tastes of the scattered sushi rice is one of the things that make this bowl so appealing. You can top this with any combination of ingredients you choose as long as you keep a good balance of these.
Ingredients For Scattered Sushi Or Chirashi Sushi Rice
In this section, let’s look at the ingredients for making a chirashizushi and why they are used. For example, which kind of rice grains have the right stickiness and texture for a sushi bowl? Or, why are eggs popular toppings in chirashi sushi? Let’s find out!
Sushi Rice
The ideal sushi rice is Japanese short-grain rice. This is due to the fact that short-grain rice has the stickiness that you need for excellent sushi rice. Another positive side of the short-grain rice is that it doesn’t become hard when served at room temperature. Medium-grain rice is not ideal although you can make do with it. Long-grain rice shouldn’t be used at all to make scattered sushi, in my opinion.
Sushi Vinegar
Sushi vinegar is a condiment that is prepared by combining rice vinegar, sugar, and salt. It has a sweet, sour, and a little salty flavor. You can create it from scratch by combining salt, sugar, and rice vinegar in a bowl and whisking it until the sugar and salt are completely dissolved. Or you can buy one already mixed, like this sushi vinegar. You can’t do without it as it’s the main ingredient to get seasoned sushi rice.
Egg
Because it is colorful and offers protein, eggs are a favorite chirashi sushi topping, especially if you intend to make it without seafood. You can also prepare Tamagoyaki or a Japanese rolled omelet and then slice or chop it to scatter it above the vinegared rice.
Seafood
The majority of chirashi sushi variations do not emphasize seafood, making it entirely optional. Boiled shrimp can be used as a topping as can raw tuna and poached shrimp. But it’s more common to use shiitake mushrooms, carrots, eggs, snow peas, and red pickled ginger.
Garnish Choices
Choose garnishes that will make the bowl of chirashi sushi’s color and texture stand out. Along with some nutty sesame seeds for highlights, try adding sweet carrots for a burst of vibrant orange and crunchy snap peas for freshness. To add even more visual impact, Japanese chefs chop the snap peas into leaves and use a veggie cutter to shape the carrots into flowers. You can garnish with any edible flowers or fresh herbs like cilantro or basil you have on hand.
How To Make Chirashi Sushi

You need to follow a few steps to make chirashi sushi. I’m sharing the steps in detail so that you can easily make it at home. Thanks to my close friend who’s from Japan, he makes it for me all the time and has taken me through the steps practically.
Ingredients for 1 Portion Of Chirashi Sushi Bowl
For the sushi rice, you need:
1½ cups or 310 grams of short-grained Japanese sushi rice
1½ cups of cold water
¼ cup of Japanese rice vinegar
3 tablespoons of sugar
1 teaspoon of Kosher salt
To make the toppings, you need:
100 grams or half a carrot peeled and sliced to make 12 coin-shaped slices
85 grams or 14 pods of snow peas, trimmed
3 large eggs
30-40 or 180 grams of peeled and deveined shrimp
1 teaspoon of vegetable oil
1 pinch of salt
2 teaspoons of toasted sesame seeds
160 grams of tuna or salmon sashimi-standard fish
100 grams of salmon roe or Ikura or flying fish roe
Soy sauce for serving
Let’s look at the steps to make the scattered sushi.
Step 1: Preparing The Rice
Remove the excess starch from the rice by putting it in a bowl or colander and running it under cold tap water. Move your hand through the rice as you wash the grains so that all the starch rises to the surface or goes out through the colander holes.
Drain the water until it is nearly clear, then add the rice to a large pot or cooker. Let the rice soak in water for 30 minutes. Some rice cookers have a soaking cycle built into the total cooking cycle so make sure how your cooker works by reading the product manual.
If you’re using a rice cooker, fill the water in the cooker slightly below the two-cup mark to account for the extra liquid you will add when you season the rice. Add 1½ cups of cold water and a lid to the pot if you’re doing this in a pot on a stovetop.
Note: 1 US cup is equal to 8 ounces or about 240 milliliters of water.
Step 2: Making The Sushi Vinegar
Make the sushi vinegar while you let the rice soak. Just combine the Japanese rice vinegar with salt and sugar and whisk vigorously until the salt and sugar dissolve in the liquid.
Step 3: Cooking The Vegetables
Put plenty of salt and water in a pan and boil the carrots until they’re tender enough for a toothpick to go through. Then add the trimmed snow peas and boil them for about 30 seconds as they should be bright green while retaining their crunch. Use tongs or a slotted spoon to remove the snow peas and carrots from the hot water and put them quickly in an ice bath – a bowl of ice water – to stop them from overcooking.
Using a sharp knife, make a V in the middle of the snow peas to give them the shape of leaves.
Step 4: Poaching The Shrimp (Optional)
Into the boiling water, add the peeled and deveined shrimp and stir once. Turn off the heat and let the shrimp simmer until they turn bright orange and become completely opaque through the middle. You can check by slicing one in half if you’re not sure how to tell if shrimp is cooked. To cool the shrimp and avoid overcooking them, place them in a dish of cold water.
Step 5: Making The Egg
One by one, break the 3 eggs into a large bowl. Using tweezers or chopsticks, remove the white membranes near the yolk. Beat the eggs with a bit of salt in a side-to-side motion instead of a circular motion to prevent bubbles from forming. If you have bubbles in the beaten egg, you will get holes in the thin omelet. Keep whisking the eggs until they turn into a uniform color. You can put the egg mixture through a fine-mesh strainer to get rid of any bubbles or remaining white membranes if you happen to have them.
Over medium-low heat, warm a nonstick frying pan until it is too hot to touch but not so hot that a drop of water sizzles. Use a folded paper towel or silicone brush like this to spread the vegetable oil throughout the pan and get rid of any extra oil beads.
Add about a quarter of the egg mixture into the pan, then quickly swirl it to spread the egg out evenly. Let it cook until the omelet’s edges begin to dry up and lift away from the pan. Then turn it over and cook the other side before transferring it to a cutting board. Continue doing this three more times to use up all the egg mixture. Turn the heat down a little if you see the egg browning because that indicates that the heat is too high.
Put all the cooked eggs on top of one another on the cutting board and roll them into a log. Then cut them into fine threads with a sharp knife.
Alternately, you can take 2 eggs, beat them with a tablespoon of dashi, a teaspoon of mirin, and salt to taste, and follow the same method to make a thin omelet or usuyaki.
Step 6: Preparing The Fish
Cut fish into bite-size cubes so that they are easy to mix with the vinegared rice and to eat. If you are using grilled eel, cut them into ¾ -inch or 2-centimeter wide pieces perpendicular to the backbone. Then cut them into half to make cubes of grilled eel.
Step 7: Steaming The Rice
Hopefully your rice has soaked for 30 minutes by now. If you’re using the stovetop, put the pan of rice on high heat. Wait until the water boils and then put the flame on low for 15 minutes to allow the rice grains to absorb the water. Check the rice after 12 minutes as it may take a few minutes less for the rice to cook properly.
When I first started cooking rice, I found out that it’s not smart to wait for the exact time to be up as the water could be absorbed sooner, leading to the bottom layer of the rice getting burnt. When there’s no more water in the pan, turn off the stove and keep the lid of the pan on for another 10 minutes to steam the rice.
If you’re using a rice cooker, simply follow the instructions and your rice should be ready by the time you are.
Step 8: Mixing The Rice And Sushi Vinegar
Take the largest bowl you have and place the steamed rice in it so that as you spread the rice, the steam and the sushi vinegar evaporate quickly. Try to use a glass, plastic, or wooden bowl as metal will impart a metallic taste to the rice. Pour the sushi vinegar over the rice evenly.
Take a rice paddle or spatula and use a folding and cutting method to coat all the rice grains with the sushi vinegar seasoning. Take care not to break the rice grains. And while you are mixing the rice and the vinegar, use a fan to cool the rice. Once the sushi rice is cool enough to handle, you can move on to the final step of making a chirashi bowl.
Step 9: Arranging The Chirashi Sushi Bowl
Take a large platter or individual serving bowls to arrange the chirashi sushi. First, place a layer of the rice on the bottom of the bowl, then spread toasted sesame seeds. Follow this with a layer of thin omelet and then arrange the fish cubes and vegetables on top. Finally, add garnishes like salmon roe, edible flowers, or herbs of your choice. Take a look and check if the chirashi sushi bowl toppings are varied enough with various colors and textures.
FAQs
What Is A Chirashi?
Chirashi sushi scatters fish cubes, sesame seeds, vegetables, salmon roe, and other toppings on a bed of seasoned sushi rice. The toppings vary from region to region in Japan.
What Is The Difference Between Chirashi And Poke?
Sushi rice topped with raw fish toppings (especially the type from Tokyo) or grilled eel or boiled shrimp is chirashi while Poke uses salmon or tuna marinated in a sweet soy sauce dressing. There is no chirashi sauce used in chirashi. Poke is served on white rice while chirashi is on sushi rice. However, both chirashi sushi and a poke look the most similar to each other because of the way they are served in a bowl.
What Is The Difference Between Chirashi And Sashimi?
Sashimi is thinly sliced raw fish that is eaten as it is without any rice. Sashimi focuses more on how the fish is presented. In contrast, chirashi sushi is a type of sushi that is eaten with rice and it may or may not include raw fish as one of the toppings.
What Does Chirashi Don Mean?
Chirashi don or kaisen don is sashimi served over plain rice instead of vinegared rice, making it a sushi, not a sashimi.