The Chilling Truth: Can Olive Oil Be Refrigerated?

As someone who has been using olive oil for cooking for many years, I’ve often found myself pondering whether or not to store my trusty bottle of liquid gold in the refrigerator. Like many others, I’ve been curious about the effects of refrigeration on the quality, flavor, and shelf life of olive oil. Can olive oil be refrigerated?

The short answer is yes, but with some caveats. In this article, we’ll dive deep into the world of olive oil storage, drawing from my personal experiences, as well as exploring the pros and cons of refrigeration, and sharing some best practices to keep your oil fresh and flavorful.

Can Olive Oil Be Refrigerated? The Cold, Hard Facts

Can Olive Oil Be Refrigerated

Understanding the chemical composition of olive oil

To comprehend how temperature affects olive oil, it’s essential to understand its chemical makeup:

  1. Monounsaturated fats: Olive oil is rich in monounsaturated fats, which are known to be heart-healthy and help reduce LDL (bad) cholesterol levels.
  2. Polyphenols and antioxidants: These compounds give olive oil its distinctive flavor and contribute to its numerous health benefits. They also help protect the oil from oxidative damage.

The impact of temperature on olive oil

  1. Effects of cold temperatures: When exposed to cold temperatures, olive oil can become cloudy and solidify, leading to changes in its texture. However, this process is reversible, and the oil will return to its liquid state once it reaches room temperature.
  2. Optimal storage temperature range: The ideal temperature range for storing olive oil is between 57°F (14°C) and 70°F (21°C). Maintaining this range helps preserve the oil’s flavor and extend its shelf life.

The Pros and Cons of Refrigerating Olive Oil

Potential benefits of refrigeration

  1. Prolonging shelf life: Refrigeration can slow down the oxidation process, potentially extending the oil’s shelf life.
  2. Slowing down oxidation: By keeping olive oil at cooler temperatures, you can reduce the rate of oxidation, preserving its quality and health benefits.

Possible drawbacks of refrigeration

  1. Changes in texture and appearance: As mentioned earlier, refrigeration can cause olive oil to become cloudy and solidify, altering its texture. This change is temporary and reversible.
  2. Flavor alterations: Cold temperatures can sometimes mute the flavors of olive oil, so it’s recommended to let the oil return to room temperature before using it in recipes where its flavor is crucial.

Best Practices for Storing Olive Oil

The Chilling Truth: Can Olive Oil Be Refrigerated? 1

Proper containers

Dark glass or stainless steel: Store olive oil in dark glass or stainless steel containers to protect it from light exposure, which can degrade its quality.

Avoiding plastic and clear containers: Plastic and clear glass containers can allow light to penetrate, accelerating the oil’s degradation.

Ideal storage conditions

Cool, dark places: Keep olive oil in a cool, dark place away from direct sunlight and heat sources.

Avoiding heat, light, and air exposure: Minimize olive oil’s exposure to heat, light, and air, as these factors can cause it to spoil more quickly.

Recognizing and Preventing Olive Oil Spoilage

The Chilling Truth: Can Olive Oil Be Refrigerated? 2

Signs of rancidity

  1. Off odors: Rancid olive oil may have an unpleasant smell, often described as crayons, putty, or even old peanuts.
  2. Unpleasant taste: The taste of rancid olive oil may be bitter, metallic, or simply off, and it won’t have the fruity or peppery notes of fresh olive oil.

Tips for preserving freshness

  1. Buying in small quantities: Purchase olive oil in smaller quantities that you’ll use within a few months to ensure it stays fresh.
  2. Properly sealing containers: Keep the container tightly closed to minimize exposure to air, which can cause the oil to oxidize and spoil.

The Role of Freezing Olive Oil

Freezing for long-term storage

  1. Benefits and drawbacks: Freezing olive oil can extend its shelf life, but it may alter the texture and cause some loss of flavor. Check out our article on freezing olive oil for more information.
  2. Guidelines for freezing: To freeze olive oil, pour it into an airtight container, leaving some room for expansion, and store it in the freezer.

Using frozen olive oil

  1. Thawing process: To use frozen olive oil, let it thaw at room temperature or place the container in a bowl of warm water to speed up the process
  2. Cooking and drizzling applications: Once thawed, you can use olive oil for cooking, drizzling over salads, or adding flavor to your favorite dishes.

Debunked Myths About Olive Oil Storage

The impact of temperature fluctuations

While it’s true that consistent temperature is essential for preserving olive oil’s quality, occasional fluctuations in temperature (such as those experienced during shipping) are unlikely to cause significant damage to the oil.

The necessity of refrigeration for unopened bottles

Refrigeration is not necessary for unopened bottles of olive oil, as long as they are stored in a cool, dark place away from heat and light.

The role of oxygen in olive oil degradation

Oxygen plays a role in the degradation of olive oil, but its impact is less significant than heat and light exposure. Still, it’s essential to keep containers tightly sealed to minimize oxidation.

Summary

In conclusion, refrigerating olive oil can be both beneficial and detrimental, depending on various factors. By considering the pros and cons, along with following proper storage guidelines, you can ensure that your olive oil stays fresh and flavorful for as long as possible. And remember, when in doubt, always trust your senses: if your olive oil smells or tastes off, it’s time to replace it.

FAQs

How long does olive oil last?

Olive oil typically lasts 18-24 months from the date of production if stored properly[^24^]. However, once opened, it’s best to consume the oil within 3-6 months[^25^].

Can you freeze olive oil for long-term storage?

Yes, you can freeze olive oil for long-term storage, but be aware of the potential changes in texture and flavor. See our in-depth article for more information.

How can you tell if olive oil has gone bad?

Signs of spoilage include off odors, an unpleasant taste, and a lack of fruity or peppery notes[^26^]. If you suspect your olive oil has gone bad, it’s best to discard it and purchase a fresh bottle.

The Raw Albacore Extravaganza: Your Ultimate Guide to Savoring the Sea

Ahoy, seafood lovers! Ever wondered about the ins and outs of raw albacore, that mouthwatering, tender fish you’ve been craving?

Well, look no further! This ultimate guide will reel you in with all you need to know about this fantastic fish, from picking the freshest catch to whipping up tantalizing dishes and understanding its nutritional perks. So, buckle up and let’s dive into the wonderful world of raw albacore!

Raw Albacore: The Basics

Raw Albacore

What is Albacore Tuna?

Albacore tuna (Thunnus alalunga) is one of the eight species belonging to the Thunnini tribe. It is prized for its light-colored flesh and delicate flavor, which sets it apart from its darker-fleshed counterparts, like bluefin and yellowfin tuna.

The Different Cuts and Grades of Raw Albacore

When it comes to raw albacore, there are various cuts and grades to choose from. The highest grade, often referred to as “sashimi-grade,” is characterized by its high fat content and exceptional quality. Lower grades, while still delicious, may have a firmer texture and less pronounced marbling.

Comparing Albacore to Other Tuna Species

FeatureAlbacore TunaYellowfin TunaBluefin Tuna
ColorLight pink to beigeBright red to pinkDeep red
FlavorMild, delicateMild, slightly strongerRich, intense
TextureSoft, butteryFirm, tenderFirm, dense
Fat ContentModerateModerateHigh
PriceAffordable, mid-rangeMid-range to expensiveExpensive, luxury
SustainabilityGenerally sustainableVaries, check for certificationsOften overfished, less sustainable
Common Culinary UsesSashimi, sushi, poke bowlsSashimi, sushi, grilledSashimi, sushi, seared

Albacore tuna is milder in flavor and lighter in color compared to other tuna species, such as bluefin or yellowfin. It is also generally more affordable and sustainable, making it an excellent choice for those seeking a delicious and eco-friendly option.

Sourcing and Sustainability

Where to Find Ethically Sourced Raw Albacore

To ensure that you are purchasing ethically sourced raw albacore, look for products with certifications like the Marine Stewardship Council (MSC) or the Dolphin Safe label. These organizations work to promote sustainable fishing practices and protect marine ecosystems.

Seasonality and Fishing Practices

Albacore tuna has a distinct seasonality, with the peak fishing season occurring during the summer months. Responsible fishing practices, such as trolling or pole-and-line, help minimize bycatch and maintain healthy tuna populations.

Albacore Tuna Conservation Efforts

Organizations like the International Seafood Sustainability Foundation (ISSF) are working to promote sustainable albacore tuna fisheries by advocating for science-based management measures, reducing bycatch, and addressing illegal, unreported, and unregulated (IUU) fishing.

Health Benefits and Nutritional Profile

The Raw Albacore Extravaganza: Your Ultimate Guide to Savoring the Sea 3

Omega-3 Fatty Acids and Heart Health

Raw albacore is an excellent source of omega-3 fatty acids, which have been shown to promote heart health by reducing inflammation and lowering the risk of heart disease.

Protein Content and Muscle-Building Potential

Albacore tuna is a lean protein source, making it a great choice for those looking

to build muscle and support an active lifestyle. A 3.5-ounce (100 gram) serving of raw albacore provides about 23 grams of protein, making it an excellent addition to a well-rounded diet.

Vitamin and Mineral Composition

Raw albacore is packed with essential vitamins and minerals, including vitamin D, B vitamins, selenium, and phosphorus. These nutrients play a vital role in maintaining optimal health and supporting various bodily functions.

Nutrient/Health BenefitAmount per 3.5 oz (100 g) of Raw AlbacoreRole in the Body
Protein~23 gSupports muscle growth, tissue repair, immune function
Omega-3 Fatty Acids~0.7 gPromotes heart health, reduces inflammation
Vitamin D~2.6 mcg (104 IU)Supports bone health, immune function
Vitamin B12~3.9 mcgSupports nerve function, red blood cell production
Vitamin B6~0.2 mgAids in metabolism, brain function
Vitamin B3 (Niacin)~15.4 mgHelps convert food to energy, supports skin health
Selenium~74.5 mcgSupports thyroid function, antioxidant properties
Phosphorus~218 mgHelps build strong bones and teeth, energy production
Calories~144 kcalProvides energy for daily activities

Preparing Raw Albacore at Home

The Raw Albacore Extravaganza: Your Ultimate Guide to Savoring the Sea 4

Safe Handling and Storage Practices

To ensure the safety and quality of your raw albacore, follow proper handling and storage practices. Keep the fish refrigerated at all times, and consume it within two days of purchase. For more information on tuna storage, check out this helpful guide on how long tuna lasts in the fridge.

How to Clean and Fillet Albacore Tuna

When preparing raw albacore at home, it’s essential to clean and fillet the fish correctly. Use a sharp knife to remove the skin and bones, and then carefully slice the fillet into thin, even pieces.

Tips for Preserving Freshness

To maintain the freshness of your raw albacore, wrap it tightly in plastic wrap or store it in an airtight container in the coldest part of your refrigerator.

Raw Albacore Dishes from Around the World

The Raw Albacore Extravaganza: Your Ultimate Guide to Savoring the Sea 5

Sashimi and Sushi in Japanese Cuisine

In Japan, albacore tuna is often used in sashimi and sushi dishes, where its delicate flavor and tender texture can be fully appreciated. It is typically served with soy sauce, wasabi, and pickled ginger.

Poke Bowls from Hawaii

Hawaiian poke bowls are a popular way to enjoy raw albacore. The fish is marinated in a mixture of soy sauce, sesame oil, and other seasonings, then served over rice with a variety of toppings like avocado, seaweed, and sesame seeds.

Tartare and Ceviche from Latin America

In Latin American cuisine, albacore tuna is often used in tartare and ceviche dishes. These raw fish preparations involve marinating the albacore in citrus juice, spices, and herbs to create a refreshing and flavorful appetizer.

Cooking Techniques for Albacore Tuna

The Raw Albacore Extravaganza: Your Ultimate Guide to Savoring the Sea 6

Grilling and Broiling Methods

While raw albacore is delicious, it can also be cooked using methods like grilling or broiling. These high-heat techniques create a delicious sear on the outside while keeping the inside tender and moist.

Pan-Searing and Oven-Baking

Pan-searing and oven-baking are other excellent ways to cook albacore tuna. Searing the fish in a hot pan creates a flavorful crust, while oven-baking allows for even cooking and retains moisture.

Sous Vide and Poaching

For a more delicate cooking method, try sous vide or poaching. These techniques result in a tender, evenly cooked albacore that retains its natural flavors and juices.

Flavor Pairings and Ingredients

Complementary Herbs and Spices

Albacore tuna pairs well with a variety of herbs and spices, including ginger, garlic, cilantro, and basil. Experiment with different combinations to create unique and flavorful dishes.

Citrus and Acid Profiles

Citrus fruits like lemon, lime, and orange complement the delicate flavor of raw albacore, while adding acidity to balance the dish. A splash of rice vinegar or a squeeze of lime can enhance the flavor profile and add brightness to your albacore creations.

Supporting Ingredients and Side Dishes

When serving raw albacore, consider adding ingredients that complement its flavor and texture. Avocado, cucumber, and edamame are popular choices, as are side dishes like steamed rice or quinoa.

Wine and Beverage Pairings

The Raw Albacore Extravaganza: Your Ultimate Guide to Savoring the Sea 7

White Wines for Raw Albacore

Light and crisp white wines, such as Sauvignon Blanc, Pinot Grigio, or Albariño, pair well with raw albacore, enhancing its delicate flavor without overpowering it.

Sake and Japanese Beverages

For a more traditional pairing, consider serving sake or Japanese beer with your raw albacore dishes. Both beverages provide a refreshing contrast to the rich flavor of the fish.

Non-Alcoholic Pairings

For non-alcoholic options, consider pairing your raw albacore with iced green tea or a sparkling water infused with citrus flavors.

Handling Allergies and Dietary Restrictions

Recognizing Tuna Allergies

Tuna allergies are relatively rare but can cause symptoms like hives, swelling, or digestive discomfort. If you suspect you have a tuna allergy, consult your doctor or an allergist for further evaluation and guidance.

Alternative Fish Options

If you are unable to consume albacore tuna due to allergies or dietary restrictions, consider alternative fish options like salmon, yellowtail, or halibut, which can be prepared and served similarly.

Accommodating Dietary Preferences

For those who follow a plant-based diet or prefer not to consume raw fish, consider using plant-based alternatives like marinated tofu or tempeh to create similar dishes.

Summary

Raw albacore is a versatile and delicious ingredient that offers numerous health benefits and can be prepared in various ways. By understanding the basics of albacore tuna, sourcing sustainable products, and following proper preparation techniques, you can enjoy this delicacy at home and impress your guests with a range of creative and flavorful dishes.

FAQs

What is the difference between albacore and other tuna species?

Albacore tuna has a lighter color and milder flavor compared to other tuna species like yellowfin and bluefin. It is also generally more affordable and sustainable, making it a popular choice for those seeking a delicious and eco-friendly option.

How can I tell if my raw albacore is fresh?

Fresh raw albacore should have a pleasant ocean-like aroma, firm texture, and a consistent light pink to beige color. Avoid fish that appears slimy, has a strong fishy odor, or shows signs of discoloration.

How long can I store raw albacore in the fridge?

Raw albacore should be consumed within two days of purchase. For more information on tuna storage, check out this helpful guide on how long tuna lasts in the fridge.

Can I freeze raw albacore?

Yes, you can freeze raw albacore. Wrap the fish tightly in plastic wrap or place it in an airtight container before freezing. Consume the frozen albacore within two to three months for the best quality.

What are some popular dishes made with raw albacore?

Raw albacore is commonly used in sashimi, sushi, poke bowls, tartare, and ceviche. Its delicate flavor and tender texture make it a versatile ingredient in various recipes.

Is raw albacore safe to eat?

Raw albacore, like any raw fish, carries a risk of foodborne illness. However, when sourced from a reputable supplier and handled properly, the risk is minimal. Always purchase sashimi-grade albacore when planning to consume it raw.

Can I substitute albacore with other fish?

Yes, you can substitute albacore with other fish like salmon, yellowtail, or halibut, depending on your recipe and personal preferences. Each fish will offer a slightly different flavor and texture, but they can all be prepared and served similarly.

What are the health benefits of consuming raw albacore?

Pregnant women should exercise caution when consuming raw fish, including albacore tuna, due to the risk of foodborne illness and potential exposure to mercury. It is best to consult a healthcare professional for personalized advice on seafood consumption during pregnancy.

How can I ensure that my raw albacore is sustainably sourced?

To ensure that you are purchasing ethically sourced raw albacore, look for products with certifications like the Marine Stewardship Council (MSC) or the Dolphin Safe label. These organizations work to promote sustainable fishing practices and protect marine ecosystems.

The Noodle Nirvana: Discovering the Healthiest Type of Noodle

Noodles, a staple in many cuisines around the world, are more than just a comfort food. With a vast array of noodle types available, it’s no wonder that many people are on the lookout for the healthiest option.

This article aims to unravel the mystery and reveal the healthiest type of noodle for your taste buds and well-being.

Healthiest Type of Noodle

The World of Noodles: Different Types and Ingredients

01 Wheat-based noodles

The Noodle Nirvana: Discovering the Healthiest Type of Noodle 8

Wheat-based noodles are common in many Asian and Western cuisines. They are made from wheat flour, which provides a firm texture and a slightly nutty flavor. Here are some popular wheat-based noodles:

  1. Ramen – A Japanese noodle variety, typically served in a rich broth with various toppings like sliced pork, green onions, and seaweed. Ramen noodles are made with wheat flour, water, and kansui, an alkaline solution that gives the noodles their characteristic chewiness.
  2. Udon – Another Japanese noodle, udon is thicker and chewier than ramen. It’s commonly served in a mild, soy-based broth with toppings such as tempura, fried tofu, and vegetables.
  3. Soba – Made from a combination of wheat and buckwheat flours, soba noodles have a distinct earthy flavor. They can be served either hot in a broth or cold with a dipping sauce.

02 Rice-based noodles

The Noodle Nirvana: Discovering the Healthiest Type of Noodle 9

Rice-based noodles are a popular gluten-free alternative to wheat-based noodles. They are made from rice flour and have a delicate, slightly chewy texture. Some common rice-based noodles include:

  1. Rice vermicelli – These thin, delicate noodles are used in various Asian dishes, such as Vietnamese spring rolls and Singapore-style noodles.
  2. Pho – A Vietnamese noodle soup, pho features flat rice noodles in a flavorful broth, usually with meat and various herbs.
  3. Pad Thai – A popular Thai dish, pad Thai combines rice noodles with a tangy tamarind sauce, eggs, tofu, and various vegetables.

03 Alternative flour noodles

For those looking for even healthier options or have dietary restrictions, alternative flour noodles provide a wide range of choices. Some popular alternative flour noodles include:

  1. Chickpea noodles – Made from chickpea flour, these noodles are high in protein and fiber, making them a great option for those looking for a healthier pasta substitute.
  2. Lentil noodles – Similar to chickpea noodles, lentil noodles are made from lentil flour and offer a high-protein, high-fiber alternative to traditional wheat-based noodles.
  3. Quinoa noodles – Quinoa is a complete protein, containing all nine essential amino acids. Quinoa noodles are made from quinoa flour and provide a nutritious and gluten-free option for noodle lovers.

Now that we’ve explored the various types of noodles, let’s delve into the healthiest type of noodle. In the next section, we’ll discuss the nutritional benefits and drawbacks of each type of noodle, and ultimately determine the healthiest choice.

The Nutrition of Noodles: What Makes a Noodle Healthy?

The Noodle Nirvana: Discovering the Healthiest Type of Noodle 10

Navigating the world of noodles can be overwhelming, especially when you’re trying to make the healthiest choice. To help make an informed decision, let’s examine the nutritional aspects of noodles and share some personal experiences with each type.

1. Macronutrients

Macronutrients are the main components of our diet and provide energy for our bodies. They include carbohydrates, proteins, and fats. When selecting a healthy noodle, it’s essential to consider the macronutrient composition.

  1. Carbohydrates – As a runner, I’ve always been a fan of carbohydrates for fueling my workouts. However, I realized that not all carbohydrates are created equal. Whole grain noodles, such as whole wheat or soba, are a better choice due to their higher fiber content and slower digestion rate.
  2. Proteins – Protein is essential for muscle repair and growth. While most noodles are low in protein, alternative flour noodles, like chickpea and lentil noodles, are a game-changer. As a vegetarian, I’ve found these noodles to be a convenient and delicious way to increase my protein intake.
  3. Fats – Most noodles are low in fat, but it’s essential to consider the type of fat when preparing a noodle dish. Using healthy fats, such as olive oil or avocado, can improve the overall nutritional value of your meal.

2. Micronutrients

Micronutrients, such as vitamins and minerals, are crucial for overall health and well-being. When comparing noodle types, it’s essential to consider their micronutrient content.

  1. Vitamins – Some noodles, like whole wheat and quinoa noodles, are fortified with essential vitamins like B-vitamins and vitamin E. Including these noodles in your diet can help support various bodily functions, such as energy production and immune system function.
  2. Minerals – Minerals like iron, magnesium, and zinc are essential for various bodily processes. Whole grain and alternative flour noodles tend to be higher in these minerals compared to their refined counterparts.

3. Fiber content

Fiber is essential for digestion and maintaining a healthy gut. In my quest for the healthiest noodle, I’ve discovered that whole grain noodles, such as whole wheat and soba, and alternative flour noodles, like chickpea and lentil noodles, have higher fiber content than their refined counterparts.

4. Glycemic index

The glycemic index (GI) measures how quickly a food raises blood sugar levels. As someone with a family history of diabetes, I’m particularly mindful of the GI of my food choices. Lower GI noodles, like whole grain and alternative flour noodles, can help maintain stable blood sugar levels and reduce the risk of diabetes and heart disease.

Comparing the Healthiest Noodle Options

With so many healthy noodle options available, it can be challenging to choose the best one for your needs. In this section, I’ll compare the healthiest noodle options based on my personal experiences and preferences, making it easier for you to make an informed choice.

Noodle TypeKey FeaturesPersonal Experience
Whole grainHigh in fiber, better blood sugar controlHearty texture, robust flavor, versatile in various dishes
Gluten-freeSuitable for gluten sensitivities or celiac diseaseRice noodles for pho and pad Thai, quinoa noodles as pasta substitute
High-proteinIdeal for plant-based diets or those looking to increase protein intakeChickpea noodles pair well with different sauces, lentil noodles work well with hearty vegetables
Low-carbSuitable for low-carb or ketogenic dietsShirataki noodles absorb flavors well, zucchini noodles as a light pasta alternative

Whole grain noodles

Whole grain noodles, such as whole wheat and soba, are an excellent choice for those looking to boost their fiber intake and maintain stable blood sugar levels. I’ve found that whole grain noodles have a heartier texture and a more robust flavor compared to refined noodles. They’re versatile and can be used in various dishes, such as stir-fries and cold noodle salads. For me, whole grain noodles have become a go-to option for a satisfying and wholesome meal.

Gluten-free noodles

Gluten-free noodles, like rice and quinoa noodles, cater to those with gluten sensitivities or celiac disease. As someone who doesn’t have gluten issues, I was initially hesitant to try these noodles. However, I’ve found that rice noodles are perfect for dishes like pho and pad Thai, while quinoa noodles offer a slightly nutty flavor and are a great substitute for traditional pasta. If you’re looking for gluten-free options, these noodles are both delicious and versatile.

High-protein noodles

High-protein noodles, such as chickpea and lentil noodles, have been a revelation for me as a vegetarian. These noodles provide a substantial protein boost, making them perfect for those looking to increase their protein intake or follow plant-based diets. I’ve found that chickpea noodles have a mild flavor that works well with a variety of sauces, while lentil noodles have a slightly earthier taste that pairs well with heartier vegetable dishes. For protein-packed meals, these noodles are an excellent choice.

Low-carb noodles

For those following low-carb or ketogenic diets, low-carb noodles, like shirataki or zucchini noodles, offer a guilt-free alternative. My first experience with shirataki noodles was surprising – they have a slightly rubbery texture but absorb flavors well, making them suitable for dishes like stir-fries or soups. On the other hand, zucchini noodles, or “zoodles,” are a vegetable-based option that I’ve found to be a refreshing and lighter alternative to traditional pasta. While they don’t have the same texture as wheat-based noodles, they’re a delicious and healthy option for those watching their carb intake.

Customizing Your Noodle Experience

The Noodle Nirvana: Discovering the Healthiest Type of Noodle 11

Creating a healthy noodle dish is about more than just choosing the right type of noodle. It’s also about customizing your meal with nutritious and flavorful ingredients.

01 Adding vegetables

Incorporating vegetables into your noodle dishes is a fantastic way to boost their nutritional value and add color, texture, and flavor. One of my go-to moves is to add a mix of fresh and cooked vegetables to my noodle dishes. For example, I love combining sautéed mushrooms, bell peppers, and carrots with fresh spinach or kale in a stir-fry or pasta dish. The variety of colors, flavors, and textures creates a vibrant and satisfying meal.

02 Incorporating lean proteins

Adding lean proteins to your noodle dishes can help keep you feeling fuller for longer and support muscle growth and repair. As a vegetarian, I’ve experimented with various plant-based protein sources like tofu, tempeh, and edamame. I’ve found that marinated and pan-fried tofu works wonders in a noodle stir-fry, while tempeh can add a delicious, nutty flavor to pasta dishes. For meat-eaters, grilled chicken, turkey, or fish can also make excellent protein-rich additions.

03 Choosing healthy sauces and condiments

Sauces and condiments can make or break the healthiness of your noodle dish. Instead of using store-bought sauces that can be high in sodium and added sugars, I’ve enjoyed experimenting with making my own healthier alternatives. For example, I’ve made a delicious peanut sauce using natural peanut butter, low-sodium soy sauce, lime juice, and a touch of honey. This homemade sauce elevates my noodle dishes while keeping the sodium and sugar content in check.

04 Portion control and moderation

As a noodle lover, it can be tempting to go overboard with portion sizes. Over the years, I’ve learned the importance of moderation and portion control. I like to use smaller plates or bowls to help control my serving size and ensure I’m not overeating. Also, by filling half my plate with vegetables and dividing the remaining half between noodles and protein, I create a balanced and satisfying meal without overindulging.

Summary

In this article, we explored the healthiest types of noodles and how to customize your noodle experience for a nutritious and satisfying meal. Whole grain, gluten-free, high-protein, and low-carb noodles all offer various health benefits, depending on your dietary preferences and nutritional goals.

To further enhance your noodle dishes, consider adding a mix of fresh and cooked vegetables, incorporating lean proteins, choosing healthy sauces and condiments, and practicing portion control and moderation. By making mindful choices and experimenting with different ingredients, you can enjoy a delicious and wholesome noodle meal that caters to your specific needs and preferences.

FAQs

What are the healthiest types of noodles?

Whole grain, gluten-free, high-protein, and low-carb noodles are among the healthiest options. Your choice will depend on your dietary preferences, nutritional goals, and personal taste.

How can I incorporate more vegetables into my noodle dishes?

You can add a mix of fresh and cooked vegetables, such as sautéed mushrooms, bell peppers, and carrots, along with fresh spinach or kale. This adds color, texture, and flavor to your dish, making it more nutritious and visually appealing.

What are some lean protein options for noodle dishes?

For plant-based diets, tofu, tempeh, and edamame are great protein sources. For meat-eaters, grilled chicken, turkey, or fish can be excellent protein-rich additions to noodle dishes.

How can I make my own healthy sauces for noodle dishes?

Experiment with homemade sauces using natural ingredients, such as natural peanut butter, low-sodium soy sauce, lime juice, and a touch of honey for a healthier peanut sauce. Homemade sauces can help you control sodium and sugar content in your noodle dishes.

How can I practice portion control with noodle dishes?

Use smaller plates or bowls to control serving sizes, and fill half your plate with vegetables, dividing the remaining half between noodles and protein. This approach helps create a balanced and satisfying meal without overindulging.

The Ultimate Guide: How Long Does Thawed Cooked Shrimp Last in the Fridge?

Have you ever found yourself puzzled, wondering how long thawed cooked shrimp lasts in the fridge? Fear not, seafood lovers!

In this ultimate guide, we’ll explore the shelf life of your favorite crustacean, as well as tips and tricks for safe storage, mouth-watering recipes, and frequently asked questions to make your shrimp experience a breeze.
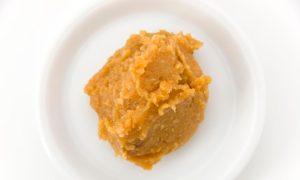
How Long Does Thawed Cooked Shrimp Last in the Fridge

How Long Does Thawed Cooked Shrimp Last in the Fridge?

As a general rule of thumb, thawed cooked shrimp can last 3 to 4 days in the refrigerator. However, this timeframe can vary depending on a few factors, which we’ll discuss below. To ensure you’re consuming safe and delicious shrimp, always use your senses—smell, texture, and appearance—to determine if it’s still good to eat. If something seems off, it’s best to err on the side of caution and discard the shrimp.

Factors Affecting Shelf Life

1. Quality of the Shrimp

The quality of the shrimp you start with will have a significant impact on how long it lasts in the fridge. Freshly caught, high-quality shrimp will generally last longer than their lower-quality counterparts. When shopping for shrimp, look for firm, plump, and glossy specimens, with minimal to no odor.

2. Preparation and Handling

Proper handling and preparation of shrimp can significantly impact its shelf life. To maximize the freshness of your cooked shrimp, be sure to follow these best practices:

  • Thaw frozen shrimp properly, following the guidelines in our guide on How to Cook Frozen Shrimp
  • Cook shrimp thoroughly, making sure it’s fully cooked before consuming or storing it. If you’re unsure whether your shrimp is cooked, check out our article on How to Tell if Shrimp is Cooked
  • Use clean utensils, cutting boards, and surfaces to avoid cross-contamination with bacteria or other pathogens
  • Allow cooked shrimp to cool slightly before refrigerating, but don’t leave it at room temperature for more than 2 hours

3. Storage Conditions

The conditions in which you store your cooked shrimp can also impact its freshness and shelf life. To maximize the lifespan of your thawed cooked shrimp, follow these storage tips:

  • Store shrimp in an airtight container or wrap it tightly in plastic wrap or aluminum foil
  • The FDA does recommend keeping the refrigerator temperature at or below 40°F (4°C) to maintain food safety and prevent bacterial growth. Place the shrimp in the coldest part of your refrigerator, ideally at a temperature between 32°F (0°C) and 40°F (4°C)
  • Avoid storing shrimp near strong-smelling foods, as shrimp can absorb odors

Tips for Extending Shelf Life

Throughout my culinary journey, I’ve learned some valuable lessons when it comes to extending the shelf life of cooked shrimp. In this section, I’ll share my personal experiences and the techniques I’ve found most effective in preserving the freshness and quality of shrimp.

The Ultimate Guide: How Long Does Thawed Cooked Shrimp Last in the Fridge? 12

Proper Thawing Techniques: My Go-To Method

I’ve experimented with various thawing methods, and the refrigerator method has proven to be the most reliable for maintaining shrimp quality. By placing the frozen shrimp in a covered container and allowing it to thaw in the refrigerator for 12 to 24 hours, I’ve found that the shrimp stays at a safe, consistent temperature, reducing the risk of bacterial growth.

While it does require some planning ahead, I’ve found this method to be the safest and most effective in preserving the shrimp’s texture and taste.

Storing with Airtight Containers: A Lesson Learned

I’ve tried storing cooked shrimp in various ways, from wrapping it in plastic wrap to using simple lidded containers. However, I discovered that using airtight containers is the best way to keep my shrimp fresh and prevent unpleasant odors from permeating the fridge.

Once, when I stored cooked shrimp in a regular lidded container, I noticed a slightly off smell in my fridge after just two days. After switching to airtight containers, the shrimp remained fresh and odor-free for up to four days.

Here’s my routine for storing cooked shrimp in airtight containers:

  1. Let the shrimp cool for a few minutes after cooking.
  2. Place the shrimp in an appropriately sized airtight container, minimizing excess air.
  3. Seal the container and place it in the coldest part of the refrigerator.

Using Vacuum-Sealed Bags: A Game-Changer

The Ultimate Guide: How Long Does Thawed Cooked Shrimp Last in the Fridge? 13

When I started using vacuum-sealed bags for storing cooked shrimp, it was a game-changer. By removing air from around the shrimp, the vacuum-sealed bags helped to further extend the shrimp’s shelf life, keeping it fresh for even longer than when stored in an airtight container.

My process for using vacuum-sealed bags is as follows:

  1. Allow the cooked shrimp to cool slightly.
  2. Place the shrimp in a vacuum-sealable bag, spreading them out evenly.
  3. Use a vacuum sealer to remove the air and seal the bag.
  4. Store the vacuum-sealed bag in the coldest part of the refrigerator.

These personal experiences have taught me the importance of proper thawing and storage techniques for cooked shrimp. By following these tips, I’ve been able to enjoy fresh, delicious shrimp dishes for longer, making the most of my seafood purchases.

Recognizing Spoiled Shrimp

Being able to recognize spoiled shrimp is essential for both food safety and taste. Here are some key factors to consider when determining if your shrimp has gone bad:

Visual Cues

Spoiled shrimp often display changes in color and appearance. Fresh, cooked shrimp should have a firm, opaque appearance and be pinkish in color. If you notice that the shrimp has become slimy, discolored, or shows signs of mold, it’s likely no longer safe to eat.

Smell Test

Shrimp has a relatively mild smell when it’s fresh. If your shrimp has a strong, fishy, or sour odor, it may be spoiled. Trust your nose – if something smells off, it’s best to discard the shrimp.

Texture Changes

Spoiled shrimp can have a mushy or soft texture. If you notice that your cooked shrimp feels slimy or has lost its firmness, it’s probably time to throw it away.

Food Safety Precautions

The Ultimate Guide: How Long Does Thawed Cooked Shrimp Last in the Fridge? 14

As a home cook, I’ve learned the importance of food safety precautions firsthand. In this section, I’ll share some personal experiences related to food safety, specifically when handling and preparing shrimp.

Importance of Proper Thawing: A Lesson in Patience

Early in my culinary adventures, I was eager to prepare a delicious shrimp dish but hadn’t planned far enough ahead to allow for proper thawing. In my haste, I attempted to thaw the shrimp at room temperature. Unfortunately, the shrimp ended up with an off taste, and I later learned that this method can lead to bacterial growth.

Since then, I’ve always used the refrigerator method for thawing shrimp, and the results have been consistently better. Although it requires some planning, the improved taste and safety make it worth the wait.

Time and Temperature Control: Preventing a Shrimp Mishap

Once, while hosting a dinner party, I prepared shrimp as an appetizer. After cooking, I left the shrimp out at room temperature for guests to enjoy, but the party went on for longer than anticipated. After several hours, I realized that the shrimp had been sitting out for too long, increasing the risk of bacterial growth and spoilage.

From that experience, I’ve learned to be more mindful of time and temperature control. Now, when hosting events, I either serve shrimp dishes straight from the fridge or use ice to keep them chilled throughout the evening.

Reheating Cooked Shrimp: Striking the Right Balance

I used to struggle with reheating cooked shrimp, often ending up with overcooked, rubbery results. After researching and experimenting, I discovered that the key to reheating shrimp is to heat it evenly and quickly, without overcooking it.

My preferred method for reheating shrimp is using a microwave. I arrange the shrimp in a single layer on a microwave-safe plate, cover it with a microwave-safe lid, and heat it in 30-second intervals, checking the internal temperature with a food thermometer to ensure it reaches 165°F (74°C).

These personal experiences have taught me the importance of food safety precautions when handling and preparing shrimp. By implementing these lessons, I’ve been able to enjoy delicious, safe, and high-quality shrimp dishes in my own kitchen.

Conclusion

In conclusion, knowing how to store and handle cooked shrimp properly is crucial for maintaining its freshness, taste, and safety. Let’s summarize the key points discussed throughout this article:

Summary of Key Points

  1. Cooked shrimp can last for 3 to 4 days in the fridge when stored properly.
  2. Factors affecting shelf life include the quality of the shrimp, preparation and handling methods, and storage conditions.
  3. Proper thawing techniques, such as refrigerator and cold water thawing, are essential for maintaining shrimp quality.
  4. Airtight containers and vacuum-sealed bags can help extend the shelf life of cooked shrimp.
  5. Recognizing spoiled shrimp is crucial for ensuring food safety; look for visual cues, smell, and texture changes.
  6. Food safety precautions, such as proper thawing, time and temperature control, and reheating methods, are critical for maintaining the quality and safety of cooked shrimp.

Importance of Proper Storage and Handling

Proper storage and handling of cooked shrimp play a vital role in preserving its freshness, taste, and safety. By using airtight containers or vacuum-sealed bags, maintaining the right temperature, and being mindful of storage time, you can enjoy delicious shrimp dishes for longer.

Ensuring Food Safety and Quality

By following the guidelines and tips shared in this article, you can ensure the safety and quality of your cooked shrimp. Always pay attention to the signs of spoilage and adhere to proper food safety practices when preparing, storing, and reheating shrimp.

In the end, understanding how to store and handle cooked shrimp correctly will allow you to enjoy delicious, safe, and fresh-tasting shrimp dishes every time.

FAQs

How long does cooked shrimp last in the fridge?

Cooked shrimp can last for 3 to 4 days in the fridge when stored properly in an airtight container or vacuum-sealed bag.

What factors affect the shelf life of cooked shrimp?

Factors that affect the shelf life of cooked shrimp include the quality of the shrimp, preparation and handling methods, and storage conditions.

What are the signs that cooked shrimp has gone bad?

Signs that cooked shrimp has gone bad include changes in color and appearance, a strong, fishy, or sour odor, and a mushy or slimy texture.

What are the best methods for thawing frozen shrimp?

The best methods for thawing frozen shrimp are refrigerator thawing and cold water thawing. Both methods help maintain the shrimp’s quality and prevent bacterial growth.

How can I extend the shelf life of cooked shrimp?

You can extend the shelf life of cooked shrimp by using proper thawing techniques, storing it in airtight containers or vacuum-sealed bags, and following food safety precautions such as time and temperature control.

What is the proper way to reheat cooked shrimp?

To reheat cooked shrimp, ensure that it reaches a safe internal temperature of 165°F (74°C) to kill any potential bacteria. Reheat the shrimp evenly, either in a microwave or on the stovetop, and avoid reheating multiple times to reduce the risk of bacterial growth and maintain the shrimp’s quality.

Can I refreeze cooked shrimp?

Refreezing cooked shrimp is not recommended, as it can lead to a loss of texture and flavor. Instead, try to only thaw the amount of shrimp you plan to consume and store the leftovers properly in the fridge.

A Flavorful Journey: How to Store Miso Paste After Opening

Welcome, miso lovers! Storing your favorite umami-packed ingredient is crucial for maintaining its deliciousness.

In this fun and concise guide, we’ll explore how to store miso paste after opening, while also learning about its types, production, and shelf life. And if you’re curious about miso paste’s lifespan in the fridge, don’t miss this helpful link here.

Let’s dive into the world of miso and keep it fresh and tasty!

A Flavorful Journey: How to Store Miso Paste After Opening 15

Understanding Miso Paste

Before we dive into storage methods, let’s explore the world of miso paste by discussing its different types, how it’s made, and its shelf life.

Different Types of Miso Paste

There are several types of miso paste, each with distinct flavors and uses. The most common types are:

White Miso (Shiro Miso): This mild and sweet miso is made with a higher ratio of rice to soybeans, making it ideal for dressings, sauces, and light soups.

Red Miso (Aka Miso): A saltier and stronger-flavored miso, it’s made with a higher proportion of soybeans and is fermented for a longer period. It’s perfect for heartier dishes, such as stews and braises.

Mixed Miso (Awase Miso): As the name suggests, this miso is a blend of white and red miso, offering a balanced flavor that works well in a variety of recipes.

How Miso Paste is Made

Miso paste is produced by fermenting a mixture of soybeans, salt, and koji (a fungus called Aspergillus oryzae). The koji helps break down the soybeans, creating a paste that’s rich in umami flavor. The fermentation process can range from a few weeks to years, depending on the desired taste and consistency.

Shelf Life of Miso Paste

Unopened miso paste has a long shelf life, typically lasting between 9 to 18 months when stored in a cool, dry place. However, once opened, it’s essential to store the miso paste properly to maintain its freshness and flavor. With proper storage, opened miso paste can last up to a year in the fridge. To learn more about miso paste’s longevity in the fridge, click here.

Storing Miso Paste: The Basics

Unopened Miso Paste

If your miso paste is still sealed, store it in a cool, dark place, such as a pantry or cupboard. Ensure that it is away from direct sunlight or heat sources to maintain its quality and prevent spoilage.

Opened Miso Paste

As mentioned earlier, opened miso paste must be stored in the refrigerator. Keep it in an air-tight container to prevent moisture loss, contamination, and odor absorption.

Factors Affecting Miso Paste Quality

  1. Temperature: Miso paste is sensitive to temperature changes. Storing it in a cool environment slows down the fermentation process and helps retain its quality.
  2. Light: Exposure to direct sunlight can affect the flavor and color of miso paste. Ensure your storage space is dark or that the container is opaque.
  3. Air Exposure: Oxygen can cause miso paste to dry out and lose its quality. An air-tight container is essential for maintaining freshness.
  4. Moisture: Keep miso paste away from moisture sources, as excess water can lead to spoilage.

Containers for Storing Miso Paste


A Flavorful Journey: How to Store Miso Paste After Opening 16

Selecting the right container is essential for preserving the freshness and flavor of miso paste. In this section, we’ll explore the different types of containers and offer guidance on choosing the best one for your miso paste.

Types of Containers

There are three primary types of containers suitable for storing miso paste:

Glass Containers: Glass containers are an excellent choice for storing miso paste because they are non-reactive and don’t absorb odors. Additionally, they are easy to clean and can be used for various other food storage purposes.

Ceramic Containers: Ceramic containers, like glass, are non-reactive and don’t absorb odors. They are also visually appealing, making them an attractive option for storing miso paste. However, they can be more fragile than glass or plastic containers.

Plastic Containers: While plastic containers are lightweight and durable, they may absorb odors over time. When using plastic containers, opt for food-grade, BPA-free plastic to ensure your miso paste remains safe and uncontaminated.

Choosing the Right Container for Your Miso Paste

When selecting a container for storing miso paste, consider the following factors:

Material: Choose a non-reactive material, such as glass or ceramic, that won’t affect the miso paste’s flavor or absorb odors.

Size: Pick a container that is appropriately sized for the amount of miso paste you have. Using a container that is too large can increase the risk of spoilage due to increased air exposure.

Airtight Seal: Ensure the container has an airtight seal to prevent the miso paste from drying out and to protect it from external contaminants.

Ease of Cleaning: Select a container that is easy to clean and dishwasher-safe to maintain proper hygiene.

By considering these factors, you’ll be able to choose the ideal container for storing your miso paste and preserving its quality and flavor for as long as possible.

The Refrigeration Method: Chill Out with Fresh Miso Paste

A Flavorful Journey: How to Store Miso Paste After Opening 17

Keeping your miso paste fresh and tasty is a breeze with the refrigeration method. Let’s dive into a step-by-step guide that’s as cool as your fridge, find out how long miso paste can chill in there, and learn how to prevent cross-contamination while keeping things fun and engaging.

Step-by-Step Guide to Refrigerating Miso Paste

  1. Choose Your Miso’s New Home: Pick a non-reactive, airtight container made of glass or ceramic that’s just the right size for your miso paste.
  2. Spoon and Smooth: Transfer your miso paste into the container, and give it a nice, smooth surface with the back of a spoon.
  3. Keep It Cozy: Press a piece of plastic wrap directly onto the miso paste’s surface to shield it from air and prevent crust formation.
  4. Seal the Deal: Secure the airtight lid, and get ready for some fridge action.

How Long Miso Paste Lasts in the Refrigerator

With proper storage, your miso paste can enjoy an extended stay in the fridge for up to a year! Just make sure you follow the storage steps we’ve mentioned, and your miso paste will remain flavorful and ready for your culinary adventures.

Preventing Cross-Contamination

Keep your miso paste in tip-top shape by avoiding cross-contamination with these simple tips:

  1. Designate a Miso Zone: Store your miso paste in a designated spot in your fridge, away from strong-smelling foods that could infiltrate its delicious umami flavor.
  2. Spoon Etiquette: Always use a clean, dry spoon when scooping out miso paste. This helps keep unwanted bacteria and moisture from crashing the miso party.

The Freezing Method: Miso Paste’s Arctic Adventure

A Flavorful Journey: How to Store Miso Paste After Opening 18

The freezing method is a fantastic option for extending the shelf life of your miso paste while maintaining its rich umami flavor. By properly portioning, wrapping, and sealing the miso paste before freezing, you can ensure it remains fresh and delicious.

Benefits of Freezing Miso Paste

Freezing miso paste comes with some frosty perks:

  1. Longer Shelf Life: Freezing extends your miso paste’s life even beyond its refrigerator stay, ensuring it’s ready for action whenever you need it.
  2. Maintain Flavor: Freezing helps preserve the rich umami flavor that makes miso paste such a culinary superstar.

How to Freeze Miso Paste Properly

Let’s get your miso paste ready for its icy vacation:

  1. Portioning Miso Paste: Divide your miso paste into individual portions, making it easy to grab just the right amount for your recipes.
  2. Wrapping and Sealing: Wrap each portion securely in plastic wrap, then place the wrapped bundles in a freezer-safe, airtight container or zip-top freezer bag. Seal tightly to keep out frosty foes like freezer burn.

Thawing and Using Frozen Miso Paste

Ready to bring your miso paste back from its icy getaway? Here’s how:

  1. Thaw It Out: Transfer the frozen miso paste portion to the refrigerator, and let it thaw for a few hours or overnight. Need it sooner? Use the defrost setting on your microwave, but watch closely to avoid overheating.
  2. Give It a Stir: Once thawed, give the miso paste a quick stir to reincorporate any separated liquids.
  3. Get Cooking: Use your thawed miso paste in your favorite recipes, from savory soups to delectable dressings. Enjoy the taste of perfectly preserved miso!

Room Temperature Storage: Miso Paste’s Cozy Staycation

A Flavorful Journey: How to Store Miso Paste After Opening 19

Sometimes, your miso paste might prefer a cozy staycation at room temperature. Let’s chat about the conditions for safe room temperature storage, the preserving power of salt, and how to spot miso paste that’s past its prime—all while keeping things light and fun.

Conditions for Safe Room Temperature Storage

For a comfy room temperature storage experience, follow these guidelines:

  1. Cool and Dry: Store your miso paste in a cool, dry place, away from direct sunlight and heat sources.
  2. Air-Tight Abode: Keep your miso paste in an air-tight container to prevent it from drying out or absorbing any funky odors.

The Role of Salt in Miso Paste Preservation

Salt, miso paste’s trusty sidekick, plays a vital role in preserving its freshness. Acting as a natural preservative, salt helps to inhibit the growth of unwanted bacteria and extend the shelf life of miso paste. No wonder miso and salt are such great pals!

Signs of Spoilage

Keep an eye out for these tell-tale signs that your miso paste has overstayed its welcome:

  1. Off Smells: If your miso paste emits an unpleasant or sour odor, it’s time to say goodbye.
  2. Mold Growth: Spotted any fuzzy mold friends? That’s a clear sign your miso paste is past its prime.
  3. Unusual Color or Texture: If your miso paste changes color or develops an odd texture, it’s best to part ways.

So, if your miso paste fancies a room temperature retreat, remember these tips to keep it safe, sound, and scrumptious. Happy storing!

Maintaining Miso Paste Freshness: Your Umami Guardian

A Flavorful Journey: How to Store Miso Paste After Opening 20

To enjoy the rich umami goodness of miso paste, it’s essential to keep it fresh and flavorful. Let’s explore some tips for maintaining miso paste freshness and the importance of cleanliness in your culinary adventures.

Tips for Keeping Miso Paste Fresh

  1. Seal It: Store your miso paste in an airtight container to prevent it from drying out or picking up unwanted odors.
  2. Cool It Down: Opt for refrigeration or even freezing to extend the miso paste’s shelf life and preserve its flavor.
  3. Portion Control: When using miso paste, scoop out only the amount you need, avoiding double-dipping or introducing moisture to the container.
  4. Avoid Contamination: Store miso paste away from strong-smelling foods or potential contaminants to preserve its distinct umami taste.

The Importance of Cleanliness

Cleanliness is key when it comes to keeping your miso paste fresh and delicious:

  1. Squeaky-Clean Utensils: Always use a clean, dry spoon to scoop out miso paste, preventing unwanted bacteria or moisture from entering the container.
  2. Regular Container Cleaning: When transferring miso paste to a new container or after using a portion, ensure the container is clean and dry before resealing.
  3. Freshness Inspection: Regularly check your miso paste for signs of spoilage, such as off smells, mold growth, or unusual color and texture changes.

Summary

In summary, it is important to refrigerate kimchi after opening in order to preserve its freshness, taste, and quality. This practice helps slow down fermentation and prevents spoilage, ensuring that the kimchi remains enjoyable to consume.

FAQs

Can miso paste go bad?

Yes, miso paste can go bad, especially if not stored properly. While it has a long shelf life due to its high salt content, it can still spoil or develop an off taste or smell. Always store your miso paste in an airtight container and check for signs of spoilage before using it.

Can miso paste be stored at room temperature?

While it’s possible to store miso paste at room temperature, it’s not recommended for opened containers. The ideal storage method for opened miso paste is in the refrigerator, as it slows down the fermentation process and helps maintain its freshness and flavor for a longer time.

How can I tell if my miso paste has gone bad?

Miso paste that has gone bad may exhibit a foul or off smell, mold growth, or a change in texture. If you notice any of these signs, it’s best to discard the miso paste and not use it in your recipes.

Can I still use miso paste if it has been frozen and thawed?

Absolutely! Freezing and thawing miso paste does not have a significant impact on its taste, texture, or quality. Just make sure to follow the proper freezing and thawing methods mentioned in the article to preserve its freshness and flavor.

Does Kimchi Have to Be Refrigerated? Unlocking the Secrets of Korea’s Fermented Treasure

Kimchi, a staple in Korean cuisine, has gained worldwide popularity for its unique taste and numerous health benefits. A fermented dish made of vegetables and spices, kimchi can be stored in various ways, leaving many to wonder: does kimchi have to be refrigerated?
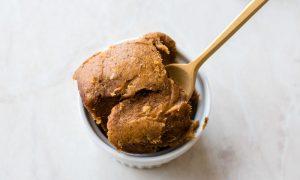
In this article, we’ll explore the ins and outs of kimchi storage and answer this question.

Does Kimchi Have to Be Refrigerated

Understanding Kimchi

Origins and history

Picture yourself traveling back in time to the early days of Korea, where the origins of kimchi can be traced. This beloved dish has been an integral part of Korean culture for centuries, with its roots dating as far back as 37 BCE to 7 CE.

Over time, kimchi has evolved and adapted to various influences, creating a rich tapestry of flavors and techniques that define its storied past.

Ingredients and variations

Does Kimchi Have to Be Refrigerated? Unlocking the Secrets of Korea's Fermented Treasure 21

As you explore the diverse world of kimchi, you’ll discover that there are numerous ingredients and variations that make each version unique. At its core, kimchi consists of vegetables like napa cabbage and radish, combined with a blend of spices such as red chili pepper flakes, garlic, ginger, and fish sauce. With over 200 known varieties, kimchi can be found in countless forms, influenced by regional and seasonal differences in ingredients and preparation methods.

The fermentation process

Does Kimchi Have to Be Refrigerated? Unlocking the Secrets of Korea's Fermented Treasure 22

The magic of kimchi lies in its fermentation process, which transforms simple ingredients into a flavorful and nutritious masterpiece. As lactic acid bacteria and other microorganisms break down the carbohydrates in the vegetables, they produce lactic acid, carbon dioxide, and various compounds that contribute to kimchi’s unique taste.

This process not only enhances the dish’s flavor profile but also improves its nutritional content and digestibility, making kimchi a celebrated staple in Korean cuisine.

Does Kimchi Have to Be Refrigerated?

In short, yes, kimchi should be refrigerated after opening to ensure its freshness, taste, and quality. Refrigeration also helps slow down the fermentation process, extending the shelf life of the kimchi. However, before opening, kimchi can be stored at room temperature.

Traditional Korean storage methods

Does Kimchi Have to Be Refrigerated? Unlocking the Secrets of Korea's Fermented Treasure 23

Traditionally, Koreans stored kimchi in earthenware pots called onggi, buried underground to maintain a consistent temperature and humidity. This method allowed for slow fermentation while protecting the kimchi from spoilage.

Modern refrigeration techniques

Today, many people store kimchi in refrigerators, which slows down the fermentation process and prolongs shelf life. Some even use specialized kimchi refrigerators to replicate traditional storage conditions.

Pros and cons of refrigeration

Refrigerating kimchi has both advantages and disadvantages. On one hand, it preserves kimchi for longer periods, reduces the risk of spoilage, and maintains a consistent flavor profile. On the other hand, refrigeration can slow fermentation, potentially hindering the development of complex flavors.

The Impact of Storage on Flavor and Fermentation

Does Kimchi Have to Be Refrigerated? Unlocking the Secrets of Korea's Fermented Treasure 24

Effects on taste and texture

Storage conditions greatly affect kimchi’s taste and texture. Refrigerated kimchi may have a crunchier texture and milder flavor, while room temperature storage can result in softer, more pungent kimchi.

Rate of fermentation

Fermentation occurs more rapidly at room temperature, allowing for the development of complex flavors. In contrast, refrigeration slows fermentation, maintaining a more consistent flavor profile over time.

Microbial activity

Microbial activity is critical to kimchi fermentation, and storage conditions can impact the balance and growth of these microorganisms. Room temperature storage may encourage a broader range of bacterial species, while refrigeration may limit their growth and diversity.

Safe and Proper Storage Guidelines

Does Kimchi Have to Be Refrigerated? Unlocking the Secrets of Korea's Fermented Treasure 25

Storing freshly made kimchi

When storing freshly made kimchi, ensure that it is sealed in an airtight container to prevent contamination and gas buildup. Press down on the vegetables to submerge them in their own liquid, which helps create an anaerobic environment for fermentation.

Prolonging shelf life

To prolong the shelf life of kimchi, store it in the refrigerator, away from direct sunlight and strong-smelling foods. Regularly check the container for gas buildup and release it if needed.

Signs of spoilage

Spoiled kimchi may exhibit a sour or rancid odor, slimy texture, or mold growth. If any of these signs are present, discard the kimchi immediately.

Conclusion

Key takeaways

Determining whether kimchi needs to be refrigerated depends on personal preference and desired fermentation levels. Refrigeration can prolong shelf life and maintain a consistent flavor, while room temperature storage may result in more complex flavors and faster fermentation. Ultimately, proper storage conditions are crucial to preserving kimchi’s taste, texture, and nutritional benefits.

Experimenting with your kimchi storage

Don’t be afraid to experiment with different storage methods, temperatures, and fermentation times to find your ideal kimchi. By understanding the impact of storage conditions on flavor and fermentation, you can create kimchi that suits your personal taste preferences.

Embracing the diversity of kimchi flavors

Kimchi’s diverse range of flavors and textures is a testament to its cultural and culinary significance. By exploring various storage methods and fermentation levels, you can fully appreciate the rich history and complex flavors of this iconic Korean dish. So, whether you choose to refrigerate your kimchi or store it at room temperature, embrace the journey of discovering the perfect kimchi for you.

FAQs

Can kimchi be frozen?

While it is possible to freeze kimchi, doing so can alter its texture and disrupt the fermentation process. If you choose to freeze kimchi, allow it to thaw slowly in the refrigerator before consuming.

How long does kimchi last?

The shelf life of kimchi varies depending on the storage method and conditions. When stored properly in a refrigerator, kimchi can last for several months, while room temperature storage typically results in a shorter shelf life of several weeks to a month.

Is it safe to eat over-fermented kimchi?

Over-fermented kimchi is generally safe to eat, but it may have an extremely sour taste. If you find it too sour, consider using it in cooked dishes like kimchi fried rice or kimchi stew.

What is the ideal temperature for kimchi fermentation?

The ideal temperature for kimchi fermentation ranges from 34°F-39°F (1°C-4°C) for refrigerated storage and 60°F-70°F (15°C-21°C) for room temperature storage. These temperatures promote optimal microbial activity and minimize the risk of spoilage.

Miso Paste Mysteries: Unraveling the Lifespan of this Fridge Staple

Hey there, miso enthusiasts! Are you always wondering, “how long does miso paste last in the fridge?” You’re in luck, as we’re about to dive into the ins and outs of miso paste storage, its shelf life, and how to make sure it stays fresh for as long as possible.

So, without further ado, let’s unravel the mysteries of miso paste!

how long does miso paste last in the fridge

How Long Does Miso Paste Last in the Fridge?

Unopened miso paste

An unopened container of miso paste can last up to a year in the refrigerator, even a few months after the expiration date, provided it is stored in a cool, dark place. The fermentation process, which is crucial to creating miso paste, acts as a natural preservative, contributing to its extended shelf life.

Opened miso paste

Once opened, miso paste can last between six months and a year in the refrigerator, depending on the type of miso and how it’s stored. Proper storage techniques, which we’ll discuss later in this article, are essential to preserving the quality and flavor of your miso paste.

Factors affecting shelf life

Type of miso: Different types of miso paste have varying shelf lives due to their unique fermentation processes and ingredient compositions. Generally, lighter miso pastes (such as white or yellow miso) have shorter shelf lives than darker miso pastes (like red miso).

Preservation methods: Using a clean spoon when scooping miso paste, sealing the container tightly, and storing it in the refrigerator can help extend its shelf life.

Understanding Miso Paste

TypeNameFlavor ProfilePerfect ForHow It’s MadeKey Ingredients
White MisoShiroMild, slightly sweetLight soups, dressings, saucesFermented mixture of soybeans, rice, salt, and kojiSoybeans, rice, salt, koji
Yellow MisoShinshuBalanced, moderately strongVariety of dishes, including soups and marinadesFermented mixture of soybeans, barley or rice, salt, and kojiSoybeans, barley or rice, salt, koji
Red MisoAkaRobust, salty, deep flavorHearty soups, stews, marinadesFermented mixture of soybeans, higher proportion of barley or rice, salt, and kojiSoybeans, barley or rice, salt, koji

White miso (shiro): This mild, slightly sweet miso paste is made from soybeans and rice. It’s perfect for light soups, dressings, and sauces.

Yellow miso (shinshu): Made from soybeans and barley or rice, yellow miso has a slightly stronger flavor than white miso and works well in a variety of dishes.

Red miso (aka): This robust, salty miso paste is made from soybeans and a higher proportion of barley or rice, giving it a deeper color and flavor. It’s ideal for hearty soups, stews, and marinades.

How miso paste is made

Miso Paste Mysteries: Unraveling the Lifespan of this Fridge Staple 26

Fermentation process: Miso paste is created by fermenting a mixture of soybeans, grains (such as rice or barley), salt, and a mold culture called koji. The fermentation process can take anywhere from a few weeks to several years, depending on the desired flavor and texture.

Key ingredients: Soybeans, grains, salt, and koji are the primary ingredients in miso paste, with each contributing to its unique taste and nutritional profile.

Proper Storage Techniques

Refrigerator storage

Optimal temperature: Miso paste should be stored in the refrigerator at a temperature between 34°F and 40°F (1°C to 4°C) to maintain its freshness.

Suitable containers: Use airtight containers or resealable plastic bags to store miso paste, ensuring that it’s protected from air and moisture.

Freezer storage

Preparing miso paste for freezing: You can freeze miso paste in small, portion-sized containers or ice cube trays for easy access and thawing.

Thawing and using frozen miso paste: Thaw

frozen miso paste in the refrigerator or at room temperature. Use thawed miso paste within a few days for optimal flavor and texture.

Signs of Spoilage

Miso Paste Mysteries: Unraveling the Lifespan of this Fridge Staple 27

Color changes

Miso paste that has gone bad may exhibit changes in color, such as darkening or developing mold. Discard any miso paste with visible mold or significant color changes.

Texture changes

Spoiled miso paste may become slimy, watery, or have an unusual consistency. If you notice any of these changes, it’s best to discard the miso paste.

Odor changes

An off or sour smell is another sign that your miso paste has spoiled. If the miso paste smells unpleasant, it’s time to throw it out and replace it with a fresh batch.

Maximizing Miso Paste Quality

Tips for maintaining freshness

  • Always use a clean spoon when scooping miso paste.
  • Keep the miso paste container tightly sealed.
  • Store miso paste in the refrigerator or freezer.

Using miso paste in recipes

  1. Soups and broths: Miso paste is a classic ingredient in miso soup, adding depth and umami to the broth.
  2. Marinades and glazes: Use miso paste to create flavorful marinades for meats, fish, and vegetables.
  3. Salad dressings: Mix miso paste with oil, vinegar, and other seasonings for a unique and savory salad dressing.

Health Benefits of Miso Paste

Nutritional profile

Here’s a text table showcasing the nutritional profile of miso paste per 1 tablespoon (18 grams) serving:

NutrientAmount% Daily Value
Calories34 kcal
Total Fat1 g1%
Saturated Fat0.2 g1%
Sodium634 mg28%
Total Carbohydrate4.7 g2%
Dietary Fiber1 g4%
Sugars0.7 g
Protein2 g4%
Vitamin K3.3 mcg4%
Riboflavin (Vitamin B2)0.1 mg6%
Niacin (Vitamin B3)0.9 mg4%
Manganese0.1 mg5%

Miso paste is a good source of protein, vitamins, and minerals, such as vitamin K, B vitamins, and manganese. It’s also low in calories and fat, making it a healthy addition to your diet.

Probiotics and gut health

Fermented foods like miso paste contain beneficial probiotics that support gut health and digestion.

Antioxidant properties

Miso paste is rich in antioxidants, which help protect your body from free radicals and oxidative stress.

Miso Paste Alternatives

Substitutes for miso paste in recipes

If you don’t have miso paste on hand, you can use alternatives such as soy sauce, tahini, or a combination of these with other ingredients to mimic miso paste’s flavor and texture.

How to make your own miso paste

Making miso paste at home is possible, but it requires time, patience, and access to the key ingredients, such as soybeans, grains, salt, and koji.

Summary

Miso paste is a versatile, flavorful ingredient with a long shelf life when stored properly. Unopened miso paste can last up to a year in the refrigerator, while opened miso paste can last between six months and a year. Proper storage techniques, such as refrigeration and using airtight containers, are essential to maintaining miso paste’s quality and freshness. Miso paste is not only delicious but also offers numerous health benefits, making it a valuable addition to your pantry.

FAQs

What is miso paste?

Miso paste is a traditional Japanese condiment made from fermented soybeans, grains (like rice or barley), salt, and a mold culture called koji. It’s commonly used in soups, sauces, dressings, and marinades to add a savory, umami flavor.

How long does miso paste last in the fridge?

Unopened miso paste can last up to a year in the refrigerator, while opened miso paste can last between six months and a year, depending on the type of miso and proper storage techniques.

Can I freeze miso paste?

Yes, you can freeze miso paste in small, portion-sized containers or ice cube trays for easy access and thawing. Thaw frozen miso paste in the refrigerator or at room temperature, and use it within a few days for optimal flavor and texture.

How can I tell if my miso paste has gone bad?

Signs of spoiled miso paste include changes in color (darkening or mold growth), texture (sliminess, watery consistency), and odor (off or sour smell). If you notice any of these signs, it’s best to discard the miso paste.

What are the health benefits of miso paste?

Miso paste is a good source of protein, vitamins, and minerals. It’s low in calories and fat, and contains beneficial probiotics that support gut health and digestion. Miso paste is also rich in antioxidants, which help protect your body from free radicals and oxidative stress.

What are the different types of miso paste?

There are several types of miso paste, including white miso (shiro), yellow miso (shinshu), and red miso (aka). Each type has a unique flavor profile and is suitable for different dishes.

Can I use a substitute for miso paste in recipes?

If you don’t have miso paste on hand, you can use alternatives such as soy sauce, tahini, or a combination of these with other ingredients to mimic miso paste’s flavor and texture in your recipes.

How can I make my own miso paste?

Making miso paste at home is possible, but it requires time, patience, and access to key ingredients like soybeans, grains, salt, and koji. The process involves fermenting a mixture of these ingredients for an extended period, resulting in a unique flavor and texture.

How Long Does Cooked Bell Pepper Last in the Fridge: A Comprehensive Guide

Ah, the humble bell pepper – a versatile and flavorful addition to any dish. You’ve whipped up a scrumptious meal, and now you’ve got some leftover cooked bell peppers. But how long do they last in the fridge? You’ve come to the right place!
In this guide, we’ll explore the shelf life of cooked bell peppers, proper storage techniques, and how to tell if they’ve gone bad. Let’s dive in!

how long does cooked bell pepper last in the fridge

How Long Does Cooked Bell Pepper Last in the Fridge?

On average, cooked bell peppers last for 3-5 days in the fridge when stored properly. However, the exact shelf life depends on various factors, such as temperature, humidity, exposure to light and air, and contamination risks.

Factors Affecting Cooked Bell Pepper Storage

Temperature

Store cooked bell peppers in the fridge at a temperature of 40°F (4°C) or below to prevent bacterial growth and spoilage. Monitor your fridge’s temperature regularly to ensure it’s consistently cold enough.

Humidity

High humidity can cause cooked bell peppers to spoil more quickly. Keep your fridge’s humidity levels in check to prolong the life of your bell peppers.

Exposure to Light and Air

Exposure to light and air can affect the quality of cooked bell peppers. Use airtight containers or plastic wrap to protect the peppers from light and air exposure.

Contamination Risks

Cross-contamination from other foods can spoil cooked bell peppers. Always store bell peppers separately from raw meats, poultry, and seafood to prevent contamination.

Signs of Spoilage in Cooked Bell Peppers

How Long Does Cooked Bell Pepper Last in the Fridge: A Comprehensive Guide 28

Visual Indicators

Spoiled bell peppers may exhibit mold, discoloration, or sliminess. Discard any cooked bell peppers showing these signs.

Odor Detection

A strong, sour, or off smell indicates that cooked bell peppers have gone bad. Trust your nose and discard any peppers with an unpleasant odor.

Texture Changes

If the texture of cooked bell peppers becomes mushy, slimy, or excessively soft, they are likely spoiled and should be thrown away.

Taste Considerations

Do not taste cooked bell peppers if you suspect they have spoiled, as doing so could cause foodborne illness.

Proper Storage Techniques for Cooked Bell Peppers

How Long Does Cooked Bell Pepper Last in the Fridge: A Comprehensive Guide 29

Choosing the Right Containers

Store cooked bell peppers in airtight containers or tightly wrapped in plastic wrap to prevent exposure to air and contaminants.

Cooling Down Cooked Bell Peppers Before Refrigerating

Allow cooked bell peppers to cool down to room temperature before placing them in the fridge. This prevents condensation inside the container, which could lead to spoilage.

Separating Bell Peppers from Other Foods

Keep cooked bell peppers separate from raw meats, poultry, and seafood to avoid cross-contamination.

Freezing Cooked Bell Peppers

How Long Does Cooked Bell Pepper Last in the Fridge: A Comprehensive Guide 30

Preparing Bell Peppers for Freezing

Let cooked bell peppers cool down completely before freezing. Cut them into desired sizes or leave them whole, depending on your preference.

How to Freeze Cooked Bell Peppers

Place the cooled bell peppers in airtight containers or freezer-safe plastic bags. Remove as much air as possible before sealing.

Thawing and Reheating Frozen Bell Peppers

Thaw frozen bell peppers in the fridge or use the microwave’s defrost setting. Reheat them in a pan, microwave, or oven until they reach a safe internal temperature of 165°F (74°C).

Shelf Life of Frozen Bell Peppers

When properly stored, frozen cooked bell peppers can last up to 10-12 months. However, for the best quality, it’s recommended to consume them within 3-4 months.

Safety Measures When Handling Cooked Bell Peppers

Preventing Cross-Contamination

Always use separate cutting boards and utensils for cooked bell peppers and raw meats, poultry, or seafood to avoid cross-contamination.

Washing Hands and Utensils

Wash your hands, cutting boards, and utensils with hot, soapy water before and after handling cooked bell peppers.

Monitoring Fridge Temperature

Regularly check your fridge’s temperature to ensure it remains at 40°F (4°C) or below for safe storage of cooked bell peppers.

Delicious Recipes Using Leftover Cooked Bell Peppers

How Long Does Cooked Bell Pepper Last in the Fridge: A Comprehensive Guide 31

Stir-Fries

Add leftover cooked bell peppers to stir-fries for a burst of color and flavor.

Fajitas

Toss cooked bell peppers into fajitas for a satisfying and delicious meal.

Stuffed Bell Peppers

Use leftover cooked bell peppers as a base for stuffed bell peppers. Fill them with rice, beans, meat, or cheese for a hearty dish.

Omelettes and Frittatas

Incorporate cooked bell peppers into omelettes or frittatas for a tasty and nutritious breakfast option.

Summary

In summary, cooked bell peppers can last 3-5 days in the fridge when stored properly. Factors such as temperature, humidity, and exposure to light and air affect their shelf life. Practice safe food handling and storage techniques, and enjoy your cooked bell peppers in various delicious recipes. For longer storage, consider freezing, pickling, or dehydrating your cooked bell peppers.

And if you’re wondering about other foods, such as how to store cooked rice, check out our other helpful articles for tips and guidance!

FAQs

Can I store cooked bell peppers at room temperature?

No, it is not safe to store cooked bell peppers at room temperature, as this can promote the growth of harmful bacteria. Always store cooked bell peppers in the fridge at 40°F (4°C) or below.

Can I refreeze cooked bell peppers after thawing?

It is generally not recommended to refreeze cooked bell peppers after thawing, as this can lead to a loss of quality, texture, and flavor. If you must refreeze, ensure the peppers have been thawed in the fridge and have not been left at room temperature.

How can I tell if cooked bell peppers have gone bad?

Look for visual indicators such as mold, discoloration, or sliminess. Additionally, a strong, sour, or off smell can indicate spoilage, as can changes in texture, such as becoming mushy, slimy, or excessively soft.

Can I freeze raw bell peppers?

Yes, you can freeze raw bell peppers. To do so, wash and dry them thoroughly, remove the seeds and membranes, and cut them into desired sizes. Place the prepared bell peppers in airtight containers or freezer-safe plastic bags and freeze.

Can I eat cooked bell peppers cold?

Yes, you can eat cooked bell peppers cold, as long as they have been properly stored in the fridge. However, if you prefer them warm, you can reheat them in a pan, microwave, or oven before consuming.

The Grain Guardian: How to Keep Cooked Rice Fresh Like a Pro

Ever found yourself with a massive amount of leftover rice but unsure how to keep it fresh and tasty for the next meal? Fret not, for we have got you covered! This guide will walk you through the ins and outs of preserving cooked rice so that you can enjoy it just as much the second time around.

So, let’s dive into the world of rice storage and learn how to keep cooked rice fresh.

How to Keep Cooked Rice Fresh

Cooking Rice for Optimal Freshness

Rinse and soak

To maintain freshness, start by rinsing and soaking your rice to remove excess starch, which can make the cooked rice stickier and less fresh.

Cooking methods and their impact on freshness

Different cooking methods, such as boiling, steaming, and using a rice cooker, can affect the freshness of cooked rice. Experiment with different techniques to find the one that yields the freshest results for your preferred rice variety.

Cooking MethodImpact on FreshnessTexture
BoilingMay become waterlogged; can affect freshnessPotentially uneven
SteamingRetains freshness longerFluffy
Rice CookerConsistent results; maintains freshnessEven and moist
Pressure CookingLocks in moisture and flavor; freshSoft and moist
BakingDrier texture helps maintain freshnessDrier

The role of water-to-rice ratio

Using the correct water-to-rice ratio is essential for achieving perfectly cooked rice and maintaining its freshness. The ideal ratio may vary depending on the type of rice and cooking method. Refer to package instructions or follow our guide for optimal results.

The Cooling Process

The Grain Guardian: How to Keep Cooked Rice Fresh Like a Pro 32

Safe cooling methods

Once the rice is cooked, spread it out on a flat surface or tray, allowing it to cool quickly and evenly. This helps prevent the growth of bacteria and ensures the rice remains fresh.

The importance of proper cooling for freshness

Cooling rice properly is essential for maintaining its freshness and preventing spoilage. Rapid cooling prevents bacteria growth, which can cause foodborne illnesses.

Timeframe for cooling cooked rice

Allow cooked rice to cool at room temperature for no more than one hour before transferring it to the refrigerator or freezer.

Effective Storage Techniques

The Grain Guardian: How to Keep Cooked Rice Fresh Like a Pro 33

Airtight containers

Using airtight containers, such as glass or plastic, is crucial for keeping cooked rice fresh. These containers prevent the rice from absorbing odors from other foods and protect it from drying out or becoming contaminated.

Vacuum sealing

Another effective storage method is vacuum sealing, which removes air from the container, helping to preserve the rice’s freshness and extend its shelf life.

Proper storage temperature

Whether you’re refrigerating or freezing cooked rice, ensure that your storage unit maintains a consistent temperature to prevent spoilage and maintain freshness.

Refrigeration Tips

The Grain Guardian: How to Keep Cooked Rice Fresh Like a Pro 34

Storing rice separately from other foods

Keep cooked rice in a separate container, away from raw or strong-smelling foods, to prevent contamination and maintain its freshness.

Optimal fridge temperature for rice

Store cooked rice in a refrigerator set to 40°F (4°C) or below to ensure it remains fresh and safe to eat. A consistent temperature helps prevent the growth of bacteria that can cause spoilage.

Shelf life of cooked rice in the refrigerator

Cooked rice typically lasts 4-6 days in the refrigerator. However, the exact shelf life may vary depending on the type of rice, storage conditions, and other factors.

Freezing Cooked Rice

Freezing techniques for maintaining freshness

Freezing cooked rice is an excellent way to preserve its freshness for longer periods. Portion the rice into airtight containers or freezer bags, and remove as much air as possible before sealing. Label the containers with the date to keep track of the storage time.

Proper defrosting methods

When you’re ready to use the frozen rice, defrost it in the refrigerator or by using the microwave’s defrost setting. Avoid thawing rice at room temperature, as it can encourage bacterial growth.

Shelf life of frozen cooked rice

Frozen cooked rice can last up to three months in the freezer without significant loss of quality. However, it’s essential to follow proper freezing and defrosting guidelines to ensure optimal freshness.

Reheating Cooked Rice for Freshness

Reheating MethodTime NeededImpact on Rice Texture & Quality
Microwave1-3 minutesQuick and convenient; may dry out if overcooked
Stovetop5-7 minutesEven heating; requires stirring; may dry out if not enough water added
Steamer10-15 minutesGentle reheating; maintains moisture; requires longer time

Microwave

The Grain Guardian: How to Keep Cooked Rice Fresh Like a Pro 35

Time Needed: 1-3 minutes

Impact on Rice Texture & Quality: The microwave is a quick and convenient method for reheating rice. However, if the rice is overcooked, it can become dry. To avoid this issue, consider adding a splash of water and covering the rice with a microwave-safe lid or plastic wrap to retain moisture.

Stovetop

Time Needed: 5-7 minutes

Impact on Rice Texture & Quality: Reheating rice on the stovetop provides even heating and allows for better control over the process. It requires stirring to prevent the rice from sticking to the pan or burning. If the rice appears dry, add a small amount of water to maintain moisture. Overcooking or not adding enough water can result in dry rice.

Steamer

Time Needed: 10-15 minutes

Impact on Rice Texture & Quality: Using a steamer is a gentle method for reheating cooked rice, which helps maintain its moisture and texture. However, this method takes longer compared to microwaving or using the stovetop. Place the rice in a heatproof dish and steam it over boiling water until heated through.

Tips for retaining texture and flavor

The Grain Guardian: How to Keep Cooked Rice Fresh Like a Pro 36

As someone who has experimented with various methods for retaining texture and flavor when reheating cooked rice, I’ve discovered several helpful tips and tricks that can make a big difference. Here are my personal recommendations:

  1. Adding moisture: If the rice appears dry, sprinkle a small amount of water, broth, or even a few drops of oil over the rice before reheating. This added moisture will help steam the rice and restore its original texture.
  2. Layering technique: When reheating a large quantity of rice, consider spreading it out in a thin layer in a wide, shallow dish. This will ensure more even heating and prevent the rice from becoming too dry or mushy.
  3. Fluffing the rice: Gently fluff the rice with a fork after reheating to separate the grains and restore the original texture.
  4. Incorporating flavors: If you’re reheating rice to serve with a specific dish, consider adding a touch of the dish’s sauce, seasoning, or herbs to the rice before reheating. This will not only maintain the rice’s freshness but also enhance its flavor.
  5. Combining methods: Sometimes, combining different reheating methods can yield the best results. For example, you might start by reheating rice in the microwave for a minute or two, then transferring it to a pan on the stovetop to finish heating and add any desired flavors.
  6. Reheating in a rice cooker: If you own a rice cooker with a “keep warm” function, you can also use it to reheat rice. Simply place the rice in the rice cooker, add a splash of water, and set the appliance to the “keep warm” setting. The rice cooker will gently reheat the rice without overcooking it, helping to retain its texture and flavor.
  7. Consider the rice variety: Different types of rice have distinct textures and flavors, so be mindful of the specific variety you’re working with when reheating. For example, jasmine and basmati rice can become dry and brittle if overcooked, while short-grain rice can become sticky and clumpy. Adjust your reheating method and cooking time accordingly to maintain the rice’s unique characteristics.

Signs of Spoilage

Appearance

Spoiled rice may appear discolored, slimy, or moldy. If you notice any of these signs, it’s best to discard the rice.

Smell

Cooked rice that has gone bad will often emit a sour or musty odor. If the rice smells off, it’s likely no longer safe to eat.

Taste

Spoiled rice may taste sour or bitter. If you suspect the rice has gone bad, do not taste it, as consuming spoiled rice can cause foodborne illnesses.

Safety Guidelines

Foodborne illnesses related to rice

Bacillus cereus, a bacterium commonly found in rice, can cause foodborne illnesses if the rice is not stored and handled correctly. Proper storage and reheating techniques can help minimize the risk of such illnesses.

Discarding spoiled rice

If you suspect your rice is spoiled, discard it immediately to avoid potential health risks.

Creative Ways to Use Stored Rice

The Grain Guardian: How to Keep Cooked Rice Fresh Like a Pro 37

Dishes that maintain or enhance freshness

Stored rice can be used in various dishes that maintain or enhance its freshness, such as fried rice, casseroles, and rice salads. These dishes often involve additional ingredients and cooking methods that help restore the rice’s texture and flavor.

Recipes perfect for leftover rice

Leftover rice is ideal for dishes like fried rice, rice pudding, and rice-based soups or stews. Using stored rice in these recipes is not only a great way to minimize waste but also allows you to create delicious meals with minimal effort.

Common Mistakes to Avoid

Storing rice too early

Allowing cooked rice to cool properly before storing it is crucial for maintaining freshness. Storing rice while it’s still hot can create a breeding ground for bacteria, leading to spoilage and potential health risks.

Improper storage temperature

Ensure that your refrigerator and freezer maintain consistent temperatures to prevent fluctuations that can contribute to spoilage and decrease the rice’s freshness.

Insufficiently sealed containers

Using airtight containers or vacuum-sealed bags is essential for keeping cooked rice fresh. Insufficiently sealed containers can expose the rice to air, odors, and bacteria, which can cause spoilage and negatively impact its freshness.

Summary

Keeping cooked rice fresh is a combination of proper cooking, cooling, storage, and reheating techniques. By following the guidelines outlined in this guide, you can ensure that your rice remains safe to eat, maintains its texture and flavor, and lasts as long as possible.

Whether you’re using leftover rice for rice pudding or wondering how long sushi rice lasts, understanding how to keep cooked rice fresh is an essential skill for any home cook or professional chef.

FAQs

How long does cooked rice last in the refrigerator?

Cooked rice typically lasts for 4-6 days in the refrigerator when stored in an airtight container. However, it’s crucial to store it properly and ensure it cools completely before refrigeration to maximize its freshness and shelf life.

Can you freeze cooked rice?

Yes, you can freeze cooked rice. Properly stored in airtight containers or vacuum-sealed bags, frozen rice can last up to 3 months in the freezer. When you’re ready to use it, simply thaw the rice and reheat it using your preferred method.

What is the best way to reheat cooked rice?

The best way to reheat cooked rice depends on your preferences and available equipment. The microwave, stovetop, and steamer are all suitable options. The key is to avoid overcooking and ensure the rice has enough moisture during the reheating process to maintain its texture and flavor.

How can I tell if cooked rice has gone bad?

Signs of spoilage in cooked rice include an off smell, mold or discoloration, and a slimy or mushy texture. If you notice any of these signs, it’s best to discard the rice immediately.

Can I use leftover rice for other dishes?

Absolutely! Leftover rice can be repurposed in various dishes, such as fried rice, rice pudding, and rice-based soups or stews. Using stored rice in these recipes is a great way to minimize waste and create delicious meals with minimal effort.

What are the food safety concerns with storing cooked rice?

Cooked rice can be a breeding ground for bacteria, such as Bacillus cereus, which can cause foodborne illness. To minimize the risk of food poisoning, ensure that you store cooked rice properly by allowing it to cool completely before refrigeration, using airtight containers, and reheating the rice to at least 165°F (74°C) before consuming.

Can I reheat rice more than once?

It’s generally not recommended to reheat rice multiple times, as it increases the risk of bacterial growth and potential foodborne illness. To minimize waste and ensure safety, only reheat the amount of rice you plan to consume immediately.

What Temp is Smoked Salmon Done? A Smokin’ Hot Guide!

Smoked salmon is a delicacy enjoyed by many around the world. With the right combination of temperature, time, and technique, you can create a mouthwatering dish that’s perfect for any occasion.

In this article, we will explore what temp is smoked salmon done, along with various preparation methods and techniques that will help you achieve the best results.

What Temp is Smoked Salmon Done

What Temp is Smoked Salmon Done?

Hot-smoked Salmon Temperatures

Hot-smoked salmon is cooked at higher temperatures, typically between 120°F to 140°F (49°C to 60°C). At these temperatures, the salmon is cooked through and takes on a flaky texture. The process usually takes about 1-3 hours, depending on the thickness of the fillet.

Cold-smoked Salmon Temperatures

Cold-smoked salmon is smoked at lower temperatures, around 75°F to 85°F (24°C to 29°C). This results in a smoother, more buttery texture compared to hot-smoked salmon. The smoking process can take anywhere from 12 to 48 hours.

Salmon Varieties and Preparation

What Temp is Smoked Salmon Done? A Smokin' Hot Guide! 38

Selecting the Right Salmon

Choosing the right salmon is crucial for a successful smoked salmon dish. Read our in-depth comparison of Sockeye Salmon vs. Atlantic Salmon to learn more about the differences and make an informed decision.

Filleting and Brining

Properly filleting and brining your salmon is essential for great flavor and texture. Brining helps to keep the fish moist during smoking, while also adding extra flavor.

A basic brine includes salt, sugar, and water, but you can customize it with additional herbs and spices.

Smoker Options and Wood Choices

What Temp is Smoked Salmon Done? A Smokin' Hot Guide! 39

Different Smoker Types

There are various types of smokers available, including electric, gas, charcoal, and pellet smokers. Each has its pros and cons, so consider your needs and preferences when selecting a smoker.

Selecting the Right Wood

The type of wood used for smoking greatly influences the flavor of the smoked salmon. Popular choices include alder, apple, cherry, and hickory. Experiment with different woods to find your favorite flavor profile. More information from Masterclass.

Maintaining and Monitoring Temperature

Ensuring Consistency

Keeping a consistent temperature is essential for perfectly smoked salmon. Make sure to preheat your smoker and adjust the vents to maintain the desired temperature throughout the smoking process.

Thermometer Options

Using a reliable thermometer is crucial for accurately monitoring the temperature of your smoked salmon. Options include instant-read, probe, and wireless thermometers. Choose one that best suits your needs and budget.

The Smoking Process

What Temp is Smoked Salmon Done? A Smokin' Hot Guide! 40

Preheating and Placement

Before placing the salmon in the smoker, make sure to preheat it to the desired temperature. Position the salmon skin-side down on the grates or use a wire rack for even cooking.

Monitoring Progress

Keep an eye on the temperature and adjust as needed. Check the salmon periodically to ensure it’s cooking evenly and reaches the desired internal temperature.

Avoiding Common Mistakes

Overcooking

To avoid overcooking, use a thermometer and monitor the internal temperature closely. Remove the salmon from the smoker when it reaches the desired temperature.

Temperature Fluctuations

Avoid opening the smoker too often, as this can cause temperature fluctuations. Adjust the vents or add more fuel as needed to maintain a consistent temperature.

Serving Suggestions and Pairings

What Temp is Smoked Salmon Done? A Smokin' Hot Guide! 41

Presentation Ideas

For an elegant presentation, arrange the smoked salmon on a platter with fresh herbs, lemon wedges, and capers. You can also serve it on a bed of greens or with crackers and cheese for a more casual setting.

Complementary Dishes

Smoked salmon pairs well with a variety of dishes. Some popular options include bagels with cream cheese and capers, cucumber dill salad, or a refreshing pasta salad. Experiment with different side dishes to find your favorite combination.

Summary

In conclusion, knowing what temp is smoked salmon done is crucial for achieving the perfect dish. Whether you prefer hot- or cold-smoked salmon, maintaining a consistent temperature and monitoring the internal temperature with a reliable thermometer are key. By selecting the right salmon, properly preparing it, and following the tips and techniques outlined in this guide, you’ll be well on your way to enjoying a delicious smoked salmon meal.

Remember, practice makes perfect, so don’t be discouraged if your first attempt isn’t perfect. Keep experimenting with different salmon varieties, wood choices, and side dishes to create a smoked salmon dish that truly satisfies your taste buds.

FAQs

Can I freeze smoked salmon?

Yes, you can freeze smoked salmon for long-term storage. For best results, wrap the salmon tightly in plastic wrap or aluminum foil, and place it in an airtight container or freezer bag. Read our guide on how to freeze smoked salmon for more information.

What is the difference between hot-smoked and cold-smoked salmon?

Hot-smoked salmon is cooked at higher temperatures (120°F to 140°F), resulting in a flaky texture, while cold-smoked salmon is smoked at lower temperatures (75°F to 85°F), giving it a smoother, more buttery texture. The smoking process for hot-smoked salmon is also shorter, usually taking between 1-3 hours, while cold-smoking can take 12-48 hours.

How do I know when my smoked salmon is done?

Use a reliable thermometer to check the internal temperature of the salmon. For hot-smoked salmon, the internal temperature should reach 140°F (60°C) to ensure it’s cooked through. For cold-smoked salmon, the texture and appearance should be consistent throughout the fillet.

What type of wood is best for smoking salmon?

Popular wood choices for smoking salmon include alder, apple, cherry, and hickory. Each type of wood imparts a distinct flavor to the salmon. Experiment with different woods to find your favorite flavor profile.

How should I serve smoked salmon?

Smoked salmon can be served in various ways, including on a platter with fresh herbs, lemon wedges, and capers, on a bed of greens, or with crackers and cheese. It also pairs well with bagels and cream cheese, cucumber dill salad, or a refreshing pasta salad. Be creative and try different serving ideas to suit your taste and occasion.