How to Clean Calphalon Pans: Our Step-by-Step Guide for Hard-Anodized Pans!

If you have ever tried a Calphalon nonstick cooking pan then you know there is no going back. These pans are so premium and comfortable to use that they have become a chef’s favorite over the last few years. 

As their popularity grew with time, more people started to use it. The problem is, we don’t know how to clean them properly. With nonstick pans, the cleaning process needs to be very specific. Otherwise, you run the risk of damaging the pan. 

In this article, we will explore how to clean  Calphalon pans or any hard-anodized pans for that matter. 

You will find all the best methods and tricks we love to use every day in our kitchen. But first, let’s figure out what Calphalon pans really are and what makes them different.

What is a Calphalon Pan?

What is a Calphalon Pan

In simple words, Calphalon pan belongs to the category of cookware that is specifically named for cookware owned by a larger company “Newell Rubbermaid”. 

It is famous for its non-stick surfaces, which are unique because they are made of anodized aluminum rather than Teflon, which is a much more common non-stick coating material. 

Calphalon cookware has grown in popularity, and the appeal of a nonstick frying pan is particularly appealing to those who enjoy frying.

You might hear many of this type of cookware being referred to as “hard-anodization” cookware. What “hard-anodization” means is the electrochemical process the company uses to harden the aluminum used to make this type of cookware. 

Calphalon’s aluminum becomes much tougher than ordinary aluminum thanks to the use of chemicals and electric pulses, allowing the material to be used for cooking. 

This process also makes the cookware’s surface more resistant to abrasion and corrosion. A piece of this cookware that has undergone the hard-anodization process could theoretically be one of the most robust pans you can purchase.

Regular Cleaning for Hard Anodized Calphalon Pans

how to clean calphalon pans

High-performance and nonstick cookware, the Calphalon pan can be a blessing in the kitchen, but after the meal has been eaten and leftovers are dealt with, it still needs to be washed. 

Fortunately, Calphalon with its hard-anodized aluminum finish makes it a piece of cake to wipe clean even the most stubborn, stuck-on residue.

Things You’ll Need:

  • Hot water
  • Mild liquid dish soap and
  • A soft sponge
  • A soft-bristle dish brush

Instructions:

  • Rinse the Calphalon pan with warm water: Hold the pan under the water stream and splash water around in it. Try to remove as much stuck-on food as possible, before you start scrubbing. Coldwater may cause the pan to warp or weaken if the temperature of the cooking surface is rapidly lowered.
  • Wash the cooking surface of the pan by hand: Although some Calphalon cookware is technically safe for dishwashers, it is always preferable to wash non-stick surfaces by hand to preserve their tempered finish and luster. Hand cleaning will also allow you to spot clean the pan, giving it a more delicate treatment and increasing its durability.
  • Use gentle soaps and scrubbers: Keep in mind to use soaps that don’t contain harsh chemicals or astringent agents. A mild liquid detergent like Dawn or Palmolive would work best. Soaps like these do not cause scratches. You should scrub your Calphalon pans with a non-abrasive sponge or soft-bristled dish brush.
  • Rinse the clean pan thoroughly: After soaking and scrubbing your pan, be sure to wash away all the remains of food and soap. Otherwise, the remaining substances might dry on the cooking surface of the pan, creating an unhygienic film. Shake off the excess water and find a clean place to hang or layout the pan to start drying.
  • Allow the pan to air-dry completely: Wipe your pan dry with a clean and dry absorbent towel. You can also keep the pan upside down on a clean counter or table and leave it to air dry. Remember to keep your pan in an open, well-ventilated area while it dries to quicken the process. 

Follow these simple steps and your Calphalon pan will look brand new! 

Deep Cleaning for Burnt Calphalon Pans

clean burnt calphalon pans

If your pan is crusted and dried due to getting burnt, it might take longer to clean the Calphalon pan. Still, the process is as easy as it can be. Simple traditional tools readily available in your kitchen should do the trick.

Things You’ll Need:

Instructions:

Baking Soda Method:

  • Make a thin paste of baking soda and warm water.
  • Apply 2-3 layers of the paste on the Calphalon pan cooking surface.
  • Let it sit for a minimum of 30 minutes up to 1 hour.
  • Scrub with a gentle-bristle dish brush.
  • Later, gently wash the pan off under the tap.

Pro Tip: If the stain is dense, let the formula be on for a maximum time and apply another layer from time to time.

White Vinegar Method:

  • Take equal proportions of white vinegar and water. Mix well.
  • Put this solution in the burnt Calphalon pan and put the pan on the stove on low flame until it starts boiling.
  • After 1-2 boiling waves, turn the flame off and let the solution rest in the pan for a couple more minutes.
  • Remove the solution and scrub the burnt residues gently with a soft-bristled brush.
  • Rinse well to clean the pan.

Salt and Lemon Method:

  • Take 2 teaspoons of salt and 1.5 teaspoons of lemon juice (increase the quantity if needed).
  • Apply the mixture to the area of burnt spots.
  • Let it be there for a maximum of 30 to 45 minutes.
  • Scrub with the soft-bristled brush without being too hard.
  • Rinse well.

Key Tips for Cleaning Calphalon Pans

  • Read the manufacturer’s recommendations for cleaning and caring for the particular piece of cookware you have bought.
  • Protecting the temper of your nonstick cookware is key to extending its lifespan, so use gentle liquid soaps.
  • For an extra soft touch, a simple cotton washcloth will also get the job done well
  • Do not use steel wool, metallic brushes, and anything else likely to ruin the pan’s temper,
  • Don’t keep away the pan wet with the lids on them, as this could lead them to smell.
  • Store the Calphalon pan in a vertical dish rack to help it drain water while drying.
  • Avoid high flames while treating a burnt pan to keep it safe in the long run.

Care and Maintenance Tips for Hard Anodized Pans

care for calphalon nonstick cookware
  • Let the cooking surface cool down before washing.
  • Always use warm or hot water to clean your Calphalon cookware.
  • Whenever possible, use plastic utensils instead of metal ones to prevent scratches. Never attempt to cut ingredients while they’re inside the pan.
  • Polish pots and pans with a special cleanser. If your pan starts to look dull after repeated use, products like Bar Keepers Friend or Calphalon Cookware Cleanser can restore the temper to its original condition.

Frequently Asked Questions 

01. How Do You Get Stains Out of Calphalon Pans?

Calphalon pans are really sturdy and resistant so removing stains is not a big issue. If you happen to burn or stain the pan, using simple kitchen tricks like baking soda paste or vinegar solution can do the job.

Just take a tablespoon of baking soda and add a teaspoon of water to it. Create a paste and apply it all over the burnt, stained spots. Then leave the pan for 20 minutes. After that use a soft silicone scrubber and scrub the pan carefully. 

You will notice all the stains have come off and it looks new again. Wash the pan under warm water and it’s good to go!

02. Do Calphalon Pans Wear Out?

No, not unless you use abrasive methods and dishwashers to clean it. The harsh detergent and liquid soaps and extremely high temperatures in the dishwasher can damage the tempered hard-anodized layers and wear the non-stick surface down.

The life expectancy of Calphalon pans are very high. Some say they last forever. But just like any other nonstick pans, if you see the upper layer chipping or peeling off, stop using it to make sure you don’t get any toxicity from it. 

Calphalon however, provides a lifetime warranty for all its pots and pans. So if you don’t ruin them due to neglect. You should be able to get a replacement in case it starts to wear off. Pretty convenient, right?

03. What Can You Do With Old Calphalon Pans?

Recycling and reusing is often the best option for old Calphalon pans. Many users often go for redesigning and reusing their old pans into beautiful art pieces for the kitchen. But the recycling option is also an easy way out, as the manufacturer does it for you. 

If you buy new nonstick pots and pans from Calphalon, a cookware company with a wide range of products, you can return your old nonstick pots and pans in the same box as your new purchases.

Calphalon provides a free main-in recycling system where you can send your old pots and pans. They then make sure that the pots and pans are recycled to their abilities. We think it’s quite environmentally friendly as well.

04. When Should You Throw Away Calphalon Pans?

Even though Calphalon claims their hard-anodized pans will last you a lifetime, no non-stick pan can be used forever. Non-stick pans are metal pans with a nonstick layer on top. The non-stick layer is made using many different chemicals. 

When the tempered surface starts to chip away and appear warped, discolored, or scratched, stop using them. 

If you accidentally eat those chipped non-stick layers, it can cause you several health issues and even cancer in rare cases. So never use chipped nonstick pans. 

Usually, a high-quality non-stick pan like a Calphalon lasts around 5-6 years. Compare that to a standard non-stick pan which lasts around 10-12 months.

05. Are Calphalon Pans Worth the Money?

Calphalon was the first brand that introduced its customers to anodized aluminum cookware, which is popular because of the durability and strength of the products. 

There actually aren’t many durable nonstick cookware brands out there. Most of them last for around 2-3 years whereas a single Calphalon pan can easily surpass 5 years of regular usage. 

They feel and look premium and can retain a lot of temperatures while cooking. All these small details add up when you use a pan every single day. 

The tempering process, durability, and long lifespan are just some reasons why it is worth the money.

06. Is Calphalon Toxic?

No. All the items produced by Calphalon are non-toxic cookware, with PTFE in its surfaces. If maintained well, the pans are non-toxic throughout their usage.

To Sum It Up

As promised, the solutions to such a brilliant kitchen appliance is as easy as it can be. With simple kitchen tricks, soft touch, and care, a Calphalon pan can be your best friend in the kitchen, giving you services for years to come. 

Was it helpful? Do you have some tips of your own? Comment down below to let us know!

How to Clean Built Up Grease on Waffle Iron

One of life’s pleasures is to bite into a golden, caramel-colored waffle with a crispy outside and soft, chewy inside. And if you add maple syrup, whipped cream, and ice cream on top with some freshly cut strawberries — heavens!

Whether you crave sweet waffle breakfast or savory waffles with spicy fried chicken, we all can agree, cleaning the waffle iron is the last thing we want to do.

In this article, we will explore how to clean built up grease on the waffle iron. You will be needing only a few household items to do it. 

How to Clean a Waffle Iron after Use

how to clean built up grease on waffle iron

Cleaning a waffle iron is quite easy. With basic kitchen cleaning tools and a little patience, you can easily clean a waffle iron and store it without worrying about wearing it out or causing stains and rust.

Things You’ll Need:

Instructions:

  1. Drain the grease: After the leftover is disposed of, clean the grease. You can remove lines of cold, congealed grease from the grates with a cotton swab. Wipe any residual oil with a fresh paper towel, then fold it and run it in any especially greasy corners.
  2. Remove crusty food bits with a cotton swab: Dislodge burnt cheese and batter from the corners with a cotton swab. And if the bits are stuck too strong, a wooden chopstick can provide a bit more leverage without scratching the nonstick finish.
  3. Dust with a pastry brush: Turn your waffle maker on its side, and sweep the remaining crumbs and residue off and away from the surface.
  4. If all else fails, Steam clean it: Heat your waffle maker to medium, then wet a paper towel under water and ring it out till it is not dripping wet. Using a pair of tongs, rub it over the grates of your waffle maker. Allow the waffle maker to cool before cleaning it with cotton swabs to clean any corners and grooves (if necessary).

How to Clean a Waffle Iron with Baking Soda

easy way to clean waffle maker

Another simple method to deep-clean your precious Waffle Iron, the baking soda method is an easy kitchen trick. Used to keep several of your kitchen gadgets clean, baking soda is a nifty little cleaning partner for you.

Things You’ll Need:

  • Baking soda
  • White vinegar
  • Paper towel
  • Spray bottle
  • Plastic spatula (optional)

Instructions:

  1. Unplug the waffle iron.
  2. Create a paste of baking soda and water. Put a layer of the paste on a cool waffle maker.
  3. Allow the paste to sit on the waffle maker overnight for the formula to work through
  4. Pour vinegar into a spray bottle. And lightly coat the dried baking soda with the vinegar, one section at a time. Do not saturate the griddles.
  5. Use a damp cloth or paper towel to wipe away the residue properly.
  6. For any remaining residue, gently scrape at it with a plastic spatula.
  7. Wipe everything down and allow the waffle iron to dry.

How to Clean a Waffle Iron with Removable Plates

Believe it or not, waffle irons with removable plates are easier to clean. With the following basic steps, your waffle iron will be spotless in a jiffy.

Things You’ll Need:

  • Gentle dishwashing liquid soap
  • Sponge
  • Soft-bristled brush
  • Dishtowel

Instructions:

  1. Unplug the waffle iron, allow your iron to cool, and gently remove the plates.
  2. Submerge the plates in warm water. Add non-abrasive liquid soap if needed.
  3. Gently clean the plates with a sponge or soft-bristled brush. Use a sponge that is made specifically for nonstick surfaces.
  4. Rinse the waffle grid plates in warm water, removing any remaining crumbs.
  5. Allow the plates to dry and push them in their placement. Rest them on a drying rack or on a clean cotton dishtowel on your table or counter.
  6. Clean the outside of the iron.

Maintenance Tips for Waffle Iron

Maintenance Tips for Waffle Iron
  1. Always read and refer to your instruction manual or follow the manufacturer’s website for cleaning tips that are specific to your waffle maker.
  2. Before the first use of the day, a thin coating of cooking oil on nonstick waffle makers is recommended. Cooking oil can be used in a refillable spray bottle, such as a Misto, or brushed on with a pastry brush. Cooking sprays with aerosols will leave a gunky residue on nonstick surfaces.
  3. Never put an electric waffle maker underwater or in the dishwasher.
  4. To cut the cooked waffles or scrape off caked-on batter, avoid using sharp or metal tools. This will scratch the surface, resulting in stuck waffles in the future.
  5. If your waffles start to stick, make sure you’re using the right amount of oil to grease the grid. In addition, the butter in your batter will be crucial. The more butter you use in your recipe, the fewer stuck waffles you’ll get.

Frequently Asked Questions

01. How Do You Fix a Sticky Waffle Iron?

While it sounds counterintuitive, using oil to remove grease is probably the best method we have found. 

Greasy substances found in the kitchen like cooking spray, little amounts of cooking oil or even butter can help clean any sticky waffle iron. 

Simply use the oil to wipe the sticky surface and use a clean paper towel or dishtowel to wipe the residue clean.

Alternatively, you can use a cooking spray to apply an even layer of oil all over your waffle iron. 

02. What is the Easiest Way to Clean a Waffle Iron?

Using a damp towel and cotton swabs is the easiest way to clean a waffle iron. Just wipe down the exterior and let it dry until you are ready to make some waffles. 

The best time to clean your waffle iron would be right after you’ve done making your waffles. Turn off your waffle makers after you’ve made your food. Then wait for a few minutes.

Use a dry paper towel to wipe your waffle maker exactly where you pour the waffle mixture. The heat helps to remove any buildup grease or leftover food from it. You won’t even have to use any soap to clean it. 

03. Are You Supposed to Grease a Waffle Iron? 

Yes. Waffle irons need to be greased every time before use. It can also be greased to clean.

The grease helps to give it a nonstick feeling so when you make your waffles, it won’t stick to the surface. If you are using a cast iron waffle maker, you need to season it from time to time. 

To season your cast iron waffle maker, apply a light coating of oil and plug it in for a while. Repeat this process until the surface looks shiny and smooth. 

04. Can You Wash a Waffle Iron in the Sink?

You should never put the entire waffle iron in the sink. In case of removable plates, remove the plates and clean them in the sink. But for un-removable plates, use a towel to wipe away any excess grease.

The reason why you shouldn’t clean it under the sink is that most waffle makers are electric. So direct contact with water can damage the gadget. It’s the same reason why we don’t wash a toaster in the sink. 

As waffle iron has many grooves and valleys, use cotton swabs if necessary to remove all buildups. Use a pastry brush to apply a light coat of oil to the waffle maker. 

05. Why are My Waffles Sticking to the Waffle Iron?

There can be a few different reasons why your waffle is sticking to the iron. One of them is not applying enough oil. Even if you are using a nonstick waffle maker, you have to use a light brush of oil on it. This helps to prevent it from sticking. 

If the waffles are sticking to the waffle iron, it can also mean the waffle iron is not hot enough. And if the waffle iron is sufficiently heated but the waffles are splitting up in between, it means that it hasn’t cooked through well.

06. Is Pancake and Waffle Mix The Same?

Both waffles and pancakes have similar ingredient lists so it’s not uncommon to assume they are the same thing in different forms. 

Pancakes and waffles both use eggs, milk, and flour. The main difference between them is the batter. 

Usually, waffle batters have more sugar or fat in them than pancake batter, making the resulting waffles browner, caramelized, and crispy.

To End

Cleaning an everyday use gadget like the waffle iron perhaps never seemed simpler! Thanks to these simple tips and tricks, now your lovely waffle iron will stay clean and give more healthy breakfasts for the days to come.

Was our article helpful? Let us know! Feel free to leave a comment and share it with your fellow waffle makers.

Best Mini Food Processors: Compact and Affordable

This post contains affiliate links to products. We may receive a commission for purchases made through these links. But it never influences our product selection process.
Did we say ‘mini’? Yes, we did! 

A typical food processor is bulky, complex, and impossible to move around with. But who said we should lose hope there?

Did you know that you can find compact, portable, and affordable food processors these days? Isn’t that the dream of everybody wanting an exclusive food processing machine that costs half of what the regular ones do?

We are so excited to present you our reviewed list of the best mini food processors that you can find on Amazon today. But it doesn’t stop there. 

We’ll walk you through the pros and cons of the best mini food processors, the buying guideline you should strictly adhere to, and some of the basic questions that only professionals can answer.

What Do You Know about Food Processors? 

When you browse through all the cooking videos on YouTube, you realize at one point that some kitchen equipment is super essential in preparing modern dishes. Don’t you think?

Imagine trying to make peanut butter with a mortar, and having to crush the nuts slowly one by one. It’s better to buy one from the store, right? 

But what if we tell you that you can save up on your monthly grocery expense by having your own mini food processor at home, and making your own healthy nut butter? 

A food processor won’t only grind and crush peanuts, almonds, pistachios, and walnuts, but also oats, spices, hard fruits, and vegetables. It can pretty much crush and grind everything into fine dust! 

Do you want to have some cinnamon powder with your morning coffee? Crush some cinnamon right away with a food processor! 

Do you want to turn heavy cream into butter, oats into flour, make homemade mayonnaise, prepare minced meat, have a pesto Festo, and cookies into crumbs for decoration? In fact, you can go wild with all the things you can do with a food processor! 

So, why wait any longer?

RankPictureNameShops#1
Proctor Silex Food Processor

Proctor Silex Mini Food Processor & Chopper

  • Cup Size: 1.5
  • Dimensions: 7.09 x 4.72 x 5.12 Inches
  • Weight: 1.6 Pounds
  • Item Material: BPA-Free Plastic
  • Blades Material: Stainless Steel
  • Color: Black


Read Our Review


Check Price

#2
Cuisinart Food Processor

Cuisinart Mini Prep Plus Food Processor

  • Dimensions: 9.25 x 7 x 5 Inches
  • Weight: 3 Pounds
    Material: BPA-Free Plastic
  • Blade Material: Stainless Steel
  • Bowl Size: 24 Ounce
  • Wattage: 250 Watts
  • Warranty: 18 Months
  • Included: Spatula and Instruction Book


Read Our Review


Check Price

#3
KitchenAid Food Chopper

KitchenAid Mini Food Processor

  • Dimensions: 5.6 x 7 x 8.7 Inches
  • Weight: 1.98 Pounds
  • Size: 3.5 Cup
  • Base Material: Polycarbonate Plastic
  • Blade Material: Stainless Steel
  • Cord Length: 36 Inches


Read Our Review


Check Price

#4
Cuisinart Mini-Prep Processor

Cuisinart DLC-1SSFR Mini Prep Processor

  • Dimensions: 9 x 6.25 x 8 Inches
  • Weight: 2.7 Pounds
  • Size: 3 Cup
  • Body Material: Plastic
  • Blade Material: Stainless Steel
  • Motor Power: 110 Watts
  • Color: Black or Silver
  • Includes: Spatula and Cleaning Brush


Read Our Review


Check Price

#5
MOSAIC Food Processor

MOSAIC Electric Food Processor

  • Dimensions: 9.65 x 8.86 x 7.28 Inches
  • Weight: 3.94 Pounds
  • Bowl Capacity: 5 Cup/ 1.25 Liter
  • Material: Glass Stainless Steel or Stainless Steel
  • Blade Coating: Titanium
  • Motor Power: 400 Watts
  • Rated Frequency: 60 Hz
  • Voltage: 120 V
  • Color: Silver
  • Includes: User Manual


Read Our Review


Check Price

#6
Kocbelle Wireless Mini Food Processor

Kocbelle Wireless Mini Food Processor

  • Dimensions: 4.2 x 4.2 x 8 Inches
  • Weight: 1.98 Pounds
  • Bowl Capacity: 0.3 Liter
  • Material: BPA-Free Glass
  • Motor Base: 150 Watts
  • Battery Capacity: 1200 mAh
  • Blade Material: Stainless Steel
  • Color: Green
  • Warranty: 1 Year
  • Includes: Scraper, USB Charger, Lithium Batteries, and User Manual.


Read Our Review


Check Price

#7
La Reveuse Electric Mini Food Processor

La Reveuse Electric Mini Food Processor

  • Dimensions: 6.1 x 4.92 x 9.84 Inches
  • Weight: 3.3 Pounds
  • Bowl Capacity: 2 Cup/ 450 ml
  • Motor Power: 200 Watts
  • Blade Material: Stainless Steel
  • Frequency: 60 Hz
  • Voltage: AC 120 V
  • Color: White
  • Includes: Spatula


Read Our Review


Check Price

#8
Toastmaster Mini Food Chopper

Toastmaster Mini Food Chopper

  • Dimensions: 10.12 x 11.93 x 7.64 Inches
  • Weight: 7.6 Pounds
  • Capacity: 1.5 Cup
  • Blade Material: Stainless Steel 
  • Color: Black
  • Warranty: 1 Year


Read Our Review


Check Price

#9
Proctor Silex Mini Food Processor

Proctor Silex Mini Food Processor

  • Dimensions: 5.13 x 5.44 x 8.5 Inches
  • Weight: 1 Pound
  • Capacity: 1.5 Cup
  • Color: White


Read Our Review


Check Price

#10
EZBASICS Mini Food Processor

EZBASICS Mini Food Processor

  • Dimensions: 10 x 5.6 x 5 Inches
  • Weight: 2 Pounds
  • Capacity: 2 Cups
  • Material: BPA-Free Plastic 
  • Blade Material: Stainless Steel 
  • Color: Silver and Red
  • Motor: 260 Watt
  • Voltage: 110 to 120 Volt, 50 to 60 Hz
  • Power Cable Length: 40 Inches
  • Includes: Whisk Attachment and Instructions


Read Our Review


Check Price

#11

AYOTEE Food Processor

AYOTEE Kitchen Cordless Food Processor

  • Dimensions: 6.1 x 3.98 x 3.9 Inches
  • Weight: 12.3 Ounces
  • Capacity: 1 Cup
  • Material: BPA-Free Plastic 
  • Blade Material: 304 Stainless Steel 
  • Color: White and Pink
  • Warranty: 1 Year


Read Our Review


Check Price

#12

Hamilton Beach Mini Food Processor

Hamilton Beach Mini Food Processor & Vegetable Chopper

  • Dimensions: 6.3 x 5.51 x 5.51 Inches
  • Weight: 3.46 Pounds
  • Capacity: 3 Cups
  • Material: Plastic
  • Blade Material: Stainless Steel
  • Color: Black
  • Warranty: One Year


Read Our Review


Check Price

#13

LINKChef Mini Food Processor

LINKChef Mini Food Processor

  • Dimensions: 6.4 x 6.4 x 9.2 Inches
  • Weight: 2.74 Pounds
  • Capacity: 2 Cups
  • Material: Stainless Steel
  • Blade Material: Stainless Steel 
  • Color: Silver and Black
  • Motor: 250 Watt
  • Warranty: 3 Years
  • Includes: Instructions and Anti-Slip Rubber Mat


Read Our Review


Check Price

#14

Goodful Cuisinart Food Processor

Goodful Cuisinart Food Processor

  • Dimensions: 9 x 7.25 x 15 Inches
  • Weight: 7.63 Pounds
  • Capacity: 8 Cups
  • Material: Stainless Steel and Plastic
  • Blade Material: Stainless Steel 
  • Color: White
  • Motor: 350 Watts
  • Includes: Feed Tube and Pusher


Read Our Review


Check Price

Our Reviews of the
Best Mini Food Processors

01. Proctor Silex Mini Food Processor & Chopper

Proctor Silex Food Processor

Proctor Silex 72507PS


Check Latest Price

Easy to Clean Food Processor

FEATURES

  • Cup Size: 1.5 
  • Dimensions: 7.09 x 4.72 x 5.12 Inches
  • Weight: 1.6 Pounds
  • Item Material: BPA-Free Plastic
  • Blades Material: Stainless Steel
  • Color: Black

Why You Should Get It:

Proctor Silex mini food processor is small in size, so you can place it anywhere on the countertop without making the place look untidy, plus it is portable. How cool is it that you can actually carry a food processor to your next camping trip! 

The blades are made of durable, sharp stainless steel that will cut through all types of vegetables, nuts, and seeds. On top of that, you can customize the texture of the ingredients by adjusting the speed control. 

If you don’t feel like washing everything by hand, just separate the blades, lid, and bowl, then pop them into the dishwasher. Can life get any easier?

Finally, the mini food processor is a great replacement for giant food processors that take ten minutes just to set up and put back!

Pros:

  • Purees, chops, and emulsifies.
  • Cleans easily.
  • Simple speed control.
  • Compact.

Cons:

  • You have to use your hand to chop.

Check the Latest Price for Proctor Silex Mini Food Processor & Chopper

02. Cuisinart Mini Prep Plus Food Processor

Cuisinart Food Processor

Cuisinart DLC-2ABC


Check Latest Price

Best Value Food Processor

FEATURES

  • Dimensions: 9.25 x 7 x 5 Inches
  • Weight: 3 Pounds
  • Material: BPA-Free Plastic
  • Blade Material: Stainless Steel
  • Bowl Size: 24 Ounce
  • Wattage: 250 Watts
  • Warranty: 18 Months
  • Included: Spatula and Instruction Book

Why You Should Get It:  

First of all, the body is light enough to carry around, yet durable enough to last years. Cleaning the motor base may be a little tricky since you have to wipe it down gently. But the rest of the parts can be chucked into the dishwasher for a quick rinse. 

The blades can reverse automatically, and there is a handle on the exterior, so you are safe while chopping ingredients. The best part is the instruction book that teaches you a lot about what you can process and how you can do so using this compact food processor. 

Not only is this baby a chopping expert, but it can also puree, blend, emulsify, and grind. On the other hand, the 250-Watt motor makes sure all tasks are achieved perfectly! However, we recommend cutting ingredients into smaller pieces before putting them into the micro food processor. 

In addition, follow this rule of thumb when using this awesome mini food processor- don’t fill up the container more than ⅔ of its space. 

Wash the blades, cover, and work bowl after each use for longevity and prevention of residues.

Pros:

  • 4 available colors.
  • 5 combos to choose from.
  • The parts are dishwasher-safe.
  • Easy touchpad controls.
  • Auto-reversing Smart Power blades.
  • The blades have sharp and blunt edges.

Cons:

  • Not powerful enough for a fine grind.

Check the Latest Price for Cuisinart Mini Prep Plus Food Processor

03. KitchenAid Mini Food Processor

KitchenAid Food Chopper

KitchenAid KFC35160B


Check Latest Price

17 Colors to Choose from!

FEATURES

  • Dimensions: 5.6 x 7 x 8.7 Inches
  • Weight: 1.98 Pounds
  • Size: 3.5 Cup
  • Base Material: Polycarbonate Plastic
  • Blade Material: Stainless Steel
  • Cord Length: 36 Inches

Why You Should Get It:

There is absolutely no doubt that this baby has a high-power motor despite its compact size, making it one of our favorites. This KitchenAid mini food processor review would like to highlight the fact that this machine can chop thick chunks and also create smooth results like hummus and nut butter.

Since the size is small, you may not be able to make a large batch, but don’t get disheartened there. 

The product comes in colors- white, twilight blue, tangerine, onyx black, matte gray, matte black, majestic yellow, liquid graphite, ice blue, hot sauce, green apple, guava glaze, empire red, contour silver, cocoa silver, boysenberry, and lastly, aqua sky blue. 

If you have a multi-shade kitchen, make your pick from this long list of beautiful colors! 

Pros:

  • Choose from 17 colors.
  • The work bowl is BPA-free.
  • 2-speed pulse operation.
  • It has an UltraTight seal.
  • Comes with a handle, lid, and easy serving pour spout.

Cons:

  • The lid is finicky.

Check the Latest Price for KitchenAid Mini Food Processor

04. Cuisinart Mini Prep Processor

Cuisinart Mini-Prep Processor

Cuisinart DLC-1SSFR


Check Latest Price

Best Affordable Food Processor

FEATURES

  • Dimensions: 9 x 6.25 x 8 Inches
  • Weight: 2.7 Pounds
  • Size: 3 Cup
  • Body Material: Plastic
  • Blade Material: Stainless Steel
  • Motor Power: 110 Watts
  • Color: Black or Silver
  • Includes: Spatula and Cleaning Brush

Why You Should Get It:

The manufacturers of Cuisinart were very generous in making this top-rated food processor. It doesn’t just hold 3 cups of content, it can go up to 4! 

In spite of its humble size, the blades are very powerful (and sharp), so cut, chop, grind, puree, and emulsify anything you want in this bombshell! Other than that, it is easy to clean, assemble, and use. 

The motor is said to be so powerful that you need to set it in place with your hand while it works its magic in less than a minute! Also, a little extra gift from Cuisinart- every purchase includes a spatula to scrape food from the container and a brush for cleaning coffee grounds.

Pros:

  • The work bowl measures 21 ounces.
  • The blades are reversible and patented.
  • Dishwasher-friendly.
  • It will last for years.
  • Easy to put together.

Cons:

  • May be loud at high speeds.

Check the Latest Price for Cuisinart Mini Prep Processor

05. MOSAIC Electric Food Processor

MOSAIC Food Processor

Mosaic


Check Latest Price

Most Quiet

FEATURES

  • Dimensions: 9.65 x 8.86 x 7.28 Inches
  • Weight: 3.94 Pounds
  • Bowl Capacity: 5 Cup/ 1.25 Liter
  • Material: Glass Stainless Steel or Stainless Steel
  • Blade Coating: Titanium
  • Motor Power: 400 Watts
  • Rated Frequency: 60 Hz
  • Voltage: 120 V
  • Color: Silver
  • Includes: User Manual

Why You Should Get It:

So far, in our eyes, nothing stood out like the MOSAIC Electric Food Processor. Although it has a large capacity despite being called a ‘mini’ food processor, wait till you hear us out! 

The motor runs at 400 Watts, hence, you can imagine the speed the blades move in order to turn a dish into paste within seconds. We are not saying 30 seconds or so, but 8 seconds! Yes, 8 seconds for meat, and 6 seconds for vegetables! 

You don’t have to worry about getting another big food grinder if you have one of MOSAIC’s food processors at your disposal. It will save so much time during meal preps and overall rush hours.

Don’t be alarmed by its power, because the manufacturers made sure that the product is safe and easy to use and handle. The parts are easy to detach and re-assemble for cleaning. Plus, you can store its compact body anywhere, in a small space or corner.

We are just too impressed to let it get lost in the sea of food processors available in the current market. So, it gets our vote 5 out of 5 as the best 5-cup food processor in the world!

Pros:

  • Rust-proof and broken-proof.
  • Low noise feature.
  • 4 blades that can be detached easily.
  • Assembly is easy.
  • Chops anything in 8 seconds.

Cons:

  • Must be careful in handling it.

Check the Latest Price for MOSAIC Food Processor

06. Kocbelle Wireless Mini Food Processor

Kocbelle Wireless Mini Food Processor

Kocbelle KB05


Check Latest Price

Best Cordless Mini Food Processor

FEATURES

  • Dimensions: 4.2 x 4.2 x 8 Inches
  • Weight: 1.98 Pounds
  • Bowl Capacity: 0.3 Liter
  • Material: BPA-Free Glass
  • Motor Base: 150 Watts
  • Battery Capacity: 1200 mAh
  • Blade Material: Stainless Steel
  • Color: Green
  • Warranty: 1 Year
  • Includes: Scraper, USB Charger, Lithium Batteries, and User Manual.

Why You Should Get It:

First things first, you are getting a very sophisticated mini food processor at a very affordable price. The Kocbelle processor prides itself in making baby food. That’s just how safe and secure this product is. 

It uses 3 blades (upper and lower) to chop food into shreds or puree with 150 Watts power. But the real advantage is that it is cordless. You just have to charge it after or before you tend to use it. That’s it! 

Kocbelle may not be able to grind anything in less than ten seconds, but it sure can do so within 30 seconds, which is not so bad, if you think about it. 

Since the blade is so sharp and competent, mind it when you are cleaning this portable food processor. Detach the parts, and gently clean the sharp material, while chucking the bowl into the dishwasher. Then, wipe the exterior and plugs for the next use. 

Lastly, Kocbelle offers a 1-year warranty for the product, and their customer service is more than willing to help you if you ever need to get in touch with them.

Pros:

  • Cordless, rechargeable, and portable.
  • Press/release the lid to chop/unchop.
  • Perfect for baby food.
  • Scratch-free, leakage-free.
  • Non-slip rubber pad underneath.

Cons:

  • None so far.

Check the Latest Price for Kocbelle Mini Food Processor

07. La Reveuse Electric Mini Food Processor

La Reveuse Electric Mini Food Processor

La Reveuse LARB1814W


Check Latest Price

Safe Mini Food Processor

FEATURES

  • Dimensions: 6.1 x 4.92 x 9.84 Inches
  • Weight: 3.3 Pounds
  • Bowl Capacity: 2 Cup/ 450 ml
  • Motor Power: 200 Watts
  • Blade Material: Stainless Steel
  • Frequency: 60 Hz
  • Voltage: AC 120 V
  • Color: White
  • Includes: Spatula

Video Demonstration:

Click here.

Why You Should Get It:

Why not? 

Have you seen the video demonstration? If not, go check it out!

There are two buttons at the front- chop, and puree that make choosing easy. You can prepare anything for the family and baby using this inexpensive food processor. 

Disassembly, re-assembly, and cleaning is a piece of cake with this baby. You don’t have to wash everything by hand; just pop them in the dishwasher (but the top rack only).

Rest assured, you won’t be hurting yourself while using this product as it meets the North American Electrical Standards. Other than that, the lid has a safe-locking feature.

Pros:

  • Saves space.
  • It has a built-in oil dispenser.
  • Easy assembly and cleaning.
  • A Safe-locking lid ensures safety.
  • One-touch pulse control buttons.

Cons:

  • It can’t puree or crush ice.

Check the Latest Price for La Reveuse Mini Food Processor

08. Toastmaster Mini Food Chopper

Toastmaster Mini Food Chopper

Toastmaster TM-61MC


Check Latest Price

Best Mini Chopper

FEATURES

  • Dimensions: 10.12 x 11.93 x 7.64 Inches
  • Weight: 7.6 Pounds
  • Capacity: 1.5 Cup
  • Blade Material: Stainless Steel 
  • Color: Black
  • Warranty: 1 Year

Why You Should Get It:

Toastmaster is one of the most affordable options on our list of the best mini food processors. It’s also simpler to use and easier to clean. 

One of the biggest catches about the Toastmaster is that it can only chop fruits, vegetables, seeds, and nuts. So, if you’re looking to make purees or pastes, you have to browse from our other products. 

However, if you are going to chop and grind, this is your best mate.

Pros:

  • Safe-locking lid.
  • One-touch pulse buttons.
  • Simple to use.
  • Easier to clean.

Cons:

  • Only chops.

Check the Latest Price for Toastmaster Mini Food Chopper

09. Proctor Silex Mini Food Processor

Proctor Silex Mini Food Processor

Proctor 72500RY


Check Latest Price

Most Lightweight

FEATURES

  • Dimensions: 5.13 x 5.44 x 8.5 Inches
  • Weight: 1 Pound
  • Capacity: 1.5 Cup
  • Color: White

Why You Should Get It:

Proctor Silex has impressed a lot of people with its chopping skills, even if you have to cut the veggies and fruits before you put them into the machine. It is elderly-friendly since it will do all the chopping and dicing into miniature shreds that is impossible for people of certain age groups. 

As with all the mini food processors here, you won’t be able to feed an entire family with it. However, singles, this is what you have been looking for!

The plastic is sturdy and durable, but we don’t recommend you to smash it around for testing. Just make sure to care for your mini food processor.

Customers have not struggled with cleaning or maintaining this masterpiece, so shouldn’t you. In fact, they are absolutely in love with it!

It can hold up to 5 cups of water. On the other hand, it is also compact in size, and comparatively safe to use. 

If you have been loving it too much and using it too much, you might end up overheating it. If that happens, give it a rest for about 45 minutes before running it again.

Pros:

  • Known to save space.
  • Blades are removable.
  • It can customize the texture of the food.
  • Purees, chops, and emulsifies food.

Cons:

  • Gets really hot so you need to be careful if you are cooking for a longer period of time.

Check the Latest Price for Proctor Silex Mini Food Processor

10. EZBASICS Mini Food Processor

EZBASICS Mini Food Processor

EZBASICS CP5002


Check Latest Price

Simple, Yet Versatile

FEATURES

  • Dimensions: 10 x 5.6 x 5 Inches
  • Weight: 2 Pounds
  • Capacity: 2 Cups
  • Material: BPA-Free Plastic 
  • Blade Material: Stainless Steel 
  • Color: Silver and Red
  • Motor: 260 Watt
  • Voltage: 110 to 120 Volt, 50 to 60 Hz
  • Power Cable Length: 40 Inches
  • Includes: Whisk Attachment and Instructions

Why You Should Get It:

A powerful motor that runs on 260 Watts, and sharp blades that cut through all types of ingredients, EZBASICS can do everything that you command it to do! Its usage is also easy as you just have to press the top to get the job done. 

Just make sure that before you start chopping and grinding, you have installed the cover properly. Otherwise, spillage and accidents may occur. 

Regardless of where the electric socket is, you can take this amazing mini-processor anywhere in the kitchen, since it has been blessed with a 40 inches power cable! Besides, the speed can be adjusted according to the recipe, and the internal parts are detachable for cleaning.

Pros:

  • Two colors to choose from.
  • Includes two speeds- high and low.
  • The slicing blades are s-shaped.
  • The anti-slip rubber mat keeps it stable.
  • Stops automatically to prevent splashing and scratches.
  • Detachable and dish washable.

Cons:

  • Difficult to blend unless the ingredients are soft.

Check the Latest Price for EZBASICS Mini Food Processor

11. AYOTEE Kitchen Cordless Food Processor

AYOTEE Food Processor

AYOTEE


Check Latest Price

Best Cordless Mini Food Processor

FEATURES

  • Dimensions: 6.1 x 3.98 x 3.9 Inches
  • Weight: 12.3 Ounces
  • Capacity: 1 Cup
  • Material: BPA-Free Plastic 
  • Blade Material: 304 Stainless Steel 
  • Color: White and Pink
  • Warranty: 1 Year

Video Demonstration:

Click here

Why You Should Get It:

Firstly, this mini food processor is wireless and can be changed later on when the battery is low. It only takes about 3 hours for it to fully charge! 

Campers will benefit from this cordless, portable food processor. For charging, you can even use your power bank or computer! 

The food processor has a child safety lock, so your babies will be safe from harm. It is also safe for the user due to the installation of magnetic suction induction. 

According to the video demonstration, AYOTEE is perfect for preparing baby food! Other than that, cleaning and storage are a piece of cake due to their compact size.

Pros:

  • USB chargeable.
  • Takes only 3 hours to fully charge.
  • Waterproof IPX 6.
  • One-touch operation.
  • Includes Child Safety Lock.

Cons:

  • Blades are horizontal.

Check the Latest Price for AYOTEE Food Processor

12. Hamilton Beach Stack & Press Mini 3-Cup Glass Bowl Food Processor

Hamilton Beach Mini Food Processor

Hamilton Beach 72860


Check Latest Price

Most Easy to Use

FEATURES

  • Dimensions: 6.3 x 5.51 x 5.51 Inches
  • Weight: 3.46 Pounds
  • Capacity: 3 Cups
  • Material: Plastic
  • Blade Material: Stainless Steel
  • Color: Black
  • Warranty: One Year

Why You Should Get It:

The Hamilton beach mini food processor is the ideal choice for couples and small families because it provides more versatility and usage over 1-cup processors. And although it is small, it has the power of a large food processor.

It has a small built-in cord that removes the need for detangling a mess of cords when you need to use this appliance. The easy, one-button use also makes it a good choice for novice cooks and those who focus on functionality instead of flashy features.

Best of all, it is very useful in the kitchen: you can grind whole spices, nuts, and herbs into fine powders and pastes. You can even use it as a veggie chopper and make things like guacamole, salsa verde, dips, and sauces.

If you don’t want to clean by hand, you can just toss the bowl into your dishwasher.

Pros:

  • Takes less than a minute to assemble.
  • The glass bowl is resistant to scratches and lingering odors.
  • One-button operation makes it easier to use.
  • 3 cup capacity is ideal for small families.

Cons:

  • Cleaning can be a little tricky.

Check the Latest Price for Hamilton Beach Food Processor

13. LINKChef Mini Food Processor

LINKChef Mini Food Processor

LINKChef


Check Latest Price

Best Small Food Processor in Stainless Steel

FEATURES

  • Dimensions: 6.4 x 6.4 x 9.2 Inches
  • Weight: 2.74 Pounds
  • Capacity: 2 Cups
  • Material: Stainless Steel
  • Blade Material: Stainless Steel 
  • Color: Silver and Black
  • Motor: 250 Watt
  • Warranty: 3 Years
  • Includes: Instructions and Anti-Slip Rubber Mat

Why You Should Get It:

Whether you want to make spice pastes, grind coffee beans, concoct nut butter, or make salad dressings, this food processor can do it all. In spite of its budget-friendly price, this inexpensive food processor works a lot like high-end ones.

The 4 blades allow for even mincing, so there will be no oddly shaped chunks of aromatics or vegetables. The fact that it operates much more quietly is definitely a plus point for this portable food processor.

If you need to spend time away from home in a dorm, taking this one is a good bet as the stainless steel design makes it sturdy and less prone to damage. It is also easy to clean and there are no nooks or crannies for food to hide in.

This is the best affordable food processor if you have limited storage space in your kitchen. The degree of control it provides makes it great for meal prep no matter what you want to cook.

Pros:

  • Handle and pouring spout make for easy use.
  • 4 dual-level blades ensure finely chopped or minced veggies.
  • Blades can lock, preventing injuries.
  • The anti-slip rubber mat prevents the device from moving when in use.
  • Pulse capability gives you total control over fineness and texture.
  • Sturdy, long-lasting, and dishwasher-safe.

Cons:

  • The motor isn’t as powerful as some would like.

Check the Latest Price for LINKChef Mini Food Processor

14. Goodful Cuisinart 8-Cup Food Processor

Goodful Cuisinart Food Processor

Cuisinart FP350GF


Check Latest Price

Easy to Assemble Food Processor

FEATURES

  • Dimensions: 9 x 7.25 x 15 Inches
  • Weight: 7.63 Pounds
  • Capacity: 8 Cups
  • Material: Stainless Steel and Plastic
  • Blade Material: Stainless Steel 
  • Color: White
  • Motor: 350 Watts
  • Includes: Feed Tube and Pusher

Why You Should Get It:

If you enjoy cooking, chances are a basic mini-processor won’t do the trick for you. Instead, why not get something more like a professional heavy-duty processor that’s scaled-down? That’s exactly what this best 8 cup food processor is; complete with all its fancy functionalities.

For starters, it has 3 speeds, pulse, high, and low, so you can control how finely the device cuts through things. Unlike many compact food processors, it has the ability to cut through things differently. This means you can blend things to make milkshakes/malteds, sauces, and chowders. 

At the same time, you can dice, chop, mince vegetables, and shred things like cheese, lettuce, and coleslaw. Storage is made easy because of its petite size and the cord can be tucked into the base when not in use. Cleanup is also pretty straightforward so you have nothing to worry about!

Pros:

  • 3 chopping settings give you more control.
  • Great value for money.
  • Easy to detach and clean.
  • Versatile blending power.
  • Attachments for blending, slicing, chopping, and shredding.

Cons:

  • Instructions aren’t very clear or detailed.

Check the Latest Price for Goodful Cuisinart Food Processor

Choosing the Best Mini Food Processor for Your Needs

With all the mini food processor reviews out there, it can be pretty confusing to choose the right one. You may be tempted solely by aesthetics or the price, but there are some major features you should factor in before making your decision.

Size and Capacity:

While no mini food processor can compare to a Cuisinart custom 14 cup food processor, the smaller ones have different dimensions, weights, and capacities. This means you can choose whichever one fits your kitchen counter, storage space, and chopping needs.

So if you want the smallest possible food processor, you need to get a one-cup mini food processor like the AYOTEE Kitchen Cordless Food Processor or Proctor Silex Mini Food Processor & Chopper (72507PS)

On the other hand, a more medium-capacity food processor that can hold 3 or 5 cup food processor is better if you have roommates or a small family. These include the Cuisinart DLC-1SSFR Mini Prep Processor or the MOSAIC Electric Food Processor

Meanwhile, the Goodful Cuisinart FP350GF 8-Cup Food Processor is a bit bigger and is best for those who need a higher capacity processor that won’t use up too much storage space.

Noise:

Nobody wants a noisy food processor that raises a racket as you work. However, many people have claimed that ‘noiseless’ mini processors have a weak motor. Instead, you need a quiet food processor that balances sound and power.

Effective, yet quiet mini food processors include MOSAIC Electric Food Processor or the LINKChef Mini Food Processor.

Functionality:

Not all mini food processors are made the same. Some are focused on just chopping or dicing, with one speed, and single button capability. These are great for those who just want a simple processor without any fuss or frills, like the Hamilton Beach Mini Processor. On the other hand, there are models with various speeds and the ability to blend foods, crush ice, slice, and mince like the Goodful Cuisinart FP350GF 8-Cup Food Processor.

Ease of Use:

It is a good idea to get a mini-processor that is easy to assemble, use, take apart, and clean. Kitchenaid mini food processor reviews always praise this brand for having the easiest to use and most efficient appliances. 

Other easy-to-use food processors include the Proctor Silex Mini Food Processor & Chopper, the Cuisinart Mini Prep Processor, and EZBASICS Mini Food Processor.

Frequently Asked Questions 

Below, you’ll find answers to questions we get asked the most about mini food processors.

01. Is a Mini Food Processor Worth Buying?

Mini food processors are a great kitchen appliance for everyone. If you live alone or have a very small kitchen, a smaller processor is a great option for saving space. On the other hand, even if you have a full-size food processor, having a smaller one as a backup or creating single portions is a good idea.

02. What are the Best Mini Food Processors?

Any Cuisinart food processor review will show that they make amazing portable food processors. Similarly, the KitchenAid Mini Processor, Breville food processor, and Sweethome food processor are all reliable and sturdy.

03. What Can I Do with a Food Processor?

Food processors are primarily aimed to dice or chop vegetables and aromatics. They can be used to make dipping sauces, guac, salsa, and even things like mayonnaise, and shakes.

04. Which Brand Has the Best Compact Food Processor?

Classic kitchen appliance brands like Molineux, KitchenAid, and Cuisinart make mini food processors that are compact, yet versatile, and powerful.

05. Can I Make Cookie Dough In a Mini Food Processor?

If you are making a small batch of cookies, you can easily use a mini food processor to combine all the ingredients to make the dough.

In a Nutshell

Whether you are moving out for the first time and want a fully stocked kitchen, or you’ve started cooking at home for the first time, the best mini food processor can make life way easier. They get rid of the need to chop vegetables, work quickly, and use up less power and space. 

Whether you choose a fancy processor with lots of capabilities or a simpler one with just one button, you won’t regret getting yourself one of these. So which one will you get for your kitchen?

Relevant Reads

Table of Contents

Related Posts

How to Use Fagor Pressure Cooker: Way Easier Than You Thought!

Want to know a little secret?

I’ve always been rather terrified of pressure cookers. My mom was always wary of them, and we had both heard stories of injuries sustained from exploding pressure cookers. Because of this, I preferred to cook the old-fashioned way, even though it meant a much longer cook time.
But since moving out, I’ve had little time to indulge in cooking. Gone are the days when I could spend an hour boiling dried beans on the stovetop. So, I got myself a Fagor pressure cooker and tried to get over my fears.

As I unpacked my new Fagor appliance, I asked myself: How to use Fagor pressure cooker? I had to go through a lot of trial and error when getting the hang of using a pressure cooker, but you don’t have to!

Instead, this set of a comprehensive set of Fagor pressure cooker directions will have you cooking like you’ve used pressure cookers all your life.

What is a Fagor Pressure Cooker?

how to use fagor pressure cooker

Fagor is a manufacturer of home appliances, specializing in kitchen and laundry goods. Their most popular products are their range of pressure cookers. But Fagor gets its specialty because their pressure cookers are different from conventional ones.

How so? For starters, they have a slightly different construction. Fagor pressure cookers are made of 18/10 steel, which allows for meat and vegetables to be directly browned in the cooker. 

As a result, stews and curries will be much more flavorful as the browning produces a richer taste.

However, the main difference between Fagor and older cookers is the safety feature. Fagor pressure cookers are much safer when compared to older models of pressure cookers, so they have fewer chances of exploding in your face.

These cookers have a lock button and a pressure indicator. The pressure will not build up in the cooker unless the lock button is pressed down, preventing any accidents. 

Moreover, the pressure indicator will show you that the pot is under pressure and ensures that the food is cooked through.

Different Types of Fagor Pressure Cookers

As mentioned before, Fagor has different kinds of pressure cookers, with slightly different functions. Each cooker is designed to suit different cooking needs.

For instance, the Fagor stovetop pressure cooker like the Innova Pressure Cooker can be used on gas, electric, and induction cooktops. Meanwhile, a Fagor Electric Pressure Cooker needs to be plugged in for it to cook.

On the other hand, the Fagor Rapid Express pressure cooker is a stovetop cooker that can cook up to 8 quarts of food in no time at all. The Fagor Splendid pressure cooker has a 6-quart capacity and 15 PSI. Fagor pressure cooker settings can also vary from model to model.

The Fagor pressure cooker cooking times are pretty much consistent regardless of device. They are also similar to those of more conventional pressure cookers. 

How to Use a Fagor Pressure Cooker

Now let’s dive straight into the meat of the matter. Fagor pressure cooker instructions usually come in a manual with the cooker itself. But in case you tossed out yours, or you’ve inherited a second-hand pressure cooker, this section is for.

Here’s how you should use your pressure cooker safely for the best results:

  1. Check your pressure cooker gasket for cracks or breaks. Ensure that the gasket is flexible and properly set in the lid. Examine the lid and pressure valves to make sure they are clean and free from food residue.
  1. Put the food into the pressure cooker. Remember to adapt recipes for cooking in the pressure cooker as the cooking time is reduced to 1/3 of the original cooking time. Brown meats and vegetables in the cooker if directed in the recipe.
  1. Don’t go beyond filling the cooker over 2/3 full. Foods that expand like rice and soups, stews, and stocks shouldn’t surpass 1/2 the volume of the cooker.
  1. Add the liquid as this is what produces the steam. Use at least 1/2 cup of liquid for cooking times of 10 minutes or less. 

    Two cups of liquid are required for cooking times over 10 minutes. Water, broth, stock wine, and even juice can be used.
  1. Cover with the lid. The mark on the lid should be parallel with the mark on the top of the pot. Press the lid down gently and rotate the lid handle to align the pot and lid handles.
  1. Press the pressure-lock button to lock the lid and allow the pressure to build and turn on the heat.
  1. Select the pressure level suggested by your recipe. Heat the cooker over high heat if using a stovetop cooker until the pressure indicator button rises, showing that the cooker is at the recommended pressure level.
  1. Reduce the heat and time the recipe. Maintain the heat so that a gentle, steady stream of steam is released.
  1. Remove the pressure cooker from the heat once cooking is finished. Reduce the pressure by turning the steam release valve to slowly release the pressure.
  1. Knowing how to open a Fagor pressure cooker may be the most important part. Remove the lid when the pressure has been lowered and the pressure indicator button shows that the pressure is down.
  1. The lock will then release so that the cooker can be opened. Open the lid facing away from you to prevent getting burned by escaping steam.

How to Lock Fagor Pressure Cooker

Lock Fagor Pressure Cooker

Locking your pressure may be the most important part of cooking, as this prevents your pressure cooking from blowing up in your face.

Set the lid of your cooker. The mark on the lid should be aligned with the mark on the top of the pot. 

Press the lid down and rotate the lid handle until the pot and lid handles are parallel to each other. Press the yellow pressure-lock button to lock the lid and this will let the pressure build-up.

You can find out how to use your pressure cooker here.

How to Clean Your Fagor Pressure Cooker

Cleaning and maintaining your pressure cooker after each use ensures that it works well and lasts longer without any hiccups. Here’s how you should go about doing it.

  1. Unplug your pressure cooker and let it cool down if you just cooked in it.
  1. Take out the lid and interior pot. Set them in the sink for the time being and let them soak in some warm water if needed.
  1. Clean the exterior of your pressure cooker. Do not ever dunk your pressure cooker in the water. Use a mild soap and dishcloth to get rid of the grime and crumbs on the outside of the cooker.
  1. Hand wash the lid and its components with dish soap and a sponge.
  1. Remove the steam-release handle and check for food particles. You can use a damp dishcloth or sponge to get rid of oil and crumbs.
  1. Next, remove the anti-block shield. Remove this from the underside of the lid to wipe the steam valve clean.
  1. Take out the float valve and silicone ring. Wipe both pieces down with a damp cloth sprayed with diluted vinegar solution.
  1. Let all these parts dry. You can pat everything down with a microfiber cloth or take the time to air dry these parts.
  1. Clean the sealing ring. This is what seals the lid closed and should be cleaned frequently to remove any lingering smells and then left to air dry.
  1. Wash the inner pot and steam rack. It is best to wash by hand unless specified by the manufacturer to be dishwasher safe.
  1. Once everything is dried completely, reassemble the pressure cooker and use it as needed.

You may also like: How to clean electric kettle with vinegar

Frequently Asked Questions 

Below you’ll find answers to questions we get asked the most about using the Fagor pressure cooker.

01. Is Fagor a Good Brand?

For most home cooks, Fagor is a good and reliable brand that makes a range of pressure cookers. They are particularly favorable because you can get electric and stove top options.

02. Are Fagor and Zavor the Same?

Fagor and Zavor are two different entities and do not have any affiliation with each other.

03. How to Cook Rice in a Fagor Pressure Cooker?

Add the water and rice to the pressure cooker, set it to 15 PSI, and let it cook for 5-12 minutes depending on the kind of rice used, as brown rice takes longer to cook.

04. How to Use Fagor Pressure Cooker Steamer Basket?

Let the water boil for 10 minutes before you add the basket with the food inside and close the cover. Wait the time mentioned in your recipe for your food to get steamed.

In Brief

Knowing how to use Fagor pressure cooker appliances can significantly cut down the time you spend in the kitchen. As we’ve established before, Fagor pressure cookers are much safer than you’d expect pressure cookers to be, so even beginners can use them without fear. 

So, what’s stopping you from upping your meal prep game with one of these?

How to Clean Non Stick Griddles: It’s Easier Than You Thought!

It doesn’t matter if you invest a lot of money on your nonstick griddle and pans only to clean them in the dishwasher and ruin them within a few months!
Yes, the griddle might look like a hefty kitchen tool that can withstand the water pressure of the dishwasher, but we can assure you, it’s not. 

Just because your griddle looks clean, doesn’t really mean it’s properly clean. Also what about those moments when you have totally burned your food and can’t seem to scrape off the layer?

Well, aren’t you in luck as we have a simple and quick guide to make cleaning very easy and efficient. Let’s be honest, cleaning isn’t the most fun thing we can do with our time. So why not make it as fast as possible?

In this article, we will find out, how to clean non stick griddles to make them look brand new again! Let’s remove the burnt-on gunk together. 

You may also like: How to clean sticky grease off kitchen cabinets

What You Need for Cleaning a Non-Stick Griddle

  • Sponge
  • Dish soap
  • Washcloth
  • Silicon scrubbing brush
  • Hot water
  • Vinegar
  • Baking soda
  • Napkin 

How to Clean Non-Stick Griddle

how to clean non stick griddle
  1. If you have just used your non-stick griddle pan, it’s better to let it cool down completely before cleaning it. You can make your dinner and then go enjoy the food. By the time you’ll be done with your food, the grilled will be ready for cleaning.
  2. Non-stick griddles have a coating on top that can get damaged pretty easily. So you should hand wash your griddle. 
  3. Take a silicone scrubbing brush or sponge and remove the stubborn grease off of the griddle.
  4. You might need to scrub with some elbow grease if the pan is severely burnt. You can use baking soda or vinegar to weaken the tricky areas if necessary
  5. After you have removed the excess bits of burnt food from the griddle, use dish soap to remove all traces of oil and grease. 
  6. Rinse the griddle thoroughly under running water and get rid of all soapy residue. There shouldn’t be any traces of detergent left on the griddle as it can damage the surface of the pan.
  7. Use a cotton kitchen towel to dry the pan completely before you store it. 
  8. Try to hang your griddle and pans in hooks instead of storing them in a closed cupboard. Open storage helps to keep the griddles moisture-free.

How to Remove Burnt Food from Non Stick Pan

remove burnt oil from pan

Probably one of the biggest nightmares for any homecook is cleaning the pots and pans afterward. And if it’s burnt severely with food and grease, we just don’t feel like doing it.

Hot Water and Soap:

In most cases, you might not need to do anything too fancy to remove the burnt grease. Our day-to-day cooking doesn’t usually cause too much damage to the griddle. 

For light burnt food, all you need is some lukewarm water and dish soap. After the pan has cooled down completely, add a few drops of dish soap and lukewarm water into the pan and let it sit for 5-10 minutes. 

After that, use a silicone scrubber to remove the burnt food. It should come off without much effort. 

Salt:

You need some kind of mild abrasive to remove burnt food from the pan. Salt is an excellent accessible option that can be found in every household.

To use salt, first cool down the pan completely and wet the burn with water. Then sprinkle some salt only on the burnt area and leave it for 10-15 minutes. Then use a scrub to remove the burnt grease off of the pan. 

Baking Soda:

When the griddle is very badly burnt and you can not remove the food with either of those methods, baking soda is your savior. It can remove any tough grease and stickiness from your pan. You might need to put some muscle into the act but it will be worth it.

Simply covers the burned area with a paste of baking soda. Then use some foil paper to cover the griddle and leave it for 20 minutes. Be careful to not leave the pan for longer than half an hour. 

Bicarbonate of soda is quite harsh so leaving for too long can damage the non-stick layer. The alkaline substance can cause the non-stick to chip off.

After 20 minutes, use a scrubber and scrub till everything looks squeaky clean.  Rinse under cold water and dry the griddle completely.

How to Clean Non Stick Cookie Sheets

remove grease from pan

As we all are into baking nowadays, cleaning the cookie sheets has become a very regular thing to do. So here’s how you do it the right way:

  1. Sprinkle a generous amount of baking soda on top of the cookie sheets
  2. Make sure the layer is thin and evenly distributed. Emphasis on the soiled areas of the sheets more. 
  3. Pour white vinegar on top of the baking soda. It will start to fizz up but that’s totally normal. 
  4. Let the mixture sit for 30-40 minutes like this. The fizz will help to remove all the tough stains and marks from your cookie sheets.
  5. After the pan has been sitting for a while, grab your nylon scrubber and start to scrub the sheets in circular motions. Get in there and use some elbow grease!
  6. The baking soda and vinegar will act as a natural detergent and remove all the burnt food particles from the cookie sheets. 
  7. Once you have scrubbed off the whole pan, rinse it off under running water. You can use dish soap to get rid of any grime and grease. 
  8. At this point, you will notice your cookie sheets are looking all shiny and clean. This is our favorite and most affordable way to get the cleaning done. 

Non Stick Griddle Cleaning Tips 

  • Always make sure that the griddle is cooled down completely before cleaning it. The drastic temperature change can be damaging to the non stick layer. That’s what you shouldn’t put your hot pan into the cold water to clean. 
  • Never use a metal scraper, knife, or scouring pad to clean your nonstick griddle. Abrasive sponges can damage the non stick layer severely and it will start to peel off. So always use soft sponges or cotton fabrics. 
  • Use a scraping tool to scrape off burnt food from the griddle surface. Never use metal spatulas. There are many affordable pan scrapers that make this job very easy. 

How to Clean an Electric Griddle 

An electric griddle can get a little too dirty in time. But how do you clean it properly — without damaging anything in the process? Here’s how: 

  1. Remove Debris From the Surface

You can remove debris from the surface in two ways: either through heating the griddle up or letting it be cleaned unplugged. 

When it’s heated up, you can scrape off the excess grease with a flat spatula, removing the debris along the way. 

If you choose to unplug it, let it fully cool off first. You may have to wait for several minutes for this. 

Use a paper towel or a piece of cloth to remove surface debris. Rub lightly to get rid of oils, crumbs, and liquids. 

  1. Use Soap and Sponges 

For a more thorough cleaning, it’s time to get your soaps out. 

Heat up some water first, then make a mixture of baking soda and vinegar with the heated water. This mixture will help in fully taking away the debris you have stuck on your electric griddle. Any burnt food will be taken away, too! 

If there is more debris that is stuck to the surface, use a blend of soap and the baking soda mixture to clean it up. You can also use the spatula again to gently scrape it off. If the remaining debris is really stubborn, let it sit in the water first before attempting to scrape and clean it up again. 

  1. Rinse and Let Sit 

Rinse the griddle thoroughly with warm water. Once all the soap is gone, wipe it down with a piece of cloth or paper towel. To make sure it fully dries, let it sit first before coming back to the cleaning process! 

  1. Finish Off The Cleaning Process with Cold Water 

To make sure all the grease is gone, rinse the griddle again with cloth and cold water. Let it dry again — this time, your griddle is fully clean and ready for brand-new use! 

If your electric griddle is non-stick, make sure not to use any metal or abrasive cleaning accessories. Instead, use a cleaning pad, scrub sponge, or piece of cloth. 

How to Clean a Stove Griddle 

A stove-top, cast-iron griddle is also quite straightforward to clean. Just follow the steps below: 

  1. Let Cool 

After using the griddle, set it aside. Don’t worry too much about the cleaning process at this step and let it cool first. Take out paper towels, cloth or sponge, soap, scraper, hot water, and vegetable oil. Yes, some seasoning is needed if you want your food to not stick to the griddle when cooking! 

  1. Clean Away Surface Debris 

Grease, oils, crumbs, and liquids should be wiped away with paper towels or cloth. A scraper may also be used to loosen stuck-on food and debris. Don’t use a metal scraper — you may risk damaging your griddle!

  1. Wash and Dry 

Use a sponge to thoroughly clean the griddle’s surface. Some soap, like dishwashing liquid, may be necessary for this portion. Rinse with hot water and dry with more paper towels or a piece of cloth. 

  1. Season and Store 

Before stowing away your griddle, get around a teaspoon of vegetable oil, and use paper towels to distribute it throughout the surface of the griddle. Wipe away the excess oil before heating the griddle up on your stove for five to ten minutes. 

After seasoning your griddle, set it aside to cool. Once it’s cool and dry, store the griddle in your cupboards or pantry. Your cleaning is all done! 

Care and Maintenance Tips for Non-Stick Pans

clean a nonstick electric griddle
  • Don’t use the dishwasher to wash your nonstick pans and griddles. The dishwasher uses a lot of water pressure to clean pans. 

    This can damage the non stick layer. So hand wash your kitchen utensils. 
  • Let your pan dry completely before you decide to store it in the cupboard. Moisture can be damaging to the pan so make sure it’s totally moisture-free. 
  • Apply oil after washing and drying. Apply a teaspoon of vegetable oil and use a paper towel to gently apply a thin layer of it. This helps to keep the non-stick surface protected. 
  • Clean your pans after each use. This might seem like too much work but you will notice a longer lifespan for your pots and pans. Most of the time you might not even need water and soap to clean. Gently wipe the surface with a paper towel and that’ll be enough.
  • Never heat your pans empty. What we mean by that is, always apply a  bit of oil or butter to the pan before heating it up. Even though it’s nonstick, it still needs a lubricant to keep it from being scratched. 
  • No metal utensils are allowed. Only use wooden or silicone spatulas as they are not abrasive on the pan surface.
  • Do not stack your pots and pans in the cupboard. This can cause them to scratch each other and ruin the nonstick layer. 

Instead, hang them on the kitchen wall or put paper towels in between each pot and pans before stacking. 

Frequently Asked Questions

01. Will Vinegar Hurt Non-Stick Pans?

Standard nonstick pans are designed to be quite resistant to abrasive ingredients, vinegar won’t be able to damage them. If you have a PTFE/Teflon non stick pan, vinegar is nothing to be worried about. 

Other types of nonstick pans such as aluminum and ceramic are also unaffected by vinegar. Vinegar is an excellent cleaning agent and can remove tough stains pretty easily. 

So be sure to use it for your non-stick pans and pots. You can use vinegar for your cast iron pans as well. As it gets diluted with water, it can not damage the surface. 

02. Why are Eggs Sticking to My Non-Stick Pans?

Even if you are using a nonstick pan, you need to use at least a few drops of oil. Nonstick pans are not supposed to be used without any oil or butter. They only reduce the amount you would need normally. 

So if your eggs are sticking to your nonstick pan, chances are you are not using any oil to cry them. Eggs are like glue, so it’s no surprise that they are sticking to the pan. 

The oil acts as a protective layer between the nonstick and the eggs. It helps to not let the egg bond with the metal. Try using a few drops of oil to see whether that solves the issue or not. 

Another reason can be, you are adding the eggs to a cold pan. Let the pan get hot enough before adding your eggs. This way it won’t stick to the surface. 

03. Does Olive Oil Ruin Non-Stick Pans?

We are not sure where this myth comes from,  but a lot of people believe olive oil damages the non stick layer. Maybe they think so because olive oil is quite acidic in nature. 

But don’t worry, olive oil can not damage your nonstick pots and pans. In fact, it’s a good idea to rub a teaspoon of olive oil on your cold pan before you use it. 

This helps to keep the non stick layer protected from any burn or scratch. The oil acts as a lubricant and keeps the pan all shiny and new. Any type of oil is okay to use on nonstick surfaces. 

04. How Do I Make My Non-Stick Pan Non-Stick Again?

If your nonstick pan has lost its smoothness over time, maybe it’s because of the grime build-ups from all the cooking. If you tend to burn your pan a lot, a thin layer of burn can stay on the surface and cause it to feel uneven and textured. 

To fix that, pour a cup of water and 2-3 tablespoons of baking soda into the pan. Then add half a cup of vinegar to it. Let it sit on the stove for 10 minutes until it starts to boil. 

When it begins boiling, bring it out of the stove and let it cool down completely. Then wash as usual with a scrub and dishwashing liquid. 

Then apply a teaspoon of vegetable oil on the surface and rub using your fingers or a paper towel. The nonstick should feel smooth again.

If your pan does not feel nonstick after this, maybe it’s time to toss out this pan. All nonstick pans have an expiration date. When the non-stick layer starts to peel off, it becomes toxic and you shouldn’t use it anymore. So be careful of it. 

05. Should Griddle be Sticky after Seasoning?

No, it should not. If you are using a cast iron griddle and season it to keep it in its top shape, it should not feel sticky. 

Cast iron pans are highly porous, so when you use oil to season it, it absorbs the oil and creates a resistant coating on top. The heat sort of solidifies the oil and produces a durable coating. 

This coating feels smooth to the touch and not sticky whatsoever. If your griddle feels sticky after seasoning, chances are you applied too much oil to season the griddle. 

You only need a teaspoon of oil on a griddle. As you coat the oil using a paper towel, most of it gets absorbed and only a little stays on the cast iron surface. This is why it never feels sticky or greasy. 

Try washing the pan and reseasoning using less oil next time. Make sure to remove the excess oil with a towel every time you season. 

Takeaway

Didn’t we say cleaning non stick griddles is super easy to do? Not only are these tips easy to follow, they actually extend the life of your griddle pans. As it’s the most used item in our kitchen, we need to take proper care of it!

Was it helpful? Do you have some tips of your own? Comment down below to let us know!

More Related Guides:

How to Clean a Toaster: Everything You Need to Know!

When you don’t have a full-sized kitchen, a toaster oven can be a lifesaver. It works and functions very similarly to a convection oven. Surprisingly enough, this handy gadget can prepare a wide range of dishes. 

From perfectly crispy toasted bread in the morning to lightly roasted chicken for dinner, a toaster oven has become a staple in most apartments. 

If you are anything like me, you will find yourself using the toaster oven more than the standard one. That’s due to how small and convenient it is. A toaster oven is also super fast so for a single-person meal, it’s perfect. 

The more you use your toaster oven, the dirtier it will get. So it’s necessary to always keep the oven clean and pristine. In this article, we will talk about how to clean a toaster oven easily and efficiently! 

Learn more about 10 Best Toaster Ovens Under $100 Reviews

How to Clean the Inside of Toaster Oven

how to clean a toaster

Things You’ll Need:

  • A small bowl
  • Vinegar
  • Dish soap
  • Soft sponge
  • Napkins/ towels 

Here’s our step-by-step guide to cleaning inside of toaster oven:

  1. Grab a bowl and fill it up with ½ cups of hot water. 
  2. Add 2 tablespoons of white vinegar to the water
  3. You can also use dish soap instead of vinegar to avoid the vinegary smell. Frankly, vinegar is the best toaster cleaner anyway. So why spend extra money on it?
  4. Take a soft sponge and dip it into the vinegar-water mixture. Then squeeze it out very well. 
  5. Use the soft side of the sponge and wipe the walls of the oven. Make sure to clean the ceiling as well.
  6. If you regularly clean your oven, wiping it with soap water is enough for a thorough cleaning. 

If the walls are filled with grease or they are burnt from baking, you need to try a different method. We will talk about that in a second.

You can also use this method to clean a new toaster oven before using it for the first time. 

How to Clean a Bread Toaster

clean bread toaster

Remember that episode from Kitchen Nightmare where Gordon Ramsay found a dead mouse inside a toaster? We all probably cleaned our toaster the day after that! I know I did. 

Even though we use this kitchen gadget almost every single morning, we hardly think of cleaning it. Cleaning a toaster is not that hard to do.  So here’s an easy guide on how to clean a bread toaster without getting an electric shock! 

Things You’ll Need:

  • Cotton cloth/ kitchen towel
  • Vinegar/ lemon
  • Toothbrush 
  • Water 

Here’s our step-by-step guide to cleaning a bread toaster at home:

  1. First things first, you need to unplug the toaster. As you’ll be using water to clean it, it can not stay anywhere near an electrical outlet. 
  2. Before getting into the actual cleaning, remove the crumb tray. If you don’t clean this tray regularly, you might find molds and crusty bread crumbs all stuck up to the surface. 
  3. Wash the crumb tray under a running sink with water and soap. The crumbs should come off fairly easily. But for rare cases, you might need to use a scrubbing brush. 
  4. Take a soft cotton fabric or kitchen towel and soak it in vinegar. You don’t want it to be super wet. Slight damp is what we are going for. Too much water can cause the toaster to gather puddles. 
  5. Use the damp cloth to gently clean the slots where the bread slices go. Take your time on this step. If you can’t reach all the areas inside the toaster, use a damp toothbrush to clean it properly. 
  6. After it’s thoroughly cleaned, use a dry fabric to remove all the excess moisture from the toaster. 
  7. You can also go on and give a good wipe with clean water if the vinegary smell bothers you too much. Then turn it upside down and give a shake to remove any excess water droplet or breadcrumbs. 
  8. Let the toaster dry in a safe space for a few hours. You should never use your toaster right after cleaning. Let it dry properly to avoid any electric shock. You can do this before going to bed and by morning it will be ready to make some freshly buttered toast!

Toaster Oven Maintenance Tips

Toaster Oven Maintenance Tips

Cleaning a toaster oven is fairly easy, but maintaining it requires a bit more care. There are a few things you should do to maintain the quality of your toaster oven for a long time. 

These are our top toaster oven maintenance tips from personal experience! 

  • After roasting or baking, keep the oven door open so it airs out. This prevents the oven from smelling bad. 
  • Always use a damp towel to remove cribs and food debris after cooking. 
  • Use a vinegar-soap spray to gently remove sticky residue. 
  • For stiff and burnt parts, apply a generous amount of baking soda on top of that area and drop some lemon juices. It will help to remove it easily. 
  • Lay a sheet of aluminum paper on the bottom of the toaster oven. This prevents heavy grease and catches all the crumbs. 
  • Always check whether your dishes are oven-proof or not. 
  • Don’t overcrowd the toaster oven with too many bowls. 

Frequently Asked Questions

01. How Do I Get Baked Grease Out of a Toaster Oven?

Cleaning baked grease out of a toaster oven is not as intimidating as it sounds. All you need is baking soda and water. Mix half a cup of baking soda with a few tablespoons of water until it creates a thick paste. 

Then spread the paste generously on top of the baked grease area and leave for a few hours. Alternatively, you can leave it overnight and clean it in the morning. 

To clean it, all you have to do is wipe it away with a damp cloth or towel. The baking soda will dissolve the tough grease areas and it will need little to no effort to remove. 

Then use either vinegar, water or soap to gently clean the surface and remove the leftover grimes. 

02. How Do I Get Stains Out of a Toaster Oven?

The best way to remove any stains from your toaster oven is to apply a cleaning solution. You can buy oven cleaners from amazon or you can make them at home.

All you need is vinegar, dish soap, and warm water. Mix these three ingredients and apply using either a spray bottle or a sponge. Let it sit for a while then use a damp cloth to scrub the stain away. 

03. What Should I Not Use on Stainless Steel?

If your toaster oven is a stainless steel one, cleanup should be relatively easier. Stainless steel is an extremely durable and smooth material so burn marks and baked grease can be removed without much elbow grease. 

Steel brushes or steel wool should never be used to clean or scrub a stainless steel oven. They will scratch the stainless steel surface and make it look not-so-shiny anymore.

04. How Do I Clean Toaster Oven Glass?

Certain recipes can really turn your clean oven into a hot mess. All you need to do is give the oven a light clean-up after each use. This helps to not create grime buildup too soon. 

If you noticed the glass of your toaster oven to be very greasy and dirty, it’s time to give it a thorough cleaning. 

Apply soapy water using a spray bottle or a napkin. Let it sit for a few seconds then scrub with a sponge or kitchen towel. Scrub in a circular motion and all the grease will come right off. 

After that, use a dry towel to remove the soap residue, and your oven glass will look brand new again!

Verdict

Now that you know exactly how to clean a toaster oven and keep it in pristine condition, there is no excuse to not do it! The trick is to add light cleanup and maintenance steps to your everyday kitchen ritual. 

So while you are cleaning the countertop, clean the glass of the toaster oven. Or give a gentle swipe after each time you use the toaster oven. 

It becomes a hassle only if you do it once every six months. Regular cleaning makes the job very easy and effortless!

Do you have any of your own tips? Share with us in the comments down below!

More Related Topics:

How to Defrost a Mini Fridge the Easiest Way!

There used to be a time when mini-fridges were associated with dorms and small apartments only. But now, almost everybody has a mini-fridge somewhere in their house. 
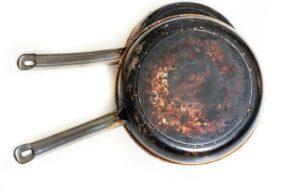
Some like to put a fridge in the gaming room while others enjoy a small fridge in the master bedroom. Who says you can’t be luxurious on a budget?

While we all love the functionality and compact features of a mini-fridge, we don’t regularly clean or take care of it. A big part of it is because defrosting a deep freezer seems like too much work to do. 

In this article, you will find how to easily defrost a mini-fridge and some other helpful tips to make the process super simple. 

But first, let’s talk about the different types of freezers out there. Not all of them use the same cleaning process!

You may also like: How to Reset Ice Maker on LG Refrigerator

What is a Frost-free Freezer?

We have all heard this term many times in our lives. There are usually two types of freezers in the market: frost-free and manual defrost. But what do they actually mean?

A frost-free freezer is a type of freezer with a built-in technology that prevents any buildups of ice particles. We all know about manual defrost refrigerators. We grew up with them. They always have a thick layer of ice inside which needs to be cleaned and removed once every few months.

Frost-free freezers don’t have that. As they have little to no first, cleaning and maintenance are very simple. 

Most people prefer frost-free options nowadays. There are also auto defrosting freezers that come with a hose to remove excess water.

Best Way to Defrost a Freezer

how to defrost a mini fridge

If you have a manual defrosting freezer, removing the thick layer of ice every few months is very important. Otherwise, you love a lot of storage space, and the overall performance of your freezer decreases. When everything in the freezer covered in frost, you know it’s time to clean. 

As high-maintenance as it might seem, defrosting refrigerators is really very easy to do. Btw, this is the same way you defrost a fridge freezer combo.

Before You Defrost:

Here’s what you should do to remove mini fridge ice build up without too many complications:

  1. Try to eat all the food throughout the week to empty the freezer as much as possible. If you have a big freezer, reorganizing everything after cleaning can feel like a lot of work. So eating all the food you won’t be needing a few weeks later is a smart idea to solve this problem.
  2. If you can, find a cooler to temporarily store raw meat/fish until the cleaning is done. Cleaning a freezer takes a few hours including the defrosting time. If you leave the raw food on the countertop, they can rot. So find a cooker and put the food there.

What You Need:

  • Hot water
  • Spatula
  • Old rug/towels
  • Dishcloths
  • Bakings sheet

Here’s what we found to be the best way to defrost an upright freezer:

01. Turn off the Freezer:

The first thing you should do is turn off the freezer. Some fridges have an only on/off button for both the freezer and the refrigerator. 

For those, you will have to unplug the whole thing. If you do not have a time limitation, just letting the freezer sit like this for a few hours will be enough to defrost it. 

02. Place the Towels:

Before you start defrosting, lay down some old towels and fabrics at the bottom layer of your freezer. We would advise placing some cotton fabrics in front of your refrigerator too, in case there is a spillage. 

When you defrost it, there will be a lot of water. So if you do not follow this step, the whole kitchen will end up messy and wet. 

You can also put baking trays to catch the extra water. 

03. Remove the Shelves:

If you are trying to remove the frost faster, remove the shelves and all the removable arts inside the freezer. It’s important to leave the door open to let fresh and warm air travel inside. 

You can remove the drawers too. This is a good time to soak them in soapy warm water to thoroughly wash them later. While you are waiting for the freezer to defrost, you can go ahead and clean them. 

Some shelves might get stuck due to the overgrown frost. Just let it sit like that for 10 minutes and you will be able to remove it. 

04. Use Your Scraper:

defrost a freezer quickly

After you have removed all the parts inside the freezer, use a plastic spatula to scrape off the thin layer of frost. You won’t be able to remove all ice this way but scraping off the frost layer by layer helps to melt the ice faster. 

You can also use a proper ice scraper, designed to be very safe for the freezer. Make sure to not use anything too sharp as it can damage the lining. 

05. Bring Out Hot Water:

If you want a faster-defrosting result, boil about a liter of water until it is super hot. Then pour it into a large bowl and place the bow inside the freezer. Let it sit for a while and you will notice the ice has started to melt. 

This is a very easy and convenient way to defrost. You can change the water continuously as it starts to cool down. 

06. Use Hairdryers:

defrost a deep freezer

If this is not fast enough, use a hairdryer or a blow dryer to melt the ice using hot air. Make sure to keep the hairdryer six inches away from the lining of the freezer. Otherwise, it can damage the surface. 

This process can work wonderfully if you are being very careful. If you are someone who is clumsy with gadgets, we don’t recommend using them. But if you can use it, the process speeds up rapidly and you won’t have to spend 30-40 minutes on defrosting. 

07. Keep on Scrapin: 

After using hot water and a blow dryer, you will notice the ice has started to melt by itself. You don’t have to work too much at this point. Apply a gentle pressure sign to your scraper and you will see chunks of ice falling down the walls. 

If you want to know how to remove ice from freezer without defrosting, the process is fairly simple. Just wipe the fridge with hot cloth to meth the thin layers of frost. This is a good trick if there isn’t too much ice or if you don’t have time for deep cleaning.

And that’s about it. Defrosting a mini freezer or any freezer is that easy! Now let’s talk about how to clean it. 

How to Clean a Mini Fridge

Clean a Mini Fridge

After you are done defrosting, it’s time to properly clean the freezer and the fridge. As this kitchen appliance is used every single day, it needs frequent cleaning. Otherwise, the performance decreases a lot. Here’s how to clean a minifridge very easily:

What You Need:

  • Dishwashing liquid
  • Baking soda
  • Washcloth
  • Towels 

Here’s our step-by-step guide on how to clean a mini-fridge:

01. Empty the Fridge:

Remove all the food and containers from the fridge including sauce bottles and milk. This is a good time to check which food items have perished or expired. Throw them away and only keep the fresh ones.

02. Remove All Drawers:

Remove all the drawers and shelves from the fridge. As we have mentioned earlier, soak them in warm water with soap to weaken the grease and grimes. 

Use a sponge or washcloth to gently wipe away the inside of the fridge. Use soap if there are any tough grimes stuck to the surface.  

03. Use Dishwashing Liquid:

Use a sponge and dishwashing soap to clean all the compartments thoroughly. Wash them in the sink in cold water. 

04. Use Baking Soda:

If your fridge has a bad odor, pour some baking soda on a dish and let it sit inside for a couple of hours. Keep the door open during this time. The baking soda will soak all the impurities from the air. 

If this method does not work, keep the door open for a few hours while the fridge is unplugged. Make sure the room is well ventilated.  

05. Clean the Exterior:

After you are done, use a wet fabric to wipe the outer body of the fridge too. It is ideal to clean the exterior of the fridge once a week. As we touch the handles very frequently, bacteria and germs tend to stick to those places a lot. So make sure to clean.

06. Let It Dry:

Let all the parts and compartments dry thoroughly before putting them back into the fridge. 

And that’s it. Cleaning a mini-fridge is that easy to do! So do it more!

Helpful Tips to Maintain a Mini Fridge

manual defrost refrigerator

Using a mini-fridge is not all the same as using a regular refrigerator. Taking care of it is necessary if you want it to work efficiently. We have found these key things to be very useful in the maintenance of a mini-fridge:

  • Do not keep your fridge where sunlight directly heats it. It is not ideal to keep the fridge straight in front of any heater or furnace either. Make sure it is in a dry and cool place.
  • Do not overstock or overcrowd the mini-fridge with too much stuff. Keep the food at a certain distance from each other so the cold air can travel everywhere easily. 
  • Do regular cleaning once a month to prevent any molds from growing inside. 
  • Use baking soda to clean the mini-fridge as it removes unwanted odors. 
  • Do not put any food openly inside the fridge. Instead, keep them all inside Tupperware and boxes to prevent any funky smell from occurring. 

Frequently Asked Questions (FAQs)

01. How Long Does It Take to Defrost a Refrigerator?

If you are planning to do it manually and letting the ice melt by itself, defrosting can take 2-3 hours. It takes longer during wintertime. 

But if you use hot water or a blow dryer, the whole process becomes much faster. It will only take an hour to defrost using our process.

02. How Long Does It Take a Mini Fridge to Get Cold?

Time might vary depending on the model and brand you have. But usually, it takes four hours to have a decent amount of coolness. There are some advanced fridges that take only to hours to cool down but usually, you will have to wait much longer,

The standard freezer takes 24 hours to reach the maximum cooling capacity. So if you have a brand new mini fridge or you have just cleaned the whole thing thoroughly, let it sit for a day and then reload it with food. 

03. Why Won’t My Mini Fridge Get Cold?

If your mini-fridge is not properly cooling down like it used to, it can be very well because of poor maintenance. Ask yourself when was the last time you cleaned your mini-fridge? If it was more than a few months ago, there you have the answer.

If your fridge is clean but it still isn’t cooling down, there might be a problem with the air vents. Sometimes if the door doesn’t close properly, it increases the internal temperature. So make sure to check that as well.  

Takeaway

Now that you know how to defrost, clean, and maintain your mini-fridge, we hope you will take good care of it. A mini-fridge is a very convenient and useful gadget to have not only in a dorm but in your game room or lounge area. 

Was this article helpful?

Let us know in the comments!

How to Clean Burnt Grease from Bottom of Frying Pans : Three Most Effective Ingredients

We all have one of those days where we put something on the burner and go to the other room for a second, only to rush back at the smell of heavy smoke. And with our utmost horror discover the worst nightmare- a burnt frying pan!
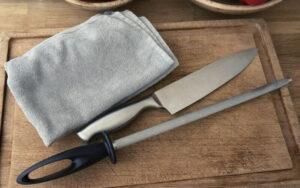
The worst part isn’t that your morning breakfast is now completely ruined. All you can think about is, “how in the world am I going to clean that up?”

Guess what? To make that frown go away, here, we have gathered all the ‘tried and tested’ tricks on how to clean burnt grease from the bottom of frying pans.!

Keep in mind that different types of frying pan require different methods. We will talk about it briefly a moment later!

The Ingredients: There is a Wide Range of ‘em!

How to Clean Burnt Grease from Bottom of Frying Pans the Easy Way

You don’t have to use all these ingredients at the same time. We tried to add things you’d easily find at your home. This way, it’s more practical and convenient!

To remove grease from pan, you will be needing ingredients such as:

Things you need to scrub: 

  • Scrubbing pad
  • Toothbrush
  • Scouring pad

How to Clean Burnt Grease from Bottom of Frying Pans: Three Most Effective Ingredients

Let’s be honest, we hardly look at the bottom of our frying pans. Unless you are Monica, who has time to look at all those nooks and crannies of the kitchen! 

But when we finally notice them, the gunk has been building for months and months. It literally takes hours to remove all that burnt grease off of the pan bottom and still they don’t fully come off. 

Well, it’s not about how you are cleaning it but mostly what you are cleaning it with. You can’t use normal dish soap to clean up a mess like that! 

You might be wondering what’s the best cleaning agent for burned-on grease from the bottom of pans. Here are three of the most effective methods to easily finish the job.

(Keep in mind you will still have to scrub, just not as much! Sadly, there is no non-scrubbing method yet).

Baking Soda 

How to Clean Burnt Grease from Bottom of Frying Pans : Three Most Effective Ingredients 1

Baking soda is probably the easiest and most known method for cleaning up old pots and pans. From removing rust to keeping the pan grease-free, baking soda is super useful for many different items. It is one of the best grease cleaner.

The reason why baking soda works is because it is a mild abrasive. So it removes the upper layer of your pan while being gentle enough to not damage the core. 

Cleaning pots with baking soda is very simple. To use baking soda, all you have to do is sprinkle some on the surface and wait for it to do its magic.

Never use baking soda on non-stick pans. As the non-stick layer can get damaged.

Oven Cleaner

Oven cleaner is not what comes to our mind when we think of cleaning our pans. But it makes sense as the oven gets constant burns and stains from baking/roasting/grilling. Oven cleaners are designed to remove all those tricky spots from a metal surface.

Just make sure you’re using an oven cleaner only on your non-stick and ceramic pans. Apply a light layer on the bottom and let it sit for an hour or so. Then use a scrubbing pad/ brush to scrub everything off!

Bar Keeper’s Friend and Aluminum Foil

How to Clean Burnt Grease from Bottom of Frying Pans : Three Most Effective Ingredients 2

You might be wondering what is the best kind of cleaning agent to use for cleaning burned-on grease. We have a proven option for you! 

You can understand why aluminum foil would work on tough burnt grease. The Bar Keeper’s Friend is the only thing on our list that you will need to purchase!

The first time we tried, we couldn’t believe it either. Sprinkle some Bar Keeper’s Friend on a wet pan and use the foil to scrape everything off. 

Even if you use Bar Keeper’s Friend by itself, it is strong enough to remove any spots or stains. You can remove burnt food from pots very easily. 

One side note, this method is not ideal for non-stick pans or any pans with protective coatings.  

How to Clean Different Types of Frying Pans

There are a few different types of pans we all use on a regular basis. Even though they all function as frying pans, the construction, and materials on them have nothing in common.

So it is no surprise the process of cleaning scorched pan would be different. The three main types of pan that we will be discussing are stainless steel pan, cast-iron pan, and ceramic pan. 

Cleaning a Stainless Steel Pan

Stainless Steel Pan cleaning
Female hands in gloves wash dishes with detergents

For stainless steel pans, a combination of vinegar, baking soda, and salt works wonders. It not only removes all the burnt marks and grease but also makes your stainless steel brighter and shinier. 

Here’s how to clean burnt stainless steel pan:

Step 1: Apply a generous layer of baking soda and coarse salt on the bottom. Put some extra on the tough burns.

Step 2: Either lightly pour vinegar on top of the soda or spray it. Make sure the vinegar reaches the whole surface properly.

Step 3: Let it sit there for 10 minutes. 

Step 4: Use a scouring pad to scrub off the grime and grease from your stainless-steel pan. 

You may also like: How to clean calphalon grill pan

Cleaning a Cast-Iron Pan

Cast Iron Pan Cleaning

Cast iron pans are a chef’s most prized possession. They are not very common in most households yet. This might be because of the high-maintenance nature of cast-iron skillets and pans.

No matter how much you season your pan, burning your cast iron is fairly easy. This may be because cast-iron pans can take a lot of heat. 

Here are our easy steps to how to clean the bottom of a cast-iron pan:

Step 1: Salt is your best friend for cast iron pans and skillets. Sprinkle a generous amount of salt all over the pan.

Step 2: Scrub the pan with a damp cloth or a plastic scraper depending on how tough the burnt is. 

Step 3: For a cast iron pan, as appealing as it seems, you can not use steel wool to scrub. Only use a brush or coarse fabric. 

Step 4: Wash it thoroughly and dry the pan completely.

Step 5: Apply a light layer of oil to not let it turn into rust.

Cleaning a Ceramic Pan

Cleaning Ceramic Pan

Ceramic pans are on the rise nowadays. This is simply due to their aesthetic look and practical nature. Ceramic pans are known for their non-stick feature. They are super easy to clean up too!

Most of us think, if a ceramic pan gets burnt, you can’t use them anymore. They need to be tossed out. But that’s not true at all. 

To easily remove the burnt grease from your ceramic pans, try following these easy steps:

Step 1: This is the preparation part. Remove as much burnt grease and grimes as possible from the pan.

Step 2: Pour vinegar water with a 1:4 ratio. Then place it inside a stove. Let the stove heat up to medium until it starts to boil. Let it sit like this for a few minutes then remove the pan from the stove.

Step 4: This step might stink so we advise putting the pan outside or removing a window. Let the water cool down. 

Step 5: Start to scrape inside the pan with a silicone spatula and sponge. For the rough areas, use a scraper. 

This answers your question of how to clean baked on grease. After you are done with all these steps, your pan should look brand new again! For the bottom of the pan, simply soak it in vinegar water overnight.

Things You Should Never Do!

Here is our list of what NOT to do when you don’t know what to do:

  • Never use an oven cleaner on stainless steel or cast-iron pan to remove burnt grease from the bottom. This can seriously damage the surface and you might lose the warranty. This method only works for mon-stick and ceramic pans.
  • Never soak your pan in Pepsi/Coca-Cola or any of those surgery carbonated drinks. They simply don’t work.

Maintenance Tips for Your Frying Pan

A good frying pan is one of the most used items in any kitchen. So you really need to take care of it properly. And that doesn’t mean just cleaning it regularly.

  • It is a good idea to invest in quality cookware as they can withstand a lot of heat and damage so you won’t have to replace your pan every two years. 
  • Always grease your pan before you start cooking. This includes non-stick pans too. Do a gentle brush of oil and it will keep the pan sleek and smooth.
  • If you use a cast-iron pan, season it twice a year. Cast iron pan can easily get rusty without proper seasoning.
  • After washing the pan, dry it properly and use a microfiber towel to wipe it off. 
  • Store your pan in a pan rack or hooks on the wall. Basically anywhere but on the stovetop!

So There You Go!

Cleaning the burning grease off of your pan is that easy. The key thing is to clean your pans and cutleries regularly. This way you never get any grease buildups. 

Having a quality pan is a commitment. As the pan serves us, we have to put a bit of our time and effort to maintain its beauty. The better your pan looks, the higher it performs!

More Related Buying Guide:

Pin Later

How to Clean Burnt Grease from Bottom of Frying Pans the Easy Way

13 Best Honing Steels: Reviews and Ultimate Buying Guide [2021]

This post contains affiliate links to products. We may receive a commission for purchases made through these links. But it never influences our product selection process.
The sight of a chef effortlessly cutting through meat or vegetables is insanely satisfying. Who wouldn’t want a knife that glides through ingredients and chops them up in no time at all?

But for most ordinary people, dealing with wobbling knives that they need to forcefully saw through tough cuts of meat. This takes a lot of time, and can even be dangerous as it leads to accidents.

So how do the best honing steels work to fix this? There is the idea that sharpening your blade will make things easier, but that’s only half the battle. Honing your knife is a great way to lengthen its life and make it work better.

And so, this article will look at the various honing steels available on the market. We’ve compiled the best ones out there and will take a nice and thorough look at them, how they work, and why we chose these particular products.

If you have trouble keeping your knives in tip-top shape, you might want to give this a read!

What are Honing Steels?

There is often some confusion over what honing steels are. Many people think they are the same as sharpening steel, and many honing knives are marketed as such. 

However, this isn’t true. There is a key difference in the honing steel vs sharpening steel debate.

The best sharpening steel will do what the name suggests; it will sharpen dull blades. However, honing steel realigns the edge of a blade so that it stands straighter and more upright than before.

The tiny points of your blade start to recede and move away from the edge. The edge of any good knife or blade is defined by its fine point. But that point will gradually start to fall to the side and lose its precise and sharp shape.

Although you can’t really see this process in real-time, it still happens. Because of this, having a straight edge can make the knife feel “sharper”.

Knowing When You Need to Hone Your Knife:

Here’s how you will know when your blade needs honing instead of sharpening:

  • Your knife will start to catch on food
  • You will need a little more power or a few more passes of the knife to cut something properly.

Top 13 Honing Steels: A Quick Look

Here’s a quick summary of the products we chose and what they are like.

RankPictureNameShops#1
ZWILLING J.A. Henckels Honing Steel

ZWILLING J.A. Henckels Double Cut Honing Steel

If we could spend the rest of our lives with one honing steel, it would be with this one. It is the perfect size for a number of different knife lengths and kinds. At the same time, it works very well and will last for a long time.

  • Sturdy and long-lasting.
  • Superb quality hardened steel.
  • Double cut steel can be used for honing and polishing.


Read Our Review


Check Price

#2
DALSTRONG Honing Steel

DALSTRONG Gladiator Series Honing Steel

This 10-inch honing steel is the ideal length for most kitchen knives people own. Dalstrong products are always a hit and this tool is no different. It realigns the blade in no time at all and improves the way your blades cut through things.

  • Very comfortable to use.
  • The triple-riveted design makes it suitable for heavy-duty use.
  • Excellent craftsmanship and construction.


Read Our Review


Check Price

#3
Mac Knife Ceramic Honing Rod

Mac Knife Ceramic Honing Rod

Want the best ceramic honing rod that stands the test of time? Together with the best chef knife sharpener, you can keep professional-style knives working for years and years on the end.

  • Long-lasting and durable function.
  • Stable, shock-absorbing design.
  • Great value for money.


Read Our Review


Check Price

#4
Professional Knife Steel

Professional Knife Steel Magnetized Honing Rod

Need a honing rod that is a little more affordable than others on the market? This one is budget-friendly, yet functions a lot like the pricier ones. At the same time, it is constructed to last and is a good choice for your kitchen.

  • Magnetized rod makes it much safer to use.
  • Easy to use and hold.
  • Made from high-quality steel.


Read Our Review


Check Price

#5
13 Best Honing Steels: Reviews and Ultimate Buying Guide [2021] 3

Kota Diamond Carbon Steel Professional Knife Sharpener Rod

Want something that can tackle even the largest and heaviest of kitchen knives? We’ve got just the honing steel for you. This honing tool is so effective, it almost works as a sharpener as well.

  • Comfortable and easy to use.
  • Sharpens knife as well.
  • Sturdy and durable.


Read Our Review


Check Price

#6
Wusthof 10-Inch Diamond Sharpening Steel

Wusthof 10-Inch Diamond Sharpening Steel

Like indulging in all sorts of fancy kitchen equipment? This Wusthof honing steel is pricey for sure, but works beautifully and is elegantly crafted. Moreover, it lasts for a long time, making it a great investment for your kitchen.

  • Thick and substantial.
  • Splendidly crafted and well-designed.
  • Easy to use.


Read Our Review


Check Price

#7
13 Best Honing Steels: Reviews and Ultimate Buying Guide [2021] 4

Green Elephant Ceramic Sharpening Honing Rod

Home cooks and professional chefs need to make sure their knives are working properly. Whenever your blades need a little pick me up, this ceramic honing rod will bring them back to life. Made from ceramic, it is a great alternative to the best diamond sharpening steel out there.

  • Multipurpose and versatile.
  • Lightweight and slender.
  • Good value for money.


Read Our Review


Check Price

#8
Steel Sharpening Rod

Utopia Kitchen Honing Steel

This extremely affordable honing tool is special because you can do a lot with it. You can use it to fancy up all kinds of kitchen knives, as well as other blades such as sporting, fishing, and pocket knives. If versatility is your cup of tea, we say go for this one!

  • Durable and works for a long time.
  • Can be used on all sorts of blades.
  • Works as a sharpener as well.


Read Our Review


Check Price

#9
Shun TDM0790 Premier Combination Honing Steel

Shun TDM0790 Premier Combination Honing Steel

Want a high-end, rustic-looking honing rod? This 9-Inch premium combination honing steel by Shun was designed to maintain blades between professional sharpening sessions. This is a great tool for kitchen knives used by pros and home cooks.

  • Easy to use.
  • Comfortable to hold for longer periods.
  • Durable and sturdy.


Read Our Review


Check Price

#10

Victorinox Diamond Honing Steel Oval

Victorinox Diamond Honing Steel

Need a honing steel that doesn’t have a hollow core? This powerful and elegant looking tool is a must-have for your kitchen. It is compact and sturdy and everything you could want in a honing rod.

  • Lightweight and compact construction.
  • Works very well with butcher knives.
  • Will work for years on end.


Read Our Review


Check Price

#11

Mercer Culinary German Honing Steel

Mercer Culinary German Honing Steel

Mercer knives are always among the best kitchen tools, and their honing rod is no different. It is a mid-ranged honing steel, and the long length makes it convenient to use for all kinds of knives, regardless of their type or size.

  • Easy to use.
  • Very functional and efficient.
  • Good value for money.


Read Our Review


Check Price

#12

Shun TDM0790 Premier Combination Honing Steel

Shun Kanso 9-Inch Combination Honing Steel

Shun products are always a delight to work with when it comes to quality and performance. This is a great tool to keep your fancy cutlery and knives in great shape at all times.

  • Very lightweight and compact.
  • Finetunes knives and blades quickly.
  • Results last much longer.


Read Our Review


Check Price

#13

Zwilling J.A. Henckels Oval Honing Steel

Zwilling J.A. Henckels Oval Honing Steel

If you want something that hones your knives in the least time possible and with very little exertion on your part, we suggest giving this tool a try. It works beautifully, is constructed well, and will last a long time, making it a solid and reliable option.

  • The black synthetic handle provides a firm grip.
  • Comfortable to hold and use.
  • Effective and efficient functioning.


Read Our Review


Check Price

13 Best Honing Steels Reviews:
A Closer Analysis

01. ZWILLING J.A. Henckels Double Cut Honing Steel

ZWILLING J.A. Henckels Honing Steel

Henckels 34958-310


Check Latest Price

Editor’s Pick

FEATURES

  • Dimensions: 17.63 x 1.5 x 1.13 inches
  • Weight: 8 ounces
  • Brand: Zwilling

If we could spend the rest of our lives with one honing steel, it would be with this one. It is the perfect size for several different knife lengths and kinds. At the same time, it works very well and will last for a long time.

If you have a set of pricey knives, you will want a tool like this to make sure they keep doing their job properly. The double-cut honing steel is quite easy to use. There are also two textures of steel which also makes it suitable for different kinds of knives.

All you need to do is pass the knife along the surface of the steel 4-5 times and your knife blade will be as good as new. It is also pretty heavy and substantial, promising its long life. 

This high-quality sharpener is easy to use due to the comfortable handle and will be one of the most useful tools in your kitchen.

Why We Recommend It:

This is the perfect tool for the regular maintenance of your kitchen knives. They are what keeps that nice, sharp edge on your blades. It will realign the blade, unlike sharpening that takes metal off of your knife. 

You can use the honing steel to polish and straighten your blades in one go. As a result, we found it to be the best knife honing steel.

Pros:

  • Easy to use.
  • Sturdy and long-lasting.
  • Superb quality hardened steel.
  • Double cut steel can be used for honing and polishing.

Cons:

  • It is pretty expensive.

Check the Latest Price for ZWILLING J.A. Henckels Double Cut Honing Steel

02. DALSTRONG Gladiator Series Honing Steel

DALSTRONG Honing Steel

Dalstrong Inc GS-10inch-honing-steel


Check Latest Price

Runner Up

FEATURES

  • Dimensions: 19.17 x 5.39 x 2.4 inches
  • Weight: 1.85 pounds
  • Brand: Dalstrong

This 10-inch honing steel is the ideal length for most kitchen knives people own. Dalstrong products are always a hit and this tool is no different. It realigns the blade in no time at all and improves the way your blades cut through things.

It’s designed with miniature grooves along the surface of the steel that brings the blade back and straightens the edge and improves overall alignment. The bolster included is attractively shaped to serve to protect your hands. This lets you use the whole length of the steel when honing longer knives.

The Pakka wood handle is quite eye-catching and has been sourced from Spain. This is a hardwood that is extremely durable while being comfortable to hold. 

The handle is also ergonomically designed with a solid grip handle that is contoured for a perfect fit. Because of this, you can use it for honing very long knives with ease.

Why We Recommend It:

This is a good option for maintaining your knives, whether you need them for home use or commercial kitchens. It can realign blades on all sorts of kitchen knives and even other blades. The entire unit is well crafted and looks attractive while functioning beautifully.

Passing your blade across the honing surface just once or twice is all it takes to realign the blade. Best of all, your hands will be protected when working with the blades, making it a good choice for people new to honing blades.

Pros:

  • Very comfortable to use.
  • The triple-riveted design makes it suitable for heavy-duty use.
  • High-quality carbon steel is resistant to staining.
  • Excellent craftsmanship and construction.

Cons:

  • Cannot be used with the Shogun series knives.

Check the Latest Price for DALSTRONG Gladiator Series Honing Steel

03. Mac Knife Ceramic Honing Rod

Mac Knife Ceramic Honing Rod

Mac Knife SRB-104


Check Latest Price

Durable & Sturdy

FEATURES

  • Dimensions: 10.5 x 1 x 1 inches
  • Weight: 11.2 ounces
  • Brand: Mac

Want the best ceramic honing rod that stands the test of time? Together with the best chef knife sharpener, you can keep professional-style knives working for years and years on the end. This ceramic model makes a nice change from steel honing rods as well.

You can use the rod to keep refreshing your cooking blades. The black ceramic is much stronger than white ceramic and steel, which makes it much sturdier than other honing tools. This 10.5-inch honing rod has a nearly 2000 grit surface that polishes your edge to smoothness. 

The rod has a steel core with rubber in between to strengthen the rod while providing shock absorption.  The tip has a rubberized plastic end cap that further absorbs shock and stabilizes the rod against your cutting board while in use. The new rods also feature two grooved sides for more thorough honing.

Why We Recommend It:

Many people need something more powerful than steel honing rods. The black ceramic is a lot more efficient than its white counterpart or steel. 

It has a lot more grit than traditional steel which makes blades much smoother and more polished. We found that this is the ideal honing rod for Japanese blades and more professional chef’s knives.

Pros:

  • Long-lasting and durable function.
  • Comfortable to use.
  • Stable, shock-absorbing design.
  • Great value for money.

Cons:

  • The handle is rather poor quality.

Check the Latest Price for Mac Knife Ceramic Honing Rod

04. Professional Knife Steel Magnetized Honing Rod

Professional Knife Steel

Noble Home & Chef HS-3STR102-10


Check Latest Price

Budget Option

FEATURES

  • Dimensions: 14.75 x 1.75 x 1.25 inches
  • Weight: 12 ounces
  • Brand: Noble

Need a honing rod that is a little more affordable than others on the market? This one is budget-friendly, yet functions a lot like the pricier ones. At the same time, it is constructed to last and is a good choice for your kitchen.

What makes this rod special? When honing steels realign the blade points, they also cause tiny metal particles of your blade to become airborne. This honing rod is magnetized to prevent these particles from being inhaled or landing on nearby food.

It is made from reinforced carbon steel and this can be seen as soon as you hold it in your hands. It feels reliably substantial, and looks well-designed, making it a welcome addition to your kitchen tools. Besides smoothing out your blade, it also polishes the metal on the blade surface.

Why We Recommend It:

From the first impression onwards, you will notice how well this honing steel works. It is so aggressive that it seems to work as a knife sharpening stick as well. 

Your blades will be straighter, smoother, and even sharper. This makes it one of the most impressive honing tools because despite its price it functions just magnificently.

Pros:

  • Magnetized rod makes it much safer to use.
  • Easy to use and hold.
  • Made from high-quality steel.
  • The handle is solid and reliable.

Cons:

  • Takes off quite a lot of metal of the blade.

Check the Latest Price for Professional Knife Steel Magnetized Honing Rod

05. Kota Diamond Carbon Steel Professional Knife Sharpener Rod

13 Best Honing Steels: Reviews and Ultimate Buying Guide [2021] 3

Kota Japan Brand


Check Latest Price

Largest Pick

FEATURES

  • Dimensions: 17.32 x 2.17 x 1.42 inches
  • Weight: 6.7 ounces
  • Brand: Kota

Want something that can tackle even the largest and heaviest of kitchen knives? We’ve got just the honing steel for you. This honing tool is so effective, it almost works as a sharpener as well.

This honing rod is 12 inches long, which means you can smooth out all sorts of knives. It has diamond electro-plating which reinforces the honing properties, refining the edge of the blade. As a result, it is the best honing steel for Japanese knives and keeping them in great shape.

The handle is ergonomically designed, making it both aesthetically pleasing and comfortable to use. This hollow rod is smooth and works quickly and easily. 

You can use it to realign things like meat cleavers, paring knives, and everything in between. Also, regardless of the material, your knife is made of, this tool can whip them back into shape.

Why We Recommend It:

If you don’t like multiple tools, this is a good all-in-one option. It works well to both realign the edge of your blade and sharpen it at the same time. 

As a result, dull blades are transformed and renewed and you can cut your ingredients quickly and safely. With this honing rod, all it takes are a few passes before your knives are ready to go!

Pros:

  • Large yet lightweight.
  • Comfortable and easy to use.
  • Sharpens knife as well.
  • Sturdy and durable.

Cons:

  • Needs many swipes to smooth out the blade.

Check the Latest Price for Kota Diamond Carbon Steel Professional Knife Sharpener Rod

06. Wusthof 10-Inch Diamond Sharpening Steel

Wusthof 10-Inch Diamond Sharpening Steel

Wusthof 4483


Check Latest Price

High-End Choice

FEATURES

  • Dimensions: 14 x 2 x 2 inches
  • Weight: 10 ounces
  • Brand: Wusthof

Like indulging in all sorts of fancy kitchen equipment? This Wusthof honing steel is pricey for sure, but works beautifully and is elegantly crafted. Moreover, it lasts for a long time, making it a great investment for your kitchen.

It has a pretty average size of 10 inches which is suitable for most knives and kitchen blades. It also features a diamond-coated steel shaft that reinforces the whole unit and makes it all the stronger.

Furthermore, the slip-resistant plastic handle fits in the hand comfortably. This gives you a firm grip and prevents accidents when honing your blade. 

Cleaning this tool is also very easy, as all you have to do is wipe it down with a damp cloth after use. It has a very coarse grit and this makes it very good for severely neglected knives.

Why We Recommend It:

This knife sharpening tool is a great tool for reviving all sorts of blades and cutters, regardless of their material. It is so coarse; it aligns the blade points perfectly and gives the blade a cleaner and sharper edge at the same time. 

It is very sturdy and lasts a long time while including a limited lifetime warranty, so you get your money’s worth.

Pros:

  • Thick and substantial.
  • Splendidly crafted and well-designed.
  • Easy to use.
  • Great value for money

Cons:

  • Can be too gritty for some.

Check the Latest Price for Wusthof 10-Inch Diamond Sharpening Steel

07. Green Elephant Ceramic Sharpening Honing Rod

13 Best Honing Steels: Reviews and Ultimate Buying Guide [2021] 4

Green Elephant 8541909077


Check Latest Price

Shock Absorbing Feature

FEATURES

  • Dimensions: 3 x 0.2 x 16.6 inches
  • Weight: 7.2 ounces
  • Brand: Green Elephant

Home cooks and professional chefs need to make sure their knives are working properly. Whenever your blades need a little pick me up, this ceramic honing rod will bring them back to life. Made from ceramic, it is a great alternative to the best diamond sharpening steel out there.

As with other ceramic honing rods, this tool is especially sturdy and durably, requiring little upkeep. It is very hard and very gritty and is guaranteed to last for years. Also, the special vibration absorbing design protects your ceramic sharpening rod from breaking when dropped.

The silicone seal between the handle and ceramic, along with the plastic end cap is designed to keep the ceramic rod safe when you use it. 

Despite its reinforcements, it is still pretty lightweight and easy to store. You can easily use it, even if you’ve never honed a blade before.

Why We Recommend It:

If you have German or Japanese knives, this is the perfect tool to keep them working properly. With just a few strokes you can restore poorly-performing blades to their former glory. 

It is perfect for honing, realigning, and sharpening kitchen knives. Cleaning it is also easy as you just have to clean it with a wet cloth and allow it to dry before storage.

Pros:

  • Multipurpose and versatile.
  • Sturdy design.
  • Lightweight and slender.
  • Good value for money.

Cons:

  • Not the best for larger knives.

Check the Latest Price for Green Elephant Ceramic Sharpening Honing Rod

08. Utopia Kitchen Honing Steel

Steel Sharpening Rod

Utopia Kitchen UK0130


Check Latest Price

Multipurpose Product

FEATURES

  • Dimensions: 15.5 x 2 x 2 inches
  • Weight: 11.4 ounces
  • Brand: Utopia Kitchen

This extremely affordable honing tool is special because you can do a lot with it. You can use it to fancy up all kinds of kitchen knives, as well as other blades such as sporting, fishing, and pocket knives. If versatility is your cup of tea, we say go for this one!

This honing rod is made from carbon steel and is plated with nickel-chrome; it is less gritty than many on the market. The fine surface of the steel rod stops the cutting edge from getting worn when honing or sharpening.

It can both realign the edge of the blade and sharpen it at the same time. Also, it is pretty easy to use and the ergonomic handle is suitable for both left and right-handed people. The slip-resistant rubber base results in your sharpener being easy to handle, staying in place when it is in use.

Why We Recommend It:

This is a cheap and easy to use honing blade that is reliable as well. It works quickly and you don’t need to keep sawing your knife on the surface to get results. 

As a result, you can sharpen all your blades in no time at all. It can handle all kinds of blades and also work to keep them functioning properly for much longer.

Pros:

  • Durable and works for a long time.
  • Can be used on all sorts of blades.
  • Works as a sharpener as well.
  • Very affordable.

Cons:

  • Somewhat difficult to handle due to its size.

Check the Latest Price for Utopia Kitchen Honing Steel

09. Shun Premier Combination Honing Steel

Shun TDM0790 Premier Combination Honing Steel

Shun TDM0790


Check Latest Price

Easy to Use

FEATURES

  • Dimensions: 13.88 x 1.25 x 1.25 inches
  • Weight: 0.57 Pounds
  • Brand: Shun

Want a high-end, rustic-looking honing rod? This 9-Inch quality honing steel by Shun was designed to manage your blades between professional sharpening sessions. This is a great tool for kitchen knives used by pros and home cooks.

The honing steel features a very smooth surface for every day honing, as well as a micro-ribbed surface for weekly and more vigorous maintenance. 

It has a walnut-laminated Pakka wood that provides maximum comfort as it is a D-shaped handle. This also makes it much safer to use.

To use this honing steel, hold the steel tip down on a sturdy surface, and then gently drag the blade down from base to tip 3-4 times. Repeat on the other side. Do not clean the rod in a dishwasher, as it is meant to be cleaned by hand.

Why We Recommend It:

We liked this honing steel because it does exactly what it claims to do. It levels the blade points and makes it straighter and more even. 

The handle makes it really comfortable to use and you don’t have to worry about accidentally nicking your hands. Moreover, it looks pretty attractive and makes a lovely addition to your kitchen toolset.

Pros:

  • Easy to use.
  • Comfortable to hold for longer periods.
  • Durable and sturdy.
  • Works reliably well for all knives.

Cons:

  • Can be hard to find the authentic one.

Check the Latest Price for Shun TDM0790 Premier Combination Honing Steel

10. Victorinox Diamond Honing Steel

Victorinox Diamond Honing Steel Oval

Victorinox 40783


Check Latest Price

Small and Compact

FEATURES

  • Dimensions: 17 x 2 x 1.5 inches
  • Weight: 0.2 pounds
  • Brand: Victorinox

Need honing steel that doesn’t have a hollow core? This powerful and elegant looking tool is a must-have for your kitchen. It is compact and sturdy and everything you could want in a honing rod.

The 12-inch rod of this honing steel makes it perfect for honing knives and kitchen blades of all sizes with ease. The regular cut means that it is more efficient than a fine cut rod and it straightens edges of dulled knives more quickly. It also works on knives that need to have their edges thinned.

With this rod, you can hone down countless knives without getting fatigued. The regular cut also helps keep sharpened knives the sharpest they can be without having to use a knife sharpener. 

This honing steel has 4 sides with 2 smooth and 2 finely grooved edges opposite of each other. As a result, it performs extremely well with most kinds of knives.

Why We Recommend It:

This can have your knives back to normal with no effort at all. It has an attractive design and looks more than just a knife honing tool. 

Because it has so many sides, you can use it to even out most types of knives. The tool is gentle and will not damage your delicate blades.

Pros:

  • Lightweight and compact construction.
  • Works very well with butcher knives.
  • Will work for years on end.
  • Great value for money.

Cons:

  • Needs to be brought from authentic sources.

Check the Latest Price for Victorinox Diamond Honing Steel

11. Mercer Culinary German Honing Steel

Mercer Culinary German Honing Steel

Mercer Culinary M14512


Check Latest Price

German Steel

FEATURES

  • Dimensions: 17 x 2 x 2 inches
  • Weight: 0.75 pounds
  • Brand: Mercer Culinary

Mercer knives are always among the best kitchen tools, and their honing rod is no different. It is mid-ranged honing steel, and the long length makes it convenient to use for all kinds of knives, regardless of their type or size.

It is made with quality German steel, which ensures resilience and long-term use. The grit is medium-fine, which is just the right amount for the average kitchen knife. It also functions as a sharpener for steel blades, so you can use it for general knife maintenance.

The handle of this tool is made from a black polypropylene handle and has a ring for added security. As it is 12-inches long, it is a good choice for bigger knives and cleavers. This tool straightens the edge of the blade and realigns it so that it functions properly.

Why We Recommend It:

This honing oval is a unique option, especially if you are tired of the usual options on the market. The gritty surface gives it the ability to smooth and even out the edge of your knife, so you can keep using it for longer. With regular use, you find it indispensable for cooking and slicing your ingredients.

Pros:

  • Easy to use.
  • Very functional and efficient.
  • Good value for money.
  • Sharpens and hones the blades.

Cons:

  • A little pricey.

Check the Latest Price for Mercer Culinary German Honing Steel

12. Shun Kanso 9-Inch Combination Honing Steel

Shun TDM0790 Premier Combination Honing Steel

Shun SWT0790


Check Latest Price

Precise Performance

FEATURES

  • Dimensions: 13.75 x 1 x 1.25 inches
  • Weight: 9.5 ounces
  • Brand: Shun

Shun products are always a delight to work with when it comes to quality and performance. This is a great tool to keep your fancy cutlery and knives in great shape at all times.

With each use, any knife’s edge bends over slightly by themselves which results in a reduction of cutting precision. This honing steel realigns micro-bends along the blade edge without damaging the blade. As a result, you can slice, peel, dice, cut, chop, and mince more effectively with less effort.

Regular honing knives will prolong the blade’s sharpness and lengthens the time before they need re-sharpening. Like many other Shun honing rods, this one has two surfaces: one smoother surface for day-to-day honing and another micro-ribbed surface for occasional maintenance honing. 

With a little practice, you can hone your knives like a pro with this honing steel.

Why We Recommend It:

This particular tool is designed based on Zen philosophy. As a result, it focuses on simplicity and functionality. It sharpens all kinds of blades and knives and will do so with ease. 

It works with precision and accuracy, which makes it a good choice for use in restaurants and other commercial catering businesses.

Pros:

  • Very lightweight and compact.
  • Finetunes knives and blades quickly.
  • Results last much longer.

Cons:

  • Not the best for nonprofessionals to use.

Check the Latest Price for Shun Kanso 9-Inch Combination Honing Steel

13. Zwilling J.A. Henckels Oval Honing Steel

Zwilling J.A. Henckels Oval Honing Steel

ZWILLING J.A. HENCKELS 32542-310


Check Latest Price

Effortless Honing

FEATURES

  • Dimensions: 18 x 2 x 2 inches
  • Weight: 14.4 ounces
  • Brand: Cookware

If you want something that hones your knives in the least time possible and with very little exertion on your part, we suggest giving this tool a try. It works beautifully, is constructed well, and will last a long time, making it a solid and reliable option.

Since it is pretty easy to use, it is a good choice for home chefs who want to realign the edge of their knives and remove any niches or burrs. As a result, you will be able to cut into things more easily, and won’t get snagged on ingredients when in use.

An oval rod is more efficient because it gives the knife more surface contact with the edge, which achieves the same results as a traditional honing rod but with fewer strokes. 

This tapered rod of hard steel alloy works just as well as any, if not better, as it also has a finger guard for safety. Moreover, there is a hanging ring on its handle for easy storage.

Why We Recommend It:

Need a basic honing tool? This one is it. It works astounding well, even though it looks pretty lackluster. 

This tool prevents your blade from going dull and performing poorly over time. Since it has a good handle, you don’t have to worry about it sliding out of your grasp or cutting yourself by mistake.

Pros:

  • The black synthetic handle provides a firm grip.
  • Comfortable to hold and use.
  • Effective and efficient functioning.

Cons:

  • Pretty expensive.

Check the Latest Price for Zwilling J.A. Henckels Oval Honing Steel

Buying Guide: Choosing the Best Honing Steels

Not sure which one of these honing rods is the right one for you? This best honing guide will point you in the right direction.

Honing Rod Type:

Honing rods are generally made from either steel, ceramic, or diamond. Each one has different levels of hardness and this determines how long your honing rod lasts, or how quickly it evens out your blade.

If you traditional honing steels, you will do well with ZWILLING J.A. Henckels Double Cut Honing Steel or DALSTRONG Gladiator Series Honing Steel

However, if you like harder ceramic tools, we suggest getting the Mac Knife Ceramic Honing Rod and Green Elephant Ceramic Sharpening Honing Rod.

Length:

Honing rods come in many different lengths. Length is the most important factor to consider as the steel must be long enough to hone longer knife blades.

Because of this, a 12-inch steel like the Kota Diamond Carbon Steel Professional Knife Sharpener Rod is the best as it can handle all sized knives. If you want something smaller, you can opt for a 10-inch or even 9-inch option.

Weight:

Some steels are lighter and more compact than others. A heavy honing steel will be difficult to use, but one with a nice heft can seem more stable while using it. 

If you want something compact, try the Green Elephant Ceramic Sharpening Honing Rod or the Victorinox Diamond Honing Steel

Meanwhile, the ZWILLING J.A. Henckels Double Cut Honing Steel has enough weight to feel solid and heavy-duty.

FAQs

Below you’ll find answers to questions we get asked the most about honing rods or steels.

01. How are Honing Rods Different from Sharpening Steels?

To put it very simply, the best knife sharpening steel will fix a blunt knife. On the other hand, honing steel will realign the sharp edge of your knife when it starts bending away. In other words, they each correct a specific problem.

02. How to Use Honing Steel or Rod Correctly?

Not used to using honing steel? Relax! We’ll tell you how it’s done

  • Hold the rod firmly with the tip correctly placed on the counter.
  • Keep the heels of the blade against the honing rod. The tip of the knife should be angled upward a little, at an angle of 16 degrees between the rod and the blade.
  • While maintaining this angle and applying light pressure on the knife, glide it down the length of the honing steel in a straight motion.
  • Finish this stroke by making sure that the whole edge of the blade touches the rod.
  • Repeat this process a few more times (or as needed) on both sides.

03. How Can I Keep My Honing Steel Clean?

All you need to do is wipe down all the surfaces of the honing surface with a damp cloth or towel. Then wipe it down with a dry cloth before storing it in a dry and clean place.

In a Nutshell

Now that you know what to look for, our list of the best honing steels will give you a wide range of choices. If you’re still confused about which honing steel is right for you, start by selecting the one with the features and advantages you want the most.

Whether you cook a lot, or occasionally you are going to need something to keep your knives in good shape. This will also save you money as you will not need to replace quality knives. So get yourself honing steel and polish your chopping skills.

Relevant Reads

Table of Contents

Related Posts

15 Best Brisket Knife Reviews: Everything You Should Know about Carving Knives!

This post contains affiliate links to products. We may receive a commission for purchases made through these links. But it never influences our product selection process.

Despite it being a tougher cut of meat, there is just something about brisket that makes us go frenzy. We all have our own “best” version of it too.

Some follow their grandma’s secret recipe while others like to experiment with many different styles. Nothethless, this slow-cooked deliciousness is just what we all need to cheer up right now. 

You know what’s the worst part is about making a juicy brisket? The carving! 

Oh boy not all of us have the hand or skill of a culinary artist. It always gets wonky; one piece is thicker than the other or you find the pieces more shredded than clean cut. 

If you happen to find yourself in a situation like that, chances are your brisket knife is too small or too dull. Or worse, you don’t have a brisket knife at all!

In this article, we have gathered our all time favourite brisket knives that even a clumsy beginner cook can use. We have options for all kinds of chefs. Here we don’t discriminate!

In a Hurry? Here’s Our Top Picks…

RankPictureNameShops#1
Victorinox Cutlery Fibrox Pro Slicing Knife

Victorinox Fibrox Pro Granton Slicing Knife

  • High-carbon European stainless steel
  • 12” blade with 5.4” handle
  • Non-slip patented fibrox pro handle
  • Granton blade for minimized friction
  • National Sanitary Foundation (NSF) approved


Read Our Review


Check Price

#2
Mercer Culinary Millennia Granton Edge Slicer

Mercer Culinary Millennia Granton Edge Slicer

  • Santroprence and polypropylene handle
  • Textured finger points
  • Hand wash knives 
  • Highest quality Japanese steel
  • One-piece high carbon
  • Stain-resistant blade.


Read Our Review


Check Price

#3
DALSTRONG Slicing Carving Knife

Dalstrong Slicing Carving Knife – Gladiator Series

  • Imported high-carbon German steel
  • Triple riveted for extra durability
  • 14°-16° angle hand polished edge
  • Ultra-premium G-10 handle
  • 56+ rockwell hardness
  • Full tang for extra strength
  • Ergonomic handle with sheath


Read Our Review


Check Price

#4
Cutluxe Slicing Carving Knife

Cutluxe Slicing Carving Knife

  • German high carbon stainless steel
  • Tempered to 56+ Rockwell
  • Full tang ergonomic design 
  • Laminated pakkawood handle
  • Granton blade edge
  • Hand-honed sharpened at 14-16° per side
  • Rust/Corrosion resistant


Read Our Review


Check Price

#5
Kessaku Slicing Carving Knife

Kessaku Slicing Carving Knife – Samurai Series

  • High-carbon stainless steel blade
  • Pakkawood mirror-polished handle
  • 2X sharper that average knives
  • Sharpened at 16° angle per side
  • Full tang and hand crafted
  • Ample knuckle clearance


Read Our Review


Check Price

#6
15 Best Brisket Knife Reviews: Everything You Should Know about Carving Knives! 7

Dalstrong Butcher’s Breaking Cimitar Knife -“The Reaper”

  • Forged thyssenkrupp high-carbon German steel 
  • Satin finish hand-sharpened blade
  • Black pakkawood handle
  • Full tang with engraved rivet
  • Lifetime warranty


Read Our Review


Check Price

#7
Hammer Stahl Carving Knife

Hammer Stahl 14” Carving Knife

  • Individually boxed with magnetic latches
  • Forged German stainless steel
  • 55-57 rockwell hardness
  • Holds in edge, easy to resharpen
  • Durable resin-infused pakkawood handle
  • Quad-tang handle


Read Our Review


Check Price

#8
Ergo Chef Prodigy Slicing knife

Ergo Chef Prodigy Series 12″ Slicing Knife

  • High carbon stainless steel
  • Razor sharp tempered blade
  • Ergonomic design non-slip handle
  • NSF tested
  • Ideal for larger brisket and roasts


Read Our Review


Check Price

#9
DALSTRONG Slicing & Carving Knife

Dalstrong 12” Slicing & Carving Knife

  • Precision forged high carbon German Steel
  • 58 rockwell hardness
  • Sharpened to 16°-18° angle
  • Black, non-reflective titanium-nitride coating
  • Tapered design for hardness
  • Added chromium for stain resistance
  • Full tang construction


Read Our Review


Check Price

#10
15 Best Brisket Knife Reviews: Everything You Should Know about Carving Knives! 8

Kai Brisket Pro Kitchen Knives

  • Ideal for trimming and slicing larger meat
  • Imported Japanese AUS6M stainless steel blade
  • Hand-sharpened at 16° double-bevel blade
  • Riveted POM handle
  • Full-tang construction


Read Our Review


Check Price

#11

15 Best Brisket Knife Reviews: Everything You Should Know about Carving Knives! 9

Cook N Home 11″ Granton Edge Slicing Knife

  • Granton edge with rounded tip
  • 16.5” of total length
  • Multipurpose knife
  • German engineered stainless steel
  • Ergonomic handle shape
  • Dishwasher safe


Read Our Review


Check Price

#12

TUO Slicing Knife

TUO Slicing Knife – Fiery Phoenix Series

  • Narrow long blade
  • Polished African Pakkawood handle
  • Ergonomic gentle curve
  • Full-tang construction
  • 3-step Honbazuke method sharpening 
  • Honed at 18° per side
  • Lifetime guarantee


Read Our Review


Check Price

#13

MAIRICO Stainless Steel Carving Knife

Mairico Ultra Sharp Premium Carving Knife

  • Premium stainless steel 
  • Ergonomic, well balanced body
  • Versatile functions
  • Lightweight with only 1.3 lbs
  • Comes with a storage case


Read Our Review


Check Price

#14

15 Best Brisket Knife Reviews: Everything You Should Know about Carving Knives! 10

SEDGE Slicing Carving Knife

  • Japanese AUS-10V high-carbon steel
  • Full tang with Damascus hammered finish
  • Three-step Honbazuke method
  • Military-grade G10 handle
  • 62+ rockwell edge retention
  • Hand-polished blade 
  • Comes with a gift box


Read Our Review


Check Price

#15

FINDKING Slicing Carving Knife

Findking 12” Slicing Carving Knife

  • Rosewood octagon handle
  • 3 layer clad steel
  • Durability with edge retention
  • Hand-polished 16° v-shaped edge
  • Comes in a beautiful packaging


Read Our Review


Check Price

Top 15 Best Knives for Slicing Brisket Reviews

01. Victorinox Fibrox Pro Granton Slicing Knife

Victorinox Cutlery Fibrox Pro Slicing Knife

Victorinox 47645


Check Latest Price

Our Top Pick

SPECS

  • Blade material: High Carbon Steel
  • Brand: Victorinox
  • Color: Black
  • Item Dimensions LxWxH: 17.38 x 1.75 x 0.75 inches
  • Construction Type: Stamped

There are many great knives available in the market and many will be. But nothing beats a classic, trustworthy option like Victorinox Fibrox Pro. The thing we most love about this slicing knife is how easy it is to use. 

The whole body of this knife is designed in an ergonomic shape. The handle is comfortable with anti-slip grip and a clever shape. If you feel uncomfortable to hold a knife for longer, this is a great option so it does not cause hand fatigue. 

Victorinox has always been a place culinary enthusiasts go to for quality products. It might not be the most affordable one but it surely is an investment piece. You buy one Victorinox knife and it will serve you decades.

The blade is the most important part of any knife. This one is made from high-carbon European stainless-steel which makes it super durable and rust resistant. 

The 12” shape blade comes with a rounded tip that is very useful for meat separation. the lightweight body maximizes cutting performance so you can use it for both firm and soft meats. 

The Granton blade prevents food from sticking to the steel. The cleanup of this slicing knife is also super simple. 

You can hand wash them or put them in the dishwasher. This is a versatile carving knife that helps you cut thinner and uniformed slices  very quickly.

This Victorinox carving knife is NSF approved and comes with a lifetime guarantee. So if you are looking for a commitment piece, there is no better one to try.

Why We Recommend This: 

This knife is a trusted favourite among many of your favourite celebrity chefs and food vloggers. This is just what you would imagine a high-quality brisket knife is like. 

It is comfortable, easy to use and has superior weight balance. It is also ideal for both professionals and mature cooks. This knife is expensive for a reason!

Pros:

  • Ideal for both homecooks and professionals
  • Lightweight
  • Ergonomic shape
  • Long, straight blade
  • Razor sharp
  • Prevents friction and sticking
  • Dishwasher safe
  • Durable and strong
  • Lifetime guarantee

Cons:

  • Expensive

Check the Latest Price for Victorinox Fibrox Pro Granton Slicing Knife

02. Mercer Culinary Millennia Granton Edge Slicer

Mercer Culinary Millennia Granton Edge Slicer

Mercer Culinary M13914


Check Latest Price

Extra Long Blade

SPECS

  • Blade Material: High Carbon Steel
  • Brand: Mercer Culinary
  • Blade Length: 14”
  • Color: Roast Slicer
  • Handle Material: Santoprene
  • Blade Edge: Plain

If you enjoy larger briskets, using a small carving knife just seems silly. Holding something like Mercer Millennia Granton Edge slicer automatically changes the whole game. 

This brisket knife is 14” long, making it an essential in any chef’s arsenal. Mercer is known for making professional grade culinary products for a durable run. 

To achieve that, they have used Japanese steel to make Mercer brisket knives. Japanese steel is different from ordinary stainless steel. 

They are much better at retaining the edge. So you get a sturdier knife that won’t break or chip. 

As japanese steel has a higher carbon content, they are easy to sharpen as well. The stronger your blade is, the thinner you can make the edge. This Mercer Culinary Brisket knife has a razor-sharp edge. 

The whole construction is made out of one-piece high-carbon, which is another distinctive feature of Japanese style knives. It is rust, corrosion and stain-resistant so it always looks brand new. 

Let’s talk about the handle for a second. Mercer Culinary Millennia Granton Edge slicer cones with an ergonomic handle. 

The material of the handle is a mixture between polypropylene and santoprene. Together they provide longevity and comfort. 

The textured finger points are great for slip resistance. This means you get a better grip which you need to handle a larger brisket. The last thing you want is accidently cutting off a huge chunk of meat in the middle of fine carving. 

On top of all these, Mercer brisket knife is NSF certified which means you get the assurance of safety, quality and performance. 

Why We Recommend This: 

This knife comes with an extra long, sharp blade that is perfect for larger meat pieces. This is a more affordable version of Victorinox Brisket knife. If you want a reasonably priced carving knife, this is the one to go to.

Pros:

  • Strong and durable material
  • Ergonomic handle provide comfort
  • Easy edge maintenance
  • Rust-resistance
  • Easy to hold
  • slip-resistance
  • NSF certified
  • Great value for money

Cons:

  • Not dishwasher friendly

Check the Latest Price for Mercer Culinary Millennia Granton Edge Slicer

03. Dalstrong Slicing Carving Knife – Gladiator Series

DALSTRONG Slicing Carving Knife

Dalstrong Gs-12-slicer


Check Latest Price

Feature-Packed

SPECS

  • Blade Material: High Carbon Steel
  • Brand: Dalstrong
  • Item Dimensions LxWxH: 8 x 0.07 x 2 inches
  • Construction Type: Forged

The Gladiator series in itself is an all time classic in the culinary world. Dalstrong created this series with precision forged blades made from a single piece of imported material. They use high-carbon ThyssenKrupp German steel.

This Dalstrong Gladiator Brisket carving knife is wear and stain resistance. It has a 56+ rockwell hardness level which means this knife is not losing its edge anytime soon.

One key thing we often overlook about kitchen knives is the angle it has been sharpened in. The angle determines whether you will be able to make a very thin, straight cut or not. 

This one’s hand-sharpened at 14-16 degrees per side to help you achieve the smallest and sharpest edge possible. You won’t have to put too much pressure to slice your brisket. Even for larger turkey, it’s very efficient. 

Dalstrong is known for their well-thought-out designing. This one has a beautiful ambidextrous handle in an ergonomic shape. This means you do not get hand fatigue. 

Dalstrong Gladiator carving knife has a G-10 Garolite handle which is a non-porous fiberglass material. The reason why it’s special is due to its adaptive nature. 

It can handle both heat and moisture pretty easily. So you get a life-long durability.

This well-engineered knife is ideal for both professional and home chefs. Used by many restaurant culinary chefs, Dalstrong Gladiator Brisket knife is a must-have. 

It’s a heavy-duty knife with a BPA-free protective sheath. So you can carry or store it nicely. 

Why We Recommend This: 

Just like all Dalstrong knives, this one is also very focused on the engineering of the blade and handle. It’s an exceptional knife that performs amazingly while looking top-notch.

Pros:

  • Extra durable construction
  • Strong and flexible blade
  • Cutting-edge technology
  • Great value for money
  • Sturdy handle design
  • Well-made sheath
  • Well-balanced
  • High edge-retention

Cons:

  • The blade is not razor-sharp

Check the Latest Price for Dalstrong Slicing Carving Knife – Gladiator Series

04. Cutluxe Slicing Carving Knife

Cutluxe Slicing Carving Knife

Cutluxe


Check Latest Price

High Durability

SPECS

  • Blade Material: High Carbon Steel
  • Brand: Cutluxe
  • Color: Black
  • Handle Material: Pakkawood
  • Blade Edge: Plain

Made to be more of a slicing knife than a carving one, Cutluxe is a premium option for anyone who wants to take an oversized turkey or roast. 

This knife is tempered very precisely to have a razor-sharp edge. This well-engineered knife cuts through meat like butter. You will be surprised to see how effortless it truly is. 

Made from high-grade German stainless steel, this knife is not a budget option in any way. You get a lifetime warranty along with the rockwell hardness level of 56+. 

This makes it a bit more expensive than the average option. But hey, good things do cost a bit more. 

The design of this Cutluxe carving knife is full tang. This means it is built using one piece of metal that extends from the tip to all the way to the end of the handle. This provides better balance and strength to overall construction. 

The handle itself is made out of pakkawood which is a very comfortable material. It is triple-riveted for a secure grip. 

The wood is laminated and polished so you do not get any water damage. This is perfect for all the neat freaks who are afraid of wood handles benign unhygienic. 

The blade is granton so meat pieces do not stick to it. It has minimum friction and a ‘zero-balance’ experience. 

The edge of this brisket slicing carving knife is sharpened at 14°-16° per side. Not only does this create an extremely fine edge, but also provide a peak performance with minimal effort. This is super sharp, so be careful with it. 

Why We Recommend This: 

The size of the blade, the design of the handle and it’s sharpness makes it a great choice for large roasts of turkey and chicken. It’s great for poultry.

Pros:

  • Full tang knife
  • Durable and strong
  • Ergonomic handle design
  • Laminated pakkawood
  • Superb balance
  • Hand polished for ultra-sharpness
  • Great value for money

Cons:

  • Not dishwasher safe
  • Small handle

Check the Latest Price for Cutluxe Slicing Carving Knife

05. Kessaku Slicing Carving Knife – Samurai Series

Kessaku Slicing Carving Knife

Kessaku 8541906717


Check Latest Price

Classic Eastern Style

SPECS

  • Blade Material: High Carbon Steel
  • Brand: Kessaku
  • Color: Silver
  • Handle Material: Pakkawood
  • Blade Edge: Plain

If you are looking for a japanese hand-crafted knife, there are only a few options as good as Kessaku. 

This Samurai series slicing carving knife looks and feels quality. If you showcase this set in your kitchen, people are definitely going to ask you about it. That’s how eye catching this series is!

But let’s talk about the brisket knife from this line. It has a full tang with hand crafted construction. The minute you hold it in your hand, you will feel how helfty and solid it is. 

Almost all brisket knives come with hollow-out design to prevent friction. But they do not look as elegant as Kessaku Samurai Slicing knives. It has a unique etched pattern that blends with the overall design. 

Japan is known for their craftsmanship so we are not going to talk too much about it. But this one has pure high-carbon stainless steel, which is a premium material and very rare. Pure high-carbon is stronger and more resistant to heat, temperature and rust. 

The Pakkawood handle of Kessaku brisket knife is mirror polished on the outside. This gives to a very distinctive sheen that looks very timeless. The polish also works as a protective layer. 

Why We Recommend This: 

Kessaku brisket knife looks high-end like with the fraction of the price! It has great balance between the balde and the handle and is razor-sharp. If you want to explore the world of Japanese culinary, this knife can be a great place to start.

Pros:

  • Gorgeous design
  • Comfortable wood handle
  • Super sharp blade
  • Full-tang construction
  • Han-crafted
  • Premium look
  • Great packaging

Cons:

  • Need regular maintenance and sharpening

Check the Latest Price for Kessaku Slicing Carving Knife

06. Dalstrong Cimitar Butcher’s Knife -“The Reaper”

15 Best Brisket Knife Reviews: Everything You Should Know about Carving Knives! 7

Dalstrong GS-10inch-butcher


Check Latest Price

Best for Sectioning

SPECS

  • Blade Material: High Carbon Steel
  • Brand: Dalstrong
  • Color: Black and Silver
  • Handle Material: Pakkawood
  • Blade Edge: Plain

We know, butcher’s knife and brisket knife are not the same thing. But what if we told you you can have both in one? Dalstrong Cimitar “The Reaper” Butcher’s knife is a masterfully designed knife that’s ideal for both raw and cooked meat. 

The tip of this knife has a curve which is great for sectioning and portioning any meat piece. This 12” knife can tackle anything. It’s ideal for moose, deer, elk, beef, pork, turkey, chicken, fish and what not. 

This scalpel-like curved blade edge is great at cutting meat in a smooth, single motion. To help you achieve that, Dalstrong provides a G10 garolite handle. 

This handle is ergonomic with mosaic and engraving, making it really gorgeous to look at. The triple riveted design and full tang construction provides a great balance with center of gravity right in the middle. This means you can use this knife very effortlessly. 

This kit includes:

  • 12” Gladiator Series Butcher & Breaking Knife
  • PerfectFit Dalstrong Sheath
  • Neatly Packed with Dalstrong’s Renowned Packaging
  • Dalstrong Support

Dalstrong Cinitar Butcher’s knife has a rockwell hardness level of 56+. This means it does not break or rust under heavy-usage. 

The blades are hand-polished to have a satin finish. This not only looks good but also improves resistance.

Why We Recommend This: 

Great for both raw and cooked meat. You can use this knife for sectioning and portioning any meat pieces. The super sharp blade is just perfect for cutting in a smooth, single motion!

Pros:

  • Great for nose to tail sectioning.
  • Super sharp blade
  • Ergonomic handle
  • Durable and sturdy
  • High edge retention
  • Great value for money

Cons:

  • The handle is a bit slippery with wet hands

Check the Latest Price for Dalstrong Cimitar Butcher’s Knife

07. Hammer Stahl 14” Carving Knife

Hammer Stahl Carving Knife

Hammer Stahl COMINHKPR114033


Check Latest Price

Detailed Craftsmanship

SPECS

  • Blade Material: High Carbon Steel
  • Brand: Hammer Stahl
  • Item Dimensions LxWxH: 2 x 1.5 x 21.5 inches
  • Construction Type: Forged
  • Item Weight: 0.75 Pounds

First things first, this knife is absolutely beautiful. With its pakkawood handle and granton blade, you will notice the details of amazing craftsmanship. 

Hammer Stahl brisket carving knife is a premium quality cutlery as it’s made from German Steel. The high-carbon stainless steel blade is forged and tempered to give you a superior edge and longevity.

Due to its extensive process of making, it has a 55-57 rockwell hardness level. Each blade is measured and cut by laser. 

Each of the blades gets sharpened at 20° bevel angle. This is the best angler to cut your brisket very thinly. 

As we have mentioned earlier, the handle is simply gorgeous. It is also super thoughtfully designed to provide ultimate comfort. So you can use it for a longer period of time without getting hand fatigue. 

Each pakkawood handle is infused with phenolic resin. It adds grip and shine to the outsider wood surface. The quad-tang is great for exceptional balance. 

Hammer Stahl carving knife comes in a beautiful balck box which is great for gifting. The box is foam-lined with magnetic latches. So it’s a perfect storage for your brisket knife. 

The thing about cutlery is, everyone loves them. So you can give it to your cooking enthusiast friend or even to a beginner. Hammer Stahl carving knife is a functional gift that will last a lifetime.

Why We Recommend This: 

This knife is known for its detailed craftsmanship. You can easily hold it and use it as it has been engineered to make the experience very convenient for you. 

The handle design is beautiful and ergonomic. Overall you will thoroughly enjoy it.

Pros:

  • Easy to hold
  • Ergonomic handle
  • Beautifully designed
  • Super sharp edge
  • Comes in a magnetic box
  • Great value for money

Cons:

  • Does not come in a small size

Check the Latest Price for Hammer Stahl 14” Carving Knife

08. Ergo Chef Prodigy Series 12″ Slicing Knife

Ergo Chef Prodigy Slicing knife

Ergo Chef 2012


Check Latest Price

Best for Homecooks

SPECS

  • Blade Material: Stainless Steel
  • Brand: Ergo Chef
  • Color: Silver
  • Blade Edge: Plain
  • Item Dimensions LxWxH: 17.5 x 9 x 1.5 inches

Ergo Chef is a family brand with immense popularity especially in the United States. Their designs are very practical and manageable for regular homecooks. This Prodigy series slicing knife is built to provide comfort while maximizing performance. 

Made from high-carbon stainless steel, this knife is super strong and durable. It does not get rust or corrosion so you do not need a lot of maintenance. 

We particularly like the size of the Ergo Chef brisket knife. This one is 12” long with a thin body. So you can basically use it for all types of meat. It is ideal for large birthday cakes as well. 

The blade is tempered and built to be razor sharp. The edge does not lose its shape very easily. So if you are a clumsy cook like us, this is a great option.

Ergo Chef always brings quality and affordability together. This knife is super budget-friendly considering the material and engineering of the handle. 

The handle is full-tang which means it has excellent balance. The balance is important for any knife if you want to make a clean, precise cut with it. 

The hollow ground oval pockets in the blade are not just for decoration. This prevents the meat pieces from sticking to the blade. 

It creates minimal friction and has better motion. Beginner cooks and carvers will find this knife very easy to use. 

The thin and narrow shape is great for larger meat pieces like beef brisket, roasts, turkey, prime rib, ham and all types of BBQs. Overall, we think this is all a homecook needs to get a satisfying bisket experience.

Why We Recommend This: 

This knife is just great for any novice or beginner carver. If you always tend to cut thick, uneven slices of meat, this one will do the hard work for you. You will be able to go as thin as you want.

Pros:

  • Super-sharp blade
  • Very easy to use
  • Garet value for money
  • Comfortable and solid handle
  • Durable and sturdy

Cons:

  • Does not come with a protective storage box/sheath

Check the Latest Price for Ergo Chef Prodigy Series 12″ Slicing Knife

09. Dalstrong 12” Slicing & Carving Knife – Shadow Black Series

DALSTRONG Slicing & Carving Knife

Dalstrong


Check Latest Price

Sleek, Modern Look

SPECS

  • Color: Black
  • Handle Type: Military grade G10 handle
  • Brand: Dalstrong
  • Material: Titanium Nitride Coated German HC Steel
  • Blade Material: Alloy Steel
  • Blade Edge: Plain

The Shadow Black series is a classic one by Dalstrong. It is made with sharp cutting-edge technology and high-craftsmanship to provide you the most effective, unique and reliable carving knife. 

One thing is doubtless, this knife is so far the most eye-catching one on our list. You would be lying if you say, this knife does not entice you! Just look at it’s sleek balck body with angle cut design. It’s super modern. 

This Ruthlessly sharp knife is made by experts to have its signature geometric look with amazing edge retention. 

The blade is made with an intense heat-treatment followed by a deep-freeze nitrogen cooling process. This whole thing enhances the strength of this brisket knife. On top of it, it has a deep-balck titanium coating to protect it from heat and water damage. 

The handle of this knife is also super balck. It has a tapered bolter that ensures a comfortable pinch grip. 

The angular G10 resin body is made to handle even the busiest kitchen. So you can be sure to get something that is super durable and strong. 

The Shadow Black Brisket knife is 12” long which is perfect for larger meat pieces like Turkey, roasts, pork, and beef. The handle is made to be anti-slippery so that when you are handling the large smoked brisket, it’s not going anywhere. No more accidental miscut!

The high-carbon ThyssenKrupp German premium steel has 58+ rockwell hardness. The blade is also hand-sharpened at 16°-18° per side. 

You can use it for both household cooking and in a professional environment. We know a lot of chefs who swear by this knife. 

The renowned customer care service and after-purchase support of Dalstrong is just another reason to invest in their creations. 

Why We Recommend This: 

This knife looks like it costs hundreds of bucks while being pretty affordable. Dalstrong always makes reliable, sturdy knives and this one ticks all the boxes. This is a great gift item for any culinary enthusiasts in your life.

Pros:

  • Super sharp edge
  • Easy to clean
  • Great value for money
  • Sturdy and durable
  • Gorgeous black finish
  • Premium materials
  • Great as a gift

Cons:

  • Not the most comfortable brisket knife

Check the Latest Price for Dalstrong 12” Slicing & Carving Knife

10. Kai Brisket Pro Kitchen Knives

15 Best Brisket Knife Reviews: Everything You Should Know about Carving Knives! 8

Kai HT7074


Check Latest Price

Best for Professionals

SPECS

  • Blade Material: Alloy Steel
  • Brand: Kai
  • Color: Slicing/Brisket -12 Inch
  • Blade Edge: Slicing Knife
  • Item Dimensions LxWxH: 17 x 0.88 x 1.63 inches

The brand Kai was born in Seki city which is Japan’s most famous knife-making capital. They have been making premium quality knives for over a century now!

In the east, Kai is a reliable place that both skilled professional and homecooks go to for high-quality cutlery and kitchen accessories. This one is their Brisket Pro kitchen knife, created specifically for large roasts and turkey. 

One thing you will immediately notice about this knife is how it has a rounded tip. That’s because you get better control and maneuverability when a carving knife has a sharp tip. Talk about attention to details!

Made from imported Japanese AUS6M steel, this knife is super durable and solid. It is of course hand-sharpened at a 16° angle in a double-bevel blade. 

Maybe it’s just us, but a hammered finish looks so much better than a smooth one. There is something organic and classic about it. Kai Brisket Pro kitchen knife has a thin hammered finish that not only looks cool but also reduces knife drag. 

The riveted pom handle along with it’s full tang construction makes it very comfortable to hold and use. The full-tang adds better balance as well. 

Kai Bristet Pro 12” kitchen knife is ideal for trimming and slicing larger roasts, ribs, turkey and BBQs. The long blade makes it very fun to use as you feel like a pro. It is also NSF certified to be used in commercial kitchens by skilled professionals. 

Why We Recommend This:

This NSF certified knife is perfect for commercial use. Pro chefs love using this knife in their kitchen. 

This doesn’t mean homecooks can’t use it. The super sharp blade with ti’s rounded tip makes it easy to maneuver and use regardless of your skill level.

Pros:

  • Super sharp double-bevel blade
  • Hammered finish
  • Riveted POM handle
  • Full-tang construction
  • NSF certified
  • Ideal for commercial use
  • Great value for money
  • Corrosion and wear resistant

Cons:

  • The blade is not super thin

Check the Latest Price for Kai Brisket Pro Kitchen Knives

11. Cook N Home 11″ Granton Edge Slicing Knife

15 Best Brisket Knife Reviews: Everything You Should Know about Carving Knives! 9

Cook N Home 02500


Check Latest Price

Best Value

SPECS

  • Blade Material: Stainless Steel
  • Brand: Cook N Home
  • Color: Green
  • Blade Edge: Hollow
  • Item Dimensions LxWxH: 16.5 x 1.25 x 0.8 inches

If you are looking for a knife that can be used for a variety of different things and still be in a reasonable price range, this Cook N Home slicing knife is perfect.

This 11” Granton Edge knife is made out of stainless steel. The whole blade is German engineered so you get a great balance and flexibility. 

The long sharp blade cans lice through effortlessly. It is ideal for meat, brat, vegetables, fruits and so much more.

The handle of this knife is particularly great. For such a long knife, you need something that will feel solid in your hand. 

This one has a textured grip with ergonomic shape. This means there is no way it can slip off even when your hand is wet.  

One thing that needed to be mentioned is, despite it being a dishwasher safe, we suggest handwashing. This is because the blade is stainless steel. 

So if you sock it in the water for a long time, it can get damaged. On the other hand, due to the stainless-steel body, you get excellent flexibility. 

The Granton edge prevents food from ticking to the blade. It’s excellent for precise carving. For a large turkey or pork roast, Cook N Home slicing knife is an excellent option.

Why We Recommend This:

This is a superb knife within reasonable price. You can use it for multiple different types of meat, poultry and even fish. This particularly works excellently on fish to make very thin cuts.

Pros:

  • Horizontal, self-basting rotation.
  • Easily fits two whole chicken at the same time.
  • Gives a beautiful charred golden exterior to the food.
  • Manual heat setting gives precise heating options.
  • Visible glass door with rotisserie accessories.
  • Specialized heating for quick cooking.

Cons:

  • Gets really hot so you need to be careful if you are cooking for a longer period of time.

Check the Latest Price for Cook N Home 11″ Granton Edge Slicing Knife

12. TUO Slicing Knife – Fiery Phoenix Series

TUO Slicing Knife

TUO TC0713


Check Latest Price

Most Versatile

SPECS

  • Blade Material: High Carbon Stainless Steel
  • Brand: TUO
  • Color: Fiery
  • Handle Material: Pakkawood
  • Item Dimensions LxWxH: 17.24 x 1.54 x 0.09 inches

TUO Fiery Phoenix Slicing knife comes in many different sizes and colors. We particularly like their 12” brisket carving knife because it’s a great size for a wide variety of items. 

Awarded as ‘world’s best kitchen knives’, Fiery Phoenix is a very popular series by TUO. This knife has an exceptional narrow blade that can be used for deboning, preparing, fileting, skinning, trimming and butterflying. So you can tell this is not just another brisket knife. 

This versatile knife is ideal for carving larger roasts, turkey, ham and even fruits and veggies like watermelon or pumpkin. Basically, anything large that needs to be precisely cut and  shaped, this knife is ideal for that job. 

The handle of the Fiery Phoenix carving knife is absolutely gorgeous with its warm polished pakkawood  and gentle carve for comfort. The wood is sourced from Africa. The ergonomic full-tang design adds balance and weight to it. 

TUO brisket knife has a hand-sharpened edge using the traditional 3-step Honbazuke method. Each side is sharpened at a precise 118° angle. This creates an extremely sharp blade that can cut through basically anything. It’s extremely efficient and functional for a busy kitchen. 

As the blade is meant to be super sharp, you can tackle firm meat pieces as well as soft, delicate options like prosciutto or salmon. Overall, we think Fiery Phoenix 12” is a great brisket knife for both professionals and homecooks. 

Why We Recommend This: 

TUO carving knife has a super sharp edge which is great for professional use. The extremely versatile blade can be used for many different types of meat as well as vegetables and fruits.

Pros:

  • Great value for money
  • Comfortable handle design
  • Ergonomic
  • Easy to hold
  • Razor sharp edge
  • Full-tang for proper balance
  • Waterproof wood handle

Cons:

  • Needs to be maintained regularly

Check the Latest Price for TUO Slicing Knife – Fiery Phoenix Series

13. Mairico Ultra Sharp Premium Carving Knife

MAIRICO Stainless Steel Carving Knife

MAIRICO 8541906658


Check Latest Price

Best Lightweight

SPECS

  • Blade Material: Stainless Steel
  • Brand: MAIRICO
  • Color: Stainless Steel
  • Item Dimensions LxWxH: 17.9 x 5.1 x 1.8 inches

This long, ultra-sharp carving knife is a favorite among seasoned chefs and rightfully so. With its lightweight construction and well balanced body, you can use it for many different types of meats without getting hand fatigue. 

Most larger knives come with an average sized handle which can feel a bit unformattable as you can’t use the blade to its full potential. This one has a long handle that makes the blade very easy to maneuver.

The blade is made out of premium steel with a stainless layer on top. This makes the knife rust-resistant so ideal for a busy kitchen. The length of the blade is very popular and desirable as you can use it for a wide range of different things. It’s super versatile for both meat and veggies. 

The ergonomic design of the handle along with its secure grip provide maximum control while cutting through large briskets with it. You also get a full refund policy provided by Mairico because they truly believe in their creation. 

Why We Recommend This: 

This is one of the most lightweight brisket knives on our list. It’s easy to hold and use for a long period of time without hand cramps. The blade length is also super convenient for beginner cooks.

Pros:

  • Ultra sharp blade
  • Ergonomic design
  • Versatile function
  • Durable and solid
  • Rust and corrosion resistant

Cons:

  • Quite expensive

Check the Latest Price for Mairico Ultra Sharp Premium Carving Knife

14. SEDGE Slicing Carving Knife – SD-H Series

15 Best Brisket Knife Reviews: Everything You Should Know about Carving Knives! 10

SEDGE 8541907499


Check Latest Price

Best for Gifting

SPECS

  • Blade Material: Japanese Damascus AUS-10V Steel
  • Handle Material: Ergonomic G10 Handle with Classic 3-Metal Mosaic Rivet
  • Total Length: 350 mm
  • Handle Length: 140 mm
  • Blade Length: 203 mm (8 inch)
  • Blade Width: 35 mm
  • Blade Thickness: 2.5 mm

While researching and trying each of these knives on our list, we were looking for a perfect option for gifting. Knife is a very personal and valuable gift for any culinary passionate. So you don’t want them to give you a side-eye while opening your present to find a very cheap knife. 

The packaging of the knife is just as important as the quality when it comes to gifting. This is why we had to pick Sedge slicing carving knives for it’s gorgeous red look. 

This knife comes with a materfully elegant rose pattern along with a hammered finish on the blade. This damascus pattern not only adds visual interest to an otherwise plain blade, but also functions as a friction-minimizer.

Don’t think this brisket knife is all about its outer beauty. The blade is made out of Japanese Aus-10V damascus high-carbon steel, with 66 layers of stainless steel. This combination makes it super rust-resistant and durable. 

SEDGE uses vacuum heat treatment and nitrogen cooling techniques to make this blade as strong as possible. As a result it has reached a maximum of 66+ rockwell hardness level. 

The handle of this Sedge SD-H series brisket knife is made with a Military grade G10 handle. This handle is highly impervious to heat, moisture and cold. The ergonomic shape is very comfortable to hold as well!

On top of all these, this knife is totally hand-polished with full tang. You can tell how well-engineered this thing is just by taking one look at it!

Why We Recommend This: 

This is just a beautifully made luxe looking knife that is perfect for gifting. The red handle and packaging with rose pattern make it look like a work of art. Any culinary lover would jump at the thought of owning this knife.

Pros:

  • Life-long durability
  • Resistant to reat, cold and moisture
  • Ergonomic handle design
  • Agile and comfortable
  • Non-slip grip
  • Superior balance
  • Great value for money

Cons:

  • The handle can feel bulky

Check the Latest Price for SEDGE Slicing Carving Knife

15. Findking 12” Slicing Carving Knife – Dynasty series

FINDKING Slicing Carving Knife

FINDKING


Check Latest Price

Premium Quality

SPECS

  • Blade Material: Alloy Steel
  • Color: Black
  • Handle Material: African Rosewood
  • Size: 12” 
  • Package Dimensions: 19 x 2.5 x 1.5 inches

We think the Findking Dynasty Series slicing knife is a very underrated brisket knife mainly because it’s a Chinese knife manufacturing company. We have this stigma against Chinese products cause we think they don’t last. 

Think again, because historically Chinese knives and swords have been globally popular since the Tang Dynasty! See how Findking found the name of this series?

The Dynasty series is all about quality and rich craftsmanship. They use alloy steel which is a much resistant and improved version of standard steel.  Alloy steel makes this knife a super rust-resistant and corrosion-free choice. 

Findking slicing brisket knife has a clad dimple, which means you get minimal friction. Your meat pieces do not stick to each other when you’re carving it. 

Apart from its amazing functionality, the Dynasty series carving knife is a beauty to look at. It is designed to have this traditional Chinese knives look, to show the world the beauty of eastern cutlery. 

It has a very well-engineered body that provides perfect blade balance. You can easily balance it on your finger to test its quality craftsmanship. The weight distribution makes it an efficient and quick knife for turkey nights!

The handle is crafted from African rosewood, which looks superb. This is the type of knife you need to have in your kitchen and bring out in front of the guests to show off.

Why We Recommend This: 

This knife is super sharp with a classic eastern look. The overall construction is thoughtfully done with very high quality craftsmanship.

Pros:

  • Beautiful construction
  • Traditional eastern design
  • No friction
  • Razor sharp
  • Durable and sturdy
  • Perfect balance
  • Great value for money
  • Comes in a great quality box

Cons:

  • Needs regular maintenance
  • Not dishwasher safe

Check the Latest Price for Findking 12” Slicing Carving Knife – Dynasty series

Buying Guide: What to Look for in a Brisket Knife

Even though we think knife shopping is so simple and easy, we often feel disappointed after using our brand-new knife for a few weeks. This is because people do not know what to look for to find the best of the best in the crowd. 

When you are looking for a brisket knife, you must factor in these following features:

Types of Brisket Knives:

Stamped Knives:  

Stamped knives are a type of knife that’s built using a large, single sheet of stainless steel. Imagine a cookie cutter, or a punch machine, that’s exactly how this knife is made. 

A machine comes and presses on the large sheet of stainless steel. Then a knifelike shape gets cut in which a handle is later added. 

Stamped knife is not a very durable and effective option to purchase. They are usually very inexpensive and “does the job” for a while. If you are looking for a long term investment piece, this is not the type for you.

Forged Knives:

A forged knife is made from a single bar of steel. The bar is then heated and pounded over and over. This not only helps to give the balr a shape, but also causes the carbon and alloy molecules to merge together under extreme pressure. 

This creates a very durable, solid and high-strength knife. Forged knives can last a lifetime if you take proper care of it. 

In olden times, forged knives were made using a lager hammer. Nowadays, we use specialized machines for it. Dalstrong Slicing Carving Knife – Gladiator Series is a very popular forged knife choice for many.

German vs Japanese Steel:

While knife shopping, you probably will notice the emergence of two very prominent types of steel, one is the German style and the other is Japanese style.

While most of us think a steel blade is a steel blade, the process of creating the blade varies a lot. 

German blades are quite thick and dense thus heavier than average steel knives. They are very durable as you can use them everyday in your busy kitchen. 

They are made to be super resistant to heat and water. So you can use them for a long time without extensive maintenance. 

One of the most popular German steel knives is the Cutluxe Slicing Carving Knife.

Japanese steel knives on the other hand are much more dainty, delicate and carefully crafted knives that are meant to be ideal for very fine, precise work. They are often very lightweight and sharp. 

So you can carve your brisket as thin as you want. Most culinary professionals enjoy using Japanese steel. 

One downside of Japanese steel knives is it’s high-maintenance nature. As they are made to be very premium, you need to take care of them on a regular basis. But passionate culinary lovers are willing to put that extra effort. 

Kai Brisket Pro Kitchen Knives is a great Japanese steel brisket knife ideal for professionals.   

Length: 

The length of your knife is a very practical element behind its peak performance. If you happen to struggle with making an even cut in your brisket, chances are your knife is a bit too small.

Try going for an 11”-12” knife. We know it’s intimidating to use such a big knife for carving, but trust us. Carving and slicing is much easier when the blade covers the whole brisket and still has a few inches left on the tip.

Try the Mercer Culinary Millennia Granton Edge Slicer for example. You will notice the efficiency instantly.

Full-Tang:

Most novice cooks do not bother to focus on this feature. But every professional chef first checks whether the knife is full-tang or not.

Full-tang is not a necessity in your brisket knife. In fact, there are some great knives like Hammer Stahl 14” Carving Knife that are not full-tang.

What full tang essentially does is, it makes the knife more balanced and comfortable. As they are made using a  single sheet of metal from tip to the handle, they have a better center of gravity. 

The Kessaku Slicing Carving Knife proves why spending a few extra bucks on a full-tang knife is so worth it.

Handle: 

Always check whether the handle is ergonomic or not. We all are guilty of choosing a knife based on how good the handle looks and completely eliminating the practicality of it. 

Some people enjoy a short grip handle whereas others love a longer handle option. Make sure to check the material of the handle. 

Wood is always the best option as they have a natural warmth and grip to them. They are also more sustainable than plastic ones.

SEDGE Slicing Carving Knife is a very good choice that comes with a well-engineered ergonomic shape that won’t cause handle fatigue or pain.

Care & Maintenance of Your Brisket Knife 

What is the point of spending so much money on a knife only to use it mindlessly and run the integrity of it? Culinary artists and lovers take their knives very seriously. 

It is said that the knife is the paintbrush of a cook. And what do artists do to their brushes? They take good care of it!

If you do not take proper care of your brisket knife, it can lose its sharpness very fast. Here are some easy things we all should do to keep our brisket knives looking shiny and new!

  • Do not use the dishwater! We can not stress this enough. Even if your knife says it’s dishwasher-safe, you should handwash them.you do not need that kind of intense heat and water pressure to clean a knife.
  • Always use mild dish soap and warm water to clean your brisket knife. Then rinse and dry them using a soft towel. 
  • It is not necessary to soak your knives in water. Knives do not require deep cleansing. Using harsh detergent or water can potentially cause rust. 
  • Brisket knives are not for bones, dried food or hard food items. They are more of an artistic cutlery, ideal for only carving and slicing.
  • Store your knife in their respective boxes or in a sheath. Avoid putting them in glass blocks. Magnetic knife holders like this HM Magnets one are great as they do not damage the delicate edge of your brisket knife.
  • To fix your blunt knife, use a professional sharpening stone or a sharpening rod like the Chefast Honing Steel is a quick way to straighten up your knife edge.

Frequently Asked Questions (FAQs)

01. Can a Bread Knife Cut a Brisket?

You can try but not sure how successful that would be. For a brisket, you need a knife that is super sharp with a really thin edge. Long blade is very much preferable as it allows more control.

Bread knives are often serrated which can be troublesome if you’re trying to get some fine cut in your brisket. We understand why you might think it will work; the brisket looks like a loaf of bread and all that. But that’s not a very effective option.

02. Can I Use a Brisket Knife to Cut Vegetables? 

You most definitely can! In fact, it is much easier to cut larger vegetables and fruits with a brisket knife than with a chef’s knife. Brisket knives have long blades that are often double the size of any standard kitchen knives.

Imagine how easy it would be to cut a full watermelon or pumpkin with a knife like that!

03. Do I Need a Brisket Slicing Knife?

That totally depends on how often you like to enjoy roasts, BBQs or brisket at home. If you are someone who loves these items and enjoys making them on a regular basis, you need to own a good quality brisket knife. It will make your life so much easier.

Even for occasional cooks who only make larger roasts and turkey on thanksgiving and christmas, owning a solid brisket knife will allow you to show off your skills in front of a room full of guests. Now who doesn’t want that!

04. Are Japanese Knives Better than German Knives?

This depends solely on what you are looking for. If you are looking for a knife that would be super durable and strong, German knives are the best, hands down!

But if you are more interested in craftsmanship and razor-sharpness, Japanese knives are for you. Japanese knives are lighter and thinner than regular knives. 

They are quite flexible which makes fine-cutting very easy. They are also excellent for carving meats.

To End

We hope you have found something that will make your life easier and better. From making the brisket to cutting it, the whole process is super enjoyable and wholesome for many of us. 

So you need a good companion that will honor your lengthy effort to make some delicious, juicy meat for the family!

So which brisket knife did you pick from our pile?

Let us know in the comments!

Relevant Reads

Table of Contents

Related Posts