Discover How Much Caffeine is in Vietnamese Coffee

Coffee is one of the most widely consumed beverages worldwide, and its popularity continues to grow. One type of coffee that has gained popularity in recent years is Vietnamese coffee. Vietnamese coffee is known for its strong and robust flavor, which is achieved by using a unique blend of Robusta and Arabica coffee beans and a specific brewing method.

how much caffeine in vietnamese coffee
The Complete Guide to Understanding the Caffeine Content of Vietnamese Coffee

Understanding the caffeine content of coffee is crucial for health reasons, as caffeine can have both positive and negative effects on the body.

In this article, we will discuss the amount of caffeine present in Vietnamese coffee, its benefits and side effects, and the factors that can affect its caffeine content. By the end of this article, readers will have a better understanding of Vietnamese coffee and its caffeine content, and how it can impact their health.

What is Vietnamese coffee?

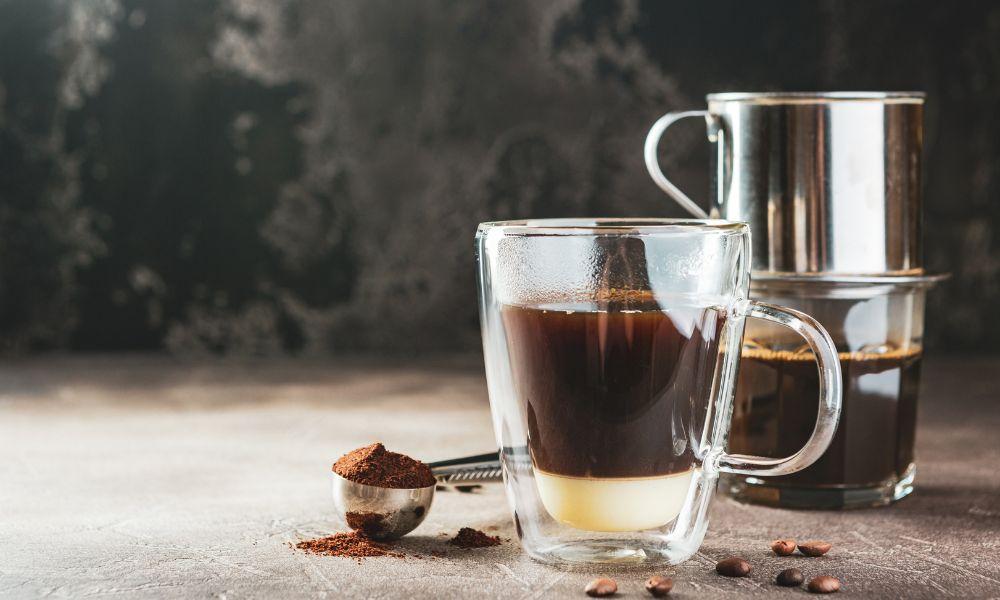
Vietnamese coffee is a type of coffee that originates from Vietnam and is known for its strong and robust flavor. It is made using a unique blend of Robusta and Arabica coffee beans, which are often roasted with added butter or oil to give it a distinct taste. Vietnamese coffee is brewed using a unique filter called a phin, which is a small metal filter that sits atop a cup.

  • Vietnamese coffee has a history that dates back to the French colonial era when the French introduced coffee to Vietnam.
  • Over time, Vietnamese coffee has developed a unique flavor profile that is recognized worldwide.
  • During the Vietnam War, coffee became an essential export for the country, and it continues to be a significant part of the Vietnamese economy today.
  • Vietnamese coffee has gained popularity around the world due to its unique taste and brewing method.
  • It is often served with condensed milk, which gives it a sweet and creamy taste.
  • Vietnamese coffee has become a popular beverage in coffee shops worldwide.
  • Many people enjoy Vietnamese coffee as an alternative to traditional coffee.

Key ingredients of Vietnamese coffee
Discover How Much Caffeine is in Vietnamese Coffee 1
Vietnamese

Vietnamese coffee is made using a blend of Robusta and Arabica coffee beans, which are often roasted with added butter or oil to give it a distinct taste. This combination of coffee beans gives Vietnamese coffee its strong and robust flavor, which is different from other types of coffee.

Robusta coffee beans, which are commonly used in Vietnamese coffee, have a higher caffeine content than Arabica coffee beans, which are commonly used in other types of coffee. Robusta beans also have a more bitter taste than Arabica beans, which can contribute to the bold flavor of Vietnamese coffee.

The use of butter or oil in the roasting process is another unique aspect of Vietnamese coffee. This practice is not commonly used in other types of coffee and can contribute to the unique taste and aroma of Vietnamese coffee.

Additionally, the brewing method of Vietnamese coffee is different from other types of coffee. Vietnamese coffee is often brewed using a phin, a small metal filter that sits atop a cup. This method of brewing allows for a slow extraction of the coffee, resulting in a strong and robust flavor.

Vietnamese Coffee Popular Brands

Discover How Much Caffeine is in Vietnamese Coffee 2
815a8JWo5pL. SL1500

There are several popular brands and types of Vietnamese coffee available, both in Vietnam and around the world. Some of the most popular brands of Vietnamese coffee include Trung Nguyen, Highlands Coffee, and Nguyen Coffee Supply.

Trung Nguyen is perhaps the most well-known brand of Vietnamese coffee, and it offers a range of coffee blends, including the famous “Gourmet Blend” and “Legendee” blends. The Gourmet Blend is a combination of Arabica, Robusta, and Excelsa coffee beans, while the Legendee blend is a premium blend that undergoes a special aging process.

Highlands Coffee is another popular brand of Vietnamese coffee that has gained popularity both in Vietnam and abroad. The brand offers a range of coffee blends, including the “Vietnamese Iced Coffee” blend, which is designed to be served with condensed milk.

In addition to these popular brands, there are several types of Vietnamese coffee available, including traditional Vietnamese coffee, which is brewed using a phin and served with condensed milk, and Vietnamese iced coffee, which is served over ice and mixed with condensed milk. Some coffee shops also offer variations of Vietnamese coffee, such as coconut Vietnamese coffee or salted caramel Vietnamese coffee.

How much caffeine is in Vietnamese coffee?

The caffeine content of Vietnamese coffee can vary depending on various factors such as the type of coffee beans used, the roasting level, and the brewing method. On average, an 8-ounce cup of Vietnamese coffee contains around 200mg of caffeine, which is higher than other types of coffee, such as drip coffee, which contains around 100-150mg of caffeine per 8-ounce cup.

Type of CoffeeCaffeine Content per 8-ounce Serving
Vietnamesearound 200 mg
Driparound 95 mg
Regularvaries, but generally around 95 mg

However, it is essential to note that caffeine content can vary depending on the type of coffee beans used, the roasting level, and the brewing method. For example, Robusta coffee beans used in Vietnamese coffee contain higher levels of caffeine than Arabica coffee beans. Additionally, darker roasts tend to have lower caffeine levels than lighter roasts.

It is also important to note that the caffeine content of Vietnamese coffee can be impacted by the brewing method. Vietnamese coffee is often brewed using a phin, which can extract more caffeine from the coffee grounds than other brewing methods. As a result, the caffeine content of Vietnamese coffee brewed using a phin may be higher than other types of coffee brewed using different methods.

Is Vietnamese coffee stronger than regular coffee? 

Vietnamese coffee is known for its strong and robust flavor, which is achieved through a unique blend of Robusta and Arabica coffee beans and a specific brewing method. However, the term “stronger” can be subjective, and it depends on how one defines “strength” in coffee.

In terms of caffeine content, Vietnamese coffee can be considered stronger than regular coffee. Vietnamese coffee typically contains higher levels of caffeine than other types of coffee, such as drip coffee. See the caffeine comparison table above.

However, when it comes to flavor and taste, whether or not Vietnamese coffee is stronger than regular coffee is a matter of personal preference. Vietnamese coffee has a distinct taste profile that is achieved through a unique blend of coffee beans and a specific brewing method, which can result in a strong and bold flavor. However, other types of coffee, such as espresso, can also be considered strong due to their concentrated flavor and high caffeine content.

Health effects of caffeine in Vietnamese coffee

One study on the effects of caffeine consumption on health found that it can have both positive and negative effects.

Caffeine is a natural stimulant found in coffee, including Vietnamese coffee, and can have both positive and negative effects on health.

Positive Effects

Positive effects of caffeine in Vietnamese coffee include improved mental alertness, increased physical performance, and a reduced risk of certain diseases, such as Parkinson’s disease, Alzheimer’s disease, and type 2 diabetes.

Negative Effects

However, consuming high amounts of caffeine, including the caffeine found in Vietnamese coffee, can also have negative effects on health. These negative effects can include insomnia, anxiety, restlessness, and an increase in blood pressure. Additionally, consuming high amounts of caffeine can also lead to dehydration, as caffeine is a diuretic that can increase urine production.

It is important to note that the negative effects of caffeine in Vietnamese coffee can vary depending on individual sensitivity to caffeine and the amount consumed. Individuals who are sensitive to caffeine or have certain medical conditions, such as high blood pressure, may need to limit their caffeine intake or avoid high-caffeine coffee blends, such as Vietnamese coffee.

FAQs

Can I drink Vietnamese coffee while pregnant?

Pregnant women are generally advised to limit their caffeine intake to no more than 200mg per day. An 8-ounce cup of Vietnamese coffee typically contains around 200mg of caffeine, so pregnant women should exercise caution when consuming Vietnamese coffee. It is always best to consult with a healthcare professional before consuming any caffeinated beverages during pregnancy.

Is Vietnamese coffee bad for my health?

Vietnamese coffee, like any other type of coffee, can have both positive and negative effects on health. While the caffeine in Vietnamese coffee can provide several health benefits, such as improved mental alertness and reduced risk of certain diseases, consuming high amounts of caffeine can also have negative effects on health, such as insomnia and an increase in blood pressure. It is important to manage caffeine intake and be aware of individual caffeine sensitivity to enjoy the benefits of Vietnamese coffee while minimizing the risks.

How does the caffeine content in Vietnamese coffee compare to other popular types of coffee?

Vietnamese coffee typically contains higher levels of caffeine than other types of coffee, such as drip coffee. An 8-ounce cup of Vietnamese coffee contains around 200mg of caffeine, while an 8-ounce cup of drip coffee contains around 100-150mg of caffeine. However, the caffeine content can vary depending on the type of coffee beans used, the roasting level, and the brewing method.

Can I drink Vietnamese coffee if I have a caffeine sensitivity?

Individuals with caffeine sensitivity may need to limit their caffeine intake or avoid high-caffeine coffee blends, such as Vietnamese coffee. It is best to consult with a healthcare professional to determine individual caffeine sensitivity and manage caffeine intake accordingly.

What are the best brewing methods for reducing caffeine content in Vietnamese coffee?

The caffeine content in Vietnamese coffee can be impacted by the brewing method. Using a different brewing method, such as drip coffee or pour-over, can result in lower caffeine levels in the final product. Additionally, using a decaffeinated coffee blend can also reduce caffeine content in Vietnamese coffee. It is important to note that the taste and flavor of the coffee may be impacted by changes in the brewing method or coffee blend used.

Conclusion

In conclusion, Vietnamese coffee is a unique and popular type of coffee that is known for its strong and robust flavor. The key ingredients and brewing method used in Vietnamese coffee differentiate it from other types of coffee and contribute to its distinct taste profile. Understanding the caffeine content of Vietnamese coffee is crucial for managing caffeine intake and making informed decisions about coffee consumption. While caffeine can provide several health benefits, consuming high amounts of caffeine can also have negative effects on health. By being aware of the caffeine content of Vietnamese coffee and managing caffeine intake accordingly, individuals can enjoy the benefits of caffeine while minimizing the risks.

We hope that this article has provided valuable insights into the caffeine content of Vietnamese coffee and its impact on health. We encourage readers to share their thoughts and experiences with Vietnamese coffee and to continue learning about the unique and diverse world of coffee.

Steelhead Trout vs Salmon Nutrition: Which is Healthier?

Fish has been a popular food choice for centuries, and for good reason. Not only is it delicious, but it is also packed with important nutrients and health benefits. Fish is a rich source of omega-3 fatty acids, protein, vitamins, and minerals, making it an essential part of a balanced diet. Among the many different types of fish available, two of the most popular options are steelhead trout and salmon.

Steelhead trout and salmon are both cold-water fish that are commonly found in North America. They are versatile, and can be cooked in a variety of ways, including grilling, baking, broiling, and smoking. Both fish are also available in a range of cuts, including fillets and steaks.

Despite their many similarities, there is a lot of controversy around which of these two fish is healthier. Some people swear by the nutritional benefits of salmon, while others insist that steelhead trout is the better option.

Steelhead Trout vs Salmon Nutrition

In this article, we will take an in-depth look at the nutritional value of both steelhead trout and salmon, and explore the many health benefits of including these fish in your diet. By the end of this article, you will have a better understanding of which fish is right for you.

The Similarities Between Steelhead Trout and Salmon Nutrition

NutrientSteelhead TroutSalmon
Protein22.1g19g
Fat5g11.5g
Omega-3 Fatty Acids0.8g1.65g
Carbohydrates0g0g
Calories120175
Vitamin B123.5mcg2.6mcg
Vitamin D645 IU570 IU
Vitamin E0.53mg0.81mg

While there are some differences in the nutritional profiles of steelhead trout and salmon, there are also many similarities between the two fish.

The study found both steelhead trout and salmon are rich sources of protein, omega-3 fatty acids, and essential vitamins and minerals. Protein is essential for building and repairing tissues in the body, while omega-3 fatty acids are important for reducing inflammation and improving heart health.

Both fish are also excellent sources of essential vitamins and minerals, including vitamin B12, vitamin D, and vitamin E, which are important for maintaining good health. These nutrients play a crucial role in the proper functioning of the nervous system, the production of red blood cells, and the maintenance of healthy bones and teeth.

In addition, both steelhead trout and salmon are low in carbohydrates, making them an ideal choice for people looking to reduce their carb intake. They are also low in calories and fat, making them a healthy option for weight management.

The Differences Between Steelhead Trout and Salmon Nutrition

While steelhead trout and salmon are both healthy and nutritious seafood options, there are some differences in their nutritional profiles that are worth considering.

Omega-3 Fatty Acids

One of the biggest differences between steelhead trout and salmon is their levels of omega-3 fatty acids. Salmon is known for being a rich source of these essential fatty acids, with a 3-ounce serving containing 1.65 grams. Steelhead trout, on the other hand, contains only 0.8 grams of omega-3s per 3-ounce serving. Omega-3s are important for reducing inflammation and improving heart health, so salmon may be a better choice for those looking to boost their omega-3 intake.

Fat Content

Another difference between these two fish is their fat content. Salmon is higher in fat, with a 3-ounce serving containing 11.5 grams, compared to 5 grams in steelhead trout. However, it’s worth noting that much of the fat in salmon is made up of healthy omega-3 fatty acids, while steelhead trout contains less fat overall.

Nutrient Density

When it comes to overall nutrient density, both steelhead trout and salmon are excellent choices. However, salmon tends to be slightly more nutrient-dense, with higher levels of vitamins and minerals, such as vitamin E and selenium, than steelhead trout.

Impact on Health Outcomes

While both steelhead trout and salmon offer many health benefits, the differences in their omega-3 and fat content may impact health outcomes for people who consume these fish.

For example, salmon’s high omega-3 content may make it a better choice for reducing inflammation and improving heart health, while steelhead trout’s lower fat content may be beneficial for people looking to reduce their overall fat intake. Ultimately, both fish are healthy and nutritious options, and the best choice may depend on individual health goals and preferences.

Health Benefits of Eating Steelhead Trout and Salmon

Steelhead Trout vs Salmon Nutrition: Which is Healthier? 3
Health Benefits of Eating Steelhead Trout and Salmon

Eating steelhead trout and salmon can provide a wide range of health benefits. The sudy found both fish are rich sources of protein, omega-3 fatty acids, and essential vitamins and minerals, all of which can contribute to improved cardiovascular health, brain function, and overall well-being.

Cardiovascular Health

The omega-3 fatty acids found in steelhead trout and salmon can help to reduce inflammation, lower blood pressure, and improve overall heart health. In addition, the protein and other nutrients found in these fish can help to lower cholesterol levels and reduce the risk of heart disease.

Brain Function

The omega-3 fatty acids in steelhead trout and salmon have also been shown to improve brain function and cognitive performance. These essential fatty acids are important for maintaining healthy brain cells and improving communication between brain cells, which can help to reduce the risk of age-related cognitive decline.

Overall Well-being

The vitamins and minerals found in steelhead trout and salmon can also contribute to improved overall well-being. For example, vitamin D is important for maintaining strong bones and teeth, while vitamin B12 is essential for proper nervous system function. Other nutrients found in these fish, such as potassium and selenium, can also help to boost immune function and support healthy metabolism.

Overall, eating steelhead trout and salmon on a regular basis can provide a wide range of health benefits. From improving cardiovascular health and brain function to promoting overall well-being, these fish are an excellent addition to a healthy and balanced diet.

Which Fish is Healthier: Steelhead Trout or Salmon?

When it comes to determining which fish is healthier – steelhead trout or salmon – there are a few factors to consider.

Both fish are rich in protein, omega-3 fatty acids, and essential vitamins and minerals, making them nutritious and healthy options for any diet.

Ultimately, which fish is healthier depends on individual health goals and dietary preferences. For example, if someone is looking to reduce their overall fat intake, steelhead trout may be the better choice. However, if someone is looking to increase their omega-3 intake, salmon may be the better option.

Overall, both steelhead trout and salmon are nutritious and healthy options for any diet. Incorporating either fish into a balanced diet can provide numerous health benefits, including improved heart health, brain function, and overall well-being.

Conclusion

In conclusion, both steelhead trout and salmon are nutritious and healthy options for any diet. Both fish are rich in protein, omega-3 fatty acids, and essential vitamins and minerals, all of which contribute to improved health outcomes.

While there are some differences in the nutritional profiles of the two fish, which one is healthier depends on individual health goals and dietary preferences. For those looking to reduce their overall fat intake, steelhead trout may be the better choice. However, for those looking to increase their omega-3 intake, salmon may be the better option.

Ultimately, the best way to reap the health benefits of both steelhead trout and salmon is to incorporate both fish into a well-rounded, balanced diet. This can help to ensure that you are getting a wide range of essential nutrients and can help to support overall health and well-being.

In summary, whether you choose steelhead trout or salmon, incorporating these fish into your diet can provide numerous health benefits. So go ahead and enjoy these delicious and nutritious seafood options!

FAQs

Is steelhead trout or salmon better for weight loss?

Both steelhead trout and salmon are low in calories and fat, making them a healthy option for weight management. However, steelhead trout has a lower fat content compared to salmon, which may make it a better option for those looking to reduce their overall fat intake.

Which fish has more omega-3 fatty acids, steelhead trout or salmon?

Salmon has a higher concentration of omega-3 fatty acids compared to steelhead trout. This makes it a better option for those looking to increase their omega-3 intake, which is important for reducing inflammation and improving heart health.

What vitamins and minerals are found in steelhead trout and salmon?

Both steelhead trout and salmon are excellent sources of essential vitamins and minerals, including vitamin B12, vitamin D, and vitamin E. These nutrients play a crucial role in the proper functioning of the nervous system, the production of red blood cells, and the maintenance of healthy bones and teeth.

Can I eat steelhead trout and salmon if I have high cholesterol?

Yes, both steelhead trout and salmon are healthy options for those with high cholesterol. They are low in saturated fat and high in omega-3 fatty acids, which can help to reduce inflammation and improve heart health.

Reviving Your Rock Hard Pretzels: Expert Tricks for Making Stale Snacks Taste Like New

Pretzels are a popular snack loved by many. However, over time, pretzels can become hard and stale, which can make them less enjoyable to eat. This is due to the loss of moisture and exposure to air, which can cause the pretzels to lose their texture and become tough.

It’s important to know how to soften hard pretzels because it can save you from wasting money by throwing away stale pretzels and also help you enjoy your pretzels to the fullest.

Reviving Your Rock Hard Pretzels: Expert Tricks for Making Stale Snacks Taste Like New 4
Reviving Your Rock Hard Pretzels

In this article, we’ll share some effective methods to soften hard pretzels, so you can savor their flavor and texture for longer.

Brief history and origins of pretzels

The origin of pretzels is somewhat uncertain, but it is believed that monks first created them in the early Middle Ages. Legend has it that around 610 A.D., an Italian monk invented the pretzel to reward children who learned their prayers. The twisted shape of the pretzel was meant to resemble arms crossed in prayer.

Another theory is that pretzels originated in Germany, where they were called “bretzel.” They were traditionally eaten during Lent as a replacement for bread, which was not allowed during fasting.

Regardless of their origins, pretzels have become a beloved snack worldwide. They can be enjoyed in various forms, from soft and chewy to hard and crunchy. In recent years, pretzels have also become popular in many dishes, from sandwiches to desserts.

Types of pretzels and their texture variations

Reviving Your Rock Hard Pretzels: Expert Tricks for Making Stale Snacks Taste Like New 5
Types of pretzels images

Pretzels come in a variety of shapes, sizes, and textures. Here are some common types of pretzels and their texture variations:

Soft Pretzels

Soft pretzels are a popular type of pretzel that has a chewy texture. They are often found at sporting events, amusement parks, and malls. Soft pretzels are made with a dough that is boiled in water and then baked, which gives them their signature chewy texture.

Hard Pretzels

Hard pretzels are another popular type of pretzel that has a crunchy texture. They are often found in snack aisles at grocery stores and are commonly enjoyed with dips and spreads. Hard pretzels are made with a similar dough as soft pretzels, but they are baked at a lower temperature for a longer period of time, which removes most of their moisture and gives them their crispy texture.

Pretzel Sticks

Pretzel sticks are a thinner version of the classic pretzel shape. They can come in either soft or hard textures, depending on how they are prepared.
Pretzel Bites – Pretzel bites are small, bite-sized pieces of pretzel dough typically served as an appetizer or snack. They can come in either soft or hard textures, depending on how they are prepared.

Flavored Pretzels

In addition to the classic salted pretzel, a variety of flavored pretzels are available, such as garlic, cinnamon sugar, and cheese. These variations can come in both soft and hard textures.

Overall, the texture of pretzels can vary based on the type of dough used, the cooking method, and the flavorings added. Whether you prefer a soft, chewy texture or a crispy, crunchy texture, there is a pretzel for everyone to enjoy.

Common ingredients in pretzels and how they affect texture

Reviving Your Rock Hard Pretzels: Expert Tricks for Making Stale Snacks Taste Like New 6
Common ingredients

Pretzels are typically made with basic ingredients, including flour, water, yeast, salt, and sometimes sugar. Each ingredient plays a role in the texture and flavor of the final product. Here’s a breakdown of how these common ingredients affect the texture of pretzels:

Flour

The type of flour used can affect the texture of the pretzel. Bread flour, which has a higher protein content than all-purpose flour, is commonly used in pretzel dough. The high protein content creates gluten, which gives the pretzel dough its elasticity and chewy texture.

Water

Water is used to hydrate the flour and activate the yeast. The amount of water used can affect the texture of the pretzel. A wetter dough will result in a softer, chewier pretzel, while a drier dough will result in a harder, crunchier pretzel.

Yeast

Yeast is used to helping the dough rise, which creates air pockets and a lighter texture. Depending on the recipe, different types of yeast can be used, such as instant yeast or active dry yeast.

Salt

Salt is an important ingredient in pretzels, as it contributes to flavor and texture. A small amount of salt is typically added to the dough, and larger salt crystals are often sprinkled on top of the pretzel. The salt crystals on top can provide a crunchy texture that contrasts with the soft interior of the pretzel.

Sugar

Sugar is sometimes added to the dough to provide a slightly sweet flavor and to help the yeast activate. Too much sugar, however, can make the pretzel dough too soft and affect the texture.

Overall, the ingredients used in pretzels work together to create the desired texture and flavor. The balance of these ingredients is crucial in producing a pretzel with the right amount of chewiness, crunchiness, and saltiness.

Common reasons for pretzels becoming hard

Reviving Your Rock Hard Pretzels: Expert Tricks for Making Stale Snacks Taste Like New 7
Common reasons for pretzels becoming hard

Exposure to air

When pretzels are exposed to air, they lose moisture, which can cause them to become stiff and dry.

Time

As pretzels age, they lose moisture and become less soft and chewy.

Improper storage

If pretzels are not stored properly, they can become stale and hard. Pretzels should be stored in an airtight container or resealable plastic bag to prevent air from getting in.

Humidity

If pretzels are stored in a humid environment, they can absorb moisture and become soft and chewy. However, they can become mushy and lose their texture if exposed to high humidity for too long.

Overbaking

If homemade pretzels are baked too long or at too high a temperature, they can become hard and crunchy.

It’s important to note that some pretzels are meant to be hard and crunchy, such as hard pretzels. However, if you prefer a soft and chewy texture, it’s important to store your pretzels properly and consume them within a reasonable time to ensure they stay fresh.

How to Soften Hard Pretzels

If you have hard pretzels that you want to soften, don’t worry! You can use several effective techniques to bring your pretzels back to life. Here are some techniques for softening pretzels based on different tools and ingredients:

Using Steam

Using steam is a great way to soften hard pretzels because it helps rehydrate them and make them soft and chewy. When steam is applied to the surface of the pretzels, it penetrates the outer layer and adds moisture to the interior. This moisture helps to loosen the tight gluten structure in the pretzels, making them hard and crunchy. By softening the gluten structure, the pretzels become more pliable and chewy.

Additionally, the heat from the steam helps warm up the pretzels, contributing to their softness. Using steam to soften your pretzels, you can achieve a texture similar to freshly baked pretzels, with a soft, chewy interior and slightly crispy exterior.

👩‍🍳 Equipment needed

A baking sheet – This will be used to place the pretzels on.

A large pot or wok with a lid – This will be used to create the steam. The pot should be big enough to fit a steaming basket or colander inside.

A steaming basket or colander – This will be used to hold the pretzels while they are being steamed. Ensure the basket is large enough to have all the pretzels you want to steam.

Oven mitts – These will be used to handle the hot pot and baking sheet.

Tongs or a spatula will transfer the pretzels from the baking sheet to the steaming basket and back again.

With these basic tools, you can easily create steam and use it to soften your hard pretzels. You can use a colander or metal strainer if you don’t have a steaming basket. Make sure that whatever you use can handle the heat and is large enough to hold the pretzels.

🥨 Step-by-step Guide

  1. Preheat your oven to 350°F (175°C).
  2. Place your hard pretzels on a baking sheet and bake them in the oven for about five minutes. This will help to warm them up and prepare them for steaming.
  3. While the pretzels are warming up, fill a large pot or wok with about an inch of water. Bring the water to a boil over high heat.
  4. Place a steaming basket or colander in the pot, making sure it’s not touching the water.
  5. Transfer the pretzels from the baking sheet to the steaming basket using tongs or a spatula.
  6. Cover the pot with a lid and let the pretzels steam for 2-3 minutes.
  7. Remove the pretzels from the pot and transfer them to the baking sheet.
  1. Bake the pretzels in the oven for another 2-3 minutes to dry them.
  2. Remove the pretzels from the oven and let them cool for a few minutes before serving.

💡Tips and tricks for best results

Don’t overcrowd the steaming basket or colander. Leave enough space between the pretzels so that the steam can circulate evenly.

Make sure the pot or wok has enough water to create steam. If the water runs out, add hot water to keep the steam going.

Use a larger pot or wok to create more steam if you have many pretzels to soften.

Add flavor to your pretzels by brushing them with melted butter or sprinkling them with garlic powder, onion powder, or grated Parmesan cheese before steaming.

If your pretzels are very hard, soak them in warm water for a few minutes before steaming. This will help to rehydrate them more quickly.

For a softer pretzel, steam them for a longer period. If you prefer a chewier pretzel, steam them for a shorter period.


Using a Microwave

Using a microwave is another effective technique to soften hard pretzels. When using a microwave, the heat causes the moisture inside the pretzel to turn into steam. The steam then penetrates the hard outer layer of the pretzel, rehydrating it and making it soft and chewy again.

Microwaves work by creating electromagnetic waves that cause water molecules in the food to vibrate rapidly, producing heat. This is why microwaves are so effective at heating and cooking food quickly. In the case of pretzels, microwaves help rehydrate the pretzels and make them soft by heating the moisture inside the pretzel.

👩‍🍳 Equipment needed

A microwave-safe plate – This will be used to place the pretzels on.

A damp paper towel – This will be placed over the pretzels to create steam and help rehydrate them.

That’s it! You can effectively soften hard pretzels with just these two basic items in just a few seconds.

🥨 Step-by-step guide

  1. Place the hard pretzels on a microwave-safe plate.
  1. Wet a paper towel and wring it out until it’s damp.
  2. Cover the pretzels with a damp paper towel. Make sure the paper towel is not too wet, as this can make the pretzels soggy.
  1. Microwave the pretzels for about 20-30 seconds on high power.
  2. Remove the plate from the microwave and check the pretzels to see if they are soft enough. If they are still hard, microwave them for another 10-15 seconds.
  3. Repeat this process until the pretzels are soft and chewy.

💡Tips and tricks for best results

If your microwave has a defrost setting, use it instead of the regular power setting. The defrost setting is gentler and will help prevent the pretzels from becoming too soft or soggy.

If your pretzels are particularly large or thick, you may need to microwave them for a longer period to ensure they are evenly heated.

Always start with a lower power setting when microwaving pretzels. This will help prevent the pretzels from becoming too hot or overcooked.

Be sure to let the pretzels cool for a few minutes after microwaving them. This will help them firm up and prevent becoming too soft or mushy.

If you have leftover pretzels that have been microwaved, store them in an airtight container or bag. This will help to keep them fresh and prevent them from becoming stale.


Using an Oven

An oven can also be used to soften hard pretzels. The heat from the oven helps to evaporate any moisture lost from the pretzels, causing them to become dry and hard. Using an oven, you can effectively rehydrate the pretzels and make them soft and chewy.

👩‍🍳 Equipment needed

Aluminum foil – This will be used to wrap the hard pretzels to help rehydrate them.

Baking sheet – This will be used to place the aluminum-wrapped pretzels on.

That’s all you need! With these two basic items, you can effectively soften hard pretzels and make them soft and chewy again.

🥨 Step-by-step guide

  1. Preheat your oven to 350°F (175°C).
  1. Wrap the hard pretzels in aluminum foil to help retain moisture.
  2. Place the aluminum-wrapped pretzels on a baking sheet.
  1. Bake the pretzels for 5-10 minutes or until they are heated through and soft. Be sure to check them frequently to prevent overcooking.
  2. Remove the pretzels from the oven and allow them to cool for a few minutes before unwrapping them.

💡Tips and tricks for best results

Use the lowest possible temperature setting. This will help to prevent the pretzels from overcooking or becoming too soft.

If your pretzels are particularly large or thick, you may need to bake them longer to ensure they are evenly heated.

Be sure to check the pretzels frequently to prevent overcooking. Pretzels can become too soft or lose their texture if left in the oven for too long.

If you have many pretzels to soften, use multiple baking sheets or bake them in batches to ensure they all get evenly heated.

To add flavor to your pretzels, brush them with melted butter or sprinkle them with cinnamon sugar or grated Parmesan cheese before wrapping them in aluminum foil.

If you want to make the pretzels extra soft, brush them with warm water or milk before wrapping them in aluminum foil.


Using a Wet Towel 

Another simple method for softening hard pretzels is to use a wet towel. The towel moisture helps rehydrate the pretzels, making them soft and chewy again.

👩‍🍳 Equipment needed

Clean kitchen towel – This will be used to wrap the hard pretzels.

Warm water – This will be used to dampen the kitchen towel.

A plastic bag or airtight container – This will be used to store the towel-wrapped pretzels while they soften.

🥨 Step-by-step guide

  1. Dampen a clean kitchen towel with warm water.
  2. Wrap the hard pretzels in a damp towel.
  3. Place the towel-wrapped pretzels in a plastic bag or airtight container.
  4. Allow the pretzels to sit at room temperature for several hours or overnight until they are softened to your desired texture.

💡Tips and tricks for best results

Use a clean kitchen towel to avoid any unwanted odors or flavors from transferring to the pretzels.

If your pretzels are particularly hard or stale, you may need to repeat the process multiple times to achieve the desired texture.

If you’re in a hurry, you can speed up the process using hot or boiling water to dampen the towel. However, be careful not to burn yourself.

To prevent the towel from drying out too quickly, you can place the plastic bag or airtight container in a cool, dark place while the pretzels are softening.

Additional ingredients that can be added to improve texture and flavor

While the techniques we’ve discussed so far can effectively soften hard pretzels, you can also enhance their texture and flavor by adding additional ingredients. Here are some ingredients you can use to improve the texture and taste of your pretzels:

Water – Adding a small amount of warm water to the pretzels can help rehydrate and make them softer.

Butter – Brushing melted butter onto the pretzels before heating them can add richness and flavor.

Cinnamon sugar – Sprinkling cinnamon sugar onto the pretzels before heating them can add sweetness and a hint of spice.

Cheese – Grating Parmesan cheese onto the pretzels before heating them can add a savory, umami flavor.

Mustard – Dipping the pretzels into a small amount of mustard after they’ve been heated can add tanginess and a bit of heat.

By experimenting with different ingredients, you can customize the flavor and texture of your softened pretzels to your liking. Just be careful not to add too much of any one ingredient, as this can overpower the flavor of the pretzels.

How to store pretzels to prevent them from becoming hard

Reviving Your Rock Hard Pretzels: Expert Tricks for Making Stale Snacks Taste Like New 8
How to store pretzels to prevent them from becoming hard

To prevent your pretzels from becoming hard in the first place, it’s important to store them properly. Here are some tips on how to store pretzels to help keep them fresh and soft:

Keep them in an airtight container – Whether your pretzels are store-bought or homemade, keeping them in an airtight container can help to prevent them from becoming hard. This will help to keep out any moisture and prevent them from getting stale.

Store them at room temperature – Avoid storing your pretzels in the fridge, as this can cause them to become harder more quickly. Instead, store them at room temperature in a cool, dry place.

Don’t open the container too often – Every time you open the container, you’re letting in air and moisture, which can cause the pretzels to become hard more quickly. Try to open the container only when necessary.

Use a bread box – If you have a lot of pretzels to store, using a bread box can be a great option. Bread boxes help to regulate the temperature and humidity, which can help to keep your pretzels fresh and soft for longer.

How to revive stale pretzels that cannot be softened

If your pretzels are stale and cannot be softened using the techniques we’ve discussed, there are still some ways to revive them and make them enjoyable to eat. Here are a few methods to try:

Toast them – Toasting stale pretzels in the oven or a toaster oven can help to bring out their flavor and add a bit of crispiness. Be careful not to burn them, which can make them taste bitter.

Make croutons – If your pretzels are too stale to eat, you can turn them into croutons for salads or soups. Simply cut them into small pieces, toss them with olive oil and spices, and bake them in the oven until they’re crispy.

Make breadcrumbs – Another way to use stale pretzels is to turn them into breadcrumbs. Simply pulse them in a food processor until they’re finely ground, and use them instead of regular breadcrumbs in recipes.

Grind them into a crust – If you’re making a dessert or savory dish that calls for a pretzel crust, you can use stale pretzels instead of fresh ones. Grind them into a fine powder, mix them with melted butter and sugar or salt, and press the mixture into a pie or tart pan.

FAQs

What are the best types of pretzels to soften?

Generally, any pretzel can be softened using the techniques we’ve discussed. However, soft pretzels and pretzel rolls tend to be more forgiving than hard pretzels and may be easier to soften.

Can soft pretzels be re-softened if they become hard?

Yes, soft pretzels can be re-softened using the same techniques as hard pretzels. However, they may require less time or a gentler method to avoid over-softening them.

How long will it take to soften hard pretzels using each technique?

The amount of time it takes to soften hard pretzels using each technique will vary depending on the thickness and hardness of the pretzels and the method used. Generally, achieving the desired texture can take a few minutes to several hours or overnight.

Can you use multiple techniques to soften hard pretzels?

Yes, you can use multiple techniques to soften hard pretzels if one method is not enough. For example, you could start using a wet towel and then finish with a quick steam or microwave to achieve the desired texture.

How can you tell if a pretzel is too hard to be softened?

If a pretzel is extremely hard and brittle, it may be too far gone to be softened using any methods we’ve discussed. Additionally, if the pretzel has a stale or rancid odor, it may not be safe to eat, even if it can be softened.

How to Preheat Air Fryer (With 6 Common Mistakes!)

You can make your favorite indulgent snacks on an air fryer without the fear of extra calories or fat. Seems like air fryers were made for us, the one who can not stop eating french fries no matter what!

Of course, it can cook many different food items too. If you already have an air fryer and are kind of struggling with it, chances are you do not preheat it.

That’s right! This small, compact, conventional-oven-alternative is designed to be used as an oven, and includes preheating! Seems like there is still a lot we can learn about air fryers. 

So, in this article, you will find all the information on how to preheat air fryer. We have also added some of the most common mistakes everyone makes while using an air fryer. Don’t miss out on that! 

Do You Preheat an Air Fryer?

It might come as surprise to some, but you do have to preheat your air fryer. Most of us have had one of those failed attempts at making a recipe using the air fryer only to end up in a massive fail. That is because we did not preheat it.

Most people treat their air fryer like a microwave when in fact they should treat it as an oven. 

It is not necessary that you always have to preheat it but for certain recipes, it’s a must. Things like french fries, chips, chicken fries, fish sticks required from the air fryer to preheat. This helps to provide a crispier result.

How Does an Air Fryer Work?

how to preheat air fryer
reheating fries in air fryer

We all enjoy a good air fryer because it gives delicious snacks without any grease or oil. So it’s super healthy and does not have that guilt of indulging in some snacks. 

But how can an air fryer make crispy french fries without even a dash of oil? For starters, air fryers do not actually “fry” your food. Instead, it sort of removes the moisture by blowing hot air around it. 

The air force and heat allow it to get the signature brown body we all love and the lack of moisture makes it crunchy. 

Did you know air fries food has 70% fewer calories than deep-fried ones? Who says you have to sacrifice your favorite meals to stay healthy. Healthy does not mean boring anymore!

How to Preheat an Air Fryer: A Step-by-Step Guide

Preheat an Air Fryer

If you have been using your air fryer and not getting the desired result, chances are you did not preheat it. Preheating your air fryer is actually pretty simple to do.

01. Check Your Recipe:

You don’t have to preheat your air fryer for all types of food. Certain recipes ask for preheating and some do not. So it is ideal to check the recipe beforehand.

02. Set the Temperature:

If the recipe actually calls for a preheated air fryer, then note down which temperature they have mentioned. Set the temperature to that and turn on the air fryer.

03. Wait:

There isn’t much to do after that. All you do is wait for 5 minutes until it’s ready. If your air fryer is small, it will take 4-5 minutes to properly heat up. For larger ones, 7 minutes is more than enough.

Alternative Methods for Preheating an Air Fryer

Use the preheat function (if available)

Many air fryers come equipped with a preheat function that sets the appliance to the desired temperature and time, ensuring that it’s ready for use when you need it. This can be a convenient and efficient way to preheat your air fryer.

Preheat your air fryer on a stovetop

Some air fryers are compatible with stovetop use. You can preheat your air fryer by placing it on a stovetop burner set to medium heat for 5-7 minutes. Make sure to use oven mitts or a towel to handle the air fryer as it will become hot.

Comparing Different Methods for Preheating an Air Fryer

One of the most common methods is to simply set the temperature to the desired cooking temperature and turn on the air fryer. This method is quick and easy and doesn’t require any additional equipment.

Another method for preheating an air fryer is to use the preheat function (if available). This function sets the appliance to the desired temperature and time, ensuring that it’s ready for use when you need it. This method is especially useful for busy individuals who want to save time and streamline their cooking process.

While preheating on a stovetop can also be effective, it’s important to note that not all air fryers are compatible with stovetop use. Additionally, preheating on a stovetop requires you to carefully monitor the air fryer and use oven mitts or a towel to handle the hot appliance.

Ultimately, the best preheating method for your air fryer will depend on your appliance and your personal preferences. Experiment with different methods to find what works best for you, and always follow the manufacturer’s instructions for safe and effective use.

Preheating Temperature and Time for Different Type of Food

Type of FoodTemperatureTime
Vegetables375°F5 minutes
Frozen Food400°F5 minutes
Meat400°F5 minutes
Baked Goods320°F5 minutes

Temperature and Time for Vegetables

When cooking vegetables, it is best to preheat the air fryer to 375°F for 5 minutes. This will ensure that the vegetables are cooked evenly and retain their crispiness.

Temperature and Time for Frozen Food

If you are cooking frozen food, it is important to preheat the air fryer to 400°F for 5 minutes. This will ensure that the frozen food is cooked thoroughly and evenly.

Temperature and Time for Meat

When cooking meat in an air fryer, it is best to preheat the air fryer to 400°F for 5 minutes. This will ensure that the meat is cooked through and is juicy and tender.

Temperature and Time for Baked Goods

If you are cooking baked goods, such as cakes or muffins, it is important to preheat the air fryer to 320°F for 5 minutes. This will ensure that the baked goods are cooked evenly and are not overcooked.

Tips for Preheating an Air Fryer

Here are some additional tips to make the most out of your air fryer preheating experience:

  • Do not preheat the air fryer for too long, as this can cause the appliance to overheat and may damage it.
  • Always follow the manufacturer’s instructions for preheating and cooking times.
  • Make sure your air fryer is clean and free of any debris before preheating.
  • Do not overcrowd the basket. This can prevent the hot air from circulating evenly, which can result in unevenly cooked food.

Common Mistakes with Air Fryers

air fryer reheat fried chicken

Being a relatively needed addition to our kitchen, we all have some misconceptions surrounding air fryers. This leads to many user errors and unsatisfactory recipes. 

If you are trying to get a certain result in your air fryer but failing, again and again, you might need to check our list of the common mistakes with air fryers. We all have made these mistakes at least once in our life!

01. Do Not Overcrowd:

As most of us are used to cooking in larger batches, this might seem a bit tedious at first. But you will get used to it.

Cook your food in smaller batches instead of large ones. This allows the hot air to move freely and cooks the food from all sides. So not overcrowding the air fryer is a key thing. 

This especially is crucial if you are making crispy items like fries and chips. Space ‘em up and let ‘em breathe! 

02. About Meat Items:

If you are trying to make meat items like chicken fry or baked chicken but they always end up soggy, chances are, you are not drying the meat properly.

You should always bloat away any excess moisture from your food. This includes both meat and vegetables. If the surface is dry, it will cook faster and have a crispy, brown exterior. 

You can use paper towels to pat your food dry. Wet food also delays the cooking time. So keep that in mind. 

03. Regular Cleaning is a Must!

This mistake actually applies to all of us. We all are guilty of not cleaning our kitchen appliances as much as we should.

As the air fryer is relatively small, it can catch a lot of oil and grimes after a few uses. So it is a very good idea to give a gentle clean-up after each use. 

This also helps to not form any bacteria or mold inside, especially if you tend to not use it very often. The leftovers can form bacteria which can be detrimental to health.

04. It’s Not Just for Fried Food:

Who says air fryers are only for fried items? As is supposed to be a portable version of an oven, you should try all the recipes you try on a conventional oven. 

This is great if you live in a  small apartment with no oven. The small size of the air fryer is perfect for easy dinner ideas. You each easily make chicken roasts or other meat-based dishes on it.

You can reheat food items like chicken tenders, grilled ribs, bbq wings very easily on an air fryer too. 

05. Rotate and Cook:

This is a fairly obvious one. When we cook on a pan, we constantly move our food around to let it get even heat from all sides. So why don’t we do that for air fryers?

As the basket inside the fryer can not move in a circular motion like a microwave, you need to do it manually. Just open the air fryer at a regular interval and use a tong to gently rotate or flip your food. 

06. It Can Bake Too!

If you have never made chocolate chip cookies on an air fryer, you are seriously missing out! Air fryers can be used to make a wide range of desserts, cakes, doughnuts, and even casseroles. 

Of course, you’d have to preheat the air fryer for 10 minutes before baking. Cleaning is also necessary especially if you use your air fryer for savory food a lot. This will help to not leave a weird smell on your desserts. 

Tips for Using Your Air Fryer

Air Fryer oven
Air Fryer oven
  • Keep your air fryer on a dry, open countertop to not overheat it. 
  • Even though you don’t need to use any oil, sparing some oil can really help to fasten the process. Either way, tis’ better than deep frying food for sure! You can use vegetable oil substitutes too. 
  • It is a good idea to shake the frying basket from time to time especially if you are making fries. Shaking is easier than flipping or tossing. 
  • If you are cooking vegetables, do not chop them into very small pieces. Sammler items can get swept inside the fan of your air fryer. This is very risky. So be careful.
  • Cooking at a low temperature for a longer time results in crispier and better food than cooking at a high temperature for a shorter time. 
  • Use an air fryer to heat up your leftover food like chicken wings. They turn out to be absolutely scrumptious!
  • Make sure to purchase the right size for your family. Standard air fryers are made for single-person cooking. 

How to Clean an Air Fryer

  1. Unplug the air fryer and allow it to cool completely before cleaning.
  2. Remove the basket and any other removable parts.
  3. Wash the basket and other removable parts in warm, soapy water. Use a non-abrasive sponge or cloth to avoid scratching the non-stick coating.
  4. Rinse the parts thoroughly and allow them to air dry.
  5. Wipe down the interior and exterior of the air fryer with a damp cloth or sponge. Do not immerse the appliance in water.
  6. Use a soft-bristled brush or toothbrush to clean any hard-to-reach areas or crevices.
  7. Dry the appliance thoroughly with a clean towel.

How Often to Clean an Air Fryer

How often you should clean your air fryer will depend on how frequently you use it. As a general rule, you should clean your air fryer after every use to prevent the buildup of food particles and oils. This will also help to prevent odors and ensure that your air fryer continues to function optimally.

Additionally, you should deep clean your air fryer at least once a month to remove any stubborn food particles or grease buildup. To deep clean your air fryer, mix equal parts water and vinegar and wipe down the interior with the solution. Allow the solution to sit for 30 minutes before wiping it clean with a damp cloth or sponge.

Frequently Asked Questions

How Long Does Instant Pot Take to Preheat? 

You will need around 10-15 minutes to preheat your instant pot depending on the size and the food items. This might seem like a lot of time but it’s pretty average for all types of instant pots. 
You will know your instant pot is preheated when the display panel shows the “ON” sign. When we see that sign, it means the pot is in the process of preheating. 

How Long Does an Oven Take to Preheat to 400? 

A standard conventional oven takes around 17-20 minutes to preheat to 400°F. If you are pre-heating it to 350°F, it will take 15 minutes. 
Almost all ovens have an indicator light that will tell you when the preheating is done. There is either a light that turns off or turns on when the oven is ready. 

Can I Put Aluminum Foil in an Air Fryer?

Yes, you can put aluminum foil in an air fryer and in fact, we encourage you to do so! Putting a piece of aluminum foil in the bottom for the air frying basket allows the food to cook faster and evenly. It also prevents soggy bottoms.
One key thing to note is, you should not cover the whole basket in aluminum foils. This can disrupt the airflow and cause malfunction. 
It is also not advised to put the foil in the bottom of the air fryer where food crumbles usually gather. Just take a small piece and put it on the button of the basket and you will be good to go!

Can I Make Popcorn in an Air Fryer?

This is absolutely genius and we love whoever discovered this. You can make delicious popcorn in your air fryer very easily and quickly. 
Preheat the air fryer to 400°F for 5 minutes. Then you can start cooking.
Simply put a piece of aluminum foil in the bottom of the basket and pour the kernels inside. You can use a spray to lightly coat them with oil but it’s not necessary. We like to spray coconut oil for a tropical flavor. 
Cook at 390°F until all the kernels pop into delicious popcorns. The time can vary depending on how many kernels you have used. Usually, it takes 10-15 minutes. 

Can you put food in the air fryer while it is preheating?

No, you should not put food in the air fryer while it is preheating. This can cause uneven cooking and may damage the appliance.

How long does it take for an air fryer to preheat?

Preheating times can vary depending on the make and model of your air fryer. Generally, it takes about 3-5 minutes for an air fryer to preheat.

Can you preheat an air fryer for too long?

It is not recommended to preheat an air fryer for more than 10 minutes. This can cause the appliance to overheat and may damage it.

Can you preheat an air fryer without the basket?

No, you should not preheat an air fryer without the basket. The basket helps to evenly distribute the hot air and ensures that your food cooks evenly.

Is it necessary to preheat an air fryer?

Yes, preheating an air fryer is necessary to ensure that your food is cooked evenly and comes out perfectly every time. Additionally, preheating can help to reduce cooking time, which is a huge benefit when you are in a rush.

Takeaway

And there you go. Preheating your air fryer is that simple! Hopefully, we here are able to help you and know what you should and should not do while using an air fryer!

Do you have any other tips?

Comment down below to let us know!

How to Empty Keurig 2.0 Internal Tank: Every Possible Method You Need to Know

If you’re lazy like me, there’s a good chance you left your coffeemaker’s tanks full of water, resulting in a stale cup of coffee that tastes like bog water. 

Or you forgot to empty out your Keurig 2.0 before leaving for the weekend, and the water froze in the cold.

Either way, knowing how to empty Keurig 2.0 internal tank would have prevented these snafus. And if the idea of dumping out water from your prized coffee maker makes you nervous, you’re not the only one. 

Emptying a Keurig water tank the wrong way can wreck the appliance.

Instead, this article will show you how to drain Keurig properly, and in different ways. If you want to learn how to drain Keurig for storage or deep cleaning, this article is the right place to start.

Meet the Keurig 2.0

Before we begin, you must know how your Keurig 2.0 works. This will make sure you know how it is supposed to work and identify the different parts when needed. To start off, this Keurig is a slender and compact appliance that offers 9 brew sizes.

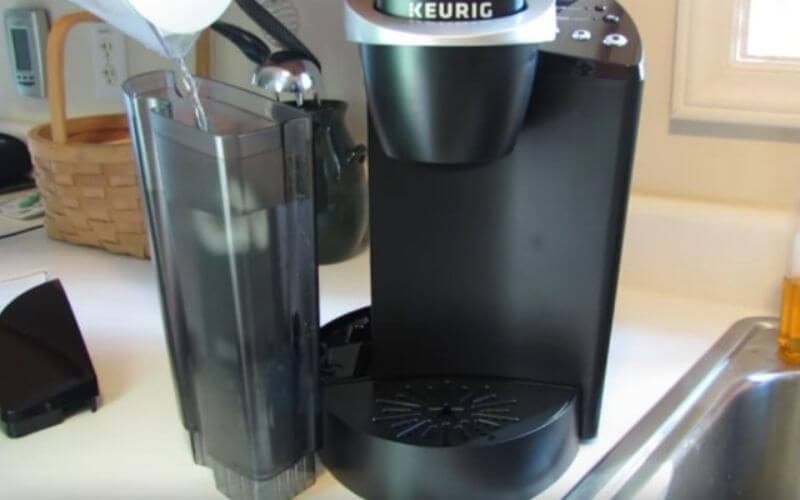
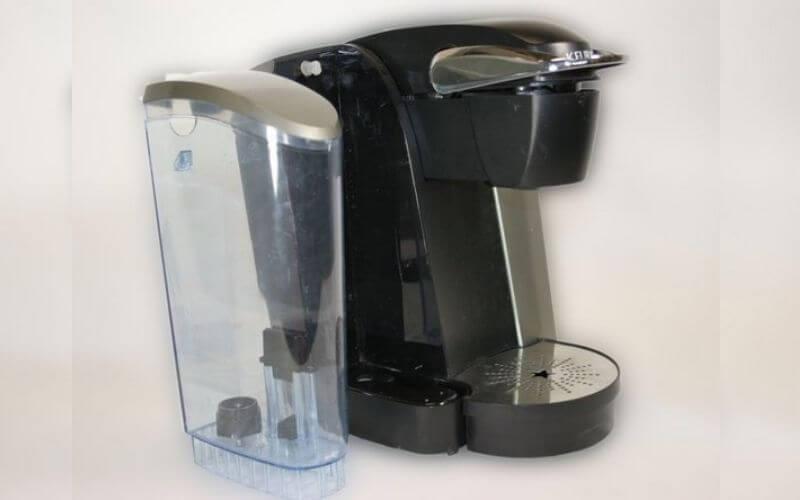
Also, the Keurig water reservoir can hold 40 ounces of water. It is removable which makes it easier to clean and empty. However, when the appliance is in use, the water is carried from the external tank to an internal one for brewing, and emptying out water from the inside is harder.

This coffee machine has a black and white touch display, which allows you to select brew strength and other options. It is a quick coffee maker and is great for those always on the run. Best of all, you can make both hot and iced coffee with a Keurig.

How long can you leave water in Keurig?

Although it is said that you can store water in your Keurig for 3-4 days safely, any water leftover a day will result in a weak brew that tastes old and stale. 

Because of this, knowing how to get water out of Keurig will ensure you always have a fresh-tasting cup of joe.

Why you need to empty the Keurig 2.0 internal tank

The Keurig 2.0 coffee maker is a popular choice for many coffee lovers, but over time, the internal tank can collect mineral buildup and impurities that can affect the quality of your coffee. This is why it’s important to empty the internal tank regularly, as it helps to maintain the quality of your coffee and keeps your coffee maker in top condition.

If the internal tank is not emptied, several problems can arise. The first issue is the buildup of mineral deposits in the tank, which can affect the taste of your coffee. Mineral deposits can make your coffee taste bitter or metallic, and in some cases, it can affect the performance of your coffee maker. If you notice a change in the taste of your coffee or your coffee maker is not working as well as it used to, it may be time to empty the internal tank.

Another problem that can arise from not emptying the internal tank is the growth of mold and bacteria. The internal tank can be a breeding ground for bacteria and mold, especially if it is not cleaned regularly. This can pose a health risk to you and your family, especially if you have a weakened immune system or suffer from allergies or asthma.

In addition, not emptying the internal tank can also cause the machine to become clogged or damaged. Mineral buildup and impurities can cause blockages in the machine, which can prevent water from flowing through the coffee maker. This can cause the machine to overheat or malfunction, which can be costly to repair.

How to Empty a Keurig Tank

how to empty keurig 2.0 internal tank
empty water from keurig

This section of the article will tell you how to drain Keurig 2.0 for storage and cleaning. You can go about emptying your Keurig’s tank in two ways. 

One method requires no disassembly or tools, while the other calls for Keurig 2.0 K200 disassembly.

Regardless of which method you choose to follow, here’s how to empty water from Keurig coffee makers without any damage to your appliance.

Keurig Drain Brewer Method Without Disassembly:

01. Empty the water tank:

This method ‘tricks’ the Keurig to think the reservoir is full of water so that it begins brewing. It will then allow the Keurig to drain all the water stored in the internal water tank.

02. Adjust the float in the external reservoir:

You will be able to see the message ‘Prime’ shown on the display once the machine has completed brewing. This message will tell you that the tank of the Keurig is empty. At this point, your Keurig 2.0 won’t pump water.

Adjust this float after you have emptied the water tank. Inside the tank, there is a metal disk on one side near the bottom. This metal disk is meant to regulate the amount of water that is still in the reservoir.

The floating magnet should be pulled till it reaches the top of its track. Then, push it a little to fix it in place. Place the lid of the reservoir back on

03. Allow the Keurig to start brewing:

To begin brewing, press the brew button. Set a cup under the spout before you do so. 

Don’t put a coffee pod since you are draining the machine, not making a cup of coffee. Your cup or carafe will catch the remnants of water that is drained out of the machine.

04. Wait for the “Prime” display:

Once the machine’s display says ‘Prime,” then the brewing process is completed. If the machine tells you to add more water, repeat the procedure. The display should say “Prime” once the second brewing is done.

It means that your brewer is completely drained. This ‘Keurig no water’ sign means that you can store your machine, or fill it with fresh water.

Keurig Draining Method through Disassembly

01. Pull the handle of the pod compartment and then remove the screws:

In this method, you can’t access the water tank through the bottom of the coffee maker. Instead, the top section will be removed to access the top of the water tank directly.

There are two screws that need to be loosened first. Use a flat-head screwdriver to remove both screws. 

Once this is done, you can then remove the top area of your Keurig. This section of the coffeemaker will read ‘Keurig’ on the front.

02. Remove the top of the coffeemaker:

The loosened top should then be gently lifted forward and upward. This exposes the inner tubing of the coffee maker.

03. Remove the silicone tubes from the internal reservoir:

The inside of the Keurig will have two tubes connected to the top of the internal reservoir.

One is shaped like an L and faces sideways. The other comes straight out of the top. Loosen the zip ties to remove the tubes. You can hold on to the zip ties with needle-nose pliers and shake to loosen them and slide them off.

04. Empty the water out by inverting the machine:

To pour water out of the L-shaped opening, upend the brewer. This can take quite some time.

To speed things up, you can place a thin straw over the opening of the detached tube on top of the water tank. This improves airflow in the tube, speeding up the draining process.

You must drain the tubes until there is no water left in the tank.

05. Reassemble the coffeemaker:

Reattach the silicone tubes after the draining is complete. If you simply loosened the zip ties down, you can just wiggle them back up to secure the tubes. Then put the Keurig back together.

This method also shows you how to drain a Keurig K40 coffee maker.

Common Issues and Solutions

Coffee tastes bad

If your coffee has a strange taste, it could be due to mineral buildup or impurities in the internal tank. Empty and clean the internal tank using the steps outlined in this article.

Slow brewing or low water flow

If your Keurig 2.0 coffee maker is taking longer to brew coffee than usual, or the water flow seems weak, the internal tank may be clogged with mineral buildup. Empty and clean the internal tank, then descale the machine using a descaling solution.

Internal tank not filling up

If the internal tank is not filling up with water, it could be due to a malfunctioning heating element or water pump. Check that the machine is properly plugged in, and try resetting the machine by unplugging it for a few minutes before plugging it back in.

Internal tank leaking

If you notice water leaking from the internal tank, it could be due to a cracked or damaged tank. Check the tank for cracks or damage, and replace the tank if necessary.

Internal tank overflows

If the internal tank is overfilling, it could be due to a malfunctioning water level sensor. Try resetting the machine, or contact Keurig customer service for further assistance.

Have More Questions?

Here you will find answers to questions people have about emptying their Keurig 2.0.

01. What Should I Do if My Keurig Won’t Pump Water from Reservoir?

If your Keurig won’t pump water through, you can try turning it off, letting it rest a few minutes, and then turning it on again. If that doesn’t work, empty out the tank and descale the coffeemaker and clean the needle.

02. Why Does My Keurig Say Add Water but It is Full?

In case this happens, you need to wait for the water in your tank to cool down, or empty the reservoir and start from scratch.

Learn more about troubleshooting your Keurig here.

03. How to Clean Keurig Water Reservoir?

If you have a removable tank, take it out and clean it with some mild dish soap and a sponge. For deeper cleaning, mix equal parts water and vinegar and rub a brewing cycle with this solution, followed by a cycle of freshwater.

04. What Can I Do if There is No Water Coming Out of Keurig Coffeemaker?

This issue has a simple fix: cleaning the needle of your Keurig. If that doesn’t work, try descaling your coffee maker and giving it a thorough cleaning.

Closing Thoughts

A malfunctioning coffeemaker can inspire a tantrum early in the morning, but restarting your Keurig is a much easier option. Whether you want to fix your coffeemaker, you just want to throw out the water you filled it with 3 days ago, this article will come in handy for you. 

Once you know how to empty Keurig 2.0 internal tank, you can enjoy a great-tasting cup of joe any time of the day.

Hamilton Beach BrewStation Troubleshooting: Simple Solutions!

Picture this: It’s morning, and you’re groggy, stumbling into the kitchen for your daily dose of caffeine. But instead of the comforting gurgle of your Hamilton Beach FlexBrew, you’re met with a hiss, a sputter, or worse – total silence. Panic sets in. Is your beloved coffee maker on the fritz?

Don’t despair! This comprehensive troubleshooting guide is here to help you tackle the most common Hamilton Beach coffee maker problems, from leaks and clogs to error codes and subpar coffee.

We’ll arm you with expert tips, simple DIY fixes, and real-world success stories so you can get back to brewing your perfect cup with minimal frustration. Whether you’re a FlexBrew fanatic, a BrewStation devotee, or a Single-Serve sipper, we’ve got you covered. Let’s dive in and brew up some solutions!

Before You Brew-bleshoot: A Pre-Fix Checklist

hamilton beach brewstation troubleshooting

Before we get into the nitty-gritty of specific issues, always start with these basic checks:

  1. Is your coffee maker securely plugged into a functioning outlet? (No judgment – we’ve all forgotten to plug in our appliances at least once!)
  2. Have you checked the water reservoir? Is it filled to the proper level with fresh, cool water?
  3. Is the filter basket properly in place and free of old coffee ground buildup?
  4. Have you given your machine a good cleaning recently? A quick wash of removable parts can work wonders.

Ticking off this simple checklist can often resolve issues without further fuss. But if your coffee maker is still misbehaving, fear not – we’re just getting started!

🛠️ Conquer Common Conundrums: FlexBrew & BrewStation Troubleshooting

Help! My Hamilton Beach FlexBrew 47950 Won’t Turn On! If your FlexBrew is playing dead, try these resuscitation tips:

Hamilton Beach BrewStation Troubleshooting: Simple Solutions! 9
FlexBrew 47950 power cord replacement
  1. Check that the machine is properly plugged into a functioning outlet. Borrow your phone charger and test the outlet – if your phone starts charging, the outlet is A-OK.
  2. Inspect the power cord for any signs of fraying or damage. If it looks worn, it might be time for a replacement.
  3. Peek inside the machine for any signs of water damage or leaks. If you spot trouble, it’s best to call in reinforcements (a.k.a. professional repair).

Conquer the Drips: Fixing a Leaky Hamilton Beach BrewStation

Puddles under your coffee maker? No thanks. Here’s how Michelle T. from Seattle tackled her leaky BrewStation:

“I thought I was going crazy when I kept finding coffee drips on my counter. Turns out, my carafe just wasn’t properly aligned with the drip tray. A little nudge to the left, and voila – leak solved! If only all my problems were this easy to fix.”

If a carafe adjustment doesn’t do the trick, try these tips:

  1. Check for cracks in the carafe or lid. Even hairline fractures can cause major drips.
  2. Clean the spray head and surrounding area to remove any buildup or debris.
  3. Inspect the filter basket for proper insertion and any signs of overflow.
  4. Run a descaling cycle to clear out any sneaky mineral deposits that could be gumming up the works.

The Slow Flow Woe: How to Speed Up Your Hamilton Beach Single-Serve

If your Single-Serve coffee maker is more of a slow drip, try these tips from Joe M. in Chicago:

“I was this close to pitching my Single-Serve when it started taking forever to fill my mug. But then I tried running a descaling cycle with plain white vinegar, and it worked like a charm! Turns out, all that built-up gunk was clogging the flow. Lesson learned – I’m a devoted descaler now.”

In addition to descaling, give these fixes a go:

  1. Clean the piercing needle to remove any trapped coffee grounds.
  2. Give the water reservoir a good rinse and make sure it’s properly seated.
  3. Experiment with a slightly coarser grind – fine grinds can clog the filter.
  4. Check that the brewing mode is set correctly – certain modes are meant to brew slower.

💁🏻‍♂️ Pro Tip: Still experiencing sluggish flow? There might be a hidden blockage in the internal tubing. Try this advanced fix: blow air through the tube with a straw to dislodge any stubborn debris. (Just make sure the machine is unplugged and cooled down first!)

Decoding the Beeps and Boops: Hamilton Beach Error Code Master Class

Hamilton Beach Coffee Maker Maintenance Tips

There’s nothing more frustrating than a nonsensical error code interrupting your morning brew. Never fear – we’ve cracked the code!

Consult this chart to diagnose and fix common FlexBrew, BrewStation, and Single-Serve error messages:

Error CodeMeaningHow to Fix
ERRWater reservoir issueFill reservoir with cool water. If error persists, clean reservoir and check valve.
E03Brewing interruptedMake sure carafe is securely in place and press START/RESET.
E05Overheated heating elementUnplug machine, let cool fully (at least 30 min.), restart.

Prevent and Protect: Easy Maintenance for Happy Coffee Makers

An ounce of prevention is worth a pound of dark roast! Keep your BrewStation or FlexBrew humming with these simple maintenance musts:

  • Monthly descaling (more often if you have hard water)
  • Weekly cleaning of removable parts (carafe, lid, filter basket)
  • Daily wipe-down of exterior and warming plate
  • Quarterly filter basket replacement
  • Filtered water for optimal coffee taste and machine health

Bonus tip from Lisa R. in Miami: “I set a recurring ‘Clean me!’ note in my phone calendar so I never forget to descale. It’s oddly satisfying to start each month with a fresh, clean coffee maker.”

Brew Victory! Real Troubleshooting Triumphs

From BrewStation blunders to FlexBrew fixes, these Hamilton Beach owners shared their hard-won wisdom:

“My FlexBrew 47950 was on the fritz, barely squeezing out a trickle of coffee. I tried all the standard fixes – descaling, cleaning the needle, checking the reservoir. No dice. But then I found a forum post suggesting to check the internal tubing for clogs. I grabbed a straw and blew into the tube, and out popped a rogue coffee ground! It was like magic – full flow restored!” Steve B. – Denver, CO

“I thought my BrewStation 47900 carafe was a goner when it started leaking from a hairline crack. But then I discovered Hamilton Beach sells replacement carafes specifically for the 47900 model, and for a fraction of the cost of a new machine. Installation was a breeze, and now it’s like having a brand new coffee maker!” Tanya M. – Brooklyn, NY

“My Single-Serve 49980 was slower than molasses, taking nearly 10 minutes to brew a single cup. I was ready to throw in the towel, but then I tried running a 50/50 vinegar and water descaling solution through it. The difference was night and day! Turns out, all that built-up calcium was the culprit. Lesson learned – I’m a devoted descaler now.” Rachel T. – Portland, OR

Below you will find answers to questions people tend to have about Hamilton Beach troubleshooting.

What’s the best way to descale my Hamilton Beach FlexBrew?

For a natural and affordable descaling solution, fill the reservoir with equal parts white vinegar and water, then run a full brew cycle. Repeat with fresh water until the vinegar smell dissipates. For extra descaling power, let the vinegar solution sit in the reservoir for up to 30 minutes before brewing.

Why does my BrewStation 47950 coffee taste bitter?

Bitter coffee is often a sign of over-extraction. This can happen if your coffee is ground too finely, your water is too hot, or you’re using too much coffee. Try a coarser grind, cooler water, or a slightly lower coffee-to-water ratio. Cleaning your machine regularly also helps keep flavors fresh.

Help! My Single-Serve 49999 is stuck in ‘Add Water’ mode, but the reservoir is full.

A phantom “Add Water” alert often points to a malfunctioning water sensor. Begin with a thorough descaling to clear any mineral buildup that might be tricking the sensor. If the issue persists, you may need to replace the sensor – consult your product manual or contact Hamilton Beach customer support for guidance.

How do I keep rogue coffee grounds out of my cup?

Gritty coffee is no fun. If you’re seeing grounds in your cup, check your filter basket for holes or tears and replace if needed. Using a coarser grind can also help keep grounds from sneaking through. Finally, make sure you’re not overfilling the basket – loosely scooped grounds should reach just below the basket’s rim.

My machine is clean and working properly, but my coffee still tastes ‘meh’. What’s the secret to a knockout cup?

Even with a flawless machine, subpar ingredients will yield subpar coffee. For the best possible brew, start with freshly roasted, high-quality beans. Grind them just before brewing for maximum flavor and aroma. And don’t skimp on the water – use cold, filtered water for purity and taste. With a little experimentation and some insider tips from [link to coffee connoisseur blog post], you’ll be sipping barista-level coffee in no time!

Conclusion 

That’s a wrap, folks! We hope this guide has armed you with the knowledge and confidence to conquer any coffee maker catastrophe that comes your way.

Remember, every brewing challenge is an opportunity to learn, experiment, and become a savvier sipper.

More Related Articles:

Keeping Ice Cream Frozen with Dry Ice: Everything You Need to Know

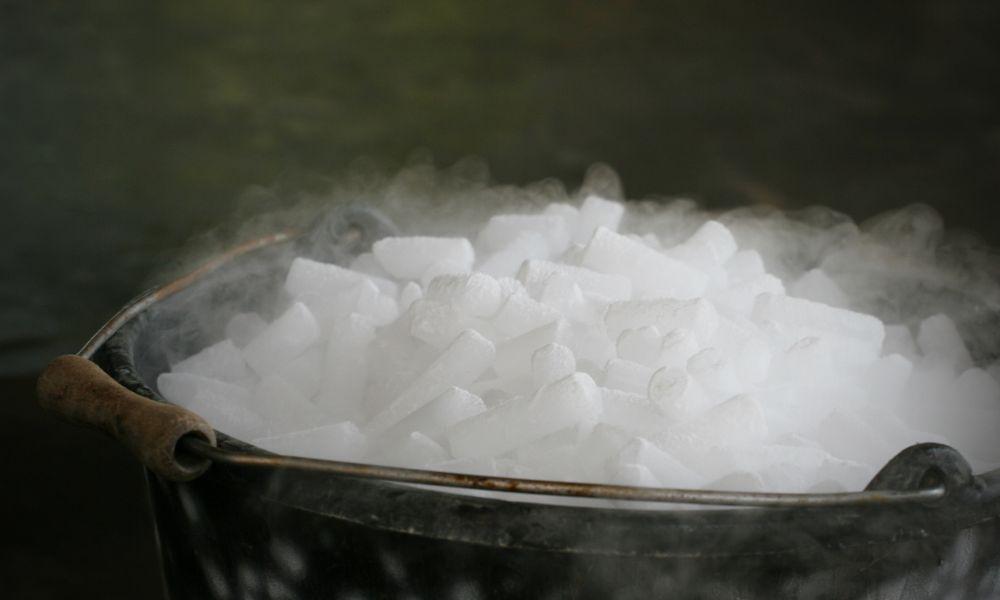
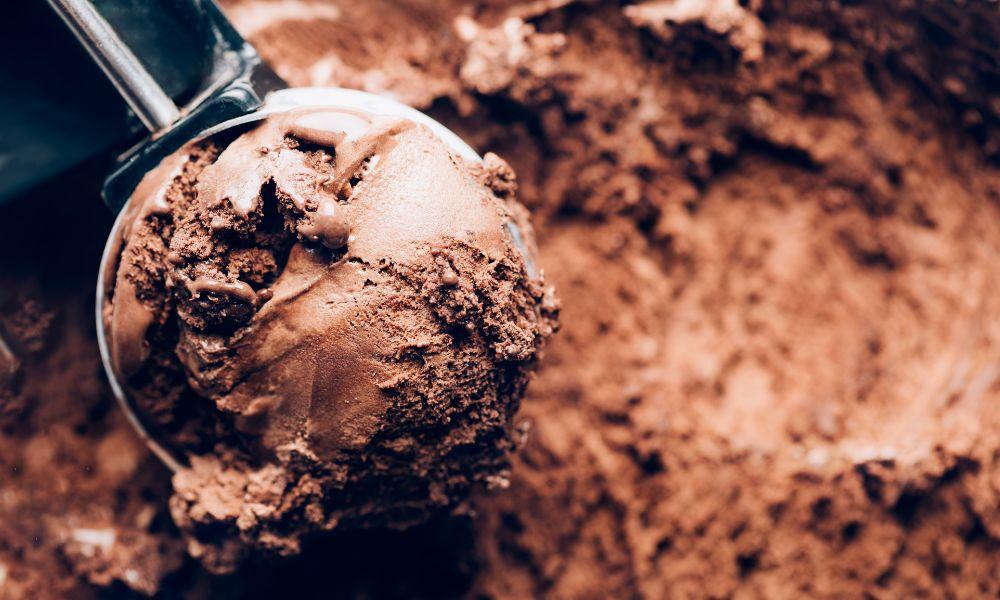
Who doesn’t enjoy ice cream? But have you ever had to throw out a tub of melted ice cream because you couldn’t keep it frozen? Worry no longer! Dry ice may be the answer to keeping your favorite dessert frozen for longer in hot day. But how exactly does it work, and what precautions should you take when using it?

Dry ice is the solid form of carbon dioxide, and it can keep your ice cream frozen for longer than regular ice. However, using it requires caution because it can be dangerous if not handled properly.

In this article, we’ll go over everything you need to know how dry ice can help ice cream stay frozen for longer periods, including the science behind how it works, the precautions you should take when handling it, and the best practices for using it. We consulted with experts in the field to bring you the most reliable and trustworthy information.

So, if you’re an ice cream lover looking for ways to keep your favorite treat frozen, keep reading to learn everything you need to know about using dry ice!

What is dry ice?

Keeping Ice Cream Frozen with Dry Ice: Everything You Need to Know 10
dry ice

Dry ice is a solid form of carbon dioxide (CO2) that is used as a refrigerant to keep items, including ice cream, frozen during transportation and storage. It is called “dry ice” because it doesn’t melt into a liquid form like regular ice but rather sublimates directly into a gas.

How is it Made?

The intricacies surrounding the production of dry ice are rooted in the compressive process of carbon dioxide gas. Through the act of compression, this gas is subjected to an environmental temperature that plummets to a frigid -109.3°F (-78.5°C).

It is at this point that the carbon dioxide undergoes a direct metamorphosis from a gaseous state into a solid state, bypassing any transitional liquid stage. The resulting byproduct of this transformation is commonly known as dry ice. In its fully formed state, dry ice takes on various physical configurations ranging from the malleable block shape to the more diminutive pellet and flake formats.

These different shapes are implemented in accordance with the specific context in which the dry ice will be utilized.

Understanding the Safety Precautions for Handling Dry Ice

Dry ice is a useful refrigerant due to its extremely cold temperature. With a surface temperature of -109.3°F (-78.5°C), dry ice is much colder than regular ice, which has a temperature of 32°F (0°C). When dry ice is used to keep items frozen, it can do so for a longer period of time.

Additionally, when dry ice is combined with rock salt, it creates a reaction that causes the dry ice to expand, which can be useful for certain applications.

However, there are some safety precautions that need to be taken when handling dry ice. Direct contact with dry ice can cause severe burns or frostbite, so it’s crucial to use protective equipment such as gloves or tongs.

Additionally, dry ice should never be stored in airtight containers, as the pressure buildup can cause the container to explode. Dry ice should also not be placed in a refrigerator or freezer, as the extremely cold temperature can cause the appliance to malfunction.

Here are some safety precautions to keep in mind when handling dry ice:

  1. Wear protective gloves: Dry ice can cause frostbite if it comes into direct contact with the skin. Always wear protective gloves when handling dry ice to prevent injury.
  2. Use eye protection: When handling dry ice, small pieces can fly into the air and cause eye injuries. Wear eye protection to keep your eyes safe.
  3. Store in a well-ventilated area: Dry ice releases carbon dioxide gas as it melts, which can displace oxygen in enclosed spaces. Always store dry ice in a well-ventilated area to prevent the buildup of gas.
  4. Do not touch with bare hands: As mentioned above, dry ice can cause frostbite if it comes into contact with skin. Do not touch dry ice with bare hands.
  5. Do not store in an airtight container: As dry ice melts, it releases carbon dioxide gas, which can build up pressure in an airtight container and cause it to explode. Always store dry ice in a container with a vent or leave the lid slightly open.
  6. Use in a well-lit area: Dry ice can create a fog-like effect when it is exposed to warm air. Use dry ice in a well-lit area to prevent tripping or other accidents.

Dry ice is an effective refrigerant that doesn’t ice cream and is commonly used in the storage and transportation of perishable goods.

However, it’s crucial to follow safety precautions such as wearing protective gloves, storing it in a well-ventilated area, and avoiding airtight containers, as cold air sinks and carbon dioxide gas can be hazardous.

Will dry ice keep ice cream frozen?

Keeping Ice Cream Frozen with Dry Ice: Everything You Need to Know 11
ice cream frozen

Dry ice can keep ice cream frozen because of the unique properties of carbon dioxide in its solid state. When dry ice is placed in contact with ice cream, it sublimates from a solid to a gas, releasing carbon dioxide.

This process causes the temperature of the dry ice to drop, creating a cold environment that can freeze the ice cream and maintain its frozen state.

Dry Ice vs. Regular Ice

PropertyDry IceRegular Ice
TemperatureApproximately -78.5°C (-109.3°F)0°C (32°F)
Duration of FreezingLasts longer, as it sublimates slowlyMelts faster
HandlingRequires protective gloves due to extreme cold temperature and potential for skin damageSafe to handle with bare hands
Cooling EfficiencyCools items much faster than regular iceCools items slowly
CostMore expensive than regular iceLess expensive than dry ice
Carbon Dioxide EmissionsEmits carbon dioxide as it sublimatesNo carbon dioxide emissions
Ability to keep ice cream frozenCreates a much colder environment than regular ice, making it more effective at keeping ice cream frozen for extended periods. Takes up less space than regular ice, which is an important factor when transporting ice cream in bulk.Not as effective as dry ice at keeping ice cream frozen for extended periods. Takes up more space than dry ice.
Effectiveness and EfficiencyDry ice is more effective and efficient than traditional ice because it is much colder and can keep ice cream frozen for longer periods of time. It also takes up less space, which can help reduce shipping costs and make transportation more efficient, especially for long-distance trips.Regular ice is less effective and efficient than dry ice for keeping ice cream frozen for extended periods, and takes up more space.

Best Practices: How to use dry ice to keep ice cream frozen?

Keeping Ice Cream Frozen with Dry Ice: Everything You Need to Know 12
keep ice cream frozen

01 How much dry ice do I need for ice cream

The amount of dry ice needed will depend on the quantity of ice cream being transported or stored, as well as the size of the container being used.

A general rule of thumb is to use 5 to 10 pounds of dry ice for every 24 hours of ice cream storage or transportation.

To calculate the amount of dry ice needed for a certain quantity of ice cream, you will need to know the weight of the ice cream and the amount of time it needs to remain frozen. Here is a general formula to calculate the amount of dry ice needed:

Amount of dry ice (in pounds) = (Weight of ice cream in pounds) x (Duration of storage in hours) x (Insulation factor)

The insulation factor will vary depending on the type of container used to store the ice cream. As a general guideline, use the following insulation factors:

  • Styrofoam coolers: 0.5
  • Cardboard boxes: 0.3
  • Plastic coolers: 0.8

For example, let’s say you have 10 pounds of ice cream that needs to be stored for 6 hours in a styrofoam cooler. Using the formula above, the amount of dry ice needed would be:

Amount of dry ice = 10 x 6 x 0.5 = 30 pounds

Therefore, you would need 30 pounds of dry ice to keep 10 pounds of ice cream frozen for 6 hours in a styrofoam cooler.

02 Purchase and handle the dry ice safely

When purchasing dry ice, it is important to wear gloves and use tongs to handle it, as it can cause frostbite and skin damage. Dry ice should be stored in a well-ventilated area, such as a cooler or insulated box, and never in a sealed container or freezer.

It is also important to avoid using dry ice in areas with poor ventilation, as it can displace oxygen and cause asphyxiation.

03 Prepare the container

Before adding dry ice to the container, it is important to prepare it by adding a layer of insulation, such as foam or Newspaper.

This helps to prevent direct contact between the dry ice and the ice cream, which can cause freezer burn. The container should also be clean and dry before adding the dry ice.

04 Add the dry ice

Once the container is prepared, add the dry ice to the bottom of the container, covering the entire surface area.

It is important to avoid adding too much dry ice, as this can cause the container to become too cold and potentially damage the ice cream.

05 Add the ice cream

Once the dry ice is in place, add the ice cream on top, being careful to avoid direct contact with the dry ice. The ice cream should be added in layers, with a layer of insulation between each layer.

To pack ice cream with dry ice, follow these steps:

  • Place a layer of dry ice at the bottom of your packing container.
  • Add a layer of insulation on top of the dry ice.
  • Add a layer of ice cream on top of the insulation, being careful to avoid direct contact with the dry ice.
  • Repeat steps 2-3 until all the ice cream is packed, making sure to leave enough space at the top of the container for another layer of insulation and dry ice.
  • Finally, add a layer of insulation and dry ice on top of the packed ice cream.

Benefits of using dry ice

How Long Does Dry Ice Last
Image Source: https://www.shutterstock.com/image-photo/hand-holding-ice-tweezer-dry-over-1682630485

Using dry ice to keep ice cream frozen has several benefits over traditional ice. Some of the main benefits are outlined below:

More effective and efficient

Dry ice is much colder than regular ice and can keep ice cream frozen for longer periods. It also takes up less space than regular ice, making it more efficient for transportation.

Reduces waste

Dry ice sublimates directly from a solid to a gas, which means there is no liquid left behind that needs to be disposed of. This reduces waste and is more environmentally friendly.

Saves money

While the initial cost of dry ice may be higher than regular ice, it can be more cost-effective in the long run. Since dry ice is more efficient at keeping ice cream frozen, it can reduce the amount of ice cream that is lost due to melting, which can save money in the long run.

Improves food safety

Dry ice is a safe and effective way to transport ice cream because it doesn’t come into direct contact with the food. This reduces the risk of contamination and ensures that the ice cream remains safe to consume.

Versatile

Dry ice can be used for a variety of different applications beyond ice cream transportation and storage, such as freezing and cooling other types of food products.

Ice Cream Container for Storing and Transporting Ice Cream with Dry Ice

When it comes to storing and transporting ice cream with dry ice, it’s important to use the right type of container to ensure that the ice cream stays frozen and doesn’t get damaged. Remember to leave some empty space in the container for gas to escape.Here are some container options to consider:

Styrofoam coolers

Keeping Ice Cream Frozen with Dry Ice: Everything You Need to Know 13
Styrofoam coolers

These are a popular option for storing and transporting ice cream with dry ice. Styrofoam is a good insulator, which helps to keep the ice cream cold, and the coolers are available in a range of sizes to accommodate different quantities of ice cream.

Insulated shipping boxes

Keeping Ice Cream Frozen with Dry Ice: Everything You Need to Know 14
81S0LJdvrML. AC SX679

These boxes are specifically designed for shipping frozen or temperature-sensitive items, including ice cream. They are made with insulating materials that help to keep the ice cream cold, and are available in a variety of sizes.

Plastic containers with tight-fitting lids

Keeping Ice Cream Frozen with Dry Ice: Everything You Need to Know 15
Plastic containers with tight fitting lids

If you are storing ice cream in a freezer, plastic containers with tight-fitting lids can work well. Make sure that the lid fits securely to prevent any air from getting in and causing freezer burn.

Ice cream container tubs with built-in insulation

Keeping Ice Cream Frozen with Dry Ice: Everything You Need to Know 16
71N0Cu9IRmS. AC SY300 SX300

Some ice cream tubs come with built-in insulation that helps to keep the ice cream frozen for longer. These are a good option if you are storing ice cream for a short period of time and don’t want to use dry ice.

Potential risks and limitations

Using dry ice to keep ice cream frozen can be a great option, as it has a lower melting point and can help the ice cream melt faster than traditional ice. However, there are also potential risks and limitations to consider.

Safety risks

Safety risks should be taken seriously when handling dry ice, as it is extremely cold and can cause frostbite or burns if it comes into direct contact with the skin. In addition, it can displace oxygen in enclosed spaces, which can be dangerous if not handled properly.

Cost

One potential limitation is the cost of dry ice, which can be more expensive than traditional ice, especially for small quantities. This can be a challenge for businesses that need to transport ice cream in large quantities.

Availability

Availability can also be a limiting factor, as it may be difficult to find a reliable source of dry ice in certain locations. This can pose a problem for businesses that need to transport ice cream over long distances.

Handling difficulties

Furthermore, handling dry ice requires special techniques to prevent it from sublimating too quickly. If not handled properly, it can also cause damage to the ice cream or other food products being transported.

To mitigate these risks and limitations, it is important to follow proper safety protocols when handling dry ice, including wearing protective gloves and eyewear, handling the dry ice with tongs or other tools, and ensuring proper ventilation in enclosed spaces.

Businesses can also work with reputable dry ice suppliers to ensure that they are getting a high-quality product at a fair price.

Finally, investing in proper storage and transportation equipment, such as insulated containers and refrigerated trucks, can help ensure that the ice cream remains at the appropriate temperature throughout the transportation process.

Conclusion 

In conclusion, dry ice can be an effective and efficient way to keep ice cream frozen during transportation and storage. Throughout this article, we have discussed the properties of dry ice, the science behind how it works to keep ice cream frozen, its benefits and limitations, and the steps to use it effectively.

If you have a surplus of dry ice, read this article to find out how to dispose of it.


FAQs

How can I keep ice cream frozen during transportation?

While there are many ways to keep ice cream frozen during transportation, dry ice is a popular and effective solution. By using dry ice, you can create a cold and dry environment that keeps ice cream at the ideal temperature, preventing melting and freezer burn.

Is dry ice safe for food transportation?

Yes, dry ice is safe for food transportation when handled properly. However, it is important to follow safety guidelines when working with dry ice to prevent injuries, such as wearing protective gloves and eye wear, handling it in a well-ventilated area, and never sealing it in an airtight container.

Can I use regular ice to keep ice cream frozen?

While regular ice can be used to keep ice cream frozen, it is not as effective or efficient as dry ice. Regular ice can melt quickly, creating a damp environment that can lead to freezer burn and other issues.

How long does dry ice last in a cooler?

The length of time that dry ice lasts in a cooler depends on various factors, such as the quantity of dry ice used, the size and insulation of the cooler, and the ambient temperature. In general, dry ice can last anywhere from 18 to 24 hours in a well-insulated cooler.

How do I dispose of dry ice safely?

To dispose of dry ice safely, allow it to evaporate in a well-ventilated area or dispose of it in a container that allows for the release of carbon dioxide gas. Do not dispose of dry ice in a closed or airtight container, as this can cause pressure buildup and possible injury.

Health Benefits of Kombucha Sexually | Improve Libido, Fertility & Lubrication

Kombucha, a fizzy and flavorful fermented tea, has been consumed for thousands of years in China and Japan and is making a comeback in popularity due to its health benefits. 

Not only is it delicious, but it’s also packed with probiotics, antioxidants, and other essential nutrients. 

From boosting the immune system to improving digestion, the benefits of kombucha are numerous. 

But did you know that this drink can also improve your sexual health? 

In this article, we’ll explore the surprising health benefits of kombucha sexually and how you can incorporate it into your daily routine.

What Is Kombucha?

What Is Kombucha?
What Is Kombucha

Kombucha is a fermented tea drink made with yeast, sugar, bacteria, and black tea. It has a yellow-orange hue and a tangy flavor and is known for its sour taste. 

The making of kombucha involves mixing sweetened tea with a SCOBY (symbiotic colony of bacteria and yeast), which is a combination of bacteria and yeast. The yeast digests the sugar in the tea, producing probiotic bacteria.

The carbonation of kombucha (the reason kombucha is fizzy) is a result of this fermentation process.

Why Has Kombucha Become So Popular? 

There are several reasons.

One is its potential health benefits. The probiotics in Kombucha can help with digestion, increase energy, support a healthy metabolism, and even improve your nightlife! Kombucha also contains antioxidants that can cleanse the liver.

It’s also favored by some people who are health-conscious and don’t drink coffee or tea, which is pretty weird because Kombucha has caffeine in it. This may be because they don’t like hot drinks.

Another reason is its distinct taste. Kombucha has a lightly carbonated, sweet, and sour flavor that can’t be found elsewhere. 

Many kombucha brands offer flavored options like lychee, orange and turmeric, ginger, blueberry, maple, and more.

The culture around kombucha is also a factor in its popularity. People who love kombucha love talking about it and experimenting with different recipes. 

Online communities have formed where people share their latest batches and ask questions. In a way, kombucha has brought people together.

Is It Just a Passing Trend?

The popularity of kombucha has been a gradual process, rather than a sudden surge. An analysis of Google Trends data indicates that fermented beverage has been a topic of discussion online since 2004. 

However, the worldwide interest in kombucha experienced a marked increase starting in 2015 and has continued to rise steadily since then.

Health Benefits of Kombucha Sexually

<strong>Health Benefits of Kombucha Sexually | Improve Libido, Fertility & Lubrication</strong> 17
Health Benefits of Kombucha Sexually 2

While the health benefits of kombucha are well-known, its impact on sexual health is often overlooked. 

Here are just a few of the ways kombucha can improve your sex life:

Improved Libido

Low libido can be caused by several factors, including stress, fatigue, and hormonal imbalances. 

Kombucha contains various ingredients that can help boost your libidos, such as caffeine and B vitamins. 

It contains around 15mg of caffeine per 8-ounce (240 ml) serving. Caffeine is a natural stimulant that can enhance your energy levels and increase your desire for sex. 

In a study published in the Journal of Sexual Medicine, researchers found that caffeine improved sexual arousal and satisfaction in women.

B vitamins, on the other hand, are crucial for maintaining a healthy nervous system, which is essential for a fulfilling sexual experience. 

B vitamins like thiamine and niacin play a key role in producing neurotransmitters like dopamine and norepinephrine, which are associated with increased sexual arousal.

B vitamins also play a crucial role in increasing sex hormones and decreasing estrogen in men, which is important for maintaining a healthy sex drive.

Improved Lubrication

If you’re struggling with dryness, kombucha can help. 

In a study published in the European Journal of Obstetrics & Gynecology and Reproductive Biology, researchers found that women who used a non-hormonal vaginal moisturizer experienced improved sexual function, including increased lubrication.

Kombucha is a fermented drink that contains organic acids (acetic acid, glucuronic acid, and gluconic acid) that can increase the production of lubrication in your body, making sex more comfortable and enjoyable. 

They also help to prevent urinary tract infections (UTI), a common problem among adult women. 

These acids are produced as a by-product of the fermentation process used to make kombucha.

Increased Fertility

Studies have shown that a healthy gut can help regulate hormones and improve overall reproductive health, which may in turn help with infertility. 

Kombucha, specifically, has been linked to balancing hormones such as thyroid and estrogen, as well as regulating the digestive system and improving vaginal pH, which can reduce the risk of infections.

Kombucha is also known to increase fertility by improving sperm quality and motility. This is due to its high concentration of antioxidants, which protect sperm from oxidative damage and improve its ability to fertilize an egg. It is important for those trying to conceive.

Antioxidants like vitamins C and E have been shown to improve sperm quality and increase fertility in men. 

In a study published in the Journal of Medicinal Food, researchers found that supplementing with vitamin C improved sperm count, motility, and morphology in infertile men.

One study conducted on mice by the International Journal of Andrology found that Kombucha can help improve the function of the male reproductive system and protect against the harmful effects of SNPs

It can also help with detoxification and reduce sugar cravings, which can have a negative impact on fertility.

While more research is needed to confirm these findings in humans, kombucha is a safe and natural way to boost fertility and increase the chances of conception.

Solve Erectile Dysfunction

It appears that some men in Harare, Zimbabwe are turning to Kombucha as a potential solution for their erectile dysfunction. 

Western drugs such as Tadalafil and Sildenafil, which are commonly used to treat the condition, have become expensive and not affordable for everyone there, leading some to seek alternative remedies.

Some male customers claimed that the drink is very effective in treating their erectile dysfunction problem.

However, there is no strong scientific evidence to back this claim. The claims may have been the result of the presence of Alcohol in the Kombucha!

Homemade Kombucha teas tend to have higher alcohol content. It can be as high as 3% or even higher.

A study published in the International Journal of Impotent Research shows that consuming alcohol in moderation may actually help with erectile dysfunction (ED) and protect against it in short term

However, chronic heavy use of it isn’t suggested, as this can lead to long-term erectile dysfunction. 

[Note: Kombucha looks like an alcoholic drink and is a good substitute if you want to avoid alcohol and keep your sexual desire strong.]

How to Incorporate Kombucha into Your Sex Life

To get the most out of kombucha’s sexual health benefits, it’s important to incorporate it into your daily routine.

Adding kombucha to your daily routine is easy! Simply replace your regular soda or energy drink with kombucha or enjoy a glass before sex to improve your sexual health. 

Having a glass of kombucha before sex may improve lubrication, enhance sexual pleasure, and reduce discomfort during intercourse.

You can also add kombucha to your favorite cocktails. 

Kombucha comes in a variety of flavors, from fruity to sour. Experimenting with different flavors can add excitement to your sex life and keep things interesting.

However, it is important to note that drinking kombucha should not be considered a substitute for medical treatment for infertility. Instead, use it as a lifestyle beverage substituting your regular tea! 

Other Health Benefits of Kombucha

Kombucha has several other health benefits besides its sexual benefits:

1. May Improve Digestion

Fermented foods, like kombucha, contain special healthy bacteria called probiotics that have been known to help with digestion and maintain a balanced gut microbiome

These probiotics can also help improve the frequency and consistency of your stool, making it easier to avoid constipation.

In addition to probiotics, kombucha also contains B vitamins, essential minerals, and organic acids. 

These organic acids have been shown to have antimicrobial properties, which means they may help to fight off harmful bacteria in the gut.

Kombucha tea prepared from green, oolong, and black tea showed antibacterial activity against all tested enteric bacteria in one study. 

However, it’s important to remember that kombucha should not be a substitute for a healthy diet rich in fiber from fruits, vegetables, nuts, and seeds

According to Denver-based registered dietitian Maria Zamarripa, these foods are crucial in creating the ideal environment for probiotics to flourish and support our gut health. 

2. May Help to Manage Type 2 Diabetes

Type 2 diabetes is a common condition that affects over 450 million people globally

Research on diabetic rats has shown that kombucha can help slow down the digestion of carbohydrates, leading to reduced blood sugar levels and improved liver and kidney function.

Kombucha made from green tea may offer even more benefits, as green tea has been proven to lower blood sugar levels on its own

In fact, a study (published in the JAMA Internal Medicine) of nearly 300,000 individuals found that those who regularly drank green tea had an 18% lower chance of developing diabetes.

3. May Boost Immunity

Studies have shown that fermented drinks like kombucha can help boost the immune system by providing beneficial bacteria, vitamins, and organic acids. 

Kombucha is low in sugar and contains acetic acid, which has been proven to kill potentially harmful microorganisms without impacting the ‘good’ bacteria in the body. 

Kombucha is also rich in polyphenols, a type of antioxidant that helps prevent cardiovascular disease and certain cancers. 

4. May Help to Lose Wight

Having a healthy balance of gut bacteria is essential for weight management and kombucha can contribute to this.

Kombucha can also offer a healthier alternative to sugary drinks like soda or juice, as the sugar content is reduced during the fermentation process. 

However, some brands add fruit juice, sugar, or stevia for taste, so check the label before you buy it. Opt for one with less than 6 grams of sugar per 8 ounces.

5. May Alleviate Mental Health

Drinking kombucha might help improve your mental health. 

The anti-inflammatory properties of kombucha may assist in reducing depression symptoms as there is a relationship between inflammation and depression.

A study from 2017 looked at many past studies and found that taking supplements with healthy bacteria might help with depression. 

However, there is no proof yet that drinking kombucha specifically can help boost your mood, relieve depression symptoms, or help in any other way with mental health.

So, you can take this one with a pinch of salt!

The Risks of Drinking Kombucha

The preparation of kombucha involves cultivating bacteria in a liquid intended for consumption! 

Some of these bacteria have probiotic properties, however, if the kombucha is not handled correctly, it can lead to the growth of harmful bacteria or mold.

However, the danger is low if you drink kombucha from reputable brands. The risks usually happen with homemade kombucha that is not properly fermented

There have been numerous reported cases of illness and even death linked to kombucha consumption dating back to the mid-1990s, including liver problems, lactic acidosis, allergic reactions, and nausea.

However, the FDA declares that kombucha is safe if made properly. 

When making kombucha at home, it’s best to use glass, stainless steel, or plastic containers and maintain proper sanitation with equipment and hands.

The best way is to buy from stores and reputable brands. They are usually produced with safe methods and should not harm a regular healthy person.

Too Much Kombucha Can Lead to Weight Gain

If you’re a fan of fermented tea, be aware that some types of kombucha can be high in sugar, which can result in weight gain. It’s best to check the labels when buying kombucha from a store. 

As kombucha is carbonated, drinking too much of it can also lead to bloating and gas.

Kombucha During Pregnancy

Given that kombucha contains alcohol and caffeine, it is not recommended for pregnant women to drink it. 

It’s also not advised to people with significant kidney, lung, or liver disease not to drink kombucha.

How Much Kombucha Should You Drink Per Day?

If you’re not in a high-risk group (diabetics), try a small amount of kombucha before drinking a lot. This way, you can see how your body reacts to the drink. 

The Centers for Disease Control (CDC) suggests that 4 ounces of kombucha can be consumed 1-3 times a day. 

So go ahead and give kombucha a try and see for yourself the amazing health benefits it has to offer!

FAQs

Is kombucha bad for your teeth?

Kombucha contains acid and sugar that can erode tooth enamel, making teeth more susceptible to decay and sensitive to certain foods. To protect teeth, kombucha drinkers should use a straw when drinking, neutralize the acid levels in their mouth, and avoid sipping it throughout the day. 

Does kombucha help in bed?

While it does contain some caffeine, it is not likely to keep you up at night. Instead, kombucha may help improve sleep for some by balancing the body and hormones, though drinking it just before bed can lead to sleep disruption. 

Is kombucha tea halal?

Muslims consider kombucha halal because its production is a by-product of a natural fermentation process that produces low alcohol levels that would not make someone intoxicated. This is confirmed by askimam.org, which states that the alcohol in kombucha is normally produced like in vinegar, bread, and other foods.

10 Most famous Starbucks drinks & what they contain!

The drink’s origins can be traced back to the 1990s when Starbucks introduced their original Mocha drink. However, it wasn’t until 2003 that the White Chocolate Mocha was officially added to the Starbucks menu, becoming an instant hit.

Starbucks offers quite a few drinks. Having too many options can confuse people. Ever felt the same while ordering at Starbucks?

If yes, you aren’t alone. Many of us recall that fresh coffee aroma and head to the nearest Starbucks, only to be confused by the numerous options. Today, however, you can say goodbye to this problem once and for all.

The list below consists of the 10 most famous Starbucks drinks you cannot go wrong with.

Starbucks History

10 Most famous Starbucks drinks & what they contain! 18
Starbucks opened in 1971

Starbucks had a humble beginning in 1971 in Seattle. Starbucks’s first store in the Pike Place Market offered coffee beans, tea, and spices. The name “Starbucks” was inspired by the tale “Moby-Dick.” The twist, however, came when Howard Schultz discovered Starbucks 10 years later and fell in love with it. He joined the company in 1982 and transformed it a year later.

When Howard discovered Italy’s coffeehouses, he pivoted Starbucks’ business model to offer a more friendly experience and delicious ready-made coffee. Apart from changing the business model, he changed the apron colors from brown to green in 1987.

The resultant pivot to serve drinks instead of beans helped Starbucks expand rapidly. By 1996, Starbucks had expanded to many cities in the US, Canada, and even across the pacific.

In the next few years, Starbucks expanded to Europe and China. The exponential growth of Starbucks helped spread to thousands of neighborhoods globally to become a household name.

The Starbucks store count is over 30,000 across 80+ countries. In the United States alone, it has over 15,000 stores. According to some estimates, Starbucks sells over 4 million cups of coffee daily.

It is an excellent achievement for a company that started with a single store in Seattle in 1971.

Time for the most famous drinks now!

How did we compile the list of the 10 most famous Starbucks drinks?

Multiple data points were analyzed to compile this list.

  • Instagram uploads & traction
  • Google search counts
  • Number of Starbucks Menu Stars by Customers
  • Number of websites covering the drink

10 most famous Starbucks drinks

1. White Chocolate Mocha

The strong taste of espresso, the creaminess of the white chocolate sauce, and the rich texture of steamed milk make white chocolate mocha one of the most popular Starbucks drinks.

The drink’s origins can be traced back to the 1990s when Starbucks introduced their original Mocha drink. However, it wasn’t until 2003 that the White Chocolate Mocha was officially added to the Starbucks menu, becoming an instant hit.

The cultural significance of the Starbucks White Chocolate Mocha lies in its appeal to a wide range of consumers. The drink’s sweetness and creaminess have made it a popular choice for those who prefer their coffee with a dessert-like twist. It is also a popular choice for those who are not fans of the traditional coffee taste but still want a caffeine boost.

IngredientDescription
EspressoConcentrated coffee made with hot water and finely ground coffee beans
Steamed MilkMilk that has been heated and frothed to create a smooth and creamy texture
White Chocolate SauceA sweet and creamy sauce made with cocoa butter, sugar, and milk solids
Whipped Cream (optional)A sweet and airy topping made with heavy cream and sugar
NutrientAmount
Calories470
Fat18g
Carbohydrates58g
Sugar53g

2. Pink Drink

Pink drink initially made its debut on the secret Starbucks menu. However, the rising popularity made it a Starbucks regular.

The drink is nothing more than a strawberry açai refresher mixed with coconut milk and a scoop full of sliced Strawberries on top. The color and refreshing taste made it go viral, and the cafe finally added it to its regular menu in 2017.

IngredientDescription
Strawberry Acai RefresherA fruity and refreshing beverage made with a blend of fruit juices, including white grape, apple, and strawberry, as well as acai berry extract
Coconut MilkA dairy-free milk alternative made from the flesh of mature coconuts
Freeze-Dried StrawberriesPieces of fresh strawberries that have been freeze-dried to preserve their flavor and texture
IceFrozen water used to chill and blend the ingredients together
Optional: Vanilla SyrupA sweet syrup made with sugar and vanilla flavoring, often added to enhance the sweetness and flavor of the drink

3. Caramel Frappuccino

Caramel Frappuccino is trending since 1999. The combination of caramel syrup, Frappuccino roast with whole milk, and ice, along with a drizzle of caramel on top, has captured the imagination of consumers, making it a popular drink.

IngredientDescription
Frappuccino RoastA proprietary blend of coffee that has been specially roasted and ground for use in blended drinks like the Frappuccino
MilkDairy milk that has been chilled
IceCubes of ice that are blended with the other ingredients to create the Frappuccino’s icy texture
Caramel SyrupA sweet syrup made with sugar, water, and natural caramel flavoring
Whipped Cream (optional)A sweet and airy topping made with heavy cream and sugar
Caramel Drizzle (optional)A sweet sauce made with sugar, butter, and cream that is drizzled on top of the whipped cream for added caramel flavor and decoration

4. Iced Caramel Macchiato

One thing you will notice on this list is the regular appearance of the caramel flavor. That is because most Starbucks patrons love the caramel flavor.

The Iced Caramel Macchiato offers high caffeine content, low calories, and delicious vanilla syrup. It might not be the most popular drink at Starbucks, but it is certainly a worthy competitor.

IngredientDescription
EspressoConcentrated coffee made with hot water and finely ground coffee beans
MilkCold milk, usually whole milk by default but can be customized to use other milk types
Vanilla SyrupSweet syrup made with vanilla flavoring and sugar
Caramel SauceA sweet and buttery sauce made with sugar, cream, and butter
IceCubes of ice to chill the drink

5. Cold brew

How about coffee steeped for over 20 hours?

Most Starbucks regulars won’t be surprised to find cold brew on this list. That is Starbucks Cold brew for you. It offers a super smooth flavor and high caffeine content without any additives.

IngredientDescription
Cold Brew CoffeeCoffee that is brewed with room temperature or cold water for an extended period of time, resulting in a smoother and less acidic flavor
WaterWater is used to brew the coffee and dilute it to the desired strength
IceThe drink is served over ice to keep it cold and refreshing
Sweetener (optional)Customers can add sweeteners such as simple syrup or flavored syrups to customize the taste
Milk or Cream (optional)Customers can also add milk or cream to make the drink creamier and richer in taste

 6. Iced Matcha Latte

Matcha has never tasted so good! The precisely sweetened matcha with delicious milk and the vibrant green color is what made this drink so popular.

IngredientDescription
Matcha PowderA finely ground powder made from specially grown and processed green tea leaves
MilkThe type of milk can vary, but typically it is a dairy milk like whole milk or 2% milk
WaterAdded to the matcha powder to create a concentrated paste before adding milk
Classic Syrup (optional)A sweetener made with sugar and water, used to add sweetness to the drink
IceAdded to the drink to make it cold

 7. Pumpkin Spice Latte

Pumpkin spice latte is usually available in August & September but it has a loyal fan base.

The nutmeg, cinnamon, clove notes, pumpkin syrup, and coffee make it delightful. It is difficult to pick anything wrong with this latte.

IngredientDescription
EspressoConcentrated coffee made with hot water and finely ground coffee beans
MilkTypically 2% milk, but customers can request different types of milk
Pumpkin Spice SauceA sweet and spicy sauce made with pumpkin puree, cinnamon, nutmeg, and other spices
Whipped Cream (optional)A sweet and airy topping made with heavy cream and sugar
Pumpkin Spice Topping (optional)A sprinkle of pumpkin pie spice seasoning on top of the whipped cream

 8. Peppermint Mocha

The competition between Peppermint Mocha and Pumpkin spice latte in seasonal Starbucks drinks is fierce. 

You get a mix of peppermint syrup, espresso, mocha sauce, and steamed milk in this drink. The milk dilutes the sweetness to the right amount, making it easier to pick every taste note.

IngredientDescription
EspressoConcentrated coffee made with hot water and finely ground coffee beans
Steamed MilkMilk that has been heated and frothed to create a smooth and creamy texture
Mocha SauceA sweet and chocolaty sauce made with cocoa powder, sugar, and natural flavors
Peppermint SyrupA sweet and minty syrup made with sugar, water, and natural peppermint flavoring
Whipped Cream (optional)A sweet and airy topping made with heavy cream and sugar
Dark Chocolate Curls (optional)Thin shavings of dark chocolate, often used as a garnish

9. Purple drink

Instagram has made Starbucks’ purple drink famous. However, you won’t find that on the menu. 

To order it, ask the barista to blend passion iced tea, Vanilla syrup with blueberries or blackberries scoop. You might fall for its aesthetics, but it is equally delicious.

IngredientDescription
Teavana Shaken Iced Passion Tango TeaA blend of hibiscus, lemongrass, and apple flavors, brewed and chilled.
Soy MilkA plant-based milk alternative made from soybeans. Can be substituted with regular milk or other alternatives.
Vanilla SyrupA sweet syrup made with sugar and natural flavorings. Adds a touch of sweetness to the drink.
BlackberriesFresh blackberries are added to the drink and serve as a garnish.
IceThe drink is served over ice for a refreshing and chilled beverage.

10. Nitro Cold Brew

How about sweet coffee without the sugar?

That is what nitro cold brew offers. Nitro cold brew is slow steeped to create a smooth taste. Infusion of nitrogen adds a unique sweet flavor and makes the drink more velvety. All this in only 5 calories.

IngredientDescription
Cold Brew CoffeeA coffee concentrate made by steeping coarse coffee grounds in cold water for an extended period of time, resulting in a smooth and less acidic coffee
NitrogenA gas that is infused into the cold brew to give it a creamy and smooth texture
Optional Sweetener or MilkCustomers can add syrups or milk to customize the flavor of their nitro cold brew

Tips to customize your drinks at Starbucks

10 Most famous Starbucks drinks & what they contain! 19
Coffee Machine In Starbucks

These Starbucks drinks are delicious, but you can make them more special by customizing them.

1. Substitute the milk option

Starbucks offers numerous milk options like

  • Almond milk
  • Coconut milk
  • Soy milk
  • Whole milk
  • 2% milk

Choose the milk type as per your taste preference.

2. Go with less ice

Certain Starbucks beverages consist of significant ice. Mention “light ice” while ordering, and you won’t have to worry about dilution.

3. Reduce sugar content

Starbucks also offers numerous sweetener options like:

  • Raw sugar
  • Honey 
  • Sweet N low
  • Equal sweetener
  • Splenda

Substitute regular sugar with alternative sweeteners to reduce the sugar content.

4. Get your drink extra hot

Want your coffee to remain hot for longer?

Instruct the barista for “extra hot” coffee while ordering. Such coffee consists of steamed milk heated longer to increase its temperature.

5. Short size does exist

While ordering many drinks, you won’t notice the short size on the menu. However, all drinks are available in the short size of 8 ounces.

6. Always mention the number of pumps

By default, a tall drink will have three pumps, a grande drink will have four pumps, and a venti will have 5 or 6 pumps. However, you can customize the number of pumps according to your preference.

 7. Order at the kid temperature

Do you find your Starbucks beverages too hot to drink?

If so, instruct the barista to make the drink at “kid temperature” the next time you place your order. Such a drink will be warm rather than hot, making it perfect for drinking immediately.

FAQ:

What are some of the most popular Starbucks drinks?

Some popular Starbucks drinks are Pumpkin spice latte, Caramel Frappuccino, White chocolate mocha, and Pink drink.

What is the Pumpkin Spice Latte?

The pumpkin spice latte consists of spice powders (cinnamon, nutmeg, clove), pumpkin syrup, and coffee. It is a seasonal Starbucks drink that has gone mainstream.

Are there any low-calorie options at Starbucks?

Yes, Starbucks offers a range of low-calorie drinks such as black coffee, unsweetened iced tea, and iced coffee. You can also customize your drink by requesting less syrup or using non-dairy milk.

Are Starbucks drinks gluten-free?

Most of the coffee and tea-based drinks at Starbucks are gluten-free. However, some flavored syrups and toppings may contain gluten, so it’s best to check with the barista before ordering.

Can you customize your drink at Starbucks?

Yes, you can customize your drink at Starbucks by requesting additional shots of espresso, different milk types, or less syrup.

How much caffeine is in Starbucks coffee?

The amount of caffeine in Starbucks coffee can vary depending on the type of drink and the serving size. However, a standard shot of espresso contains around 75mg of caffeine.

What is the healthiest drink at Starbucks?

Some of the healthiest drinks at Starbucks include black coffee, unsweetened iced tea, and a latte made with nonfat milk and sugar-free syrup.

How to Grind Coffee Beans (With or Without a Grinder!)

The aroma and taste of coffee can lift up anybody’s mood. And if it’s lightly-roasted freshly-ground beans, there is nothing comparable to it. 

We all go for easy options like store-bought grounded coffee that taste bland and dull. It’s not that we don’t want to do it at home, the process seems a bit too much to do! Or so we think. 

In reality, grinding your own coffee is super easy and much more affordable. You don’t even need a fancy coffee grinder to do that. 

In this article, we will explore all the ways there are to grind coffee beans easily at home. We have gathered the easiest methods to answer how to grind coffee beans very efficiently. 

The History and Science of Coffee Grinding

Coffee grinding began in Ethiopia in the 15th century. As coffee consumption became widespread, a more effective method was needed to smash coffee beans.

First came the 17th-century coffee grinder. Two crank-operated stones smashed the coffee beans. The metal-roller roller grinder enhanced it.

Steam-powered grinders revolutionised coffee in the 19th century. This mass-produced ground coffee, making it more accessible.

Blade, burr, and electric coffee grinders are available nowadays. Burr grinders smash the beans between abrasive surfaces, whereas blade grinders cut them. The most common grinders are electric.

Coffee grinding science concerns particle size and coffee extraction. Water extracts coffee taste and fragrance faster depending on grind size. Finer grinds extract quicker, whereas coarser grinds extract slower. Choosing the correct grind size for different brewing procedures is crucial.

Overall, coffee grinding has evolved. Technology and knowledge have improved coffee bean grinding. Understanding the coffee grinding process will improve your morning cup, whether you’re a coffee expert or not.

Types of Coffee Grinders

Coffee grinders have been around since the Greeks ruled the world. Not just the Greeks, almost every ancient civilization had some sort of grinders to make a fine powder out of dry herbs and spices. Those versions were manual and took a lot of time and muscle power to use. 

Nowadays, we have many different options both manual and electrical. In terms of popularity, there are three main types of coffee grinders:

Blade Grinder:

How to Grind Coffee Beans

Blade grinders are the most common and inexpensive type of coffee grinders. They use a blade piece to basically chop the beans into smaller pieces. 

When you press the button, the blade starts to rotate at a very fast speed which causes the beans to rotate as well. This motion causes chopping the beans into smaller and smaller pieces. 

You can control the grind size by monitoring the amount of time you grind it for. If you want coarse pieces, grind it for 10-15 seconds. For finer pieces, you will need to spend 40-50 seconds. It can be tricky to understand when to stop but after a few tries, you will get the gist of it. 

Burr Grinder:

Burr Grinder
Burr Grinder

Burr grinders are made using two abrasive surfaces that revolve in a circular motion. The coffee beans fall in between them and get crushed into fine, uniform sizes. Those two abrasive circles are called burr, hence the name. 

This is one of the oldest methods of grinding coffee. Even though so many different types of grinders have been invented in the last decade, coffee lovers tend to always favor burr grinders over anything else. 

This is because of how uniformed the grounds look when you use them. There are no chunky coffee pieces in the middle of a fine powder. Each time it comes out perfect. Needless to say, it’s our favorite type of coffee grinder as well.

Manual Grinder:

Manual Grinder
Manual Grinder

Most burr grinders are electrically powered which makes them super easy to use. But there are still some manual options available.

Manual grinders are great as you can carry them anywhere with you. So if you plan to travel a lot or go camping, you can take your manual grinder. It requires no power or fuel which is economical and environmentally friendly. 

They also look vintage and stylish. Old-fashioned things have a certain charm that makes anything feel very luxurious and elegant. Manual grinders look very attractive compared to our modern electrical options.

The Different Brewing Methods

To achieve the best results, different brewing methods necessitate different grind sizes, and a grind size that is too fine or too coarse can affect the taste and quality of the coffee.

Understanding the various brewing methods and how to select the appropriate grind size can assist you in making the perfect cup of coffee.

Brewing MethodGrind SizeCoffee Taste and Quality
Drip CoffeeMedium to fine grindWell-balanced, smooth, flavorful
French PressCoarse grindFull-bodied, rich flavor
Pour-OverMedium grindClean, crisp
EspressoVery fine grindStrong, bold

Coffee Beans Grinder Machine: How to Use

We have gathered all the different ways there are to grind your coffee beans using many different instruments. You will also find how to grind coffee beans without a grinder. 

Grinding Coffee Beans in Vitamix:

Grinding Coffee Beans in Vitamix
Grinding Coffee Beans in

Vitamix is one of the most reliable and well-known blenders/grinders. Due to its high-efficiency, it has become a household name for many. 

They claim that your Vitamix can blend everything. But can it grind coffee grinds though?

We tried and discovered it is really good for grinding coffee beans! Of course, it’s not going to perform like a proper coffee grinder! 

The ground coffee from a Vitamix is not as precise or consistent. So you can get a mixture of smooth and coarse ground beans. However, for an easy, quick option, it’s comparable to basic, low-end coffee grinders on the market. 

Here is how to grind coffee beans in a Vitamix:

  1. Use the dry blade container to get better results. Start by measuring out 2 cups of roasted coffee beans. 
  2. Check the user manual to find out the best settings for grinding. Set the left switch to “variable” and turn the dial to number 3. This setting varies depending on which model of Vitamix you have.
  3. Add the beans to the container and close the lid.
  4. Turn on the machine and let it grind for 15 seconds. This is enough for any standard drip coffee. The longer you do it, the finer the grind will be. Finer grind is ideal for Turkish style coffee or espresso. 
  5. Grind for 5 seconds and take a break. Shake the container if necessary. This helps to create a more uniform blend. 

Nutribullet Coffee Grinder:

Nutribullet Coffee Grinder

Nutribullet is known for its versatile functionality and convenient design. You can use it for a wide variety of items including coffee beans. 

This is probably the easiest way to grind your coffee beans. Here’s how to grind coffee beans in a Nutribullet coffee grinder:

  1. Always check the manual as the first step. If there are any instructions, follow that. 
  2. Use the flat blade for coffee beans. Fill up the container with as many beans as you need. We would recommend keeping a little bit of space inside.
  3. Start the blender and let it grind for 10 seconds without interruptions. 
  4. Shake the container and grind again for 5 minutes. Keep doing this until you’re satisfied with the blend. 
  5. Shaking it helps to help the large particles go down toward the blade. 
  6. Unplug your Nutribullet and put the ground beans into an airtight container. This is perfect for easy morning coffee. And it takes less than a minute to do so! 

Grinding Coffee Beans in a Blender:

Grinding Coffee Beans in a Blender

If you have no kitchen appliances, chances are you have a basic blender and a microwave. We all do. That’s why it makes sense to use one for coffee beans. 

But the process is not as simple as just tossing them inside and pressing a button. Here’s how to grind coffee beans with a blender:

  1. Check if your blender has a “grinder” setting. If it has one, select it. If not, look for the “medium-high” setting. 
  2. Pour around ½ cup of beans into the blender and close the lid firmly. 
  3. Use the pulse setting to grind your beans. Grind them for 5 seconds and then take 3 seconds to break. Then grind again for 5 seconds. 
  4. Repeat this at least 7-8 times. You should grind for a total of 30 seconds. To make sure it’s grinding consistently, tilt the blender sideways in the middle of grinding. 
  5. Pour it all into an airtight container to store it for longer.

Ninja Blender Coffee Grinder:

Ninja Blender Coffee Grinder

Ninja Blender is a very known kitchen appliance used by millions of people. They have a wide range of models. For this particular task, having a single-serve cup is the most preferable. 

So here’s how to grind coffee beans with a Ninja blender:

  1. It’s important to clean up your ninja blender very well. If you previously used it for spices or garlic, then it would have a strong scent that can ruin the smell of the coffee. 

  2. Put a cup of coffee beans on your Ninja Blender or until there is 3 inches empty space left on the container.
  3. Plugin your blender and pulse up to 8-10 times depending on the texture you want. If you want it coarse, pulse less. For finer ground, you can pulse up to 12 times. 
  4. And that’s about it. Your coffee is ready to brew!

How to Grind Coffee Beans without a Grinder/Blender

If you don’t have a grinder or a blender, there are still ways to grind your coffee beans to desired consistency. We will tell you how to grind coffee beans for espresso without any electronic kitchen gadgets. 

These steps might need some elbow grease and patience to follow as some of them are not as simple as pressing a button!

Rolling Pin:

Rolling Pin
Rolling Pin

You might not think about it, but a rolling pin is a very easy way to make coarse grind without any machine. All you need is a ziploc bag and of course, a rolling pin, and you are set for grinding your own coffee.
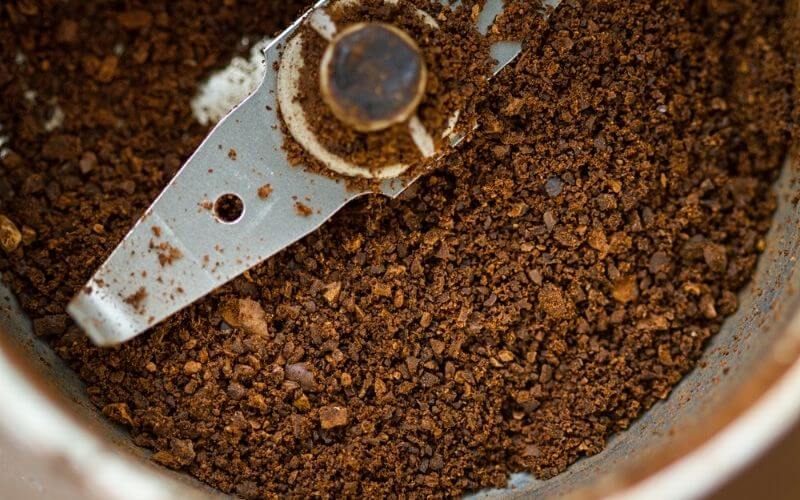
Even though it’s pretty self-explanatory, here’s how you can grind your coffee beans using a rolling pin:

  1. Put your desired amount of roasted coffee beans in a ziploc bag. It is ideal to not overfill the bag. Less is more for this process.
  2. Grab your rolling pin and gently press all over the bag. This will lightly crush the beans. Sue your rolling pin like a hammer for this step. 
  3. Now start to drive the rolling pin front and back applying light pressure. Keep doing it until all the beans are evenly crushed.
  4. Move around the larger pieces to the middle and repeat the process. This can take a bit of time but be patient with it.

Mortar and Pestle:

Mortar and Pestle
Mortar and Pestle

We don’t recommend using this method for larger batches as mortar and pestle is quite labor-intensive. But if you are trying to grind coffee for only 1-2 cups, this is very useful. 

For finer ground, mortar and pestle is ideal. You can also control how coarse or how fine you want your beans to grind. 

Here’s how to use mortar and pestle for coffee beans:

  1. Use around ¼ cup of coffee beans to fill up your mortar. This obviously depends on how big the mortar is. Ideally, you should always have enough space left to move the pestle around. 
  2. Hold the pestle with your dominating hand and put the other one on the pestle to make sure it doesn’t move. For a stone pestle, you might not need to do that as they are quite heavy. 
  3. Force the pestle down and use it as a hammer to break the beans into tiny pieces.
  4. When all the beans are crushes, move the pestle in a circular motion so the beans start to grind into a finer consistency. Keep doing it until you reach your desired level.
  5. Use a spoon to move around the beans so no part of it can escape the grinding motion of the pestle. 
  6. When you are done, remove the grounds and repeat from step 1 for more coffee.  
Troubleshooting Tips

Grinder Not Grinding Beans


If you find that your coffee grinder is not grinding beans, it could be due to several reasons. The first thing you should check is the power source. Make sure the grinder is plugged in and the power source is working. If the grinder is working but not grinding beans, check the blades. They may be dull or broken and need replacement. Another cause could be an accumulation of coffee oils and residue that clogs the grinder. Cleaning the grinder with a brush or a dry towel can help remove this buildup.

Uneven Grinding


Uneven grinding can occur if the grinder blades are dull or unevenly worn. It could also be a result of too many or too few beans in the grinder. If you are experiencing uneven grinding, check the blades and ensure they are sharp and evenly spaced. Also, make sure that you are using the correct amount of coffee beans for the desired consistency. Overloading or underloading the grinder can lead to uneven grinding.

Grinder Jamming


Grinder jamming is a common problem that can occur when beans get stuck in the grinder. If you are experiencing jamming, try cleaning the grinder and blades thoroughly to remove any blockages. If this does not solve the problem, check for any damaged or bent parts that may need replacement.

Coffee Grounds Clumping Together


Coffee grounds clumping together can be a result of static electricity. To reduce static, try using a different container or cup to catch the coffee grounds. You can also try adding a small amount of salt to the coffee beans before grinding. Another solution is to use a grinder with an antistatic coating.

Inconsistent Grind Size


Inconsistent grind size can be caused by various factors, including dull or unevenly spaced blades, too many or too few beans in the grinder, or an incorrect grind setting. If you are experiencing inconsistent grind size, try adjusting the blades, using the correct amount of beans, or changing the grind setting.

FAQs

01. Is Grinding Coffee Beans Worth It?

If you are a passionate coffee drinker, you have to grind your own coffee beans. Not only does it taste hundreds of times better than pre-ground coffee, but it also has a better aroma. There is nothing nicer than the smell of freshly-ground coffee beans. 

Pre-ground coffee beans lose a lot of natural oil and moisture in the process. This results in a dull, bland brew that does not feel very strong. With your own ground coffee, you won’t need as much to get the same kick. It’s very economical as well!

02. Does a Finer Grind Make Stronger Coffee?

The size of your grinding does not dictate how strong or weak your coffee will taste. The ground size matters in terms of brewing time. 

If your coffee ground is coarse, it would take longer to brew in comparison to if it were fine powder. But finer grind does help to bring out the aroma and natural oil from within. This makes your coffee taste better and balanced. 

However, if you overdo it, your coffee will taste very bitter and unpleasant. 

03. How Many Coffee Beans Should I Grind?

This totally depends on how much coffee you want to make. You can batch grind a lot of them to store ro you can just grind every day to get the freshest brew possible. 

Passionate coffee enthusiasts will tell you to grind coffee beans every day. And why not? You will only have to use 2 tablespoons of coffee beans to make 2 cups. 

It’s so little that it takes literally seconds to do! But the result is a refreshingly strong coffee each time. 

As it was freshly grounded, all the flavors stay inside it rather than evaporating in the air. So the aroma is stronger and smoother than store-bought ones.

You can also take a cup of beans to grind them for batch storing. A cup of coffee beans will make around 10 oz of ground coffee. 
Inference

We tried to add a wide range of ways to grind your coffee beans at home. Hopefully one of them suited your needs and preferences. Now you know exactly how to grind coffee beans at home both with or without a grinder!
Which one are you going to try? Let us know in the comments down below!

Pin Later

How to Grind Coffee Beans (With or Without a Grinder!)
How to Grind Coffee Beans With or Without a Grinder