The Complete Guide to Kanikama Sushi: Make The Best Kani Sushi at Home

Kanikama sushi is popular, but what exactly is it? To know everything about kanikama and its various uses in recipes, read our article today.

What is a Spicy Crab Roll?

The Complete Guide to Kanikama Sushi: Make The Best Kani Sushi at Home 1
Spicy Crab Roll

A spicy crab roll is one of the most popular Japanese sushi roll types there. The overall taste is creamy, spicy, and satisfying! They’re quite simple to make. A spicy kani sushi roll features the imitation crab as its central ingredient, along with sriracha spicy mayo sauce, nori or seaweed sheets, sushi rice, sushi vinegar, and sesame seeds.

What is Kanikama?

Kanikama, more commonly known as kani, are sticks of imitation crab made from something called surimi. Surimi is a paste made from ground varieties of fish to make the imitation crab meat taste!

Imitation crab meat is distinctive for its bright red or orange color. It’s also quite smooth, in comparison to real crab meat, which has ridges and striations.

What is the Nutritional Value of Kanikama?

Kanikama is a good snack you can have at any time! Between real crab meat and imitation crab, real crab has more nutrients and is packed with more protein. Imitation crab meat is less nutrient-dense.

As a result, as highly processed meat, imitation crab is best taken in moderation. There are also additives you might want to avoid in general!

Types of Imitation Crab Meat

  1. Crab Sticks

A crab stick is the most common shape that kani crab meat can come in. They look like sticks or sausages, tinted red to imitate real crab.

  1. Shredded Crab Meat

Shredded crab meat can be used in salads, tacos, and crab cakes. Kani crab meat is a little bit rarer to find, but it’s there nevertheless!

  1. Flake-Style or Chunky Crab Meat

If you’re looking for pizza toppings, or something to use in stir fries, chunky crab can be used as well!

If you’re in a pinch, you can also look for canned real crab meat. Canned crab meat is also a great way to do all these dishes — you can even get fresh crab meat, too! Kanikama can be your substitute instead.

Is Kanikama Bad For You?

Kanikama isn’t bad for you per se, but it can be a bit too much if you don’t moderate your servings. It’s still processed food and additives are included, so you don’t want to eat too much.

How to Make Kanikama Sushi or Nigiri
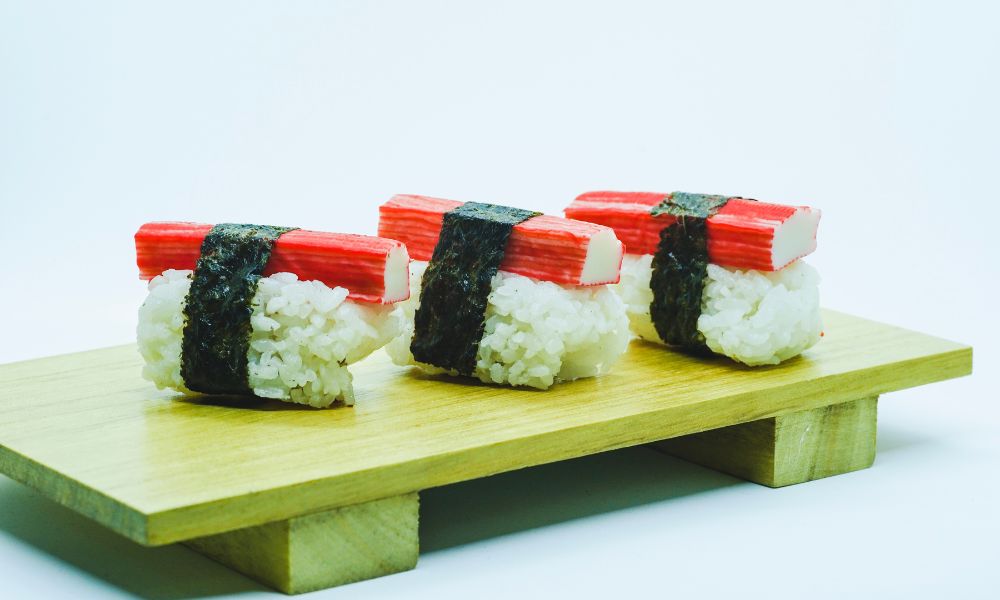
Kanikama Sushi
Kanikama Sushi

What You Will Need:

  • Sushi rice
  • Water
  • Vinegar for sushi
  • Kanikama sticks
  • Nori seaweed sheets

The Kani Sushi Recipe:

  1. Make the sushi rice. Wash the rice, add it to the rice cooker, and let it cook for up to twenty minutes. Once cooked, let it cool — then stir in the vinegar.
  2. Shape the rice. You want your sushi rice to be oval-shaped and uniform. As the rice is sticky, you can dip your hands in vinegar before forming them in uniform pieces.
  3. Get the kanikama sticks. Cut each stick into smaller pieces.
  4. Start making the nigiri. Press each small kanikama stick to each oval-shaped rice. You can even use a small portion of wasabi to “glue” each kanikama stick to the rice!
  5. Serve. Use shoyu, pickled ginger and wasabi on the side. Congrats, you have kani sushi!

How to Make Kani Maki

The Complete Guide to Kanikama Sushi: Make The Best Kani Sushi at Home 2
Kani Maki

What You Will Need:

  • A bamboo mat
  • Japanese short-grain sushi rice
  • Sushi vinegar or a rice vinegar mixture
  • Shredded crab sticks
  • Mayonnaise
  • Pickled ginger, shoyu, and wasabi
  • Nori seaweed sheets

The Kani Maki Recipe:

  1. Cook sushi rice. Measure and rinse out the rice. Add water before making a seasoned rice vinegar mixture. Once cooked, transfer the rice to a large bowl before pouring in the seasoned rice vinegar.
  2. Prepare the nori seaweed sheets. Place the nori seaweed sheets on the bamboo mat, rough side up. Start by placing the rice evenly on the nori seaweed sheets.
  3. Add mayonnaise and cooked crab meat. You can use canned crab meat or kani sticks for this! Spread a thin strip of mayonnaise and crab onto the rice.
  4. Start rolling the bamboo mat. Firmly roll the kani maki with the bamboo sushi mat halfway.
  5. Cut the kani maki into rolls. Use a sharp knife! Moisten it with water, trim the ends, and cut the kani maki right in the middle. Cut each half of the Japanese sushi roll into three equal parts.

How to Make Spicy Crab Rolls

Spicy crab rolls are quite straightforward to make! Here, we have a guide to make the best possible sushi roll with spicy crab:

Ingredients for a Good Spicy Crab Roll:

Kani Sticks

As mentioned above, kani sticks are the essential feature of any good spicy kani roll. For a sushi roll, you’re going to use around around a packet or two of kani.

Sushi Rice

Sushi rice is Japanese, short-grain rice, also known as Japonica or shari rice. There’s a certain preparation needed before you can use the sushi rice in a sushi roll, which we’ll get into later in the recipe!

Sushi Vinegar

Sushi vinegar is ideal, but in a pinch, you can mix together certain ingredients to make your own sushi vinegar! Rice vinegar, sugar, and salt is enough to make your own homemade sushi vinegar.

Nori Sheet

Nori is dried edible seaweed. Nori seaweed sheets are thin and paper-like, so they must be crispy enough to break into half.

Sesame Seeds

Both white and black sesame seeds can be used for this sushi roll recipe! Ideally, you can also toast the sesame seeds for a few minutes in the frying pan.

Mayonnaise

Looking for creaminess? Mayonnaise is your best bet for the spicy kani roll. Japanese mayonnaise is better than most other mayo products. If you want a healthier version of the spicy kani roll, you can substitute plain Greek yogurt.

Sriracha

Sriracha adds heat to the spicy crab roll. If you want to make your own sriracha sauce, you can do so: just add chili, vinegar, garlic, and salt together in a bowl!

How to Make A Spicy Crab Roll or Spicy Kani Roll

Aside from the ingredients, a sushi bamboo mat is also necessary. Have you got everything? Let’s get started!

Make the sushi rice

To begin making a spicy kani roll, you have to start with sushi rice. Cook the sushi rice like you normally would with other kinds of rice! Start by washing it thoroughly. With sushi rice, rinse it around three times before settling on a 1:1 ratio.

Use a rice cooker for convenience! If you don’t have a rice cooker, a pot is enough.

Wait for twenty minutes for the rice to cook. Transfer it to a large bowl and leave it to cool. Once cool, stir in the sushi vinegar before mixing it well.

Make a crab salad

Prepare a mixing bowl. Shred the imitation crab stick into the bowl, before adding the sriracha spicy mayo sauce.

Cut the nori sheet

Use kitchen scissors to cut the nori sheet in half. Now that you have two halves, place half of the nori sheet on the bamboo mat. The shiny side should be facing down.

Spread the seasoned sushi rice and crab salad

Measure around 3/4 cups of seasoned sushi rice and crab salad, then spread it over the nori sheet evenly. Sprinkle sesame seeds on top of the nori seaweed.

Roll, roll, roll

Now, it’s time to roll spicy crab, rice, and nori seaweed sheets together. Lift the edge of the bamboo mat, over the filling, and start rolling! Roll spicy crab until the ends meet.

Cut each roll to serve

Congrats, you’re nearly done with the sushi roll! Now, all you have to do is free it from the bamboo mat and cut it in eight pieces. You can drizzle the spicy sriracha mayo onto it as well.

Is a Spicy Crab Roll Cooked or Raw?

A spicy kani roll sushi has raw ingredients, but the sushi rice in itself is cooked.

Tips on Making This Spicy Crab Roll Recipe

Use Tezu Water

Sushi rice can get a little sticky when making a spicy crab roll. When making spicy kani rolls, dip your hands in a bit of Tezu water to help with the stickiness. If you want to make Tezu water on your own, you can make it with 1/4 cup of water and two teaspoons rice vinegar.

Adjust the Sriracha Spicy Mayo Sauce

The spicy mayo is what makes your spicy kani sushi roll creamy — and packed with a lot of heat. Sriracha mayo is best adjusted to your taste with any spicy crab roll. It’s what makes each roll spicy, so make sure you use just enough!

You don’t want the sriracha mayo to be too hot, but you don’t want the spicy sriracha mayo to be too little, either. Adjust the proportions of the spicy crab roll according to your liking!

Use the Bamboo Mat to Firm It Up

To prevent the sushi roll from falling apart, place the mat over the rolls and squeeze gently. If you made your spicy kani maki too loose, this is a good technique to make sure it stays firm!

How to Store Spicy Kani Rolls

Wrap In a Moisture-Proof Paper

Everything about your spicy crab roll should not be spoil. Ideally, you should have moisture-proof paper ready to wrap each spicy crab roll in.

Alternatively, Use Foil or Plastic

If you don’t have moisture-proof paper, foil or plastic wrap is also a good alternative for a spicy crab roll. You can store each spicy crab roll in an airtight container as well. You don’t want anything that promotes bacterial growth or food spoilage.

Store It in The Refrigerator or Freezer

Low temperatures will lead a spicy kani roll to store well. You can store each spicy kani roll for two to four days in the fridge or freezer. Otherwise, you want to serve and eat spicy crab roll up quick — with some shoyu sauce, pickled ginger, and wasabi!

There are some signs of spoilage in a spicy crab roll that you should look out for, namely:

  • Odor. An unpleasant odor may emit from a spicy kani roll when it’s spoiled.
  • Dull look. There may be changes in color in a spicy crab roll, and the visual presentation of the sushi rolls may end up looking duller. At their worst, the spicy crab roll may become inflicted with mold.
  • Slime. The texture will also change with sushi rolls! Feel the texture of the sushi rolls just in case.

What’s the Difference Between California Rolls and Kani Sushi?

A California roll is a popular Japanese sushi roll, with the filling containing avocado, cucumber, crabmeat, and seaweed.

In contrast to kani sushi, a California roll is not wrapped in seaweed. Instead, it’s an inside-out roll that you can sprinkle sesame seeds onto. However, a California roll can also use tobiko or masago — or flying fish roe and capelin roe, respectively.

A California roll is one of the most popular Japanese sushi rolls out there. Due to its global popularity, it’s often credited to be one of the dishes that open the gates of non-traditional fusion cuisine.

One thing a California roll and kani maki can have in common is the spicy mayo. You can add more spicy mayo sauce to a spicy California roll to make it tastier!

What Else Can You Do with Crab Sticks?

Have leftover crabmeat, but don’t want to make another spicy crab roll? Take a few tips from any Japanese restaurant and get the following:

Spicy Kani Crab Salad

Ingredients:

  • Kani
  • Cucumber
  • Carrots
  • Mango
  • Japanese mayo
  • Lemon
  • Soy sauce
  • Salt and pepper

The Recipe:

  1. Make the dressing. Whisk together the mayonnaise, lemon juice, soy sauce, and salt and pepper. You can also grate some lemon zest onto the dressing.
  2. Peel and cut the cucumbers, carrots, and mangoes. Cut the cucumbers, carrots, and mangoes into thin strips. As much as possible, you want the cucumbers to be free of seeds.
  3. Shred the crabmeat. As much as possible, you also want the crabmeat to be in thin strips.
  4. Toss all the ingredients together. Mix the cucumbers, carrots, mangoes, and crabmeat together.
  5. Pour the dressing. After you’ve mixed everything together, you can pour the dressing you made earlier over the entirety of the salad.
  6. Serve. It’s best with some lettuce sleeves, grilled chicken, or some salmon!
  7. Make it spicy. This is an optional step, but you can choose to make spicy crab salad or spicy kani salad! Use some sriracha sauce and mix it in with some mayo. The sriracha sauce will give your salad the jolt of spiciness it needs while the mayo will allow for some creaminess — just like the crab roll recipe we discussed above.

Spicy Crunchy Tempura Crab Roll

Looking for more crunch and texture in your spicy kani roll dish? Instead of a simple spicy kani roll, make it into a crunchy tempura crab roll instead! Follow our recipe below:

Ingredients:

  • Cooked sushi rice
  • Nori sheets
  • Tonkatsu, ponzu, tamari or soy sauce
  • Shrimp tempura
  • Panko bread crumbs
  • Avocado
  • Olive oil
  • Sriracha sauce

The Recipe:

  1. Cook the sushi rice. Rinse the rice thrice and put it in a cooker or pot on low heat. Stir in vinegar once it’s cooked!
  2. Cook the tempura. You can bake it in a preheated oven at around 450 degrees Fahrenheit or 250 degrees Celsius.
  3. Cook the panko toppings. Cook the panko toppings until it’s golden brown!
  4. Assemble the sushi. Get the bamboo mat, and place the nori sheet rough side up. Place the shrimp tempura, crabmeat, and avocado on the nori sheet, along with the rice.
  5. Roll spicy crab-tempura roll in panko bread crumbs. Once it’s all done, you can cut the crab-tempura rolls and roll them in the panko bread crumbs.

Kani Salad Rolls

Tired of eating spicy kani maki, or want to up your kani sushi recipe? Easy enough. If you don’t feel like eating a spicy kani salad, make kani salad rolls instead!

Ingredients:

  • Cucumber
  • Crabmeat sticks
  • Japanese mayo
  • Salt
  • Vietnamese rice paper
  • Lettuce
  • Mango

The Recipe:

  1. Cut up the cucumber strips and crabmeat. After you shred the crabmeat and cut up the cucumber strips, squeeze the cucumber to get rid of the excess water. This kani roll also has mango, so make sure to cut it up into strips as well!
  2. Combine ingredients in a bowl. For this kani roll, combine the crabmeat, Japanese mayo, mangoes, and cucumbers. Mix it all together in one bowl.
  3. Start using the rice paper. Soften a piece of rice paper with water. This kani roll in particular uses Vietnamese rice paper! Use a spoon to place a portion of crabmeat mixture onto the lettuce leaf. To make the kani roll, roll the rice paper tightly together.
  4. Arrange and serve. Serve the kani roll on a serving platter with some Japanese mayo on the side. Dip each kani roll into the mayo before eating it!

Store the dishes in an airtight container, in a plastic wrap, or in aluminum foil.

Frequently Asked Questions

What does kanikama taste like?

Kanikama tastes a lot like crab! It’s sweet, savory, and salty at the same time. Take a bite of a kani crab stick and see the taste for yourself.

What meat is kanikama?

A kani crab stick or canned kani meat is made of raw fish! Varieties of raw fish are involved in making the paste used for the kanikama itself.

Is kanikama real meat?

Yes, it is, but it’s not real crab — while there’s real kani meat out there, kanikama substitutes kani crab meat. Instead, it’s made of fish with some additives to it.
How to Keep Pulled Pork Warm?

Reheating pulled pork can be a problem. You’ve made a lot for everybody, and you have leftovers you’ve got to freeze. But what happens after, when you need to reheat pulled pork and serve it again?

This is where we come in. From the different methods of reheating pulled pork to what recipes you can do with reheated pulled pork, we’ve got you covered. Let’s begin!

What is Pulled Pork?

How to Keep Pulled Pork Warm
Pulled Pork

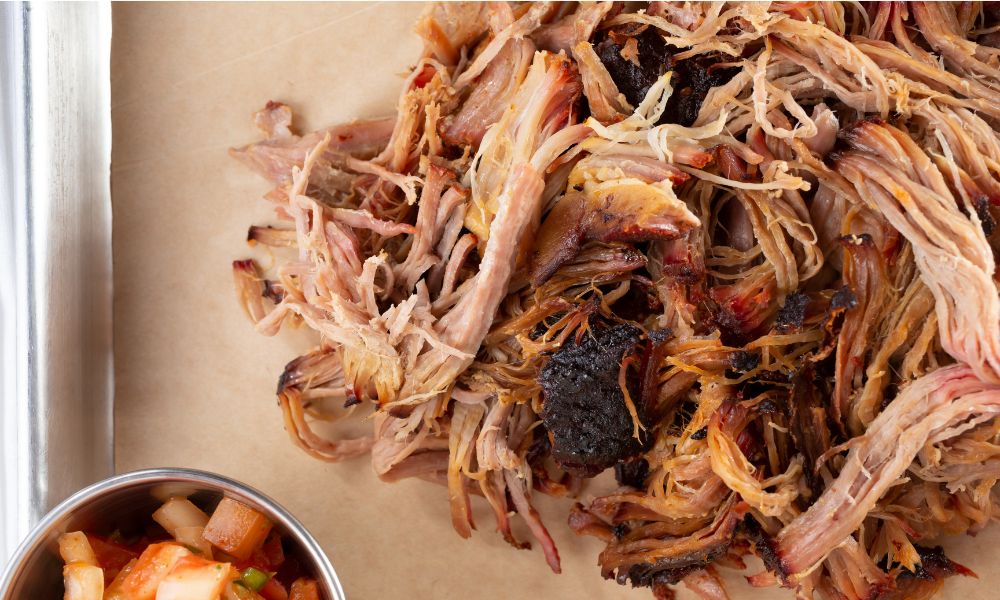
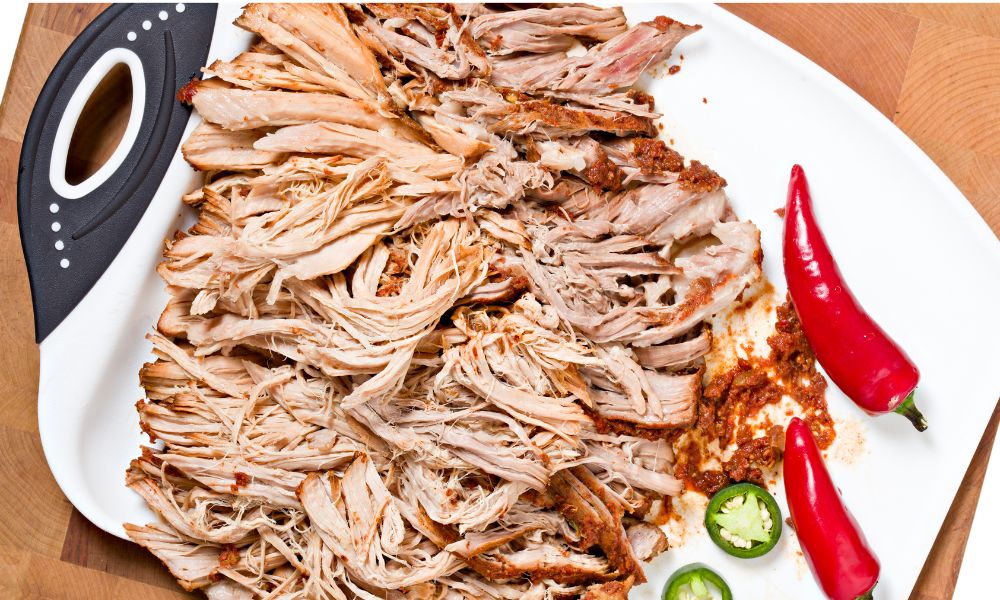
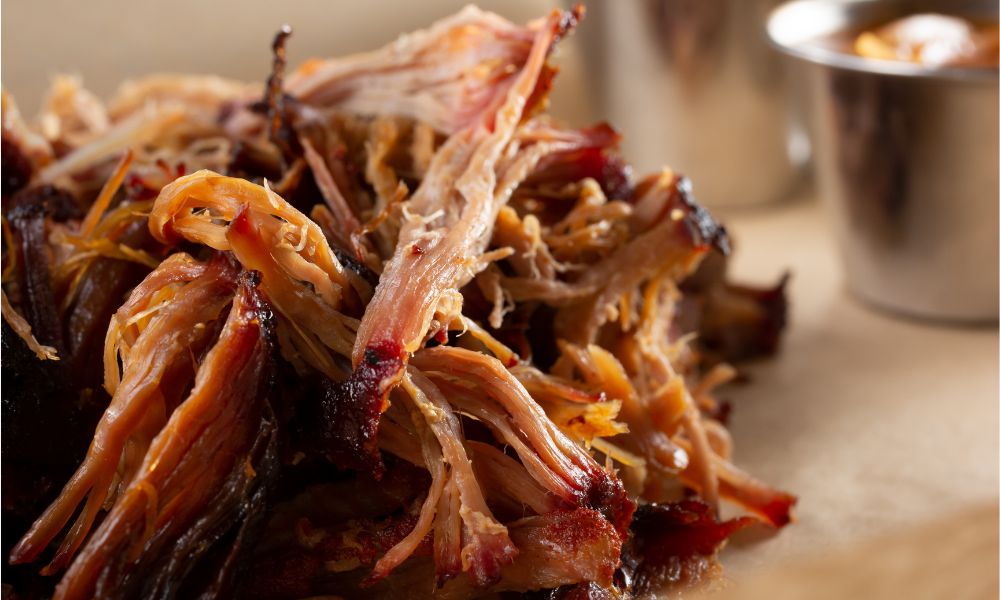
Pulled pork is a popular American barbecue dish most commonly found in the South. The barbecued pork shoulder or pork butt is slow-cooked over wood, before being shredded and mixed with homemade sauce.

If you can’t make pulled pork over wood, you can also use a slow cooker, crock pot, oven, or pressure cooker. Using a pressure cooker can speed things up by making the usual 12-hour cooking time be cut down sixty to ninety minutes.

If you haven’t experienced this dish yet, you’re missing out!

However, if you’re on this page, you probably have experienced the wonders of pulled pork — and are now wondering how to keep it warm.

How to Keep Pulled Pork Warm

To keep this dish warm, you can use the following methods:

  • Keep in a buffet server
  • Reheat using a microwave
  • Reheat using a stove
  • Reheat sous-vide style
  • Reheat using an oven
  • Reheating using a grill or crock pot

We dive into how you can keep and heat up pulled pork below. Let’s dive in!

How to Store Pulled Pork After Cooking

How to Keep Pulled Pork Warm? 3
How to Store Pulled Pork After Cooking

Yay, you’ve got leftover pulled pork in your hands! Now that you’ve had your fill, it’s time to consider where you could possibly put your pulled pork.

Of course, the fridge is the best method — and for many people, the only option. Refrigerating leftover pulled pork is quite straightforward. You just have to make sure you lock in the flavor.

To make sure the flavor is still present with leftovers, put them in sealed plastic bags or plastic containers.

If you’re thinking of having the leftover pulled pork around for longer, you may consider putting it in the freezer. For this, a vacuum-sealed bag or a sealable plastic freezer bag is ideal. If you must freeze it, you should also make sure to wrap the meat in plastic or aluminum foil to keep it around for longer.

In either one of those methods, you have to make sure to compress all the air out to avoid possible spoilage and loss of flavor in your pulled pork leftovers.

How to Reheat Pulled Pork

Okay, so you’ve had your pulled pork in the fridge for a while now. Now, you want to eat it and share it with your family. How do you reheat pulled pork properly?

There are multiple methods to reheating pulled pork. When you reheat, you don’t want the moisture or the flavor to be gone forever! Here are some of our trusty reheated pulled pork methods:

Sous-Vide Style or Hot Water Bath Style

What You Will Need:

  • Plastic wrap or Ziploc bag

Before you can reheat pulled pork sous-vide style, you should already have the shredded pork in a plastic bag with vacuum-sealing.

You can either use a vacuum sealer or vacuum-seal it on your own to be able to reheat it sous-vide.

How to Do Vacuum-Sealing

To seal it on your own, simply fill a large stock pot with boiling water. Place the pulled pork – or whatever food you need frozen – into a plastic bag. Compress as much air as you can out of the plastic bag.

Close the bag, but leave a little corner unopened as you vacuum-seal it. Slowly lower the bag into the boiling water until you reach the little corner, then close it all the way. This is a way of storing pulled pork that will help it freeze and thaw out properly!

When you lift the plastic bag of pulled pork, the plastic should have molded itself onto the food. If there’s still leftover air, try to redo the same method.

Reheating Sous-Vide Style

Okay, so now how do you reheat leftover pulled pork with the sous-vide method?

It’s easy. The reheating process takes place as soon as you heat up the water to 170 degrees Fahrenheit. Dip the watertight plastic bag into the pot. Leave it there for at least forty-five minutes so the pulled pork takes in all the indirect heat.

Take out the bag and let it sit for a few minutes before taking the pulled pork out. You’ll be amazed to find out that the moisture and flavor has stuck around while it was in the plastic wrap!

Using the Microwave Method

What You Will Need:

  • Microwave-safe dish
  • Leftover juices or apple juice

For reheating meat with a microwave, you have to make sure you have a microwave-safe dish first. That’s where you’re going to place and reheat your pulled pork!

After you have your dish, you put your leftover pork in it. It’s best if you have a BPA-free microwave container or even a Pyrex baking dish.

There’s only one problem with reheating pulled pork in the microwave: it can dry out quickly. To keep the meat moist, reheat pulled pork with added preferred sauce. It can be the leftover sauce you have for the pulled pork, your own homemade marinade, or even a little apple juice.

Next, set up the right temperature for the direct heat to hit the baking dish. For leftover meat like pulled pork, 165 degrees Fahrenheit should be enough. You need around five to ten minutes until the pulled pork reaches an internal temperature that’s good enough to eat!

Congratulations, you’ve successfully reheated meat in your microwave!

Using a Charcoal Grill

What You Will Need:

  • Grill
  • Charcoal
  • Aluminum foil
  • BBQ sauce

It might not seem obvious, but you can also use the direct heat from the grill to heat up the pulled pork.

The first step requires you to thaw out your pulled pork. Make sure it’s soft to touch! Leave frozen pulled pork at the counter or pop the pulled pork in the microwave to get it to defrost a little.

Next, you’re going to have to do a two-zone method. This means separating your grill into two zones: a cool and hot zone. The hot zone has the charcoal and open flames ready to reheat pulled pork.

After you have two zone ready, you can wrap your leftover shredded pork in foil. As you do this, prepare some barbecue sauce with water. Grilling can dry out the entirety of the meat, and you want the leftover juices to stay within the meat.

As much as possible, you want the grill to reach 170 degrees, and later, you want the meat to reach an internal temperature of 165 degrees Fahrenheit. For this, you want to use a meat thermometer.

Leave the cooked pulled pork wrapped in aluminum foil on the cool side. Once the hot side reaches 170 degrees, conduction will allow indirect heat to reach the cooked pulled pork where it is.

Then, you can pull the pulled pork over to the hot zone and let the direct heat side reach the pork. Grill the pork up to 30 minutes before serving. Now you have an added smoky flavor, too!

Using the Crock Pot

What You Will Need:

  • Apple juice
  • BBQ sauce
  • Steaming basket

Reheating food in a crock pot or slow cooker is also easy. Just spread out the pulled pork on steaming basket as you get started! Add the juice or barbecue sauce to keep it as moist as possible.

Using the Oven Method

What You Will Need:

  • Baking dish
  • Leftover juices and apple juice
  • BBQ sauce

None of the other reheating methods can compared to the oven method, which is the best way to reheat your pulled pork.

As you preheat your oven at the warm setting — at 250 degrees Fahrenheit — prepare a baking dish with the pulled pork. Ideally, you have leftover juices, more sauce, or even some apple juice to help in retaining moisture as you reheat pulled pork. You don’t want to eat dry meat!

The goal is to have reheated meat that comes out as if they were freshly cooked.

In oven-reheating pulled pork, you bake it until it reaches a certain internal temperature. For this one, it’s 165 degrees!

Mix the pork together with the juices, which will keep the pulled pork moist. Add more BBQ sauce after the reheating process, and serve!

Cooking with Reheated Pulled Pork: Top Three Recipes

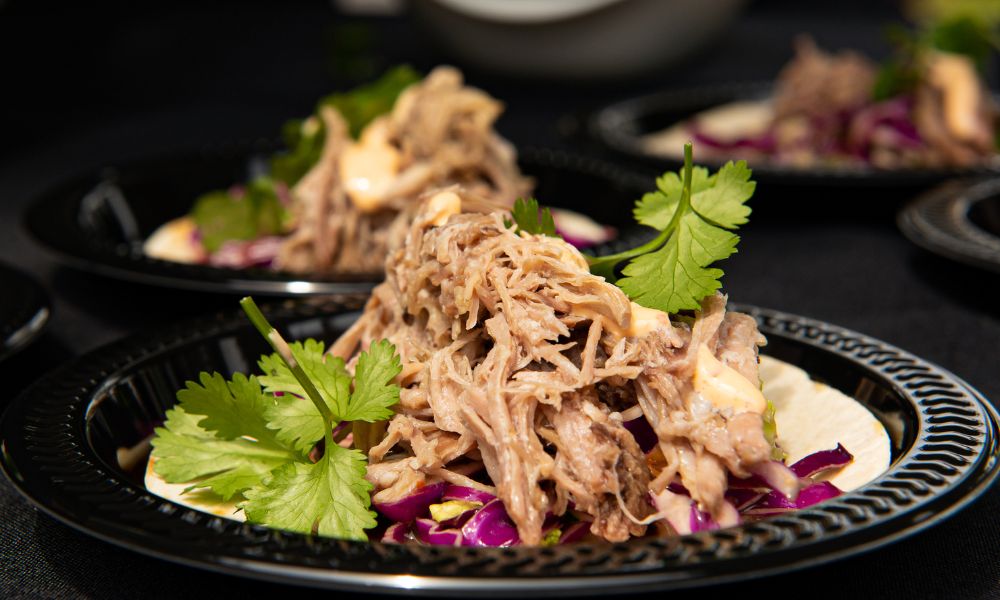
Pulled Pork Tacos

How to Keep Pulled Pork Warm? 4
Pulled Pork Tacos

When you reheat pulled pork, add the following:

  • A cup of prepared salsa
  • Chipotle chili and adobo sauce

Mix them all together in a crock pot to combine. Coat the pulled pork with some sauce.

Prepare the tortillas. Warm them up before you put in the mixture of pulled pork into the tortillas for ideal serving! You can put your desired garnishes, too.

Pulled Pork Sweet Potato Hash

For this recipe, you just have to use a single skillet! To make pulled pork sweet potato hash, you need the following:

  • Sweet potatoes
  • Red onions
  • Olive oil
  • Eggs
  • Salt and pepper
  • Fresh herbs

You need an oven for this recipe! Preheat it to 425 degrees F. As it preheats, dice the sweet potatoes. It should be enough to cut them into 1/2 inch pieces — the smaller they are, the better, as they will be cooked much quicker.

Dice the red onion. Add some olive oil to the sweet potatoes and stir it in. Cook the sweet potatoes in a cast-iron skillet over medium heat for ten to fifteen minutes.

Add the red onion, season with salt and pepper, then add the pulled pork. Mix it all in together!

Once it’s all heated together, make four small holes or indentations before cracking an egg into each hole. Season with salt and pepper.

Now, you can transfer the pan into the preheated oven. You can cook it for around five to seven minutes before garnishing everything with fresh herbs.

Pulled Pork Chili

To make pulled pork chili, you need the following:

  • Brown sugar
  • Garlic powder
  • Salt
  • Pepper
  • Chili powder
  • Cumin
  • Cayenne pepper
  • Beef broth
  • Tomato sauce
  • Diced tomatoes
  • Chili beans
  • Hot sauce

It’s going to be a long cooking time for this chili — around 8 to 10 hours! Cook it on low heat. Stir the chili well as your shred the pork with two forks, then serve it right away!

How to Cook Pulled Pork

How to Keep Pulled Pork Warm? 5
How to Cook Pulled Pork

Okay, so now you know how reheating leftover pulled pork works. But how do you cook pulled pork in the first place?

We’re here to guide you through the cooking process!

What You Will Need:

  • Pork shoulder or pork butt
  • Oil
  • Sugar
  • Chili powder
  • Onion powder
  • Garlic powder
  • Cumin
  • Kosher salt
  • Black pepper
  • 12 ounces of Coke
  • Barbecue sauce

The Steps You Need to Cook Pulled Pork

  1. Trim the excess fat

Cut the fat off the meat and then divide it into four pieces.

  1. Prepare the spices

Combine the chili, onion, garlic, cumin, salt, pepper, and sugar in a bowl. Rub it all over the pork you just cut!

  1. Sear the pulled pork

This is an optional step, but you can opt to this to make sure your pulled pork gets cooked! Add two tablespoons of oil into a Dutch oven pot or pan over medium-high heat. Sear the meat for a few seconds on all sides.

  1. Using the oven:

First, you have to preheat the oven. Around 300 degrees F should work fine.

Next, take the Coke and pour it into the Dutch oven. Put the pork in the oven, too. Cover the Dutch oven with a lid and let it cook for up to three hours. After you remove the lid, cook the pulled pork for an additional 1 to 2 hours.

The pork should be tender enough to shred with a fork. Congrats, you’ve made pulled pork!

  1. Using the slow cooker method:

Another way to make pulled pork is through a slow cooker. Simply put the pork in the slow cooker and pour Coke around it. Cover it and cook the pork on low heat for eight hours, or on high heat for four to five hours.

  1. Using the instant pot method:

Place the pork in an instant pot and pour Coke. For 70 minutes, you can cook the pork butt for manual or high heat. Let the pot release pressure for around fifteen minutes before shredding the meat inside.

Once the meat reaches an internal temperature of around 165 degrees, it should be good!

How Much Pulled Pork Do You Need?

Around four pounds of pulled pork is enough for a dinner! You can adjust the ingredients with the amount of pulled pork you used.

Why Use Coke?

The Coke allows you to have sweetness in your dish, and at the same time, tenderizes the meat. If you don’t want to use Coke, you can use root beer or apple cider vinegar and apple juice.

Precautions in Cooking and Reheating Pulled Pork

  1. Avoid freezer burn on food

Freezer burn is common, and you don’t want it to happen to your food!

When this happens, a layer of ice forms across the surface of the food. Now, the layer of ice will melt and the food will be completely edible, but the moisture escapes from the food as well. As a result, you have dryer, tasteless food in your hands.

To avoid it, we recommend performing a couple of precautions. First, you have to set your freezer to the right temperature. Make sure your freezer isn’t over-filled — or under-filled — to get the right temperature.

  1. Use heat-proof gloves

When handling a baking pan or putting pork in the oven, use heat-proofed gloves in handling these items will help you out a lot! Handling food carefully is a must, especially if you’re looking for the best way to reheat and cook food.

If you don’t you risk burning and scarring quite easily.

  1. Always Keep Pulled Pork Moist

When you reheat smoked pulled pork, especially when it comes from the freezer, it can be dried out. To keep the pulled pork moist, you can use juice, leftover pork juices, and different marinades and sauces.

  1. Use a Meat Thermometer

When you reheat pulled pork, it’s important that you use a meat thermometer. You can also use it during cooking so you’re assured that the temperature levels are balanced and optimal! Ideally, 165 to 170 degrees F is good enough for both the cooking and reheating process.

Frequently Asked Questions

What is the best way to reheat pulled pork?

You can reheat pulled pork in the oven for the best results! You have more control over the reheating process and it can come out juicier, too.

How do you keep pulled pork warm for hours?

You can use an oven, crock pot, sous-vide, grill, or microwave to keep your pulled pork warm. However, if you really want to reheat your pulled pork for hours, we recommend using a buffet server like this one.

How long can pulled pork stay warm in a crockpot?

It’ll take around an hour for pulled pork to stay warm in a crock pot.

How do you reheat pulled pork and keep it moist?

When you want to reheat pulled pork and keep it moist, you should use different juices or sauces. Pop the pork in the oven and add sauce or marinade before mixing it together!

How Hot Is Coffee Supposed to Be Served? The Facts According to Science

How hot is coffee supposed to be served? Find out the facts according to science with this guide that breaks down everything you need to know.

How Hot Is Coffee Supposed to Be Served? The Facts According to Science
How Hot Is Coffee Supposed to Be Served The Facts According to Science

Coffee is one of the most popular drinks in the world and there are many ways to prepare it. The temperature at which coffee is served can have a big impact on the taste and quality of the drink.

So, how hot is coffee supposed to be served? The answer may surprise you.

According to a scientific study published in Burns Journal, the perfect temperature for serving coffee without any risk of burn is 136 °F (57.8 °C). This temperature will give you the best balance between burn safety and flavor.  

However, it’s not possible to serve coffee at a defined temperature every time. The optimum temperature range for serving coffee is 130 °F to 140 °F (54.4–60 °C).

Don’t let the numbers confuse you. For one, the preferred drinking temperature will be lower than the serving temperature. Also, there is a difference between serving and brewing temperature, and it’s not certainly suggested as the best-tasting temperature for hot coffees!

The following article discusses these confusions as they come up in detail – so you can better brew your own coffee the same way you would be an experienced barista.

Different Types of Coffee Served Temperature

Type of CoffeeAverage Served Temperature (°F)Average Served Temperature (°C)
Espresso150°F – 170°F65.5°C – 76.6°C
Drip Coffee140°F – 160°F60°C – 71.1°C
French Press140°F – 160°F60°C – 71.1°C
Pour Over140°F – 160°F60°C – 71.1°C
Cold BrewBelow Room TemperatureBelow 20°C

Note: Temperatures may vary based on personal preference and serving methods.

☕️ Note: Temperatures may vary based on personal preference and serving methods.

How Temperature Can Impact Your Experience of Drinking Coffee?

How Hot Is Coffee Supposed to Be Served? The Facts According to Science 6
drinking coffee

If coffee is served too hot, it can become bitter and burnt tasting. On the other hand, if it is not hot enough, the flavors will be muted, and the coffee will lack the characteristic richness that we all love.

But how hot is too hot? Which temperature range allows for the coffee to retain its flavor and aroma while still being hot enough to enjoy?

Let’s take a look at how your coffee may taste at different temperatures, according to science:

180–185 °F: Warming Sensations and Almost No Taste

This is considered too hot for serving coffee. At this temperature, you’ll barely taste anything, and your taste buds may burn.

Some commercial coffee shops serve coffee at this temperature only because they assume it will stay fresh for a while.

155–175 °F: Hot, Less Acidic, Rounded, and Bitter Notes

Most coffee experts recommend serving coffee between 155- and 175 degrees Fahrenheit.

The coffee will taste “hot,” but it is still palatable in this range. In this heat setting, the taste isn’t very strong; you may taste a momentary acidity or bitterness in the beginning.

However, these temperatures bring forth a distinct scent. If it’s a chilly morning or you’re drinking a subpar cup of caffeine, you may drink at this temperature range.

140–150 °F: Lots of Flavor and Warmth

Some argue that even 155°F is too hot for coffee, even though it may seem like a proper temperature to you.

140–150°F is the middle ground for drinking a hot, high-quality ground coffee with a sweeter taste. You’ll taste the coffee’s roast flavor and distinctive bitterness around this temperature range.

Dark roasts and those who like a hot beverage’s warmth should drink their coffee at this temperature.

120–140 °F: More Acidic, Smooth, and Mellower Flavor

120 to 140 degrees, you’ll be able to taste the complete flavor of coffee at its best. Coffee is more acidic and has a sharper flavor.

Your taste buds will experience the complete spectrum of subtle aromas and acidity with each sip, which lasts for a few seconds. Also, under 140 degrees, the coffee is no longer “hot,” but it still feels warm.

This range is especially recommended for a light roast with distinct nuances.

Below 120 °F: “Cool,” Yet Delicious

The coffee is now considered to be “cold.” Heat no longer reaches your tongue. This enables the taste to linger and become perceptible on the tongue.

Many drinkers will try to reheat their cup of coffee when the temperature drops below 120°F. However, reheating coffee alters its flavor profile, therefore we don’t advise doing it.

Instead, once the temperature approaches 100 degrees, you should enjoy it as a cold coffee and even pour over some ice!

So, What’s the Ideal Temperature?

So, you want a conclusion? How hot coffee is supposed to be served for a delicate balance of hot and cold?

The only real takeaway from this discussion may be that your ideal serving temperature for coffee depends on your own taste preferences as long as it is neither lukewarm nor boiling hot.

Sorry to say that you won’t find an answer everyone agrees on.

However, don’t leave disappointed. Here are some general guidelines from us to help you find the perfect temperature for your cup of coffee:

  • You would be better off staying in the 155–175 °F range if you like the warm, sweet, rounded, and bitter characteristics of coffee.
  • But if you like a cup that is sharper, brighter, and more acidic, aim for a temperature between 120 and 140 °F.
  • Finally, though we don’t recommend it, a cup between 180 and 185 °F served right after brewing would be ideal for you if you have an evolutionary bias toward hot beverages.

Our recommendation is that you may serve coffee a bit hotter since it will cool down and the person consuming it can choose when it is ready, so long as you don’t burn the coffee when you boil it. When it’s cold, it’s more difficult to reheat it.

Your Personal Preference Is the Key Here

Of course, the ideal coffee temperature is just a starting point. Your personal preferences will ultimately dictate what temperature is perfect for you.

So, if you like your coffee on the hotter side, go ahead and crank up the heat. If you prefer your coffee on the cooler side, don’t be afraid to let it cool down a bit before you take your first sip.

The perfect cup of coffee is out there waiting for you, and with a little experimentation, you’ll find it in no time.

What Temperature Should Coffee Be Brewed at?

How Hot Is Coffee Supposed to Be Served? The Facts According to Science 7
making coffee

If you’ve come this far, it should be no secret to you that the temperature of your coffee can have a big impact on the coffee flavor. But what many people don’t realize is that the brewing coffee temperature and the serving temperature can be very different.

The serving temperature is the temperature of the coffee when it is finally poured into your cup. This can be anywhere around 120-180 degrees Fahrenheit.

The brewing temperature is the temperature of the water when it comes in contact with the coffee grounds. According to the National Coffee Association of USA, this temperature should be between 195-205 degrees Fahrenheit.

However, brewing coffee is an inexact science, and there are a lot of variables that go into making the perfect cup of coffee.

So, what is the ideal temperature to brew coffee?

The answer is: it depends. On what? The type of coffee, the grind, the brewing method, and the water all play a role in the final brewed coffee.

  • Different types of coffee beans require different brewing temperatures. For example, light roast coffee beans are best brewed at a lower temperature than dark roast beans.
  • The grind also makes a difference. A finer grind will require a higher brewing temperature, while a coarse grind can be brewed at a lower temperature.
  • The type of brewing method also plays a role in the final temperature. A French press will require a different temperature than an espresso machine.
  • And finally, the water you use can also affect the final temperature. Hard water will require a higher brewing temperature than soft water.

Unfortunately, there is no one-size-fits-all answer for the ideal coffee brewing temperature. The best way to figure out the ideal temperature for your coffee is to experiment and find what works best for you.

So why is there such a big difference between the brewing temperature and the serving temperature?

It all has to do with the extraction process.

At higher temperatures, the coffee grounds will release more of their oils and flavors into the water. Therefore, brewing at a higher temperature will result in a more flavorful cup of coffee (which is why it’s recommended). However, if the coffee is too hot, it can become bitter and unpleasant while drinking.

On the other hand, brewing at a lower temperature will result in a less flavorful cup of coffee. But the coffee will be less likely to taste bitter.

How to Ensure Preferred Temperature While You Drink Coffee?

How Hot Is Coffee Supposed to Be Served? The Facts According to Science 8
Preferred Temperature While You Drink Coffee

From all the discussions, it turns out that the temperature of your brewed coffee can make a big difference in the coffee flavor. And now that you know about the ideal brewing and serving temperature for coffee, it’s time to bring all the knowledge to your coffee table.

How do you make sure your coffee is at your preferred temperature?

Whether you like it piping hot or relatively cool, there are a few things you can do to make sure your coffee is always at your preferred temperature.

While You’re at a Coffee Shop

You may think you’ve no control over the coffee when you’re in a coffee shop outside. But that’s not the case.

Here are a few tips:

  • If you like your coffee hot, ask for it to be brewed with boiling hot water.
  • If you prefer your coffee to be more on the lukewarm side, request that it be brewed with room-temperature water.
  • If you want your coffee to be at a specific temperature, you can always ask the barista to adjust the water temperature to your liking. You can also ask to see the coffee brewing temperature gauge.
  • If you’re not sure what temperature you prefer, just drink in as they serve for the first time. Next time you’re there, you’ll know what to ask.

While You’re Brewing at Home

If you’re someone who likes to brew his own coffee in the morning, here are some things you can do:

  • Use a thermometer: A thermometer is the best way to ensure that your coffee is at your preferred temperature. Place the thermometer in the coffee pot or mug and wait until it reaches your desired temperature.
  • Pay attention to the water temperature: If you like it hot, make sure to use hot water when brewing. Conversely, if you prefer your coffee on the cooler side, use cooler water rather than cooling down later.
  • Use a preheated mug: If you’re using a mug, make sure to preheat it before adding the coffee. If you’re using a carafe, do the same. This will help keep the coffee hot.

By following these simple tips, you can make sure your coffee is always at your preferred temperature. So go ahead and enjoy that perfect cup of coffee, just the way you like it.

The Best Way to Keep Coffee Hot

How Hot Is Coffee Supposed to Be Served? The Facts According to Science 9
The Best Way to Keep Coffee Hot

The best way to keep coffee hot is to use a thermal coffee mug or thermos. It’s also called a “thermal carafe “.

These mugs have a double-walled construction with a vacuum seal between the walls. This helps to keep the coffee hot for hours. You can also find mugs with a built-in heating element that will keep your coffee hot all day long.

If you are using a regular coffee mug, you can preheat it by filling it with hot water and letting it sit for a few minutes before adding your coffee. You can also put a lid on your coffee mug to help keep the heat in.

The Fastest Way to Cool Down Hot Coffee

If you’re looking for the fastest way to cool down hot coffee, here are a few methods you can use:

  • One way is to pour the hot coffee into a container with a lid and place it in the fridge or freezer for a few minutes. This will help the coffee to cool down quickly.
  • Another way to cool hot coffee is to pour it into a cup with ice cubes. This will help to lower the coffee’s temperature quickly.
  • If you’re in a hurry, you can also try blowing on the coffee to help cool it down.
  • If you find that your coffee is too hot or too cold, add a little bit of milk or cream to adjust the temperature.

The next time you make coffee or order one, be sure to pay attention to the temperature. Everyone’s taste is different, so you’ll have to experiment to find the temperature that suits you best. And once you find that perfect temperature, your taste buds will thank you!

FAQs

How Hot Was the Coffee in The McDonald’s Lawsuit

In the McDonald’s lawsuit, the coffee was determined to be too hot. It was estimated to be between 180 and 190 degrees Fahrenheit and it was determined that this was too hot for consumers.
This lawsuit led to McDonald’s changing their coffee brewing practices, and the company now brews its coffee at a lower temperature.

How Hot Is Coffee Served at Starbucks?

Starbucks coffee is typically served at around 155 degrees Fahrenheit, which is close to the industry standard for coffee. However, this can vary depending on the individual store and the type of coffee being brewed.
Some people find this temperature to be too hot, so Starbucks also offers its coffee at a lower temperature upon request.

How Hot Does Coffee Have to Be to Burn You?

Coffee has to be pretty hot to burn you – around 70 degrees Celsius or 160 degrees Fahrenheit.  
At this temperature, it will cause a first-degree burn, which is when the top layer of the skin is damaged. This is hot enough to cause a serious burn in just a few seconds. If you have coffee that is this hot, be careful not to spill it on yourself.

How Many Scoops of Coffee for 12 Cups?

Wondering how much coffee you need for a gathering? We’ve got you. We cover everything you need to know about measuring coffee in this article!

For 12 cups of coffee, it’s actually quite straightforward.

How Many Scoops of Coffee for 12 Cups?

How Many Scoops of Coffee for 12 Cups?
How Many Scoops of Coffee for 12 Cups

If a scoop of coffee equates to two tablespoons, then ideally, you can put 6 scoops of coffee for 12 cups. This means you’re going to have one coffee scoop for two cups of coffee.

However, we’re basing this off of ground coffee — it’s different if we’re talking about flavored coffee, whole coffee beans, and other coffee measurements! You also have to factor in different brewing methods, cup size, and coffee strength.

Let’s put this all into context by diving into the article below.

Why Measure Coffee?

How Many Scoops of Coffee for 12 Cups? 10
Measure Coffee

Why should we bother measuring coffee in the first place? Well, there’s a lot that can result from the measurements, including the following:

Taste Consistency

It’s one of the things that keeps us coming back to coffee shops: consistency.

We know the taste of each consistent cup of coffee that they make. When you make coffee at home, the resulting taste varies each time. Maybe you put in too much ground coffee, or too little. Maybe you overshot the water used, or you were too cautious and put only a small amount.

Measuring coffee and water used produces consistent, brewed coffee every day.

Adjusting Strength

Coffee makers aren’t just in the craft of making coffee for the fun of it. I’m sure you want to unlock the benefits of coffee per cup, too!

The strength, then, matters a lot when making your perfect cup. If you want a stronger cup of coffee for the jolt of energy in the morning, measuring out ground coffee is necessary. If you only want a light brew per cup, you have to take into account what kind of beans to use and how to brew them properly.

How to Adjust the Amount of Coffee for Different Brewing Methods

The Different Brewing Methods

There are multiple methods in brewing coffee grounds. The brewing method affects the amount of caffeine that’s extracted from your coffee, so it also helps if you’re looking for the perfect coffee taste.

MethodYieldAmount of Coffee (tablespoons)
Drip Coffee Maker2 to 12 cups12 tablespoons (6 scoops) for 12 cups
French Press1 cup2 tablespoons for 1 cup
Pour Over Brewer1 cup1 level scoop for 1 cup
Espresso Machine1 shot20-30 grams (around 20-30 seconds to pull)

01 Drip Coffee Maker

Your standard drip coffee maker can yield anywhere from 2 to 12 cups of coffee. Chances are, a drip coffee maker is what you’ve got in your kitchen!

Using a drip coffee maker is quite simple. You add water into the attached water reservoir, then add a filter – either a reusable or disposable one. Make sure you have the right coffee to water ratio. Add the coffee grounds to the filter.

If you’re making 12 cups of coffee, you’re likely to use around 12 tablespoons of coffee, or six scoops. Press the brew button and you’re all ready to go!

02 French Press

A French press is simpler and distinct from the drip coffee maker. Instead of waiting for coffee brewing to finish, you pour coffee grounds into the French press before adding hot water. Be careful, however — the water should just be a little bit below the boiling point or it may taste burnt!

But it shouldn’t be that cool, either, or you risk getting weaker coffee. For a strong cup, good extraction is a must. Here’s the best ratio for French Press.

After letting the coffee grinds bloom, you press down on the French press and let the coffee grounds and water separate. You’re all done!

For a press, however, how many coffee cups you make is limited. It can contain, at most, more than one cup. So you’re only looking at around a single scoop of coffee for a single serving. Can you remember how many tablespoons that would equate to?

Yes, that’s right – just two tablespoons. It’s going to be time-consuming to make 12 cups of brewed coffee, but the taste is well worth it!

03 Pour Over Brewer

A pour-over brewer is one of the simplest ways to make strong coffee. You don’t need anything special — at most, you might want to invest in a gooseneck drip kettle. We’ll explain why below.

The brewing methods in a pour-over brewer is already in its name: pour-over. You get a coffee filter, add some coffee grounds, and slowly pour in the water for your coffee.

This brewing method should make use of wetting, or slowly immersing your coffee grounds in water.

This is why a gooseneck drip kettle is important. It allows you to control the distribution and amount of water you incorporate into the coffee brewing process.

However, this technique is also time-consuming for those who want to make twelve cups of coffee. One level coffee scoop is more than enough for one cup, and you need to repeat the coffee brewing process for each cup if you want to serve twelve people.

04 Espresso Machine

If you want the most caffeine out of your ground coffee, an espresso machine is the way to go. To use an espresso machine, you just have to follow these steps:

  1. Preheat the Machine

Begin the entire process by starting up your machine to warm it up. Make sure the entire machine is preheated.

  1. Grind Whole Beans

If you have ground coffee, that’s perfectly fine. However, the best cup of coffee includes grinding whole beans. Use a fine grind size and fill up your portafilter of around 20 grams of coffee. Brush away the excess coffee grounds to get ready for tamping.

  1. Tamp Evenly

It’s time to tamp! Make sure everything is evenly distributed before tamping down. Press the puck straight down, and spin it to polish the ground coffee off.

  1. Pull and Dial in the Shot

Allot around 20 to 30 seconds to pull your first shot! If you want to adjust the taste and strength of the next shot, take note of the dial of the pressure gauge — if you have one on your espresso machine, that is.

Like other brewing methods mentioned in this list, however, an espresso shot only serves one. If you’re looking to serve twelve cups of coffee, you’re going to have to take some time in serving each! A coffee pot with a drip coffee maker is the ideal one for you.

Other Factors That Affect Coffee Measurements

Other Factors That Affect Coffee Measurements

Cup Size

It might seem obvious, but this detail often escapes people’s minds. The size of your cup can determine how strong your coffee is or how much coffee you need to make. The coffee to water ratio is also affected.

If your cups are larger, expect to make more coffee — that means more coffee scoops and more water. If your cups are smaller, you can easily make twelve cups.

Type of Coffee Roast Can Affect the Amount Needed

Ideally, you start with whole bean coffee and make them into ground coffee or coffee grounds. What you have to look at now is the type of roast. This will have a direct link to its strength.

Light

A light roast is distinctive with its light brown color. There’s little to no oil on the coffee beans, and retain much more caffeine than you think. It’s a common misconception that light roasts have less caffeine that medium and dark roasts, but since they roast for far less time, they have more caffeine than others.

If you want a stronger cup of coffee, coffee ratios with a light roast will vary.

Medium

A medium roast is known for its brown, thick body and balanced flavors. They lose more caffeine in comparison to a light roast.

Dark

A dark roast comes in dark, blackened colors, with a glossy surface from the oils. The robust, full-body flavor is notable as well! It can be hard to achieve a proper dark roast without burning it, so you have to make sure you buy the right brands.

Spoon Size

This is also an obvious thing in measuring out how much coffee you need, but it does slip a lot of people’s minds! If your spoon or scoop size is bigger than usual, then you need less coffee per cup. If your spoon or scoop size is smaller, then you may need more than six scoops of coffee or more than twelve tablespoons of coffee.

The Golden Ratio Method

In measuring coffee, you can follow the golden ratio in figuring out how many tablespoons or coffee scoops you need per coffee cup.

The golden ratio is the following: 1 gram of coffee to 15-18 grams of water. This golden ratio achieves a good balance between the acidity and flavorful notes. Using more water can make the coffee weaker but much more bitter, while using less water than usual will lead to a concentrated, sour taste.

For more information on coffee ratio, you can check out the Specialty Coffee Association’s website. They’ve got everything you need to know about brew methods, cup measurements, and proper measuring tools!

Using a Scale to Measure Coffee

But how do you even achieve the golden ratio? It’s easy — use a coffee scale. Weigh out a gram of coffee to 15-18 grams of water, then multiply that amount by twelve if you need! That means you have to measure out water for twelve grams of coffee.

Coffee Beans Measurement Conversions

If you’re going to start questioning how much ground coffee you need per cup, it’s best to use a scale to weight it in grams instead of volume. We explain why below:

The Advantages of Using a Scale to Measure Coffee

Precision

With a scale, you can achieve the golden ratios of coffee per cup much easier. If you don’t remember, the golden ratio says that a gram of coffee needs 15-18 grams of water. That vaguely translates to one to two tablespoons of coffee for every six ounces of water.

However, if you want the coffee per cup to taste consistent and of quality, it’s best if you use a scale. Unlike with measuring coffee out with a measuring cup or a spoon, measuring with ground or bean weight makes sure you’re not prone to any variabilities.

Flexibility for Different Roasts

If you didn’t know, the different roasts means various densities for each coffee bean. For example, a dark-roasted bean will be less dense than a light-roasted bean due to a longer roasting process. How many grams it used to have as a green coffee beans has been burned off.

Grinds will also factor into how many grams or how many scoops you should put into a cup of coffee.

There will be gaps in the coffee grounds with a coarser grind, for example, and if you measure a cup of coffee in volume, you wouldn’t have an accurate measurement. It’s best to use a scale – for your coffee to water ratio and coffee scoops!

Taste Consistency

Having a scale as a technique to measure coffee per cup will make each coffee pot you make taste better. A little bit of precision goes a long way!

What to Consider When Brewing Coffee

The Equipment

Ideally, you want to have all the top-notch equipment you could have in your kitchen. This includes everything from the any coffee puck to grinders you use to the automatic drip coffee makers you will get.

When shopping for equipment, make sure you get ones that are good in terms of price for value.

You want something that’s of quality and is durable, but you also don’t want to break your wallet! You don’t need all the barista tools in your home as a beginner in coffee-making, but if it seems like a good investment, we won’t stop you.

Aside from having all the tools you need, it’s also important to have them all cleaned after each use.

Cleaning everything thoroughly after each use isn’t just hygienic – it also helps preserve the flavor of your coffee!

When you clean your equipment, you make sure that there are no grounds or oils left. If there are some left when you don’t clean up properly, you run the risk of leaving your coffee rancid and sour to taste.

Water Used

Coffee is 98% water, so it’s best if you’ve got quality water available for your coffee-brewing!

Ideally, you should have some sort of filtration system involved for your water. It can drastically improve the taste of your coffee.

The mineral build-up can affect the taste and once that’s removed, making coffee will be a much more pleasurable experience.

Avoid distilled or softened water for the best possible results.

Water Temperature

Water temperature is a whole different ball game when it comes to coffee-brewing. For optimal extraction, it’s best to have it within 195 to 205 degrees Fahrenheit!

Go too hot, and you’ll lose the taste quality, but if you go too low, the coffee will taste flat and under-extracted.

Of course, you should always make safety your top priority when brewing coffee. Make sure you have every precaution set first!

The Beans

Each coffee cup owes its taste to great beans. All coffee makers know this! You should check the following before even putting a coffee scoop into your coffee pot:

  • Coffee’s country and region of origin
  • Coffee’s variety
  • Roast type
  • Grind texture

There are a lot of choices out there, but don’t worry. You’ll get used to experimenting and trying out different variations of coffee — from the coffee grind to the roast. Enjoy different combinations as much as you can!

Freshness

If you can buy whole bean coffee, all the better. Ideally, you want to be the one roasting and grinding the coffee yourself, but that doesn’t stop you from buying pre-ground coffee, too!

Just make sure they store it properly so you know the coffee beans — or coffee grounds — are still fresh. Each fresh coffee scoop matters! We recommend looking for vacuum-sealed, opaque packaging for your freshly roasted or ground coffee.

Grind

The grind of your coffee beans also matters a lot! If you’re grinding the beans yourself, a burr grinder is preferable to a blade grinder.

It’ll give you a better grind more than anything else! You might get an under-extracted, more bitter taste if you let the coffee beans be ground too fine, so be careful.

Benefits of Drinking Coffee

Benefits of Drinking Coffee
  1. Enhanced Energy Levels

Suffering from a bout of the blues? Or maybe you just can’t seem to get your energy up after a long day at work. It may seem obvious, but a coffee pot is the answer to your troubles!

We can all thank caffeine, which is present no matter how much coffee you consume.

Coffee lovers all know the jolt of the mild stimulant that caffeine gives. However, you do have to be careful: while caffeine can wake you up when needed, you can also develop a higher tolerance to it over time.

How much coffee you might consume to develop a tolerance is unknown, but don’t overdo it to be safe! Stick to a cup or two a day.

2. Get a Boost from Antioxidants

Depending on the grams of coffee you take per cup, you have a high chance of benefiting from antioxidants coffee offers. The two main antioxidants coffee boasts are hydrocinnamic acids and polyphenols.

Hydrocinnamic acids neutralizes free radicals that may cause cancer. Meanwhile, polyphenols prevent a number of conditions, including heart disease and cancer!

The coffee industry is probably the biggest modern source of antioxidants out there.

How many coffee cups would be safe, then, to get the most antioxidants out of those ground beans? Around one to two cups consumed everyday should be fine.

Just remember that the antioxidants from coffee doesn’t replace antioxidants you get from whole grains and plant food!

  1. Jumpstart Your Memory

Studies have shown that moderate caffeine consumption can boost your memory. However, this study was based on caffeine capsules — at 200 milligrams each. There’s no telling how many coffee cups you need to be able to boost your memory properly, too.

Studies still do show the many active ingredients found in a cup of coffee. Your cup of coffee can contain chlorogenic acids, cafestol, kahweol, and trigonelline, all compounds that benefit your biological pathways in one way or another.

Aside from boosting your memory, coffee can also improve different parts of your brain function, including mood, reaction time, and attention.

If you want to strengthen your regular cup of coffee, get the measuring cup out or a coffee scale. Knowing how many coffee grounds go per cup can make a difference!

  1. Activate Your Heart Health

Surprisingly, your coffee scoops can also benefit your heart. In fact, a habit of coffee-drinking has been linked to a lower risk of coronary heart disease in women. In general, habitual drinkers of coffee can lower their risk of heart failure by 30%.

However, just because there’s evidence on how coffee scoops can lower your risk of heart diseases doesn’t mean you still shouldn’t be careful on how you drink those grams of coffee.

If you’re drinking it for heart health, don’t dress it up with sugar and cream. As much as possible, you want to get a cold brew or a plain Americano to get all the health benefits and none of the downsides.

Be careful about lattes or macchiatos, and you’re good to go!

There are some limitation to this study — for example, they didn’t distinguish between other brewing methods or other ways to get caffeine, like in energy drinks or tea. Just remember to keep those coffee scoops in moderation.

  1. Reduces Body Fat

Looking to lose those last few pounds? Several grams of coffee incorporated into your daily routine can help you with that!

There are studies that show how coffee can reduce fat, while at the same time, increase your metabolism per cup consumed.

Several stimulants found in coffee can boost your metabolism, including caffeine, theobromine, theophylline, and chlorogenic acid. The latter can even help the breakdown of carbs!

As coffee stimulates your nervous system, it also helps your cells to mobilize fat breakdown much faster.

It also increases your metabolic rate by a lot! You have more advantage of an increased metabolism with your cold brew if you’re young and lean — the effect is less pronounced with those who are older and/or obese.

  1. Increases Physical Activity

Maybe part of the reason why coffee can reduce body fat per cup is because it also increases physical activity. When consumed in doses of 3-6 mg/kg body mass, caffeine can greatly improve your exercise performance.

Get the coffee scale out for the coffee to water ratio for the measurements!

If you’re looking to enhance performance, coffee is the best suit for you. From your hormones, to muscle-building, and to fat-burning, coffee has got your covered.

For endurance exercises, 100 to 200 mg doses of caffeine combined with a carbohydrate-electrolyte drink can go a long way. Performance improvements are almost guaranteed.

Aside from endurance exercises, caffeine is also great for high intensity exercises, strength exercises, and fat loss.

  1. Lessens the Risk of Type 2 Diabetes

Now, we mostly have caffeine to thank for most of these benefits, right? But lessening the risk of type 2 diabetes is found in both caffeinated and decaffeinated coffee.

Due to the high amount of antioxidants found coffee, you can actually enjoy the lesser risk of disease with your typical dose of java.

However, if you already have Type 2 diabetes, caffeine may not be good for you.

It actually gets tougher to control your blood sugar! If you find it hard not to keep up with your coffee habit, it’s best to get a decaffeinated cup instead.

  1. Curbs Depression and Anxiety

Studies have found that caffeine can decrease the risk of developing depression — and at the very least, help out with symptoms. There’s even proof that a long-term relationship with coffee can lead to a lower risk for suicide as well!

However, if you’re experiencing symptoms of anxiety and depression, don’t go for a cup of coffee right away. In some cases, it may overwhelm you instead of helping you out! It also has a negative impact on sleep, which can easily lower your mood.

If you want to curb the symptoms of depression but not have palpitations, try watering your coffee down so the strength isn’t that high.

Look into your regular coffee to water ratio, use a dark roast, and try a different brewing method.

  1. Reduces the Risk of Liver Diseases

Another benefit caffeine has is lowering your risk of liver diseases. When the body digests caffeine, a chemical called paraxanthine is formed, which helps slow the growth of scar tissue in fibrosis.

This slowing down fights liver cancer, cirrhosis, fatty liver disease, and even hepatitis C.

Kahweol and cafestol are also to thank. They help fight cancer, and other acids in coffee can help fight hepatitis B.

  1. Guards Against Alzheimer’s Disease

Worried about being forgetful in old age? Lessen your risk with coffee. Regular caffeine consumption can lessen your chances in a lifetime to develop Alzheimer’s or dementia. It’s especially helpful during the pre-morbid phase!

How much ground coffee you need every day is in question, but just enough to make one to two cups should be fine.

How to Store Coffee Beans

You can either use a vacuum-sealed bag or keep whole coffee beans in an airtight and opaque container for long periods of time.


Roasted entire coffee beans can be vacuum-packed and stored for three to five months.
Roasted coffee beans can be frozen in vacuum-sealed bags for at least two to three years.

How to Select High-quality Coffee Beans

Several factors should be taken into account when searching for premium coffee beans.

One must first consider the origin of the beans. For the best coffee, seek out beans grown in places like Colombia, Ethiopia, and Jamaica. Second, picking the best bean is crucial. Compared to Robusta beans, Arabica beans are thought to be of higher quality and have a softer flavour.

The degree of roast should be considered next. You can pick beans that have been roasted to your prefered level of doneness, whether that’s light, medium, or dark. Beans that haven’t been roasted for more than two weeks aren’t worth buying, so keep that in mind. Find specialty-grade coffee beans with few flaws for the highest quality.

In closing, consider long-term effects. Pick a company that stands for sustainability and fair trade by looking for things like organic labels and fair trade practises. If you want to make sure the coffee is to your liking, you should try a small amount first.

Frequently Asked Questions

How many scoops of coffee do I put in a 12-cup coffee maker?

You can put six scoops of coffee for a 12-cup serving. In other words, you can put twelve tablespoons of coffee — or two tablespoons per scoop.

How many scoops of coffee do I put in for 10 cups?

You can put five scoops of coffee for a 10-cup serving. For tablespoons of coffee, it’ll be around 10 tablespoons — once again, it’s going to be two tablespoons per scoop.

How many cups of coffee is a scoop?

One scoop of coffee can yield two cups of coffee. However, there are variations to this due to the sizes of spoons and cups.

How many cups of coffee a day is healthy?

It’s okay to drink around two to four cups of coffee a day. It’s even better if you take it as a cold brew, as it’s the healthiest one you can drink! However, too much coffee can lead to adverse health risks, so remember to be careful.

8 Portobello Mushroom Vegan Recipes That You Can’t Get Enough Of!

Get portobello mushroom vegan recipes that will make your life easier, and more delicious, and help you get all the nutrients you need without any meat or dairy!

8 Portobello Mushroom Vegan Recipes That You Can’t Get Enough Of!
8 Portobello Mushroom Vegan Recipes That You Cant Get Enough Of

Button mushrooms were all the rage in our kitchen until I discovered portobello mushrooms.

Portobello mushrooms, also known as portabellas, have a meatier and less spongy texture than button mushrooms and have a robust flavor

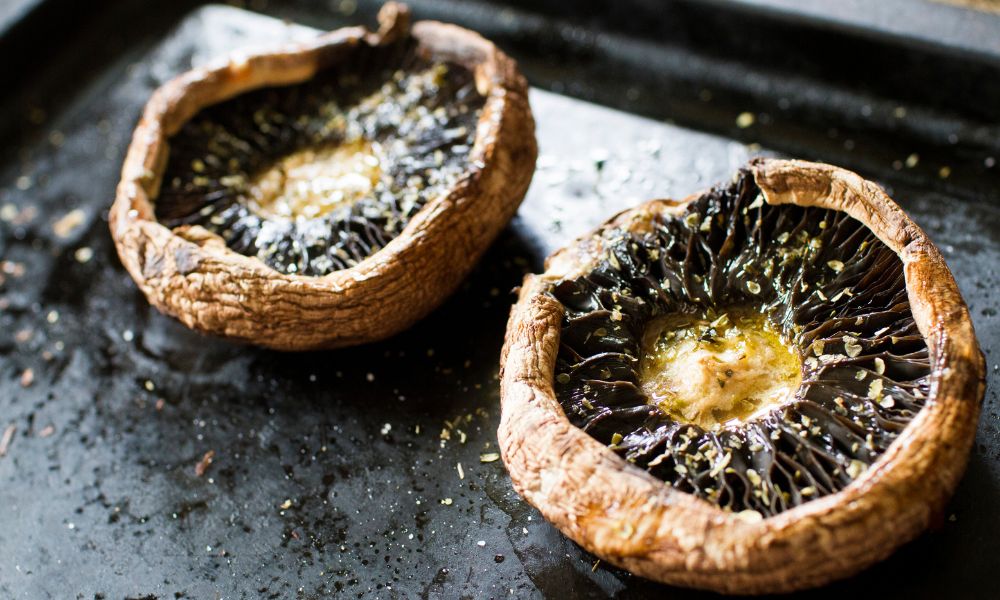
I love having them stuffed, roasted, broiled, and grilled due to their size.

And since I’m a vegan, portobello mushrooms are my most accessible go-to ingredient. 

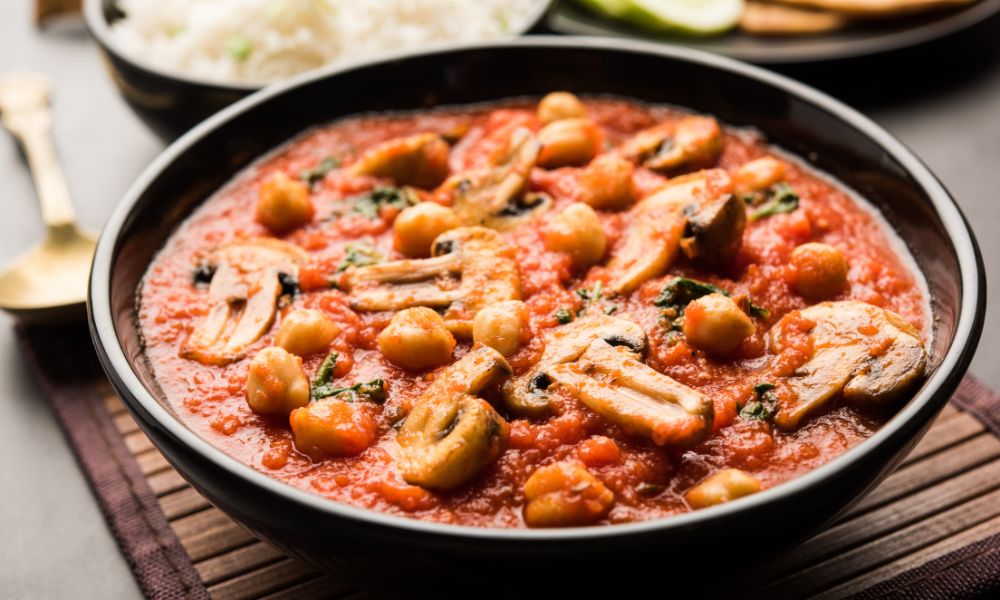
From a juicy vegan portobello mushroom steak to a simple gluten free vegan mushroom curry, in this post, we will cover all recipes that are portobello mushroom vegan. 

Let’s get started!

What Are Portobello Mushrooms?

8 Portobello Mushroom Vegan Recipes That You Can’t Get Enough Of! 11
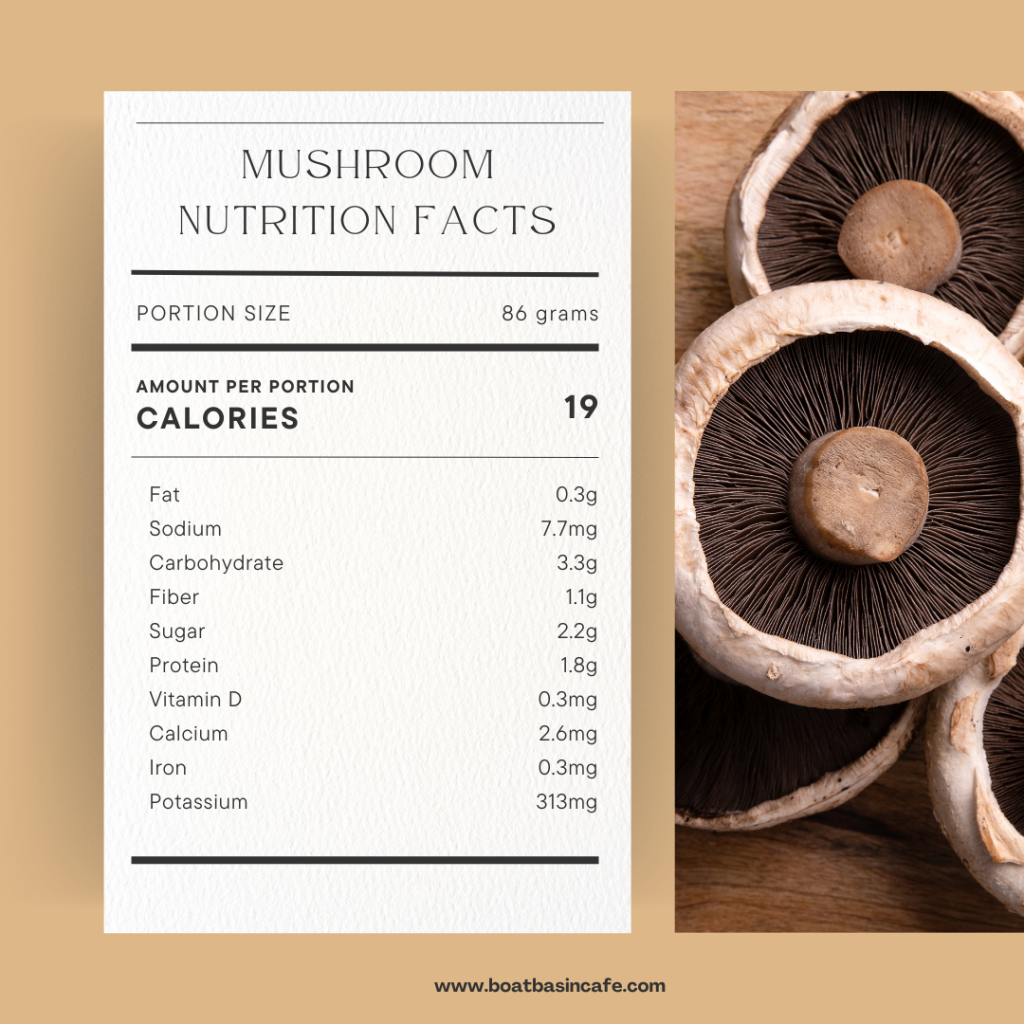
Nutrition Facts Of Portabella Mushrooms Per 86 Grams

With their large, umbrella-shaped caps, portobello mushrooms are the edible fungus Agaricus bisporus, which also comprises button mushrooms and cremini mushrooms, which mature into portobello mushrooms. 

The least mature stage of the species is represented by button mushrooms, followed by the intermediate stage of cremini, and the largest, darkest-brown stage, is represented by portobello mushrooms.

What Does A Portabella Mushroom Taste Like?

The umami flavor profile of portobello mushrooms is one of the rich, earthy, meaty, and brothy notes. 

Glutamate, an amino acid naturally found in mushrooms and other foods like parmesan cheese and anchovies, is the source of the umami flavor. 

The umami flavor of portobello mushrooms is more potent because the flavors are concentrated when the mushrooms ripen and lose water content. 

Its meaty texture and deep, meaty flavor make it an especially adequate meat substitute.

Vegetarian Recipes With Portobello Mushrooms

Be it a vegetarian or portabella mushroom recipes vegan, you will surely find something you will like from our list of recipes.

Converting vegetarian to gluten free and vegan portobello mushroom recipes is just a matter of using substitutes that don’t have dairy or grains in them.

For example, use cheese made from almond or soy milk. 

All the recipes are versatile and you can substitute many of the ingredients with others to suit your taste buds. 

If a recipe calls for Balsamic vinegar or white wine vinegar, you can use these substitutes to make an equally delicious recipe. 

01 Portobello Mushroom Steaks

8 Portobello Mushroom Vegan Recipes That You Can’t Get Enough Of! 12
Portobello Mushroom Steaks

This gluten free and vegan portobello mushroom steak recipe is the juiciest and meatiest out there.

It’s healthy and easy to make, and you can serve it as a main dish or a side. 

I love to have this as a main dish but if you’re serving it to your vegetarian friends, just serve it with pasta, potatoes, some grilled or sauteed veggies, or rice.

Ingredients:

  • 4 large portobello mushrooms with stems removed and cleaned
  • 1 teaspoon garlic powder
  • ¾ teaspoon smoked paprika powder
  • ½ teaspoon coconut sugar
  • 2 tablespoons Balsamic vinegar
  • 6 tablespoons low-sodium gluten free tamari or if you’re okay with gluten, use soy sauce 

Step-by-Step Directions:

Step 1: Preheat your oven to 400°F (204°C). If you’re not sure, find out how long to preheat oven to 400°F. 

Step 2: Clean the portobello mushrooms with a quick rinse and follow up by drying them with a damp towel, making sure all the dirt has been wiped off. 

Step 3: After chopping off the stems, place them with the gill side up on a baking dish lined with foil so that it can catch all the drip and make cleaning up easier.

If you prefer not to have the portobello mushrooms come in direct contact with the aluminum foil, place a piece of parchment paper in between the foil and the mushrooms.

Pro Tip: Don’t throw away the stems as they can be used with other vegetable stalks to make a vegetable broth or stock. 

Step 4: Make a marinade with the ingredients mentioned above and pour about a quarter of the marinade over the undersides of the portobello mushrooms and set aside for 10 to 15 minutes. 

Step 5: Turn the mushroom steaks over, score the tops using a knife, and pour the rest of the marinade over them or use a brush to rub it in. 

Step 6: Bake the portobello mushrooms in the oven for about 15 minutes. 

Step 7: Turn them over, add some of the mushroom marinade from the baking dish, and bake the marinated mushrooms for another 15 minutes. 

Step 8: Remove from the oven and allow a standing time of 10 minutes so that the portobello mushroom steaks can absorb all the juice. 

02 Stuffed Portobellos With Cheese And Spinach

8 Portobello Mushroom Vegan Recipes That You Can’t Get Enough Of! 13
Stuffed Portobellos With Cheese And Spinach

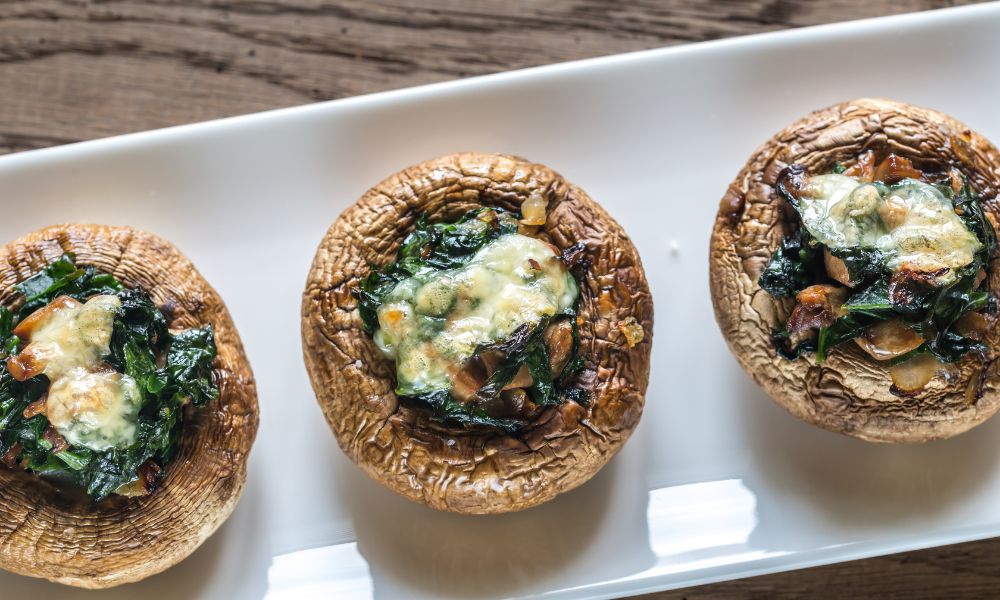
In this stuffed portobello mushroom recipe, we load the roasted portobello mushroom caps with ricotta, spinach, and Parmesan cheese, the ingredients of a vegetarian lasagna filling. 

If you can only get smaller portobello caps, purchase one or two extra and split the filling among all the caps. 

The recipe works best with really large portobello caps. 

Serve these stuffed portobello mushrooms with whole-wheat dinner rolls, a tossed salad, and spaghetti with marinara sauce for a complete meal. 

Ingredients:

  • 4 pieces of large portobello mushroom caps
  • ¼ teaspoon each of salt and pepper
  • ½ cup of grated Parmesan cheese, divided
  • 1 cup of ricotta cheese
  • 1 cup fresh spinach, finely chopped
  • ¾ cup marinara sauce
  • 2 tablespoons kalamata olives, finely chopped
  • ½ teaspoon Italian seasoning

Step-by-Step Method:

Step 1: Set oven to 450°F (232°C) and spray cooking oil on a baking sheet with a rim.

Step 2: Place the mushroom caps on the preheated pan, gill-side up. 

Add 1/8 teaspoon each of salt and pepper. 

Roast for 20 to 25 minutes, or until tender.

Step 3: In a medium bowl, combine the ricotta, spinach, 1/4 cup Parmesan, olives, Italian seasoning, and the rest of the 1/8 teaspoon pepper. 

Put the marinara sauce in a small bowl, cover it, and heat on high in the microwave for 30 seconds to 1½ minutes, depending on the package directions.

Step 4: Pour away any liquid that has collected in the caps of the mushrooms after they are tender. 

Gill-side up, put the caps back in the pan. 

The remaining sauce should be covered to stay warm after spooning 1 tablespoon into each cap. 

Fill each cap with a good 1/3 cup of ricotta, then top with the remaining 1/4 cup of Parmesan. Bake for about 10 minutes, or until heated. 

Use the remaining marinara sauce to serve.

Pro Tip: Turn this into a vegan portobello recipe by using vegan ricotta and vegan Parmesan.

03 Vegan Stuffed Portobello Mushrooms

8 Portobello Mushroom Vegan Recipes That You Can’t Get Enough Of! 14
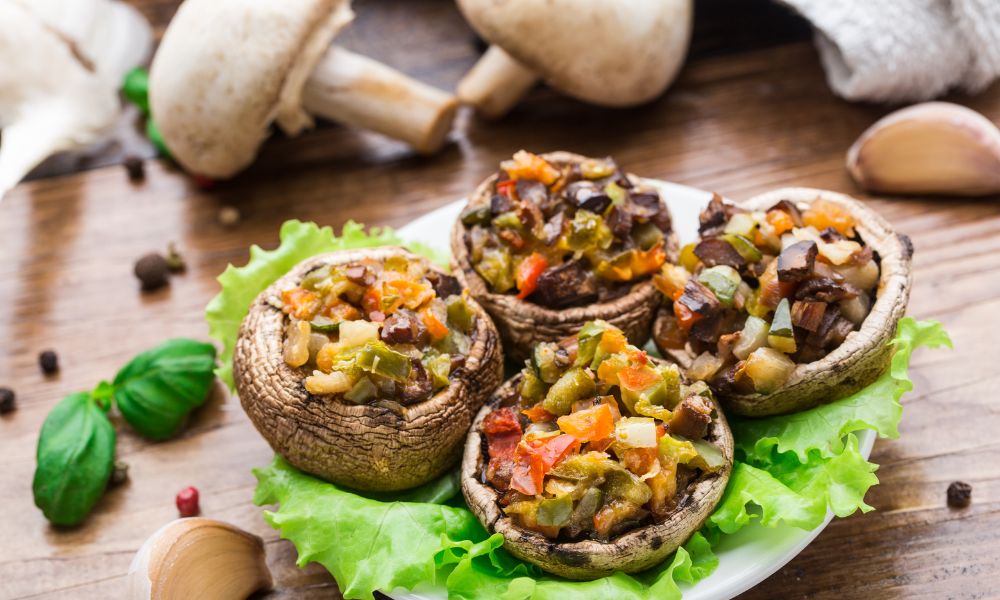
Vegan Stuffed Portobello Mushrooms

A few basic spices and veggies make these roasted portobello mushrooms full of flavor and nutrients. 

They are also gluten free and if you’re a vegan like me, just perfect. 

Serve it as an appetizer or side dish and it’s bound to be a crowd-pleaser. 

The best thing about this stuffed portobello mushroom recipe is that you can make it ahead by preparing the veggie filling and baking it right before you serve your guests. 

Ingredients:

  • 8 large portobello mushrooms, cleaned and stems removed (if you want)
  • ½ teaspoon salt
  • ½ teaspoon smoked paprika powder
  • ½ teaspoon dried oregano
  • 2 tablespoons olive oil
  • 1 cup fresh spinach
  • ½ cup fresh or frozen corn
  • 1 zucchini, diced into ½-inch pieces
  • 1 small onion, diced
  • 3 garlic cloves, freshly grated or minced
  • 1 cup cooked quinoa or you can skip this if you want to make this stuffed portobello mushrooms recipe low in carbs

Step-by-Step Method:

Step 1: The oven should be preheated to 375°F (190°C). 

Using parchment paper, line a large baking pan.

Step 2: Snap the Portobello mushroom stems off at the base to remove them. 

If you’d like, you can cut the stems and add them to step 4 of this recipe. 

Sprinkle salt and pepper on the insides of the portobello mushrooms lightly.

At this point, bake the portobello mushrooms for 3 to 5 minutes (if they are quite large) by placing them upside down on a lined baking pan.

Step 3: In a large skillet over medium heat, cook the diced onion and pepper in the olive oil for 5 to 10 minutes, or until soft. 

Add the minced garlic and cook until fragrant for a few minutes.

Step 4: Add the diced zucchini and cook it until tender. 

Sauté the zucchini and portobello mushroom stems if you’re using them until they become tender. 

After adding the corn and fresh spinach, sauté for 2 minutes or until the spinach shrinks and becomes soft. 

Remove from the flame. 

Step 5: Now is the time to add salt, smoked paprika, dried oregano, and cooked quinoa. 

Stir everything together, then taste it to see if extra salt is necessary. 

Place aside.

Step 6: Turn the Portobello caps upside down, then divide the filling among the 8 caps. 

Bake the Portobello mushrooms for 5 minutes, or until they are tender and cooked to your preference. 

Serve warm and top with vegan Parmesan or fresh parsley.

Notes About This Recipe

Portobello mushrooms: 

You can include the stems in the filling if your portobello mushrooms still have them. 

Simply cut them off at the root, dice them, and then include them with the sliced zucchini in step 4. 

The stems of portobello mushrooms are edible and equally nourishing as the caps themselves.

While preparing the veggie filling, you should pre-bake the portobello mushrooms for three to five minutes if they are especially large. 

But take care not to cook them all the way through. 

To prevent the mushrooms from becoming soggy while baking, flip the caps upside down on the baking sheet (like an umbrella).

Spinach:

You can add more fresh spinach if you want as cooked spinach reduces in amount. 

You may also use frozen spinach; simply thaw it, squeeze out as much excess liquid as you can, and mix it in with the cooked vegetables. 

No sautéing is necessary.

Substitutes: 

Instead of zucchini, you might substitute sliced yellow squash. 

Use what you have in the kitchen — omit the corn, double the quinoa, add some frozen peas, or use bell peppers of a different color!

04 Portobello Mushrooms Stuffed With Chickpeas And Veggies

There’s no end to the variations of the stuffing you can mix and match to make your own version of stuffed vegan portobello mushrooms. 

This stuffed portobello mushroom recipe comes full circle with minerals and vitamins from the veggies and protein and carbs from the chickpeas. 

On top, it’s gluten free and vegan. 

Even your meat-eating friends will be impressed by how good these mushrooms are!

Serve this dish as a light main with a salad on the side, or as an appetizer.

These portobello mushrooms are not only great to eat but also look pretty when you serve them and will perk up any dinner table on any occasion.

Ingredients:

  • 5 portobello mushrooms
  • 1 tablespoon of any neutral cooking oil like olive oil or avocado oil
  • 110 grams of diced onion; choose one small or medium size of onion
  • 1 medium size pepper
  • 1 teaspoon garlic powder
  • 1 teaspoon onion powder
  • Freshly ground black pepper, chili powder, and salt to taste
  • 2 garlic cloves
  • 175 grams of drained and rinsed chickpeas
  • 40 grams or ⅓ cup of chopped walnuts
  • 1 heaped tablespoon of tomato paste
  • 1 tablespoon soy sauce or tamari for a gluten free version
  • 4 tablespoons non-dairy milk
  • ½ tablespoon balsamic vinegar
  • Vegan cheese as per taste
  • Fresh herbs for garnishing

Step-by-Step Directions:

Step 1: Preheat your oven to 360°F (180°C) and line a baking dish with parchment paper.

Step 2: Using a damp towel, clean the portobello mushrooms, trim the stems, chop them, and set them aside. 

Step 3: In a bowl, add the chickpeas and mash them with a fork. 

Step 4: In a large skillet on medium heat, add oil and once it’s heated, add the pepper, onion, and all the spices and stir for 3 to 4 minutes so that everything combines well. 

Step 5: To the skillet, add the chopped walnuts, garlic, and mashed chickpeas. 

Step 6: In a mixing bowl, combine the tamari or soy sauce, balsamic vinegar, non-dairy milk, and tomato paste.

Stir to combine well. 

Step 7: Stir in the chopped mushroom stems and cook for a few minutes to bring out the full flavor of the portobello mushrooms. 

Step 8: Remove the skillet from the stovetop. 

Step 9: Arrange the portobello mushrooms in the lined baking dish and spoon out the filling to cover completely. 

Step 10: Bake for 10 minutes then sprinkle with vegan cheese and bake for another 10 minutes.

Step 11: Garnish with fresh herbs and serve. 

Notes About This Recipe:

Chickpeas: Instead of canned chickpeas, if you have dried chickpeas, you can soak them overnight and boil them the next day until they become tender. 

Walnuts: You can substitute the walnuts for a nut-free version with pine nuts or sunflower seeds. Just dry roast them to extract the full flavor before adding them to the filling. 

Vegetables: Instead of pepper, you can use other veggies like frozen or fresh spinach, corn, peas, diced carrots, cauliflower rice, and others. 

Spices: For a smoky flavor, use smoked paprika powder.

Or, if you want to have a more South Asian flavor, you can add ground cumin and coriander. 

Make-Ahead:

Prepare the stuffed mushrooms with chickpeas and vegetables as a make-ahead, cover them in cling wrap, and refrigerate them in an airtight container for up to two days. 

You can bake them chilled for an additional two minutes just before serving. 

Alternatively, you can freeze the portobello mushrooms with the stuffing.

Just put them on a tray, freeze them, take them out, and transfer them to an airtight container. 

Put them away in the freezer and they can be stored for up to three months. 

05 Mushroom Chickpea Curry

8 Portobello Mushroom Vegan Recipes That You Can’t Get Enough Of! 15
Mushroom Chickpea Curry

Portobello mushrooms and chickpea curry are my favorite fall and winter warmer.

A bowl of this vegan portobello curry will warm your mind, body, and soul like no other. 

Not only is this recipe easy to make but it’s also gluten free and naturally vegan. 

That’s why you can serve it to your guests also who follow a strictly vegan diet. 

Speaking of which, on a side note, you may want to find out the top 20 high protein vegan breakfast ideas to start your day on the right note.

Without any further rambling, let’s get on to the recipe.

Ingredients For The Spice Blend:

  • 1 teaspoon sea salt
  • 1 teaspoon turmeric powder
  • 1 teaspoon coriander powder
  • 1½ teaspoons cumin powder
  • 2 teaspoons garam masala
  • 1½ teaspoons mild chili powder

Ingredients For The Curry:

  • 8 portobello mushrooms
  • 2 tablespoons vegetable oil or olive oil
  • One large onion, finely chopped
  • 5 garlic cloves, crushed or minced
  • 1 tablespoon finely grated fresh ginger
  • 400 grams or 14 oz drained and rinsed cooked chickpeas
  • 1 tablespoon tomato paste
  • ½ cup tomato passata or 3 chopped large tomatoes or chopped or crushed canned tomatoes
  • 2 cups of baby spinach
  • 1 cup vegetable stock
  • 1 cup coconut milk
  • 1 to 2 tablespoons vegan butter

Step-by-Step Instructions:

Step 1: Clean the portobello mushrooms with a damp cloth and trim the stems. 

Step 2: Cut the portobello mushroom caps into thick slices. 

Step 3: The onion should be sautéed in a skillet with vegetable oil or olive oil over low to medium heat for 5 minutes, or until tender. 

Stir in the spice mixture before adding the garlic and ginger and leave to simmer until fragrant.

Step 4: Add the portobello mushrooms and chickpeas and stir to coat them properly in the fragrant spice blend. 

Step 5: Add the coconut milk, vegetable stock, tomato paste, and tomato passata or its sub.

Step 6: Turn the flame on high to bring to a boil the mushroom chickpea curry. 

Then turn it down low and allow it to simmer for 40 minutes until the sauce becomes thick. 

Step 7: Turn off the stove and remove the pot. 

Add the vegan butter and the spinach. 

The fresh spinach should wilt after 5 minutes.

Your delicious portobello mushroom chickpea curry is now ready to serve with pita bread or steamed rice. 

06 Vegan Mushroom Gyros

8 Portobello Mushroom Vegan Recipes That You Can’t Get Enough Of! 16
Vegan Mushroom Gyros

Greek kebabs, or gyros, are often made with lamb, beef, or chicken that has been roasted on a vertical rotisserie spit and is then packed inside pita bread with salad and tzatziki sauce. 

In place of the meat in this recipe, the flavorful marinated mushrooms give the meal a meaty feel. 

Vegan Worcestershire sauce gives the mushrooms an umami taste, and thyme, cumin, and cinnamon add more flavor to the dish.

So, this recipe is divided into three parts – the pita bread, the mushrooms, and the tzatziki sauce.

Only if you’re brave enough to make everything from scratch should you attempt this recipe. 

Otherwise, you can always buy store-bought tzatziki sauce and pita bread

But that, my friend, won’t give you the same satisfaction and flavor as making your own.

Ingredients For The Pita Bread:

  • 500 grams of white bread flour
  • 14 grams yeast
  • 2 teaspoons sugar
  • 1 teaspoon of sea salt flakes
  • 3 tablespoons of extra virgin olive oil
  • 300 milliliters of warm water

Ingredients For The Portobello Mushrooms:

  • 4 to 6 portobello mushrooms
  • 3 cloves of crushed garlic
  • 1 sliced onion
  • Sea salt and black pepper to taste 
  • 1 teaspoon ground cumin
  • ½ teaspoon cinnamon powder
  • 1 teaspoon dried oregano
  • 2 teaspoons of paprika powder
  • 1 teaspoon thyme
  • 1 tablespoon olive oil
  • 1 teaspoon liquid smoke
  • 1 tablespoon lemon juice
  • 1 tablespoon of vegan Worcestershire sauce

Ingredients For The Tzatziki Sauce:

  • 300 grams of non-dairy yogurt
  • Half a cucumber grated coarsely and drained
  • 1 tablespoon of lemon juice
  • 1 teaspoon sugar
  • Sea salt and black pepper to taste
  • 1 tablespoon of fresh dill chopped finely
  • 1 tablespoon fresh mint chopped finely
  • 1 clove of garlic, crushed

You will also need the following fresh vegetables as fillings in the gyros:

  • Sliced cucumber
  • Shredded iceberg lettuce
  • Fresh green chilies sliced finely
  • Red onion sliced finely
  • Pickled red cabbage
  • Chopped coriander and dillIf you can’t find dill, you can always use any of the best substitutes for dill.

Step-by-Step Directions:

Step 1: Combine flour, sugar, salt, and yeast in a large bowl to make the pita bread. 

Step 2: Add the warm water and olive oil gradually as you mix with your hands. 

Step 3: Knead the dough for a few minutes with your hands.

Step 4: Put some oil on the counter and knead the dough on this surface for 6 to 8 minutes until the dough becomes soft and non-sticky. 

Step 5: Coat all around with some oil, place in a bowl, cover, and leave for an hour in a warm place to rise. 

Step 6: Slice the portobello mushrooms into ¼-inch thick slices.

Step 7: Mix in all the marinade mix, coat all the mushrooms well, and refrigerate until it’s time to cook them. 

Step 8: To make the tzatziki sauce, combine the sea salt, garlic, and cucumber and spread this mixture on a plate lined with a couple of layers of tissue paper to absorb the moisture. 

Step 9: In a bowl, combine the rest of the tzatziki ingredients.

Step 10: Now add the cucumber mixed with garlic and sea salt into the bowl and mix well.

Step 11: Check the seasoning, adjust as per taste, and refrigerate. 

Step 12: When the dough has risen, knock the air out of it before transferring it to a floured surface. 

Make 8 equal balls of dough and roll each one as thinly as you can, leaving it to rest for a few minutes.

Step 13: On high flame, heat a large frying pan.

Add some oil to one side of a pita with a brush and put that side on the hot pan.

Step 14: Leave to cook until the bread begins to puff up and bubbles develop. 

Once dark scorch marks have emerged on the underside, turn the pita after brushing the uncooked side with oil.

Step 15: When both sides have browned, remove from the pan and set aside covered by a kitchen towel to keep the pita warm. 

Step 16: Heat another pan and add a drizzle of oil. 

Add the mushrooms and their marinade, stirring quickly while being mindful not to break the slices.

Step 17: Remove the mushrooms from the pan once they have browned and the marinade has been completely absorbed.

Step 18: When it’s time to serve, arrange your own wraps using the pitas, cooked portobello mushrooms, salads, and tzatziki on a serving plate.

07 Portobello Mushroom Pita

8 Portobello Mushroom Vegan Recipes That You Can’t Get Enough Of! 17
Mushroom Pita

If the previous recipe seems too time-consuming, you can cut to the chase and make easy portobello mushroom pita in a jiffy. 

The simple 3-step process is quick – takes less than 30 minutes – but the stuffed mushrooms are full of meaty and umami flavors. 

Perfect for a busy weekday or after a long day at work when you don’t want to spend a lot of time in the kitchen but would like to have something delicious. 

For a vegan version, just order some vegan pita bread, vegan mayonnaise (I love Hellman’s), and any other ingredients you need to make the filling.

Ingredients:

  • About ¾ pounds or 4 portobello mushrooms 
  • 4 large whole wheat pita bread
  • ½ cup regular light or vegan mayonnaise
  • 1 clove of finely chopped garlic
  • ¼ teaspoon salt
  • ¼ cup Parmesan cheese, grated 
  • 2 tablespoons fresh basil leaves, chopped or you can sub with 1 teaspoon of crushed, dried basil leaves
  • 2 red onions cut into ¼-inch thick round slices
  • 1 medium-sized tomato, thinly sliced
  • Lettuce leaves

Step-by-Step Method:

Step 1: Combine mayonnaise, salt, garlic, basil, and cheese in a bowl and set aside. 

Step 2: If you want, season the mushroom caps and onions with salt and freshly ground black pepper. 

Grill or broil the portobello mushroom caps and onions for 8 minutes, or until tender, flipping once.

Step 3: Arrange the pita bread on a serving plate.

Spread half of the mayonnaise mixture on the pita bread and top with portobello mushrooms, tomato, onions, and lettuce leaves. 

Then drizzle with the rest of the mayonnaise mix.

08 Portobello Steaks With Avocado Chimichurri 

8 Portobello Mushroom Vegan Recipes That You Can’t Get Enough Of! 18
Portobello Steaks With Avocado Chimichurri

This roasted portobello mushroom in a saucy marinade with avocado chimichurri will make you forget all about beef burgers. 

It’s an easy, 30-minute recipe that you can whip up in a short time and surprise your friends and family. 

And if you’re wondering what chimichurri is, well, it’s a strong sauce with origins in Argentina and Uruguay.

It usually contains parsley, garlic, olive oil, vinegar, oregano, and red pepper flakes. 

You can add other seasonings too and use chimichurri either as a condiment for chicken, fish, or roasted beef steak, or you can use it as a marinade.

In this recipe for serving three people, we will use chimichurri as a condiment. 

Ingredients For Chimichurri:

  • 1½ cups parsley, finely chopped
  • 2 to 3 cloves of garlic, minced
  • 1 medium shallot, minced
  • ¼ teaspoon red pepper flake
  • 2 tablespoons olive oil
  • 2 tablespoons lemon juice or red or white vinegar
  • ½ teaspoon sea salt
  • ½ teaspoon black pepper
  • 1 ripe, small-sized avocado

Ingredients For Roasted Portobello Mushroom Steaks:

  • 3 large portobello mushrooms
  • 3 tablespoons balsamic vinegar
  • 2 tablespoons olive oil
  • ¼ teaspoon smoked paprika powder
  • ½ teaspoon ground cumin
  • ½ teaspoon black pepper
  • 3 cloves of minced garlic
  • 1 tablespoon steak sauce (use a vegan option if you want)

Step-by-Step Method:

Step 1: Clean the portobello mushrooms with a quick rinse and use a damp towel to dry and remove any dirt. 

Step 2: In a shallow baking dish, place the portobello mushrooms. 

Step 3: Combine together the balsamic vinegar, olive oil, cumin, black pepper, paprika, garlic, and steak sauce in a small mixing bowl. 

If necessary, taste and adjust the seasonings.

Step 4: Using a pastry brush, coat each side of the mushrooms with sauce.

Marinate each side for 5 minutes. 

Step 5: Make the chimichurri by combining parsley, garlic, shallot, red pepper flakes, olive oil, lemon juice, salt, and pepper in a medium mixing bowl. 

Taste the dish and make any necessary flavor adjustments by adding additional salt, lemon juice, or red pepper flakes as desired. 

Toss in the avocado and set it aside.

Step 6: Heat a grill or a skillet to medium heat. 

Cook each marinated portobello mushroom for two to three minutes on each side, or until deeply browned and caramelized. 

To add more flavor when cooking, brush on any leftover marinade.

Step 7: Plate the portobello mushroom steaks and top with avocado chimichurri. 

Portobello mushroom is not really a vegetable, but a type of fungi. 

Mushrooms don’t have roots, leaves, or seeds and therefore, cannot be in the same category as a true vegetable.

FAQs

Should I Remove Gills From Portobello Mushrooms?

Although a portobello mushroom’s gills can be eaten, most people choose to remove them as they can give your dish a murky appearance, which can be a turn-off.
Some people say that the gills taste bitter.
Others remove the gills in order to get rid of any dirt or debris that might be under them.

Is Portobello Mushroom Good For Weight Loss?

Portobello mushrooms are a nutritious addition to any diet since they offer a lot of important nutrients while being low in calories. 
This is especially true if you substitute them for meat, which is higher in calories, fat, and cholesterol, therefore, making portobello mushrooms good for weight loss.

Should I Wash Portobello Mushrooms?

Yes, it would be best if you washed portobello mushrooms, especially under the cap where the gills can hide dirt.

What Is The Difference Between A Portobello And A Portabella?

There is no difference between a portobello and a portabella mushroom.