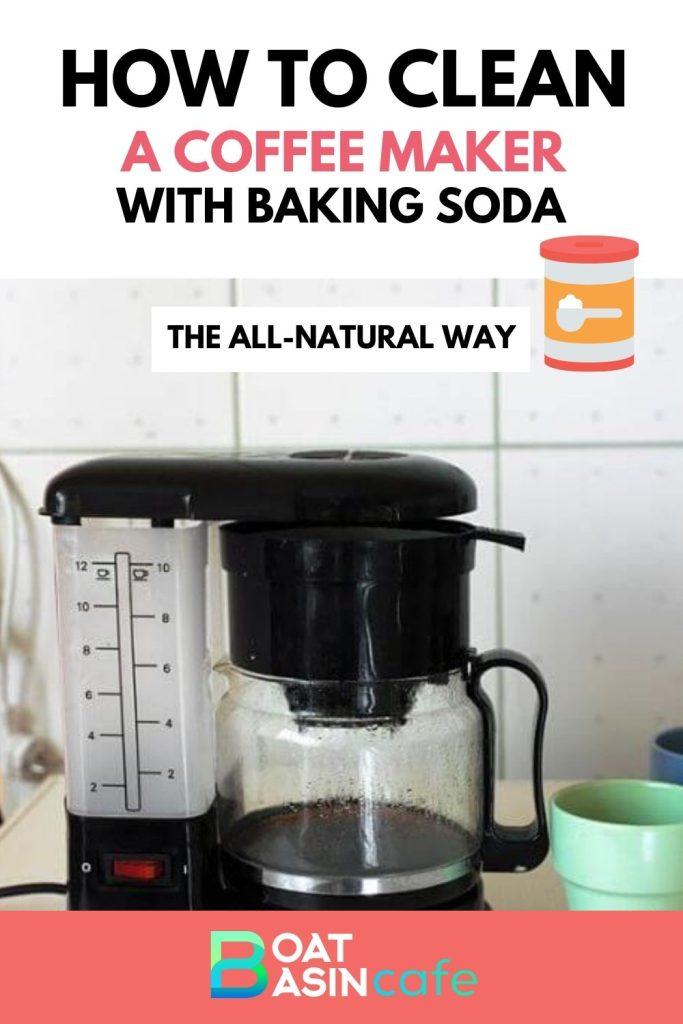
How to Clean a Coffee Maker with Baking Soda: The All-Natural Way

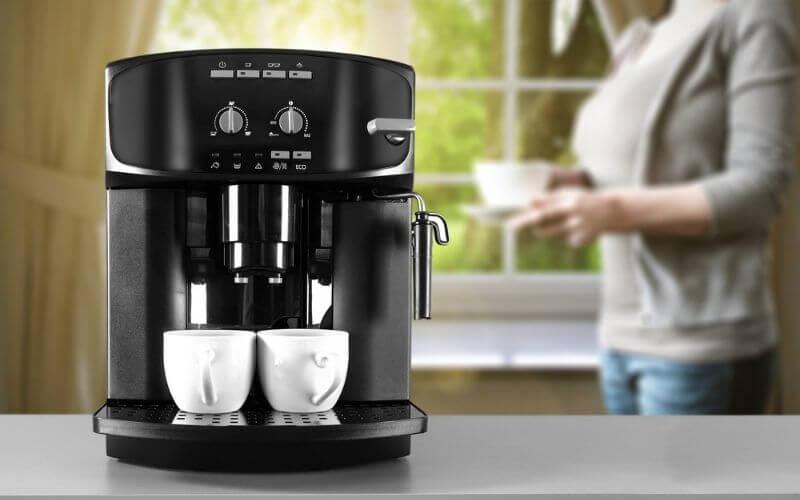
Sick of the gunk in your coffee brewer? This article tells you how to clean a coffee maker with baking soda.

How to Clean a Coffee Maker with Baking Soda: The All-Natural Way
How to Clean a Coffee Maker with Baking Soda

Most of us wake up and reach for our coffee pots before we start the day. This makes our humble coffee makers be the most frequently used appliance at home. 

It is also the most reliable item at home. After all, we all depend on multiple cups of coffee to get us through the day.

However, this means that it is also pretty neglected when it comes to maintenance. After all, when was the last time you gave your coffee machine a good cleaning? 

A coffee maker needs to be cleaned often, as remnants and dirt can result in coffee that tastes more like bog water.

To clean out coffee makers, you need a good cleaning agent. However, using strong chemicals and cleansers can often end up giving your coffee strange, soapy flavors. 

As an alternative, you can always use chemical-free home remedies using products already in your home. In this article, we will show you how to clean a coffee maker with baking soda.

Why Baking Soda?
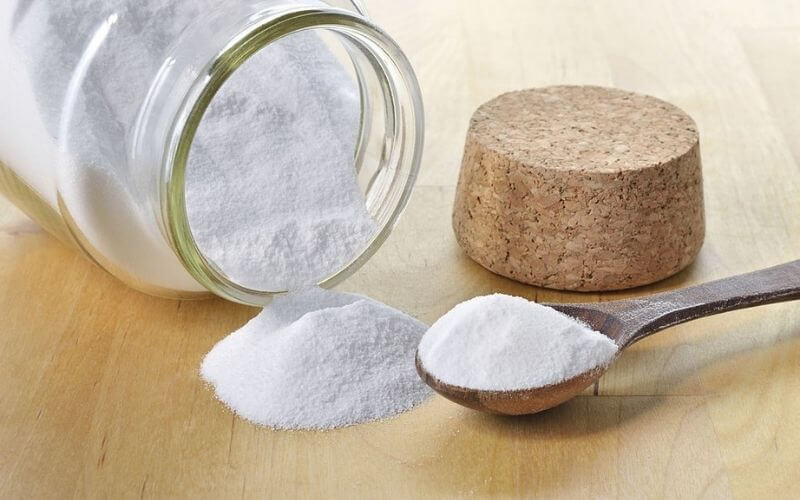
Cleaning with Baking Soda

If you’re skeptical about whether you can get a clean coffee pot with baking soda, we feel you. After all, baking soda is pretty nondescript and you will need a strong detergent to get a properly cleaned appliance.

But you can absolutely get a clean coffee maker with baking soda. Baking soda is in fact a natural yet effective way to clean your coffee machine. This is because baking soda can get rid of build-up and remove lingering odors from the appliance.

For the best results, add a quarter cup of the baking soda to the container, dissolved in water. Make sure to use warm water and stir the mixture together so that there are no lumps. Run the coffee maker on a regular cycle, flushing out the insides.

If any lumps are remaining, your coffee maker can get clogged. Although this product is abrasive, it is still gentler than store-bought cleaning agents. As a result, it will melt away residue and build-up, as well as strange smells that can stink up your brew.

For best results, you can mix the baking soda with acidic solutions. For example, cleaning coffee makers with white vinegar is a well-known home remedy and you can use both for a sparkling clean coffee machine.

How to Clean a Coffee Maker with Baking Soda
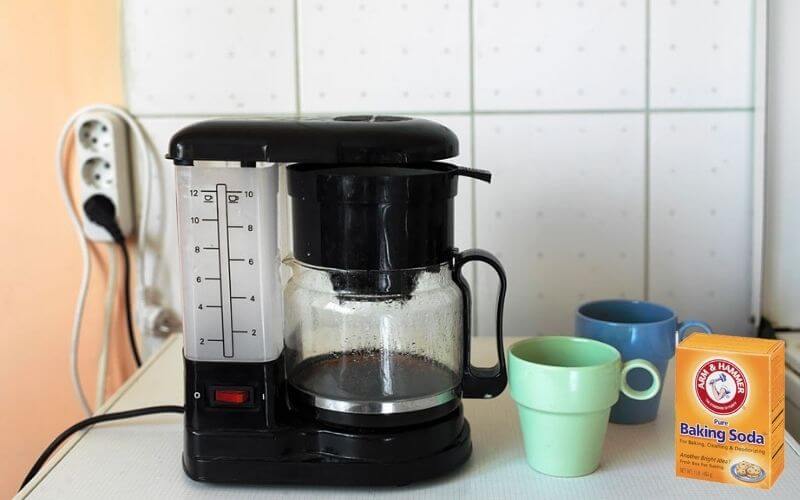
How to Clean a Coffee Maker with Baking Soda

Using Just Baking Soda:

Follow these steps to thoroughly clean your coffee maker with baking soda, plain and simple.

What you will need:

  • A cup of warm water
  • 4-6 tablespoons of baking soda
  1. Measure out a cup of warm water and add the necessary amount of baking soda.
  2. Stir the baking soda into the water until it is fully dissolved, without any lumps.
  3. Pour this mixture into the tank of your automatic coffee maker.
  4. Turn on your coffee machine, and start a brewing cycle as you normally would.
  5. Running the cycle will allow the solution to flow through all the parts of the coffee maker, cleaning residue, gunk, and lingering odors.
  6. Allow the solution to drain into the carafe, coffee pot, or any other vessel.
  7. Empty the vessel and rinse it clean.
  8. Fill the tank with plain clean water and run another cycle to flush out the baking soda solution. This step may have to be repeated until the coffee maker dispenses plain water.

Using Vinegar and Baking Soda:
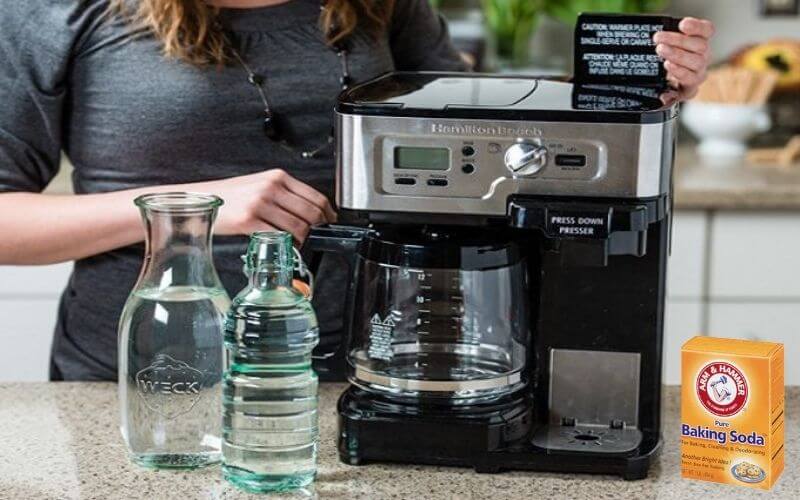
Using Baking Soda
Using Baking Soda

You might have heard about using a cleaning coffee pot with vinegar solutions. But you can also use vinegar to clean coffee maker parts in general. When mixed with baking soda, it makes for a very potent cleaning solution.

White vinegar has many uses with coffee machines. A plain mixture of vinegar diluted with water is great for cleaning Mr. Coffee coffeemaker. You can even try descaling the Ninja coffee bar with vinegar, as it dissolves buildup from hard water.

What you will need:

  • A soft cloth
  • Half a cup of baking soda
  • 4 tablespoons of white or apple cider vinegar
  • Water (optional)
  1. Mix the baking soda with vinegar until it forms a smooth paste. You can add water to dilute the mixture.
  2. Apply this paste to the area with buildup in your coffee pot, carafe, and heating plate.
  3. Let the paste rest, dissolving the buildup over time.
  4. Use a damp cloth to get rid of the paste and rinse the pot and carafe in clean running water.
  5. Keep rinsing with water, or let the parts soak in lots of water overnight to get rid of the strong smell of vinegar.

Caution:

  • Dissolving baking soda with vinegar and running a brew cycle with this mixture might damage the internal parts of your coffee maker. However, you can run vinegar through a coffee maker, diluted with water to clean the different components.
  • To clean a glass coffee pot or carafes, be wary when using abrasive materials like baking soda as it can scratch the material and damage it.
  • After using vinegar and/or lemon juice, you might have to run your brewer with normal water until it no longer smells like vinegar.

Pro-Tips:

  • Adding salt to your baking soda can neutralize funky odors.
  • You can also replace the vinegar with an equal amount of lemon juice.
  • If your coffee maker has a stainless-steel exterior, use a baking soda-vinegar paste to buff off stains and caked-on residue.
  • Including a little dishwashing fluid in the reservoir is a great idea for a deep clean.

Frequently Asked Questions

In this section, we answer questions you might have about cleaning your coffee maker with baking soda.

01. How Can I Clean My Cuisinart Coffee Maker?

To clean your Cuisinart coffee maker, clean, fill the water reservoir to capacity with a solution consisting of 1-part white vinegar to 2 parts water. Hold down the Clean button. Once the self-clean indicator lights up, turn the coffeemaker on by pressing the on/off switch.

When the cycle is completed and the five beeps sound, your coffeemaker will turn off. Turn the coffeemaker on again to check if the Clean indicator continues to flash. 

If it does, switch it off again. Then repeat the cleaning process with a new solution of vinegar and water.

If the Clean indicator doesn’t light up, turn the coffee maker off and then run one or two cycles of fresh cold water through the brewer before using the unit again to brew coffee. This will remove the smell of vinegar in the coffee maker.

02. What is the Black and Decker Coffee Maker Cleaning Procedure?

Clean the Black + Decker coffee maker with vinegar once a month to prevent scales from forming due to hard water.

Fill half of the tank with white vinegar and half with water. Put a clean filter in the filter basket and press the ON/OFF button to begin the brewing cycle. 

Allow the carafe to fill halfway and then turn off the coffee maker. Now let the coffee maker and carafe soak for 15 minutes and then turn the machine on again to finish the cycle.

Drain the vinegar and water solution from the reservoir and carafe. Add fresh water and run the machine for another cycle to clean out the vinegar solution from the coffeemaker. If you can still smell the vinegar, repeat the brewing cycles with clean water as needed.

03. Can I Use Baking Powder Instead of Baking Soda to Clean My Coffee Maker?

You can replace baking soda with baking powder but you will need to double or even triple the amount to get the same cleaning power. This is because baking powder is mixed with cream of tartar, making it less potent.

04. Does Baking Soda Get Rid of Stains in Coffee Pots?

The abrasive nature of baking soda means that it scrubs off build-up and residue that gets stuck to your coffee maker. It can also dissolve oils from your coffee beans that build up in your coffee machine. 

These oils can stain the coffee maker and carafe, and you can use a paste made from baking soda to clean these stains.

To Sum Up

You might put off cleaning your coffee maker, without thinking much will come of it. However, one day can stretch into a week and the next thing you know, your coffee machine has a whole ecosystem thriving in it.

Getting rid of the gunk in your coffee machine can seem exhausting, but it doesn’t have to be. Your coffee machine basically does the work for you. Once you know how to clean a coffee maker with baking soda, you can stay on top of a regular cleaning schedule.

More Related Articles:

Pin Later

Cleaning your Coffee Maker with Baking Soda
How to Clean a Coffee Maker with Baking Soda

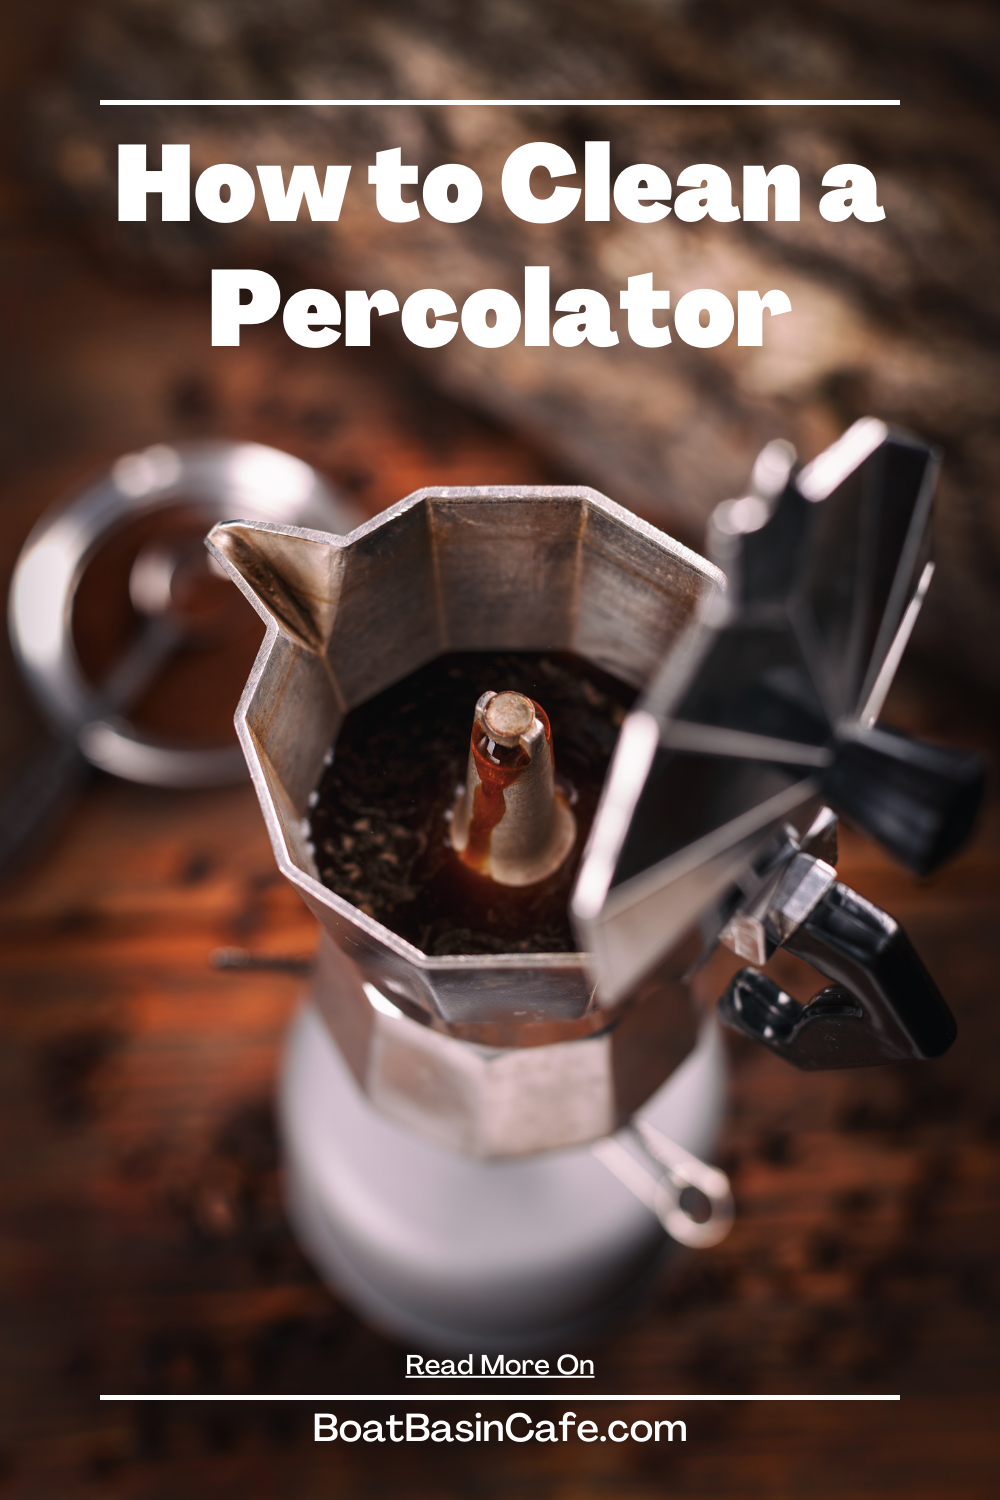
How to Clean a Percolator: Like a Pro!

Got a dirty percolator that you’re not sure how to fix? This will show you in detail how to clean a percolator.

How to Clean a Percolator: Like a Pro!
Travel Blog Pinterest Pin

Whether you like a hot cup of coffee to get the day started or a frothy latte to settle in after a long shift, the taste of a good solid cup of coffee can lift the dampest of spirits.

This rings especially true for percolator coffee. This kind of brew is much stronger and more intense than something brewed in a French Press or drip coffee maker. But what do you do when your coffee tastes stale, burnt, and reminiscent of swamp water?

The issue may be that your old percolator coffee pot needs a good cleaning. Coffee residue can linger in your coffee maker, as well as minerals from the water used can build up. This, along with remnants of used grounds can haunt your percolator, ruining the taste of your coffee.

The idea of a coffee percolator cleaner can be intimidating, but it doesn’t have to be that way.  In this article, we will look at the methods on how to clean a percolator. Whether you own a traditional stovetop percolator or an electric one, we have you covered.

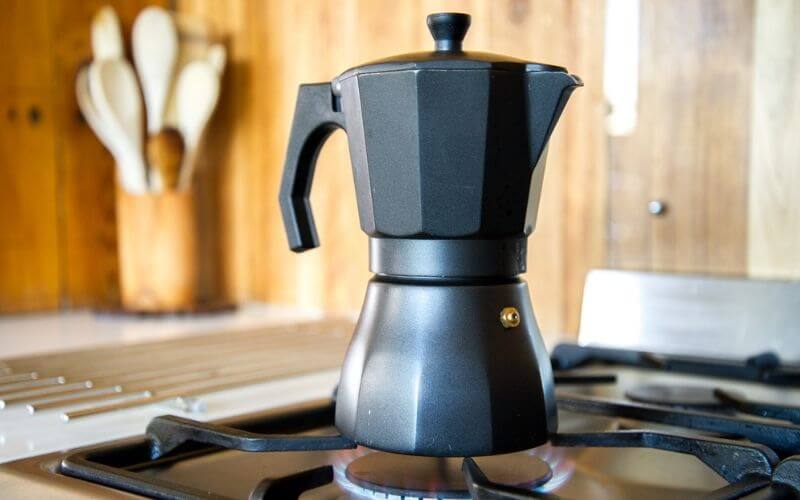
How to Clean a Stovetop Percolator

How to Clean a Percolator
Stovetop Percolator

Coffee is notorious for leaving stains. Whether it is a marble or glass coffee pot, or a stainless-steel percolator, coffee will leave stains over time. In this section, you will learn how to clean a stainless-steel coffee percolator.

A stovetop percolator is easier to clean as you don’t have to worry about the wiring and circuits. These percolators are also more long-lasting and will work for years; even being passed down from generation to generation.

While you should wash your percolator with dish soap after every use, this is more suitable for deep cleaning the unit every month. Here is how to clean stainless steel coffee pots.

What You Need:

  • Brush
  • Baking Soda
  • Salt (Optional)
  • Water
  • Apple Cider or White Vinegar

What You Need to Do:

  1. Fill your percolator with water.
  2. To the water, add a quarter cup (4 tablespoons) of baking soda. You can add a spoon of salt as well if your coffee maker is smelly.
  3. Place it on the burner and let it run a cycle.
  4. Let the water cool slightly, then scrub the inside with a brush to loosen any residue and build up.
  5. Throw out the water and rinse well.
  6. Then, fill your percolator with equal parts water and vinegar.
  7. Run another brewing cycle and wait for the percolator to perk; then discard the water and rinse again.
  8. Run a third cycle of fresh, clean water to rinse any leftover vinegar or baking soda. You can repeat this step until you are sure your percolator doesn’t smell like vinegar.

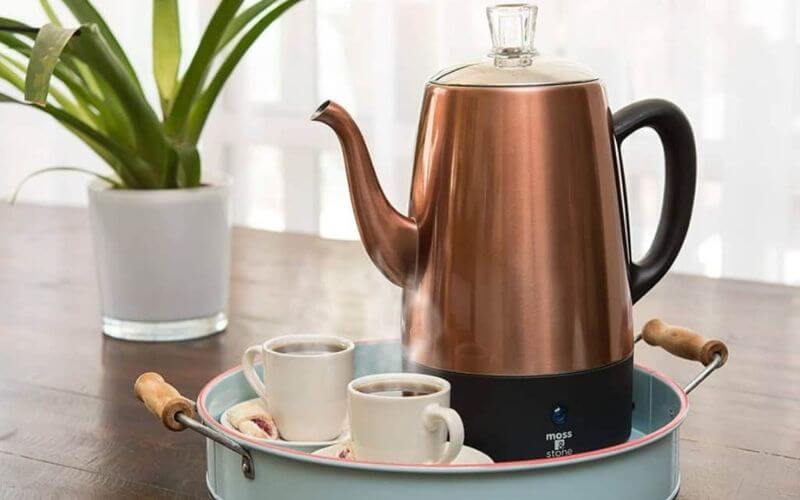
How to Clean an Electric Percolator

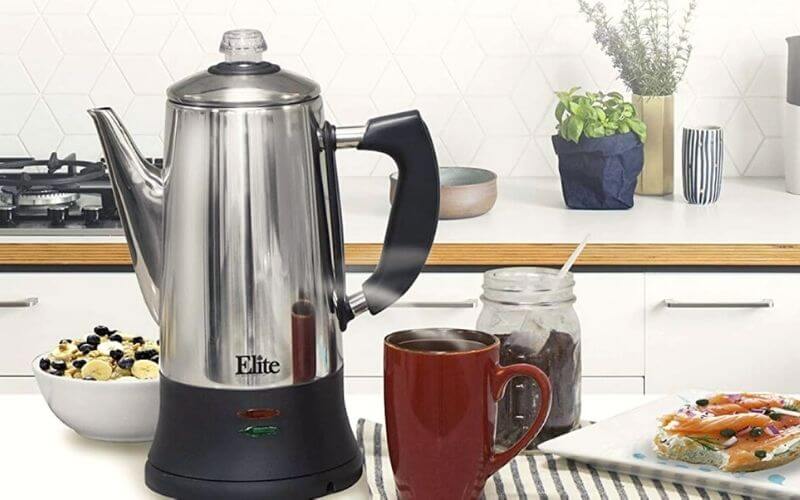
Electric Percolator
Electric Percolator

If you own something like a West Bend percolator, this section is for you. Let’s find out how to clean an electric coffee pot or percolator.

What you need:

  • Dishwashing detergent or Dip-It percolator cleaner
  • Baking soda
  • White vinegar
  • Hydrogen Peroxide (Optional)

What you need to do:

Basic Cleaning:

First, you need to clean the percolator the regular way. Unless mentioned otherwise, do not try cleaning your percolator in a dishwasher. Also, do not use steel wool scrubbers and harsh abrasive materials as this will scratch and damage your percolator.

You should always use something like a washcloth or soft rag. If there’s a stubborn stain or residue, use a plastic scrubber or dish brush. Harsher materials will scratch off the protective coating and your percolator will rust or stain easily.

When cleaning your percolator, remove any trapped coffee granules in the small spaces between parts. You can get rid of them with a toothpick or a pin.

Vinegar Wash:

Removing limescale and buildup is one of the most important parts of deep cleaning your percolators. A lot of this buildup is calcium and other salts from your water and can be dissolved in acidic solutions like vinegar.

  1. Dry the coffee maker and prepare it for use. You have to run a cycle with a solution of vinegar and water.
  2. To do this, fill half the percolator with water. Then, add vinegar until the percolator is full. This mixture will descale the inside and parts, neutralizing alkaline compounds without ruining the metal.
  3. Insert the basket, close the lid, and start a brew cycle. Give this solution 15 to 20 minutes to do the descaling.
  4. After this time passed, unplug the percolator and pour out the water. Let it cool for another 15 minutes, and then wash it by hand with dish soap or Dip-It coffee cleaner for percolators.
  5. Next, dry the percolator and fill it with fresh water. Plug it in and run another brew cycle. Empty out the water and repeat again with clean water. This will remove the smell of vinegar from the percolator.

In most cases, this vinegar brew is enough to clean your percolator. But if it is extreme, you might need the next step for a more thorough cleansing.

Baking Soda Scrub:

While most grime and residue are generally washed out with either soap or vinegar, more significant buildup will need something more abrasive to clean. This something is baking soda, and the gritty texture does a good job of removing stains, smells, and stubborn residue.

  1. To clean with this pantry staple, drop a tablespoon or two of baking soda in your percolator and dissolve it in some water. Let the mix sit for a few minutes.
  2. Then, wash and rinse as usual. You can use a dishcloth or soft brush for extra cleaning power.
  3. If there are still stains and gunk in your percolator, it may be time for a different remedy. Use a mix of hydrogen peroxide diluted in water to clean your percolator.
  4. Still dirty? This might help.
  5. Coat the dirty surfaces with a paste made from baking soda and a tiny bit of water. Let it sit for a couple of minutes and settle.
  6. Pour vinegar over this mixture. The fizzy neutralization reaction loosens up hardened gunk and residue.
  7. After the fizzing has subsided, rinse with water and enjoy your clean percolator.

How to Clean a Percolator Basket

Percolator Basket
Percolator Basket

Often, you don’t have to clean your entire percolator; just the basket. This is the part that tends to get most of the build-up and is used most frequently.

This saves a lot of time that would have been spent deep cleaning your entire percolator.

To clean your percolator basket, soak it in a mixture made of equal parts hot water and vinegar. Let it soak in the solution for a couple of hours, and even overnight.

Rinse well afterward and run a cycle with plain water to get rid of the vinegar smell if needed.

How to Keep Your Percolator Clean

Keeping your percolator clean can prevent the need for frequent deep cleaning, saving you precious time and elbow grease.

  • Rinse out the percolator after each use. Empty the basket and wash it out with dish detergent.
  • Use a soft cloth, dish scrubber, or brush to clean the percolator to prevent scratching the unit.
  • Throw out any coffee that remains in the percolator instead of letting it marinate in the pot for hours.
  • Only use a little soap of dish fluid to prevent your coffee from tasting soapy.

Any Questions?

Here we answer questions you might have about cleaning your percolator.

01. Where Can I Find Parts for Farberware Percolator?

These parts can be found on Amazon, Etsy, and eBay. The parts include the basket washer and even cords that need replacing.

02. Can I Use Salt to Clean My Percolator?

Adding salt can neutralize stale and burnt smells in your coffee maker. However, using it to replace the baking soda can scratch up the steel of your percolator.

03. Can I Use Lemon Juice Instead of Vinegar for Cleaning?

Swapping vinegar for an equal amount of lemon juice will work just fine to remove build-up and residue in your percolator.

04. How Do I Unclog a Percolator?

Mix half a cup of hydrogen peroxide with vinegar and let the mix sit in your coffee maker for about an hour. Pour out the mixture and rinse the percolator with hot water.

Conclusion

The best way to get the most out of your coffee maker is to keep it clean and functional. Know that you know how to clean a percolator, you can keep yours in the best shape possible. With a clean and spiffy percolator, you can brew the strongest and freshest tasting coffee right at home.

A clean unit will brew barista-style coffee no matter what. And with that strong coffee as a base, you can flex your home brewing skills and make things like smooth and rich lattes, cortados, and mochas right in your kitchen.

More Related Articles:

Pin Later

How to Clean a Percolator Like a Pro
How to Clean a Percolator

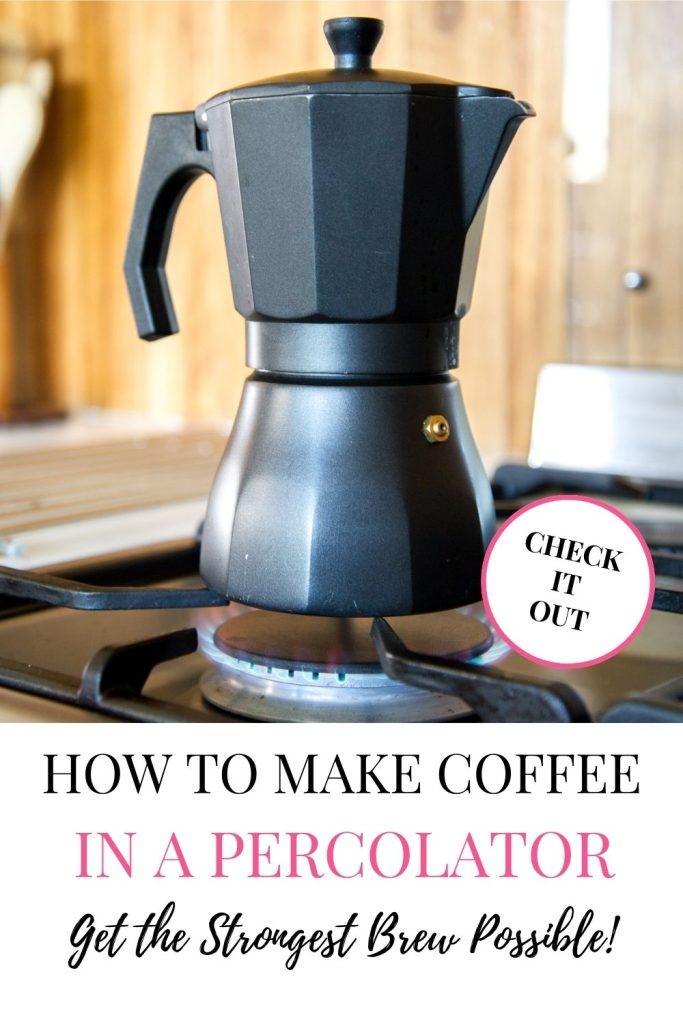
How to Make Coffee in a Percolator: Get the Strongest Brew Possible!

If you’re a coffee enthusiast, you may have tried out coffee brewed in all the usual ways. Whether it’s something potent made in an espresso machine, the nasty brew from a drip automatic coffee maker, or the nicer ones made in a French Press or Moka pot.

But how about something a lot more old-timey? Percolators have been around for decades and are often dismissed as something old-fashioned and difficult to use. 

But this isn’t true at all. Coffee brewed in a percolator is stronger, heavier, and tastes more potent than anything made in a coffee maker.

If you have a hand-me-down percolator from your grandparents, it is worth dusting it off and giving it a try. Not sure how it works? The mechanism is pretty simple and the appliance is easy to use.

But that’s not all. We are going to tell you how to make coffee in a percolator. If you are tired of weak and mild brews, no matter how strong you brew your joe, it’s time for the percolator!

What is a Percolator?

How to Make Coffee in a Percolator

To describe this appliance or brewer in the simplest of terms, it is a sort of kettle with a mechanism that draws and trickles hot water through the grounds. 

The term percolate generally describes a process of filtering something through a porous surface. When the water passes through the grounds, the coffee is brewed.

While brewing coffee, the percolator recirculates it through the grounds several times. As a result, it is brewed more than once. This means that the coffee will smell incredible, but it will also be very strong and potent, and even a little bitter for some.

People also dismiss an old-fashioned coffee percolator because they result in a little sediment or coffee grounds in your cup. This also makes the coffee taste a little extra bitter. For these reasons, people prefer using drip coffee makers instead of percolators

However, if you want to try this method to brew coffee and practice a little, you will be able to brew an incredible cup of coffee using a percolator. You just need to find the percolator that suits you best and learn how to use it properly.

Percolator Types:

There are two main kinds of percolators:

01. Stovetop Percolators:

How to Make Coffee in a Percolator: Get the Strongest Brew Possible! 1

These brewers need an external heat source and are generally placed on top of stovetop burners. They are very convenient because you take them with you and use them anywhere with a stove. 

They enable you to make coffee on the stove. However, you need to keep an eye to make sure the water doesn’t boil over and burn the coffee.

02. Electric Percolators:

How to Make Coffee in a Percolator: Get the Strongest Brew Possible! 2

Electric percolators coffee makers are easier because you don’t have to worry about temperature or brewing time. These brewers typically have various settings that automate the brewing  process. 

The best thing about electric percolators is that they tend to brew consistent coffee using settings that pre-installed.

Moreover, most electric percolators keep your coffee warm once the brewing process is finished. However, it is important to remember that this can result in the over-extraction of your coffee, leading to an acrid and bitter taste.

How to Brew Coffee in a Percolator

Brew Coffee in a Percolator

These steps will enable you to brew a perfect cup of coffee in a percolator.

Clean Your Device:

Start with a clean percolator. All the different components have to be cleaned properly, even if you just went and got a new percolator from the store. Anything like old coffee remnants and chemicals will alter the taste of your brew.

Prepare the Percolator:

Assemble the percolator by placing the stand and the stem together and set them inside the pot. Pour some fresh water into the base. It should be no higher than spring at the top of the stem.

Add Your Coffee:

Add the amount of coffee you need to the grounds basket (around 1 tablespoon of ground coffee for a large cup of coffee). Connect the basket to the stem.

Arrange the Percolator:

Close the grounds basket tightly using the cover. You need to check that the dome is positioned right in the middle of the lid. Cover the pot with the lid firmly.

Brew the Coffee:

Place your percolator on a cold burner if it is a stovetop model. If you have an electric one, plug it in. Heat the percolator slowly until it perks. Depending on the strength of the brew you prefer, perk it for around 7-10 minutes.

Remove from the Heat:

After it has been brewed to your preference, remove the percolator from the heat. Going any longer than the advised time will result in a bitter and over-extracted brew,

Finish Up:

Let the coffee grounds settle at the bottom of the pot. Resting it for 5 minutes is a good idea. Pour your brewed coffee into a cup, carafe, or pot. You can serve it with a sweetener, creamer, or the flavorings of your choice.

Why Brew with a Percolator?

With so many options available, you might wonder whether you should bother with a percolator coffee pot. We’ve got the answers ready and we might just convert you to a whole new way of brewing coffee.

Stronger Brew:

Percolators are less popular because this method yields a rather bitter brew. The coffee is very strong and a super-rich flavor. 

This can be too much for some people. But this is a matter of preference. If you prefer strong coffee, a percolator is the perfect brewing method for you.

Extremely Hot Coffee:

Percolators use extremely high temperatures for brewing coffee. In fact, it makes the hottest cup of coffee ever. Your coffee will even be hotter than that brewed in an espresso machine. 

This is because percolators create steam to draw water through the system. This steam also heats the water, boiling it and resulting in a very hot cup of joe.

Cloudy Coffee:

Because of how it is brewed, this method of making coffee results in a certain flavor and texture. The coffee grounds are drenched with steam and water circulates the system and through the grounds multiple times. 

Your coffee is thus reheated so it can be brewed many times. As a result, the brew is very saturated and has a rather cloudy appearance.

Percolators: Do’s and Don’ts

If you just got a new percolator, or you’ve retrieved an old coffee percolator that’s been in your basement since the 80s, you might be confused about how to get the hang of things. But have no fear; we’ll show you the ropes.

What You Should Do:

  • Follow the manufacturer’s instruction manual when assembling the percolator.
  • Use good quality coffee beans for the best tasting coffee.
  • Clean your percolator after you have brewed your coffee.
  • Carefully pack it and the separate parts when you take it with you on journeys.

What You Shouldn’t Do:

  • Do not leave unconsumed coffee or used coffee grounds in the percolator.
  • Never leave a stovetop percolator on the burner after brewing is done.
  • Avoid using abrasive materials when cleaning your percolator.

Frequently Asked Questions about Percolator Brewing

Still have questions about using a percolator for making coffee? We answer some of the most pressing concerns here.

01. How Much Coffee is Needed in a Percolator?

This depends on the volume your percolator can hold, as well as the strength of your coffee. On average, you need a tablespoon of coffee for 6 ounces of water. 

For a lighter brew, use just a touch over half a tablespoon for the same volume of water, or use 8 ounces of water. For a stronger brew, use 1.5 tablespoons of coffee.

02. How Long Does It Take to Percolate Coffee?

As a rule of thumb, it generally takes 5-10 minutes for your coffee to be brewed but this may differ in a stovetop percolator based on the heat used.

03. Which Grind Size is Best for a Percolator?

Use a coarse grind when brewing coffee in a percolator, as using a fine grind can make the brew unbearably bitter. Also, always remember to use quality beans that have been freshly ground.

04. Which is Better: A Percolator or an Automatic Drip Coffee Maker?

As with most foods and beverages, this is a matter of personal taste. Drip coffee is much lighter and milder. On the other hand, percolators brew much stronger and more intense coffee. 

However, you like a more rustic and authentic brew with a more caffeinated taste, we suggest giving a percolator a try.

Final Thoughts

No matter how it is brewed, few things bring more joy than a freshly brewed, steaming hot cup of coffee. A percolator is a classic way of brewing coffee and has stuck around because of how convenient and effective it is. 

Knowing how to make coffee in a percolator is great for people who want to make a very strong cup of coffee. For unbeatable flavor, give your old percolator a try. We assure you that you won’t regret it when you take that first flavorful sip!

More Related Articles:

Pin Later

How to Make the Strongest Coffee with a Percolator
How to Make Coffee in a Percolator

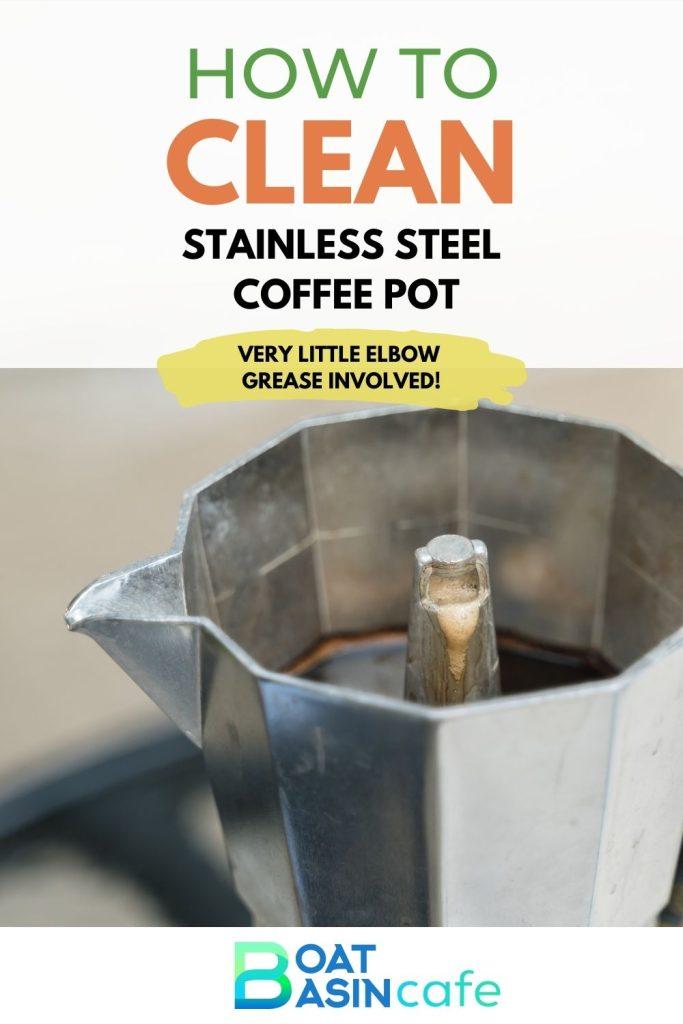
How To Clean Stainless Steel Coffee Pot: Very Little Elbow Grease Involved!

We all have those days. Instead of washing the coffee pot, we shove it back onto the counter, leaving it for the next day.

But one day becomes a whole week and your stainless-steel pot is unrecognizable. Sure, it looks all shiny and fancy on the outside, but the insides tell a whole different story. Maybe you have a matching steel carafe marinating in your car too!

If you want to clean the mess in your coffee pot, but are scared of the horrors that lurk within, we’re here to help you out. This article will tell you how to clean stainless steel coffee pots quickly and easily.

A clean stainless steel coffee pot will lengthen the lifespan of your coffee pot and make your brew taste so much better. If you want to learn the best way to clean a coffee pot, keep reading and we’ll get you there!

How To Clean Stainless Steel Coffee Pot: Every Method You Will Ever Need

How To Clean Stainless Steel Coffee Pot

We are going to talk about the different ways you can clean your stainless-steel coffee pot. Some of them require a bit of labor, while others take a more hands-free approach. The state of your coffee pot will determine which method will be best for you.

These methods will also work when cleaning coffee carafe and other coffee vessels. Without further ado, let’s get started:

Cleaning Coffee Residue without Any Scrubbing:

What you will need:

  • Boiling water
  • Cleaning products like dishwasher tabs or washing powder
  • Cheap coffee

What You Need to Do:

1.     Boil enough water to fill the coffee pot (or carafe) completely.

2.     Add the washing powder or cleaning tab to the coffee pot. If you choose to use powder, add a quarter cup of washing powder to the pot.

3.     After the water has boiled, pour it into the pot, right up to the brim.

4.     Wait 30 minutes to an hour with the lid off. At this point, the cleaning agent will start breaking down the buildup in the pot and you need to sit back and let it work its magic.

5.     Next, swirl the water in the coffee pot carefully, making sure you don’t burn yourself. The water is still very hot, so make sure you use gloves. Swirling the water will loosen the gunk from the walls of the pot.

6.     After swirling the water a couple of times, empty the coffee pot into your sink. Rinse the pot thoroughly and you will see that the pot is now clean.

7.     Brew some cheap coffee and pour it into your newly washed coffee pot. Let it settle in the pot for half an hour.  This will remove any soapy smells or compounds that might linger in the pot.

8.     Empty out the coffee and rinse it with clean water properly. This will remove the remnants of coffee and any of the cleaning agents.

This method works for both coffee pots and carafes. You can even use it to remove coffee stains from stainless steel thermos without any scrubbing.

Cleaning Coffee Stains with a Brush:

Have stubborn stains that soaking won’t fix? Here’s what you can do instead.

What You Need to Do:

1.     After letting the hot water and cleaning agent soak the residue in the cup, tip out most of the water. Leave a little liquid in the pot and add something abrasive like salt and baking powder to the pot.

2.     Use a coffee pot brush to gently buff off the stains. This can take a bit of time, but be patient. The brush and the salt/soda will remove the stains and stubborn buildup.

3.     Empty out the contents of the coffee pot.

4.     Rinse the pot or carafe until it is sparkling clean and there is no residue from your cleaning agents.

5.     Repeat the step of filling it with inexpensive coffee and then empty it out again.

This step also works well for thermos or carafes that have been used frequently. It is a good way to remove coffee stains from stainless steel travel mug and remove coffee stains from cups.

How to Clean a Glass Coffee Pot

Cleaning a glass coffee pot is a little more complicated, since you have to be careful not to scratch the glass. Because of this, you can’t use abrasive materials when washing a glass coffee pot or carafe.

These steps can be used to clean Bunn coffee pot and/or the coffee maker itself.

What you will need:

  • Mild dish detergent
  • Warm water
  • A soft cloth

What You Need to Do:

  1. Use warm water to rinse the coffee pot.
  2. Pour in some dish detergent into the pot.
  3. Use a soft cloth to rub all the parts of the glass pot and create lather. Gently buff away any residue and stubborn coffee stains.
  4. Rinse well and allow to dry.
  5. Alternatively, you can also clean glass coffee pots upside down in a dishwasher.

Pro-Tip: Once in a while, use something like Bonavita descaling powder, to deep clean your coffee maker, brewer, and carafe to remove buildup and strange tastes or smells.

Home Remedies for Cleaning Coffee Pots

Don’t like the idea of harsh cleansers, detergents, and surfactants in your brewing tools? We understand. Here are tips for a home remedy for cleaning stainless steel. The best parts? You most probably have all the things required in your pantry!

Natural stainless steel pot cleaners include things like lemon juice, white vinegar and natural abrasives that will remove buildup, residue, and stains without the worry of toxic chemicals.

What you will need:

  • Baking soda
  • Salt
  • Warm water
  • White vinegar
  • Lemons or lemon juice
  • Essential oils (Optional)

What You Need to Do:

  1. Cleaning a coffee pot with vinegar is the easiest way to go. Combine equal parts white vinegar and water. You can also use lemon juice. Pour this into the coffee pot and let it sit in there for several hours or overnight.
  2. If there is lots of buildup, you can try to get a clean coffee pot with baking soda.  Pour a cup of baking soda into your pot and scrub to remove stains. Rinse out well and repeat if needed.
  3. Cut your lemons in half and squeeze the juice into your coffee pot. Add some salt to give yourself the abrasive properties.
  4. Leave this mixture of lemon juice and salt inside the pot for a few hours to soak and break down the gunk inside. You can add a drop or two of essential oil at this point if you wish.
  5. Then, scrub out the inside of the pot.
  6. Finally rinse everything out with clean warm water and let it dry properly.

Coffee Pot Maintenance Tips

How To Clean Stainless Steel Coffee Pot: Very Little Elbow Grease Involved! 3
Coffee Pot Maintenance

Here’s how you can keep your coffee pot, coffee maker and carafe working properly for much longer. With these tips, your coffee maker will work better, last longer, and your brew will taste great every single time.

  • Wash, or at least rinse out your coffee pot after every use.
  • Once a month, deep clean with a vinegar or detergent soak.
  • Dump out leftover coffee grounds instead of leaving them in the coffee maker.
  • Regularly descale your coffee maker and pot to prevent buildup.
  • Lemon juice and saltwater rinses get rid of stale or funky odors.
  • Use something like Dip-It coffee pot cleaners on your automatic drip coffee maker to flush out the whole system and get rid of buildup.

Any More Questions?

We’ll answer any other questions you might have about cleaning your stainless-steel coffee pot.

01. What is the Best Coffee Pot Cleaner?

Any solid dish detergent is good enough to clean your coffee pot. On the other hand, white vinegar works just as well, if not better to keep your stainless-steel pot clean when mixed with an equal amount of water.

02. What Gets Out Coffee Stains from Fabric?

Blot or soak up excess coffee with another clean, dry cloth. Soak the stain in a solution of 1-quart of warm water, ½ teaspoon dishwashing liquid or powder and a tablespoon of white vinegar for 15 minutes. Rinse with warm water. You can also use rubbing alcohol to spot-treat stains.

03. What Removes Coffee Stains from the Coffee Pot or Carafe?

All you need is some baking soda or a small brush. Sprinkle a little baking soda into the pot or carafe, add enough water to form a paste, and scrub. The mild abrasion of the baking soda will remove stains in minutes.

Then, simply rinse and wash the pot the way you usually would. You can also use a brush to scrub off the stains.

In a Nutshell

Procrastinating over cleaning out your coffee pot can result in a congealed mess that makes you want to throw out your pot altogether. Knowing how to clean stainless steel coffee pots will make it much easier for you to keep using your pot without any difficulty.

If you’ve been hiding from your coffee pot, you don’t have to be scared anymore. Bust out your cleaning things and get scrubbing–your coffee pot will be spiffy in no time at all!

More Related Articles:

Pin Later

Cleaning Stainless Steel Coffee Pot the Easy Way!
How To Clean Stainless Steel Coffee Pot

How to Clean Burnt Grease from Bottom of Frying Pans : Three Most Effective Ingredients

We all have one of those days where we put something on the burner and go to the other room for a second, only to rush back at the smell of heavy smoke. And with our utmost horror discover the worst nightmare- a burnt frying pan!

The worst part isn’t that your morning breakfast is now completely ruined. All you can think about is, “how in the world am I going to clean that up?”

Guess what? To make that frown go away, here, we have gathered all the ‘tried and tested’ tricks on how to clean burnt grease from the bottom of frying pans.!

Keep in mind that different types of frying pan require different methods. We will talk about it briefly a moment later!

The Ingredients: There is a Wide Range of ‘em!

How to Clean Burnt Grease from Bottom of Frying Pans the Easy Way
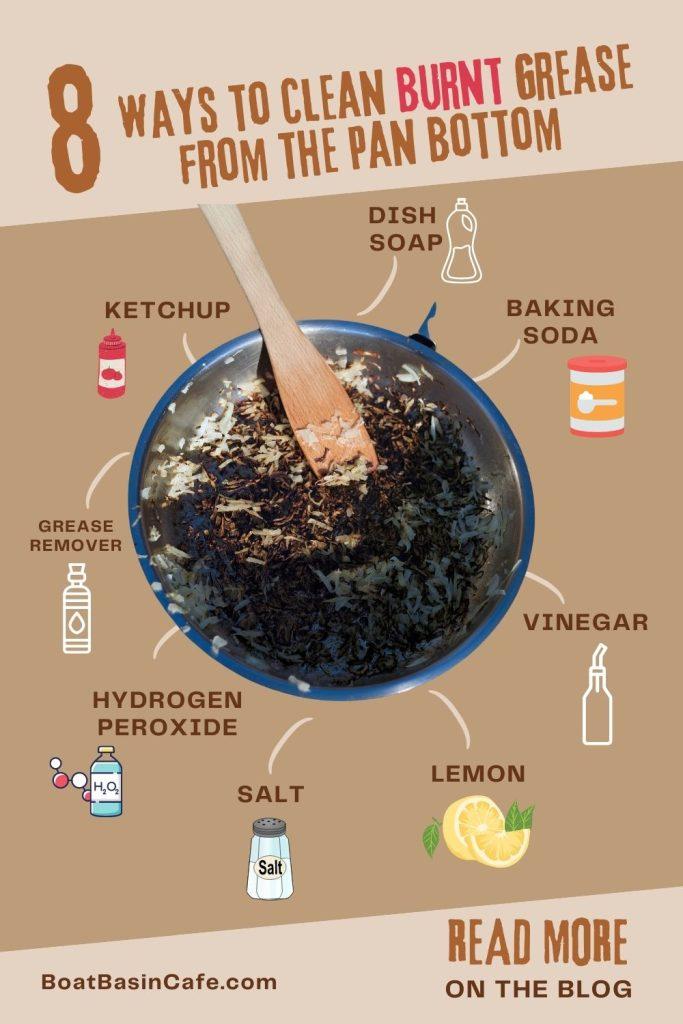
How to Clean Burnt Grease from Bottom of Frying Pans infographic

You don’t have to use all these ingredients at the same time. We tried to add things you’d easily find at your home. This way, it’s more practical and convenient!

To remove grease from pan, you will be needing ingredients such as:

Things you need to scrub: 

  • Scrubbing pad
  • Toothbrush
  • Scouring pad

How to Clean Burnt Grease from Bottom of Frying Pans: Three Most Effective Ingredients

Let’s be honest, we hardly look at the bottom of our frying pans. Unless you are Monica, who has time to look at all those nooks and crannies of the kitchen! 

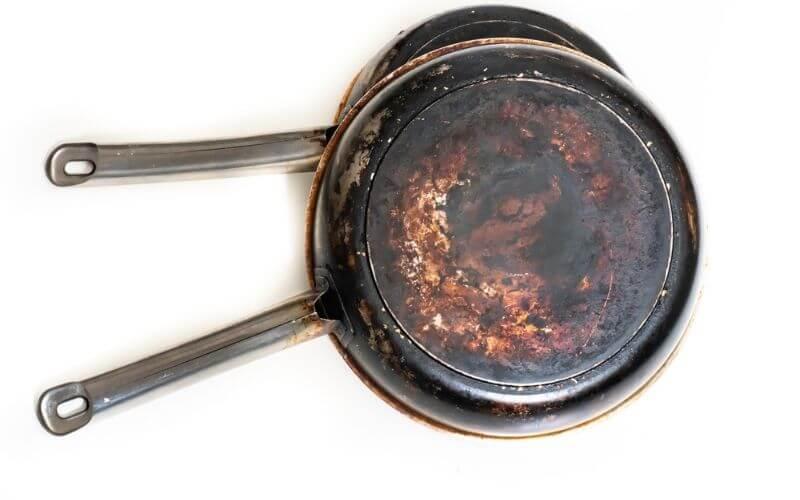
But when we finally notice them, the gunk has been building for months and months. It literally takes hours to remove all that burnt grease off of the pan bottom and still they don’t fully come off. 

Well, it’s not about how you are cleaning it but mostly what you are cleaning it with. You can’t use normal dish soap to clean up a mess like that! 

You might be wondering what’s the best cleaning agent for burned-on grease from the bottom of pans. Here are three of the most effective methods to easily finish the job.

(Keep in mind you will still have to scrub, just not as much! Sadly, there is no non-scrubbing method yet).

Baking Soda 

How to Clean Burnt Grease from Bottom of Frying Pans : Three Most Effective Ingredients 4
baking soda

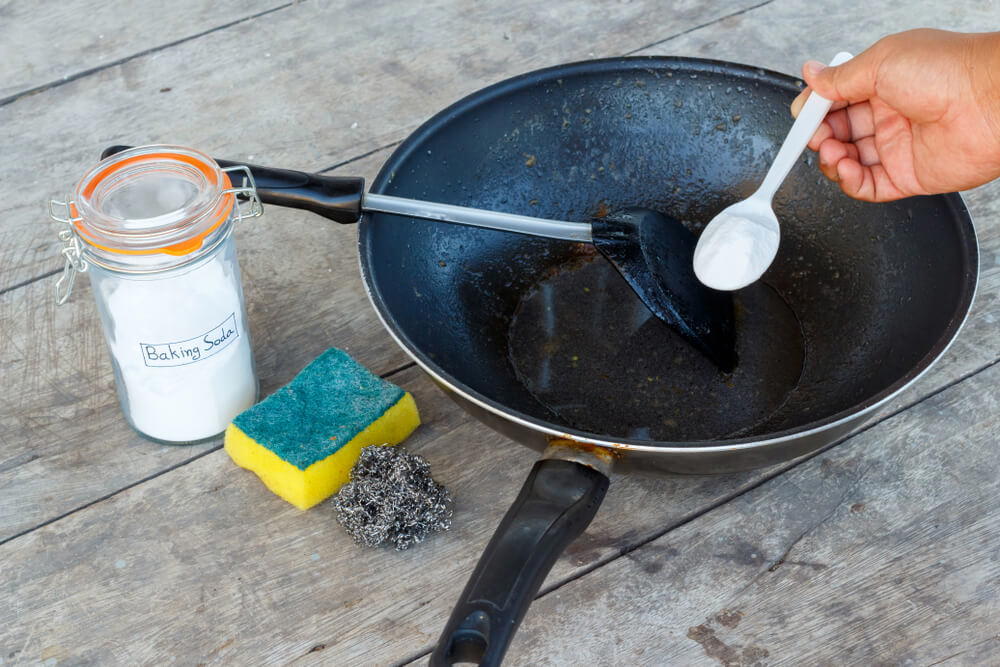
Baking soda is probably the easiest and most known method for cleaning up old pots and pans. From removing rust to keeping the pan grease-free, baking soda is super useful for many different items. It is one of the best grease cleaner.

The reason why baking soda works is because it is a mild abrasive. So it removes the upper layer of your pan while being gentle enough to not damage the core. 

Cleaning pots with baking soda is very simple. To use baking soda, all you have to do is sprinkle some on the surface and wait for it to do its magic.

Never use baking soda on non-stick pans. As the non-stick layer can get damaged.

Oven Cleaner

Oven cleaner is not what comes to our mind when we think of cleaning our pans. But it makes sense as the oven gets constant burns and stains from baking/roasting/grilling. Oven cleaners are designed to remove all those tricky spots from a metal surface.

Just make sure you’re using an oven cleaner only on your non-stick and ceramic pans. Apply a light layer on the bottom and let it sit for an hour or so. Then use a scrubbing pad/ brush to scrub everything off!

Bar Keeper’s Friend and Aluminum Foil

How to Clean Burnt Grease from Bottom of Frying Pans : Three Most Effective Ingredients 5
Aluminum Foil

You might be wondering what is the best kind of cleaning agent to use for cleaning burned-on grease. We have a proven option for you! 

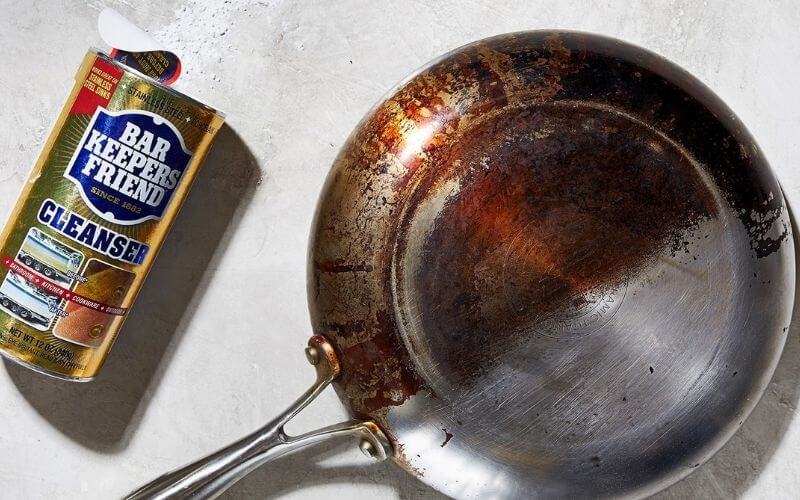
You can understand why aluminum foil would work on tough burnt grease. The Bar Keeper’s Friend is the only thing on our list that you will need to purchase!

The first time we tried, we couldn’t believe it either. Sprinkle some Bar Keeper’s Friend on a wet pan and use the foil to scrape everything off. 

Even if you use Bar Keeper’s Friend by itself, it is strong enough to remove any spots or stains. You can remove burnt food from pots very easily. 

One side note, this method is not ideal for non-stick pans or any pans with protective coatings.  

How to Clean Different Types of Frying Pans

There are a few different types of pans we all use on a regular basis. Even though they all function as frying pans, the construction, and materials on them have nothing in common.

So it is no surprise the process of cleaning scorched pan would be different. The three main types of pan that we will be discussing are stainless steel pan, cast-iron pan, and ceramic pan. 

Cleaning a Stainless Steel Pan

Stainless Steel Pan cleaning
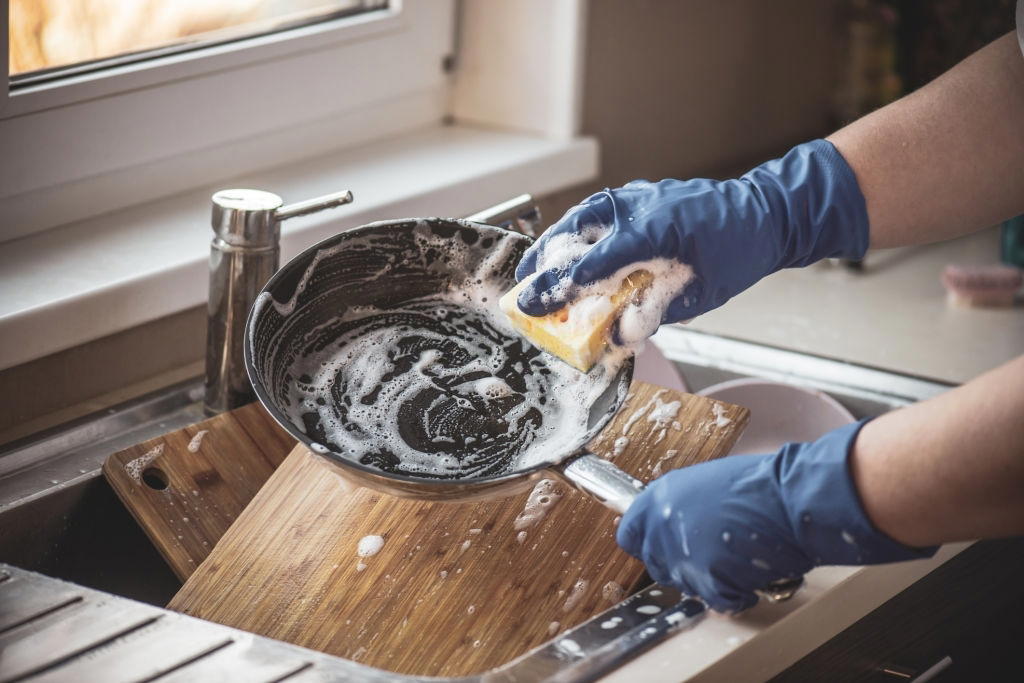
Female hands in gloves wash dishes with detergents

For stainless steel pans, a combination of vinegar, baking soda, and salt works wonders. It not only removes all the burnt marks and grease but also makes your stainless steel brighter and shinier. 

Here’s how to clean burnt stainless steel pan:

Step 1: Apply a generous layer of baking soda and coarse salt on the bottom. Put some extra on the tough burns.

Step 2: Either lightly pour vinegar on top of the soda or spray it. Make sure the vinegar reaches the whole surface properly.

Step 3: Let it sit there for 10 minutes. 

Step 4: Use a scouring pad to scrub off the grime and grease from your stainless-steel pan. 

You may also like: How to clean calphalon grill pan

Cleaning a Cast-Iron Pan

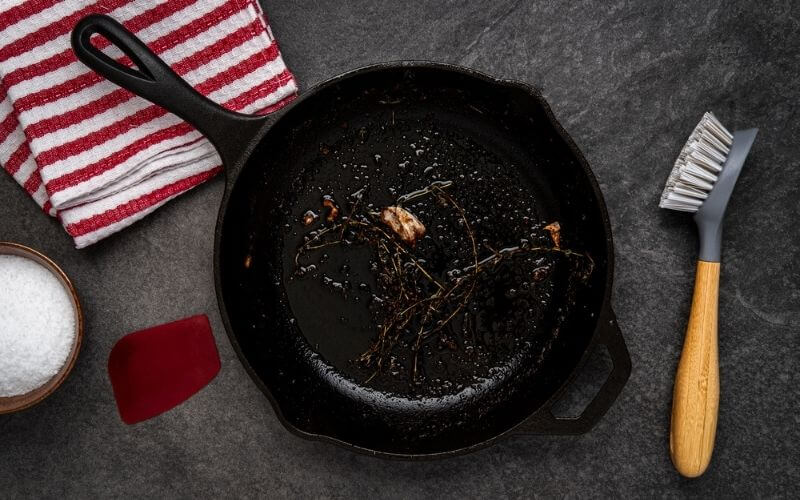
Cast Iron Pan Cleaning
Cast Iron Pan

Cast iron pans are a chef’s most prized possession. They are not very common in most households yet. This might be because of the high-maintenance nature of cast-iron skillets and pans.

No matter how much you season your pan, burning your cast iron is fairly easy. This may be because cast-iron pans can take a lot of heat. 

Here are our easy steps to how to clean the bottom of a cast-iron pan:

Step 1: Salt is your best friend for cast iron pans and skillets. Sprinkle a generous amount of salt all over the pan.

Step 2: Scrub the pan with a damp cloth or a plastic scraper depending on how tough the burnt is. 

Step 3: For a cast iron pan, as appealing as it seems, you can not use steel wool to scrub. Only use a brush or coarse fabric. 

Step 4: Wash it thoroughly and dry the pan completely.

Step 5: Apply a light layer of oil to not let it turn into rust.

Cleaning a Ceramic Pan

Cleaning Ceramic Pan
Ceramic Pan

Ceramic pans are on the rise nowadays. This is simply due to their aesthetic look and practical nature. Ceramic pans are known for their non-stick feature. They are super easy to clean up too!

Most of us think, if a ceramic pan gets burnt, you can’t use them anymore. They need to be tossed out. But that’s not true at all. 

To easily remove the burnt grease from your ceramic pans, try following these easy steps:

Step 1: This is the preparation part. Remove as much burnt grease and grimes as possible from the pan.

Step 2: Pour vinegar water with a 1:4 ratio. Then place it inside a stove. Let the stove heat up to medium until it starts to boil. Let it sit like this for a few minutes then remove the pan from the stove.

Step 4: This step might stink so we advise putting the pan outside or removing a window. Let the water cool down. 

Step 5: Start to scrape inside the pan with a silicone spatula and sponge. For the rough areas, use a scraper. 

This answers your question of how to clean baked on grease. After you are done with all these steps, your pan should look brand new again! For the bottom of the pan, simply soak it in vinegar water overnight.

Things You Should Never Do!

Here is our list of what NOT to do when you don’t know what to do:

  • Never use an oven cleaner on stainless steel or cast-iron pan to remove burnt grease from the bottom. This can seriously damage the surface and you might lose the warranty. This method only works for mon-stick and ceramic pans.
  • Never soak your pan in Pepsi/Coca-Cola or any of those surgery carbonated drinks. They simply don’t work.

Maintenance Tips for Your Frying Pan

A good frying pan is one of the most used items in any kitchen. So you really need to take care of it properly. And that doesn’t mean just cleaning it regularly.

  • It is a good idea to invest in quality cookware as they can withstand a lot of heat and damage so you won’t have to replace your pan every two years. 
  • Always grease your pan before you start cooking. This includes non-stick pans too. Do a gentle brush of oil and it will keep the pan sleek and smooth.
  • If you use a cast-iron pan, season it twice a year. Cast iron pan can easily get rusty without proper seasoning.
  • After washing the pan, dry it properly and use a microfiber towel to wipe it off. 
  • Store your pan in a pan rack or hooks on the wall. Basically anywhere but on the stovetop!

So There You Go!

Cleaning the burning grease off of your pan is that easy. The key thing is to clean your pans and cutleries regularly. This way you never get any grease buildups. 

Having a quality pan is a commitment. As the pan serves us, we have to put a bit of our time and effort to maintain its beauty. The better your pan looks, the higher it performs!

More Related Buying Guide:

Pin Later

How to Clean Burnt Grease from Bottom of Frying Pans the Easy Way
How to Clean Burnt Grease from Bottom of Frying Pans

How to Turn Off Flashing Clean Light on Mr Coffee

The indicator light on your Mr. Coffee is there to tell you when you should clean it properly. So if it keeps on blinking and you can’t turn it off, it’s time to listen to your favorite machine and give it the well-needed maintenance. How to turn off flashing clean light on Mr Coffee?

Of course, there can be many reasons behind this blinking. It can definitely be a technical error. But for most of the time, all you have to do is clean it!

If your coffee machine does not turn off the light even after following our cleaning steps, we have some more tips on how to turn off its flashing light. Keep on reading to know how to turn off the flashing clean light on Mr. Coffee!

Why Mr. Coffee’s Indicator Light is Troubleshooting

If your Mr. Coffee indicator light keeps blinking nonstop, maybe it’s time to actually clean it thoroughly. There can be several reasons why Mr. Coffee clean light stays on all the time. Some of the most probable ones would be:

  • You forgot to clean the coffee maker properly.
  • You did not follow the user manual to use the coffee machine. 
  • You did not wait for the cycle to complete before unplugging. This one we all are guilty of at least once. 

Before we get into the details of how to fix this issue, let’s start with the basics and talk about our top ways to clean your Mr. Coffee easily! 

How to Clean Mr. Coffee Coffee Maker

How to Turn Off Flashing Clean Light on Mr Coffee 6

Cleaning your Mr. Coffee is relatively easier than any other coffee maker. We often forget to clean our kitchen devices. So having a cleaning indicator light on this coffee maker really helps us to be aware of when it’s time to do so.

With our busy lifestyle, we hardly keep track of the last time we actually took care of our coffee maker. So when you see that light go on, grab your cleaning supply and get ready! 

You Will Need:

  • Water
  • Baking soda
  • Lemon
  • Liquid dish soap
  • Sponge
  • Dishtowel

Here are our easy steps for cleaning Mr. Coffee:

Unplug the Machine:

This is the first thing you have to do. Before you do any type of exterior or deep cleaning, always unplug your devices. 

Wherever there is water and electricity involved, you run into the risk of electrocution. So be careful of that.

After unplugging, let the machine cool down for a few minutes. Now it’s time for the next step.

Empty the Filter:

Remove the water reservoir and filter. This is the part where you should remove all the leftover coffee from the carafe as well. Then, use a clean sponge and dish soap to gently wash the filter.

You will notice a lot of dark color water coming out of the carafe and filter. These are actually the buildups of coffee.

Don’t be too harsh as it can damage the filter. Replace it when you are done with the cleaning. 

Grab Your Cleaning Supply:

Now it’s time to deep clean your coffee maker. For that, you can use a few different things. Some people really like using vinegar to remove hard water buildups. We personally do not like that.

Vinegar has a very intense, lingering smell that does not want to go away even after a few brews. End up with vinegar flavored coffee for the rest of the week, and who wants that?

Instead of vinegar, use lemon juice or baking soda. 

They are mild abrasive ingredients that remove all the grimes without actually damaging the machine in any way. 

Apply two tablespoons of baking soda into your carafe. Then add water to it. You can use a measuring cup for the lemon juice. Add an equal ratio of lemon juice and water.

Start Cleaning:

Put on a new filter and put your carafe in the warming tray. You will notice there is a button for cleaning in Mr. Coffee. Press that button and wait for it to light up.

At this point, the machines should start the cleaning process. The overall process takes around an hour to complete. You can get on with your day while it is self-cleaning itself! 

Rinse and Repeat:

After an hour, you will notice the water is totally dark and dirty. You can rinse the carafe and filter again. If the water is too dirty or you have never washed your Mr. Coffee before, we recommend deep cleansing it one more time. 

When it’s all done, start brewing using only clean water. Do this for a few cycles until your Mr. Coffee feels squeaky clean! 

Why Clean Mr. Coffee Regularly?

How to Turn Off Flashing Clean Light on Mr Coffee 7

Any type of coffee machine needs regular cleaning to maintain its performance and quality over time. If you are lazy about the maintenance of your Mr. Coffee, you will face quite a few issues.

Some of the reasons why you should regularly clean includes:

  • Bacteria and Germs: Your coffee machine is actually a heaven for bacteria. It is warm, dark, and damp. Bacteria culture grows faster in an environment like this.

    The grimes also work as food for the bacteria. So if you don’t clean your machine regularly, you will be consuming them with each cup of coffee. 
  • Hard Water Build-up: Most of us use regular tap water to make our coffee. The problem is, our tap water is hard water, and it contains many chemicals.

    These chemicals overtime cause buildups. If you don’t clean your coffee machine properly, they can clog and cause leakage. 
  • Durability:  Not cleaning your Mr. Coffee can downgrade its performance and overall longevity. It won’t last nearly as long and you will end up with a damaged unit. 
  • Health Concerns: Coffee has oil infused in them, when you brew, the oil gets out and spreads inside the machine. Over time they turn into grimes that collect dust and dirt. For that reason, cleaning them is necessary for your good health.

How to Turn Off Flashing Clean Light on Mr Coffee

How to Turn Off Flashing Clean Light on Mr Coffee

After cleaning your Mr. Coffee coffee machine, the light would automatically turn off. If that did not happen for some reason, or Mr. Coffee light is on but not brewing, try to use these simple tricks:

  • Turn the coffeemaker off for a few minutes and turn it back on. Then adjust the time of the coffee machine. The light will turn off after this.
  • Clean the lid and the exterior of the coffee maker using a soft damp sponge. Do it carefully after unplugging the machine.
  • We often make the mistake of plugging the machine back on immediately after cleaning. You should not do this. This will result in Mr. Coffee clean light flashing.

    Let the machine rest for an hour and then turn it back on. This will stop the blinking indicator light.

Always follow the Mr. Coffee cleaning instructions mentioned in the User Manual: 

  • Never stop the cleaning cycle in the middle of the process.
  • Do not unplug or reset the machine until it is fully cleaned. Never interrupt the cycle.
  • If something happens and you have to stop the cleaning cycle mid-way, start all over again after a small break.
  • Always unplug the coffee maker before you open it to clean the carafe and filter.

Daily Maintenance of Your Mr. Coffee

Deep cleaning as we have mentioned should happen once every month, that doesn’t mean you don’t have to take care of it in between. 

Ideally, you should clean your coffee machine after each use. We don’t mean anything too thoroughly. Just clean the carafe with regular tap water and dishwashing liquid.

Just a basic rinse is great as coffee can stain the container. It takes only 5 minutes to do so..

What We Have to Say

Taking good care of your gadgets prolongs their life cycle and provides a seamless experience. We use our coffee machine on a daily basis, which is why it is important that we clean it every day.

Regular cleaning ensures that Mr. Coffee cleaning lights won’t keep flashing or troubleshooting. The solution is quite simple, isn’t it?

Pin Later

How to Turn Off Flashing Clean Light on Mr Coffee
190 How to Turn Off Flashing Clean Light on Mr Coffee

How to Clean Keurig Needle in 7 Easy Steps!

Almost all coffee enthusiasts have a Keurig or dream of owning one someday. They are one of the most popular coffee machines in the world. The way Keurig is able to prepare delicious coffee at the press of a button, explains why people love it so much. 

While Keurig is an absolute legend in its performance, you might find yourself struggling from time to time with it. It can be because the machine is leaking, or because it’s not pouring coffee at all. You have cleaned and washed the whole thing and still, no change. 

Maybe the problem is not in the machine at all, maybe it’s the needle. In this article, we will tell you how to clean a Keurig 2.0 needle in 7 easy steps!

What is a Keurig Needle?

How to Clean Keurig Needle in 7 Easy Steps! 8

This might come as a surprise to some but there is a needle inside your coffee machine! The first time I read about it, I was shocked. But it makes sense. Ever wondered how the coffee pod gets punctured to release your favorite espresso? 

The needle punches a hole in the pod which then is filled with hot water. This process is one of the most common ways of making coffee at home

Not all of us have time to roast the beans, grind them and then make fresh coffee each morning. So you see, the Keurig needle plays an essential role in your daily caffeinated life. This makes maintenance on a Keurig needle just as important.

How to Clean Keurig Needle: In 6 Simple Steps!

Cleaning up your Keurig needle is one of the easiest things to do. People don’t clean it often because most don’t know we have to clean it. Here are our six easy steps on how to clean Keurig needle:

Step 1: Unplug Your Keurig

First thing’s first, you have to unplug your Keurig coffee machine. Before handling any electrical devices, this is crucial. Otherwise, you might get an electric shock. 

Step 2: Remove the Parts

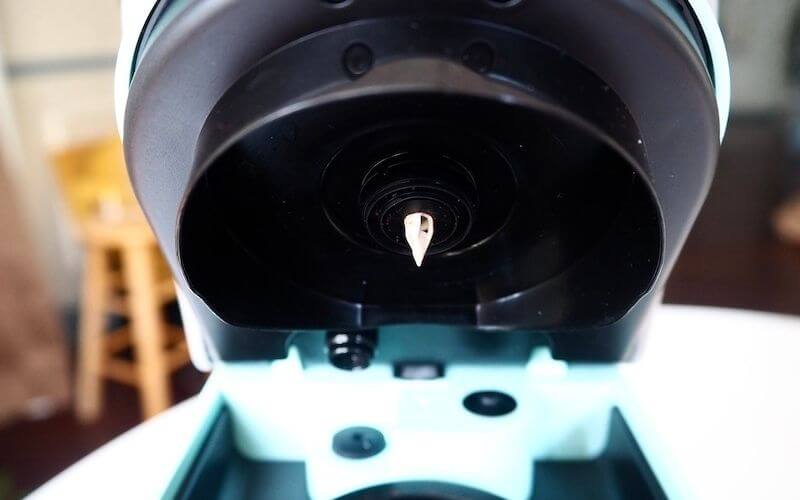
This includes removing the pod holder and the funnel inside it. To remove the pod holder, lift the handle of your Keurig and grab the pod holder.

Use your other hand to push it from underneath. After removing the pod holder properly, bring out the funnel form inside of the holder.

Step 3: Bring Out Your Toothpick

It’s time to use your toothpick or paperclip. Clean the exit needle and then flip your pod holder to insert the toothpick inside the tube. 

Then move it around to reach all the places inside. Do this for 30 seconds to remove any hidden dirt or debris. This process also eliminates clogs. 

Step 4: Time for Rinsing

This is the part where you rinse the pod holder and funnel under running water. Make sure to properly clean it. 

Use a sponge and dish soap to remove any buildups and grimes. Be careful not to poke yourself with the needle inside. 

Step 5: Clean the Entrance Needle

After you are done cleaning the pieces, set them aside to dry and life the brewer handle. This is where you insert your K-cups.

The needle can be found on the underside of the top half. Be careful while you are trying to clean it. The needle is made to be very sharp.

You can use a toothpick or a paperclip to clean the entrance needle. Take your time to remove any grimes and dust from it. 

Step 6: Reassemble It All! 

This is the final part of the cleaning process! Now that everything is well-cleaned and dry, put the pod holder back together with the funnel. Then reinsert the pod holder into your Keurig coffee machine. 

After resetting all the necessary parts back together, run two/three brew cycles using only water. That will remove any loose up dust from it. And this is how you clean Keurig 2.0.  

Why is It Necessary?

The needle on your Keurig pokes a hole into the coffee pod. So over time, it can gather a lot of coffee residue and oil. 

These things build up and clog the needle. When this happens, you can not use the Keurig until it’s properly cleaned again. 

The place where the needle sits is a very convenient place for bacteria and molds to form. It’s wet, dark, gathers food crumbles, and stays damp. This is why maintenance on a Keurig needle is so essential.

If you don’t clean the needle, each time you make a cup of coffee, you will be consuming a small number of bacteria and dirt. Now, who wants that every morning? 

How Often Should You Clean Keurig Needle?

This depends on how often you use your Keurig coffee machine. If you are a regular coffee drinker, cleaning the Keurig needle once a month is a necessity. Otherwise, you risk ruining the integrity of the taste and hygiene of your coffee. 

Most people regularly clean their coffee machine but not their Keurig needle. This is because most of us are unaware that we have to clean the needle too. I’ve even met people who were oblivious of the existence of any needle in their coffee machine!

Keurig is a premium coffee maker that deserves more care and maintenance than simple spot cleaning. So take care of your device so it gets a long life.

They also have Keurig needle cleaning pods for easy usage. Now that you know how to perform needle maintenance on a Keurig, hopefully, you will do it more often.

How to Maintain a Keurig Needle

To maintain your Keurig, you need to clean both the entrance needle and exit needle. You can perform the needle cleaning and maintenance steps we included above, or invest a few dollars into a Keurig’s brewer maintenance kit. This specialized kit comes with disposable rinse pods and a brewer maintenance tool as well!

Simply use the brewer maintenance tool and disposable rinse pods together on the needle. After a while, you should see remnants of coffee grounds and debris in the rinse pods. Make sure you put on at least three water cycles for the Keurig to completely rinse itself out. 

Cleaning and Maintenance Tips for Your Keurig

How to Clean Keurig Needle in 7 Easy Steps! 9

As you are in the process of cleaning your Keurig needle, maybe it’s time for deep cleaning of the whole machine. Don’t worry, it’s not hard to do at all. Here are our bonus tips on how to clean your Keurig coffee machine:

To descale Keurig coffee machine, you will need:

  1. White vinegar or baking soda
  2. Large ceramic mug
  3. Fresh tap water

Instead of vinegar, you can also use Keurig descaling solution. As it’s their customized cleaning product, you will get a better result. 

Here are the simple steps to properly descale your Keurig coffee machine:

  1. Prepare Your Keurig: 

Before you start to clean your Keurig, it is again important to unplug it properly. As we have mentioned before, we don’t want anyone to get electrocuted. At this point, remove the water reservoir and water filter as well. 

  1. Fill the Reservoir: 

Add a mixture of 1:1 ratio of water and vinegar to the reservoir. If you are using baking soda, use 1-2 tablespoons of it.

Then fill the rest with fresh water. For the Keurig cleaning solution, use it according to the instructions on the bottle.

  1. Start Brewing: 

Here comes the fun part. Turn on the mache and start your usual brewing cycle. The hot water and the vinegar will break down all the water buildups and grips from the machine.

Repeat this process until you feel satisfied. After around 3 cycles, the water should look clean. If not, do it one more time. 

  1. Let It Rest: 

Let your machine rest for 20-40 minutes so the inside stays wet. This helps to soften the leftover grimes.  

  1. Final Rinsing

Remove the water reservoir and rinse it out properly. Then fill it up with freshwater and run a few more cycles.

This is important to remove the vinegar smell from the machine. You don’t want your coffee to taste like vinegar.

 For the Keurig descaling solution, you will be needing to run it for at least 12 more cleansing brews before you can make a coffee for yourself. This is to ensure all the chemicals are out of the system properly.

Ideally, it is better to descale your Keurig once every 4 months. Otherwise, you compromise the taste of your coffee. 

After spending so much money on such a fancy machine, this slight maintenance is well worth it. There are Keurig brewer care kits to make this experience very comfortable for your busy lifestyle.

Conclusion

Cleaning your Keurig needle is a very fast task that takes only five minutes to do. But the difference in the performance is drastic. So why not just do it regularly? 

When was the last time you cleaned your Keurig needle? Let us know in the comments!

Pin Later

How to Clean Keurig Needle in 7 Easy Steps!
How to Clean Keurig Needle in 7 Easy Steps

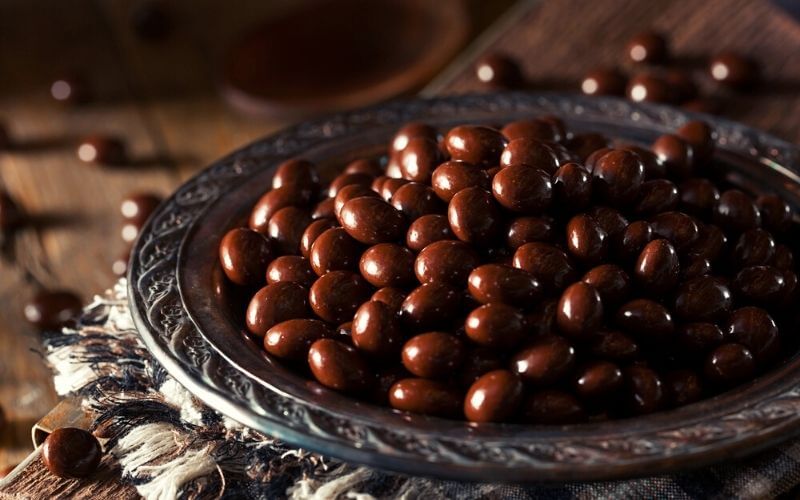
How to Make Chocolate Covered Coffee Beans at Home : The Easiest Way

Although I am a passionate tea person, you bring a jar of chocolate covered coffee beans and I will lose my mind. They are so flavorful and delicious that it’s hard to stop eating them. How to make chocolate covered coffee beans at home?

I once made the mistake of having too many of them around 9 pm at night. You can guess what it did to my non-coffee-drinking body. I was awake till 5 am and wondered why I can’t fall asleep! 

These beans are like small capsules of energy that you can carry around as your mid-day snack. 

There are so many different brands that make various versions of these chocolate-espresso beans. Even starbucks has some! But guess what, they are pretty pricey to buy. And it’s so easy to make that I see no point of not doing it by myself. 

As a serial procrastinator, everything in life seems like too much work. So when I say, this recipe is easy, trust me. It only takes 10 minutes to make homemade chocolate covered coffee beans!

You may also like : How Much Caffeine in Chocolate Covered Espresso Beans?

How to Make Chocolate Covered Coffee Beans at Home : Chocolate Covered Coffee Beans Recipe

How to Make Chocolate Covered Coffee Beans at Home

Chocolate Covered Coffee Beans

How to Make Chocolate Covered Coffee Beans at Home : The Easiest Way 10

As a serial procrastinator, everything in life seems like too much work. So when I say, this recipe is easy, trust me. It only takes 10 minutes to make homemade chocolate covered coffee beans!

  • Measuring cup
  • Fork
  • 100 grams chocolate bar (or 1 bag of chocolate chips)
  • ⅓ cup coffee beans
  • Cocoa powder (optional)
  • Coconut flakes (optional)
  • Icing sugar (optional)
  • Melted white chocolate
  • Parchment paper
  1. Put a saucepan on the burner and boil some water. Then reduce the heat to simmer.  

  2.  Break your chocolate bar into small pieces and add it into a heat-proof bowl. You can also use chocolate chips to make the melting process faster. 

  3.  Put the bowl on the saucepan so the heat starts to melt the chocolates. Stir it continuously to have a smooth, buttery consistency. 

  4.  When all the chocolate melts properly, remove it from the what and set aside. 

  5. Bring out your cocoa beans and add them into the melted chocolates. Mix them thoroughly so each bean gets a generous coating of rich, creamy chocolate.

  6. Lay down some parchment paper on a baking tray. Then use a fork to carefully take out each one of the evans.

  7. Put the beans on the parchment paper. Do not put them too close to each other. Otherwise they will all stick together. 

  8. Transfer the trey immediately to your freezer and allow them to completely cool down and set. This might take 1 hour to 3 depending on the climate you live in. for colder climates, it might only take half an hour, 

  9. When you bring them out of the freezer, apply a light coating of cocoa powder or melted chocolate. You can add whatever coating you want to this. So go creative!

  10. And there you go! Your DIY chocolate covered cocoa beans are ready for consumption!

  • You can use a microwave to melt your chocolate. But for that, bring out the pot after every 30 seconds and give a stirr. Then put it back in the microwave. Continue this until everything is properly melted. 
  • Do a double dipping to get a thicker layer of chocolate. For that, freeze for 20 minutes then dip the beans into the chocolate again. 
  • Add crushed coconut flakes on top of the beans before putting them in the freezer. This will add a tropical flavor to the recipe. 
  • You can use different types of nuts following the same process to have a jar full of delicious chocolate treats! 
  • Put them in a glass jar and tie a ribbon around it. And now you have the perfect gift to give to your loved ones!

Milk Chocolate vs. Dark Chocolate

This is an endless debate that seems to have no right answer. Most chocolate covered coffee beans use dark chocolate as they have a higher caffeine content than milk chocolate. Dark chocolate coffee beans add a certain richness to the roasted coffee beans that feels very addictive.

On the other hand, the sweetness and creaminess of milk chocolate is a great companion for bitter coffee beans. These two together create a balanced favour in your mouth. So at the end of the day, it’s a preference thing.

Finding The Right Espresso Beans

How to Make Chocolate Covered Coffee Beans at Home : The Easiest Way 11

You might think all coffee beans should work for this but no! The market is saturated with low-quality beans that taste horrible. You need to look for ‘dark roasted beans’ instead of “espresso beans”. 

This is the part where spending some extra bucks is more than necessary. Chocolate coated coffee beans are not a regular food item, they are a luxury and a delicacy. So if you plan to make them at home, you have to choose the best ingredients available. 

Dark roasted beans have a great crunch to them. They are also much easier to chew. So your jaw won’t get tired after eating a few of them. You can basically binge-eat a whole jar in one setting.

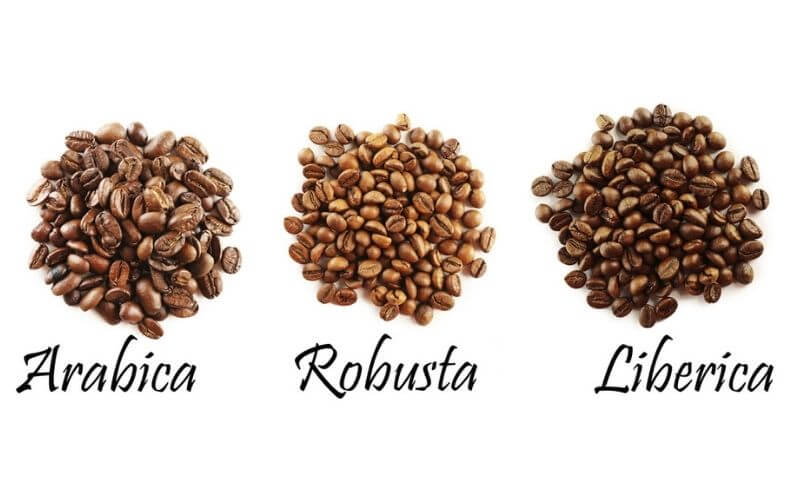
Now let’s talk about the type of coffee beans available. Some of the most popular types are: Arabica, Robusta, ibera and Excelsa. The one we would be discussing today are the first two.

How to Make Chocolate Covered Coffee Beans at Home : The Easiest Way 12

Arabica beans are the most common types to find around the world. If you go to any local coffee shop and order a coffee, chances are they will prove you an espresso made with arabica beans. 

They are very rich in quality and taste delicious. The bitterness is not too intense making them perfect for chocolate-covered snaking. 

Robusta beans are 40% of the world’s whole coffee consumption. They are mostly found in instant coffee, espresso and filler in grounded coffee blends. Their other name is coffea canephora. 

They taste much bitter and earthy compared to Arabica beans. This is due to their high caffeine level. So might not be the best choice for making chocolate-covered coffee beans snack.

Liberica beans are mostly found in Liberica hence the name. They are quite large compared to average coffee beans. This can be a downside if you are looking for smaller bite size options. 

Liberica beans are also quite rare to find in local markets. But if you can get a hold of them, surely try as they have a very rich flavor profile.

Excelsa beans are a fairly new option as they were only discovered a century ago. They are unfortunately not that common either. However, they have a similar taste to Arabica beans.

Are Chocolate Covered Coffee Beans Caffeinated?

They are individual pieces of coffee beans, of course they have caffeine in them. Whether that number is significant or not is a whole other story. 

If you are planning to eat this snack as an alternative to regular coffee, you won’t get the same amount of caffeine in your system unless you consume a considerable amount, of course. Now the next question you might have is, how much caffeine is in chocolate covered coffee beans?

An average chocolate covered coffee bean has around 3mg of caffeine in it. So for 20 pieces, you only consume 60-70mg of caffeine. 

Compare this to a cup of coffee. A standard cup of coffee contains around 200mg of caffeine! The difference needs no explanation. 

So if you are trying to limit your caffeine intake, there probably isn’t a better way than this. 

Are Chocolate Covered Coffee Beans Bad for Health?

dark chocolate coffee beans

Quite the opposite actually. Chocolate covered coffee beans are one of the healthiest chocolate-based snacks as it contains little to no sugar. Apart from this, there are other health benefits as well:

Antioxidants:

These small bite size snacks are jammed with antioxidants. Both coffee and dark chocolate contain a type of antioxidant called flavanols. This antioxidant is known for its ability to fortify the cells and fidgeting vascular diseases.

So if you are a heart patient or have type 2 Diabetes, this is a very healthy, nutritious thing for you to try. Some studies believe that dark chocolate can help reduce blood pressure level. 

If you suffer from heavy menstrual cramps every month, this snack can really help to decrease the lower body pain. 

65% dark chocolate is known for their ability to reduce the risk of high cholesterol. So whoever says chocolate makes you fat, knows nothing. Chocolate does not increase your weight, sugar does. 

Energy Boosters:

As we have mentioned these chocolate coated coffee beans contain little doses of caffeine, they are going to boost your energy level. Maybe not as much as a cup of coffee, but good enough to keep you energized throughout the day. 

Munching on coffee beans is much healthier than drinking cups after cups of coffee all day. Plus your breath doesn’t stink of old coffee anymore! Win-win for me!

Healthy Midday Snack:

If you’re anything like me, you need something to chew or bite right after having a big lunch. I don’t know what it is, but I immediately crave something around 4 o’clock in the afternoon. 

That time is not practical enough for a high-calorie snack. So having something like this in a jar right at the desk is super convenient. 

If you’re on a diet and trying to limit your calorie intake, trying this snack is  a great way to keep your mouth busy while not consuming too much. And of course, it does not feel like a diet at all as these beans are rich and delicious. Starbucks chocolate covered espresso beans is an easy option if you don’t want to make it at home.

What Happens If You Eat Too Many Chocolate-Covered Coffee Beans?

How to Make Chocolate Covered Coffee Beans at Home : The Easiest Way 13

Although dark chocolate coffee beans have a very small amount of caffeine in them, binge eating an entire bag of them will add up. Eating coffee beans has a faster effect on our blood caffeine level than drinking them. Studies show that you will feel the effect of caffeine faster if you consume them through chewing.

Now that this is clear, let’s talk about what would happen if you eat too much chocolate-covered espresso beans. Firstly, you will get a spike of caffeine in your bloodstream which can result in restlessness, dehydration, sleep deprivation and headache

For pregnant women, they can experience high anxiety and nausea. Although none of these symptoms are long lasting, they surely do not feel good. The caffeine will go out of your system within 8 hours but during that time, you might feel bloated, heartburn and even diarrhea. 

So consume edible coffee beans in moderation and treat this snack as the delicacy that it is!

Verdict 

There you have it. The internet is filled with many different recipes and they can feel too confusing. 

We tried to provide you the easiest way to make this delicious treat. We just love the idea of consuming coffee and chocolate in a healthy, tasty manner. 

So what are you waiting for? Go and make some right now. They only take 5 minutes of preparation anyway!

Happy Caffeinating!

Pin Later
How to Make Chocolate Covered Coffee Beans at Home : The Easiest Way
How to Make Chocolate Covered Coffee Beans at Home

How to Make Drip Coffee: Brewing A Robust, Hearty Cup of Joe

A simple cup of drip coffee may be one of the most underrated beverages out there. Of course, nothing beats a cup of lovingly brewed espresso. And we get the charms of things like pour-over coffee or the machinations of a Moka pot.

But sometimes, like during a quick break at work, or the end of a long day, you need a decent cup of coffee that brews quickly, doesn’t need 30 minutes to prepare, and simply fills you with that caffeinated warmth and comfort.

Besides that, a manual drip coffee maker is one of the cheapest ways to make a strong cup of coffee. And if you want to up your game and put your coffee maker at home to good use, we’ll tell you how to make drip coffee properly.

You may also like: How to make homemade cowboy coffee chew

What You Need: The Right Components

How to Make Drip Coffee

When it comes to making a slow drip coffee maker (or any kind of coffee really), you get what you give. Because of this, you need good ingredients and the right kind of equipment for a solid brew.

Coffee Beans:

To make a good cup of coffee, you need to start with great coffee beans. If you have a drip coffee maker, steer clear of pre-ground coffee. Get quality coffee beans and grind them yourself.

A medium or dark roast is a good idea, especially if you want a chilled drink like those made with Japanese drip coffee.

Grind Size:

If your coffee beans are ground too finely, your coffee will be over-extracted and bitter. You need to strike the right balance with your drip coffee grind size.

On the other hand, if the coffee grains are too big the water will pass through them quickly, resulting in under-extracted coffee that is flat and weak.

For most auto-drip coffee makers, you will need a fine or medium grind based on the kind of drip coffee filters. If you have flat bottom filters, a medium grind with a sand-like texture is best. A medium-fine grind works well with cone-shaped filters.

The Right Ratio:

Unlike espresso, you can make drip coffee without precise measurements. However, you still need the right amounts for a good tasting brew.

The drip coffee ratio is something like one tablespoon of coffee for every cup of water. In other words, you need two tablespoons of ground coffee for every 16 ounces of water.

Water:

This might sound like a no-brainer. Any kind of water should do, right? Wrong.

Tap water contains lots of minerals and these alter the taste of your cup of coffee. Filtered water is the best way to go.

Temperature:

Brewing temperature is one of the most important factors when brewing drip coffee or any other brewing method.

The best temperature for drip coffee is between 195- and 205-degrees Fahrenheit. Using a thermometer is the best way to ensure a great cup every time.

The Drip Coffee Maker:

Most people think you can only make a good cup of coffee with an expensive espresso machine. But this couldn’t be further from the truth. You need just a basic automatic coffee maker and not one of the pricier models.

While we suggest avoiding the super cheap ones as they make poor coffee and break down easily. You can get a one cup drip coffee maker or pour over drip coffee maker that is convenient and affordable.

A hand drip coffee maker, like the Blue Bottle drip coffee works because you pour the water over the ground coffee.

Pour-over coffee instructions are easy and you have total control over the process. A drip coffee maker does the pouring for you, so it is a good idea to make sure it does the job well.

How to Brew Coffee with an Automatic Drip Coffee Maker

How to Make Drip Coffee: Brewing A Robust, Hearty Cup of Joe 14

In this section, we outline how you can make coffee with a drip coffee machine in the fastest and easiest way.

  1. Grind your roasted coffee beans to the right grind size (medium-fine in most cases).
  2. Place a coffee filter in the filter basket. All automatic drip coffee makers come with a filter basket located usually right under the brew head (where the hot water is dispensed). Make sure your filter has been rinsed thoroughly.
  3. Add one tablespoon of coffee to the paper filter for every cup (8 oz) of coffee you want to make. You can a little more or less if you want a weaker or stronger cup.
  4. Fill the reservoir with cold and filtered water. For every cup of coffee, you want to make, add 8 ounces of water.
  5. Press the start button to start the coffee maker’s brew cycle. A majority of automatic drip coffee makers will have a simple “start” button that is easy to locate.
  6. Kill the heat as soon as your coffee is done brewing. This will prevent any burnt or bitter flavors in your brew. The best pour-over coffee method works because after they are brewed, the coffee can settle into its flavor without disruption. 

On the other hand, the hot plate of a drip coffee maker overheats the coffee and wrecks the taste. Remove the carafe from the coffee maker as soon as possible.

Customizing Your Cup of Coffee

Here’s how you can make your cup of drip coffee taste much better.

  • For a strong cup of coffee, use a finer grind or use 6-4 ounces of water instead.
  • For a milder cup of coffee, use a coarser grind, or a smaller amount of coffee.
  • If you want a coffee with fruity or floral notes, brew light or blond roast coffee beans.
  • If you want a coffee with woody, smokey, or cocoa notes, brew darker roast beans.
  • You can also use flavored syrups or dairy to include notes of caramel, toffee, hazelnut, mocha, or vanilla in your coffee.
  • Pour your brewed coffee into a thermal carafe instead of leaving it in the glass carafe on the hot plate. Using a hot plate will add an unwanted bitterness as the coffee compounds get burnt and over-extracted.
  • Measure your ingredients by weight instead of volume. This will give every cup of coffee a consistent taste and make it taste more like something you would get in a restaurant or coffee shop. Using 15 grams of coffee for every 225 grams of water is a good place to start.

FAQs

Here we answer questions people often have about brewing coffee with drip coffee makers.

01. How Do You Use Drip Coffee Maker?

Using a drip coffee maker is pretty straightforward. You just have to add the needed amount of ground coffee to the filter basket and pour water into the reservoir. Press the start button and wait for the machine to dispense the brewed coffee.

02. What is a Pour Over Coffee Maker?

The pour-over method involves pouring hot water over ground coffee in a filter. The water drains through the coffee and filter, so the brewed coffee pours directly into the carafe or mug.

This tells us that there isn’t much of a pour-over coffee maker, as you just have to pour hot water from a kettle directly over the grounds.

03. How Do You Make Pour-Over Coffee?

  1. Bring around 600 grams (20 oz) of water in a kettle to a boil.
  2. Grind 30 grams of coffee (3 tbsp) until they have the texture of sea salt. Using light or medium roast coffee gives the best flavor for this method of brewing.
  3. Set a filter in the cup or carafe of your choice. You might have to wet the filter first.
  4. Add the ground coffee to the filter and gently tap or shake it to level the surface of the grounds.
  5. Pour just enough water to cover the ground coffee which lets the coffee “bloom.” Then wait 45 seconds. This step allows the carbon dioxide to escape from the coffee which helps improve the overall flavor.
  6. After the coffee has bloomed, begin pouring the remaining hot water over the coffee in small circular motions. Focus the pouring mostly in the inner circle, pouring near the edges occasionally the grounds keep the grounds wet. For the first pour, add about 7 ounces of water.
  7. If you pour slowly, you can maintain a constant pour and let it filter at the same rate (which is ideal for the best flavor). Or you can pour in 7-ounce batches at a time. Make sure the grounds don’t dry up.
  8. After the coffee is brewed, remove the filter and enjoy your drink.

04. How Do You Make Cafe Bustelo in a Drip Coffee Maker?

  1. Use a drip coffee maker and a washable filter, just like many any cup of coffee.
  2. Place a rounded tablespoon of the coffee into the coffee maker’s filter. The amount of ground coffee depends on how you like your Café Bustelo.
  3. Add water to the coffee maker’s reservoir.
  4. Once you’ve completed the steps above, hit the switch button on the drip coffee maker. Let the brewing begin.

Final Thoughts

A good cup of coffee takes time, patience, and good ingredients. Once you have the basics nailed down, you can enjoy a good cup of coffee, whether it is a quick cup of drip coffee or a fancy espresso.Knowing how to brew drip coffee will make the bitter office brew much more bearable. Also, once you find out how to make drip coffee, you can put your coffee maker at home to good use.

On chilly days, you enjoy a hot cup of coffee without having to leave the house. So why not give drip coffee a try?

Pin Later
How to Make Drip Coffee.jpeg
How to Make Drip Coffee

How to Grill Rockfish: Soft, Flakey and Juicy!

While we all love grilled meaty dishes, there’s no denying that too much can cause health issues. For a healthier option, and a change of scenery, try grilling fish instead.

But many people are scared of grilling fish because it ends up sticking to the grill, and people end up mutilating the pieces when removing it from the grill. But if you are still willing to experiment and want to grill seafood, we suggest a grilled rockfish as a good starting point.

Nervous? That’s all right; we will show you how to grill rockfish for perfect results every time. Once you get started, you won’t be able to stay away from a good rockfish seafood grill.

This article will look at two ways to grill rockfish, both with the skin and without the skin. We also give tips on how to grill fillets and the whole fish. Let’s get started on this culinary adventure!

You may also like: Making the Poor Man’s Lobster: How to Cook Monkfish to Taste Like Lobster

An Intro to Rockfish

How to Grill Rockfish

If you aren’t used to fishing there’s a good chance you haven’t heard about rockfish all that much. People tend to be a lot more used to grilled snappers, mahi-mahi, salmon, and swordfish.

So, what is rockfish? Rockfish is a generic term that can be used to refer to lots of species (around 60!)  of fish. 

What is Rockfish?

Any fish that darts around rocks in the water can be called a rockfish. These include striped bass, sebastidaes, salvelinus and grouper.

Rockfish are good for you because they contain healthy fats, vitamins, and can boost brain power, and can reduce the likelihood of diseases. It is also a pretty healthy component as rockfish calories are pretty small in number per serving.

Rockfish taste best when grilled because the fish goes soft and flakey and absorbs the marinade or spices very well. 

When smoked, it adds dimension and the charred flavor goes very well with the fish. Pan-fried rockfish is also great, but grilling, whether on a gas grill or charcoal one, is a healthier alternative.

What You Will Need

  • Rockfish of your choice
  • Oil or cooking spray
  • Seasonings like pepper, paprika, or chili flakes
  • Herbs like thyme, basil, and parsley
  • Lemon or orange zest and slices
  • Aromatics like garlic and ginger
  • Spatula and tongs

How to Grill Rockfish

How to Grill Rockfish: Soft, Flakey and Juicy! 15

Now that we’ve got all the introductions out of the way, let’s talk about the grilling process. If you follow the steps mentioned here, you are guaranteed to make scrumptious grilled rockfish every time you try.

Getting the Grill Ready:

01. Before you start, prep your grill. Preheat the grill on high at 400-450 degrees Fahrenheit.

Bringing the grill up to a high temperature helps caramelize the fish and give them the signature grill marks that add to an intense smokey flavor and appealing appearance.

02. Keeping the temperature on high will also reduce the amount of time needed to cook the rockfish grill. Best of all, it will prevent the fish from sticking to the grill.

03. The next thing to do is to clean the cooking grates with a stainless-steel brush to remove any kind of cooking debris that may still be left from previous grilling. This will also prevent the fish from getting stuck to the grill.

Grilling Your Fish with the Skin On:

  1. Let your fish sit for 5-10 minutes to bring it down to room temperature. This will help to reduce the chances of sticking.
  2. After that, coat the sides of the fish with the rockfish marinade. You can also use a little oil with herbs or seasoning, and a splash of lemon juice. This step applies to both fillet pieces and whole fish.
  3. Grease the flesh side of the fish and place it flesh side down directly on the grate if you want to sear the surface and grill according to your recipe.

    After it is finished being grilled on that side, the rockfish will release by itself from the cooking grate. If you don’t want a sear, just place the fish skin side down directly on the grate.
  4. The rule of thumb is to allow 8-10 minutes of grill time per inch of fish thickness. If your fish is two inches thick, grill each side for about six to eight minutes.

    In other words, grill both sides until the fish is no longer translucent and the flesh is soft and flaky.
  5. To remove your fish from the grill, slide your spatula into the space between the skin and flesh. Use a sliding motion and go through the two parts of the fish so that the layer of skin remains on the grate and only the fish is removed from the grill.
  6. Let the fish rest for 3-5 minutes after grilling. This will allow the juices to circulate through the fish, making it much more tender.

Grilling Your Fish with the Skin Off:

  1. To help prevent the fish from sticking to the grill, allow it to rest for 5-10 minutes to bring it down to room temperature.

    Then, slather a generous amount of oil on both sides of the fish and add the seasoning and herbs of your choice to your fish before putting it on your cooking grates.
  2. Make sure you grill the rockfish for 8-10 minutes for every inch of the fish. Therefore, if your fish is an inch in thickness, grill on each side for around three to four minutes. You can also grill your fish until the inside reaches a temperature.
  3. Just flip or turn the piece of fish once while grilling. Do not keep turning and flipping it. This will increase the chances of them breaking apart on the grill.
  4. When flipping the piece of fish, do not wrestle the piece of fish off the grill. Be gentle and patient and let the fish naturally release itself from the cooking grate on both sides. When the fish releases itself from the grill, you will know that it is done cooking.
  5. Make sure you give your fish ample resting time to rest once it is off the grill. In most cases, 3-5 minutes is enough time to let the fish relax and allow for the juices to run through your cut of fish, making it softer and more flavorful, and tender.

Tips

  • Always remember to grill with your lid down. Each time you open the lid, you decrease the temperature and extra additional cooking time to your meal.
  • When grilling a whole red rockfish or something similar stuff the cavity of the fish with slices of lemon and fresh herbs to get rid of the fishy taste.
  • Don’t touch or prod the fish when it is grilling, as this will cause it to fall apart.
  • For added flavor marinate the fish in soy sauce and ginger.
  • If you want a more charred flavor without the risk of burning, add a little smoke to your rockfish. When grilling on a charcoal grill, soak wood chips for at least 30 minutes and place them right on your charcoal to boost your fish’s flavor.
  • If grilling on a gas or electric grill, soak the wood chips for around 30 minutes before placing them in a smoker box or pouch and onto the cooking grates.

Grilled Rockfish Recipes

How to Grill Rockfish: Soft, Flakey and Juicy! 16

Rockfish tastes fine no matter how it is grilled. You can get away with seasoning your fish with a little salt and pepper before grilling and it will still taste great.

But for a more classic flavor, you can marinate the fish in some crushed garlic, lemon juice, and black pepper. Then brush some browned butter on the fish fillets and set them on the grill.

You can also marinate the whole rockfish in soy sauce, fish sauce, crushed ginger, and a dash of molasses or honey. This Asian take on rockfish is sure to dazzle the taste buds!

Marinating your rockfish in citrus will get rid of the fishy flavor. Paired with garlic and spices like cumin or paprika will make for a fresh and lively tasting grilled meal.

No matter how you marinate or season your fish, serve over slices of lemon and garnish with fresh herbs for the best possible flavor, seasoning with lots of salt and pepper.

FAQs

Here we answer any questions you might have about grilling rockfish.

01. Is Rockfish Healthy?

Rockfish can provide cell-building benefits, help increase brain power, and gives the body a healthy dose of selenium and vitamin D, making it reasonably healthy.

02. Is Rockfish Suitable for Diets?

Rockfish is pretty lean and low in fat, making it a good choice for people on low-fat diets. This also gives it a mild, crisp, and clean taste.

03. How Long Does Rockfish Have to be Grilled?

A rockfish fillet that is 2 inches thick needs to be grilled for 4 minutes on each side. The exact time depends on the temperature of your grill, how well you want your fish browned, and the thickness of the fish as a whole.

Final Verdict

If you want a break from grilled ribs and burger patties, turning to seafood is a great palate refresher. Rockfish is much lighter and less greasy, allowing the fish to soak in flavors from seasoned rubs and marinades. They brown beautifully and taste amazing.

When paired with bright salads and seasonal soups, you will enjoy the full flavor profile of these fish. Know that you know how to grill rockfish, what’s stopping you from firing up your grill?

Pin Later
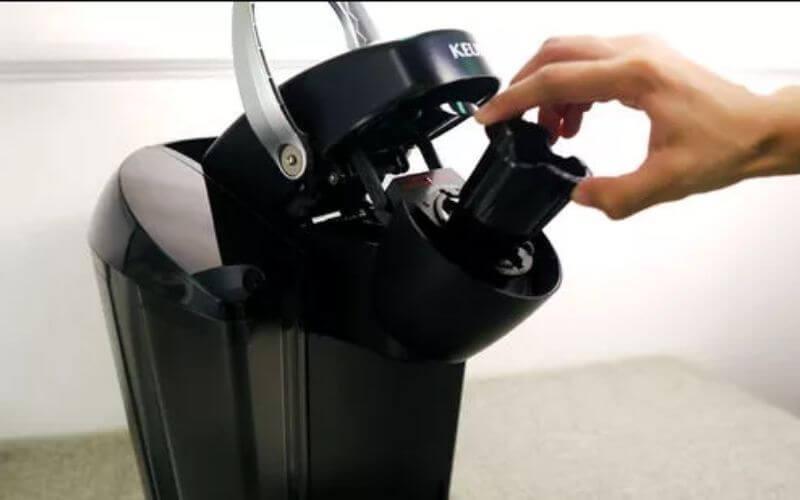
Grilling Tips for Rockfish: How to Grill Soft, Flakey and Juicy Fish!
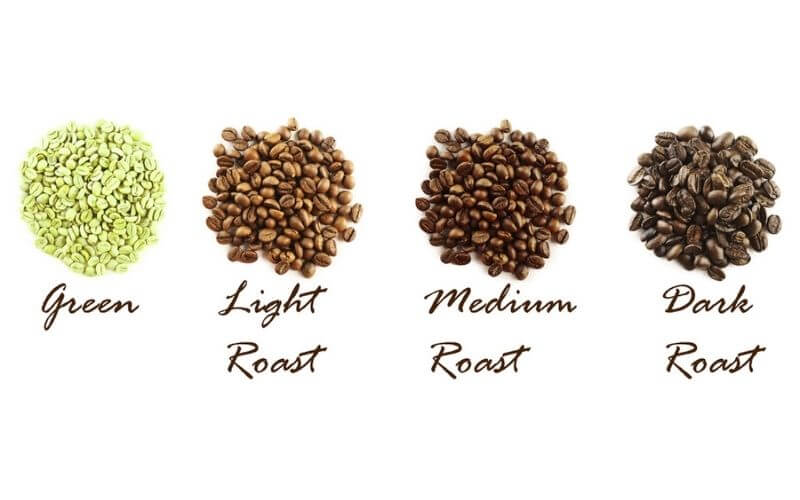
How to Grill Rockfish Soft Flakey and Juicy