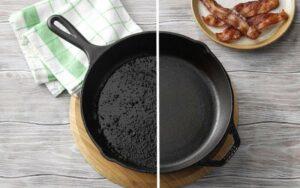
How to Clean Cast Iron Grill Easily: Banish Dirt Forever

If you went out and purchased a pricey cast iron grill pan without much research, you likely had no idea how to maintain it. While cast iron cookware is well-loved and praised by professionals and home cooks alike, it isn’t easy to deal with.

So if you messed up your cast iron cookware, whether it’s the classic cast iron skillet or a cast iron grill pan, you’ve come to the right place. This article will show you how to clean cast iron grill pans and utensils easily. You can even use these methods to clean cast iron grill grates!

Besides showing how to clean your cast iron cooking pans, you will also learn how to season and maintain your cast iron grill pan/skillet to keep it in great shape for much longer.

So without further ado, let’s look at how you can clean your cast iron cookware!

The Best Ways to Clean a Cast Iron Grill Pan

how to clean cast iron grill

Because cast iron has a seasoned surface, it is very important to make sure that the cleaning process doesn’t damage this protective coating. If this layer is scratched off, the pan loses its nonstick surface and will need to be seasoned intensively, which is labor and time-consuming.

Instead, work gently and use substances that are very mildly abrasive to remove the gunk and debris from your cast iron grill pan. Although the process may take longer, it is worth it as it will be better for your cookware in the long run.

Here’s what you will need:

  • Salt
  • Dish detergent
  • Hot/Boiling water
  • Spatula
  • A soft cloth or dish sponge

Cleaning a Cast Iron Grill Pan with Just Hot Water:

This is the gentlest and most effective way to remove small bits of burnt food, grease, and debris from your pan. It is also particularly useful for pans with tall sides. All it needs is a little elbow grease.

Instructions:

  1. Boil some water in your grill pan on the stovetop. The water needs to be 2-3 inches in depth.
  2. Once the water starts to boil, the bits of food and debris will gradually loosen up and rise to the water surface.
  3. Use a spatula to gently scrape larger or more stubborn bits of debris stuck to the pan.
  4. Then, allow your grill pan to cool and drain the water and debris/residue into your sink.
  5. Once the cast iron pan is emptied out, rinse it with clean hot water and then dry it off with a soft dish towel.

Cleaning a Cast Iron Grill Pan with Just Salt:

Grill Pan cleaning Salt

Many cooks prefer a ‘dry’ method to clean their cast iron cookware. The good news is that salt is mildly abrasive and can clean a slightly dirty cast iron pan on its own.

Instructions:

  1. Cover the pan’s surface with a thick layer of salt.
  2. Use a napkin or small dishcloth to gently scrub the cast iron grill pan with the salt. As you rub the surface, you will notice the salt dislodging the pieces of food and residue from cooking.
  3. Add more salt if needed, and keep scrubbing until all the burnt bits of food have been loosened from the pan surface.
  4. Discard the salt and use a clean cloth to remove the bits of salt and loosened debris in the pan, until it is completely cleaned.

Cleaning a Cast Iron Grill Pan with Salt and Hot Water:

If your cast iron grill pan is dirtier than expected, using salt and hot water together will work well to scrape bits of food without scratching the cast iron surface.

Instructions:

  1. After use, allow the cast iron pan to cool down a little.
  2. Once the pan is just warm, pour some coarse salt into the grill pan, making sure the entire surface is covered.
  3. Then, pour a small amount of hot water into the salt. This will turn the salt into a sort of paste.
  4. Use your dish sponge to scrub the salt-paste into the grill pan surface. Clean between the ridges, as well as the sides as these areas often have hardened residue.
  5. Once all the gunk is loosened up, rinse the salt mix and debris off with hot water, then dry with a kitchen towel or paper napkin.

Cleaning a Cast Iron Grill Pan with Soap and Water:

Cast Iron Grill Pan with Soap and Water

Using dish detergent and water may be the most common way to clean dirty cast iron grill cookware. It is also a good way to clean a pan that is dirty but doesn’t have stubborn bits of burnt food stuck to it.

However, harsh soaps can affect the seasoning of your pan, so use this method sparingly and make sure you use a very mild detergent.

Instructions:

  1. Start by adding a tiny amount of mild dish detergent in the middle of your grill pan.
  2. Then add a bit of hot water to the pan to make a lather.
  3. Use a soft scrubber or sponge to gently scrub the surface and sides of the cast iron pan.
  4. Once all the gunk has been cleaned off and the surface of the pan is smooth, rinse off thoroughly, making sure no soap remains in the pan.
  5. Dry completely with a dish towel or any other soft cloth.

Seasoning a Cast Iron Grill Pan

This is an important part of maintaining all kinds of cast iron cookware like griddles and pans. 

Even if you haven’t scratched your cast iron grill pan while cleaning, seasoning it afterward is still necessary. This will keep your pan in good shape for much longer, and make cooking in it absolutely pain-free.

Here’s the quick and easy way to season your cast iron pan:

  1. After cleaning your pan, dry it carefully with a towel or napkin.
  2. Then set it on the stovetop on high heat for a minute, until any lingering moisture has evaporated.
  3. Once the pan is cool enough to work with, use a paper towel to rub any kind of neutral oil (vegetable, sunflower seed, peanut) across the entire cooking surface, as well as the bottom of the pan. Don’t forget to oil the sides! This will also protect glass cooktops.
  4. Use another napkin to wipe off any excess oil. The whole pan just needs to be coated with a thin layer of oil.
  5. Then set the pan back onto the stove and heat until it starts smoking just a bit.
  6. Wait for the pan to cool down again before storing it in a dry place.

Removing Rust from a Cast Iron Grill Pan

Removing Rust from Grill Pan

If you’ve left your cast iron cookware in a damp space, and the coating has been compromised, rust will set in immediately. Here’s how you can fix all that:

Step One: Removing the Rust

First things first, get rid of the rust. There are two ways to do this: soaking and scrubbing.

You can either soak your pan in a bucket or sink filled with white vinegar diluted with an equal amount of water. The important thing to remember is that you need to remove the pan immediately after the rust dissolves and flakes away.

This is because the pan has no coating and the unseasoned surface will be totally rusted. This kind of rust can not be fixed so you need to be careful.

Or you can gently scrub the rust away with steel wool. While this is more labor-intensive, it is safer for your pan. You can also use soapy water. The important thing is to dry your pan completely afterward with a towel, or by placing it over medium heat on the stove.

Step Two: Season the Pan

Then re-season the pan from scratch. This takes more time than your regular seasoning.

Preheat your oven to 350˚F and place a large sheet of aluminum foil on the bottom rack. Rub a neutral oil all across the entire pan. Then, put the pan upside-down in the oven over the foil, as this will catch any oil drips.

Let the pan bake in the oven for an hour, cooling afterward for at least 45 minutes before using it. Make sure you dry your pan completely when cleaning, and season lightly as mentioned before to keep it working well.

To prevent rusting, store the cast iron cookware in a low-humidity environment. Always wipe it down with a bit of oil that has no taste and a high smoke point.

Maintaining Your Cast Iron Grill Pan

If you’ve been dealing with rust and other issues with your cast iron cookware, these tips will help avoid them in the future.

  • Avoid using soap or detergent as much as possible when cleaning your grill pan.
  • Avoid using metal utensils and stick to wooden or silicone spatulas and spoons.
  • Store your cast iron grill pan in a clean, cool, and dry place.
  • Don’t store any food in your pan, especially when cooking things like sauces that have tomatoes, vinegar, lemon juice, or other acidic ingredients.
  • Always keep your cast iron pan coated with a light layer of neutral oil.
  • Clean your cast iron pan immediately after each use, and do not leave it to soak overnight, as this encourages rusting.
  • Never use a steel wool scrubber to clean your pan after cooking-instead use a gentle scrubber or dish sponge to dislodge bits of food.

Frequently Asked Questions

Here you will find answers to questions we get asked the most about cast-iron grill pans.

01. Is Cast Iron Good for Grilling? 

Yes, grilling steaks on a cast iron pan will allow the meat to brown evenly, and will also contain any drippings from the meat, which adds more flavor.

02. Is It Healthy to Cook in Cast Iron?

Because you can steam, broil, and even ‘fry’ without oil in a well-seasoned cast-iron pan, it is a pretty healthy option to cook in.

03. What is a Cast Iron Grill Pan Good for?

These grill pans are best for grilling veggies, searing steaks, pork chops, and cuts of meat.

04. Why is Cast Iron Better for Grilling Steak?

Cast iron heats very evenly, which means the steak will be cooked uniformly with even browning. It also keeps the meat nice and juicy without drying out.

05. What are the Disadvantages of Cast Iron?

Cast iron cookware is a little tricky to use, as the seasoned surface needs maintenance and cannot be scratched off. You also need to be careful when cleaning and storing your pan.

06. Is Cast Iron Better Than Non-Stick?

Although cast iron is pricier than non-stick cookware, cast iron is better for cooking because it conducts heat more effectively and evenly than non-stick.

Also, the non-stick surface wears off over time and the pan will need replacing, while a cast iron pan can be re-seasoned and used for decades.

In Brief

While cast-iron seems scary for first-time cooks, it is one of the best investments for your kitchen. You can grill, fry, steam, and even bake in one of these, which makes it a great tool for cooking. 

Once you learn how to clean cast iron grill pans, you can maintain your cookware indefinitely, using it without damage. As you can see, cleaning the pan will just take a bit of extra effort and time. Once you get your pan nice and clean, you can cook almost anything out there. So what will it be? Will you use your pan to cook some burgers, or grill a mighty Tomahawk steak?

How to Put Out Charcoal Grill: Wrap It Up with No Fuss!

Grilling with charcoal is always an amazing experience, and this kind of grilling infuses the food with an intense smoky taste. Using charcoal grill and accessories requires a bit of finesse and grilling itself is a culinary art.
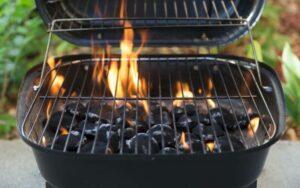
Most beginners get the hang of lighting a charcoal fire pretty easily. The process of grilling meat isn’t overly complicated either. But what about putting out a charcoal grill? Many guides gloss over this part of grilling, so grill amateurs aren’t sure how to put out charcoal grills.

However, knowing how to handle a grill after you are done using it is extremely important. You should extinguish your embers/charcoal as soon as possible as this saves fuel and also prevents accidents from flare-ups.

Also, if you have small children or pets, it is important to put out your grill right away. If you fumble around with your grill once the BBQ is winding down, you can be risking a fire hazard.

This article will change that. If you just got a BBQ charcoal grill, and you aren’t sure how to deal with the aftermath, keep reading. We cover everything; from putting out your charcoal grill to cleaning up the ash and debris.

How to Put Out a Charcoal Grill

how to put out charcoal grill

The easiest way to turn off your grill is to close all the vents, cutting off the oxygen supply to the burning coals. This method is a little slower, and it can take up to 2 days to let the coals cool down completely.

Putting out the grill with water is a little risky, but much faster. To completely put out charcoal, you need a bit of expertise in handling them. We’ll walk you through extinguishing barbecue grill charcoal.

What You Need:

Putting Out the Grill:

  1. Start by putting on heat proof oven mitts or BBQ gloves and make sure that they are heat resistant so that the heat from the grill won’t burn you.
  2. Take the rack off your grill and carefully close the lid. If your grill has vents then make sure that they are closed all the way to cut off the oxygen supply.
  3. Charcoal for the grill can always take a very long time to cool down, and it can be difficult to tell whether they’re still burning or not.

    Because of this, it is best to leave the coals to cool down for around 48 hours, just to make sure that they are completely cool.

Ash Disposal:

After this time has passed, and the contents of the grill have cooled down, you can start cleaning up the ash and remnants of the burnt charcoal.

  1. Use something like an ash removal bucket to safely scoop up the ashes. Pour them onto a large sheet of aluminum foil before disposing of them, as this prevents the ash from spilling and making a mess.
  2. Carefully fold up the foil, sealing the ashes inside securely. Dispose of the foil and ashes in a large metal basket or trash can. Avoid using plastic, as any remaining embers can burn it.
  3. When handling the ash and aluminum, wear gloves and use tongs. Even though the ash is mostly cold, it is safer to make sure any sparks or glowing embers won’t burn you.
  4. However, you don’t always have to wait for the charcoal briquettes to cool down completely. You can still remove them with the ash while they are still warm using a pair of sturdy tongs.

    However, in doing so, you need to use separate metal trash cans or containers; one for the ash and one for the charcoal.
  5. If the coals are still very hot, this means that they will keep burning in the metallic container and create more ashes. To extinguish them completely, use tongs to dip the burning coal into a large container or bucket of water.
  6. Do not spray or pour water onto the hot grill or charcoals. This can create flare-ups, and you can be injured by the jets of steam. The steam can also scatter the hot ash which can result in serious burns.
  7. Furthermore, coals burn at very high temperatures, and spritzing them with water can result in a cracked grill.
  8. Always wait until the ash and coals have completely cooled down, even if it takes two whole days, to stay on the safe side.

Cleaning the Grill:

  1. Use a metal grill spatula or a trowel to brush off the remaining ash from the grill.
  2. Then, thoroughly clean out the chamber containing ash. Pay particular attention to the vents, as stray bits of ash can end up there, blocking the vents when you next use your grill.
  3. Use a wire brush and grill cleaner to thoroughly clean the grates and lower section of the grill. You can also clean the grates using just soap and water.
  4. After the grates are clean and dry, spray some silicone to lubricate them. The spray acts as an anti-rusting agent and improves the lifespan of your grill grates in the long run.

After they have completely cooled down, use a pair of tongs to place the cold charcoal briquettes back in the bottom half of your grill so that you can use them the next time you fire up your grill.

Tips for Shutting Down Your Grill

After cooking on a charcoal grill, you need to put out the embers right away. These tips will help you extinguish your grill safely and quickly.

  • Don’t ever put hot charcoal in plastic bins or garbage bags, as this can burn up and even start a fire if there is an ember.
  • Don’t move the grates around before they have completely cooled down.
  • Locate the vents on top and bottom of the grill and close them. This will gradually put out the burning coals.
  • Always keep a bucket of water nearby to douse any hot smoldering charcoal briquettes. Keeping a fire extinguisher in the immediate vicinity is also a good idea.
  • Even if you think the charcoal grill is not hot enough to cause burns, use gloves and tongs anyways. Even after 48 hours, some ash or remaining charcoal can still be very hot.

Frequently Asked Questions

Below you’ll find answers to questions we get asked the most about putting out charcoal grills.

01. What Do I Do with Charcoal after Grilling?

After you are done with putting out the grill and cleaning the ash, you can reuse partially burnt coals the next time. After putting them out with water and allowing them to cool, let them dry completely before putting them back in the grill.

02. How Should I Put Out a Grill Fire?

To put out a grill fire, close all the vents to cut off the fire’s oxygen supply. This will slowly choke out the fire and eventually put it out.

03. Can You Reuse Charcoal?

After the charcoal is used or partially burned, it can be lit again after it has cooled and dried.

04. How Long Does Charcoal Burn for?

Lump charcoal generally burns for 4-6 hours, while briquettes will give you a good 8-10 hours. However, every BBQ grill is different and these burn times are dependent on the grill, and the airflow of the vents. If the vents are completely open, they will burn more intensely.

05. At What Temperature Does Charcoal Burn?

Charcoal burns at extremely hot temperatures. Charcoal burns at temperatures over 1,100 degrees Celsius (2,010 degrees Fahrenheit). This makes it even more vital to be careful around burning charcoal.

06. How Do I Get Rid of Charcoal Ash?

Let the ashes fully cool down or pour plenty of water onto them and stir thoroughly to speed up the process. Once the ashes have cooled completely, use a trowel to remove them from the grill.

Wrap them in aluminum foil or put them in a small metal container, like a coffee can. Then dispose of the ashes in an outdoor or metal garbage bin.

Conclusion

The best way to enjoy a BBQ is to use the grill properly and safely. Once you know how to put out a charcoal grill, you will be able to put a wrap on your cookout safely and quickly.

The key to handling a hot grill is patience; just shut off the vents and let science do the rest! Give the grill, charcoal, and ash time to cool off so you can handle them more safely.

What do you think? Are you going to follow this method after your next BBQ?

How to Turn on a Grill (Both Automatic and Manual)

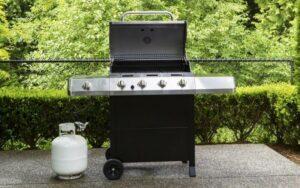
Nowadays, we all are upgrading to propane grills from our beloved charcoal grills. While charcoal grills have their place, gas grills are just easier to use on a regular basis. 

Not only gas grills save a lot of time and energy, but they are also healthier for our body and cause less greenhouse emission. We know, turning a propane grill is not that tough either. 

But if you are here, that means it’s your first time using a gas grill and you need an easy guideline. So here we are with two different methods to turn on your grill within minutes.

You may also like: How to start a traeger grill for the first time

How to Start a Propane Grill

how to turn on a grill

Although gas grills are fairly easy to use, we all face one of those moments where it is just not turning on. And the fact that there are so many different models with different features can make it a little bit confusing for a beginner. 

No worries, as we are going to mention all the different methods there are to turn on your propane grill. If your grill ever troubleshoots and the gas grill does not ignite, check if you are doing it right in the first place.

Using the Ignition System:

Ignition System

This is basically the default way you are supposed to start your gas grill. When this method does not work, we have to look for alternatives. Here’s how to turn on your grill using the ignition system for the first time:

01. Open the Lid:

Before you start doing anything else, open the lid of your gas grill. If you accidentally turn on the gas without opening the lid, there can be serious fire hazards as gas tends to explode in closed environments. So whether you have a grill with lid open or closed, knowing this is a good thing.

This is because gas fumes tend to gather in enclosed areas. When you lit up the grill, all the gas inside the lid will just fire up and cause an explosion. It is very dangerous. So do this step first.

02. Supply the Gas:

If you are using propane gas for your grill, you need to make sure that there is actually enough gas available to use. For first time users, you will have to set up the propane tank as well. As most of the propane grills are easy to carry, you won’t have too much trouble setting it up. 

Hook up the gas tank to the grill following the guideline mentioned in the propane tank. Follow the cautions carefully as fully loaded gas tanks need extra attention to handle. But this is just something you have to do once every month, depending on how much you use your grill.

For built-in grills with a main gas supply, there is no worry of replacing propane tanks. You just have to set it up once and forget about it. 

03. Turn on the Gas Supply:

After making sure the gas connection is properly set up, you can turn on the supply of it. For propane grills, turn your knob either clockwise or counterclockwise. Then wait 15 seconds to let the gas run through the system.

04. Ignite the Grill:

This is the fun part. Now you can ignite the grill by pushing the ignition button. After doing so, your grill will light itself up. Most propane grills have the same system for automatic ignition. You will find the button just beside the gas knobs. 

And there you have it. It’s that easy to turn on a gas grill with an automatic ignition system. In the next part, we will talk about what to do if you don’t have it!

Do It Manually:

turn on a grill Manually

Maybe your grill does not have an automatic ignition or it simply is not working properly. This does not mean you can grill your favorite food on it! Here’s how to turn on a grill manually:

01. Find the Lighting Hole:

The first thing you need to do is find the lighting hole. The lighting hole is usually on the grill’s exterior. You can not light up your grill like a regular gas stove. 

If you can not find this exact lighting place, do not try to toss a matchstick inside the open grill. So look for it thoroughly or check the instruction manual to easily find it.

02. Grab Your Matchbox:

Now that you have found where you have to light it up, grab your matchbox and fix it on the curled holder. This helps to keep your hand at a distance. Sudden flame exposure can burn your fingers so taking careful measures like this are crucial. 

The curled holder also helps to put the light exactly where you want. As most automatic grills are not meant to be used manually, the design is not very user-friendly. 

So the narrow holder helps to easily enter the match inside the hole. Without this, you will end up wasting a lot of good matchsticks. 

03. Light It Up:

After you have successfully set up your match into the holder, it’s time to light up your grill. Make sure to turn on the burner before doing so. 

After one burner is ignited, you can go and turn on all the other burners. This process is basically the same for both manual grills and grills with a broken automatic ignition system.

You may also like: How to keep a charcoal grill lit

How to Tell If Your Grill Has Issues

Your Grill Has Issues
  • If it has a hissing sound when you turn it on. This can be a sign of gas leakage.
  • If the ignition and gas supply has no problems but your grill still won’t turn on, then your burner needs to be replaced.
  • For a colder environment, you might be experiencing a slow gas supply. Cold can freeze parts of propane and reduce the gas flow.
  • If your rubber pipe feels rigid, they need to be replaced immediately. Long term use makes rubber lose its flexibility.

Maintenance Tips for Gas Grills

Maintenance Tips for Gas Grills

As gas grills are not cheap to own, taking proper care is a must. Here are some of our favorite tips to maintain the quality of your grill for years:

  • Do routine checkups with soapy water to know if there are any gas leaks. Running soapy water once a month through the pipes is a very smart idea to look for holes.
  • Always cover your grill. Keep the lid on when you are not using it. Put a durable, high-quality grill cover on top to make sure it doesn’t get corrosion or rust. This protects your grill from weather damage. 
  • Clean your grill after each use. This is very important to keep it looking brand new.
  • Do a thorough cleaning once a month. 
  • Season your grill grades to get a non-stick finish and rust-free experience.  You don’t have to do it for stainless steel or ceramic-coated grated. 
  • Regularly check fuel levels.

Frequently Asked Questions 

01. Why is My Weber Grill Not Lighting Up?

If you are having trouble with turning on your Weber grill, the problem probably is in the ignition system. So the first thing you should do is check the system to make sure all the wires are connected to the right place. You can plug and unplug all the wires to make sure they are in their respective places. 

If this does not work, you can manually light up Weber grill by using a matchstick. Of course, this is a temporary solution. You can replace the ignition system by contacting the manufacturer using your warranty.

02. How to Fix Low Flame on Gas Grill?

Low flame issues on a gas grill is a very common problem. To fix it, you can start by turning everything off. This includes the gas flow at the tank. After that, disconnect the regulator from your gas tank. 

Let the whole grill sit like that for 5-10 minutes. Then set everything up again and slowly open the valve all the way, wait for 40 seconds, and then light up your grill. You will find your grill to have an increased flame.

03. How Do I Unclog a Gas Grill Line?

You can unclog your gas grill line using a thin and sturdy wire. The wire needs to be longer than the line you want to clean. Then push it gently through the line and remove whatever is stuck inside it. This will unclog it and let the gas run through seamlessly again.

04. How Do I Light Up My Grill if the Ignitor is Broken?

It is a very common problem to happen. You can definitely use other things to light up your grill. To light up your grill without an ignitor, first, open the grill and find the lighting hole on its side. 

Then light up a matchstick and put it in the curled end of the holder. You can also use a lighter to light up a piece of paper and use it the same way as the matchstick. Once the fire is closer to the hole, turn on your gas burner. And voila! Your grill is ready to use. 

Wrap Up

Now that you know how to turn on your gas grill, go and start making your favorite hamburgers and wings. Whatever you do, make sure to keep it clean and pristine. 

If you can not turn on your grill even after following all those steps, it’s time to consult some professionals as you will likely have to replace some inside parts. 

With proper care, you can actually use your grill for years and years without any issues. So make sure to appreciate such a useful gadget for making mouthwatering dishes!

How to Cook Bacon on the Grill: Crispy Bacon in Minutes!

Hate cooking bacon on the stove? Few people fry bacon on a pan and get away unscathed; there are oil splatters and burns and most folks huddle behind their counter to avoid bacon-related injuries.
Since no one is giving up bacon any time soon, we decided to come up with an alternative. Something that reduces the chances of oil splatter burns and chewy bacon. You use this method to cook up a batch of bacon easily when you have guests over or fancy up your breakfasts.

Yup, we’re talking about grilling bacon. If you’re wondering, ‘Can you grill bacon?’ The answer is a resounding yes. Bacon can be grilled for a nice juicy and smoky flavor, with the perfect crispy texture.

If this seems a little over-the-top, stay with us a minute. We will show you how to cook bacon on the grill for unbelievable results and easy cleanup. As a bonus, we will also show you how to cook bacon in a skillet, as well as on a griddle without all the trouble.

Cooking Bacon on the Grill

Cooking Bacon on the Grill

Grilling bacon may be the easiest way to cook bacon. You don’t have to deal with scary grease splattering on your arms, cleanup is easy and the grilling gives an amazing depth of flavor.

What You Need:

  • Outdoor grill
  • Aluminum foil
  • Bacon

Directions:

1.     Put out a double sheet of foil, measured to hold the amount of bacon you want to grill, with the edges turned up to collect the bacon fat.

2.     Place the foil on a sheet pan or baking tray.

3.     Preheat your grill to medium heat (350F-400F).

4.     Place your bacon strips on the foil, making sure they aren’t overlapping.

5.     Place the baking sheet on the grill grate and close the lid.

6.     Cook for 12 minutes or until it reaches your desired level of crunchiness.

7.     Transfer bacon to a plate lined with paper towels to absorb extra grease.

Frying Bacon on the Stove

On a Griddle:

Cooking bacon on the griddle, electric, or otherwise is a good option because the bacon can be laid down flat, which also makes them easier to flip.

That’s not all. Griddles allow you to cook in bulk, and also makes it easy to drain the grease that is rendered from the bacon.

Directions:

1.   Take the bacon out from the fridge at least 15 minutes before cooking.

2.   Place each strip onto a cold electric griddle. Make sure none of the strips are overlapping while fitting as many as possible.

3.   Turn the griddle up to 325F. This is the ideal temp to cook bacon on griddles.

4.   Flip the bacon just once. To check if they need flipping, use tongs to lift a piece slightly and peek under it. If it has browned, turn it over.

5.   The second side doesn’t need as long to cook, so wait a minute or two before killing the heat.

6.   Once the bacon is done, transfer to a plate lined with paper towels to absorb the excess fat.

In a Fry Pan or Skillet:

Although it is the scariest way, it is also the most common way of cooking bacon on the stove. Here’s the best way to fry bacon without any trouble.

Directions:

1.   Start with a cold pan or skillet. Bacon should always start off in a cold pan, so lay out your strips on the pan before turning on the flame. It’s okay to crowd the pan, but try to keep the overlapping to a minimum.

2.   Cook the bacon low and slow. Turn your burner on low and slowly cook the bacon. The bacon will soon start to release some of the fat. When the strips start to curl up, use tongs to loosen the strips and turn them over.

3.   Keep flipping and turning the bacon strips so that they all brown evenly.

4.  Pour off grease carefully. The easiest way to do this is to spoon them off. If you want to pour off the grease, make sure the flame is off and the container you are draining the grease into is heat-proof.

5.  Fry until the bacon is done. This will depend on how crispy and browned you like your bacon.

6. Remove the cooked bacon from the pan and let the extra oil drain off on pieces of paper towels.

Crispy Bacon or Chewy Bacon?

Crispy Bacon

People often debate over the superior sort of bacon. Some love their bacon with a good crunchy texture, while others prefer a softer and chewier slice.

The difference lies in the way the bacon is cooked, and also in the amount of fat in your strips. In crispy bacon, the fat is rendered out completely, giving you a drier texture. On the other hand, chewy bacon contains some of the fat, giving it a moist and meaty mouthfeel.

To make your bacon on the crunchy side, cook the bacon on low heat slowly. This will gradually melt out the fat, giving you that crispy texture. The longer cook time also makes the meat less tender, giving it the signature crunch.

To make chewy bacon, cook the strips at a hotter temperature for a shorter time. A hotter pan will cook the bacon before the fat has the chance to melt out. As a result, the texture will be softer, with chunks of fat.

No matter how you like your bacon, both crispy and chewy strips make for a hearty breakfast of the champions. If you want to experiment, pairing crispy bacon with eggs and chewy ones with pancakes is a great way for both sorts of bacon.

Bacon Cooking Tips

Follow these tips for diner-style bacon that will taste like it was made by a chef!

  • Always start bacon in a cold pan.
  • Drain your bacon afterward to stop them from going soggy or being overly greasy.
  • Wear oven mitts to prevent oil splatter when cooking bacon on a griddle or fry pan.
  • Cook over medium heat, as bacon can burn quickly.
  • Put a little water onto the frypan. This renders the fat, reduces splatter, and results in crispy edges every time.
  • Cook them in the microwave by stacking the bacon on layers of paper towels on a plate. When cooked for 4-6 minutes, the bacon will be done with little cleanup involved!

Frequently Asked Questions

Below you will find answers to questions people often have about cooking bacon.

01. What is the Best Temperature to Cook Bacon?

When grilling or baking bacon, 400F is the best temperature to cook it on. When cooking on a stove, using medium-low heat is the best way to prevent burning or overcooking.

02. Can I Use a Cast Iron Skillet to Cook Bacon?

Using a well-seasoned skillet is perhaps the best way to cook bacon. You will get crispy edges, and be able to spoon out the extra fat with ease. It renders out the fat quickly, giving your bacon an evenly browned surface.

03. Which is Better- Grilling or Frying Bacon?

Grilling bacon results in no oil splatter. It is also a hands-free process and needs minimal cleanup. Best of all, it reduces the amount of shrinkage of your bacon, so there is more to munch on!

04. Can I Add Seasoning to My Bacon?

You can season your bacon with any herbs and spices of your choice. For a more interesting flavor, sprinkle some brown sugar onto the strips. 

This will caramelize and add a complex sweetness to the typical bacon flavor. You can even brush on some maple syrup to glaze your bacon.

05. How Can I Bake Bacon Properly?

Put a rack in the center of a large sheet pan. Place the bacon on top of the rack so they are evenly spaced out and aren’t overlapping. 

Bake at 375°F for 15 minutes, then carefully turn over and bake further until the bacon is fully cooked; golden-brown in color and crisp. This can take around 8 to 10 minutes depending on the thickness of the bacon slices.

So the Point is..

Salty, smoky, meaty. Bacon is the one food that can unite half the world and cure their woes. Whether you like it crispy or chewy, no hearty breakfast is complete without bacon. 

This article shows you how to cook bacon in 3 ways. Knowing how to cook bacon on a grill is the easiest and safest way to get perfectly crispy bacon.

The next time you are having a backyard BBQ, grill up some bacon as an appetizer, or for guests to nibble on along with their sides. You’ll be surprised at how much more bacon you can fit into your meals when you aren’t worried about the cooking process! 

So fire up your grill and start laying out your bacon!

Why Don’t Gas Grills Use Lava Rocks Anymore?

Remember the time when all the built-in gas grills came with their own set of lava rocks? Those days are gone. Now you can hardly find lava rocks in any grills. Ever wonder why we all just stopped using them?
There is no doubt that lava rocks are amazing at creating the most delicious smoked briskets and stakes. They are a natural ingredient that seems like a better environmental choice as well. So why don’t gas grills use lava rocks anymore? 

Before we find out the answer, let’s take a look at what lava rocks really are.

What are Lava Rocks?

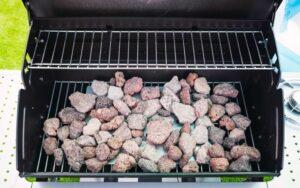
Why Don’t Gas Grills Use Lava Rocks

The name itself is pretty self-explanatory. Lava rocks are a type of volcanic rock that is found after volcanic eruptions. 

Once the lava cools down, they turn into these hard pieces of rocks that can retain tons of heat. For this reason, they have been used for baking and grilling for centuries. 

As they are formed through the solidification of molten lava, they are very porous in nature. These stones are super durable and strong. Lava rocks can retain tons of heat too. And why wouldn’t they? They are born from magma!

Why Were Lava Rocks Used in Gas Grills?

Lava rocks can hold a lot of heat compared to any other type of rock. They heat up very fast and can reflect heat from a propane grill. This makes barbecuing very easy. 

Traditionally, lava rocks were used on gas grills. As they get super heated-up, when the fat from the meat drops down into them, it creates smoke and adds a rich flavor to the food. Lava rock cooking was a really popular way to grill different types of meat and veggies.

The smokiness you get from lava rocks is very intense and unique. They make any type of meat super delicious. This is the reason why it was so popular to use. However, using them for gas grills was no easy task.

Why Don’t Gas Grills Use Lava Rocks Anymore?

Gas Grills Use Lava Rocks

Modern technologies have created better alternatives and inventions that make grilling very easy and fast so we don’t need to use lava rocks anymore. Apart from that, lava rocks have their own set of drawbacks that makes us not want to go back to them. 

Health Concerns:

If you are someone who loves to barbecue very frequently, using a gas grill with lava rocks can result in serious food poisoning. This is because the stones can harbor bacteria and even mold. 

The appeal of lava rocks is the smokiness you get from using them on any type of meat. This happens because the meat drippings and fat falls straight into the hot rocks and forms smoke. The smoke flavors the meat. 

As much tasty as the meat gets, the bacteria and molds inside the rocks tend to come into contact with the meat as well. So not only are you getting a roasted flavor, but you also get exposed to many different health risks with it. 

Most people develop serious stomach issues. So instead people now use gas grill ceramic briquettes. We will talk about them in a moment.

Hygiene Issues:

You might be wondering why bacteria or mold would grow on lava rock grills. Well, this is due to the nature of the grill itself. 

In modern gas grills, all the fat drips into a tray. As lava rocks are very porous, the drippings get absorbed by the stones. 

So even after burning the rocks for hours, there is still moisture and fat left on them. What happens when moisture and fat get exposed to open air? They start to get moldy. 

This problem would be easily avoided if we could clean the lava rocks after each use. But cleaning them is not an easy task as you can not use any liquids. Not even water is allowed to clean lava rocks. 

And even if you do, there needs to be a long drying process before you can use them to their full glory again. Who wants to do so much work only to make a few hamburgers? 

Excess Smoke:

You can imagine the number of smoke lava rock BBQ grills would produce when grease starts to drop on its burning flames. The specialty of lava rocks is their charred flavor which is achieved through excessive exposure to smoke. 

This is all fun and game until you are the one who has to grill the meat. Not only would you start to cough uncontrollably, but regular exposure to that amount of smoke can cause serious lung damage.

Are Lava Rocks That Bad?

Lava Rocks That Bad

Not really. Lava rocks are still used for many different things. As we have mentioned before, they are porous. This is a disadvantage when you are trying to cook with them. 

Lava rocks for gas grill might be out for their porous quality, but this very feature makes them lightweight and easy to move around. 

Lava rocks are also very inexpensive compared to other alternatives. This is one of the reasons why they grew so popular in the first place. 

But the key thing that attracted everyone toward hot rock cookers is their high smoke level. This adds a gorgeous smokiness to any type of meat you are grilling. The distinctive flavor is very hard to recreate with anything else. 

Lava rock grills are also super good at longer heat retention. This means you can check up on your food without worrying about any heat escaping.

Better Alternatives of Lava Rocks 

At this point you might be thinking, I will just use charcoal then. Not trying to discourage you but charcoal is not ideal for gas grills. We have two very effective alternatives to lava rocks for you:

Ceramic Briquettes:

Ceramic Briquettes

Ceramic briquettes are a very popular and probably the most used alternative to lava rocks. They are made out of ceramic using the latest technology. 

As this is a manmade item, all the briquettes have the same shape and size. This provides a uniform look which results in better heat distribution. Gas grill ceramic briquettes have totally replaced lava rocks.

There are many advantages of using ceramic briquettes for gas grills. Some of the key ones are:

  • As ceramic briquettes evenly distribute heat throughout your grill, it saves a lot of energy. So it is fuel-saving by design. 
  • Ceramic briquettes add delicious flavors to your food. The aroma is very smoky and quite similar to lava rocks. 
  • The cleanup is one of the biggest advantages of ceramic briquettes. You can use a brush to simply remove all the debris from it.
  • It adds the same flavor profiles as lava rocks without any of those health concerns. 
  • You rarely need to replace your ceramic briquettes. They can easily last 5-6 years before they start to show signs of wear. Even lava rocks do not last that long!

To us, this is the obvious choice for anyone who is looking for a perfect replacement without losing any taste and flavors. Ceramic briquettes provide just that.

Heat Shields:

If you are someone who is more of a low maintenance kind of person, it is probably a better idea to look for heat shields or flavor grids for your gas grill. 

Heat shields are a type of metal tent that protects the burner from grease and meat drippings. It also helps to disperse heat more evenly. This makes them very useful if you’re new at grilling. 

Some of the key advantages of heat shields include:

  • They are very easy to clean. Simple soap and water would do the trick.
  • They are quite lightweight compared to lava rocks and ceramic briquettes. So you can easily carry it around. 
  • In case one part gets damaged, you can replace the whole thing very easily as they are not very expensive.

However, one drawback is that heat shields are not very long-lasting. Ceramic briquettes last years and years without any issues. But these shields are not ideal if you happen to grill very frequently.

To Finish 

Now that you know how risky lava rocks can be for grilling, hopefully, you will not go back to the old-fashioned style anymore. As amazing as this material is, the risk exceeds the benefits.  

It’s no wonder why gas grills don’t use lava rocks anymore! Besides, there are so many better alternatives, we can not see a reason why anyone would try them again.

Pin Later

Why Don’t Gas Grills Use Lava Rocks Anymore?

How to Clean a Blackstone Griddle: Doesn’t Have to be Hard

If you came into this post wondering what is the best way to clean a Blackstone griddle, we have an answer for you! 

Actually, we have several different answers along with a step-by-step guide to help you season your Blackstone griddle. We all enjoy using Blackstone Griddle for its flat-top surface and versatile usage. 
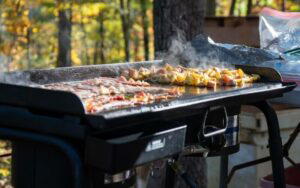
You can cook various different food items all at once. The only thing none of us enjoy is the cleanups.

In this post, you will find the easiest way to clean a Blackstone griddle without feeling annoyed to do it. With our step-by-step guide, you will master the art of griddle cleaning, something every grilling enthusiast should know!

When to Clean Your Blackstone Griddle

You will know it’s time to properly clean your Blackstone griddle if any of these matches your situation:

  • Food keeps sticking to the griddle
  • Uneven cooking of meat
  • Grease buildup on the surface
  • The griddle surface feels sticky to the touch. 
  • Burnt flakes on the surface. 

How to Clean a Blackstone Griddle

Clean BlackHow to Clean a Blackstone Griddlestone Griddle

It doesn’t take much to clean your Blackstone Griddle after each use. But it sure is necessary to maintain the quality. If you don’t clean your griddle, it will begin to rust and deteriorate over time. 

The good thing about the Blackstone griddle is, the surface is made out of stainless steel. This means it does not require too much elbow grease to clean and maintain.

You will need:

  • Griddle scraper
  • Cooking oil
  • Sponge
  • Tablecloth/ paper towel
  • Lemon juice
  • Sandpaper

Step-by-Step Guide:

  1. Turn up the heat to 300-350 degrees. As the griddle starts to turn very hot, bring out your scraper and scrape off the surface with it. This will help you to get rid of all the food particles, grease, and burnt pieces from it. 
  2. After you are done scraping the surface, pour some warm water on it. This helps to remove the grease buildups. As the surface is totally flat, you have to be careful not to burn yourself. 
  3. After the surface cools down a little bit, use your sandpaper or griddle pad to scrub away the entire surface. You don’t have to put too much pressure on it. By this point, the grease and burnt will come off fairly easily.
  4. Rinse the surface properly and then use your paper towel to wipe it off. 
  5. Use some lemon juice and a soft tablecloth to wipe away any leftover grimes. You can also use a stainless steel cleaner for this step. 
  6. Make sure the surface dries properly before you move on to re-seasoning it. It needs to be clean and bone-dry. 

To Get Rid Of Rust from Blackstone Griddle

Griddle

The joy of cooking outside with the Blackstone griddle is incomparable. The griddle, however, can not handle the harsh weather if you don’t season and maintain it properly. 

Maybe you didn’t know about regular cleanups and now your Blackstone has rust all over its flat-top. No worries as we have easy ways to eradicate rust from Blackstone Griddle. 

You will need:

Step-by-Step Guide:

  1. Before you do anything else, put on your gloves to prevent any accidental burns. Turn your griddle to high heat and let it sit for 2 minutes. This helps to weaken the rust on top of the surface.
  2. Turn the heat off and let it cool down for a while. Once it is bearable to touch, bring out your metal scraper and start scraping off all the rust from it. It will also remove all the cooking buildups and grease. 
  3. After you are done scraping off all the corrosion from it, bring out your cooking oil and apply a few tablespoons all across the surface.
    Start scrubbing the flat-top with griddle stone or sandpaper. Do it in a circular motion to prevent any scratch marks. You can also use steel wool for this. 
  4. Use a paper towel to remove all the oil and rust from it.
  5. Repeat the process as many times as needed. 
  6. After you are properly done cleaning off the corrosion, add another 3-5 tablespoons of cooking oil and wipe it off with a clean towel.
    This helps to remove any rust residue. Keep doing it until the paper towel looks fresh and white. 
  7. The next step is to season the griddle which we will talk briefly about in a moment.

How to Season a Blackstone Griddle

blackstone griddle cleaning

If you have never seasoned your Blackstone griddle before, you will be surprised by the result. Ideally, you should season your grill on a regular basis to keep it rust and damage-free. It also helps to cook food easily with less oil. 

You will need:

Step-by-Step Guide:

  1. First things first, you have to clean your griddle before you plan to season it. If you did clean your griddle a few days ago, it doesn’t hurt to do a gentle wiping with dish soap and a paper towel.
    This will remove all the dust and grease from the surface. After that, let the surface dry completely.
  2. Now that the griddle is squeaky clean, preheat it at the highest settings for 10-15 minutes. Alternatively, you can heat it up until the surface starts to go dark brown. When you notice this, turn off the burner. 
  3. Let the surface cool down properly. Then apply a very thin layer of oil all over the griddle. Use a paper towel to wipe it around and distribute the oil evenly.
    Some people debate on what type of cooking oil to use. You can use any available cooking oil for this. We like to use olive oil for its high bonding abilities. 
  4. Repeat this process a few times then turn on the griddle again. Let it get super hot.
    It will start to burn the oil but that’s okay. We want the oil to be burnt. But this, a good portion of the oil will solidify on top and create a protective barrier against moisture. 
  5. After it’s done, let it cool down completely and add another layer of oil. Then turn the burner on again. Repeat this process 3-4 times to create a durable and solid seasoning. 

Blackstone Griddle Maintenance Tips

Blackstone Griddle Maintenance

All the steps we have mentioned earlier are a part of using your griddle. They need to be done on a monthly basis.

But there are some things that you should always do to maintain the quality of the griddle. If you regularly take care of your Blackstone griddle, it doesn’t take too much work to deep clean it. 

Here are our tips to maintain the griddle overtime:

  • Use a griddle scraper after each use to remove all the buildups of grease and burnt food. 
  • When the flat top is cold, spray the surface with dishwashing liquid and give it a good rinse. Use paper towels to wipe it clean. 
  • Paper towels are your best friend. Use them to casually remove grease, to dry the surface, or to remove dust. It takes no time and effort but leaves the surface feeling fresh as new.
  • It is a smart idea to re-season your grill after each use. If you use the griddle on a daily basis, do it twice a week. 

Frequently Asked Questions 

01. Can I Leave My Blackstone Griddle Outside?

Yes, you can leave your Blackstone griddle outside. But you have to be careful about it.

Blackstone griddle, just like any other stainless steel griddle can rust when exposed to moisture. To ensure this doesn’t happen, you have to keep it inside a shade or put a protective griddle cover on top. 

If you actually do these things, you can use the griddle even in the wintertime to cook delicious warm dishes for family and friends. 

02. Why is My Blackstone Griddle Sticky?

If you try to use your Blackstone griddle and notice food sticking to its surface, then the problem might be in your seasoning. You have to properly season your Blackstone griddle for it to feel almost nonstick. 

Oftentimes we only season our griddles with one coating of oil. This is simply not enough. You need to apply multiple coatings of oil to fix the issue.

However, if you use too much oil, it won’t create the kind of protective layer we are expecting from seasoning. As a result, food will stick to it.

03. What is the Best Oil to Season a Blackstone Griddle?

There are many debates on this topic. You can use pretty much any type of kitchen oil to season your Blackstone Griddle. But of course, some oil has better bonding abilities than others.

Blackstone even sells their own seasoning conditioner. We recommend trying that out for the maximum result.

For household oils, extra virgin olive oil and flaxseed oil have the best seasoning qualities to them. They can be used to create multiple layers of seasoning and they don’t gum up like regular vegetable oil. You can also use canola oil for it. 

Finally

A lot of griddle owners think investing in an expensive griddle is enough to keep it looking shiny and new. But the truth is, you have to put love and care into the griddle to maintain its performance.

Now that you know how to clean Blackstone griddle, hopefully, you will take care of yours. 

Blackstone Griddle is super easy to clean and season compared to other options in the market. So keep it clean and enjoy delicious BBQs all year round!

Pin Later

How to Clean a Blackstone Griddle: Doesn’t Have to be Hard

How to Grill Rockfish: Soft, Flakey and Juicy!

While we all love grilled meaty dishes, there’s no denying that too much can cause health issues. For a healthier option, and a change of scenery, try grilling fish instead.
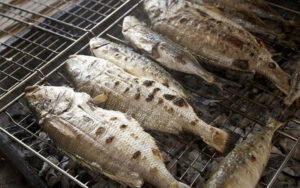
But many people are scared of grilling fish because it ends up sticking to the grill, and people end up mutilating the pieces when removing it from the grill. But if you are still willing to experiment and want to grill seafood, we suggest a grilled rockfish as a good starting point.

Nervous? That’s all right; we will show you how to grill rockfish for perfect results every time. Once you get started, you won’t be able to stay away from a good rockfish seafood grill.

This article will look at two ways to grill rockfish, both with the skin and without the skin. We also give tips on how to grill fillets and the whole fish. Let’s get started on this culinary adventure!

You may also like: Making the Poor Man’s Lobster: How to Cook Monkfish to Taste Like Lobster

An Intro to Rockfish

How to Grill Rockfish

If you aren’t used to fishing there’s a good chance you haven’t heard about rockfish all that much. People tend to be a lot more used to grilled snappers, mahi-mahi, salmon, and swordfish.

So, what is rockfish? Rockfish is a generic term that can be used to refer to lots of species (around 60!)  of fish. 

What is Rockfish?

Any fish that darts around rocks in the water can be called a rockfish. These include striped bass, sebastidaes, salvelinus and grouper.

Rockfish are good for you because they contain healthy fats, vitamins, and can boost brain power, and can reduce the likelihood of diseases. It is also a pretty healthy component as rockfish calories are pretty small in number per serving.

Rockfish taste best when grilled because the fish goes soft and flakey and absorbs the marinade or spices very well. 

When smoked, it adds dimension and the charred flavor goes very well with the fish. Pan-fried rockfish is also great, but grilling, whether on a gas grill or charcoal one, is a healthier alternative.

What You Will Need

  • Rockfish of your choice
  • Oil or cooking spray
  • Seasonings like pepper, paprika, or chili flakes
  • Herbs like thyme, basil, and parsley
  • Lemon or orange zest and slices
  • Aromatics like garlic and ginger
  • Spatula and tongs

How to Grill Rockfish

How to Grill Rockfish: Soft, Flakey and Juicy! 1

Now that we’ve got all the introductions out of the way, let’s talk about the grilling process. If you follow the steps mentioned here, you are guaranteed to make scrumptious grilled rockfish every time you try.

Getting the Grill Ready:

01. Before you start, prep your grill. Preheat the grill on high at 400-450 degrees Fahrenheit.

Bringing the grill up to a high temperature helps caramelize the fish and give them the signature grill marks that add to an intense smokey flavor and appealing appearance.

02. Keeping the temperature on high will also reduce the amount of time needed to cook the rockfish grill. Best of all, it will prevent the fish from sticking to the grill.

03. The next thing to do is to clean the cooking grates with a stainless-steel brush to remove any kind of cooking debris that may still be left from previous grilling. This will also prevent the fish from getting stuck to the grill.

Grilling Your Fish with the Skin On:

  1. Let your fish sit for 5-10 minutes to bring it down to room temperature. This will help to reduce the chances of sticking.
  2. After that, coat the sides of the fish with the rockfish marinade. You can also use a little oil with herbs or seasoning, and a splash of lemon juice. This step applies to both fillet pieces and whole fish.
  3. Grease the flesh side of the fish and place it flesh side down directly on the grate if you want to sear the surface and grill according to your recipe.

    After it is finished being grilled on that side, the rockfish will release by itself from the cooking grate. If you don’t want a sear, just place the fish skin side down directly on the grate.
  4. The rule of thumb is to allow 8-10 minutes of grill time per inch of fish thickness. If your fish is two inches thick, grill each side for about six to eight minutes.

    In other words, grill both sides until the fish is no longer translucent and the flesh is soft and flaky.
  5. To remove your fish from the grill, slide your spatula into the space between the skin and flesh. Use a sliding motion and go through the two parts of the fish so that the layer of skin remains on the grate and only the fish is removed from the grill.
  6. Let the fish rest for 3-5 minutes after grilling. This will allow the juices to circulate through the fish, making it much more tender.

Grilling Your Fish with the Skin Off:

  1. To help prevent the fish from sticking to the grill, allow it to rest for 5-10 minutes to bring it down to room temperature.

    Then, slather a generous amount of oil on both sides of the fish and add the seasoning and herbs of your choice to your fish before putting it on your cooking grates.
  2. Make sure you grill the rockfish for 8-10 minutes for every inch of the fish. Therefore, if your fish is an inch in thickness, grill on each side for around three to four minutes. You can also grill your fish until the inside reaches a temperature.
  3. Just flip or turn the piece of fish once while grilling. Do not keep turning and flipping it. This will increase the chances of them breaking apart on the grill.
  4. When flipping the piece of fish, do not wrestle the piece of fish off the grill. Be gentle and patient and let the fish naturally release itself from the cooking grate on both sides. When the fish releases itself from the grill, you will know that it is done cooking.
  5. Make sure you give your fish ample resting time to rest once it is off the grill. In most cases, 3-5 minutes is enough time to let the fish relax and allow for the juices to run through your cut of fish, making it softer and more flavorful, and tender.

Tips

  • Always remember to grill with your lid down. Each time you open the lid, you decrease the temperature and extra additional cooking time to your meal.
  • When grilling a whole red rockfish or something similar stuff the cavity of the fish with slices of lemon and fresh herbs to get rid of the fishy taste.
  • Don’t touch or prod the fish when it is grilling, as this will cause it to fall apart.
  • For added flavor marinate the fish in soy sauce and ginger.
  • If you want a more charred flavor without the risk of burning, add a little smoke to your rockfish. When grilling on a charcoal grill, soak wood chips for at least 30 minutes and place them right on your charcoal to boost your fish’s flavor.
  • If grilling on a gas or electric grill, soak the wood chips for around 30 minutes before placing them in a smoker box or pouch and onto the cooking grates.

Grilled Rockfish Recipes

How to Grill Rockfish: Soft, Flakey and Juicy! 2

Rockfish tastes fine no matter how it is grilled. You can get away with seasoning your fish with a little salt and pepper before grilling and it will still taste great.

But for a more classic flavor, you can marinate the fish in some crushed garlic, lemon juice, and black pepper. Then brush some browned butter on the fish fillets and set them on the grill.

You can also marinate the whole rockfish in soy sauce, fish sauce, crushed ginger, and a dash of molasses or honey. This Asian take on rockfish is sure to dazzle the taste buds!

Marinating your rockfish in citrus will get rid of the fishy flavor. Paired with garlic and spices like cumin or paprika will make for a fresh and lively tasting grilled meal.

No matter how you marinate or season your fish, serve over slices of lemon and garnish with fresh herbs for the best possible flavor, seasoning with lots of salt and pepper.

FAQs

Here we answer any questions you might have about grilling rockfish.

01. Is Rockfish Healthy?

Rockfish can provide cell-building benefits, help increase brain power, and gives the body a healthy dose of selenium and vitamin D, making it reasonably healthy.

02. Is Rockfish Suitable for Diets?

Rockfish is pretty lean and low in fat, making it a good choice for people on low-fat diets. This also gives it a mild, crisp, and clean taste.

03. How Long Does Rockfish Have to be Grilled?

A rockfish fillet that is 2 inches thick needs to be grilled for 4 minutes on each side. The exact time depends on the temperature of your grill, how well you want your fish browned, and the thickness of the fish as a whole.

Final Verdict

If you want a break from grilled ribs and burger patties, turning to seafood is a great palate refresher. Rockfish is much lighter and less greasy, allowing the fish to soak in flavors from seasoned rubs and marinades. They brown beautifully and taste amazing.

When paired with bright salads and seasonal soups, you will enjoy the full flavor profile of these fish. Know that you know how to grill rockfish, what’s stopping you from firing up your grill?

Pin Later

Grilling Tips for Rockfish: How to Grill Soft, Flakey and Juicy Fish!

Kamado Joe Review: The Best Charcoal Grill or Too Good to be True?

Whether you’re a serious cook or you do it just for fun, crossing paths with a grill or smoker is inevitable. Anyone dabbling in the culinary arts will know how important it is to work a grill. And why not?
Smoking meat can give you a nearly endless supply of sausages that can last the entire year. Knowing how to grill burgers or BBQ ribs will make you the most incredible person on the block. 

Kamado Joe

Most people are delighted with a good smoker like this one. Moreover, barrel smokers are immensely popular as they give you the softest and most tender meat and vegetables.

But what if you want to take things to the next level? If you’ve been on the lookout for the best charcoal grill, we exactly know what you need. And that’s why we’ve decided to talk about that grill in this Kamado Joe review.

This innovative grill has several features that will make grilling a dream. The attractive grill is visually appealing and has top-notch construction and incomparable heat control. 

If you never got the appeal of ceramic cookers before, the Kamado Joe BBQ will change your mind.

In our Kamado Joe Classic II review, we will talk about the grill’s design, performance, and the things we liked about it. Let’s get started then, shall we?

Kamado Joe Classic II Review

[amazon box=”B01INNA89S”]

Ever wondered why these grills are called Kamado grills? They are named after the Kamado style of cooking, which started in China and spread to Japan. It uses a clay oven that is fueled by wood or charcoal. 

The modern Kamado Joe Classic uses the same concept, and what makes it unique is how they combine low-temperature smoking and high-temperature grilling.

There’s a lot to talk about since the grill gets a lot done. If you’re confused about which grill to get, we’ll help you out in that department. We are going to talk about the different areas regarding this grill.

Grill Design:

Wondering what the grill itself looks like and how it is constructed? The grill has a simple but cohesive and efficient layout.

Overview:

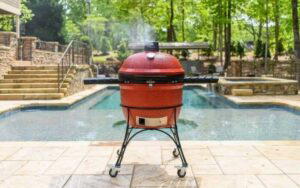
First, this 18-inch grill looks like a typical egg-shaped appliance with stainless steel cooking grates. It is constructed from ceramic, and the red brick color is very eye-catching and striking. Since it is shaped like an egg, the domed head is a little on the long side.

This lid has a thermometer embedded in it, making it easy to keep track of the temperature as you grill. Hate lugging your grill onto your patio? 

The Kamado Joe Classic 2 comes with a durable welded metal stand that has to lock back wheels. As a result, it is pretty mobile and convenient.

It also has plastic side shelves that you can use for holding utensils when you cook. You can tuck them down and out of the way when they aren’t needed. Best of all, these shelves even have hooks for hanging grilling tools.

Last but not least, the grill has a rust-resistant aluminum top vent that doesn’t move around when you adjust the lid. Also, the patented air lift hinge reduces the Kamado Joe weight significantly. 

In particular, the dome weight is lowered by 96%, allowing you to lift the grill lid with a finger.

The warranty is worth noting as well. The ceramic parts all have a limited lifetime warranty, while the metal ones have a 5-year warranty. Moreover, the heat deflector and thermometer/gasket have a three-year and 1-year warranty, respectively.

Cooking Racks:

The Kamado Joe’s innovative design makes it stand out more than its bright color. We were especially impressed with the ‘Divide and Conquer’ rack design that lets you place the food close to the fire for searing or keep it several inches higher for gentler heat.

Besides this, the multi-level half-moon layout allows you to cook different foods in their way at different temperatures. Because of this, there is no need to remove any Kamado Joe Classic heat deflector–move the racks closer or further from the heat.

Cleaning:

Unlike many other grills, cleanup is unbelievably easy. It features a slide-out drawer which makes the collected ash simple to remove. 

This grill differs from other Kamado models as you don’t have to take out the internal components to get rid of the ash.

The drawer collects all the ash, and you remove it and dump out the ashes. Then, slide it back in. There is no need for raking the ashes and creating a mess!

Performance:

The all-star performance of this unit takes things to the next level. First of all, the ceramic body gives it excellent heat retention. Even the firebox that contains the burning coals is ceramic, which holds on to the heat very well.

Also, the Kontrol Tower Top Vent keeps a steady air setting for specific airflow management when opening and closing the dome. Adjusting the top and bottom vents lets you control how much air enters the firebox and, therefore, how hot the grill gets.

The vents also work together in sync. The bottom vent changes the temperature dramatically, while the top vent is for smaller temperature adjustments. 

But the best thing about this Kamado Joe grill? It uses much less charcoal, as the ceramic retains heat and maintains the necessary temperature needed for grilling.

For example, when grilling racks of ribs at 250-degrees, you can have them ready in 4 hours without adding more charcoal. You might even have enough fuel left over to give the meat a good char.

The high temperature is excellent for caramelizing and browning the surface of your meat and veggies without drying them out. You can use it for grilling and BBQs at high temperatures with the top vents fully open. 

It makes the grill pretty versatile since you can grill pizzas and end up with a crispy, blistered bottom and melted gooey cheese on top.

Furthermore, the divide and conquer mechanism makes it ideal for cooking steaks as well. 

You can sear the steaks on the hot side of the grill and then move them to the side with the heat deflector to finish cooking in indirect heat. Your steak will be perfectly cooked and tender!

As the grill has a large cooking area, you can cook multiple things at the same time. It cuts down on the overall cooking time as you can grill vegetables and seafood along with your steaks or ribs. However, it is best to grill one pizza at a time.

Kamado Joe cooking proves to be an easy and hassle-free affair. The powder-coated aluminum vents are mold and rainproof so that you can use them in extreme temperatures without any effect on the grilling process since they can smoke things at a mild 225F and sear at a crispy hot temperature of 750F.

Tired of your firebox misbehaving? Kamado Joe grill reviews are generally full of praise for the advanced multi-panel firebox as it has a six-piece design. It makes it harder for the charcoal to break off when grilling and increases overall efficiency.

What’s Included:

This grill comes with all the essentials you will need for smoking and BBQs. These are all the different parts that come with the Kamado Joe II:

  • Metal cart with locking wheels
  • Stainless steel grill grates
  • Built-in lid thermometer
  • Ceramic heat deflectors
  • Slide-out ash drawer
  • Accessory rack/shelf
  • Grabber tool

You can also buy additional accessories for an even better grilling experience. Whether you need a grill cover or cooking surfaces (a set of soapstone, cast iron griddle, and a grill grate) for grilling delicate fish and veggies, this brand has you covered! With these add-ons, you’ll be barbecuing like a pro in no time at all.

Main Features:

  • Dimensions: 24.6 x 24.26 x 36 inches
  • Weight: 250 lbs.
  • Material: Ceramic and steel

The Pros:

  • Has lots of cooking surface area and lets you customize cooking.
  • Easy and precise temperature control.
  • AMP firebox decreases the chances of cracking or breakage.
  • Dome is lightweight and easy to lift.
  • Allows you to smoke, sear, and char with flexibility.
  • The gasket has a secure fit.
  • Includes everything you need to grill.

The Cons:

  • The price is rather steep.

Why We Recommend It:

This grill is worth every penny because of how reliable it is. The solid construction means that you won’t ever have to worry about the grill falling apart. On top of that, the warranty makes sure that any setbacks are corrected.

Besides this, the half-moon racks and the ‘Divide and Conquer’ system make grilling easy and quick. The Kamado Joe uses much less fuel than similar grills, preserving charcoal in the long run. 

But the charms of the grill go beyond that. It allows you to prep ribs and steaks as usual, as well as searing burgers and even slow-cooking meats.

Buying the Kamado Joe: What You Need to Know

Considering getting yourself a Kamado Joe II? There are a couple of things you need to think about first.

Size:

The Kamado Joe II is 18 inches in diameter. This one is large enough for most people, and it is enough to cook multiple steaks and burgers simultaneously. Besides this, it is sufficient space for entire grilling chickens and large fish.

However, if you don’t have much room, you might prefer the Joe Jr, just 13.5 inches and a lot more petite. On the other hand, the Big Joe is a better option if you need something larger for grilling, especially if you plan on searing or smoking bigger cuts of meat.

Material:

Ceramic is the best material for kamado grills. It is because of its excellent heat retention, sturdiness, and it uses up less charcoal. 

Best of all, it won’t rust and can withstand both cold and burning heat. However, this does mean that the grill is rather heavy.

Price:

As far as quality grills go, the Kamado Joe II is middle-range, leaning towards rather expensive. However, since it works so well and is very sturdy, the unit pays for itself. 

You won’t need another grill for years. Also, the top-notch performance more than makes up for the price of the grill!

Using the Kamado Joe Grill

Not sure how to set up and use the Kamado Joe? While it is easy to get this grill up and running, it does require a bit of elbow grease and patience.

Unpacking the Grill:

  1. Cut the plastic bands and then get rid of the top and side panels of the shipping container.
  2. After that, carefully remove the top piece of the grill cart and cut away or tear the plastic from the top of the grill.
  3. Open the dome of the grill and remove the parts from the inside of the grill. Be sure to handle the internal ceramic components with care.

Assembling Your Kamado Joe Grill and Cart:

  • After taking out the internal components from inside the grill, carefully lift the grill out of the container or box and set it aside. It is the hardest part for most people.
  • Since this grill is pretty heavy, it is recommended that two people perform this task. Do not try to lift the grill by its side shelf tabs. Instead, use the back hinge and the front lower vent opening as your lifting points.
  • Next, remove the plastic wrapping from the grill cart base.
  • After this, lock the casters on the bottom portion of the grill cart.
  • Assemble the two pieces of the grill cart with the stainless-steel screws that are included. You will find these screws attached with tape and plastic on the bottom section of the cart.
  • With the same lifting technique used before, lift the grill facing the front of the cart. This side of the cart is the one with the two locking casters.

Internal Assembly:

  1. Open the dome and position the Slide-Out Ash Drawer in the bottom of the grill, so the handle aligns with the lower vent opening.
  2. Place the base of the FireBox over the Slide-Out Ash Drawer, aligning the opening of the base with the ash drawer handle.
  3.  Set the Cast Iron Fire Grate on top of the base. Note: the ribbed side of the fire grate should face downward.
  4.  Begin building the FireBox Walls. Place each piece on top of the FireBox Base. Note that the parts will lean against the inner wall of the base of the grill.
  5. Using the hole in each piece, pull towards the center to fit under the outer rim of the Stainless-Steel Ring. Repeat the step for each piece until FireBox is secure.
  6.  Place the Divide & Conquer rack on top of the Stainless-Steel Ring. Remember that the flexible cooking system rack should fit along the indents of the ring.

Maintaining & Cleaning Tips Your Kamado Joe Grill

The best way to give your grill a long life is to keep it clean and maintain it after every use. The good news is that the best way to clean the Kamado Joe is to get it nice and toasty and burn everything off. It’s kind of like a self-cleaning oven.

The same applies to the stainless-steel grill grates, as well as the ceramic heat deflector. Let them heat up in the grill for 15 to 20 minutes at 600F. 

Once that’s done, close the vents and allow them to cool down. Any food or residue stuck to the grill will turn to ash, making it easy to clean off with a brush.

This procedure also works for removing mold. However, storing the grill in a clean and dry place will prevent mold from forming in the first place. Like we said, this low-maintenance grill is easy to clean, which makes it an excellent choice for the lazy cook!

Where You Can Buy the Kamado Joe II Classic

[amazon box=”B01INNA89S”]

This grill is available for sale at many online retailers. You can find it easily on Amazon, the Kamado Joe website, and even at Home Depot and Lowes’ websites. You can also find it in any online store selling grilling products and accessories.

If you want to pick it up from a physical store, you will find these grills at Target or Walmart.

FAQ

Below you’ll find answers to questions we get asked the most about Kamado Joe Classic II grill.

01. What Makes Kamado Joe Grills Special?

These grills are great because of their stellar heat retention, high quality, and general durability. They are also great since it gives you precise control over your grilling or smoking temperature.

02. How Long Does a Load of Charcoal Last in the Kamado Joe?

In normal weather conditions, you can use a load of charcoal to get 18 hours’ worth of smoking time. However, you might need to refuel before the 18 hours are up.

03. Which is Better, Kamado Joe or Big Green Egg?

The Kamado Joe is better because you get more for your money. This grill will save fuel and comes with all the necessary accessories needed for grilling. Although the two grills have the same quality, the Kamado Joe has more to offer.

04. How Many People Can I Cook for with The Kamado Joe Classic?

This grill makes enough food when cooking for 5-15 people.

05. Is It Difficult to Add More Fuel While Cooking with This Grill?

It can be a little tricky if you are using heat deflectors. It is because you need to lift them out using heat-proof gloves.  

However, once you get used to working the grill, it’s so efficient that you won’t even need to add more charcoal during a smoke.

Final Verdict

The Kamado Joe grill is one of the best units on the market if you want reliability and longevity. Investing in one of these will have your grilling and smoking needs covered for many years to come.

Whether you want an efficient grill for the best BBQs, the Kamado Joe is what you need. It is versatile, efficient, and easy to use–and we tried to showcase all of that in our Kamado Joe review.

The innovative upgrades combined with the ancient and time-tested grilling method make the grill so very special. And you can sear steaks and burgers, char a rack of ribs, or slowly smoke a gigantic ham whenever the mood strikes. 

The flexibility makes it easy to cook virtually anything on this grill. With that being said, what are you planning on grilling with the Kamado Joe?

12 Best Gas Grills under $500: Spend Less, but Have a Lot of Fun!

This post contains affiliate links to products. We may receive a commission for purchases made through these links. But it never influences our product selection process.
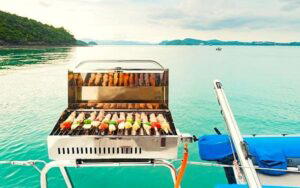
Looking for an affordable gas grill that will work for years to come? We bring you the best gas grills under $500 so keep reading to find out more!

Soup, teas, and pumpkin spice lattes.

Sounds like fall, doesn’t it? But there’s one more thing that we have to include in our plans now that the weather is starting to cool down.

Outdoor grilling and cookouts!

Come to think of it, we actually prefer fall grilling sessions, since the crisp, chilly air beats the sweltering heat any day. And in case you’ve missed grilling or this summer, you can always get yourself a grill and enjoy a few BBQs before winter arrives.

Look at it this way; you can swap the cold beers for some cider or a hot toddy. And your guests can enjoy a hearty, loaded cauliflower bisque while they wait for their meat to get grilled. 

Also, anyone with a barrel smoker or grill will tell you that a rack of ribs goes amazingly well with some broccoli-cheddar soup.

On a bit of a budget? Well, we’re here to help you out. We’ve examined and tested loads of affordable grills. And so, we’ve compiled this list of the 12 best gas grills under $500. These outdoor grass grills are all budget-friendly and work amazingly well.

In this article, we talk about the grills’ performance, their special features, and the things we liked about them. If you’re looking for the best propane grill under 500 dollars, this buying will have you covered.

Best Gas Grills under $500: Our Favorites

Don’t want to go through all the entries on this list? You’re in luck because we’ve summed our favorite gas grills right here:

Our reviews will look at the features of these gas grills, how well they function, and why we recommend buying them. Let’s get right to it!

RankPictureNameShops#1
Weber 49010001 Natural Gas Grill

Weber 49010001 3-Burner Natural Gas Grill

Looking for a grill that will be there with you for the long haul? This heavy-duty gas grill has a 10-year guarantee and will function smoothly for decades without giving you any trouble.

  • Even heat distribution on the grilling surface.
  • Excellent and durable construction.
  • Solid grease management system.


Read Our Review


Check Price

#2
Fuego F24C Propane Gas Grill

Fuego F24C Professional Propane Gas Grill

Want a superbly designed grill that cooks amazingly well? This Fuego grill will serve you smokey, charred meat that you won’t forget any time soon.

  • Small and compact design.
  • Great for searing and charring meat, veggies, and seafood.
  • Attractive design.


Read Our Review


Check Price

#3
12 Best Gas Grills under $500: Spend Less, but Have a Lot of Fun! 3

Char-Broil 4-Burner Cart-Style Liquid Propane Gas Grill

Want a cart-style gas grill with a reliable electric ignition? We found this to be the best stainless-steel grills under 500 dollars!

  • Well-built and attractive design.
  • Heats quickly and evenly.
  • The side burner is convenient and useful.


Read Our Review


Check Price

#4
12 Best Gas Grills under $500: Spend Less, but Have a Lot of Fun! 4

Char-Broil 2-Burner Cabinet Gas Grill

Looking to get a grill that will give you the most bang for your buck? The good news is that this grill combines an excellent at an affordable price point.

  • High-quality construction.
  • Comes with ample storage space.
  • Lid-mounted temperature gauge gives you more control.


Read Our Review


Check Price

#5
Coleman 285 Portable Propane Grill

Coleman 285 RoadTrip Portable Stand-Up Propane Grill

Going hiking or camping? Then this portable grill will be the perfect companion for your trip!

  • Affordable price.
  • Quick and easy assembly.
  • Lightweight and portable.


Read Our Review


Check Price

#6
Kenmore 3-Burner BBQ Gas Grill

Kenmore PG-4030400LD-AZ-AM 3-Burner Outdoor Patio BBQ Gas Grill

If you want an efficient, powerful, and long-lasting BBQ grill, look no further than this model.

  • Intense and even heat.
  • Easy to assemble.
  • Convenient and efficient.


Read Our Review


Check Price

#7
Char-Griller E3001 Grillin' Pro Gas Grill

Char-Griller E3001 Grillin’ Pro Gas Grill

This bold and striking griller is sure to become your favorite companion for BBQs and cookouts, no matter what the season.

  • Plenty of grilling space.
  • Sturdy and durable construction.
  • Lots of heat output.


Read Our Review


Check Price

#8
12 Best Gas Grills under $500: Spend Less, but Have a Lot of Fun! 5

Cuisinart CGG-7400 Full Size Gas Grill

Cuisinart is a favorite for home cooking equipment and this grill is yet another example of their excellent design and construction.

  • Great temperature control.
  • Perfect for heavy-duty use.
  • Large cooking surface and warming rack.


Read Our Review


Check Price

#9
12 Best Gas Grills under $500: Spend Less, but Have a Lot of Fun! 6

Royal Gourmet GD401 Portable Propane Gas Grill

Can’t decide whether you want a grill or a griddle more? This portable gas-and-griddle combo lets you have the best of both worlds!

  • Versatile for cooking.
  • Built-in grease management system.
  • Large, yet portable.


Read Our Review


Check Price

#10
12 Best Gas Grills under $500: Spend Less, but Have a Lot of Fun! 7

Royal Gourmet GB8000 Event Gas Grill

Need a grill when cooking or catering for a large event? This 8-burner grill will give you the largest cooking area and matching power to boot.

  • Superior and powerful burners.
  • 2 grease cups for oil management.
  • Sturdy porcelain-coated cooking grates.


Read Our Review


Check Price

#11

MASTER COOK 3 Burner BBQ Propane Gas Grill

MASTER COOK 3 Burner BBQ Propane Gas Grill

Looking for a nice, basic grill to use in your backyard? Look no further than this 30,000 BTU Barbecue grill as it is both petite and powerful.

  • Lightweight and portable.
  • Easy to clean/assemble.
  • Strong and even heating.


Read Our Review


Check Price

#12

12 Best Gas Grills under $500: Spend Less, but Have a Lot of Fun! 8

Royal Gourmet Cabinet Propane Gas Grill SG6002

Want a large grill that will make your cookouts the talk of the town? This magnificent 6-burner grill will be the best investment you’ve made for your BBQs!

  • Assembly is complicated.
  • Easy to use and clean.
  • Convenient and efficient design.


Read Our Review


Check Price

Our Reviews of the
12 Best Gas Grills Under $500

01.Weber 3-Burner Natural Gas Grill

Weber 49010001 Natural Gas Grill

Weber 49010001


Check Latest Price

Top Pick

FEATURES

  • Dimensions: 52 x 26 x 57 inches
  • Weight: 110 pounds
  • Manufacturer: Weber

Looking for a grill that will be there with you for the long haul? This heavy-duty gas grill has a 10-year guarantee and will function smoothly for decades without giving you any trouble.

This impressive grill boasts a GS4 grilling system that will give your food a nice crispy sear and lovely char marks that will captivate you (and your stomach). It also has 3 infinity ignition burners and a fantastic grease management system.

The grilling grates have porcelain-coated Flavorizer Bars which keep them from getting rusted. The three burners also let you grill a lot of food at the same time. This, along with the large, 529-sq. inch cooking space lets you grill burgers, steaks, ribs, and veggies all at once.

Also, the grill itself has an attractive, open cart design that is remarkably eye-catching. There are also six large hanging hooks and two wheels, as well as a built-in thermometer.

Why We Recommend It:

Weber is known for making splendid grills, and this one is no different. The design is attractive, the cart is sturdy, and it performs well. The three burners provide a total of 30,000 BTUs of power which heats the grill up to 500 degrees in just a few minutes evenly across the board.

The cart grill also has two side tables that give you plenty of space for seasoning, condiments, and cooking tools. You can also use the hanging hooks to keep your tongs and spatulas out of the way when not in use.

Pros:

  • Even heat distribution on the grilling surface.
  • Excellent and durable construction.
  • Solid grease management system.
  • Easy to assemble and clean.

Cons:

  • Rather expensive for a grill with 3 burners.

Check the Latest Price for Weber 3-Burner Natural Gas Grill

02. Fuego Professional Propane Gas Grill

Fuego F24C Propane Gas Grill

Fuego F24C


Check Latest Price

Runner Up

FEATURES

  • Dimensions: 24 x 24 x 47 inches
  • Weight: 80 pounds
  • Manufacturer: Fuego

Want a superbly designed grill that cooks amazingly well? This Fuego grill will serve you smokey, charred meat that you won’t forget any time soon, making it one of the top grills under 500 dollars.

If you’re sick of your grill’s paint peeling away after a couple of uses, worry not. This one has a porcelain enamel lid which prevents the paint from bubbling or peeling. It has a total grilling surface area of 525 square inches. You can even grill quarter-pound burgers at once!

The structure of the grill is pretty compact, which is perfect for smaller patios and backyards. It also takes just 30 minutes to assemble, even for a newbie!

Moreover, it heats up pretty quickly, reaching 500F in just 5 minutes. The dual-burner system is great as it heats the grill surface evenly. You can also crank up the heat to 650F for searing steaks and seafood.

Why We Recommend It:

We really liked this grill for its smart design and small footprint. Not everyone has a huge patio and this one is perfect for people with less space. Putting it together is very easy and you can have the grill up and running in just half an hour.

The two burners with their 26,500 BTU heat the grill through evenly and quickly. Although the temperature isn’t as hot as a charcoal grill, it is still hot enough to sear your meat. Furthermore, the grill hood opens at a 45-degree angle, preventing burns and accidents.

Pros:

  • Small and compact design.
  • Great for searing and charring meat, veggies, and seafood.
  • Gives a beautiful charred golden exterior to the food.
  • Quick and easy assembly.

Cons:

  • The plastic accessory tray is very flimsy.

Check the Latest Price for Fuego Professional Propane Gas Grill

03. Char-Broil 4-Burner Cart-Style Liquid Propane Gas Grill

12 Best Gas Grills under $500: Spend Less, but Have a Lot of Fun! 3

Char-Broil 463377319


Check Latest Price

FEATURES

  • Dimensions: 50.4 x 24.5 x 45 inches
  • Weight: 92.8 pounds
  • Manufacturer: Char-Broil

Want a cart-style gas grill with a reliable electric ignition? We found this to be the best stainless-steel grills under 500 dollars!

It uses liquid propane as fuel and has 4 burners in total. The stainless-steel finish also keeps the grill working properly for much longer, improving its durability. Furthermore, the cooking grates are coated in porcelain, making them resistant to rust.

The grill also comes with a porcelain-coated grease dish. This can be easily removed for cleaning. Moreover, some burners emit flames from the top that result in fast and even cooking.

Also, it includes a 10,000 BTU side burner which is great for making side dishes and sauces. When not in use, you can fold it down to keep it out of the way.

Why We Recommend It:

This is a great grill, especially considering its price. It lasts for ages, and the combination of stainless steel and porcelain-coated parts makes it virtually indestructible. The 4 burners do a great job heating the grill surface quickly and the flames heat the grates evenly.

We were impressed with the side burner since it lets you multitask while grilling. You can use it to heat up soups and sauces, and even sauté vegetables and other side dishes. 

All things considered; this is a great choice for people who want a simple grill without any of the other add-ons.

Pros:

  • Well-built and attractive design.
  • Heats quickly and evenly.
  • The side burner is convenient and useful.
  • Portable and easy to clean.

Cons:

  • Doesn’t come with space for storing tools or condiments.

Check the Latest Price for Char-Broil 4-Burner Cart-Style Liquid Propane Gas Grill

04. Char-Broil 2-Burner Cabinet Gas Grill

12 Best Gas Grills under $500: Spend Less, but Have a Lot of Fun! 4

Char-Broil 463673519P1


Check Latest Price

Best Value for Money

FEATURES

  • Dimensions: 24.5 x 42.9 x 44 inches
  • Weight: 82.5 pounds
  • Manufacturer: Char-Broil

Looking to get a grill that will give you the most bang for your buck? The good news is that this grill combines an excellent at an affordable price point.

This double burner with 24,000-BTU gives you 300 square inches of primary grilling space on porcelain-coated grates. There is also an additional 100 sq. inches of space on a swing-away rack for keeping your food warm or toasting buns.

It has a stainless-steel lid which is both stylish and durable. This grill lets you have precise control over the temperature thanks to the temperature gauge mounted into the lid. Also, it uses an electrical ignition for a quick and reliable startup.

The best thing about this grill? It has two side tables that make prep work much easier. Moreover, there is a storage cabinet below the grill where you can keep the propane tank and any other accessories you need.

Why We Recommend It:

We found that this is a great grill for people on a tighter budget. It has many great features and is very sturdy and durable, making it the best value gas grill on this list. Also, unlike many other grills, it won’t take ages to put together.

It is also very convenient as the side tables make cooking and prepping the food a lot faster. You can also use the cabinet below to store knives, tongs, and spatulas, as well as oil or sauces. In short, this is the best affordable gas grill out there.

Pros:

  • High-quality construction.
  • Comes with ample storage space.
  • Lid-mounted temperature gauge gives you more control.
  • Easy to clean and assemble.

Cons:

  • It doesn’t heat up as evenly as other models.

Check the Latest Price for Char-Broil 2-Burner Cabinet Gas Grill

05. Coleman 285 RoadTrip Portable Stand-Up Propane Grill

Coleman 285 Portable Propane Grill

Coleman


Check Latest Price

Best Portable Gas Grill

FEATURES

  • Dimensions: 45.6 x 19.5 x 35 inches
  • Weight: 52.58 lb.
  • Manufacturer: Coleman

Going hiking or camping? Then this portable grill will be the perfect companion for your trip!

Small, light, portable. A powerful to boot. These are the words best used to describe this grill. It boasts 3 independently adjustable burners for greater temperature control. It also has two side tables that can hold condiments and utensils while you grill.

Despite its size, it has 20,000 BTUs of power and 285 sq. in. of cooking space, which is more than enough for something designed to take up the least amount of space possible. For more convenience, it also uses an InstaStart push-button for ignition, removing the need for matches.

There is also a water pan that is placed below the grill to catch any grease and drippings. Best of all, the cooktop is interchangeable, so you can also use it with a griddle or stove grates.

Why We Recommend It:

The Coleman grill is a wonderful option if you tend to go camping or on road trips pretty often. Since it is pretty small, it is also good for people who live in apartments and have tiny patios. It is pretty powerful, heats up quickly and evenly, and deliciously juicy burgers!

We liked how it wasn’t too complicated to assemble. The grill also cools down quickly, which in turn makes clean up pretty easy. In addition, the construction of the grill is super sturdy, making it one of the most durable and long-lasting grills to make this list.

Pros:

  • Sturdy and durable.
  • Affordable price.
  • Quick and easy assembly.
  • Lightweight and portable.

Cons:

  • The water tray is shallow and makes a mess.

Check the Latest Price for Coleman Portable Propane Grill

06. Kenmore 3-Burner Outdoor Patio BBQ Gas Grill

Kenmore 3-Burner BBQ Gas Grill

Kenmore PG-4030400LD-AZ-AM


Check Latest Price

FEATURES

  • Dimensions: 51.1 x 24.1 x 45 inches
  • Weight: 88.2 pounds
  • Manufacturer: Kenmore

If you want an efficient, powerful, and long-lasting BBQ grill, look no further than this model. Once you give it a try, you’ll be convinced it is the best BBQ under $500.

It has 3 burners that heat up the cooking surface quickly and evenly. There are 381 square inches in the primary cooking area. Also, there is an additional 131 square inches of secondary cooking surface. All in all, you can cook 33 burgers at a time!

The side shelves make cooking easier and can be used to hold other ingredients when grilling. Each of the burners has a 10000 BTU power, so the grill has an output of 30000 BTU together. Efficiency is the key here as it lets you cook a large amount of food in a short time.

Afraid of rain or hail? The grill is powder-coated, which makes sure it can survive anything, including damp storage spaces.

Why We Recommend It:

This is a splendid grill for BBQs and grilling. The size is just right and it lets you cook multiple portions in one go. The side hooks and tables keep things organized, resulting in a more efficient grilling experience.

The Kenmore grill functions a lot like a higher-end grill. However, it is lightweight and pretty portable. This in turn makes storage and transport much easier. You certainly won’t regret getting this grill!

Pros:

  • Intense and even heat.
  • Easy to assemble.
  • Convenient and efficient.
  • Sturdy, long-lasting design.

Cons:

  • Doesn’t come with a drip pan.

Check the Latest Price for Kenmore 3-Burner Outdoor Patio BBQ Gas Grill

07. Char-Griller E3001 Grillin’ Pro Gas Grill

Char-Griller E3001 Grillin' Pro Gas Grill

Char-Griller E3001


Check Latest Price

FEATURES

  • Dimensions: 48 x 28 x 48 inches
  • Weight: 0.09 Pounds
  • Manufacturer: Char-Griller

This bold and striking griller is sure to become your favorite companion for BBQs and cookouts, no matter what the season. The 40,800-BTU gas grill is powerful, heating quickly, and is perfect for cooking up burgers, barbecuing ribs, and searing steaks.

It is relatively large, with 438 sq. inches of cooking space. As a result, it is ideal when cooking for many people. There is also a 192 sq. inch warming area that will prevent your freshly grilled food from going cold.

The Char-Griller is made from steel and is very durable. It lasts a long time without breaking down or needing repairs. The porcelain-coated cast-iron grates won’t rust and will work well for years.

Furthermore, it has a rack at the bottom meant for or storing things. The two side tables are also great for holding side dishes and condiments. There is also a row of hooks along with one of the side tables for hanging spatulas and utensils.

Why We Recommend It:

The large cooking area and spacious side table make this one of the best outdoor grills under 500 dollars. The construction makes the grilling unit pretty long-lasting, especially if it is maintained and stored in the right conditions.

The large cooking space is perfect for large gatherings and you can cook multiple burgers and even entire chickens and large racks of ribs. The grill heats very quickly and can reach high temperatures at no time at all. In short, you will love grilling with the Char-Griller.

Pros:

  • Plenty of grilling space.
  • Sturdy and durable construction.
  • Lots of heat output.
  • Great temperature control.

Cons:

  • Not easy to assemble.

Check the Latest Price for Char-Griller Grillin’ Pro Gas Grill

08. Cuisinart CGG-7400 Full Size Gas Grill

12 Best Gas Grills under $500: Spend Less, but Have a Lot of Fun! 5

Cuisinart CGG-7400


Check Latest Price

FEATURES

  • Dimensions: 54 x 22.5 x 46.5 inches
  • Weight: 72 pounds
  • Manufacturer: Cuisinart

Cuisinart is a favorite for home cooking equipment and this grill is yet another example of their excellent design and construction. This four-burner grill has a total output of 44, 000 BTUs of cooking power, making it perfect for grilling just about anything under the sun.

It has a large cooking space (around 443 square inches) it’s a great choice if you happen to host backyard BBQs pretty often. It lets your grill burgers, sausages, ribs, and other large cuts of meat.

The heavy-duty cast-iron grates heat up fast and hold on to the heat, which is perfect for slow-roasting things on the grill. Two side tables help prep your meals and hold sauces, condiments, and utensils.

The heat control and lid are made from stainless steel so they will not be damaged by rust or heat. It also comes with a drip tray that holds the grease that leaks from the grill, as well as a pipe that connects it to your propane tank.

Why We Recommend It:

If you love grilling frequently, this will be the best one for you. We loved how it can cook huge portions of food in one go, thanks to the large cooking area and high heat. Assembly is straightforward and you easily clean it with high-quality grill cleaners.

The heavy, durable construction of the grill was also impressive. When cared for properly, this grill can last a decade (if not longer) without any performance hiccups. Needless to say, this grill pays for itself many times over!

Pros:

  • Great temperature control.
  • Perfect for heavy-duty use.
  • Large cooking surface and warming rack.
  • Built-in thermometer and bottle-opener.

Cons:

  • Grates will rust when exposed to moisture.

Check the Latest Price for Cuisinart Full Size Gas Grill

09. Royal Gourmet Portable Propane Gas Grill

12 Best Gas Grills under $500: Spend Less, but Have a Lot of Fun! 6

Royal Gourmet GD401


Check Latest Price

FEATURES

  • Dimensions: 66.1 x 21.8 x 43.7 inches
  • Weight: 103.6 pounds
  • Manufacturer: Royal Gourmet

Can’t decide whether you want a grill or a griddle more? This portable gas-and-griddle combo lets you have the best of both worlds!

If you’ve ever had the urge to grill early in the morning, you will love this combo. The combination of a gas grill and a griddle with two cooking zones makes cooking multiple items much easier. 

You can use the grill for cooking patties and sausages while flipping pancakes and hash browns on the griddle at the same time.

Each cooking area is 292 sq. inches each, making this combo great for cooking outdoors. It has a large size but is still portable with quick assembly. The automatic ignition makes cooking easier and the side tables provide ample prepping space.

It also has to fold down legs for easy storage and locking casters that make it easier to move around. The convenient grease management system prevents your deck or yard from getting dirty.

Why We Recommend It:

We loved this combo because it gives you the convenience of having a grill and a griddle in one unit. The portability was also an important factor as you can take it with you on prolonged road trips or picnics.

Many grills make a mess as they have a lot of grease or water leaking from the unit. But the integrated grease management system makes cleanup way easier. Once you are done using it, you can fold it up and put it away for storage.

Pros:

  • Versatile for cooking.
  • Built-in grease management system.
  • Large, yet portable.
  • Easy assembly and cleanup.

Cons:

  • The Grill section doesn’t have a lid.

Check the Latest Price for Royal Gourmet Portable Propane Gas Grill

10. Royal Gourmet GB8000 Event Gas Grill

12 Best Gas Grills under $500: Spend Less, but Have a Lot of Fun! 7

Royal Gourmet GB8000


Check Latest Price

FEATURES

  • Dimensions: 90.6 x 24.2 x 38.2 inches
  • Weight: 117 Pounds
  • Manufacturer: Royal Gourmet

Need a grill when cooking or catering for a large event? This 8-burner grill will give you the largest cooking area and matching power to boot.

Together, the 8-burners have an output of 104,000 BTU cooking power and give you an even heating system. Moreover, it has a 950 sq. inch area cooking surface, which allows you to cook 60 burgers in one go.

What makes this grill special is that it also includes an integrated windscreen to protect the flames when grilling outdoors. The electric ignition system removes the need for using matches and takes just a second to light the grill.

It also has two large grease cups that catch any oil drips down from the grill. They are also easily removable for quick cleaning. There are two folding tables, giving you more space to prep the food. The ample storage space comes with two shelves at the bottom.

Why We Recommend It:

The 8-burner grill is definitely worth getting if you have to cook for a lot of people quite often. The intense heat is perfect for searing and grilling and it can cook up to 120 hot dogs at a time. Unlike other large grills, it makes no mess at all due to the dual grease cups.

It has two side tables that make cooking even easier as it keeps all your ingredients and grilling tools within reach. The locking casters on the grill also lets you move it around without any trouble.

Pros:

  • Very large cooking surface.
  • Superior and powerful burners.
  • 2 grease cups for oil management.
  • Sturdy porcelain-coated cooking grates.

Cons:

  • Needs complex assembly.
  • Can’t be converted to a natural gas source.

Check the Latest Price for Royal Gourmet Event Gas Grill

11. MASTER COOK 3 Burner BBQ Propane Gas Grill

MASTER COOK 3 Burner BBQ Propane Gas Grill

MASTER COOK


Check Latest Price

FEATURES

  • Dimensions: 27.5 x 23 x 17 inches
  • Weight: 46.7 pounds
  • Manufacturer: Zefeel

Looking for a nice, basic grill to use in your backyard? Look no further than this 30,000 BTU Barbecue grill as it is both petite and powerful.

It has 3 stainless steel burners that provide quick and even heating. The ignition system is an integrated piezoelectric button with control knobs that keep things quick and snappy. Moreover, the entire control panel is plated with chromium, making it even more durable.

This unit also has a built-in thermometer on the lid, along with two foldable side tables to use as a prepping station when needed. It also has two heavy-duty caster wheels for easy storage and movement.

It also gives you a lot of cooking space. There are 339 square inches of space for primary cooking, along with an additional 132.8 square inches for keeping the grilled food warm. All these features make it perfect if you like grilling with your family in your patio or backyard.

Why We Recommend It:

This is a good grill if you like grilling habitually. As the unit isn’t made for heavy-duty use, this grill is inexpensive and great if you want to use it once in a while. The 3 burners provide sufficient heat for grilling and searing meat and vegetables and heat up quickly.

It is easy to use and the in-built thermometer lets you control the temperature of what you cook. The warming rack is also great if you have to grill large batches of food.

Pros:

  • Lightweight and portable.
  • Easy to clean/assemble.
  • Strong and even heating.
  • Good value for money.

Cons:

  • The grill leaks a lot of greases.
  • The model is not very sturdy.

Check the Latest Price for MASTER COOK 3 Burner BBQ Propane Gas Grill

12. Royal Gourmet Cabinet Propane Gas Grill

12 Best Gas Grills under $500: Spend Less, but Have a Lot of Fun! 8

Royal Gourmet Corp SG6002


Check Latest Price

FEATURES

  • Dimensions: 62.6 x 21.3 x 47.2 inches
  • Weight: 114.6 pounds
  • Manufacturer: Royal Gourmet

Want a large grill that will make your cookouts the talk of the town? This magnificent 6-burner grill will be the best investment you’ve made for your BBQs!

We found this to be one of the most impressive best natural gas grills under 500 dollars for many reasons. Firstly, it has 5 regular stainless-steel burners and one searing burner. It also features a lidded side burner. All in all, the grill has a 71000BTU power output.

Moreover, it also has porcelain-coated cooking grates for cooking and a warming rack, giving it almost 800 sq. inches of cooking surface. The double-layer lid traps heat and speeds up cooking. At the same, the built-in thermometer lets you control the temperature.

This grill also has a metal shelf on the side so you can store your grilling accessories. To keep things tidy, there is a grease tray that collects the oil and water released during grilling.

Why We Recommend It:

This is a great grill if you have to cook for a large crowd. The 5 regular burners are great for old-fashioned grilling and BBQing, while the searing burner is perfect for steaks, and the side burner is perfect for whipping up quick pan sauces.

It also has lockable caster wheels so you can move it around more easily. At the same time, is very lightweight so taking it apart for storage is almost effortless. The grill gives you perfect temperature control, which makes it perfect for searing juicy steaks and grilling seafood as well.

Pros:

  • Assembly is complicated.
  • Easy to use and clean.
  • Convenient and efficient design.

Cons:

  • Construction is subpar.
  • The grease tray is difficult to remove.

Check the Latest Price for Royal Gourmet Cabinet Propane Gas Grill

Getting the Best Gas Grill under $500: A Buying Guide

Now that you are acquainted with the best gas grills out there, you need to narrow down the specifics. This will allow you to get a grill that is compatible with your needs. Here’s what you need to consider beforehand:

Cooking Area:

Different grills have different surface areas for cooking. This will depend on how many people you generally have to grill. 

If you like to keep your grilling sessions smaller, you’re better of with something a little smaller, like the Char-Broil 463673519 2-Burner Cabinet Gas Grill or the Weber 49010001 3-Burner Natural Gas Grill which is pretty average in terms of cooking space.

However, if you need something larger and need to cook for lots of people, you should get something like the Royal Gourmet Cabinet Propane Gas Grill SG6002 or Royal Gourmet GB8000 Event Gas Grill.

Total Number of Burners:

Like the cooking area, the number of burners in your grill is related to how many people you are cooking for. If you tend to grill smaller portions, a 2 or 3-burner like the Weber 49010001 3-Burner Natural Gas Grill or Fuego F24C Professional Propane Gas Grill are both great options.

If you want something a bit stronger, a 4-burner grill is a good idea. On the other hand, a 6 or 8-burner grill like the Royal Gourmet Cabinet Propane Gas Grill SG6002 and Royal Gourmet GB8000 Event Gas Grill is best for very large events and catering.

Additional Accessories/Tools:

Some grills have things like side burners, folding tables, and shelves that make your grilling experience a little easier. If you want a little help while you grill, get something like the Char-Broil 463377319 4-Burner Cart-Style Liquid Propane Gas Grill and the Char-Broil 463673519 2-Burner Cabinet Gas Grill are both great options.

But if you want a plain grill with nothing else attached to it, you will like the Coleman 285 RoadTrip  Portable Stand-Up Propane Grill.

FAQ

Got more questions about gas grills and how they work? We’ve answered some of the questions people tend to have about using these sorts of grills.

01. How Long Does a Gas Grill Keep Working?

A gas grill’s lifespan depends on the quality of materials it was made with. How well it is stored and how frequently it is used will also determine its lifespan.

Regular grill cleaning and storing it in a dry place is a vital part of ownership that can extend your gas grill’s life for years. A grill that is used properly and well-maintained can last for 10 years without any major issues.

02. How are Gas Grills Different from Charcoal Grills?

The main differences between the two are that the gas grill takes less time to cook the food when compared to charcoal grills. Charcoal grills take a lot longer to heat up and rely on a slow-cooking method.

Moreover, charcoal grills infuse the food with a smoky flavor that you will not get with a gas grill.

03. How Should I Clean My Gas Grill Grates?

After your grill has cooled, lightly scrub your grates and soak them in hot, soapy water. Then, heat your grill and allow any of the food stuck to the grates to get burnt. Most of the charred remains will fall off.

Use a good grill brush to scrape off any of the residue left on your grates.

04. Can I Remove Rust from My Grill Grates?

First, gently brush your grill grates with a soft brush to remove as much rust as possible. Put your grate on your gas grill barbecue and cover your grates with baking soda.

Then, start your grill. Once heated, the baking soda will begin to bubble and remove the rust. After the bubbling starts to slow down, turn off your grill and let the grates cool down. Rinse it and dry completely before storing it somewhere without moisture or humidity.

To End

Gas grills are a great way to have a cookout on short notice. With the best gas grills under $500, you will be able to use your grill exactly as you would a higher-end one. They are perfect for grilling and searing meat, seafood, and vegetables.

Choosing the right gas grill will give you a faithful grilling companion with great value for your money. Besides making amazing food, your gas grill will also make lots of wonderful memories and let you spend some quality time with your favorite people. 

So why not order the gas grill you want today?

Relevant Reads

Table of Contents

Related Posts

10 Best Boat Grills: Delicious, Smoky BBQ Even on Water!

There is nothing better than delicious meat straight off the grill outdoor, on the water— in a boat.

You, and your friends and mates, with a beer in one hand and a tong in another, surrounded by the oozing smoked flavor of freshly charred pork. 

Can you imagine something better than that?

The secret to a memorable boat outing like this is to have the perfect boat grill. But which grill should you pick from oceans of options?

In this post, we have gathered the top 10 best boat grills reviews along with buying guides to help you find the best one. 

So take a look at our list before you make a final decision. 

The Best of the Best 

A good boat grill can change the way you enjoy leisure in the water with no troubles nearby. You get to relish fresh and yummy items all prepared at the spot. It’s very therapeutic as well. 

From our research, we have found that there is no single ultimate grill that can fit everyone’s needs. So we have chosen our top three picks each for a different reason: 

Best Premium: Magma Products, Marine Kettle 3, Combination Stove & Gas Grill

  • Marine-grade stainless steel with large surface cooking experience.
  • Durable construction that can last for years and years. 
  • Foldable legs for both railings and flat surface cooking. 
  • Compatible with 1 lb propane gas and CNG tank.

Best Overall: CUISINART CGG-180T Portable Propane Petit Gourmet Tabletop Gas Grill

  • Compact and portable design for small spaces. 
  • Porcelain-enameled grate for a non-stick cooking experience.
  • Comes with a built-in knob for easy temperature control. 
  • Perfect for any outdoor activities or traveling. 

Best Budget: Flame King RV Or Trailer Mounted BBQ – Motorhome Gas Grill

  • Flame King is the best budget-friendly option for anyone!
  • Sturdy and well-performing grill design. 
  • Advanced features with maximum heat settings.
  • Easily mountable on different and versatile surfaces.

Now that you have gotten an overview of our top three picks, t]let’s dive deep into all the other selectively chosen options for their best portable grill features.

RankPictureNameShops#1
Magma Products

Magma Marine Kettle 3, Combination Stove & Gas Grill, Propane Portable Oven

  • Dimensions: 18.4 x 17.6 x 11.8 inches
  • Weight: 14.5 pounds
  • Material: Nonwoven-Fabric
  • Color: Stainless Steel


Read Our Review


Check Price

#2
CUISINART CGG180T Portable Propane

CUISINART CGG-180T CGG180T Portable Propane

  • Dimensions: 12.2 x 18 x 12 inches
  • Weight: 2.2 pounds
  • Material: Steel
  • Color: Petit Gourmet Tabletop Gas Grill, Red


Read Our Review


Check Price

#3
Flame King RV

Flame King RV Or Trailer Mounted BBQ – Motorhome Gas Grill

  • Dimensions: 22 x 11 x 17 inches
  • Weight: 22.7 pounds
  • Color: Black
  • Style: RV Grill


Read Our Review


Check Price

#4
NOMADIQ Portable Propane Gas Grill

NOMADIQ Portable Propane Gas Grill

  • Dimensions: 25.6 x 16 x 7.5 inches
  • Weight: 12.3 pounds
  • Material: Stainless Steel
  • Color: Black
  • Power Source: Propane


Read Our Review


Check Price

#5
Kuuma Premium Stainless Steel Mountable Charcoal Grill

Kuuma Premium Stainless Steel Mountable Charcoal Grill

  • Dimensions: 18.5 x 11 x 11.25 inches
  • Weight: 16 pounds
  • Material: Stainless_steel
  • Color: Silver


Read Our Review


Check Price

#6
Cuisinart CGG180 CGG-180 Petit Gourmet Gas Grill

Cuisinart Petit Gourmet Gas Grill with VersaStand

  • Dimensions: 16 x 16.5 x 31.5 inches
  • Weight: 2.2 pounds
  • Material: Steel
  • Color: Petit Gourmet Gas Grill with VersaStand


Read Our Review


Check Price

#7
Magma Products, Connoisseur Series Gas Grills

Magma Products, Connoisseur Series Gas Grills

  • Dimensions: 22 x 14 x 13 inches
  • Weight 16.9 Pounds
  • Material: Other
  • Color: Multi


Read Our Review


Check Price

#8
Kuuma Premium Stainless Steel Mountable Gas Grill

Kuuma Premium Stainless Steel Mountable Gas Grill

  • Dimensions: 20 x 11.25 x 11 inches
  • Weight: 8 pounds
  • Material: Stainless Steel
  • Color: White


Read Our Review


Check Price

#9
Masterbuilt SH19030819 Propane Tabletop Grill

Masterbuilt SH19030819 Propane Tabletop Grill

  • Dimensions: 17.24 x 27.36 x 12.08 inches
  • Weight: 17.8 pounds
  • Material: Stainless Steel
  • Color: Stainless Steel


Read Our Review


Check Price

#10
Cuisinart Grill Modified for Pontoon Boat

Cuisinart Grill Modified for Pontoon Boat with Arnall’s Stainless Grill

  • Dimensions: 18 x 12 x 19 inches
  • Weight: 22 pounds
  • Material: Stainless Steel
  • Color: Stainless Steel
  • Frame Material: Stainless Steel


Read Our Review


Check Price

Our Reviews of the
10 Best Boat Grills

01. Magma Products, Marine Kettle 3, Combination Stove & Gas Grill

Magma Products

Magma Products


Check Latest Price

Our Top Pick:

FEATURES

  • Dimensions: 18.4 x 17.6 x 11.8 inches
  • Weight: 14.5 pounds
  • Material: Nonwoven-Fabric
  • Color: Stainless Steel

When it comes to marine grill products, magma is kind of the golden standard for quality and longevity. 

Magma Marine Kettle 3 Stove & Gas grill comes with its signature patented design and highly efficient cooking. 

It utilizes both radiant and convection cooking. This means it has the highest temperature with the least amount of fuel. What can be more efficient than that!

The perfectly balanced hinged lid has a smooth mechanism that stays cool even while cooking. 

The grill comes with a swiveling, windproof turbo venturi tube, and a control valve that virtually eliminates any blowouts.

The whole exterior is made out of heavy-duty stainless steel with air cooked supports. Not only this gives the grill a modern, sleek look, but also makes it super functional and easy to clean. 

The burner and hi-tech radiant plate and dome provide equal heat distribution. If you are a fan of open flame grilling, this is perfect as it prevents flare-ups. 

The inner safety shells of this grill keep the outer shell cooler for longer. This also prevents any discoloration or rust which adds years of life to the grill.  

This is an ultimate outdoor travel companion for low maintenance campers. The cleanup is super easy due to the stainless steel frame. You can just wipe away any excess oil and grease. 

Why I Recommend:

If you have to buy one grill for your entire life, but this one. Many customers mentioned how others were envious of their grill when they bought it outside. It’s functional. Modern and durable with a smart look to it. And don’t even forget how comfortable it is to carry around!

Pros:

  • Easy to use, simple functional design.
  • Lightweight and compact.
  • Comes with electric ignition.
  • Lasts literally a lifetime.
  • Eye Catching, sleek look.
  • Stainless steel body.
  • Very easy to clean.

Cons:

  • Quite expensive. It’s an investment piece.
  • The lid can get very hot.

Check the Latest Price for Magma Products Combination Stove & Gas Grill

02. CUISINART Portable Propane Petit Gourmet Tabletop Gas Grill

CUISINART CGG180T Portable Propane

CUISINART CGG-180T


Check Latest Price

FEATURES

  • Dimensions: 12.2 x 18 x 12 inches
  • Weight: 2.2 pounds
  • Material: Steel
  • Color: Petit Gourmet Tabletop Gas Grill, Red

The name basically describes itself! It’s a compact, petite girl that’s designed to give you perfect grilled meat every single time.

This portable gas grill with a 145-square-inch grilling area comes with a powerful 5,500 BTU stainless steel burner.

It can cook up to 8 burgers, 8 steaks, 6 to 10 chicken breasts, or 4 pounds of fish. This is really convenient especially if you are hanging out with your friend and buddies. 

The foldaway aluminum legs are sturdy and set up in seconds. The integrated lid lock keeps the lid secure while it’s cooking larger portions of food. 

Due to its smaller size, the grill heats up really fast with an even heat distribution. 

The grill has a porcelain enamel coated grill grate that makes cleanup really easy. It is also nonstick which is perfect for steaks and burgers.

If you think smaller sized grills mean a sacrifice on quality, you are going to be pleasantly surprised by this cooker. It is solid and durable and provides an excellent charred flavor. 

Compared to standard-sized grills, it uses far less gas which is energy efficient and economical. You can carry it anywhere you go from windy beach to serene campsite, it’s perfect. 

Why I Recommend:

This is an overall good product with simple yet exact features. To have an amazing grill experience, you don’t need anything more than this grill. It’s especially perfect for beginner grill chefs!

Pros:

  • Durable and sturdy construction.
  • Full stainless steel body.
  • Lightweight and easy to carry.
  • Easy to clean.
  • Value for money.
  • Specialized heating for quick cooking.

Cons:

  • Shallow dip tray.
  • The ignitor has some issues.

Check the Latest Price for CUISINART Portable Propane Petit Gourmet Tabletop Gas Grill

03. Flame King RV Or Trailer Mounted BBQ – Motorhome Gas Grill

Flame King RV

Flame King YSNHT500


Check Latest Price

FEATURES

  • Dimensions: 22 x 11 x 17 inches
  • Weight: 22.7 pounds
  • Color: Black
  • Style: RV Grill

Flame King Motorhome Gas grill is a must-have product for anyone who loves tailgating and camping. 

This high-quality grill comes with its own bracket system that allows you to mount it to the side of any motorhome or trailer so you can BBQ anywhere you want. 

Who says you have to sacrifice flavors for convenience? With Flame King gas grill you get a complete grilling station. 

The station includes an adjustable flame controller, upper grill deck, and 214 square inches of grilling surface.

Whether you like to mount your grill or freestand it while cooking, this gas grill does it all. The hanging rack can be transformed into legs to make the grill freestanding

You can understand how this single feature makes this so much more versatile for camping and tailgating than other standard compact grills. 

To make it secure and solid, the grill has locking retainer pins to set it on a mounting bracket. The lid has a dual locking system for storage.

This grill is intended to be used with an RV or Motorhome’s self-contained gas system. 

If you want to connect it to any standard propane cylinder, you have to use their 96” Quick Connector Regulator Hose. It’s a bummer as you have to buy it separately.

Why I Recommend:

If you are looking for a budget option without having to sacrifice on the quality, you can’t find anything better than this grill. It’s a handy little grill for traveling and having some fun times with delicious food.

Pros:

  • Solid construction.
  • Reliable design.
  • Portable and easy to use.
  • Best value for money.
  • Perfect for 3/4 people.
  • Good barbecue flavor

Cons:

  • The control button can give electric shocks.

Check the Latest Price for Flame King RV Or Trailer Mounted BBQ – Motorhome Gas Grill

04. NOMADIQ Portable Propane Gas Grill

NOMADIQ Portable Propane Gas Grill

NOMADIQ 762253914873


Check Latest Price

FEATURES

  • Dimensions: 25.6 x 16 x 7.5 inches
  • Weight: 12.3 pounds
  • Material: Stainless Steel
  • Color: Black
  • Power Source: Propane

NomadiQ gas grill is reinventing the idea of a portable grill with its advanced features and design.

This gorgeous looking machine comes in a sleek, foldable design with a matte black finish

It has an electronic ignition system that provides fast and reliable startups every single time. All you have to do is push a button and it’s ready!

With the nomadiQ portable gas grill, you don’t have to cook on a smaller surface. It has a 226 sq inch of cooking space that can fit about 10 hamburgers!

The cooking grates have a ceramic coating that gives a proper nonstick experience. Ceramic captions also help to evenly distribute the heat. 

This advanced grill is also rust-resistant so they are ideal for any environmental changes. 

You’d be surprised to see how easy the cleanups are. All you have to do is wipe down the shells for a fast clean-up or remove the grates for deep cleaning. Yes, the grates are removable.

The grill comes with two stainless steel burners with separate temperature control for a versatile cooking experience. 

The grill has an ergonomically designed handle that makes carrying relaxed and fun. You can carry this beauty with a breeze. 

It comes with an extra padded shoulder strap that makes longer distance traveling very convenient. 

Why I Recommend:

This is a really simple, lightweight design with a powerful heating system. It’s easy and intuitive to use. You can carry it for your road trips, camping, tailgating and so much more. The small size is the biggest advantage of this grill. It also has a lot of cooking surface.

Pros:

  • Easy to use, simple functions.
  • Fast heating, high temperature.
  • Even heat distribution.
  • Sturdy, durable construction.
  • Easy to clean, removable grates.

Cons:

  • Does not have a lid or cover.
  • Can’t connect to RV propane supply.

Check the Latest Price for NOMADIQ Portable Propane Gas Grill

05. Kuuma Stow N Go Charcoal Grill w/Inner Lid Liner by Camco

Kuuma Premium Stainless Steel Mountable Charcoal Grill

Kuuma 58110


Check Latest Price

FEATURES

  • Dimensions: 18.5 x 11 x 11.25 inches
  • Weight: 16 pounds
  • Material: Stainless_steel
  • Color: Silver

Kumma grills are specially designed to be used on boats. Their Stow N Go Charcoal Grill is built to survive any harsh marine environments. 

The Stow N’ Go 160 Charcoal grill is made out of 300 series marine grade stainless steel. What that means is, it won’t rust or discolor even at the contact of saltwater and humid air. 

This grill comes with a spacious 160 sq inches of grilling area which is perfect for a family of five. 

The integrated fold-away legs allow you to grill easily on any flat surfaces. This is a great detail that saves up a lot of hassle especially if you are camping. 

It features a removable liner which is very convenient for portability. The latching lid and stay cool handle makes cooking comfortable and easy.

The Stow N’ Go can be easily transported to any place with its portable construction and lightweight body. 

This is a charcoal grill, not a gas one. Charcoal grills are not the most convenient traveling type as you have to carry the charcoal separately. 

The charred charcoal flavor, however, alleviates even the cheapest cuts of meat. 

This is perfect for RVing, tailgating, and patio or deck grilling. You can mount it to your boat, home, or any kumma rails. 

Why I Recommend:

If you live in a one-bedroom apartment with a balcony, consider buying this portable charcoal grill to make delicious barbecue at home. It is so convenient and easy whether you want to cook at home or take it outside.

Pros:

  • Saves a lot of space with its compact size.
  • Clean style and look.
  • You need a very little amount of coal.
  • Amazing smokey flavor and taste.

Cons:

  • The drip tray leaks oil and juices out from the button.
  • The latches are loose and do not fit all rails.

Check the Latest Price for Kuuma 58110 Stow N Go Charcoal Grill

06.Cuisinart Petit Gourmet Gas Grill with VersaStand

Cuisinart CGG180 CGG-180 Petit Gourmet Gas Grill

Cuisinart CGG180


Check Latest Price

FEATURES

  • Dimensions: 16 x 16.5 x 31.5 inches
  • Weight: 2.2 pounds
  • Material: Steel
  • Color: Petit Gourmet Gas Grill with VersaStand

The Petit Gourmet gas grill from Cuisinart provides an excellent chargrilled flavor anywhere you want. It gives you the freedom to enjoy your favorite meals every day. 

This bright red gas grill with extendable legs provides an excellent cooking experience. It comes with a 160-square-inch porcelain enamel cooking grate.

You not only get a spacious cooking surface but also get to enjoy the versatility of using a nonstick grill.

The 5,500 BTU burner provides high heat cooking with precise temperature control

The grill measures 19 x 11.5 x 10 inches with a stand. It’s really small and compact which makes it the perfect boat barbecue grill. 

You can easily set it up or pack it away in just a matter of seconds. The additional drip tray helps to collect grease and dripping for easy cleanups. 

Whether you’re looking for a barbecue grill for boats or you want a camping partner, this grill is a great option. 

If you live in a smaller one/two-bedroom apartment without any backyard, you can still enjoy delicious meaty goodness with this compact, efficient grill. 

Why I Recommend :

This is a great gift for anyone who loves grilling. Even though it’s made to be used on boats and campings, you can set it on your patio. With the fun look and design, it fits any environment you’re in. It’s super portable as well.

Pros:

  • Easy to set up and move around.
  • Lightweight and compact basket style.
  • Similar flavor to charcoal grills.
  • Durable and fun design.
  • Extendable legs.
  • Easy to clean.

Cons:

  • The outside of the handle is plastic so if it gets hot, it might melt.

Check the Latest Price for Cuisinart Petit Gourmet Gas Grill with VersaStand

07. Magma Products, Connoisseur Series Gas Grills, Propane, LPG, Stainless Steel

Magma Products, Connoisseur Series Gas Grills

Magma


Check Latest Price

FEATURES

  • Dimensions: 22 x 14 x 13 inches
  • Weight: 16.9 Pounds
  • Material: Other
  • Color: Multi

This durable, stainless steel gas grill bigger than other boat grills we have on the list if you have enough room on your boat to put a beauty like this, don’t think twice before doing it. 

It not only has foldaway legs for onshore but also multiple onboard mounting options for rail, deck, rod holder, pedestal and so many different places. 

It comes with inner safety shell funnels with a lock-in grease tray, with this you won’t have any leakage or dripping whatsoever. 

The grill has a convenient snap-out radiant plate that provides even heat to the whole surface. 

Due to the stainless steel construction, you can easily clean it up without having to scrub or brush. It has 100% 18-8 polished stainless steel.

This gorgeous grill also comes with a swiveling valve that allows quick and safe gas bottle exchange. They have really thought about everything. 

Why I Recommend:

If you want a durable, high-quality stainless steel grill with a larger cooking surface than average, this is a great option. It’s grate and lid quality is much bigger and higher than other portable boat grills. So this is an investment piece that you will get to enjoy for years.

Pros:

  • Easy to set up.
  • Heats up really fast
  • Lockable lid function
  • Portable propane tank for safe storage.
  • High-quality stainless steel.
  • Rust and scratch-resistant.
  • Stores well on smaller spaces.

Cons:

  • Mount brackets do not come with the grill.

Check the Latest Price for Magma Products, Connoisseur Series Gas Grills

08. Kuuma Premium Stainless Steel Mountable Gas Grill w/Regulator by Camco

Kuuma Premium Stainless Steel Mountable Gas Grill

Kuuma 58140


Check Latest Price

FEATURES

  • Dimensions: 20 x 11.25 x 11 inches
  • Weight: 8 pounds
  • Material: Stainless Steel
  • Color: White

The Kumma Premium Mountable Gas Grill is a compact grill that has a sturdy and convenient construction. 

This stainless steel grill comes with a 125 sq inch cooking surface that allows you to cook larger potions while still being very portable and light. 

It’s 9000 BTU/hr heat output creates the perfect temperature for that charred meaty taste we all crave for. 

The whole grill is constructed of 300 series marine grade stainless steel that gives the hives form of resilience from rust and water.

The compact size of this grill is perfect along with its easily mountable system. It can be mounted to any kumma rail, rod, or pedestal mount. 

Designed for high-pressure propane this premium grill is compatible with 1 lb. throwaway propane cylinders. 

The whole machine weighs around 14.5 lbs which are really handy for outdoor activities or camping.  

Why I Recommend:

This is a really high-quality marine grill for anyone who loves to cook at the beach or on camping trips. It uses small amounts of fuels. Kumma also provides great customer service in case anything goes wrong.

Pros:

  • Easy to assemble
  • Comes with safety features.
  • Lightweight and compact size.
  • Easy to mount.
  • Even heat distribution.
  • Easy cleanup.

Cons:

  • You need to take out 4 screws to clean under the flash plate. Seems like a design overlook.

Check the Latest Price for Kuuma Premium Stainless Steel Mountable Gas Grill

09. Masterbuilt SH19030819 Propane Tabletop Grilln

Masterbuilt SH19030819 Propane Tabletop Grill

Masterbuilt SH19030819


Check Latest Price

FEATURES

  • Dimensions: 17.24 x 27.36 x 12.08 inches
  • Weight: 17.8 pounds
  • Material: Stainless Steel
  • Color: Stainless Steel

This compact, modern grill is designed for grill connoisseurs who love outdoor BBQ with passion. 

If you are looking for portability, this grill comes with a locking lid, folding legs, and a large front carry handle, perfect for easy transport.

One of the issues with portable grills is the operating system. This one uses small, disposable 1lb propane cylinders

These cylinders are so common that you can find them in any hardware stores nationwide. So no matter where you go, it’s always ready for grilling!

Even with one burner, this is one spacious grilling machine. With it’s 288 sq inches of cooking surface and 10,000 BTUs it can grill multiple hamburgers at once. 

Good quality products are easy to tell by their looks and construction. This Masterbuilt grill is built to last. 

It has a chrome coated warning along with the foldable design. This stainless steel burner will last you years. 

The grill comes with a push-button ignition that helps to light up the burner quickly and easily. 

The grill has a U-shaped burner that doesn’t seem important at first. But the moment you start cooking you will realize the shape helps tremendously with the heat distribution. 

This is such a good grill no matter where you are. You will find yourself using this grill even at your home instead of the bigger ones in your backyard!  

Why I Recommend:

If you are not familiar with grilling and looking for something easy and low maintenance, this is a great option. It stores up easily without taking too much space. The grill heats up very fast and can cook 4/5 steaks at a time. Perfect for camping and traveling.

Pros:

  • Simple assembly comes with all the instructions.
  • Portable and convenient.
  • Heats up evenly.
  • Heavy-duty construction.
  • Easy to store.

Cons:

  • Poor lid design slants downward.

Check the Latest Price for Masterbuilt SH19030819 Propane Tabletop Grill

10.Cuisinart Grill Modified for Pontoon Boat with Arnall’s Stainless Grill Bracket Set

Cuisinart Grill Modified for Pontoon Boat

Extreme Marine Products 37942


Check Latest Price

FEATURES

  • Dimensions: 18 x 12 x 19 inches
  • Weight: 22 pounds
  • Material: Stainless Steel
  • Color: Stainless Steel
  • Frame Material: Stainless Steel

This Cuisinart grill is specifically modified for Pontoon boats with the best Arnall’s stainless steel grill bracket set. You can even pick the color for your bracket!

This grill comes with 145 square inches of grilling surface which is perfect for 4/5 hamburgers. You can cook larger portions especially if you are hanging out with our family or friends. 

The grill is portable with a locking lid and easy to carry handles. It only weighs 18 pounds. 

You can mount it to 1.25” open square Pontoon boat railing. The brackets are very strong as they are made out of 304-grade stainless steel. 

Unlike most boat grills, this one comes pre-installed with all the brackets in place. All you have to do is get it out of the box and start grilling!

The Cuisinart has a solid mount for the propane tank, nothing flimsy or cheap. It’s easy to install and stow as you don’t need any special equipment for the brackets. 

This Cuisinart grill comes with a long three-year warranty so if anything goes wrong you don’t have to worry. They are famous for their dedicated customer service. 

Why I Recommend:

If you do not like assembling, this is a great option as it comes pre-assembled. It;s really easy to attach to the railings and you get clear instructions on how to use it. So perfect for anyone who is new to boat grills or barbecue cooking in general.

Pros:

  • Sturdy and solely built.
  • Easy to install.
  • Easy to clean.
  • Energy-efficient.
  • Non-stick coating.
  • Value for money.

Cons:

  • The drip tray is very small so it leaks everywhere.

Check the Latest Price for Cuisinart Grill Modified for Pontoon Boat Grill

Buying Guide

Now that you have gotten an overview of the best boat grills out there, you might be really confused about which one to pick. 

Don’t worry, we have prepared an in-depth guide for you. Here you will find all the things you need to focus on while buying a boat grill. 

What’s Your Boat Type?

This is the first thing you need to focus on. Not all boat grills fit the same type of boat. The ideal place for a boat grill would be a boathouse, which let’s be honest none of us have. 

The next best thing would be to install the grill on a pontoon boat. Pontoon boats are great for casual hangouts with friends or a small family party.

If you have a pontoon boat, having a grill is kind of mandatory! Cuisinart Grill Modified for Pontoon Boat is a good one to try.

Another great boat would be our good old fashioned fishing boats. A 30-feet or larger fishing boat has enough room for a decent-sized boat grill. 

Boats that shouldn’t have any grills are sailboats and speed boats as they are riskier and can cause a fire hazard. 

Mounted vs Tabletop:

Do you want a mounted boat grill that will be set with the boat railing? Or do you want a convenient option that can be placed anywhere to cook?

This is a personal choice. Everyone has a different opinion on it. Make sure the one you are buying has the feature you are looking for. 

We think it’s smarter to go for grills that can do both even if it costs a few extra bucks. Check out  Flame King RV Or Trailer Mounted BBQ for dual style.

Types of Fuels:

Choosing the right types of fuel is important as this is the heart of the grill. There are three main types of grills: gas, charcoal, and electric. 

Propane/ Gas:

In our experience, gas grills are the most common and easy types of grills available. They are so popular because they have numerous advantages. 

Gas grills are fast, efficient, and really affordable. You can find gas canisters anywhere you go. They are low maintenance and comparatively safer in harsh environments. 

Our top pick for gas grill is NOMADIQ Portable Propane Gas Grill.

The only downside would be, you don’t get the signature charred  BBQ smokiness with a gas burner. 

Charcoal:

If you are only judging by taste and flavor, nothing can beat charcoal grills. 

Charcoal grills are the traditional way of cooking grilled meat. It adds a delicious smokiness to the meal while keeping it tender and light. You can’t get this flavor in any other way. 

For a great charred taste check out Kuuma 58110 Stow N Go Charcoal Grill.

The obvious downside is, you have to carry the charcoal with you which adds a significant amount of weight. 

Charcoal grills are also hard to maintain and temperature control. If you are a newbie then this is not for you. You also can’t use charcoal grills in wet environments.

Electric:

This is a really convenient type of grill if you have electricity on board. You don’t need any additional fuels to buy and it takes zero preparations. 

A popular and durable choice is George Foreman 5-Serving Multi-Plate Evolve Grill System.

The only issue is, most boats do not come with electricity. Also, it’s considerably more expensive to cook on an electric grill than a gas one. 

Materials:

Boat grills need to be made with a material that can handle the harsh weather and coastal air. SO buying a durable one is necessary. 

Stainless Steel:

Stainless steel is so far the most popular and durable material for boat grills. The 300 series in particular handles harsh environments really well. 

Coastal air contains much more salt than normal air. Salt destroys most metals and creates rust. Rust is basically cancer for metals. Stainless steel is rust free thus perfect for a boat. 

Magma Products, Marine Kettle 3 is a solid stainless steel option. It is also our top pick!

Aluminum:

Another option that some companies use is aluminum. Aluminum has a bad reputation for discoloration and rust. 

However, there are some brands that make a corrosion-resistant aluminum alloy that is as good as stainless steel. 

Aluminum is also lighter than stainless steel. So if you buy an aluminum grill, make sure it’s corrosion-resistant otherwise, don’t buy it.

Check out Char-Broil Grill2Go TRU-Infrared Liquid Propane Gas Grill.

Portability:

As you want to travel everywhere with your boat grill, it needs to be light and easy to pack. So look for foldable legs with padded handles or straps for easy transportation. 

Smaller grills have a smaller cooking surface and that’s something you have to accept. 

We have added great options with a bigger cooking area but obviously a portable grill won’t have the same grilling space as a standard backyard one

Cuisinart Petit Gourmet Gas Grill is a good choice as it has extendable legs for easy setup.

Do not buy a big grill as you will have a hard time enjoying your trip with it.

Warranty:

Always check for warranties before you purchase a product. As good boat grills are not cheap, you want to use it for a longer time. 

A warranty simply puts our minds at ease. If anything goes wrong, you can simply contact the manufacturer and they will fix it for you. 

Frequently Asked Questions (FAQs) 

01. Are boat grills different from normal grills?

Boat grills are basically a smaller, more compact version of a standard backyard grill. You can travel with it anywhere to enjoy a delicious juicy barbecue. 

Boat grills come with mount brackets that you can attach to your boat railing for convenient cooking. They are designed to handle harsh weather changes and rough transport. So they are more durable than average grills. 

Boat grills are also energy efficient due to their smaller size. You don’t need that much fuel to cook for 5-6 people. 

Their cooking surface, obviously, is much smaller than standard grills. But compared to other portable grills, they have more functions and features. 

02. Is it legal to grill on a boat?

Yes it is. But only if you follow safety rules to not create any fire hazards. The most important thing is to put your grill far away from clothes, wood, or anything that can cause a fire. 

Another important thing is to properly mount your grill to the surface or railing. If you decide to put in on a table, you have to screw it properly so that it doesn’t move. 

If you try to cook fish, make sure the state where you are fishing does not have any prohibitions against certain fish species. 

If any coast guards find you with the exception to these rules, you will get into some serious troubles. So make sure to grill safely. 

03. Can a portable grill cook for 5/6 people?

The time is gone when portable grills meant cooking only two chicken wings at a time. Most modern boat grills come with plenty of cooking surface and high heat fuel system.

You can easily cook for up to 4-5 people with standard boat grills. If you go for a bigger size, you might be able to cook for more than 6 people. 

Portable boat grills come with precise temperature control, dual gas chamber, air shields and so much more. You can have a barbecue party with your friends and family and enjoy a great time together!

04. Is it safe to grill on a boat?

With modern grills that are specifically designed for boats, it is completely safe to have some delicious barbecue without any worry. 

Barbecue grills are made out of sturdy and strong materials that can last years without even a scratch. You then mount the grill with strong-grip screws to the railing of the boat or a fixed table. 

There is no way your grill could move while you are using it. So there is no fear of any accidents. 

One thing you have to make sure is to not grill your food on any wooden surface. The good thing is, no boats have wooden furniture or decks anymore. So it is totally safe to grill on a boat. 

05. What can you grill on a boat?

You can grill basically anything on a boat. From juicy chicken wings to beef ribs and pork belly, you can have fun with your menu. You’re forgetting the obvious thing, fishes.

If you plan to go fishing with your buddies, you can enjoy fresh barbecue fish on the spot with your boat grill. It’s so convenient especially if you like to fish quite often.  

You can make steaks, kebabs, pork chops, hamburgers, hot dogs, seafood, shrimps and so many more!

Conclusion

A boat grill can truly add so much joy and fun to your life. Finding the best boat grill for you, however, is not so fun. 

Hopefully, with our curated list and guide we have managed to help you. We have selected the best options with high functionality and portability. 

Now that you have all the information you need, hurry up and pick a grill to start enjoying mouthwatering dishes anywhere you want to travel to! 

Relevant Reads

Table of Contents

Related Posts