There used to be a time when mini-fridges were associated with dorms and small apartments only. But now, almost everybody has a mini-fridge somewhere in their house.
Some like to put a fridge in the gaming room while others enjoy a small fridge in the master bedroom. Who says you can’t be luxurious on a budget?
While we all love the functionality and compact features of a mini-fridge, we don’t regularly clean or take care of it. A big part of it is because defrosting a deep freezer seems like too much work to do.
In this article, you will find how to easily defrost a mini-fridge and some other helpful tips to make the process super simple.
But first, let’s talk about the different types of freezers out there. Not all of them use the same cleaning process!
You may also like: How to Reset Ice Maker on LG Refrigerator
What is a Frost-free Freezer?
We have all heard this term many times in our lives. There are usually two types of freezers in the market: frost-free and manual defrost. But what do they actually mean?
A frost-free freezer is a type of freezer with a built-in technology that prevents any buildups of ice particles. We all know about manual defrost refrigerators. We grew up with them. They always have a thick layer of ice inside which needs to be cleaned and removed once every few months.
Frost-free freezers don’t have that. As they have little to no first, cleaning and maintenance are very simple.
Most people prefer frost-free options nowadays. There are also auto defrosting freezers that come with a hose to remove excess water.
Best Way to Defrost a Freezer
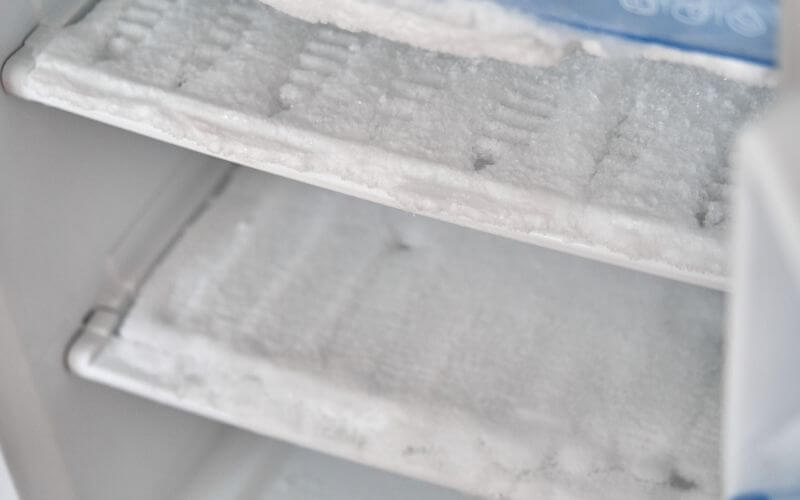
If you have a manual defrosting freezer, removing the thick layer of ice every few months is very important. Otherwise, you love a lot of storage space, and the overall performance of your freezer decreases. When everything in the freezer covered in frost, you know it’s time to clean.
As high-maintenance as it might seem, defrosting refrigerators is really very easy to do. Btw, this is the same way you defrost a fridge freezer combo.
Before You Defrost:
Here’s what you should do to remove mini fridge ice build up without too many complications:
- Try to eat all the food throughout the week to empty the freezer as much as possible. If you have a big freezer, reorganizing everything after cleaning can feel like a lot of work. So eating all the food you won’t be needing a few weeks later is a smart idea to solve this problem.
- If you can, find a cooler to temporarily store raw meat/fish until the cleaning is done. Cleaning a freezer takes a few hours including the defrosting time. If you leave the raw food on the countertop, they can rot. So find a cooker and put the food there.
What You Need:
- Hot water
- Spatula
- Old rug/towels
- Dishcloths
- Bakings sheet
Here’s what we found to be the best way to defrost an upright freezer:
01. Turn off the Freezer:
The first thing you should do is turn off the freezer. Some fridges have an only on/off button for both the freezer and the refrigerator.
For those, you will have to unplug the whole thing. If you do not have a time limitation, just letting the freezer sit like this for a few hours will be enough to defrost it.
02. Place the Towels:
Before you start defrosting, lay down some old towels and fabrics at the bottom layer of your freezer. We would advise placing some cotton fabrics in front of your refrigerator too, in case there is a spillage.
When you defrost it, there will be a lot of water. So if you do not follow this step, the whole kitchen will end up messy and wet.
You can also put baking trays to catch the extra water.
03. Remove the Shelves:
If you are trying to remove the frost faster, remove the shelves and all the removable arts inside the freezer. It’s important to leave the door open to let fresh and warm air travel inside.
You can remove the drawers too. This is a good time to soak them in soapy warm water to thoroughly wash them later. While you are waiting for the freezer to defrost, you can go ahead and clean them.
Some shelves might get stuck due to the overgrown frost. Just let it sit like that for 10 minutes and you will be able to remove it.
04. Use Your Scraper:
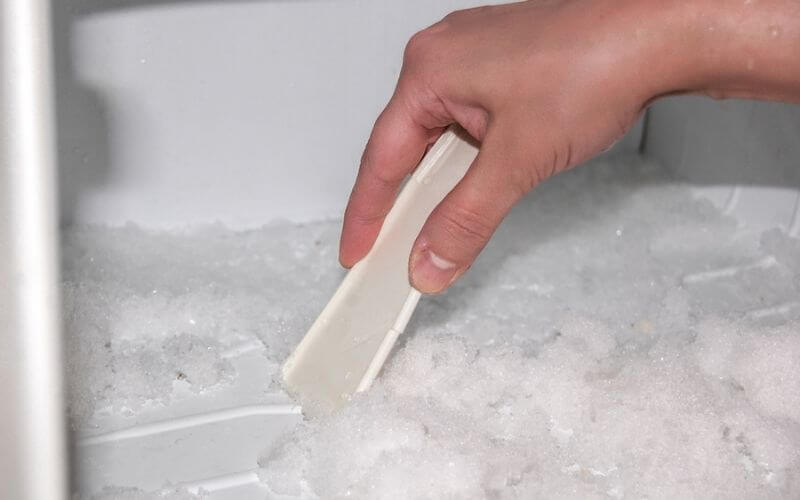
After you have removed all the parts inside the freezer, use a plastic spatula to scrape off the thin layer of frost. You won’t be able to remove all ice this way but scraping off the frost layer by layer helps to melt the ice faster.
You can also use a proper ice scraper, designed to be very safe for the freezer. Make sure to not use anything too sharp as it can damage the lining.
05. Bring Out Hot Water:
If you want a faster-defrosting result, boil about a liter of water until it is super hot. Then pour it into a large bowl and place the bow inside the freezer. Let it sit for a while and you will notice the ice has started to melt.
This is a very easy and convenient way to defrost. You can change the water continuously as it starts to cool down.
06. Use Hairdryers:
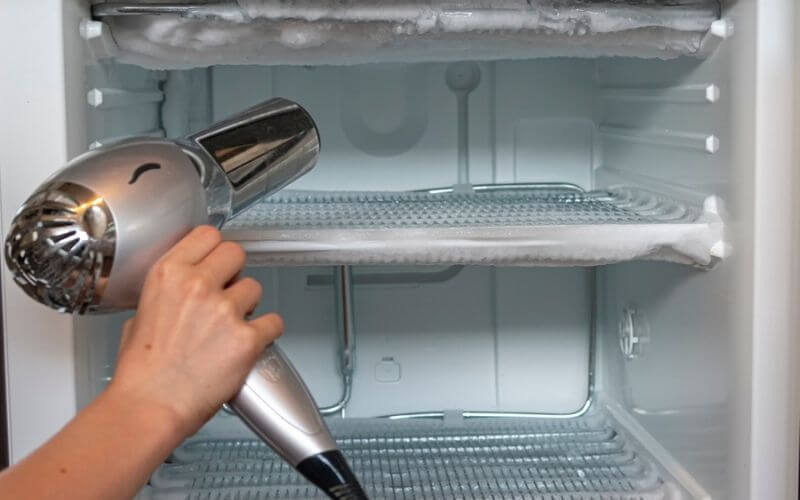
If this is not fast enough, use a hairdryer or a blow dryer to melt the ice using hot air. Make sure to keep the hairdryer six inches away from the lining of the freezer. Otherwise, it can damage the surface.
This process can work wonderfully if you are being very careful. If you are someone who is clumsy with gadgets, we don’t recommend using them. But if you can use it, the process speeds up rapidly and you won’t have to spend 30-40 minutes on defrosting.
07. Keep on Scrapin:
After using hot water and a blow dryer, you will notice the ice has started to melt by itself. You don’t have to work too much at this point. Apply a gentle pressure sign to your scraper and you will see chunks of ice falling down the walls.
If you want to know how to remove ice from freezer without defrosting, the process is fairly simple. Just wipe the fridge with hot cloth to meth the thin layers of frost. This is a good trick if there isn’t too much ice or if you don’t have time for deep cleaning.
And that’s about it. Defrosting a mini freezer or any freezer is that easy! Now let’s talk about how to clean it.
How to Clean a Mini Fridge
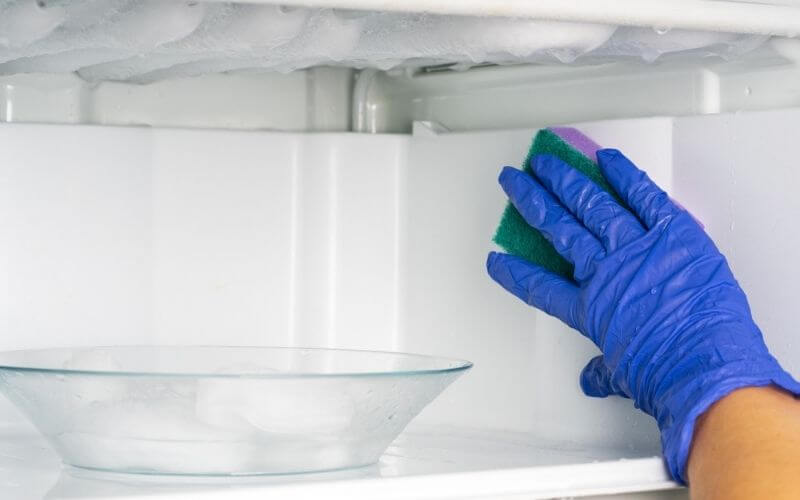
After you are done defrosting, it’s time to properly clean the freezer and the fridge. As this kitchen appliance is used every single day, it needs frequent cleaning. Otherwise, the performance decreases a lot. Here’s how to clean a minifridge very easily:
What You Need:
- Dishwashing liquid
- Baking soda
- Washcloth
- Towels
Here’s our step-by-step guide on how to clean a mini-fridge:
01. Empty the Fridge:
Remove all the food and containers from the fridge including sauce bottles and milk. This is a good time to check which food items have perished or expired. Throw them away and only keep the fresh ones.
02. Remove All Drawers:
Remove all the drawers and shelves from the fridge. As we have mentioned earlier, soak them in warm water with soap to weaken the grease and grimes.
Use a sponge or washcloth to gently wipe away the inside of the fridge. Use soap if there are any tough grimes stuck to the surface.
03. Use Dishwashing Liquid:
Use a sponge and dishwashing soap to clean all the compartments thoroughly. Wash them in the sink in cold water.
04. Use Baking Soda:
If your fridge has a bad odor, pour some baking soda on a dish and let it sit inside for a couple of hours. Keep the door open during this time. The baking soda will soak all the impurities from the air.
If this method does not work, keep the door open for a few hours while the fridge is unplugged. Make sure the room is well ventilated.
05. Clean the Exterior:
After you are done, use a wet fabric to wipe the outer body of the fridge too. It is ideal to clean the exterior of the fridge once a week. As we touch the handles very frequently, bacteria and germs tend to stick to those places a lot. So make sure to clean.
06. Let It Dry:
Let all the parts and compartments dry thoroughly before putting them back into the fridge.
And that’s it. Cleaning a mini-fridge is that easy to do! So do it more!
Helpful Tips to Maintain a Mini Fridge
Using a mini-fridge is not all the same as using a regular refrigerator. Taking care of it is necessary if you want it to work efficiently. We have found these key things to be very useful in the maintenance of a mini-fridge:
- Do not keep your fridge where sunlight directly heats it. It is not ideal to keep the fridge straight in front of any heater or furnace either. Make sure it is in a dry and cool place.
- Do not overstock or overcrowd the mini-fridge with too much stuff. Keep the food at a certain distance from each other so the cold air can travel everywhere easily.
- Do regular cleaning once a month to prevent any molds from growing inside.
- Use baking soda to clean the mini-fridge as it removes unwanted odors.
- Do not put any food openly inside the fridge. Instead, keep them all inside Tupperware and boxes to prevent any funky smell from occurring.
Frequently Asked Questions (FAQs)
01. How Long Does It Take to Defrost a Refrigerator?
If you are planning to do it manually and letting the ice melt by itself, defrosting can take 2-3 hours. It takes longer during wintertime.
But if you use hot water or a blow dryer, the whole process becomes much faster. It will only take an hour to defrost using our process.
02. How Long Does It Take a Mini Fridge to Get Cold?
Time might vary depending on the model and brand you have. But usually, it takes four hours to have a decent amount of coolness. There are some advanced fridges that take only to hours to cool down but usually, you will have to wait much longer,
The standard freezer takes 24 hours to reach the maximum cooling capacity. So if you have a brand new mini fridge or you have just cleaned the whole thing thoroughly, let it sit for a day and then reload it with food.
03. Why Won’t My Mini Fridge Get Cold?
If your mini-fridge is not properly cooling down like it used to, it can be very well because of poor maintenance. Ask yourself when was the last time you cleaned your mini-fridge? If it was more than a few months ago, there you have the answer.
If your fridge is clean but it still isn’t cooling down, there might be a problem with the air vents. Sometimes if the door doesn’t close properly, it increases the internal temperature. So make sure to check that as well.
Takeaway
Now that you know how to defrost, clean, and maintain your mini-fridge, we hope you will take good care of it. A mini-fridge is a very convenient and useful gadget to have not only in a dorm but in your game room or lounge area.
Was this article helpful?
Let us know in the comments!
