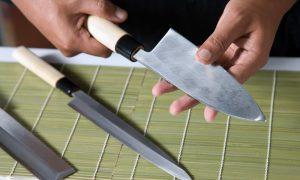
Dry ice, a mysterious solid form of carbon dioxide, is used in numerous industries, from perishable goods transportation to medical and scientific realms. The proper storage of this substance is imperative, as improper handling can cause harm to people and equipment alike.
But why bother with the storage of dry ice at all? The answer lies in its benefits – a longer shelf life for perishable goods, effortless transportation, and cost-efficiency when compared to traditional refrigeration methods. And let’s not forget, dry ice is a versatile and eco-friendly alternative to conventional cooling agents.
In this comprehensive guide, we’ll unravel the dry ice characteristics, the varied types of containers, safety measures, and the best practices for successful storage.
What is Dry Ice?
Dry ice, an enigmatic solid form of carbon dioxide (CO2) with a chemical formula of CO2, astounds with its existence as a mere 0.04% of the Earth’s atmosphere, yet it holds immense significance in multiple industries. This white, opaque, and spongy entity, produced by subjecting carbon dioxide to pressure alterations, boasts a temperature of a staggering -109.3°F (-78.5°C), granting it the power to swiftly induce subzero temperatures in its surroundings.
Its unique quality of sublimating directly from solid to gas, bypassing the liquid phase, makes dry ice an unparalleled choice for cooling and preserving perishable goods. There are two forms of dry ice that marvel us – pellets and blocks. Pellets, the small cylindrical pieces, widely used for their ease of handling, stand in contrast to the large blocks, utilized for heavy-duty cooling and transportation.
How Dry Ice Is Used
Field
Use of Dry Ice
Food and Beverage
Maintains low temperatures for extended periods
Medical
Medium for cryotherapy
Scientific
Tool for low temperature preservation of samples
From transportation to food and beverage, medical to scientific, the versatility of dry ice knows no bounds. In transportation, its exceptional ability to maintain low temperatures for extended periods surpasses traditional cooling methods. In the medical field, it astounds as a medium for cryotherapy, while in scientific experiments, it marvels as a tool for low temperature preservation of samples.
Compared to normal ice made by freezing water, dry ice does not introduce moisture which helps keep the humidity within the container constant. This is important to all fields of use listed above.
At my testing lab, we often receive food and other research samples packed alongside dry ice.
How to Store Dry Ice
Safe and effective utilization of dry ice requires proper storage to protect people and equipment from potential harm. Read on for vital information on the different container options, temperature and ventilation needs, label mandates, and optimal storage strategies for dry ice.
Choosing the Right Container for Dry Ice Preservation
When it comes to storing dry ice, there are multiple container options available, such as foam coolers, insulated (but not airtight) containers, and plastic containers. Foam coolers are a common pick for home use, as they are readily accessible and cost-effective. Insulated containers, on the other hand, are best for commercial and industrial purposes due to their durability and superior insulation. Plastic containers also have their own advantages – they are lightweight and durable, making them ideal for transportation.
Do not use airtight containers. As the dry ice sublimates and releases carbon dioxide gas, pressure will build up within an airtight container which can cause it to explode.
Critical Factors to Consider When Selecting a Container
When selecting a container for dry ice storage, various factors need to be taken into account, including size, insulation, toughness, and mobility. The container must be big enough to hold the desired amount of dry ice, and its insulation should maintain the dry ice temperature at a constant level. Durability is a crucial aspect as containers are prone to wear and tear during transportation. Portability should also be a concern, particularly if the dry ice will be transported to various locations.
Temperature and Airflow Requirements
The optimum dry ice storage temperature is between -130°F to -112°F (-80°C to -70°C).
Containers with dry ice in them must be stored in a well-ventilated area. The released CO2 gas can be very dangerous if inhaled in substantial quantities, as it can cause tachycardia, cardiac arrhythmias, impaired consciousness, coma, and even death. Hence, it is crucial to ensure sufficient ventilation while storing dry ice, especially when storing dry ice overnight while you are sleeping. The temperature of the storage area should be cool and must be consistent and not fluctuate rapidly, as this can cause the dry ice to sublimate faster.
Labeling Guidelines
All containers holding dry ice must be labeled with the date of storage, the quantity of dry ice, and any related safety information. This information will assist in ensuring that the dry ice is utilized within its shelf life and will provide crucial safety information in emergency situations.
Storing Dry Ice in Vehicles
When transporting dry ice in a vehicle, the container must be firmly placed, and the vehicle must be well-ventilated. The trunk is the ideal location, as it provides a secure and well-ventilated storage area. If the trunk is not feasible, the container must be securely placed in the vehicle, and the windows must be kept slightly open for ventilation.
Safety Measures for Handling and Storing Dry Ice
Dry ice is a popular refrigerant that comes with inherent dangers that must be considered. We’ll delve into the potential risks associated with dry ice, personal protective gear and attire, safe handling techniques, emergency first-aid, and critical emergency procedures.
The Threats of Dry Ice
Dry ice is incredibly cold and may cause injury to the skin and eyes if not handled with care. Yes, dry ice causes burns, similar to frostbite. If your skin starts to peel or blister, you should consult your doctor. Consult your doctor. Additionally, as it sublimates, it releases carbon dioxide gas that can be hazardous if inhaled in large amounts. Hence, caution and safety measures must be exercised when handling and storing dry ice.
Protective Gear and Clothing
When handling dry ice, it’s crucial to wear protective gear such as gloves and safety glasses to avoid skin and eye injuries. Your attire must also be comfortable and free-flowing to reduce the risk of accidents. A lab coat is generally recommended.
Handling and Transportation of Dry Ice
When moving or transporting dry ice, it’s crucial to use suitable containers and to secure them tightly to prevent the release of carbon dioxide gas and minimize the risk of injury from the ice’s low temperature.
Fortunately, dry ice is not flammable. However, the foam container used to store dry ice can be highly flammable, so it is best to keep it all away from potential sources of fire.
Emergency Treatment of Injuries
In case of injury from dry ice, immediate first aid measures should be taken. Dry ice burns are similar to frostbite. For skin injuries, immerse the affected area in warm water until the pain subsides. For eye injuries, rinse the eye with water for at least 15 minutes and seek medical attention promptly. If carbon dioxide gas has been inhaled, move the person to a well-ventilated area and seek medical attention immediately.
Emergency Procedures
In the event of a dry ice emergency, it’s essential to follow the proper emergency procedures. If carbon dioxide gas has been released in a confined space, evacuate the area immediately and contact emergency services. If someone has been injured, provide first aid and seek medical attention immediately.
Best Practices for Storing Dry Ice
Observing the weight of the dry ice is important to track its sublimation over time. For maximum preservation, it is advisable to store it in small quantities and not reuse it.
Dry ice releases carbon dioxide gas as it sublimates, hence, it should be stored in a well-ventilated area. Label the container with the contents and date of storage for safe handling and transport. How long does dry ice last, read our article here.
Optimal storage duration of 24-48 hours
Optimal temperature is between -80°C to -70°C
Monitoring the weight of dry ice to prevent sublimation
Storing dry ice in small quantities and avoiding reuse
Storing dry ice in a well-ventilated area
Minimizing air space in the container to slow down sublimation
Keeping dry ice away from sources of heat
Labeling the container with the contents and date of storage
Keeping dry ice away from people and pets.
Final Thoughts
In summary, the storage of dry ice is a crucial aspect that must be taken into consideration for its safe and effective utilization. Dry ice, being a solid form of carbon dioxide, has various applications but it comes with certain dangers that must be mitigated. The optimal storage of dry ice entails choosing the correct container, temperature, handling, and transportation procedures. It is imperative to adhere to the best practices of dry ice storage to avoid any hazards.
FAQs
How long does dry ice endure?
Dry ice can endure for a span ranging from 24 to 48 hours, granted it’s stored with the utmost caution in a well-insulated container that maintains a temperature between -80°C to -70°C. However, the length of time may fluctuate contingent on the temperature, ventilation, and the volume of air within the container.
What’s the most appropriate method to store dry ice?
To ensure the longevity of dry ice, it’s imperative to store it in a well-insulated container with minimal air space. The container must be tightly sealed to prevent the escape of carbon dioxide gas and the infiltration of moisture. The optimal temperature for storing dry ice lies within the range of -80°C to -70°C.
Is it secure to transport dry ice in a vehicle?
Yes, it’s secure to transport dry ice in a vehicle, but with certain safety measures and proper handling techniques in place. The vehicle must be well-ventilated, and the dry ice must be stored in a well-insulated container with minimal air space.
Can dry ice be reused?
No, dry ice cannot be reused as it sublimates into gas as it is used.
What dangers does dry ice pose?
The dangers associated with dry ice include the release of carbon dioxide gas, which can lead to suffocation in enclosed spaces. The extreme cold temperature of dry ice can cause harm or damage to skin and eyes. It’s crucial to handle and transport dry ice with protective gear and clothing to avoid injury.
A guide to Japanese sushi knife and the styles they come in along with their features and uses so that you can choose the best sushi knife.
The Japanese sushi knife has been around for centuries, and its popularity is only increasing. Today, these knives are used by sushi chefs all over the world.
Japanese sushi and sashimi knives are designed specifically for slicing fish, vegetables, and other seafood.
The blades of these knives are usually long and thin with a pointed tip. This allows for precise slicing with less effort.
If you’re considering getting a sushi knife, it’s important to know what to look for.
In this guide, we’ll tell you everything you need to know about Japanese sushi knives.
Japanese Sushi Knife: A Brief History
The Japanese sushi knife has a long and interesting history.
The techniques used by Japanese knife makers to fashion these knives date back more than a thousand years.
Japanese handcrafting techniques for swords can be traced to the 14th century when swordsmiths made knives and samurai swords.
In the 1850s, Japan opened up to trading with other parts of the world and it is during these times that the swordsmiths made more knives and fewer swords or katana.
After the end of the Second World War, everyone was banned from carrying samurai swords, and thus, the transition to designing sushi knives was complete.
But even today, the sushi knife has the design of the samurai sword at its core – sleek, sharp, and precise.
In Japan, Seki City has been renowned for bladesmithing for 800 years.
From this region, one of the top blacksmithing families that produce world-class sushi knives is Fujiwara Kanefusa.
Another famous brand from the same area is Sakai Takayuki which belongs to a family of blacksmiths that have been in practice for hundreds of years.
A second-generation swordsmith from this region is Takeshi Saji with the “Traditional Master Craftsman” certificate under his belt.
Basic Terms Used For Japanese Sushi And Sashimi Knives
Before we delve further into the topic of sushi knives, we should discuss some basic terms used for knives for better understanding.
Blade
A blade is a thick piece of steel that can’t cut through ingredients unless its edge has been sharpened to do the job of cutting and chopping.
Bevel
The bevel is the ground angle and the shape of the blade’s edge.
A double-bevel or double-edged knife has angles on both sides, usually in a 50:50 ratio, giving the blade edge a V shape.
The ratio means that if one side of the blade edge has been ground at 11 degrees, the other side has also been honed at 11 degrees, bringing the total to 22 degrees.
Single-bevel or single-edged knives have a single angle on one side.
They have an asymmetrical edge that is ground to a thinner thickness with ratios of 70:30, 60:40, and 90:10.
Using the single-bevel knife takes special skills that the user needs to learn before using.
Knife Grinds
The different ways of creating the knife’s edge to perform different kinds of cuts and slices are known as knife grinds.
Tang
The part of the steel blade which extends to the handle of the sushi knife.
A full tang knife runs down the entire length of the knife while a half tang does not.
Wa-Handle
Traditional Japanese handles include the Wa-Handle.
They typically feel lighter overall and balance the blade forward as there is less steel inside the handle.
What Are The Main Parts Of A Sushi Knife?
The main parts of the sushi knife are:
Handle
Kireha or cutting edge
Kissaki or tip
Mune or the spine
Ago (the chin or heel)
The sushi knife’s cutting edge, which actually does the cutting, is like the basic sections of a kitchen knife.
Sushi knives are single-beveled, meaning that only one side of the blade is completely sharpened and the other has a slightly concave edge to facilitate cutting food.
The cutting edge of a blade is on the right side for a right-handed person and on the other side for a left-handed person.
While the spine of the blade is where you rest your index finger for a better hold, the tip, or kissaki, is the sharp, pointy portion of the sushi knife.
The area closest to the handle and the thickest section of the blade is called the chin or heel.
When cutting tough items, the chin or heel prevents any damage.
With the wooden handle, you can control the knife movements easily as it gives you a good grip.
Chef’s Knife: How Is It Different From Traditional Japanese Sushi Knife?
The regular chef’s knife you have at home is different in a few aspects from the traditional Japanese sushi knife.
Bevel
The bevel or the angle of the blade’s edge is the key distinction between traditional Japanese sushi knives and blades in the chef’s knives used in the West.
The bevel in the chef’s knife is sharpened at an angle on both sides in a 50:50 ratio, creating a V shape, and therefore, called a double-edged knife.
This can be used by both right- and left-handed users.
In a Japanese sushi knife, the blade is sharpened at an angle on only one side, creating a chisel-like shape.
The ratios, as mentioned earlier, are 70:30, 60:40, and 90:10.
The sushi knife is usually honed on the right side, making it perfect for right-handed users.
For left-handed users who need one that has been sharpened on the left side, they need to order a special one like this.
💡Japanese sushi knives are single beveled, but chef’s knives made in the West are double beveled.
Shape Of The Blade
The shape of the blade is another point of difference.
While the typical Japanese sushi knife has a straight blade, the chef’s knife in the Western style is usually curved along the blade.
The higher the angle, the better it is to chop or cut thick vegetables and meat.
On the other hand, the bevel angle is quite low in the sushi knife – a maximum of 5 degrees.
When slicing delicate fish, shellfish, meat, and vegetables, this creates an extremely fine or sharp edge.
Sharpness Of The Cutting Edge
Japanese sushi knife that is single-beveled is extremely sharp.
This is because only one side needs to be sharpened, making it simpler to cut an angle much smaller and sharper.
This makes it possible to slice, dice, and cut precisely—a necessary skill in Japanese cuisine, especially when making sushi.
Additionally, a single bevel knife enables the cook to create long, uninterrupted cuts that resemble wafers, which is crucial when preparing several Japanese veggies (for example: peeling daikon).
Whereas, the chef’s knife doesn’t have a very sharp cutting edge.
That’s because it is used for cutting tougher meat and vegetables like pumpkin.
Use Case
The use of a chef’s knife is to cut through tough ingredients like bones and meat.
But the sushi knife is meant to use for more delicate slicing of fish, meat, and vegetables.
Using a sushi knife to cut through dense ingredients will not only ruin the blade of the knife but will also spoil the structural integrity of the meat or fish and spoil their texture.
Types Of Sushi Knives
There are different types of sushi knives depending on the specific purpose for which they are used.
Sushi knife types depend on the blade length, blade material, and handle material.
There are two broad categories of sushi knives with different styles under each.
One is the traditional Japanese knife that is sharpened on one side of the blade.
The second one refers to the Western-style sushi knife that is sharpened on both sides of the blade and has a Japanese influence in the design.
This influence can be seen in the angle of the blade.
Instead of the typical chef’s knife that has a 50:50 ratio to give the blade a V shape, the ratios are such to give the blade an asymmetrical shape – 70:30, 60:40, or 90:10.
The following are traditional Japanese sushi knives:
Yanagiba (AKA Shobu)
Usuba
Kamagata Usuba
Deba
Fugubiki
Takobiki
Kiritsuke
Yanagiba (AKA Shobu)
The Japanese word for Yanagiba is “willow leaf blade.”
With its origins in the Kansai region, it is a typical sushi knife made in Japan that is between 210 and 360 millimeters (8 5/16 – 14 3/16 inches) long.
This knife is commonly referred to as the “Shobu” by people from the Kansai region since it means “iris leaf.”
Due to its resemblance to the Japanese iris plant, which has spear-shaped leaves, this name was given.
Features
A thin and long blade with a pointed tip is required to get thin slices for boneless fish filets.
Single-beveled on the right side with a concave edge on the left side so that the food does not stick to the blade but falls off smoothly.
The unique shape of the blade can cut through the delicate skin of fish without spoiling the texture.
Either D-shaped handles or Wa-handles that are oval or octagonal.
Purpose
Yanagiba knife uses include making clean slices of raw fish for sushi and sashimi dishes as well as for making fish filets.
The proper techniques required to make the most of using the Yanagiba knife are the following:
Usuzukuri
This technique translates to “fine cuts.” It is used by sushi chefs for cutting raw fish into incredibly thin pieces.
By slicing the fish in this way, cooks can highlight how translucent white fish is and accentuate its springy feel.
Hirazukuri
To create long, thin slices of fish, chefs pull-cut perpendicularly across the body of the fish.
Chefs prepare fatty fish, such as salmon and tuna, in this manner.
Sogizukuri
Pull-cutting in the direction of the fish’s skin or scales at an angle of roughly 45 degrees. Slices produced using this method are both long and thick.
Sushi is more enticing and satisfying to eat when the salmon is cut in this manner.
Usuba
With a thin blade and a sharp cutting edge, the Usuba is a rectangular knife with a straight edge that hails from the Kanto.
It’s ideal for chefs who want to glide through slicing jobs easily and precisely.
Features
A long, flat, straight-edged blade comes into contact with the cutting surface, it is perfect for cutting nori sheets and veggies.
The thin blade makes it easy to maneuver the knife, making it ideal for fileting fish, chopping components, and cutting veggies with precision into smaller pieces.
Sushi chefs can put pressure on the ingredients without damaging the food structure.
A Wa-handle that’s light and is either oval, octagonal, or D-shaped.
The sharp blade is perfect for making crosscuts on fish, slicing vegetables, and chopping through small bones without breaking them.
Purpose
The Usuba knife is also referred to as the vegetable knife as it can make delicate and precise cuts.
Thanks to the thin blade, the vegetables can be sliced thinly without ruining the texture.
The Usuba knife has the bonus advantage of enabling you to make decorations with vegetables for outstanding food presentations.
You need to have total concentration when using the very special Usuba knife.
Only after handling many other types of Japanese sushi knives will you be able to handle this one comfortably.
Kamagata Usuba
Unlike the Usuba that originated in Kanto, the Kamagata Usuba has its origins in Osaka.
Features
It’s a traditional Japanese knife featuring a pointed tip to make delicate cutting an easier and more precise job.
A strong Sushi knife with a thick spine, a cutting edge, and a pointed tip is called a “deba.”
It has a single bevel, or one side of the blade is ground totally flat.
The thickness of the spine makes it more resistant to wear and less likely to sustain injury when slicing through dense flesh.
Features
The blade is sharp, tough, and between 5-9 millimeters (3/16 – 5/16 inches) thick, giving you the perfect balance and good control when handling tough cuts like chopping off fish heads.
The long blade is wide at the chin or heel and narrows down as it nears the cutting edge.
A sharp tip makes it easy to cut through bones and fibrous tissue.
A 180-millimeter-long (7 1/16 inches) blade is recommended by sushi chefs.
The high carbon steel blades in the Deba ensure the durability of this knife.
The Wa-handle could be octagonal, oval, or D-shaped.
Uses
The Deba knife is the best type of knife to use for handling whole fish.
It is used by chefs to filet fish, behead fish, and cut through bones.
Some chefs use its weight to cut through birds’ flesh and small bones.
However, it’s not recommended to use the Deba knife to cut through the tough bones as that would break or chip the blade and weaken it.
The tough heel helps to remove the head and tail of the fish easily without damaging the blade.
The tip of the Deba can be used to feel the bones of the fish before making the cut to get filets.
Since the middle part of the blade is thick, it’s ideal to chop through tough meat without damaging it, making it more long-lasting.
You can easily remove the skin of the fish too with the Deba.
Fugubiki
Deriving from blowfish or fugu in Japanese, the Fugubiki is another traditional knife used for slicing fish.
Features
Similar to the Yanagi, it is, however, not recommended to use the Fugubiki for the same purpose as the Yanagi.
The Fugubiki is a specialty knife and it’s lighter, thinner, and shorter than the Yanagi.
Purpose
Slicing specifically blowfish as the custom in Japan is to serve this fish on a painted plate with extremely thin fish slices so that you can see the design of the plate through them.
Takobiki
Originating in the Tokyo region of Kanto, the Takobiki is a close cousin of the Yanagi.
It derives its name from the octopus, “tako”.
Features
The special features of the Takobiki include a blunt tip with a thin body and a balanced weight.
Purpose
You can use the Takobiki to make straight-cut sashimi slices easily with its thin body.
With its balanced weight and blunt tip, it’s easier to work with the Takobiki on tough ingredients like the octopus.
Kiritsuke
Kiritsuke is a mix of Yanagiba and Usuba.
Translated into English, Kiritsuke means to “slit open” in Japanese.
You can get the Kiritsuke knife measuring between 240 and 330 millimeters (9 7/16 – 13 inches). Experts suggest you get one that’s 270 millimeters (10 5/8 inches) long.
Borrowing features from the Yanagiba and Usuba, the Kiritsuke can be used to make fish filets or make thin vegetable slices.
Kiritsuke is the ultimate symbol of expertise and seniority as the knife can be used only by head chefs in typical Japanese restaurants.
Features
The blade features a clip-point tip and a sword-like look.
Sushi chefs can make precise cuts with its straight-edge blade, especially for fileting fish.
With a flat heel, it is easier to use the push-cut technique.
With an angled tip, making clean and straight slices is possible, especially when it comes to fileting fish or cutting through bones.
A sharp and sturdy single bevel cutting edge.
The spine of the knife has a flat area that extends up to the curved tip.
The Wa-handle is either D-shaped, octagonal, or oval.
Uses
A multipurpose and versatile knife, the Kiritsuke is great for cutting, slicing, and fileting.
What’s more, you can also use it to debone poultry and chop vegetables.
However, massive training is needed before you can make the optimum use of this knife and use the angle of the blade and the handle in ways that suit your purpose.
The Kiritsuke knife is also used both as sushi and a sashimi knife.
Styles Of Traditional Japanese Sushi Knives
Features
Purpose
Yanagiba
Thin, long, pointed blade Single-beveled Concave edge D-shaped or Wa-handles
Clean slices of raw fish for sushi and sashimi
Usuba
Long, flat, straight-edged blade Wa-handle
Precise cutting of vegetables and nori sheets Fish fileting
Kamagata Usuba
Pointed tip
Making thin sheets of vegetables
Deba
Sharp, tough, long, and thick blade for durability Single-beveled Wa-handle
Handles whole fish by cutting through small bones and for chopping fish head and tail
Fugubiki
Lighter, thinner, and shorter than Yanagi
Making very thin slices of blowfish to be able to see the design of the plate on which it’s served
Takobiki
Thin body with a blunt tip and balanced weight
For making straight-cut sashimi
Kiritsuke
Straight-edged blade with flat heel Angled tip Single-beveled Wa-handle
Cutting, slicing, fileting Deboning poultry
The Main Western-style Chef’s Knives
Gyuto
Sujihiki
Yo-Deba
Santoku
Nakiri
Gyuto
The Japanese equivalent of the traditional Western chef’s knife is called a Gyuto.
It is a real multi-purpose knife that is suitable for chopping through meats, seafood, vegetables, and fruits.
Features
A pointed tip for precise cutting and working in small spaces.
The heel or chin of the Gyuto is flatter to make cutting, mincing, or chopping with the rocking technique more comfortable.
In this technique, the knife is moved in a back-and-forth motion from the tip to the heel to mince, chop, or cut.
It’s also tall enough to chop with a tapping motion on the middle or tip of the blade
The thinner and lighter blade tends to balance toward the tip.
Purpose
A multi-purpose knife used for chopping meat, fish, vegetables, and fruit.
It can also be used for mincing and dicing.
You can do both a pull-cut and a push-cut with ease with the Gyuto.
Sujihiki
The Sujihiki is a slicer with a long and narrow blade with which you can cut meat or fish with just one drawing motion from the heel to the tip.
Features
A long and thin blade for slicing meat and fish with one stroke.
Blade with an acute edge angle for making it easier to cut with the knife.
The sharp edge, angle, and cutting technique contribute to slicing with minimum damage to the cells and surface of the ingredients.
Purpose
The Sujihiki is great for skinning and fileting fish, removing sinew and fat from meat, and making thin slices of boneless fish and meat
The sharp edge and angle of the blade preserve the texture and flavor of the ingredients.
Yo-Deba
The Yo-Deba is one of the western style knives that are heavy-duty butcher knife types to get through all your meat-cutting needs.
Features
Heavier with a tougher cutting edge for tough use and durability.
Purpose
The Yo-Deba is used for cutting through semi-frozen foods, fish, shrimps, lobsters, and chicken with bones.
However, it’s not advised to use this knife for cutting frozen foods.
Santoku
Santoku means “three virtues” and it can handle fish, meat, and vegetables with ease.
Features
With a lightweight blade, the Santoku knife is of medium size and features a spine that curves toward the tip and a cutting edge that is slightly curved or straight.
Purpose
Great for chopping, dicing, and slicing meat, fish, and vegetables.
Nakiri
The Nakiri has a thin blade and is double-beveled, perfect for chopping and cutting light ingredients like vegetables.
Features
A thin, straight, and lightweight blade for slicing vegetables with precision.
The blade is taller than a Gyuto to make more clearance space for the knuckles above the cutting board.
Purpose
Precision cutting, chopping, and mincing vegetables and fruits.
Not recommended for cutting bones and other tough ingredients.
The Nakiri is a good choice for push- or pull-cutting and tap chopping.
Western-Style Chef’s Knives
Features
Purpose
Gyuto
Thin and light with a sharp, pointed blade with a relatively flat heel or chin
Cutting meat, fish, fruit, and vegetables for Western cuisine Rock chopping or mincing Both pull-cut and push-cut
Sujihiki
Long and narrow blade with acute angle
Fileting and skinning fish Trimming fat and sinew from meat Making fine slices of boneless fish or meat
Yo-Deba
Heavy and tougher cutting edge
Cutting through semi-frozen food and bones
Santoku
Medium-sized with a lightweight blade, a straight or slightly curved edge with the spine curving toward the tip
Chopping, slicing, and dicing meat, fish, and vegetables
Nakiri
Double-beveled edge with a thin, straight and tall blade Lightweight
Slicing, mincing, cutting vegetables and fruits with precision
✍️Note: Sushi chefs generally use three types of sushi knives – Yanagiba, Deba, and Usuba.
Sujihiki Vs Yanagi
The Yanagiba is revered by some of the top chefs in the world, particularly those who specialize in meat and fish.
When used with discipline and competence, it is a tool that is tremendously sharp and articulate.
It’s possible that you already have at least one in your toolkit if you work as a professional at a sushi restaurant.
However, Sujihiki would be a better option if you’re a home or amateur chef looking for something simpler to handle, sharpen, and utilize to make straight cuts.
A Sujihiki is what you need if the majority of your work includes cutting ham, prime rib, or turkey.
Is There Any Difference Between Sushi Knife And Sashimi Knife?
Before we go into the differences between sushi and sashimi knives, let’s get to know what’s sashimi.
Sashimi is raw fish, seafood, or meat consumed with soy sauce. The fish or seafood is usually in paper-thin slices. Sashimi is presented by itself without any other ingredient. And that’s where the main difference lies between sushi and sashimi.
Sushi is made with rice mixed with salt, sugar, and vinegar. Then it’s either rolled with nori sheets with fillings of raw or cooked fish or vegetables inside or shaped into rice balls and topped with cooked or raw seafood or vegetables along with some wasabi.
Sashimi can be cut into a number of different forms, such as flat slices, thin strips, rectangles, cubes, or diagonal slices.
Now. let’s get back to the main topic – is there any difference between sushi and sashimi knives?
Sushi and sashimi are two alternative methods for preparing raw fish.
To preserve the integrity of the item when preparing sushi, you must use precise cutting techniques.
Since it may be used to cut vegetables, fish, and sushi rolls, a sushi knife is more functional.
Sashimi knives, however, serve a more narrowly defined function.
The sashimi knife uses its thin blade to make paper-thin slices of raw fish that are presented on a platter.
Sashimi knives are therefore best used for slicing raw fish.
Because sashimi knives have thinner blades, sashimi chefs find it easy cutting raw fish without sacrificing the texture’s quality.
Types Of Steel Used In Sushi And Sashimi Knives
Three types of steel are used to manufacture Japanese and western style knives.
The materials vary in terms of durability, maintenance, and price.
Carbon Steel
This kind of steel has the sharpest edge possible but needs the most upkeep and is susceptible to rust.
Therefore, if you get a sushi knife made of high carbon steel, you will need to sharpen it more frequently than a knife made of another type of steel and you will need to be very careful to keep the blade thoroughly cleaned and dry.
Stainless Steel
Stainless steel has the benefit of not rusting but on the flip side, it doesn’t have the sharpness of carbon steel or composite steel.
This brings us to the last type of steel used for making sushi knives.
Composite Steel
Composite steel has the benefits of stainless steel in that it doesn’t rust easily and therefore, doesn’t need high maintenance.
It has the advantage of being sharper than stainless steel sushi and sashimi knives.
One possible downside is the price of composite steel knives – it’s higher than both carbon and stainless steel knives.
Best Sushi Knives For Value Seekers
Best sushi knives for beginners who are looking for one within a low-end budget include:
Masahiro Stainless Steel Yanagiba 240-millimeter
This Masahiro Yanagiba is a perfect combination of affordability and good quality.
Rust-resistant – made from original stainless steel by Masahiro, it’s a low-maintenance knife as it is resistant to rust.
Sharp – the stainless steel blade is extremely sharp for making precise cuts.
Water-resistant and durable – a combination of compressed laminated wood and resin makes the handle resistant to water, thereby making it durable and anti-slip.
Tojiro DP Gyuto 8.2-Inch
This knife has a core made of cobalt alloy steel that’s covered by outer layers of chromium stainless steel.
Superior construction – made from stainless steel, Blue steel, and ceramics for durability.
Personalization – you can have your name carved on the blade.
Extreme sharpness – the alloy steel is hard and gives a sharp cutting edge for making extraordinary sushi and sashimi.
Benefits Of A Good Sushi Knife
You need to invest a bit in a good quality sushi knife to get the full benefits of using one.
For the finest results, use good quality sushi knives to slice your fish and veggies.
They work to ensure that your contents are distributed and proportioned properly so that your sushi maintains its structural integrity.
High-carbon stainless steel is used to make a high-quality sashimi knife, which is extremely robust and have razor-sharp blades.
High-quality sushi knives have been ergonomically constructed to allow for prolonged use.
Sushi knives with a variety of blade types, weights, and sizes will suit your demands more effectively.
There are plenty of reasons why you shouldn’t use a cheap alternative.
The cheaper alternatives that are touted on online marketplaces may end up getting you more frustrated instead of motivating you to make sushi and sashimi at home.
A cheaper knife will not be durable and its blade will be more susceptible to breaking.
In the long run, you end up buying more of these cheaper knives and spending more unnecessarily when you could be using better quality and pricier knives from the start.
Besides, cheaper sushi knives are not made from top-quality materials and won’t be razor-sharp – a must-have quality for sushi chefs.
Only sharp blades can help you cut slices of fish and vegetables with precision and ensure that your sushi is intact.
Handles of cheap sushi knives are not well-crafted and might easily slip, creating hazards in the kitchen.
Last but not least, using cheaper knives will leave your sushi looking messy with uneven cuts.
This won’t make you look good as a chef, nor will it make the sushi look appetizing.
How To Choose The Best Sushi Knife
Look for these factors when choosing the best sushi knife.
After all, you don’t want to keep changing from one knife to the next, so it’s better to be patient and choose a high-quality knife rather than regret it later.
Purpose
First, you need to decide what you’re going to do with a Japanese sushi knife.
For example, if you want to use it to cut through small bones or chop off the head and tail of a whole fish, then Deba should be your choice.
If you are looking for super-thin slices of raw fish and vegetables for sushi or sashimi, Yanagiba is your best bet.
Materials
As discussed earlier, choose high-quality materials with which the sushi or sashimi knife has been made.
Otherwise, you will have to compromise on the quality of cuts, the appearance of the final dish, the durability of the blade and handle, safety when operating in the kitchen, and saving money in the long run.
Choose knives made of carbon steel as this is a popular material for making traditional Japanese knives.
Due to their high purity content, knives made from this material are sharper although they are not rust-proof.
Handle
The handle of Japanese knives is made from wood.
Before you buy a sushi or sashimi knife, check out the handle.
Feel it in your grip and see how comfortably your hand fits in the handle.
The handle should have an ergonomic design to prevent the hand from slipping.
If the handle is D-shaped, it’s likely to be handled more comfortably when used for a long time period.
Also, look for signs of whether the handle is full tang or partial tang.
A full tang knife handle with the steel blade running across the full length gives you more balance and won’t tire out your wrists.
Such a handle also increases the weight of the knife.
A partial tang or a rat-tail tang tapers down toward the end of the handle and is covered by the wooden handle.
These knives that have a partial tang are less expensive and weigh less.
If you buy a knife with a partial tang, its lightweight feature will cause you less stress.
However, knives with a partial tang will not be as durable as full tang ones.
Moreover, you can’t use a half tang knife for cutting through tough materials like pumpkin or melon.
Before you buy a sushi knife, check if the blade can be seen between the end of the visible part of the steel blade and the part where the wooden handle begins.
If you can see it, don’t buy it as it shows it’s not been secured properly and the blade will come off the handle.
Blade
The blade is the most important part of the sushi knife as it is THE part that cuts the food.
Choose a sushi knife made from high-grade materials – preferably high carbon stainless steel – so that you know you have the best blade at your disposal that won’t give away while you’re working.
Moreover, the material will keep the blade durable, and resistant to rust, stains, and corrosion while maintaining its sharpness.
Check the sharpness of the blade to ensure you get exactly the cuts you want.
While you check the blade construction, check its length as well.
With a length ranging from 9 to 10.5 inches, Yanagiba knives are often substantially longer than other sushi blades.
The length of other sushi knives, like Nakiri or Santoku knife, is often between 6 and 7 inches.
Thinking about the type of sushi you want to eat and selecting the right length for the task are the keys to getting the best sushi knife for your needs.
How To Sharpen Sushi Knives
It’s normal for sushi chefs to keep the tool of their trade sharpened on a regular basis.
It’s widely believed that cleaning and sharpening the knife every day and letting it rest overnight improves the taste of food.
Sushi chefs like to hone the blade of their knives before it gets too blunt.
This keeps the knife sharp and saves them from spending a lot of time getting back the desired sharpness.
If you recall, traditional Japanese-style sushi knives are sharpened on one side of the blade or single-beveled.
On the other hand, western style knives are sharpened on both sides of the blade or are double-beveled.
This difference also creates different ways to sharpen sushi knives.
Prepping The Whetstone
Whether you’re sharpening a single – or double-edged knife, preparing the whetstone is essential.
Here’s how to do it.
Soak the whetstone and stone fixers in water for 10 minutes or until you don’t see any more air bubbles before sharpening your knife on it.
Using the stone fixer, level down the sides of the whetstone and sand the top of it to make it flat.
On a damp towel, place the whetstone with the narrow end pointing away from you.
The towel will help the whetstone stay in place when sharpening the sushi or sashimi knife.
Speaking of whetstones, there are three main types that you need to know about.
Each type of whetstone is used for varying levels of damage on the blade.
Arato
It’s a coarse grit stone to fix damaged edges and create new ones.
The average grit of the Arato varies between 400 and 600 and can go either above 600 or below 400.
Nakato
For creating a sharper edge and for slight repairs, the Nakato whetstone is used as it has a medium grit between an average of 1000 to 1200.
Shiage
The Shiage is a fine-grit stone used for polishing or finishing.
It has an average grit of 6000 to 8000.
If you’re a home chef and wondering which whetstone is best for you, choose a combination stone with Nakato on one side and Shiage on the other.
Note: You leave tiny scratches on the metal’s surface while sharpening with medium-grade grit (Nakato).
Moving to the finer grit (Shiage) polishes out those dings to produce a polished, sharp edge.
In order to polish along the same lines and in the same direction as you did when you formed them with the more abrasive stone in the previous stage, it is crucial to maintain a constant angle of the knife to the stone during the entire sharpening process.
How To Hold The Sushi Knife When Sharpening
Your thumb should be on the flat section of the knife’s blade, your index finger should be on the spine, and the remaining three fingers should be wrapped around the blade.
Hold it comfortably, but not in a way that would be similar to cutting with it.
Although it can range from 45 to 80 degrees, the angle between the knife and the stone should be between 60 and 70 degrees.
Maintain a constant angle for the best results.
How To Sharpen Single-Edged Knives
You should know how to sharpen traditional Japanese knives that are single-beveled to prevent the blade from getting damaged, bent, or rusted.
Follow the steps below to sharpen a single-edged sushi knife.
Put two or three fingers of your left hand, starting at the tip, near the edge of the knife while holding the knife against the front of the stone closest to your body.
When you push the knife down the stone, apply equal pressure to the blade edge where your fingers are because here is where the sharpening is taking place.
Place the knife along the length of the whetstone and push.
When you move the knife forward and back to the beginning position once more, let go of the pressure on your fingertips.
Before moving on to the next portion of the blade, repeat this action one more time.
This is particularly true for the Yanagiba due to its more delicate and thin blade.
Finish off the current part of the blade with no more than 5 or 6 strokes.
As you proceed down the blade, be sure to maintain the same angle of the knife to the stone and the blade edge to the stone.
Look out for the burr forming along the edge of the blade as you start to sharpen it.
Once the burr shows along the whole length of the cutting edge, put the blade on its reverse side flat on the far side of the whetstone and perpendicular to it.
Put your left hand’s middle and index finger against the edge of the blade while softly pressing your thumb against the spine.
By applying gentle pressure on your fingers, pull the blade toward yourself.
Proceed to the next section of the blade until burr forms on the entire length.
Remove the burr with a clean cloth to finish off the sharpening process.
✍️Note: Sprinkle water on the stone as necessary to lubricate it, but leave the sludge that accumulates because it helps the sharpening process.
How To Sharpen Double-Edged Knives
Western style Japanese knives like Nakiri or Gyuto are double-edged and need to be sharpened differently.
Consult the manufacturer’s guide to find out the angles of the front and back edges of the blade.
If you can’t do that, here’s how you can find out the angles:
Put the blade’s face flat against the whetstone.
Put your fingers half on the whetstone and half on the edge of the blade.
Raise the knife slowly to feel the flat touch of the bevel on the stone.
You want to sharpen this side at this angle.
Repeat the above step for the other side of the blade.
Continue to sharpen both edges of the blade in the same way as you would sharpen a single-bevel knife.
Care And Maintenance Tips
Do not cut frozen food or tough bones with a sushi knife as it will dull and damage the blade.
If you are using your sushi knife to cut ingredients that are acidic like lemons, sushi (with vinegar), or apples, make sure to wash and wipe the knife often.
Never use a sharpening steel to sharpen your sushi knife. Always use a whetstone or a water stone as suggested by the manufacturer.
Always handwash your sushi knife after each use with soapy water and give a final rinse with hot water.
Use tissue paper or a towel to dry your sushi knife especially if your knife is made of carbon steel. This material is prone to rust and leaving water droplets will cause the blade to rust.
Never try to roast the knife over a fire to dry it quickly as this would affect the sharpness of the blade.
If you do notice discoloration due to rust on the sushi knife blade, wet the knife and place it on a chopping board. Sprinkle with a powder cleanser to cover the area of rust evenly. Take a cork and put it in water. Use the wet cork to rub the area of rust while making sure the blade doesn’t move from its place.
Never wash your sushi knife in a dishwasher.
Before putting it away, add a thin layer of any plant-based oil with tissue paper, wrap your sushi knife in a newspaper, put it in a case, and store it in a separate space either on a rack or in the drawer. The newspaper contains some oil as well and will prevent any rust from forming.
As the blades are more delicate in traditional Japanese knives, apply caution when using them as direct contact with bones, stones, or any hard material can damage the blade.
Avoid twisting the blade when you are removing the knife from the raw fish to prevent the blade from bending and losing its shape.
For sterilizing the knife, always use hot water, never an open fire.
FAQs
What Is A Japanese Sushi Knife Called?
“Wa-bocho” is the term that refers to traditional style Japanese sushi and sashimi knives.
What Kind Of A Knife Is Best For Cutting Sushi?
Yanagiba is the best knife for cutting sushi.
What Is Special About A Sushi Knife?
Their single-beveled edge, the flat part of the blade that prevents the food from sticking to the blade, the multifaceted blade that can cut vegetables, fish, and roll, a D-shaped handle for comfort, and the tang or part of the blade that can either run the full length or partial length of the knife.
What Kind Of Knife Is Used For Sashimi?
For sashimi, you need a knife with a long and narrow blade like a Yanagiba.
Looking to find out if your Pyrex product is microwave-safe? This article gives you the inside scoop in discovering if it is!
You may have acquired a new Pyrex bowl, or you have a collection of Pyrex products.
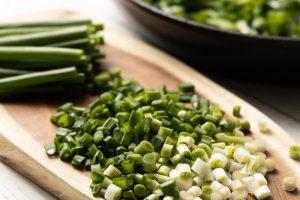
Now, you’ve got a dish you refrigerated for some time. Or maybe you’ve been cooking and looking for ways to store and reheat your food.
You want to reheat it and microwave Pyrex glass bowls. Or maybe you have something you want to heat up in an empty Pyrex cup.
But you’re worried. You have the option of a microwave oven or a toaster oven.
Could Pyrex glass be microwave-safe?
We’re here to answer your question. Yes, Pyrex glass is microwave-safe, but there are certain things you have to look out for. Read our article to know more!
What is Pyrex?
Pyrex is a brand of kitchen cookware and laboratory glassware that’s been around since 1915.
They started as a brand by using borosilicate glass. Borosilicate glass cookware is less likely to be subjected to thermal stress. As a result, borosilicate glass, or Pyrex glass, can withstand higher temperatures than usual.
Later on, soda-lime glass was also used for their glass cookware.
In any kitchen, you can find everything from a Pyrex glass measuring cup to Pyrex bowls. You may also find some people who collect vintage Pyrex dishes – or that may be you in this case!
Is Pyrex Glass Different?
Yes, Pyrex glass is quite different from other common glass cookware.
Pyrex glassware products are known for their high heat-resistant properties.
The Pyrex brand in Europe is still made of borosilicate glass, but the North American manufacturers have since changed their products into tempered glass.
The use of tempered glass still makes Pyrex shatter-resistant, while keeping the price point low.
The 10 pcs Pyrex set is a must have in any home – they’re perfect for packing lunches especially if you’re worried about leakage.
The point is: Pyrex products, may it be a Pyrex jug, Pyrex cup, or Pyrex bowl, can all withstand wider ranges of heat in comparison to other glass products.
Is Pyrex Microwave Safe?
Yes, you can microwave Pyrex! However, it can depend on the type of product.
You can microwave both plastic and glass Pyrex products. Thankfully, plastic Pyrex is microwave-safe and BPA-free.
You can also microwave Pyrex lids in a microwave oven.
However, do take a second look at your Pyrex dishware. If it’s decorated with gold leaf or other metallic decorations, it may be incompatible with microwave ovens.
Don’t microwave Pyrex that has these decorations, or you may risk shattering inside your microwave oven!
Is Pyrex Glass Also Oven-Safe?
So you can microwave Pyrex. But is it safe if you’re heating food or cooking using an oven?
Yes, Pyrex glass cookware is oven-safe.
However, the same cannot be said for plastic Pyrex cookware. Be especially careful with plastic lids.
While heat-resistant, there’s a risk of Pyrex lids reaching a melting point with high heat inside a conventional oven.
Is Pyrex Glass Dishwasher-Safe?
Yes, Pyrex glass is dishwasher-safe! You can opt to wash your plates by hand or have them go through the dishwasher.
However, you should still be careful. Dishwashers can slowly etch Pyrex glassware.
Make sure to keep plastic lids and glassware away from heating in the dishwasher. While Pyrex glass is absolutely microwave-safe and heat-resistant, we don’t know what could happen with the heating elements in a dishwasher!
As long as you follow manufacturer’s instructions, your Pyrex can thrive in a freezer.
The manufacturer’s instructions include allowing it your Pyrex cool before inserting it into the freezer. Be careful in handling the Pyrex as well so it won’t break or hit any utensils.
Pyrex can survive a very cold surface — up to negative 40 degrees Celsius, to be exact.
How to Make Sure Pyrex Glass Doesn’t Shatter
Sure, Pyrex is safe to go through your microwave oven. But there are still safety tips you must follow when cooking, heating food, or using a microwave.
01 Avoid Drastic Temperature Changes
Yes, Pyrex can technically withstand any drastic temperature. That’s why it’s safe to microwave in the first place!
But a drastic temperature change can break your dish.
Glass products, after all, are still vulnerable to thermal expansion. If you move Pyrex glass bowls from cold temperatures to high temperatures suddenly, the extreme temperatures can make it break.
If you’re going to microwave a cold dish from the freezer, make sure it cools down a little before transferring it inside a microwave oven. Cold Pyrex glass may shatter if you microwave it right away!
Plus, we advise you not to pour hot liquid into a cold Pyrex glass, or put hot Pyrex on a cold surface. Thermal shock may occur, which will lead the Pyrex to shatter, too.
02 Use Dry Mitts When Handling Cookware
If you’re getting your Pyrex from a microwave or oven, use dry mitts.
This is especially advised if you’re handling or cooking a hot dish. Not only does it save you from getting burned, it also makes sure the glass doesn’t break as easily.
03 Don’t Use Glass Cookware For Cooking With High Heat Techniques
Extreme temperatures will eventually get to the glass you’re using. A microwave is fine, but broiling and grilling using your glass cookware is not advisable.
How to Take Care of Your Pyrex Glass Dishes
Aside from making sure your Pyrex glass is safe to microwave, you can go the extra mile to make sure you take care of your Pyrex glassware.
From food storage to cleaning tips, we have the guide to taking care of your Pyrex collection below:
01 Avoid Temperature Changes – Especially with a Hot Pyrex Dish
Extreme temperature changes can break your Pyrex glassware. While Pyrex is usually heat-resistant and microwave-safe, temperature changes will still affect them and they may go into thermal shock.
For example, you should avoid dousing a hot Pyrex dish in cold water. Don’t pour hot liquids on cold Pyrex either, or put a cold Pyrex on a hot stove.
Instead, let the Pyrex bowls or dishes cool at room temperature, then soak them in warm water. Don’t let a hot Pyrex dish touch even a wet cloth!
Otherwise, your Pyrex dish could go through thermal shock.
Thermal shock occurs when sudden temperature changes cause tension in the material, causing it to break.
Broken Pyrex could potentially injure you as well.
If your Pyrex dish came from a refrigerator, however, you can microwave cold Pyrex or place it in a conventional oven right away. It’ll be safe as the cold Pyrex dish will change its temperature evenly.
The same goes when you want to microwave cold Pyrex. It’s still safe to microwave as long as the heat is distributed evenly.
To make sure you safely microwave Pyrex, however, it may be advisable to let it cool down to room temperature first.
02 Use Mild Abrasives for Tougher Residue
Even the best dish can leave some residue on your Pyrex dish after cooking and eating.
Usual residue on your Pyrex dishes can be removed by soaking it in warm water. Remember, if you have a cold Pyrex dish, let it get back to room temperature first.
After soaking the dish in warm water, you can go forward with your usual dishwashing process and scrub the area clean with liquid soap, a sponge, and water.
Tougher residue can benefit from mild abrasives. However, it’s best if you avoid abrasives on painted and decorated surfaces of your Pyrex dishes.
03 Handle Your Pyrex Glass Dishes Carefully
Careful handling is essential to the maintenance of your Pyrex dishes!
The lids don’t fit as tightly on Pyrex glassware in comparison to other products. Make sure to hold your Pyrex dishes carefully with both hands when transferring them from one place to another.
Pyrex glassware are usually heat-resistant and durable, but they’re still breakable. Proper handling will make your Pyrex glassware last longer.
04 Store Them Properly
Proper storage also goes a long way with Pyrex. Make sure all the shelving and racks you use are sturdy, and can reasonably support several Pyrex dishes’ weight.
Try to avoid sharp corners or any material that may scratch or mar your Pyrex glassware. Stack them according to size to avoid breakage.
05 Don’t Use a Dishwasher
Pyrex is also dishwasher-safe, but it’s not advisable to put Pyrex through a dishwasher. Instead of safely cleaning your Pyrex cookware, all it will do is slowly etch the glass — damaging it in the process.
Instead of using a dishwasher, you can choose to wash Pyrex glassware and Pyrex lids by hand.
FAQs
Are Pyrex Measuring Cups Microwave-Safe?
Yes! Just like all other Pyrex products, Pyrex measuring cups are also microwave-safe.
Is a Vintage Pyrex Safe?
While mostly safe, vintage Pyrex does have lead in it. You might be curious as to the safety of these products and their impact to your health. Remember that no product is 100% lead-free!
A vegetable food chopper may not seem like essential kitchen equipment. However, you may not realize how convenient having one is and how much time it will save you when chopping your ingredients until you have one.
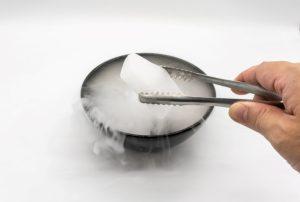
This article will review the top 10 best vegetable choppers. The article also provides a brief buyer’s guide to help you choose the right vegetable chopper.
Versatile. The Fullstar manual vegetable chopper can be used for many functions, including chopping, slicing, and spiralizing. It comes with four interchangeable blades that are easy to swap. The blades have a lock mechanism to ensure the vegetable chopper’s safety. It is suitable for all types of fruits and vegetables, including carrots, cucumbers, potatoes, and tomatoes.
Quality Build. The metallic parts of the Fullstar vegetable chopper are made of heavy-duty 420 stainless steel, which is rust resistant and retains razor sharpness for smooth cutting. The handle is covered with rubber for a soft, non-skid grip, while the plastic components are made of BPA-free material. The base is anti-slip.
Comes With a Large Catch Tray. The large tray of this veggie chopper allows you to prepare large portions of the ingredients at a time for quick prep. The blender also comes with cleaning brushes for easy cleaning of the blades. The various parts are dishwasher safe.
Wide Range of Application. The Mandoline vegetable chopper is an 11-in-1 multifunction fruit and vegetable cutter. It has seven interchangeable blades for various food prep functions, including cutting, slicing, chopping, grating, dicing, shredding, and spiralizing. It also has a peeler, egg separator, and a drain basket. You can use the drain basket to wash the vegetables or drain pasta. Aside from fruits and vegetables, the set can also be used with meat and cheese.
Quality. The blades are made of 420 stainless steel, which is not only rust-resistant but maintains sharpness for a long time. The plastic parts are BPA-free. The manufacturer backs the blender’s quality with a 100% money-back guarantee.
Design Prioritizes Safety. The sharp blade retains sharpness, ensuring you do not over-exert when using it. The Mandoline vegetable chopper is also designed with a finger guard to prevent accidental cuts by the sharp blade. The handle has rubber strips for a soft and non-slip grip. Note that it is not dishwasher safe.
Marked Catch Container. The catch container has marks from ½ cup up to three cups to enable you conveniently measure your ingredients as you prepare them.
Easy to Clean. The Vidalia Chop Wizard Promax comes with a cleaning lift tab on the lid and a cleaning grid. Besides, the various parts are dishwasher safe.
Easily Interchangeable Blade. To help you perform the various chopping tasks quickly.
Comes With Three Blades. The vegetable chopper comes with 12mm, 23mm, and 6mm dicing blades to quickly cut your fruits and vegetables into your preferred sizes.
Easy to Use. The slicing blades have an extra-large surface area for easy and effortless cutting. They are made of 420-grade stainless steel for durability and sharpness retention. The top lid has an easy-push action and is suitable for right and left-handed individuals.
Large Container Capacity. The Brieftons Quickpush food chopper is bigger than most.
Small, Compact Design. The design of this mini chopper is not only easy to handle but also space-saving. It takes minimal space on the counter. The processing bowl has a 1.3 cup capacity. It is best suited for preparing small portions of ingredients.
Easy to Use. It has a one-touch pulse control button for easy operation. It is also designed with a safe locking lid and anti-slip feet to enhance safety during use.
Easy to Clean. The various parts are easy to disassemble and clean. You can immerse all of them in water apart from the base, which is fitted with a motor.
Mini Food Processor Design. The Cuisinart DLC 2ABC Mini-Prep Plus is a mini-processor that lets you quickly grind and chop your ingredients.
High Performance. It is powered by a 250-watt motor. The Cuisinart DLC 2ABC Mini-Prep Plus design also incorporates a patented reversible stainless steel blade. It has a push-button control panel that lets you switch between chopping and grinding processing options.
Available in a Wide Range of Colors. It is available in 14 color options to suit your preference and kitchen décor. You can also choose between three and four cup processing bowl sizes.
Quality. The pitcher jar is made of BPA-free plastic, while the blades are made of stainless steel. The mini processor is backed by an 18-month warranty.
Cord-Pull Operating Mechanism. The Kuhn Rikon chopper utilizes a manual pull mechanism to operate. Simply pull the cord attached to the side of the lid. It will rotate the shaft and blades, chopping the ingredients in the bowl. You will need to pull the cord about 5 times for coarse cuts, 10 times for fine cuts, and 15 times to make dips and sauces.
The Container is Microwaveable. If you need to war your ingredients, you can place them in the microwave using the vegetable chopper’s container. You can also place it in the refrigerator to store any leftover ingredients or to chill them for a salad.
Safe to Use and Easy to Clean. It has a non-slip base that ensures it stays in place when used. It also has a blade protector to cover the blades when not used. It is dishwasher safe.
Comes with all Essential Attachments. It comes with 4 different blades to suit your chopping needs. The blades include a 6.8mm dicer, 13.6mm dicer, a wavy blade, and a cross blade.
High-Quality Build. The blades are made of 420-grade hardened stainless for durability and optimal sharpness so that you make seamless cuts each time with a single motion. The 1.2L container is made of professional-level, heavy-duty reinforced food-grade ABS. The blender can be used with both soft and hard fruits and vegetables. It can also be used to cut cheese.
Lifetime Warranty. The Muller Vegetable chopper is the only product in this review article with a lifetime warranty. The company also offers telephone customer support to answer your questions or address any issues that may arise when using the vegetable chopper.
Two-Blades. The Zyliss Easy pull food chopper design incorporates two blades that rotate in opposite directions to ensure that the ingredients are chopped finely. It has two booster arms—at the top and bottom—to prevent the food from sticking on the shaft and to ensure that the ingredients are cut evenly.
Ergonomic Handle. The handle is ergonomically designed to ensure minimal effort when chopping.
Easy to Use. Put the ingredients in the bowl and close it. Place one hand on top of the lid to keep the chopper in place, and then use the other to gently pull the two-foot cord. The cord will naturally draw back, allowing it to reset before pulling it out again. You will need to make 5-12 pulls depending on the ingredients and how finely you want them chopped.
Small yet Powerful. The Tikbaba mini electric food processor is the size of your palm but can process a wide range of ingredients, including carrots, meat, onions, garlic, pepper, etc. Due to its small size, it is best suited for chopping small portions of ingredients. It is also suitable for making baby food. It is highly portable, making it suitable for traveling or outdoor use.
Easy to Operate. The 36W mini food chopper is electrically powered through a USB port. Once you have set it up, press the operation button at the top to start it and then release it to stop it once your ingredients are adequately processed. The motor rotates the blades at high speed, and it takes only five seconds for your ingredients to be shredded.
Designed for Enhanced Safety. It has a hall sensor switch, so the processor cannot start unless the lid is well-lined up. The bottom is non-slip.
Best Vegetable Chopper Buying Guide
Below is a look at the key factors to consider when choosing a vegetable chopper.
Type
There are two main types of vegetable choppers—manual and electric. As their names suggest, a manual one requires you to pull or push to operate it, while the electric ones have a motor powered by an electric connection. Both types are affordable and efficient; the right choice depends on your preference.
Capacity
The capacity of a vegetable chopper depends on the size of the processing bowl or catch container ranging from 1 cup up to 5 cups. A large-capacity vegetable chopper will be most suitable if you usually prepare large portions of ingredients.
Quality
The quality of a vegetable chopper is determined by the overall design and materials used. Ultimately, the design should be coherent and offer optimal operational efficiency.
For instance, the blades should be hard with excellent sharpness retention. 420-hardened stainless steel is the most suitable for vegetable chopper blades as it is rust and corrosion-resistant. The plastic parts should be made of ABS and BPA-free materials.
It is advisable to go for a vegetable chopper backed by a warranty, such that in case of any issues, you can return it for a refund or replacement.
Safety Features
You want to minimize the risks of an accident using the vegetable chopper. Therefore, go for a vegetable chopper that has safety features. In the case of an electric chopper, it should not start until the lid is well-lined up and properly closed. Other key safety features include an ergonomic handle, non-slip base, and protective finger guard.
Is there a Difference Between a Food Processor and a Food/Vegetable Chopper?
A vegetable chopper is mainly specialized for chopping, cutting, and slicing ingredients. On the other hand, a food processor has a wider scope of application as it can be used to make dough, batter, mix ingredients, etc.
Generally, food processors have a larger capacity than food choppers. Food processors are mostly electric, while food choppers can be either electric or manual. The electric ones have a lower power rating than food processors. They also vary in their overall look and design.
Conclusion
The best vegetable choppers are easy and quick to use and save you time when preparing ingredients. They also have good quality and durability. They should have essential safety features such as a non-slip base.
Dry ice has a wide range of applications. You can use it to cool and preserve food while on the move, like on road or camping trips. You can also use it to maintain refrigerator temperatures in case of a blackout.
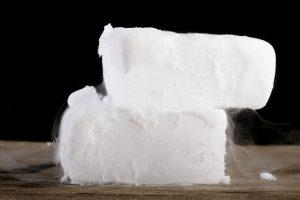
Dry ice is often used in coolers to transport perishable goods by individuals, shipping companies, and businesses. It is also used to make mosquito traps. However, how long can it last?
The length of time dry ice can last before it sublimates depends on where it is contained, the volume, and the surrounding environment. It can last anywhere from a few hours to 18-24 hours.
This article will discuss how long dry ice can last and what to do for it to last longer. But first, an overview of dry ice and how it works.
Dry ice is a solid form of carbon dioxide. It is made through a special process that entails cooling and then pressurizing it into a liquid. It is then depressurized and allowed to turn back to gas.
The expansion process causes a sudden temperature drop, which causes some carbon dioxide to freeze into solid pellets. The solidified carbon dioxide is then shaped into chunks used in different settings, including food preservation, biochemical labs, and Halloween haunted house scenes.
The main reason it is referred to as dry ice is that it does not turn into liquid. At higher temperatures, the ice sublimates into vapor.
How is Dry Ice Made?
Dry ice(aka frozen carbon dioxide), often referred to as “solid snow,” is made by liquefying carbon dioxide and injecting it into a holding tank where its temperature drops down -109° F.
It can then be compressed into different shapes or forms depending on what type of machine was used for production; these include pellets that melt when touched with warmth from your hand but don’t Ways like regular snowball fights during wintertime!
How Long Does Dry Ice Last?
The shelf life of dry ice depends on how it is stored, surrounding temperature and conditions, and the amount of ice.
Typically, dry ice sublimates at a rate of 5-10 pounds per hour at room temperature. It takes 3-5 hours to evaporate if you leave it in the open air. Dry ice sublimates much faster when put in liquid than in the open air. A 5-pound block will sublimate within 15 minutes when put in water.
With proper storage and handling, dry ice can last longer. A 5-pound block of dry ice can last between 12-24 hours when put in a well-insulated Styrofoam shipping box or dry ice cooler. Two bags can last up to 36 hours.
Since dry ice has a relatively short lifespan, it should be bought as close as possible to the time of use and then stored properly. When buying dry ice for later use, consider that some of it will sublimate. Let’s say you need 15 pounds of dry ice for use the next day; you will need to buy 20-25 pounds.
Tips for Storing Dry Ice to Extend Its Shelf Life
Freezers are more efficient than refrigerators because they don’t require as much empty space. Dry ice should be stored in a insulated cooler when not in use. Ideally, one insulated with the lid loosely closed. Dry ice should not be put in an airtight container, but it should not be left exposed for extended periods.
🧤Important: When handling the pieces of ice, use thick rubber gloves or tools. It’s important not to get any on your skin because it can cause an infection and/or chop seriously into you if touched with bare hands!
Therefore, the lid should never be closed tightly. This is because, inevitably, some of the dry ice will sublimate into carbon dioxide, and if the container is closed too tightly, the carbon dioxide gas can cause an explosion.
Place the cooler box in a well-ventilated, cool area. Dry out the cool box before putting in the dry ice. As mentioned earlier, water and moisture cause the dry ice to sublimate.
If the dry ice is not in use, cover it with a towel, paper bag, or newspaper to slow down sublimation from exposure to air and atmospheric moisture. If you have packed items for preservation in the cool box, use a newspaper or paper to fill up any spaces between the items and dry ice to slow down sublimation.
Not all cool boxes are suitable for use with or storing dry ice. Always check a cool box’s manual to confirm if it is compatible. Usually, cooler boxes designed for use with dry ice—such as Styrofoam coolers—have extra padding to protect the inner parts from damage. They are also designed with a ventilation system.
If you use dry ice with a cool box that is not specified for that use, it can freeze spots on the box and damage its interior. Furthermore, an accumulation of carbon dioxide could lead to an explosion.
💡Tips: When you put the dry ice on top of your cooler, it will disappear much faster than if we were to do so with bottom placement. This is because heat from a hot surface such as sitting near an open flame can warm up quickly and cause condensation which leaves water vapor in its wake.
How long do dry ice last in a cooler?
The rate at which dry ice sublimes is about 10 pounds per 24 hours when stored in a quality cooler.
Pounds of Dry Ice
Cooling Time
5-7 pounds
18-24 hours
8-12 pounds
24-40 hours
13-20 pounds
40-60 hours
Conclusion
Dry ice keeps things colder for longer. However, it has a relatively short lifespan and requires proper storage in a Styrofoam cooler in a cool, dry place. When properly stored, a 5-10-pound pack lasts about 24 hours.
Therefore, if you are using it to preserve frozen food for longer than 24 hours, you will need to refill the cool box with 5-10 pounds of dry ice as it will have sublimated.
Have dry ice that you no longer need and have to dispose of? It is important to learn the proper way to dispose of dry ice as to not harm yourself or cause any damage.
FAQs
Does dry ice go bad?
Dry ice does not go bad. Neither does it have an expiration date.
Can you store dry ice in the freezer?
Never store dry ice in the freezer. Dry ice is much colder than the normal freezer temperature range. Therefore, putting it in the freezer can shut down the thermostat damaging the freezer. Also, the freezer door closes airtightly, which can cause the dry ice to explode.
How long does dry ice last in a drink?
One of the more fun uses of dry ice is for cocktail making. A small piece of dry ice—about the size of a sugar cube—is dropped into the cocktail using tongs. It starts to sublime as soon as it comes into contact with the drink creating a white smoke that rises up the glass for a dramatic effect. Note that dry ice consumption can be detrimental to your health. Therefore, only a small amount should be used. Also, ensure that white smoke (carbon dioxide) clears up completely before taking your drink. It takes about five minutes for the entire ice cube to sublimate and for the vapor to clear up.
If you have leftover dry ice, it is important to dispose of it appropriately. Dry ice is frozen carbon dioxide. When exposed to air, it sublimates into carbon dioxide vapor that integrates into the environment. Therefore, disposing of dry ice involves exposing it to open air in a well-ventilated area for it to sublimate.
This article will discuss the steps for disposing of dry ice and the safety precautions to observe. We will also cover the top FAQs for disposing of dry ice.
Related Reading:How long does dry ice last? Before learning how to dispose of dry ice properly, you may wonder how long it lasts.
How to Dispose of Dry Ice?
What You Need
Insulated gloves
Hard and wide plastic tray/Styrofoam tray
Well-ventilated open area
Wear the Gloves
Do not handle dry ice with bare hands. It is extremely cold and can cause frostbite or severe freezer burns immediately when touching it. Insulated gloves create a barrier between your hands and the dry ice.
Even if you plan on pouring the dry ice into a wider container, it is safer to have gloves on as pellets or a block may accidentally come into contact with your skin. You can use winter gloves or oven mitts.
Thin latex or nitrile gloves are not suitable for handling dry ice as they do not provide an adequate barrier. Alternatively, you can use ice tongs to pick up and transfer the dry ice blocks or pellets.
Identify an Open, Well-Ventilated Area to Dispose of the Dry Ice
An open-air outdoor area is the best place to dispose of dry ice. Or, you can use a big room with large, open windows. You can also use your balcony area if it is well ventilated.
You may keep the dry ice in a cool box or lay it out on a wide plastic tray. The tray will offer a wider surface area for the dry ice to sublimate faster. The tray should be made of hard plastic or Styrofoam; otherwise, the extremely cold dry ice may damage it.
Do not put the ice directly on your floor—even if tilled—or backyard, as it will damage them by causing ice burns.
Leave the Dry Ice to Sublimate
Depending on the amount you want to dispose of, it may take a few hours or several days. Generally, it takes about 24 hours for a 10-pound block of dry ice to sublimate completely. Pellets and flakes have a larger surface area to volume ratio, so they sublimate faster.
The surrounding environmental conditions may also affect how fast the dry ice sublimates. For instance, if it is sunny, windy, or humid, the dry ice will sublimate faster than if it is cold.
Leave the Cool Box or Tray Out Longer
Even if all the dry ice has sublimated, leave the tray or cool box outside for any residual carbon dioxide to clear before returning it to the house.
Don’ts for Disposing Dry Ice
Do Not Dispose of Dry Ice in Public Places
It puts other people at risk if they come into contact with the dry ice block, flakes, or pellets or inhale the carbon dioxide. Therefore, when choosing an open area to sublimate the dry ice, do not use hallways, shared backyards, driveways, etc. Also, ensure that animals and kids do not have access to the area.
Do Not Dump Dry Ice Into the Garbage Chute or Trash Can
Firstly, the cold may damage the walls of the trash bin or garbage chute. Secondly, as the dry ice sublimates, there is likely to be a buildup of carbon dioxide in the trash or garbage chute, causing an explosion.
An explosion can be fatal to anyone nearby or cause extensive damage to surrounding property, depending on the volume of the dry ice.
Do Not Flush Dry Ice Into a Toilet or Sink
As is the case with putting dry ice in the trash bin, it can damage the surface of the sink/toilet as well as the pipes in the plumbing system. It can also cause carbon dioxide to build up in the plumbing system resulting in an explosion.
Do Not Put Dry Ice into a Tightly Sealed Container
Whether storing dry ice or transporting it to a favorable location for disposal, never put it in an airtight container. Do not close the lid tightly; place it loosely to allow room for the sublimated carbon dioxide to escape.
Do Not Transport Dry Ice Inside the Cabin of a Small Car
The carbon dioxide released can easily accumulate in the car’s cabin, causing the driver and other occupants to get sickly and disoriented or cause accidental suffocation.
The best way to transport dry ice would be using a truck with the cool box at the back. If using a small car, put it in the trunk. Avoid transporting dry ice over a long distance.
Keep Away from Sublimating Dry Ice
It may be tempting to stay nearby and observe the smoky effect of the sublimating dry ice. However, you may inhale a lot of carbon dioxide, leading to rapid suffocation.
Tips for Sublimating Dry Ice Faster
If you want to dispose of dry ice faster, here are some helpful tips for sublimation:
Break the Dry Ice Into Smaller Pieces
If the dry ice is in the form of blocks, use a hammer to break it into smaller pieces for faster sublimation. Wear protective gear—gloves, mask, and safety goggles when breaking it.
Put the Dry Ice in Water
You may put the dry ice in a bucket of water, pour it into your swimming pool, or sprinkle some water on top. Like regular ice, water causes dry ice to “melt” faster. Typically, water transmits heat faster than air resulting in faster sublimation. Hot water sublimates dry ice even more rapidly.
Leave it Out it in the Open Air on a Sunny Day
The airflow and higher environmental temperatures will help it to sublimate faster. Alternatively, you could blow some hot air towards it using a fan if the weather is cold.
Does Sublimated Dry Ice Pose a Risk to the Environment?
Excess gaseous carbon dioxide in the atmosphere has been linked to global warming. Therefore, if you are environmentally conscious, you may be concerned that the CO2 gas released when you sublimate dry ice might add to the global warming issues.
However, the volume of carbon dioxide released is quite low, with an almost negligible environmental effect.
How to Clean a Container That Had Dry Ice
You clean it as you would any other container—with warm water, soap, and a soft cloth, then rinse and dry it. The key is to ensure that all the dry ice has sublimated completely before washing the container.
FAQ
Can you pour dry ice down the sink?
No. It can damage the surface of the sink/toilet as well as the pipes in the plumbing system. It can also cause carbon dioxide to build up in the plumbing system resulting in an explosion.
How long does dry ice take to melt?
Dry ice is a great way to add some fun and mischief before your next party, but it only lasts for about 24 hours when stored in an ordinary cooler. To make sure you don’t run out at the wrong time or just need one less than expected we recommend buying on dayshares; they’re perfect because even though five pounds will turn into gas after sitting around all day (and night), by getting them early their durability has been maximized!
Can I leave dry ice outside to melt?
NO! It puts other people at risk if they come into contact with the dry ice block, flakes, or pellets or inhale the carbon dioxide. Therefore, when choosing an open area to sublimate the dry ice, do not use hallways, shared backyards, driveways, etc. Also, ensure that animals and kids do not have access to the area.
Is dry ice toxic?
The use of dry ice can be dangerous to your health if not stored in an area with proper ventilation. Inhaling the gas CO2 from these blocks will cause you pain and discomfort, among other things like confusion or disorientation which could result in death!
Conclusion
As discussed above, disposing of dry ice is quite easy. Put it in an open, well-ventilated space for it to sublimate. However, you must observe safety precautions when handling dry ice and disposing of it. Do not handle it with bare hands. Do not place it into an airtight container, dump it into the trash bin, or flush it down a sink or toilet.
The continent of Africa is home to some of the most diverse recipes in the world. Each part of Africa offers its own unique flavors and ingredients that can tantalize even the most trying of taste buds.

With this in mind, we are going to be taking a look at some highly popular and extremely delicious African foods from across North, South, East, and West Africa.
From Ghanaian dishes like Akara (stewed yam) to Nigerian delicacies such as Eba, these are some of the best and tastiest African food you will find anywhere!
Let’s first take a general look at African cuisine.
What Is African Cuisine?
African cuisine has evolved over time through the influence of many cultures. It has been influenced by the countries it has passed through, which include Egypt, Spain, Portugal, France, Germany, Italy, Greece, Turkey, India, China, and Japan.
The main staples of traditional African diets were grains, legumes, vegetables, and fruits. These foods have remained integral parts of the diet throughout history.
However, there was also an abundance of meat including beef, goat, chicken, lamb, fish, pork, and game. This combination of protein-rich and carbohydrate-heavy meals made up the bulk of the diet.
As the years went on, the introduction of new spices and ingredients began to change the flavor profile of the diet.
In addition to the usual suspects such as garlic, ginger, and turmeric, other exotic ingredients were added to the mix in African cuisine, including cinnamon, cardamom, nutmeg, saffron, cumin, coriander, cloves, pepper, paprika, and more.
These additions helped create a more complex flavor profile that became very popular with consumers.
Today, African cuisine still includes a wide variety of staple foods, but has become much more varied than it used to be due to the influx of foreign influences.
There are now many different types of cuisines within the African continent, each with its own distinct characteristics.
For example, Ethiopian cuisine is known for being rich in spice and having a heavy emphasis on lentils, while Nigerian cuisine tends to favor seafood and rice.
As mentioned above, this article will focus on some of the most popular and delicious African foods. We will start off with a look at some of the classic dishes from each region of Africa. Let’s get started!
North African Cuisine
1. Harira
This soup has a long history in Morocco and is considered by many Moroccans to be the perfect dish to cure what ails you.
It is known for its fragrance and zest, with a tomato base that tends to be seasoned with a wide range of herbs and spices including pepper, ginger, and even cinnamon.
Chickpeas are another important ingredient that gives it a healthy amount of body and helps to balance out the zesty flavor.
2. Ful Medames
This vegetable dish is made from a combination of onions and fava beans, alongside some rich and fragrant spices. A lot of people tend to confuse ful medames with hummus, but they are two very different things.
Ful medames is much more savory than hummus and is often served on its own or alongside other Egyptian dishes.
3. Tajine
Tajines are stews that originated in North Africa and have been around since ancient times. They are usually slow-cooked over low heat and contain a variety of vegetables, meat, and seafood.
There are many regional variations of tajines throughout North Africa, such as Moroccan Tajine de Poulet, Algerian Tagine d’Agneau, Tunisian Tajine D’Aubergines et Fenouil and Libyan Brik Tagine.
4. Matbucha
Matbutcha is a traditional North African dip that is made primarily from tomatoes and peppers as well as paprika, garlic, and olive oil. As well as being a great accompanying dip, Matbutcha is also an excellent starter meal.
However, it does tend to be incredibly spicy, so make sure to adjust the spice level to your own tastes accordingly.
5. Shakshuka
Shakshuka is a traditional Tunisian breakfast dish that consists of eggs poached in a spicy sauce made up of peppers, onions, tomatoes, and various spices.
Although it may seem simple, shakshuka is actually quite complex and takes time to prepare properly.
6. Couscous
One of the most well-known dishes of North Africa, couscous is made from semolina flour that is steamed until soft before being mixed with water and then allowed to dry.
Once dried, it is ready to eat and can be used as a main course or accompaniment.
7. M’hanncha
This delicious Moroccan dessert is also known as a “snake cake” due to its design, made from coiled filo pastry in a whirl shape.
The pastry is filled with almond paste and then flavored with a bit of pistachio and orange flower water. Once cooked, an M’hanncha can be made complete with a sprinkling of cinnamon.
South African Cuisine
8. Malva Pudding
Also known as Malva kaross, this is one of the most popular desserts in South Africa. It is typically eaten during the winter months, although it’s not uncommon to see it all year round.
Malva puddings are traditionally made with a thick custard-like mixture that is baked inside a flaky pastry case.
9. Biltong
One of the most popular snacks to come out of South Africa, biltong is a type of jerky made from cured beef. It is typically prepared using coarse salt and spices, which gives it a unique texture.
Today, there are many types of biltong available depending on the region of origin. Some popular varieties of biltong include Limpopo biltong, Bushbuckers biltong, and Karoo biltong.
10. Milktart
Milk tart is another classic South African dessert that has become extremely popular when it comes to sweet treats.
Typically, milk tarts are very similar to pies and are made up of a sweet, pastry crust and a cream filling that is made up of eggs, flour, milk, and sugar.
11. Chakalaka
Chakalaka is a spicy vegetable relish that is commonly associated with South African cuisine.
It is typically served as an accompaniment to other foods such as meat, bread, and stews and is often seasoned with hot pepper flakes, ground coriander, curry powder, turmeric, and other spices.
12. Bobotie
Another famous South African food, bobotie is a simple dish made up of curried meat that is topped with a milk and egg mixture before being baked. Bobotie is a great dish if you are looking for something simple and easy to make that is still delicious!
13. Boerewors
Boerewors is a spicy sausage with a unique flavor that originated in South Africa. These sausages are typically made with beef and a combination of various spices and seasonings.
14. Pap
Pap refers to either cornmeal oatmeal or polenta that is cooked in boiling water. Pap is traditionally eaten with a variety of different meats and vegetables, since it helps cleanse your palate and aids in digestion.
15. Cape Malay Curry
A traditional Cape Malay dish, curry is usually made by frying onions in oil, adding spices and herbs, and finally adding stewing meat like chicken or lamb.
This aromatic curry is a must-try when it comes to South African dishes and African foods in general.
East African Cuisine
16. Sambusas
Sambusa is a savory snack that is typically prepared throughout East Africa and India. Similar to Indian samosa, sambusas are a deep-fried pastry stuffed with vegetables- such as lentils-, spices, and minced beef.
The savory yet small nature of the Sambusa makes for a perfect appetizer or snack.
17. Mandazi
Mandazi is an African donut that is typically cut into triangle shapes and made from lightly sweetened fried dough. These pastries are hollow on the inside but crispy on the outside, making for a wonderful treat.
18. Injera
Injera is a type of Ethiopian flatbread that is used as both a utensil and a plate, as well as a food item in its own right! Injera is often used to scoop up soups, sauces, salads, and even desserts.
What is unique about Injera is that it is made from teff flour, which is the world’s smallest grain. This offers a unique texture and flavor that makes the Injera
19. Matoke Curry
This Ugandan Curry is one of the most well-known East African cuisines today. Matoke is a variety of plantain that is indigenous to southwest Uganda, as well as some areas of Burundi and Rwanda.
As is to be expected, this curry- otherwise known as a spicy green banana mash- is loaded with a wide range of spices and offers a tangy, spicy and buttery flavor.
20. Ugali
Ugali is a type of cornmeal oatmeal that is made simply with cornmeal and water. This creates a stiff, maize flour porridge- with a dough-like consistency- that is very much a staple in East African diets, frequently being used as an accompaniment for means such as curries and stews.
21. Tilapia
Tilapia is an excellent choice when it comes to an East African fish dish.
Often served in a casserole, tilapia is a kind of fish that can be cooked in various ways, commonly being coated in a creamy sauce that contains turmeric, ginger, garlic, and other spices. It can then be baked until golden brown and flaky.
22. Kitfo
Kitfo is another popular East African meat dish that originated in Kenya. Essentially, kitfo is much like a hamburger made of minced and raw lean beef with niter kibbeh – a herby clarified butter – and a classic Ethiopian spice called mitmita.
Kitfo is considered to be a delicacy of sorts and is known for its tenderness and luxurious texture.
West African Cuisine
23. Waakye
Waakye is a well-known Ghanaian breakfast meal made up of rice and beans along with spaghetti, stew, and ground cassava, also known as moist gari.
The rules aren’t too strict for Waakye though, as you can choose your own protein to accompany it such as boiled eggs, fish, or meat.
24. Jollof Rice
Jollof Rice is a delicious West African dish that originated in Senegal. The name jollof means “to boil” in Wolof, so jollof rice is basically a simple rice dish that is simmered over low heat.
Traditionally, Jollof Rice is made with long grain rice and combined with various spices, tomatoes, onions, and peppers as well as meats and vegetables.
25. Fufu
Fufu is a traditional West African food that is usually made out of mashed yams. However, fufu can also refer to any type of starch-based product including cassava, potatoes, plantains, etc.
Fufu has become increasingly popular around the world due to its versatility and health benefits because of its high fiber content.
26. Cachupa
Cachupa is a West African stew that is traditionally made from a combination of sweet potatoes, cassava, slow-cooked ground corn- also called hominy- and a choice of seasoned meat or fish. This is a super versatile dish that can be eaten hot or cold and can easily be customized to suit one’s personal taste.
27. Thieboudienne
This rice and fish dish originated in Senegal in West Africa and is made with smoked fish, layers of vegetables, and tomato sauce. The stew is then flavored with a spice known as Netetou, carrots, cassava, cabbage, peanut oil, and spiced onions.
The dish has a striking similarity to the dish known as Savannah Red Rice, which comes from the deep south in the United States.
Because of this, it is thought that the dish traveled to America and was subsequently adapted to the tastes of the Creole people.
28. Egusi Soup
Egusi soup is a thick, spicy soup that originated in Nigeria. It is made by blending dried and grounded egusi (seeds of the melon family) into a paste before adding stock and seasoning.
After cooking, the paste is strained and added back to the soup base where it creates a rich, tangy flavor. The soup is made complete with a mixture of fish or meat along with leafy veggies.
It is also relatively popular to eat the soup with pounded yams. This is another staple in East African cuisine, especially in Nigeria amongst the Ibo people.
29. Efo Riro
Efo Riro is a Yoruba dish that originates from the city of Lagos in southwestern Nigeria. It is a one-pot stew that contains a great deal of stewed spinach (which isn’t much of a surprise, as Efo Riro loosely translates to “stirred spinach” in Yoruba).
The stew is known for its variety of ingredients and flavors, resulting in an aromatic and delicious dish. Some of the ingredients that can be used alongside spinach include tomatoes, peppers, okra, onion, garlic, ginger, palm oil, and other spices.
30. Yassa
Yassa is a dish from Senegal that typically contains cabbage, onions, peppers, and garlic and is finished off with lemon marinated chicken and more onions!
This dish is typically served with rice and makes for a delicious, savory meal with an aromatic, zesty flavor thanks to the addition of lemon chicken.
31. Puff Puff
Puff Puff is a Nigerian drop donut dessert that is also referred to as Bofrot in Ghana. These donuts are the definition of simplicity and can easily be whipped up in around 15 minutes.
They consist of yeast dough that is fried until golden brown and filled with coconut cream. The dough can then be left plain or paired with anything from jam to cream to powdered sugar.
The Puff Puff is a highly popular African dessert treat that is incredibly versatile, served as street food, as a snack, or as a dessert in its own right.
Final Thoughts
So there you have 31 popular African foods from across the continent! African food is such a diverse culture and there are so many different foods that originate from all over the continent.
If you’re looking to add some new dishes to your culinary repertoire or try some foods from a different part of the world, these are just a few suggestions!
If you are feeling brave enough, why not give one of these recipes a try? You may just find your new favorite food!
Grease can cause clogs in your sink, pipes, and sewer system. You should never pour used cooking oil down the sink! Grease can be dangerous if you pour it down the drain. So, how To Dispose Of Cooking Oil? Read on to find out!
How To Dispose Of Cooking Oil (Cooking Oil Disposal)
To properly dispose of used cooking oil, you should first empty your container into a trash can or recycling bin. Then, pour the liquid down the drain.
You can use a funnel if needed. Next, add water to the remaining oil until it reaches the level of the top of the container. Add baking soda or vinegar to the mixture to make sure there are no leaks.
Finally, mix well and let sit overnight. In the morning, you can remove the solidified solids by pouring them out of the container. Use the remaining liquid as an ingredient in homemade cleaning products.
Oil should be stored in a sealed container. Make sure you store it in an appropriate place. Don’t throw it in trash cans unsealed. Seal the container properly and tightly.
Once sealed, you can now dispose of this in your food waste bins for proper disposal.
Contain And Toss
Oil bottles and buckets are the most convenient containers for storing leftover cooking oil. You should use them as long as possible before you throw them away.
Recycling bins are also great for storing leftovers because they’re easy to clean up. Some people always make sure that the oil they put in the trash is frozen. This helps prevent leaks and spills.
However, it will melt eventually, of course, so make sure you use a good sealed container anyway. Biodegradable containers help avoid pollution.
Contact A Recycling Center Or Household Hazardous Waste Disposal Company
Cooking oils are a type of hazardous material that needs to be disposed of properly. Contact your local city or county government to see if your town accepts used cooking oil. If you need help disposing of your old oil, check with your local recycling center.
Household hazardous waste collection services are beneficial because they allow people to dispose of multiple types of waste at once.
Companies that collect HHW also collect other categories like medical wastes. If they have a door-to-door pickup service, then this allows you to dispose of multiple types at once.
Add To Compost
Earthworms eat cooking oil. When you add cooking oil to your compost, you’re helping out earthworms. You’ll also be attracting other creatures such as insects.
However, try to limit how much cooking oil you use. Too much oil can block water and air flow.
Store And Reuse
Oil should be cleaned as soon as possible after use. You can store it in the refrigerator or freezer until you need it again. You can use paper coffee filters to filter the oil for reuse because they are inexpensive and easy on the environment.
After you strain your oil, store it in an airtight container in the refrigerator. Don’t store it at room temperature, as this will cause it to go bad faster.
Take out the amount you need and let it sit on the counter for about 30 minutes before using it. This tempering process allows you to use less energy when heating your oil.
Oil is used as fuel, for heating, for lubrication, and for cleaning. When you use oil for these purposes, it breaks down into smaller molecules, making it less effective.
This also makes it harder to clean up spills or remove stains. Also, when you reuse oil, you may be using an old batch of oil that has gone bad.
Oil that has been properly strained should appear clear. Sediment that looks like charcoal dust should not be present. Gelatinous substances that appear as jelly-like or gooey should not be present. Don’t reuse oil if it smells bad.
Tips For Reusing Cooking Oil
You should use glass jars when storing your leftover oil. This is an old trick that you can use to save money. Also, you can reuse these jars later on.
Once you’ve stored your glass containers in your pantry or fridge, you should be safe to use them again. You’ll be able to reuse them up to six times before you need to throw them out.
You should use a fine mesh strainer when pouring oil into jars. Otherwise, you’ll end up with clumps of batter or other foodstuff stuck inside the strainer.
Paper towels are usually recyclable. However, grease-lined paper towels are not recyclable. You should use other more eco-friendlier alternatives like a washcloth or a microfiber cloth that you can easily clean, wash, dry and throw away.
If you’re using a strainer, make sure to wipe off any excess grease before washing it in the kitchen sink. Grease stains can cause problems when trying to recycle your paper towels.
You should separate your different types of oils when storing them. Don’t use the same type of oil for frying fish as you did for making fried chicken.
Use different oils for different foods.They should never be used to cook anything else. Cross contamination is very dangerous.
When Reusing Cooking Oil Keep Track Of Its Expiration Date
Cooking oils should be separated when using them for different purposes. Labels must be placed on the containers indicating what type of food was cooked in the oil.
Fried chicken cooking oil should be cleaned out as soon as possible. Used cooking oil from fried chicken should be stored in a refrigerator or freezer until you use it again. Potato chip cooking oil should be cleaned up as soon as possible.
Reuse cooking oil by using it again after washing it out. You should use it as many times as possible before discarding it, of course, but always make sure it doesn’t go bad. Use the same amount of oil each time you cook.
Tips For Recycling
Cooking oil should be stored in the refrigerator until needed. When using it, make sure to put it in a container that won’t leak. Freezing cooked oil makes it easy to handle. It also helps it stay fresh longer.
You should use your old cooking oil to cook again. Don’t throw it away! Use it to make salad dressing or even soap.
Pick The Right Container
For recycling, you have several options like plastic butter containers, coffee cans, etc. Plastic is a bad idea for hot oil. Label your containers so people know what they’re getting. Don’t put oil in the fridge because it’ll go bad.
Keep Filling Up Container
This is especially true if you use a lot of oil. By topping up as needed, you’ll be able to make the most out of your container and also save time by disposing of all your used oil in one go.
In this case, it’s assumed that these oils have already been reused to their maximum capacity and ready to dispose of them at the recycling center. You should definitely remove any large pieces of food.
Find A Recycling Center
Recycling centers take cooking oil and convert it into fuel. It’s a good way to turn an ordinary household waste item into clean biodiesel that powers most diesel engines, and it prevents pouring greasy oil down the drain, which can damage pipes and sewage systems.
Soybeans are used as fuel for cars and trucks. Biodiesel is created by mixing vegetable oil with alcohol or methanol. This mixture is then put into engines to run them. Corn is also used for this same purpose.
Biodiesel is made by mixing vegetable oil with alcohol or methanol. You can find many online resources to find local businesses that convert cooking oil into biofuel.
Restaurants can sell used cooking oil to commercial oil recyclers for a profit. The oil is processed into fuel or soap.
If you can’t find reliable information about recycling centers from your county’s sanitation or water services website, call them up. They might be able to tell you where recycling centers are located and what types of materials they accept.
Make Soap
Using cooking oil to make soap isn’t as bad as you think. You can use it to cook with or even clean your car. It’s better than throwing it away because it doesn’t go to waste.
Reuse Cooking Oil As A Nontoxic Insecticide Or Weedkiller
This works well on pests such as aphids, spider mites, whiteflies, thrips, mealybugs, leafhoppers, scale insects, and other sucking insects.
Mistakes To Avoid When Disposing Of Used Cooking Oil
Oil should be disposed of after use. Keep it in a sealed and strong container. This will prevent it from leaking into the rest of your trash. Cooking oils should be reused or stored properly.
Grease can clog up pipes and cause sewage problems. Other options include using recycled oil or storing it in an airtight container.
Don’t pour down the drain! Used cooking oil is nasty. Especially when you’ve been deep-frying food because there could be lard or vegetable shortenings involved in the process. That makes the oil even nastier.
Don’t pour down the sink – even in small amounts. This might seem like an easy task, but it’s also quite dangerous. Even just a little cooking oil can cause plumbing problems.
If that happens, then you’ll need to call a plumber for repairs. Those repairs could cost you a lot of money. If your sewer pipe gets clogged up, that could actually affect your basement because of leaking sewage.
Don’t pour down your toilet! Pouring used cooking oil down your toilet can cause several of these problems: damage to bathroom pipes, sewage pipes and drains, clogged toilets, and more. One of the key problems is caused by basic physics laws: oil doesn’t mix with water.
Besides that, the oil moves slower than the water. That causes it to mix with other things and clog up the entire piping system.
The situation is even worse when you’re dealing with used cooking oil versus new cooking oil. When used, the oil gets mixed with animal fat, and makes the problem much worse.
Don’t pour hot oil into the trash can. This can attract lots of things like bugs and rats. You can also cause problems with your garbage truck if you do this.
Don’t add to the septic tank. This can clog up pipes, and even affect the drainage fields and distribution lines. There’s even a chance it could contaminate local waterways.
As much as it’s beneficial to properly dispose of used cooking oil, what really works best is to reduce its use in the first place.
Reducing Fats Oils And Grease In Your Home Or Apartment
Follow these rules to avoid problems with your pipes. Don’t put anything down your drains or toilets. Keep your toilet tank lid closed when you flush.
Use a plunger if you see any signs of a clog. Have your septic system pumped every two years by a professional plumber.
Do ✅
Recycling used cooking oil is an easy way to save money and protect our environment.
You should never throw away used cooking oil because it could damage the environment and harm people who eat fish or other seafood. Instead, you should always recycle used cooking oil.
Scrapes should go in the garbage, not the sink. Wash your dishes by hand, not with soap. Don’t use paper towels to clean up spills. Catch any leftover food in a bowl or pan, then toss it in the trash.
Colder water works better than really hot water when washing dishes. When you wash dishes by hand, use warm or lukewarm water. Hot water will melt the fat, oil, and grease off your dishes and into the drain.
This will cause problems later on down the line because the hot water will be too hot to flow properly in the pipes.
Don’t ❌
Do not use a garbage disposal or a food grinder. Food scraps should be washed in water first. Cooking oils, pan drippings, and other fats should not be poured down the drain.
Grease and oil should be removed from your kitchen as soon as possible. You should never put anything greasy down the toilet. Wipes should be thrown away after being used.
Tips For Reducing The Use Of Cooking Oil
Oil-less cooking is generally healthier because there is less fat in the dish. Cooking oil is expensive, but you can save money by using less of it. You can make tasty dishes without oil.
Air Fryers are designed to simulate frying. They use hot air circulating at high speed which then browns or crisp the food placed inside. Baking is a healthy alternative to frying.
There are tons of recipes that you can bake instead: potato croquettes, samosas, frites, kebabs and burgers – these taste delicious, warm and tenderer when baked.
Steaming is a great cooking method because it uses less oil than frying. Steamers use steam instead of hot air to cook food.
Frying from a shallow frying pan is a great cooking method. It uses less oil than deep-frying and traps moisture which makes food taste better.
Oil-Free Cooking And Baking
Oil is unhealthy because it is mostly made up of saturated fats. Avocados contain healthy unsaturated fats. Nuts are also high in unsaturated fats. There is a problem with having too much fat of any kind.
Cooking oil-free is easy! You can use water instead of oil in most recipes. Make sure your kitchen is equipped with the right equipment to do this. Here are some tips and tricks to get started.
How To Cook Without Oil
Sautéing and stir-frying is the process of cooking foods by searing them over high heat and then finishing them off with lower temperatures. You can sauté without oil using water instead. Water is also used for making sauces and soups.
Browning and caramelizing are both ways to make foods taste better by adding flavorings. You can do these things without oil. Sauté vegetables without oil and then add flavors to them. Cook them until they turn brown and caramelize.
Brown bits in the pan add a lot of flavor so de-glaze the pan by adding a bit of liquid and stir until the bits lift and flavors the liquid.
Steaming is a quick way of cooking vegetables. You should wait until after the veggies have been steamed before you season them. You can cook onions quickly by steaming them in water.
Stovetop Kitchenware Suggestions
There are many nonstick pans available today. Some of them are made out of silicone or ceramic. But, there are some pans that are made out of metal.
These pans are great because they are durable and easy to clean. You can use these pans for any type of cooking.
Non-stick pans are great for cooking without using any oils. However, if you want to cook with oils, you should avoid them because they may leave a residue on your pan. You should also be careful when cleaning your pans because they could scratch easily.
Cast iron skillets are heavy pans that are coated with enamel. They are used for making pancakes, omelets, and other foods. They are also used for frying and sautéing.
They are made out of metal and are nonstick. They are not recommended for use when you want to add flavor to your food.
Woks are inexpensive items that make cooking oil-free easy. You can buy them online or at any store that sells kitchen supplies. There are many different types of woks available, but if you’re interested in making stir-fries, then you’ll need a wok that has a flat bottom.
A steamer is an appliance used for boiling water. It consists of a pot with a lid, a steam chamber, and a heating element.
To use a steamer, place the ingredients inside the pot, cover them with the lid, and turn on the heating element. Once the water boils, remove the lid and wait until the cooking time is over before removing the contents from the pot.
Oven Cooking Without Oil
Roasting vegetables without oil is an easy way to make them taste delicious. Non-stick pans work best for this purpose. You can use parchment paper or a silicone mat to cover your pan.
You can roast your veggies at a low temperature for a long period of time, or you can increase the temperature and speed up the process.
Deep Frying
You can use a pan with no oil by using parchment paper or silicone baking mats. To get a crispy outer crust, bake your veggies on a sheet of parchment paper or silicone baking mat. Then finish with a few minutes under the broiler for extra crispiness.
Oil-free air fryers are a healthy alternative to deep-fried foods. They’re also convenient because you don’t need to use oil to cook them. You can even use them to make popcorn!
Oil Substitutions For Baking
You can bake without oil or butter by using applesauce instead. Applesauce is an excellent substitute for oil or butter because it adds moisture to your baked goods.
Bananas mashed into butter or oil make delicious baked goods. Avocados mixed into butter or oil give baked goods a light but rich taste. Ground flax or chia adds a mild flavor to baked goods.
Pumpkin purée is used as an alternative to butter in recipes. It adds moisture without adding fat. This makes it great for cakes, cookies, and other dense items.
Oven Kitchenware Suggestions
Nonstick and silicone bakeware are great options for baking. You’ll want to make sure your bakeware is 100% silicon, and not filled with any other materials.
Q&A
How Do I Tell If My Cooking Oil Is Bad?
Your nose can tell you if your cooking oil is fresh or old. Take a sniff before using. If it stinks, throw it out.
Can’t I Compost My Bacon Grease Or Cooking Oil?
You shouldn’t really add much oil into your compost bin. Too much oil will mess up the natural microbe that helps break down organic material.
Bacon grease doesn’t stink, but it does attract pests. Keep it away from your compost bins!
Can I Pour My Used Oil On The Ground?
Absolutely not. It’s a bad way to dispose of oil. Oil spills should be cleaned up immediately. Animal fat and vegetable oil should be disposed of properly.
How Can I Clear Greasy Drains?
You should use baking soda and vinegar to clean out your drains. Baking soda helps to break up any clogs by absorbing grease and other debris. Vinegar kills bacteria and cleans the pipes.
Do this once a month to make sure your drains stay clean.
Conclusion
Cooking oil is very useful for many things. You can reuse it by using it as fertilizer, pesticide, or biodiesel. You can recycle it by melting it down and making new products out of it.
You can blend it with other oils to make them more effective. You can even use it for composting.
The main takeaway is that you should be careful when disposing of cooking oil because it could cause harm to people, animals, plants, and the environment. And try to use less oil wherever possible!
Sirloin steak in crock pot? Hmm, that’s something we usually don’t come across when we look for steak recipes. It’s either a heavy skillet or pan that’s most commonly used when it comes to cooking steak. Or even a recipe that shows how to make slow cook sirloin steak in the oven.
But you’d be surprised to know that slow cooking in crock pot results in juicy pieces of sirloin steak. These have all the seasoning and ingredients’ flavors infused to the core.
You see, a slow-cooked sirloin steak not only retains the full flavors of the meat and other ingredients. Slow cooking also gives you time to do other chores. You can zone out from the kitchen and do other work or nothing at all! Now that’s what we call the best of both worlds!
So, to find out how to cook sirloin steak in crock pot, read on to discover the ultimate recipe!
How To Cook Crock Pot Sirloin Steak
There are a few ways you can cook crock pot sirloin steak. Apart from the meat and seasoning, you can play around with the other ingredients for more flavor and gravy.
However, the slow cooking method and the cooking time remain more or less the same.
Follow the recipe below for the perfect slow cook sirloin steak in crockpot.
Crock Pot Recipe
For this steak sirloin crockpot recipe, you will need the following ingredients:
Top sirloin thinly sliced – 2 pounds for serving a family of 4 to 6. If you’re planning to serve 8 people, then 3 pounds of sirloin should be good.
We recommend the top sirloin as this part is more tender and will suck in all the flavors from the condiments.
Ranch seasoning – 1 Packet (1 oz or 3 Tablespoons is equal to 1 packet)
Au Jus seasoning – 1 Packet (1 oz or 3 Tablespoons is equal to 1 packet)
Water – 2½ cups
Time
Prep time is very reasonable for this sirloin steak in a crock pot recipe. The cooking time varies as per the flame. Overall, it’s a delicious steak dinner where the slow cooker does the main job without having you sweat over it.
Prep Time: 10 to 15 minutes.
Cooking Time: 4 hours on high flame.
Plating Time: 5 minutes.
Total Time: 4 hours 20 minutes.
Cooking Instructions
For a simple, straightforward sirloin steak, follow the steps below.
Place the sirloin steak slices at the bottom of the crockpot.
Sprinkle the Au Jus and Ranch seasonings to cover the steak slices.
Add the water and stir while making sure all the sirloin steak pieces are covered well.
Cook on a high flame for 4 to 5 hours or on a low flame for 8 to 10 hours. Don’t forget to give an occasional stir.
Serve with a side dish of your choice.
Many prefer to have their steak sides seared first before adding to the crockpot. In that case, take two tablespoons of vegetable oil and sear each side of the steak slices for about a minute. Then take them out and let them steep in the seasoning and water inside the slow cooker.
If you want to add some more flavors and nutrition to your sirloin steak, throw in some celery, carrots, and bell peppers into the crockpot.
Slow-Cooked Sirloin Steak With Gravy Recipe
Craving for some gravy? Then you’ll need a few more ingredients besides at least 2 pounds of sirloin steak slices and 3 cups of water. These additional ingredients are:
¼ of an onion, diced
1 Beef bouillon cube
½ teaspoon garlic powder
½ teaspoon onion powder
¼ teaspoon black pepper
Steak seasoning of your choice
¼ cup flour
2 tablespoons vegetable oil
Step-by-Step Process
Sprinkle any steak seasoning, salt, and pepper on the sirloin steak pieces – according to your taste.
In a pan, add the vegetable oil over a medium-high flame and sear the sirloin steak slices to give them a nice crust. Now remove the steak pieces from the pan and put them in the bottom of a crockpot.
Into the hot pan, add two cups of water and a cube of beef bouillon.
Let the water come to a boil and the beef bouillon cube dissolve completely.
In the meantime, take a bowl and mix the flour, onion powder, garlic powder, and black pepper with a cup of water. This is what’s going to thicken the gravy.
Now pour this mixture into the pan and stir while you pour. Allow the gravy to come to a simmer.
When you get the desired gravy consistency, remove the pan from the stove and slowly pour the gravy over the steak slices in the slow cooker.
Now add the diced onions to enhance the steak and the gravy flavor.
Cover with a lid and cook on high flame for 4 hours.
Note: You can substitute flour with cornstarch. Both serve well as thickening agents.
Also, instead of a beef bouillon cube, you can use a can of low-sodium beef broth and ¼ cup of Worcestershire sauce for a more beefy gravy.
For a subtle herbal flavor, you can use dried herbs like dill and thyme.
Perfect Side Dishes for Sirloin Steak
If you don’t want to have slow-cooked sirloin steak all by itself, here are some ideas for the perfect side dish to go with it:
Mashed potatoes
Salad
White rice
Dinner rolls
Baked sweet potatoes
Pasta
Boiled or sauteed veggies
Green beans
Boiled peas
If you’re health-conscious, dump the side dishes that are full of carbs like dinner rolls and pasta or rice and just go for the greens.
Conclusion
Nothing is more comforting than a family coming together over a dinner of slow-cooked sirloin steak in crock pot. This heart-warming meal takes its own time to cook while freeing you up to spend more time doing things you love.
Even the prep time is minimal unlike when you want to slow cook sirloin steak in the oven.
In this post, we have shared a basic recipe and a variation that adds gravy to it. You can experiment by adding ingredients that you like.
Here’s to chilly nights warmed by cozy family time and a crock pot full of hearty and slow-cooked sirloin steak!
This post contains affiliate links to products. We may receive a commission for purchases made through these links. But it never influences our product selection process.
Muffins are awesome since they aren’t as sugary as cupcakes but still taste delicious. They are also filling thanks to the fact that you add seeds, nuts, dried fruit, and even chocolate chunks to the batter.
If you bake muffins for breakfast or as a snack pretty often, there’s a good chance you need to replace your muffin pans frequently. And in this article, I’ll be talking about the best muffin pan and which muffin tins you need to buy ASAP.
But this article won’t just stop there. It will talk about how different kinds of muffin tins hold up when baking, how you should maintain your pans, and what you should consider before getting a muffin pan.
I’ve compiled a list of the best muffin pans available right now, and I’ll go into their features and how well they bake muffins. If that’s what you’ve been looking for, keep reading!
Looking for some gotham steel pans? Check out our gotham steel pans reviews.
How Does a Muffin Pan Work?
Although this might sound like obvious knowledge, muffin pans work by baking the batter and giving the muffin a lovely golden-brown, crispy surface. Muffin pans are also special because they cook the batter in such a way that the top puffs up significantly.
Wondering what’s the difference between a cupcake and a muffin? For starters, the batter is different. Cupcakes use lots of sugar and generally use butter. However, muffins aren’t as sweet and usually include oil instead of butter.
Cupcake batter is smooth and the texture is airy, just like a regular cake. But muffins have a lumpy batter and are much denser. Moreover, from a muffin pan vs cupcake pan perspective, muffin pans have more space between the cups and have straight sides.
The cups are also much deeper than that of a typical aluminum cupcake pan. However, if you’re in a pinch, you can use either pan to bake both muffins and cupcakes.
What Makes a Muffin Pan the Best?
Muffin pans come in lots of sizes and are made from different materials. As a rule of thumb, using a tin made from dark material will ensure a crispier, darker crust.
In comparison, using a silicone or glass muffin pan will give you little or no browning and will take longer to bake.
However, they are quite expensive. Lodge Muffin Pans are an example of cast iron cupcake pan and are great but need regular seasoning and maintenance.
These materials are most often used when manufacturing muffin tins:
Aluminum:
Aluminum pans are the ones most commonly used by home bakers. These pans are lightweight, inexpensive, and conduct heat very well, resulting in evenly baked muffins. They work similarly to a copper muffin pan.
Steel/Stainless Steel:
These are similar to aluminum muffin tins but have the added advantage of being much sturdier. They won’t get bent or warped and are very easy to clean.
Glass:
If you’re worried about nonstick coating breaking down and contaminating your food, you might prefer glass pans as they are safe and non-reactive. However, your muffins or cupcakes will take much longer to bake and won’t have those golden-brown tops we love and crave.
Silicone:
Silicone bakeware has become very popular as they are naturally non-stick. The flexible material also makes it really easy to pop the muffins out of the pan. Bear in mind, however, that using silicone muffin pans will need a longer bake time and a higher temperature.
The Favorites
In case you don’t want to go through our entire list, check out the highlights here!
What makes the Wilton Pan work? For starters, it can make 24 muffins or cupcakes in one go, so they are great for a large baking project. The non-stick coating prevents your baked goodies from getting stuck, and the overall unit is sturdy enough to last for years.
Looking for long-lasting bakeware? The Perlli Carbon Steel Bakeware Set comes with 10 different pans and uses silicone grips to make them easier to use. Made from carbon steel, they will hold up for much longer without scratches and dents, even with frequent use.
The Focus Foodservice 24 Cup Jumbo Muffin Pan can be used for a plethora of baking needs. Besides cupcakes and muffins, they can be used to bake a batch of quiches, mini pies and tarts, and even baked meatballs!
Looking for the only muffin tin you will need for the rest of your life? This 24-cupcake pan is versatile, long-lasting, and perfect for baking large batches of muffins!
Who wouldn’t want an affordable muffin pan designed by a professional? This 6-cup muffin pan comes with a range of other bakeware including round cake pans and a cookie sheet!
If you’ve been baking for a long time and need to replace some worn-out bakeware, don’t miss a chance to get your hands on this heavy-duty aluminum bakeware set.
If you aren’t looking for a bakeware set, you might prefer this large muffin tin made from heavy gauge aluminized steel. Whether you are a home cook or bake professionally, this 12-cup pan will come in handy.
Suitable for commercial use
Fluted design results in quick and even baking
The non-stick surface makes it easy to unmold and clean
Looking for the one and only muffin tin you will need for the rest of your life? This 24-cupcake pan is versatile, long-lasting, and perfect for baking large batches of muffins!
Wilton muffin pans are well known for their quality and this one doesn’t disappoint. It makes 24 regular-sized muffins at a time and has a non-stick surface that prevents the muffins from sticking to the pan. This also makes unmolding them and cleaning the pan much easier.
Since it fits into most ovens easily, this stainless-steel muffin pan is very convenient when baking at home. The pan is also great for weekly meal prepping or making brunch for lots of people. It is versatile and you can also use it for making mini-quiches, frittatas, and even cinnamon rolls.
We like how the pan comes with a limited 10-year warranty which will have you covered in case of any design flaw. While the muffin tray is dishwasher safe, it is better to wash it with warm soapy water before and after use.
Why I Recommend It:
This is a great baking pan for people who have to cook in bulk. Whether you are cooking for a host of people or preparing food in advance to freeze and store them, this muffin tin will make things quick and easy.
The steel design makes it durable and long-lasting especially when cared for properly. As long as the muffin pan is cleaned before and after use, greased well when baking, and stored in a dry place, you can use it for decades to come!
Pros:
Heats up quickly and evenly, so none of your muffins will be over or underbaked.
Easy to clean and use, since the non-stick coating prevents sticking and burning.
Sturdy and durable; you can use this pan for decades.
Perfect for parties and gatherings as well as meal prepping in advance.
Cons:
It can be difficult to fill the pan without making a mess.
If a 24-cup muffin man is too big for you, you might prefer something a little smaller, but just as sturdy and easy to use. This aluminum tin is the best cupcake pan for making oversized cupcakes and muffins.
It has 3 rows of 4 cups, so it can make a total of 12 oversized muffins at a time. The glazed finish is also non-stick but you should still grease the tin before baking or use liners to prevent any chance of your muffins sticking to the pan.
This muffin pan is also pretty multipurpose as you can use it for making mincemeat pies and individual-serving tarts, as well as many other desserts. We liked how you can easily remove the baked muffins from the pan without them breaking or crumbling.
For the best results, fill each cup three-quarters of the way with the batter, as this will allow the muffins to rise and puff up properly.
Why I Recommend It:
Many aluminum large muffin pans are prone to getting damaged quickly. They get bent or rusted quickly and need replacing after a couple of uses. But this muffin tin is made from high-quality materials and will always remain as good as new.
Although it is pretty hefty, this muffin pan is solid and dependable. Because of the glazed non-stick surface, it releases the baked goodies easily. This also makes it easy to clean. All in all, this one of the best muffin tins money can buy.
Pros:
Easy to fill and remove food with spills or messes, which speeds things up.
Cleans quickly and easily, even when washed by hand.
Multipurpose and versatile and makes large-sized portions.
Durable and long-lasting design, so the unit will not rust or wear down after years of use.
Cons:
Can feel rather heavy, so it is not the best option when baking with young children or older people.
Who wouldn’t want an affordable muffin pan designed by a professional? This 6-cup muffin pan comes with a range of other bakeware including round cake pans and a cookie sheet!
The everyday durability was what we liked best about this muffin pan. In fact, every item in this set was made from heavy gauge steel construction which makes them ideal for regular use.
They are all non-stick, which allows for the easy release of your baked goodies and makes cleaning the pans fast and effortless.
If you hate pulling hot, heavy trays out of your oven, we have good news for you. The pans all have silicone grips that give you a firm and comfortable grasp, even when using oven mitts.
The muffin pan is easy to fill with batter and can handle temperatures up to 450F. All in all, this bakeware set is great as it combines a stylish and durable design with efficient functionality.
Why I Recommend It:
The bakeware set and the muffin pan included are great for new bakers. Since the muffin tins have 6 cups, you can use them to make smaller batches of muffins or large cupcakes. We found the silicone grips to be particularly useful as it made pulling the hot pans out of the ovens much easier.
The price point of this is amazing as you get 4 pieces of commonly used bakeware at a very affordable rate. If you are new to baking, or on a strict budget, we can’t recommend this enough!
Pros:
Comes with other pans that will cover all your basic baking needs.
Attractive and elegant design with a bright pop of color.
Easy to use and clean due to non-stick coating.
Great for both gifting and home use.
Cons:
Nonstick coating might come off with frequent use, so be gentle when cleaning and grease thoroughly before each use.
If you’ve been baking for a long time and need to replace some worn-out bakeware, don’t miss a chance to get your hands on this heavy-duty aluminum bakeware set.
The set boasts a high-grade aluminum construction and contains a 12-cup jumbo muffin pan, a large cookie sheet, a half sheet, a loaf pan, a rectangular cake pan, and a square cake pan. All the components of the set are suitable for commercial use and can handle regular use.
The corrugated design allows for better air heat circulation, which facilitates even baking. The result? Your muffins and cakes will bake through more quickly and won’t stick to their pans! The pans are collated with a PTFE and BPA-free silicone which gives them a nonstick surface.
The muffin tin is deep and this allows the muffins to rise as they bake, giving you perfectly browned tops and a soft and fluffy texture. And once you’re done baking, you can easily wash them by hand with a soft non-scratch sponge and some mild detergent.
Why I Recommend It:
This is a great set for people who need to bake often. Whether you run a small baking business or your family just really loves baked goods, this set will come in handy and cover all your baking needs.
The muffin tin in the set is very high-quality and the grooved edges make it easy to remove the muffins once they have baked. Since the aluminum pan is very conductive, your muffins will be ready in minutes!
Pros:
Their design makes it quite easy to unmold baked goods.
Very durable and sturdy due to its aluminum construction.
Meant for heavy-duty use, so you can use them regularly without scratching or damage.
Easy to use and clean as the set is pretty low maintenance.
Cons:
A little expensive, but you will certainly get your money’s worth as it is high-quality.
Need more than just a muffin pan? This bakeware set will have all your basic baking needs covered. If you like your cooking equipment fancy, you’re going to love this luxurious gold set.
The muffin tin has 12 cups and makes regular-sized muffins or large cupcakes. As it is non-stick, the muffins will pop right out of the pan after baking. Also, you can easily wash it by hand, as a dishwasher will scratch the non-stick coating.
Worried about your pans getting warped by extreme heat? All the items in the set are durable and can handle temperatures up to 450F. This means you can also use the muffin pan to make mini pies and even chocolate lava cakes!
Best of all, all 10 pieces come with heat-proof silicone grips so you can easily move your pans into and out of a hot oven. If you are new to baking and want different pieces of bakeware, these will be the best muffin pans for you!
Why I Recommend It:
This set is made from high-quality carbon steel and you will feel the difference when you use it. The pans are hefty and feel solid and dependable and will not fall apart after a few uses. Best of all the pans are versatile and can be used in both convection and toasting ovens.
We also liked this set because of the silicone grips. Unlike many others, these grips won’t lose their slip or get frayed over time. Long story short, this set has the best muffin pan if quality and durability are your priorities.
Pros:
Thick, heavy construction makes it sturdy and durable.
Great value for money as you get 10 pieces for an affordable price.
Easy to clean and use as these pans are also dishwasher safe.
They can withstand temperatures up to 450°C, so you can roast chicken and veggies in them as well.
If you aren’t looking for a bakeware set, you might prefer this large muffin tin made from heavy gauge aluminized steel. Whether you are a home cook or bake professionally, this 12-cup pan will come in handy.
It has a lifetime warranty and makes standard-size muffins. You can also use it to make brownie bites, sweet buns, and other mini-desserts. This nonstick muffin pan has an Americoat surface–a food-grade silicone coat that makes the muffins slide out easily once baked.
This pan is meant to be washed by hand only; scrub it gently with a soft brush or sponge and some warm soapy water. It has a fluted pattern that makes the pan resistant to warping or twisting. It lets the heat distribute evenly, resulting in a shorter bake time. It also enhances the pan’s nonstick abilities.
Why I Recommend It:
What we loved the most about this pan was how it will last you for ages. The non-stick surface works wonderfully well and lets your muffins pop right out of the tin without sticking to it. At the same time, it is easy to clean by hand.
Besides this, it heats up fast and retains heat so you will cut down on the preheating and baking time needed. This muffin tin is a good investment if you bake regularly.
Pros:
Suitable for commercial use, sturdy and long-lasting.
Fluted design results in quick and even baking, while preventing overflowing or spills.
The non-stick surface makes it easy to unmold and clean.
This muffin pan is suitable for use in small bakeries, as well as for use at home.
Want a good, reliable oversized muffin pan that you can use all the time? This pan has an excellent grip, bakes well, and will last you for ages!
Besides being long-lasting, the pan is also pretty versatile. You can also use the pan to make large cupcakes, mini quiches, and even Portuguese egg tarts. If you need something smaller, it also has a variant that makes 24 tiny muffins, which is the best mini muffin pan out there.
This pan is made from Swiss engineered ceramic reinforced aluminized steel and has two layers of nonstick coating. This makes the pan extremely durable and it won’t have any scratches, stains, or rust–even after frequent and rough use.
The nonstick and micro-textured surface minimizes surface contact and this results in better airflow and even baking. It also allows the muffins to slide right out of the pan without any trouble.
Why I Recommend It:
If you want to get perfectly baked, golden-brown muffins every single time, this is the muffin tin you should get. The heavy square-rolled edges give you a secure grip for fast transfer to and from the oven.
The pan is extremely efficient and is made to be strong and very long-lasting. The micro-textured surface and nonstick coating make it extremely easy to unmold your baked muffins or cupcakes. To sum things up, this is a great ceramic muffin pan in terms of quality and functionality.
Pros:
Durable and long-lasting steel construction.
Bakes quickly and evenly so your cupcakes will have that perfect golden-brown color.
Has a thick and reliable grip so there is no chance of you dropping a heavy-filled pan.
Versatile and easy to use, making it a good choice for beginners.
Cons:
It isn’t dishwasher safe, which can be a major inconvenience for some.
If you’re serious about meal prep (or just super busy), this gigantic muffin pan will become your greatest and most important kitchen tool.
Although the price can be alarming, this muffin tin will pay for itself many times over. The pan is suitable for heavy-duty and commercial use, so it is great for small bakeries and coffee shops. If you’re baking at home, this is perfect for parties and potlucks as you can bake in bulk.
Besides that, you bake lots of snacks and meals in advance to freeze when meal prepping. This includes mini frittatas, sausage cups, pizza pinwheels, and hash browns. The nonstick coating makes everything slide out smoothly once cooked.
Also, if you want something smaller, this pan has a variant for mini cupcake tins. With the jumbo-sized muffin pan, you use it to make countless sweet and savory meals without making a dent in the tin. Sounds great, doesn’t it?
Why I Recommend It:
Durability is the most important factor when getting cookware, as you want it to last for a long time. This muffin pan is reinforced with a rod that prevents it from warping in a hot oven. The nonstick coating won’t come off easily which is a bonus as well.
The tin is very useful when baking multiple servings of food and saves time as you won’t have to cook in batches. You can also use it to make enough muffins to last almost a month and store them in the freezer for a quick breakfast.
Pros:
Super easy to clean as there are no sneaky corners and crannies for food to hide in.
Won’t bend or warp as it is heavy-duty and sturdy.
Multipurpose and versatile, so you can use it for baking in bulk and meal prepping in advance.
Comes in different capacities, from 12 to 48 cups.
Cons:
It is very heavy, but this can be a bonus as it ensures durability.
Material: Steel with Nonstick Titanium and Ceramic Coating
Brand: Gotham Steel
Like bright colors? This copper-orange bakeware set will brighten up your kitchen and make some super yummy treats! If you like bright colors, these will be the best muffin pans for you!
The set has a little of everything: a 12-cup small muffin pan, a loaf pan, a cookie sheet, and a square and round cake pan. Moreover, the ultra-nonstick titanium and ceramic coating prevent your baked goodies from sticking to the pan. You won’t need to grease these tins at all!
The pans are all heavy, and this prevents them from warping or bending in high temperatures. It also enables even baking and faster bake time. The best part? The set is dishwasher safe, so cleaning them will be no issue at all!
On top of that, everything in the bakeware set is scratch-proof, and you can use metal utensils with them. Although it is made from high-grade materials, the muffin pan and other items are lightweight and easy to move around.
Why I Recommend It:
This is another bakeware set, so it isn’t just good for muffins. However, the muffins baked in these are lovely, with golden tops and perfect texture. Best of all, cleanup is extremely easy and there is no need to soak or scrub the pans.
If you’re a new baker looking to buy a set of bakeware, this one will have all your immediate needs covered. The coating works like a dream and makes the muffin long-lasting. You won’t regret getting this!
Pros:
Long-lasting and sturdy steel construction.
Fun and eye-catching color will liven up your kitchen.
Easy to use and clean due to their non-stick surface.
Lightweight and non-bulky, making them suitable for everyone to use comfortably.
Cons:
Food can brown too much and even burn at higher temperatures.
Cuisinart never lets their customers down, and this classic, no-nonsense muffin tin is the bakeware you keep coming back to, no matter what.
Although it might seem a little overpriced at first glance, you will soon see why this muffin pan has great value for money. It is rather small, with 12 cups, and will fit into slightly smaller ovens.
The tin heats through evenly, resulting in moist and dense muffins with the ideal crispy tops. Furthermore, it has rolled edges to add strength and resistance and prevent warping. Best of all, the muffin pan is dishwasher safe and easy to clean.
The nonstick coating makes for an easy release when you unmold your baked treats. Even if your muffin batter includes sticky things like caramel, honey, or fresh fruit, the muffins won’t get stuck to the tin.
Why I Recommend It:
If you prefer quality over quantity, you will love this simple muffin pan. Despite its nondescript appearance, it is very durable and bakes a batch of the best muffins you will ever make. The pan is easy to fill with batter and removing the baked muffins afterward is a breeze.
While you must store it in a completely dry place to prevent the steel from rusting, general maintenance is pretty straightforward. Since it is dishwasher safe, you won’t have any trouble cleaning it. All in all, this is a wonderful muffin tin for frequent baking.
Pros:
Easy to use as there is no spillage or leaks.
Lasting nonstick coating will not wear down anytime soon.
Dishwasher-safe and easy to clean.
Sturdy and durable, and will last for a long time.
Cons:
Some customers found the edges to be rather sharp.
Wondering which of these muffin pans will be the right one for you? We’ll help you out so you can determine which pan will work best for you. Here are a few things you need to consider before getting your baking tin:
Always get a muffin pan that is easy to hold. Otherwise, you might drop a hot pan full of muffins and make a mess (and your gorgeous muffins will go to waste).
You can also go for a pan with rolled edges as they are smooth and easy to grasp even when hot.
In other words, the best muffin pans will have a comfortable grip with smooth edges that make carrying them easy without spills.
Size:
This will depend on your baking needs. Do you often need to make large batches of muffins and desserts? Are you a professional baker, or do you bake for your family and friends?
If you need to bake infrequently or make enough for a few people, a smaller 6-cup muffin tin will be sufficient for your baking. This is also a good option if you have a small oven and not much room in your fridge for leftovers.
On the other hand, a 12-cup muffin pan like the USA Pans Bakeware Cupcake and Muffin Pan (1200MF) is perfect for regular baking, especially if you have kids or want to host a party. They are also great for picnics and office potlucks.
Have you avoided getting a muffin pan because you were put off by the idea of cleaning something with so many nooks and crannies? Are you unsure of how to clean a muffin pan?
No worries there because we will tell you how you should clean your muffin tin and increase its lifespan!
With a Dishwasher:
First, you need to determine whether your muffin tin is dishwasher safe or not. If you aren’t sure, wash your pan by hand.
Scrape off any bits of food or residue stuck to the pan using a wood or silicone spatula.
Run it through the dishwasher with your other dishes as you normally would.
With Soap and a Scrubber:
Handwashing your muffin tin is easy and nothing to be afraid of.
If there is residue and burnt bits stuck to the pan, leave it to soak in some hot water and dish soap for a few hours.
Add some mild soap or detergent to your scrubbing brush or sponge and gently scrub the entirety of your pan. Pay special attention to the inside of the cups as they can get greasy.
Rinse the pan thoroughly. If the pan is still greasy, repeat the process until completely clean.
With Baking Soda:
Silicone pans attract a lot of greases, and this can harden and form an unappealing layer if the mold isn’t cleaned correctly.
Soak the silicone pans in very hot water to loosen up the grease as much as possible.
Scrub it well with a sponge and dish soap. After rinsing, some grease will stick to the pan, especially the cups.
Use baking soda and a little water to make a thick paste. Spread the paste onto the parts of the pan with the grease.
Let the paste dry. As it does, the baking soda will absorb the grease. This can take a bit of time.
Rinse it under hot water while scrubbing off the hardened paste with a sponge and some soap.
FAQs
We’ve answered some questions people often have about using and maintaining their muffin tins.
01. Which Muffin Pan is Better; Silicone, or Metal?
Each material has its benefits. Silicone muffin pans are easier to use as you can easily unmold the muffins or cupcakes after they have baked. They are also lightweight and easy to store.
On the other hand, metal pans need to be greased and floured and they are also heavier. However, your muffins will bake faster in metal tins and they will also have browner, crisper tops.
02. Do I Need to Use Muffin Liners When Baking?
If you have a muffin pan with an excellent non-stick surface, you won’t need liners. The same applies if you have a silicone muffin mold. However, if you aren’t sure about the nonstick surface and want to avoid getting your muffins stuck to their tin, use muffin or cupcake liners.
03. Can I Use a Regular Muffin Pan to Bake Cupcakes?
Although you can get pans that are meant for baking cupcakes, you can easily use muffin tins to make cupcakes. Make sure you use cupcake liners and add less batter for each cupcake. The bake time may differ too, depending on your recipe.
04. How Should I Store My Muffin Pans?
If you have a silicone muffin pan, you don’t have to worry about storage at all. Toss it in a cupboard and forget about it until the next use.
But if you own steel muffin tins, make sure you dry them completely before putting them away. Store them in a cool and dry place as dampness or humidity can accelerate rusting. If you don’t use them very often, check up on them often to make sure corrosion hasn’t set in.
Final Say
Baking is a great way to relax and take your mind off things. Not only is the process therapeutic, but who doesn’t think that a blueberry-chocolate muffin will cheer them up? Whether you’re making muffins for work or your kids, the best muffin pan will make the baking them much easier.
Once you get the right pan for your kitchen, you don’t have to bake muffins. Cupcakes and mini versions of everything you love can be baked in muffin pans. Amazing, right? Which muffin pan have you decided to get?
My Number One Recommendation
If you want the best muffin pan from all these entries, go with the Wilton Non-Stick Standard-Size Muffin & Cupcake Baking Pan. Looking for the one and only muffin tin you will need for the rest of your life? This 24-cupcake pan is versatile, long-lasting, and perfect for baking large batches of muffins!
Since it fits into most ovens easily, this stainless-steel muffin pan is very convenient when baking at home. This versatile pan is also great for weekly meal prepping or making brunch for lots of people.