How Long Does Sourdough Starter Last? Tips for Maintaining a Healthy Starter

Sourdough bread is an all-time favorite for many, but what is the secret behind its unique taste? A healthy and active sourdough starter! If you’re an aspiring bread baker or a seasoned home baker, understanding how long the sourdough starter lasts is crucial for a perfect homemade sourdough loaf.

Let’s dive in and learn how to maintain our starters for as long as possible, giving us delicious bread for years to come.

Understanding Sourdough Starter
sourdough starter how long does it last

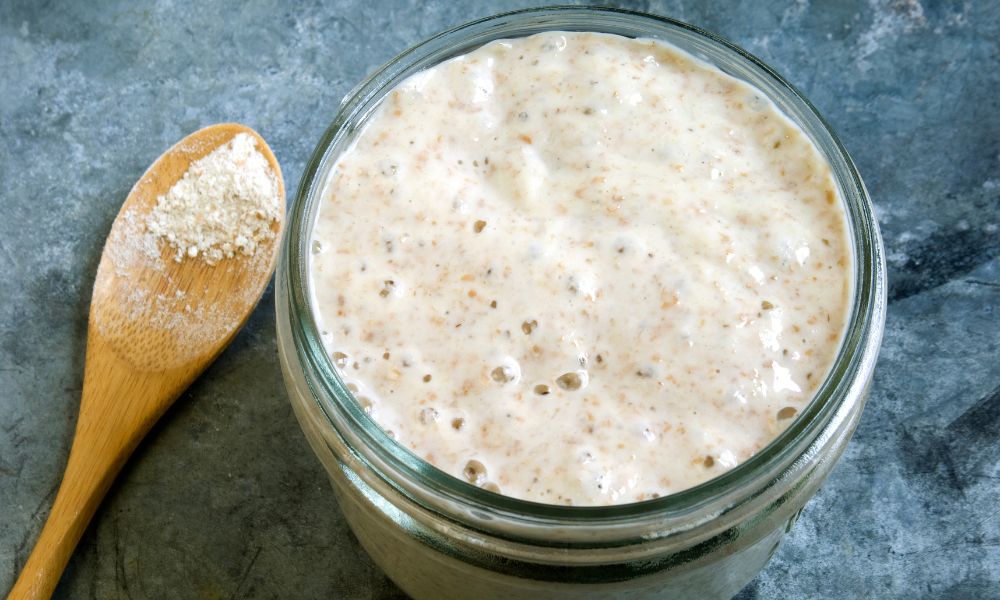
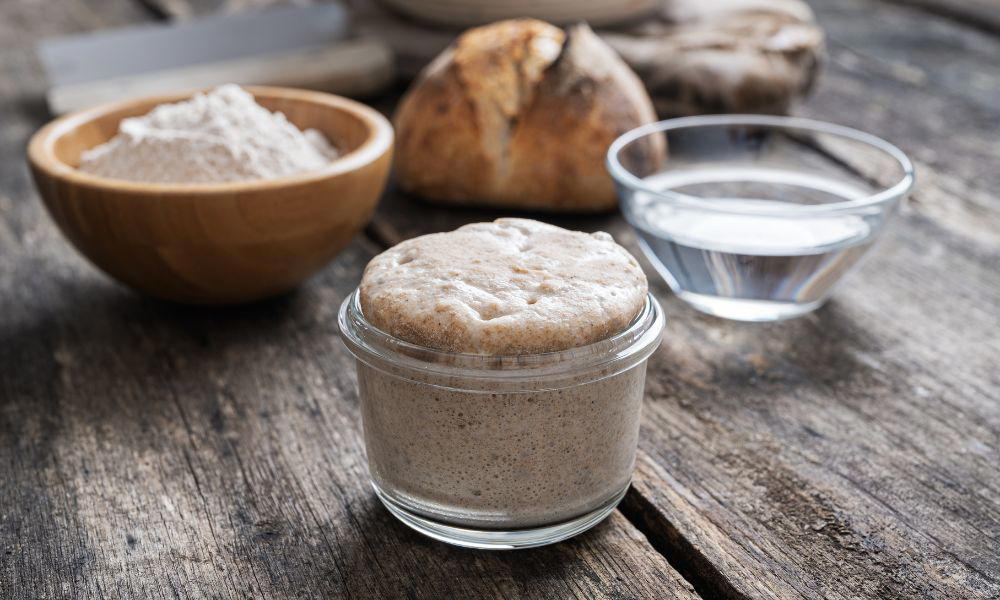
A sourdough starter is a mixture of flour and water, left to ferment over time. This fermentation process allows wild yeast and good bacteria to multiply and result in a powerful natural leavening agent responsible for the unique flavor and texture of sourdough bread. The key to an amazing sourdough loaf is a healthy and active starter.

Feeding your sourdough starter regularly is important as this serves as its source of nourishment. To feed a starter, simply add fresh flour and water based on the starter’s needs.

Factors Affecting the Shelf Life

🌡️Temperature

Temperature plays a significant role in the lifespan of your sourdough starter. Warm temperatures speed up fermentation, causing your starter to reach peak activity and consume its fuel faster. For longer-lasting starters, opt for cooler room temperatures or find a cool spot in your kitchen for storage.

💧Hydration

The ratio of water to flour in your starter, also known as hydration level, can also affect its shelf life. High hydration starters tend to ferment faster, thereby reducing their overall lifespan. Lower hydration starters may last longer between feedings.

👩‍🍳Feeding Frequency

Oftentimes, beginner bakers question “how often should I feed my sourdough starter?” The answer varies based on factors such as temperature and hydration. A simple rule of thumb is to look for signs of activity – if your starter is bubbling and rising, that means it’s craving more food! Regular feedings lead to a healthy and strong sourdough starter.

🫓Flour Type

Finally, the type of flour you use also plays a part in the shelf life of your starter. Whole grain flours not only contribute additional nutrients to the mix but also possess a higher microbial content, which helps promote a more diverse and active fermentation process.

Signs of a Healthy and Active Starter
How Long Does Sourdough Starter Last? Tips for Maintaining a Healthy Starter 1

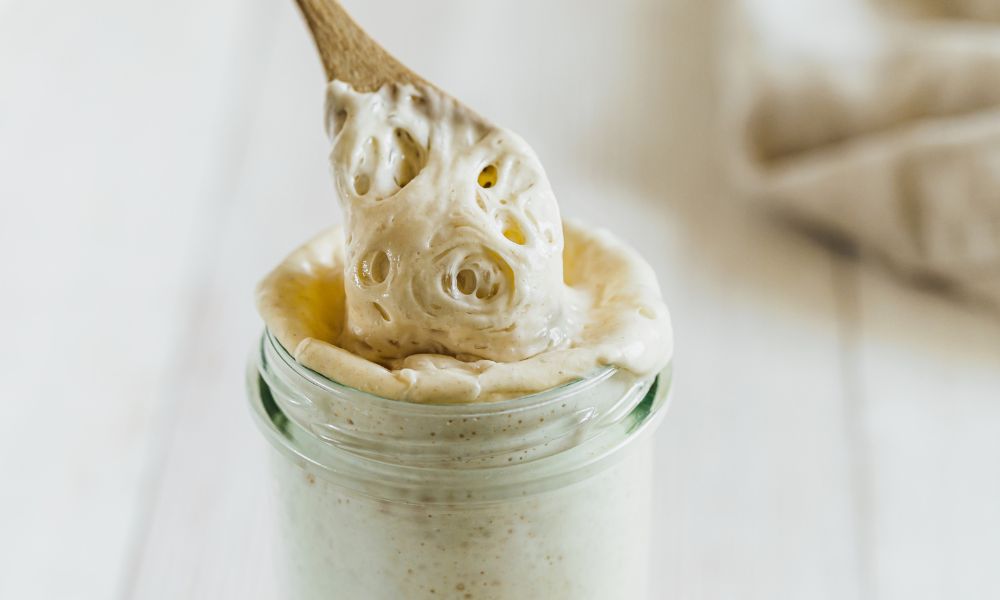
Understanding what a healthy sourdough starter looks like and recognizing the signs of it being active is crucial for maintaining its shelf life. Some key indicators include:

  • Bubbles on the surface of the starter, which show that the fermentation is producing gas.
  • A noticeable rise in volume after each feeding – this indicates that the yeast is metabolizing the new food and producing carbon dioxide, which expands the starter’s volume.
  • A pleasant, sour, yogurt-like smell that suggests the presence of lactic acid bacteria, important for the starter’s performance.
  • PH balance also plays a key role in your starter’s wellbeing – a pH of 4 to 4.5 is ideal for maintaining a healthy environment that discourages the growth of harmful bacteria.

Understanding Sourdough Starter’s Lifespan

At this point, you might be curious about how long does sourdough starter last? When properly maintained, a sourdough starter can last indefinitely. [1]In fact, some bakers boast about their centuries-old starters! However, neglect and unfavorable conditions may shorten the lifespan of your starter.

Several factors can influence your starter’s longevity, such as hydration level, temperature, and feeding frequency discussed earlier. Furthermore, it’s important to look out for signs that your starter may have gone bad or spoiled.

Signs of a spoiled sourdough starter include:

  • Mold growth – visible colored spots on the surface or any streaks in the starter, commonly caused by contamination or poor maintenance.
  • A strong, off-putting smell – while sourdough starter should have a pleasant tangy aroma, an unpleasant, rancid smell indicates something has gone wrong.

If your sourdough starter shows such signs, it’s best to discard it and start fresh.

Extending the Shelf Life of Sourdough Starter

Keep your sourdough starter alive and thriving for a long time with these best practices:

  1. Find the optimal feeding frequency based on the temperature of your kitchen and the activity level of your starter.
  2. Adjust the hydration level to control the fermentation speed and ensure longer-lasting shelf life.
  3. Use whole grain flours to boost the fermentation diversity and make your starter more resilient.
  4. Properly store your sourdough starter, especially during periods of non-use. Keeping your starter in the refrigerator will slow down fermentation, allowing you to go longer between feedings.

Remember that a healthy, well-maintained sourdough starter is the key to delicious, flavorful bread. You’ve now gained enough knowledge to maintain a long-lasting sourdough starter.

Troubleshooting Common Issues
How Long Does Sourdough Starter Last? Tips for Maintaining a Healthy Starter 2

Sluggish or Weakened Starter

Problem: Your starter doesn’t seem as active as it should be, and the rise is minimal.

Solution: Increase the feeding frequency or consider using a warmer spot for storage. Incorporating whole grain flours may also provide a microbial boost.

Contamination, Off-Flavors, and Unusual Odors

Problem: Your starter smells particularly unpleasant or has acquired an off-taste.

Solution: Ensure you’re using clean utensils and jars for your starter. If the issue persists, consider starting anew with a fresh starter to avoid potential health hazards.

Mold or Signs of Spoilage

Problem: You observe visible mold or streaks in your sourdough starter.

Solution: Dispose of the affected starter and take preventative measures, such as ensuring cleanliness of all tools and jars when creating a new starter.

Frequently Asked Questions (FAQs)

How often should I feed my sourdough starter?

Feeding frequency depends on factors such as temperature and hydration level. Observe your starter’s activity and adjust feeding accordingly. Most starters require feeding at least once every 24 hours at room temperature.

Can sourdough starter be refrigerated to extend its life?

Yes, refrigerating your sourdough starter slows down fermentation, allowing for longer breaks between feedings (typically once a week).

Can I use my sourdough starter if it hasn’t been fed in a while?

Yes, in most cases. Revive the starter by feeding it consistently and observing its activity. If it returns to its bubbly, rising state, it’s good to use.

What should I do if my sourdough starter separates?

Separated starters can be stirred back together before feeding. If separation persists, consider adjusting the hydration level or temperature at which it’s stored.

How can I tell if my sourdough starter has gone bad?

Look for signs like mold growth or a strong, off-putting smell. If you observe either, discard the starter and start fresh.

Can I freeze my sourdough starter for long-term storage?

Yes. Freezing slows down fermentation drastically. Thaw and feed the starter consistently to reactivate it before use.

Should I discard part of my sourdough starter during feeding?

Discarding a portion of the starter helps maintain a manageable volume and ensures a higher ratio of fresh food to maintain an active starter.

Can I share or give away a portion of my sourdough starter?

Absolutely! Sharing your sourdough starter is a great way to spread the joy of sourdough baking.

What happens if I use expired sourdough starter in my bread?

If the starter produces poor results or an off-flavor in your bread, it may be time to refresh or replace your starter.

How can I speed up the activation of a new sourdough starter?

Store the starter in a warmer environment and consider more frequent feedings or using whole grain flours to boost fermentation activity.

Conclusion

Understanding the shelf life of sourdough starter is essential to bake exceptional sourdough bread. A well-maintained, healthy sourdough starter can last indefinitely, providing you with countless delicious loaves. Follow the guidance provided in this article and stay diligent in observing and adjusting your starter’s feeding and storage methods.

Don’t be afraid to experiment, learn from your experiences, and, most importantly, have fun while baking! We’d love to hear about your sourdough baking adventures – share your stories or ask any further questions in the comments below. Happy baking!
Tomatoes About to Go Bad? Discover How to Rescue and Transform Them!

Imagine the scenario: you stumble upon a neglected batch of tomatoes tucked away in the depths of your fridge or pantry, only to find they’re nearing their expiration date. Good news, tomato aficionados! In this article, we’ll traverse a maze of creative ideas to salvage and rehabilitate those aging beauties, skillfully minimizing food waste while tickling our tastebuds.

We’ll dive into tantalizing recipes, ingenious preservation strategies, and valuable tips to rejuvenate slightly wilted or mushy tomatoes. Grab your aprons and begin prepping – together, we’ll save those blushing gems from an unfortunate demise in the trash!

Assessing Tomato Freshness

what to do with tomatoes about to go bad

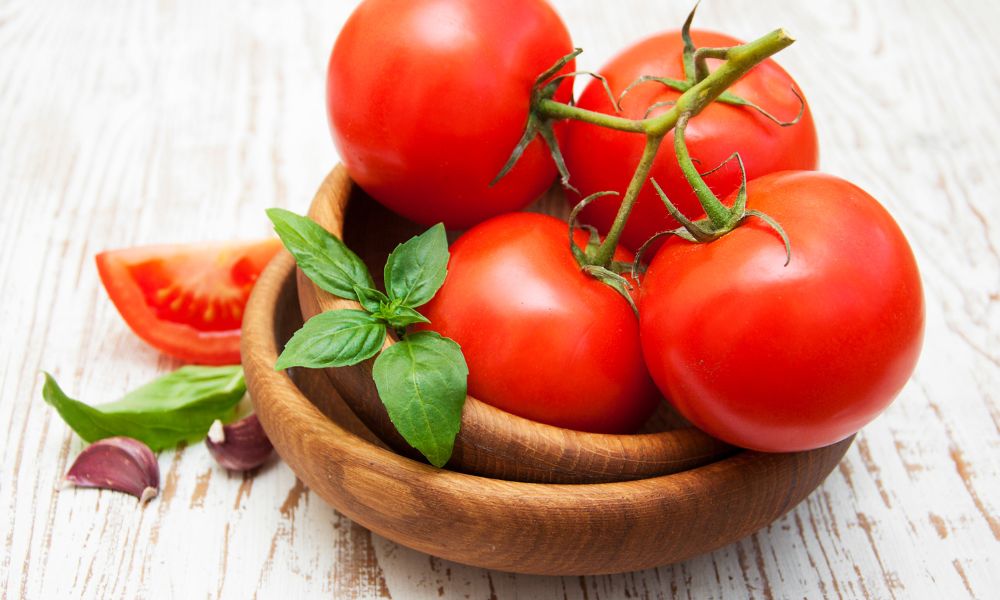
Embarking on our culinary journey first involves gauging the freshness of our tomatoes. Is it still safe to indulge in that near-ripe fruit, or is it time to bid farewell? Tomatoes on the brink of spoilage often display wrinkling, softness, or perhaps mold growth. Assessing freshness requires harnessing the power of our senses – observation, aroma, and touch.

Inspect your tomatoes visually. If mold is present, discard them. However, if they’re simply somewhat softened or wrinkled, they can still be salvaged. Next, inhale their scent – a mildly overripe yet edible tomato may boast a more robust aroma than its fresher counterpart but should never smell rancid. Lastly, utilize your tactile sensations – while modestly mushy tomatoes prove valuable in various dishes, excessively squishy or leaking fruits necessitate disposal.

Safety triumphs – always err on the side of caution when contemplating aging produce.

Quick and Easy Recipes for Aging Tomatoes

Now that our crinkled comrades have been deemed edible, let’s delve into a realm of irresistible culinary masterpieces. Presenting quick and easy recipes for aging tomatoes that will satiate your senses while combating food waste:

Tomatoes About to Go Bad? Discover How to Rescue and Transform Them! 3

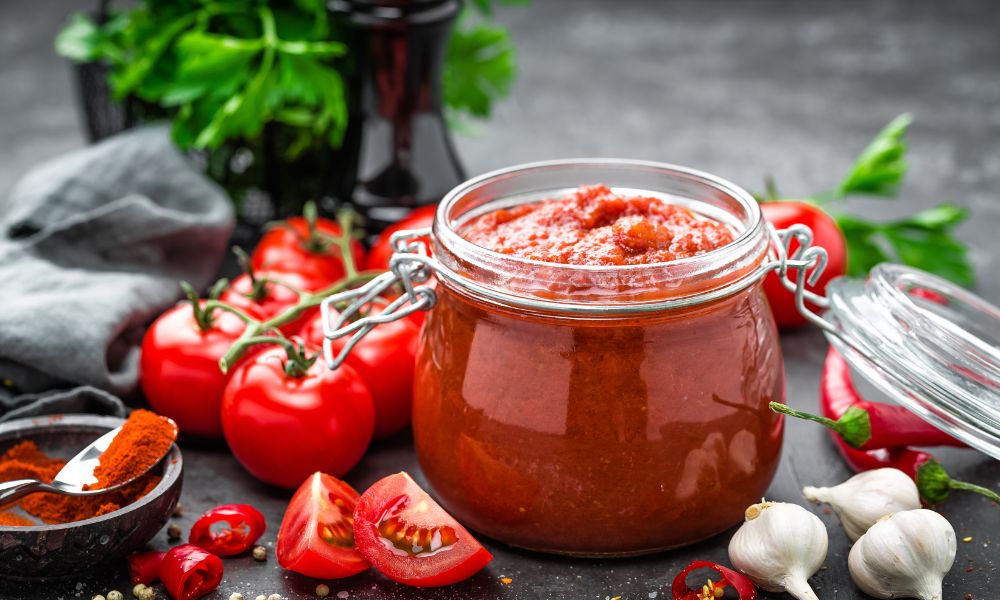
Speedy Tomato Sauce, Featuring Slightly Overripe Tomatoes

Ingredients:

  • 6-8 aging tomatoes
  • 1 generously-sized onion, chopped
  • 2 cloves garlic, minced
  • 2 tablespoons olive oil, from your pantry
  • A sprinkling of salt and pepper, to your liking
  • Fresh basil leaves, chopped (optional, but encouraged)

Instructions:

  1. Initiate the process by blanching those tomatoes: fill a pot with water and bring it to a rolling boil, followed by the tomatoes’ imminent immersion. Keep them submerged for 1-2 minutes until their delicate skins crack open. Retrieve the tomatoes with a slotted spoon, placing them in an ice bath to recuperate.
  2. Cool and ready-handed, peel and chop your previously wrinkled friends.
  3. Heat the olive oil in a large saucepan over medium warmth, toss in the onions, and await for them to soften and transform translucent – approximately 5 minutes.
  4. Summon the garlic, cooking for a further 1-2 minutes in harmony with the onions.
  5. Merge the recently chopped tomatoes, salt, pepper, and fresh basil leaves (if your heart desires) with your sizzling mixture. Boil and reduce, allowing it to simmer gently for 25-35 minutes, stirring occasionally.
  6. Enlist the assistance of an immersion blender, or a regular blender, to mix the sauce to a consistency tailored to your taste buds (optional).
  7. Savor your mouthwatering homemade tomato sauce with an array of pasta or pizza selections!

Vibrant Tomato Salsa, Refreshing and Invigorating

Tomatoes About to Go Bad? Discover How to Rescue and Transform Them! 4

Ingredients:

  • 5-6 aging tomatoes (Roma being a prime choice)
  • 1/2 a small red onion, finely chopped
  • 1 feisty jalapeno, minced (discard the seeds for a milder demeanor)
  • 1/4 cup of freshly chopped cilantro
  • The juice of 1 lime, freshly squeezed
  • A seasoning of salt and pepper to suit your preferences

Instructions:

  1. Employ the same blanching, peeling, and chopping techniques used in the previous recipe.
  2. In a medium-sized bowl, gather the tomatoes, onion, jalapeno, cilantro, and lime juice, mixing them harmoniously.
  3. Integrate salt and pepper, adjusting to taste.
  4. For optimal enjoyment, refrigerate your vivacious salsa for a minimum of one hour before delighting in its tangy presence, whether paired with tortilla chips or your favorite Mexican dishes.

Experiment with these culinary creations, and your previously wrinkled tomatoes will transform into a veritable feast. A plethora of recipes awaits exploration, from wholesome soups and stews to zesty roasted tomatoes – your aging produce is a mere canvas for your imaginative brushstrokes in the kitchen.

Preservation Techniques for Tomatoes

To extend the lifeline of our aging tomato comrades, let’s explore diverse preservation techniques, allowing us to savor their delightful flavors in the long run. Canning, freezing, drying, and crafting tomato paste or sauce for long-term storage are all viable options.

We’ll delve into detailed instructions, equipment requirements, and safety measures for each preservation tactic. The rewards reaped from preserving tomatoes include a wealth of future culinary adventures thanks to their convenient availability in your pantry.

Canning Tomatoes

  1. Sterilize your canning jars by boiling them in water for 10 minutes.
  2. Prepare your tomatoes by blanching, peeling, and chopping them, as described earlier.
  3. Fill the jars with chopped tomatoes, leaving 1/2-inch headspace.
  4. Add a tablespoon of lemon juice to each jar for acidity.
  5. Wipe jar rims clean and secure lids and bands.
  6. Process the jars in a water bath canner for 45 minutes.
  7. Allow the jars to cool for 12-24 hours before checking the seals and storing them in a cool, dark place.

Freezing Tomatoes

  1. Blanch, peel, and chop your tomatoes.
  2. Lay them on a parchment-lined baking sheet.
  3. Place the sheet in your freezer, leaving them until solid.
  4. Transfer frozen tomatoes to airtight containers or zip-top freezer bags, removing as much air as possible.
  5. Stow them in your freezer for future use in soups, sauces, and stews.

Drying Tomatoes

  1. Preheat your oven to its lowest temperature setting (around 200°F/93°C).
  2. Wash, core, and cut tomatoes into 1/4-inch thick slices.
  3. Arrange slices on a baking sheet lined with parchment paper, leaving space between each slice.
  4. Sprinkle with salt and optional seasonings, such as herbs or garlic powder.
  5. Bake for 4-6 hours, checking regularly for desired dryness.
  6. Cool the dried tomatoes before storing them in an airtight container or bag, with a silica gel packet if available.

Reviving and Refreshing Techniques

Tomatoes About to Go Bad? Discover How to Rescue and Transform Them! 5

Not all aging tomatoes need to be repurposed; sometimes, a little bit of tender care can breathe new life into their wrinkled skins. Here are some tips and tricks to revive wilted or mushy tomatoes:

  • Blanch the tomatoes, halting the ripening and firming their flesh.
  • Submerge in ice water as a refreshing wakeup call for your tomatoes.
  • Cooked dishes offer the perfect disguise, accommodating imperfections and creating sumptuous meals.

Don’t shy away from experimenting, as a little creativity can result in surprisingly delightful outcomes.

Conclusion

By embracing creativity in the kitchen and exploring these ideas and recipes, using up those aging tomatoes gifts us with tantalizing flavors and increased sustainability. Enjoy the impressive transformation of your once-wilted tomatoes into a luscious culinary experience. Take the plunge, and share your own tips, recipes, and stories with fellow food adventurers! Happy rescuing!

How to Keep Blueberries Fresh for Longer: Expert Tips and Tricks

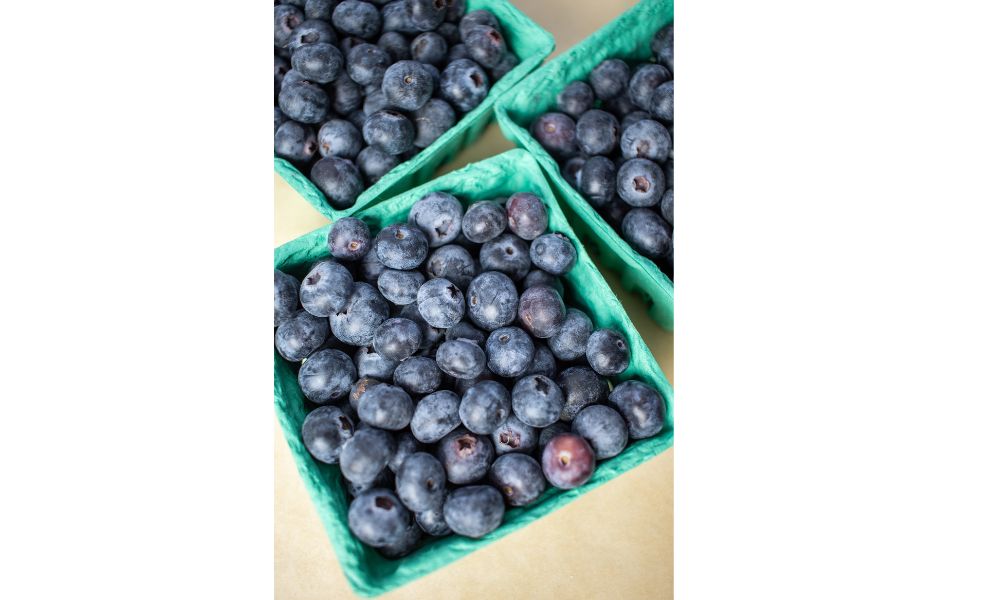
Blueberries are a delightful and nutritious addition to any meal, snack, or dessert. Their juicy, sweet, and slightly tangy taste makes them a favorite fruit among many people. However, their delicate nature can often mean that they spoil quickly, sometimes even before we have the chance to enjoy them.

Fortunately, there are ways to extend their freshness so you can savor those berry-licious flavors for longer. In this article, we’ll explore some key techniques and tips to help you make the most of your blueberries.

Why Freshness Matters

how to keep blueberries fresh for longer

Eating fresh blueberries comes with a host of benefits, including superior taste, nutritional value, and optimal texture. When properly stored, they maintain their delicious flavors and healthful properties, contributing to a wholesome and nutritious diet.

On the other hand, consuming stale or spoiled blueberries can lead to flavor degradation and potential health risks. Mold growth and fermentation can cause blueberries to become unappetizing or even unsafe to eat. Moreover, minimizing waste is an important consideration for the environment and our wallets.

By learning how to extend the shelf life of blueberries, we can ultimately reduce food waste and maximize enjoyment of this delightful fruit.

Proper Storage Techniques

How to Keep Blueberries Fresh for Longer: Expert Tips and Tricks 6

Through my experiments, I’ve discovered that maintaining the ideal temperature and humidity conditions is crucial for preserving blueberry freshness. Here’s what you need to know about properly storing your blueberries to make them last longer:

  • Refrigerate your blueberries: The best way to store blueberries is in the refrigerator, where you can maintain a consistent temperature between 32°F and 34°F (0°C and 1°C). Humidity should be kept around 90% for optimal freshness.
  • Choose the right container: Select a shallow, breathable container such as a basket or colander rather than a tightly sealed plastic container. This will allow air circulation and prevent moisture buildup, which can cause mold growth.
  • Keep blueberries dry: To avoid excess moisture, don’t wash your blueberries until you’re ready to consume them. Store them unwashed, and if there’s any visible moisture, gently pat them dry with a paper towel before storage.
  • Freeze for long-term storage: If you don’t plan on eating your blueberries within a few days of purchase, consider freezing them. Place the unwashed blueberries in a single layer on a baking sheet lined with wax paper or parchment paper, and freeze for an hour or two. Once frozen, transfer them to a resealable plastic bag, removing as much air as possible. Your frozen blueberries should retain their quality for up to 6 months.

Handling and Preparation Tips

Handling blueberries with care can significantly enhance their overall quality and extend their shelf life. Here are my best practices for handling blueberries:

  • Inspect for bruised or damaged berries: When buying or sorting through your blueberries, remove any that are squishy, bruised, or show signs of mold. This helps to prevent mold from spreading to healthy berries while in storage.
  • Gently wash before eating: When you’re ready to consume your blueberries, wash them gently under cool, running water. To remove dirt and contaminants without damaging their delicate skin, consider using a colander or strainer to gently tumble and rinse the berries.
  • Dry thoroughly: After washing, it’s important to remove any excess moisture to prevent spoilage. Lay the blueberries out on a clean kitchen towel, gently rolling and patting them dry.

You may also like: Can You Bring Fruit Through Airport Security? A Friendly Guide

Preserving Blueberries

How to Keep Blueberries Fresh for Longer: Expert Tips and Tricks 7

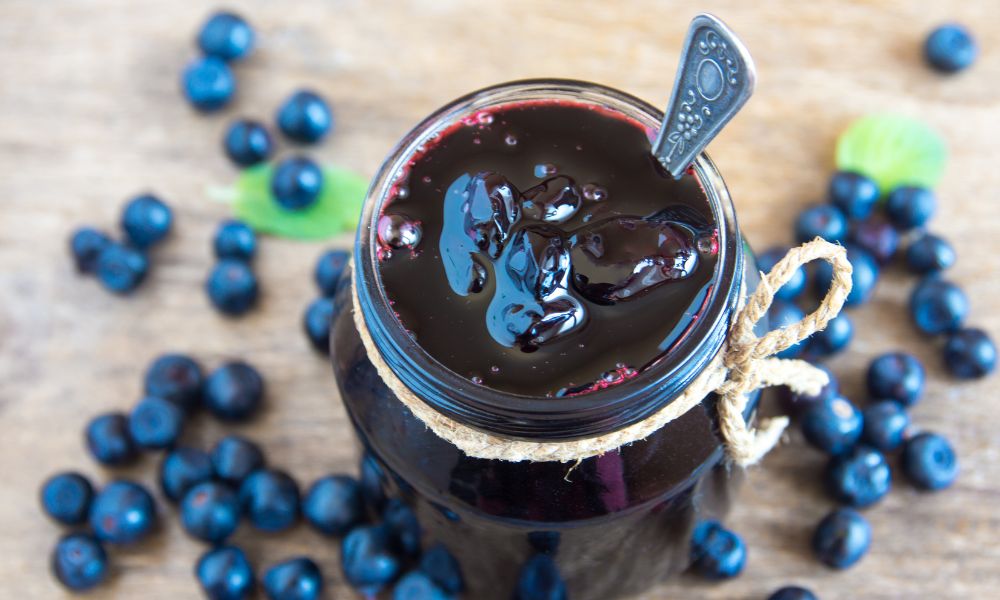
If you’ve got a surplus of blueberries and want to savor them for an extended period, consider preservation methods like making blueberry jam, freezing in syrup, or dehydrating. Here are some detailed instructions and recipe ideas to get you started:

Blueberry Jam

Combine equal parts blueberries and sugar in a saucepan, stirring occasionally and simmering over medium heat until thickened (approximately 25-30 minutes). You can also add pectin for a thicker consistency. Pour the hot jam into sterilized jars, seal, and process in a boiling water bath for 10 minutes.

Freezing in Syrup

Prepare a syrup by mixing sugar and water, using a ratio of one part sugar to three parts water. Place washed and well-drained blueberries in single layers in airtight containers, and pour the syrup over your blueberries until they are covered. Seal and freeze.

Dehydrating

To dehydrate blueberries, you’ll need a dehydrator, parchment paper, and a little patience. Follow your dehydrator’s instructions for temperature and time settings. Typically, blueberries are dehydrated at a temperature of 135°F (57°C) for up to 18 hours, or until the berries are pliable and slightly crunchy.

Exploring these preservation methods not only adds variety but can also help you extend the shelf life of your blueberries even further. Get creative and let your personal preferences guide you.

How Long Does Vegetable Oil Last Once Opened? Tips for Storage and Shelf Life

Understanding the shelf life of vegetable oil is essential, as it plays a vital role in many cooking processes. From frying and sautéing to baking and making salad dressings, vegetable oil can enhance the taste and texture of many dishes.

In this article, we’ll delve into how long vegetable oil lasts once opened and explore recommendations on tips for storage and extending its shelf life.

What Affects the Shelf Life of Vegetable Oil?

how long does vegetable oil last once opened

Several factors impact the longevity of vegetable oil, and one of the critical aspects to consider is the storage condition. How you store the vegetable oil can greatly affect how long it will last once opened. Exposure to light, air, and heat can significantly impact the shelf life of vegetable oil and hasten its degradation.

When vegetable oil is exposed to light, its natural antioxidants can break down, giving rise to rancidity. Additionally, prolonged exposure to air causes the oil to oxidize, changing its aroma and taste. Lastly, heat can accelerate the breakdown of oil components, shortening its shelf life and even posing a safety risk.

How Long Does Vegetable Oil Last Once Opened?

The average shelf life of vegetable oil once opened primarily depends on storage and the type of oil. However, opened vegetable oil can generally last for 6 months to a year.

Signs of Expired Vegetable Oil
  • Unpleasant off smell (rancid or sour)
  • Cloudy or thickened appearance
  • Changes in taste (bitter or off-flavors)
  • Mold or debris floating in the oil

A simple taste test can help you determine whether or not your vegetable oil is still good to use. Of course, make sure you follow proper food safety practices when conducting a taste test. Dip a clean spoon or utensil into the oil and take a small taste. If it tastes bitter, stale, or otherwise off, it’s time to dispose of the vegetable oil.

Different Types of Vegetable Oil and Their Shelf Life

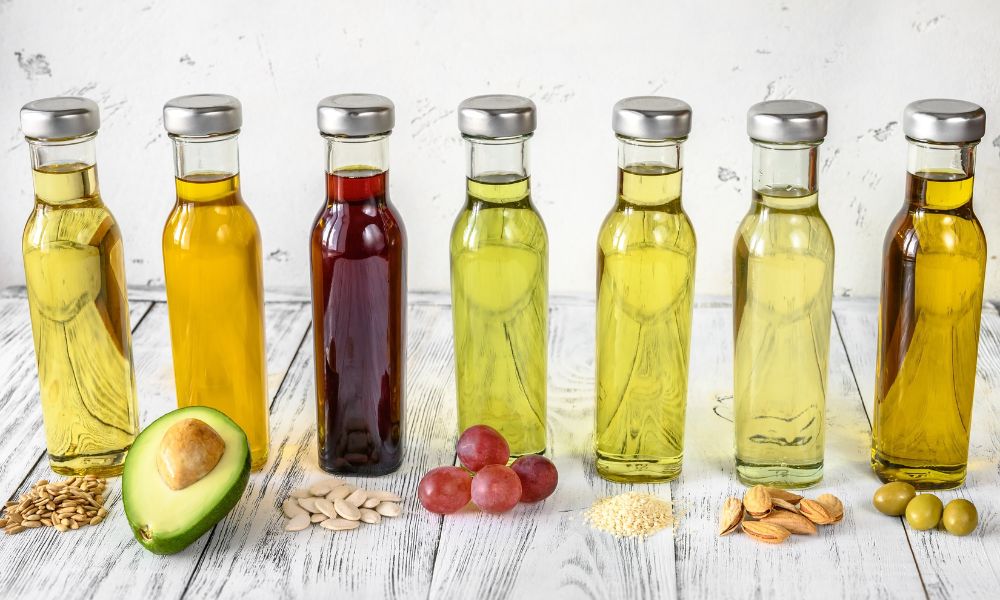
Various types of vegetable oils differ in terms of shelf life. Let’s take a closer look at some popular options and their expected shelf life once opened:

Oil TypeUnopened Shelf LifeOpened Shelf Life
Canola Oil1 year6 months to 1 year
Olive OilUp to 2 years3 to 6 months
Sunflower Oil1 year6 months to 1 year
Coconut OilUp to 3 yearsApproximately 1 year
Grapeseed Oil6 months2 to 3 months
  1. Canola Oil: Canola oil has a typical shelf life of one year if unopened and six months to a year after opening if stored correctly.
  2. Olive Oil: While unopened olive oil can last for up to two years, once opened, it should be consumed within three to six months for optimal freshness.
  3. Sunflower Oil: Sunflower oil has a similar shelf life to canola oil, with one year unopened and six months to a year after opening under ideal storage conditions.
  4. Coconut Oil: Coconut oil can last for up to three years unopened and approximately one year after opening, given proper storage.
  5. Grapeseed Oil: Grapeseed oil has a shorter shelf life in general, lasting around six months unopened and only two to three months after opening.

If you ever run out of vegetable oil or need an alternative for a specific recipe, check out this informative guide on substitutes for vegetable oil for options to try.

Tips for Storing Vegetable Oil

How Long Does Vegetable Oil Last Once Opened? Tips for Storage and Shelf Life 8

Following some essential tips can greatly extend the shelf life of your vegetable oil by mitigating the effects of light, air, and heat.

Keep Vegetable Oil in a Cool, Dark Place

Store the vegetable oil in a pantry or cupboard away from direct sunlight and heat sources, such as stoves or ovens. A consistent and cool temperature can help maintain the oil’s freshness for a more extended period.

During one of my pantry cleanups, I discovered an opened bottle of vegetable oil that had been hidden behind other items for over a year. The bottle was stored in a cool, dark, and dry pantry, away from the stove and any sunlight. To my surprise, the oil hadn’t gone rancid, and it was still good to use. However, keep in mind that this is not the norm, and you should always check the signs of expired vegetable oil mentioned earlier before using old oil.

Refrigerate or Freeze Vegetable Oil for Extension of Shelf Life

Refrigerating or freezing vegetable oil can help extend its shelf life, especially for those that are more prone to spoilage like grapeseed, walnut, or flaxseed oils. However, note that freezing might change the texture of the oil, but it’s still safe to use once it returns to liquid form.

Fun Experiment Alert! I decided to freeze a small amount of vegetable oil to observe the changes in texture. After a few hours in the freezer, the oil became thicker, almost like the consistency of soft butter. When I let it sit on the counter for a while, it returned to its original liquid state and was good to use.

Alternative Uses for Expired Vegetable Oil

How Long Does Vegetable Oil Last Once Opened? Tips for Storage and Shelf Life 9

If you have expired vegetable oil that you can’t use for cooking, consider repurposing it for other various uses around your home instead of disposing of it immediately. Here are some ideas:

  1. Lubricating hinges and locks: A few drops of expired vegetable oil can help loosen squeaky hinges and door locks.
  2. Removing adhesive residue: Expired vegetable oil can be used to remove sticky residues left by labels or stickers.
  3. Paintbrush conditioner: After washing paintbrushes with soap and water, rinse them in expired vegetable oil to keep the bristles soft and conditioned.
  4. Firestarter: Soak a piece of cloth or cotton in expired vegetable oil and use it as a firestarter for camping or grilling.
  5. Gardening tool cleaner: Rub expired vegetable oil on your gardening tools to remove dirt and help prevent rust.

Proper Disposal of Expired Vegetable Oil

It’s essential to dispose of expired vegetable oil responsibly. Pouring it down the drain can cause plumbing issues and negatively impact the environment. Instead, follow these steps to properly dispose of expired vegetable oil:

  1. Cool the oil: Ensure the vegetable oil is at room temperature or colder.
  2. Pour into a disposable container: Use a sturdy, sealable container such as an empty milk carton or disposable food container.
  3. Seal and label the container: Securely close the container and label it as “used vegetable oil” or “bad vegetable oil” so that others know its contents.
  4. Dispose of appropriately: Place the sealed container in your regular trash or, if your local recycling center accepts it, bring it there for proper disposal.

Properly disposing of expired vegetable oil helps keep our environment clean and our plumbing systems functioning.

Final Thoughts

The shelf life and quality of vegetable oil are greatly influenced by its proper storage and the type of oil being used. Ensure that your vegetable oil remains fresh and usable by keeping it away from light, air, and heat. Always remember to check for signs of spoilage before using it in your cooking.

What is the best way to store vegetable oil?

Store vegetable oil in a tightly sealed container in a cool, dark place, such as a pantry or cupboard away from direct sunlight and heat sources.

How can I tell if my vegetable oil has gone bad?

Check for an unpleasant off-smell, cloudy or thickened appearance, changes in taste, or mold/debris floating in the oil.

Can vegetable oil be frozen?

Yes, vegetable oil can be frozen, especially if it’s more prone to spoilage like grapeseed, walnut, or flaxseed oils. Keep in mind that freezing might alter the texture temporarily, but it’s still safe to use once it returns to a liquid state.

Does the type of vegetable oil affect how long it lasts once opened?

Yes, the type of vegetable oil can impact its shelf life. More stable oils like canola, sunflower, or coconut oil tend to last longer. In contrast, oils that are more prone to spoilage, such as grapeseed, walnut, or flaxseed oils, have shorter shelf lives.

Can rancid vegetable oil be harmful?

Consuming rancid vegetable oil can lead to digestive discomfort and may have long-term health implications if ingested regularly. Always check for signs of spoilage before using vegetable oil.

The Ultimate Guide to Cirkul Flavors: How Long Do They Last?

As a Cirkul user, you understand the importance of staying hydrated while enjoying your preferred Cirkul flavors. However, have you ever wondered about the shelf life of these flavors and how to prolong their freshness?

In this ultimate guide, we will explore the lifespan of Cirkul flavors and share tips on how to maximize their taste and quality. Cirkul has gained significant popularity due to its customizable and convenient hydration solutions. This article will provide you with everything you need to know to fully enjoy your Cirkul experience.

What Are Cirkul Flavors?

The Ultimate Guide to Cirkul Flavors: How Long Do They Last? 10

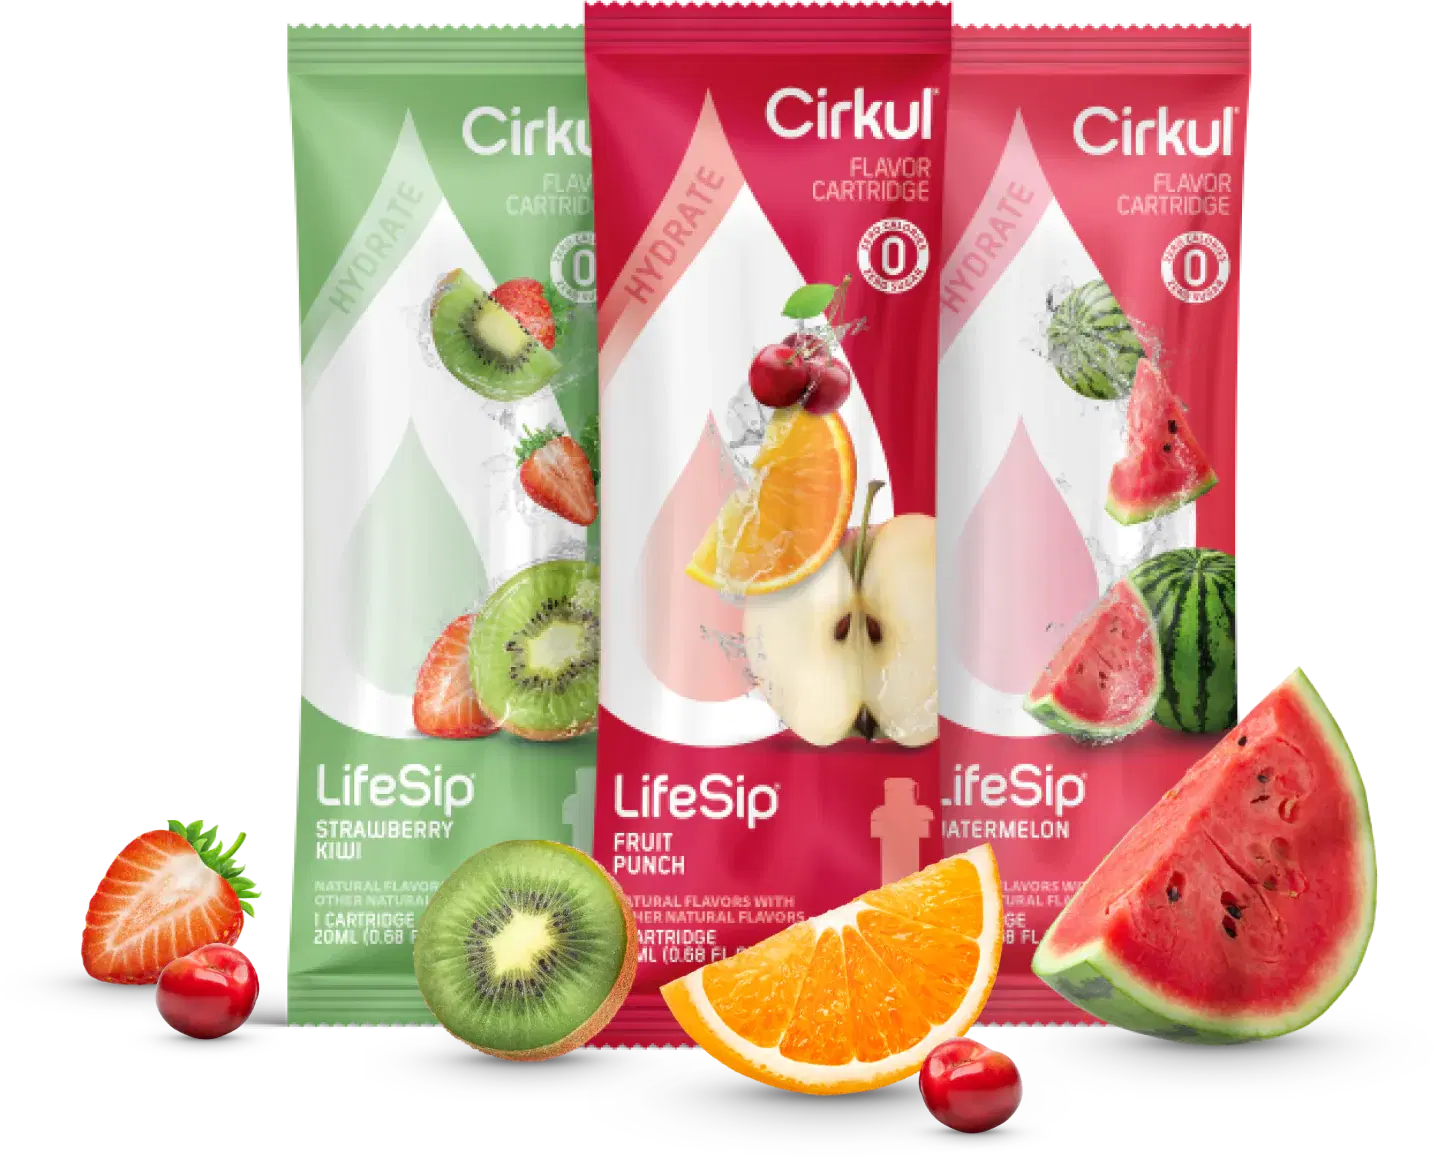
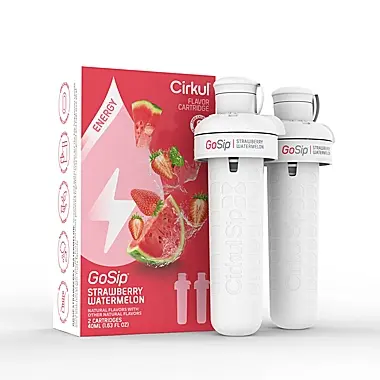
Cirkul flavors are liquid concentrates used to personalize the taste of your water. They come in a small, easy-to-use cartridge that transforms ordinary water into a delicious, flavored beverage within seconds. Cirkul offers a wide variety of flavors, including fruit blends, tea blends, electrolyte blends, and even caffeinated varieties.

With their innovative Sip and Dial technology, you can also control the intensity of flavor in your drink, making it a popular choice among those looking to stay hydrated and satisfied throughout the day.

How Long Do Cirkul Flavors Last?

Typically, an unopened Cirkul flavor cartridge has a shelf life of 12-18 months from the date of production. Once you open the cartridge, it is best to consume it within three months to ensure optimal flavor and quality. To locate the expiration date, check the bottom of the flavor cartridge or refer to the packaging.

Several factors can affect the shelf life of your Cirkul flavors:

  1. Storage Conditions: To prolong the lifespan of your Cirkul flavors, store them in a cool, dry place away from direct sunlight or heat sources.
  2. Frequency of Use: Depending on your drinking habits, a single Cirkul flavor cartridge can last anywhere from a few days to several weeks.
  3. Ingredients: Certain ingredients in specific flavors may have shorter shelf lives than others. For example, natural ingredients may degrade faster than artificial ones.

Storage Hacks for Prolonging Cirkul Flavor Lifespan

We all love to savor our favorite Cirkul flavors, and by following these simple hacks, you can ensure that they remain fresh and last longer:

  1. Batch Labeling: To help you keep track of when you opened each cartridge, use a permanent marker or a small label to write the opening date on the cartridge.
  2. Rotation: Organize your Cirkul flavors by their expiration dates, placing the ones that are closest to expiring at the front for easy access and consumption.
  3. Proper Seal: Make sure to close the cap properly after each use, as it will help prevent any leakage, evaporation, or contamination.
  4. Avoid Refrigeration: Although it might seem counterintuitive, there’s no need to store your Cirkul flavors in the refrigerator; a cool, dry place away from direct sunlight is sufficient.
  5. Keep it Clean: Ensure your Cirkul bottle and flavor cartridges are clean by washing them regularly with warm, soapy water to maintain their quality and hygiene.

How to Dispose of Cirkul Flavor Cartridges

how long do cirkul sips last

Wondering what to do with your used Cirkul flavor cartridges? Follow these steps to dispose of them responsibly:

  1. Empty the Cartridge: Make sure to consume all the liquid inside the cartridge before disposing of it.
  2. Separate Components: Separate the plastic cap from the cartridge itself, as they may have different recycling requirements.
  3. Check Local Recycling Guidelines: Review your local recycling guidelines for disposing of plastics and follow their instructions on recycling the cartridge and cap.
  4. Repurpose: Think of creative ways to repurpose your used Cirkul flavor cartridges, such as using them as small containers for seeds, beads, or other small items.

Conclusion

With the knowledge and tips provided in this ultimate guide, you are now well-equipped to make the most of your Cirkul flavors while ensuring they remain fresh and delicious throughout their lifespan. Remember to properly store and care for your Cirkul cartridges, and enjoy a diverse range of flavors to keep your hydration experience fun and unique. So go ahead, experiment with your Cirkul flavors and stay refreshed!

FAQs

What are the ingredients in Cirkul flavors?

Cirkul flavors are made from a combination of water, natural and artificial flavorings, and sweeteners such as sucralose, stevia, or cane sugar. Some specialized cartridges may also contain functional ingredients like electrolytes, caffeine, and vitamins.

Are Cirkul flavors safe for consumption?

Yes, Cirkul flavors are generally safe to consume. They are carefully formulated and undergo rigorous testing to ensure safety and quality compliance. However, if you have any specific dietary restrictions or allergies, it is crucial to check the ingredient list and consult with your healthcare professional before consuming.

How do you store Cirkul flavors to extend their shelf life?

To ensure the longevity and freshness of your Cirkul flavors, follow these storage tips:
1 Keep the cartridges in a cool, dry area away from direct sunlight or heat sources to avoid degradation and preserve flavor quality.
2 After opening a cartridge, ensure that the cap is securely closed to prevent leakage or exposure to air, which may cause the flavor to spoil quicker.

How often should you change the Cirkul flavor cartridge?

The duration a Cirkul flavor cartridge lasts can vary depending on your preferred level of flavor and your frequency of use. On average, one cartridge provides 132 servings or 6 bottles of a 22-ounce Cirkul bottle filled to the max flavor intensity. Replace the cartridge when you notice a decline in flavor or if the cartridge is past its expiration date.

Can you mix and match Cirkul flavors?

Although mixing and matching Cirkul flavors in a single cartridge is not recommended, you can still play around with different combinations by taking a sip of different flavors while moving the dial to your desired intensity.

Can Cirkul flavors go bad?

As with any other food or beverage product, Cirkul flavors can deteriorate over time due to improper storage or past expiration dates. To identify spoiled flavors, check for signs such as an unpleasant taste, off odor, or discoloration. Discard the cartridge if you notice any of these signs.

[1] https://cirkul.com/pages/faqs [2] https://www.drinkfinity.com/uk/en/how-we-define-fresh-taste [3] https://www.medicalnewstoday.com/articles/324341 

How Long Do Cirkul Sips Last? Tips for Fresh Drinks

Cirkul Sips are personalized flavored cartridges designed to revolutionize the way you drink water, making hydration fun and enjoyable. Knowing how long they last not only helps you maintain freshness but also ensures your flavorful water remains enjoyable.

This article walks you through the different types of Cirkul Sips, their shelf life, proper storage methods, and tips to keep them fresh for an extended period.

What are Cirkul Sips?

how long do cirkul sips last

Cirkul Sips are small, portable cartridges filled with liquid concentrates that you can attach to a specially designed Cirkul bottle. Just like adding a small teabag to your water bottle, the Cirkul system features a variety of flavors, transforming plain water into a refreshing and delicious drink with every sip – and without any hassle.

Types of Cirkul Sips Available

There is a wide range of Cirkul Sips available, from fruity to energizing flavors. Some popular options include Fruit Punch, Lemonade, Raspberry Tea, and Coconut Pineapple. There’s practically a flavor for everyone’s preferences!

Benefits of Using Cirkul Sips

Cirkul Sips offer several advantages, such as making it easier to stay hydrated while cutting down on single-use plastic bottles. It provides a fun and eco-friendly alternative to traditional flavored waters or soft drinks. Additionally, Cirkul Sips are sugar-free, helping curb excessive sugar intake and maintain a healthier lifestyle.

How Long Do Cirkul Sips Last?

How Long Do Cirkul Sips Last? Tips for Fresh Drinks 11

Factors Affecting the Shelf Life of Cirkul Sips

Several factors can affect the shelf life of your Cirkul Sips, including storage conditions, exposure to air, and general hygiene. So, how long do they last? Well, their longevity depends on how well you preserve them.

Average Shelf Life of Cirkul Sips

On average, unopened Cirkul Sips can last up to two years if stored in a cool, dry place. Once opened, it’s best to use them within 30 to 45 days to ensure the flavors remain potent and preserve their optimal taste. Beyond this period, your Cirkul Sip may start to lose its zest and effectiveness.

Tips to Extend the Shelf Life of Cirkul Sips

To make the most out of your Cirkul Sips, here are a few helpful tips:

  1. Store in a cool, dry place: High temperatures and humidity can cause Cirkul Sips to degrade faster. Keep them away from direct sunlight and heat sources for better longevity.
  2. Seal the Sips after use: Properly reseal your Cirkul Sips after usage to keep air exposure to a minimum. This helps prevent the concentrates from evaporating, thus retaining their freshness.
  3. Practice good hygiene: To avoid contamination, always wash your hands before handling your Cirkul Sips, and clean your Cirkul bottle regularly.

How to Store Cirkul Sips Properly?

How Long Do Cirkul Sips Last? Tips for Fresh Drinks 12

Proper Storage Methods for Cirkul Sips

For long-lasting and fresh Cirkul Sips, here’s what you can do:

  • Keep Cirkul Sips in their original packaging, as it is designed to protect them from air exposure and help retain freshness.
  • Store in a cupboard, drawer, or pantry – this keeps them away from potential heat sources and direct sunlight.
  • Avoid keeping them in your car, especially during the summer months, as temperatures can rise and compromise their integrity.

Common Mistakes to Avoid When Storing Cirkul Sips

To maximize the shelf life of your Cirkul Sips, avoid the following mistakes:

  • Storing them near a stove, oven, or other heat sources – this can cause the concentrates to evaporate or degrade faster.
  • Leaving them in open space where they are exposed to air and sunlight, leading to faster deterioration.
  • Allowing them to come in contact with moisture, which can affect the overall taste and quality.

How to Know if a Cirkul Sip Has Gone Bad?

If you notice any of these signs, it’s time to discard your Cirkul Sip:

  • A strong, off-putting odor or taste.
  • Changes in texture or viscosity.
  • Mold growth on the Sip.

FAQs

What are the ingredients of Cirkul Sips?

Cirkul Sips contain natural and artificial flavors, purified water, and other ingredients that vary depending on the flavor. For a detailed ingredient list, visit the official Cirkul website.

Can you freeze Cirkul Sips?

While freezing Cirkul Sips may extend their shelf life, it is not recommended as it may lead to changes in taste, texture, or overall quality. Stick to following proper storage methods to keep them fresh.

Are Cirkul Sips safe for kids?

Yes, Cirkul Sips are safe for children. However, it’s a good idea to monitor their usage, as some flavors may contain caffeine, which could affect their energy levels or sleep.

How many Cirkul Sips can you have in a day?

There is no specific limit to the number of Cirkul Sips you can consume daily, but moderation is key. Most Cirkul Sips are sugar-free and low in calories, making them a healthier alternative to sugary beverages.

Do Cirkul Sips contain caffeine?

Some Cirkul Sips contain caffeine, while others are caffeine-free. You can find this information on the product’s packaging or refer to the Cirkul FAQ page.

What are the flavors available for Cirkul Sips?

There is a wide range of flavors available, including Fruit Punch, Lemonade, Raspberry Tea, and Coconut Pineapple. With so many options, everyone is sure to find their favorite flavor!

How Long Are Hot Dogs Good for After Opening? Expert Advice

Hot dogs are a staple at any barbecue, sports event, or family gathering. But, have you ever paused for a moment before taking a bite and wondered: how long have I had these hot dogs in the fridge?

In this article, we’ll delve into the shelf life of hot dogs after opening and why it’s important to be aware of their freshness. Food safety is crucial, as consuming expired food can lead not only to a bad taste in your mouth but also to significant health risks.

How Long Do Hot Dogs Last After Opening?

how long are hot dogs good for after opening

When unopened, hot dogs generally have a shelf life of about two weeks when kept in the refrigerator. However, once the package is opened, the clock starts ticking on how long those delicious dogs will be safe for consumption.

Factors that can impact the shelf life of opened hot dogs include storage temperature and packaging material. The temperatures in which the hot dogs are stored play a significant role, as the hot dogs’ quality quickly deteriorates when subjected to improper temperatures. Similarly, improper packaging can allow bacteria to grow and lead to spoilage.

As a general guideline, opened hot dogs should be consumed within 3-7 days, according to the U.S. Department of Agriculture’s Food Safety and Inspection Service. But to be on the safe side, always follow the date provided on the packaging, or use your senses to tell if it’s time to say goodbye to those hot dogs. Remember that when in doubt, it’s always better to be safe than sorry!

Signs That Hot Dogs Have Gone Bad

How Long Are Hot Dogs Good for After Opening? Expert Advice 13

Nobody wants to bite into a spoiled hot dog, and there are some telltale signs that you should be aware of. Some common indicators that hot dogs have spoiled include changes in color, texture, and smell.

For color, we’re on the lookout for any grey or dull hues – fresh hot dogs are usually bright pink. Next is texture – sliminess or stickiness is a big red flag. Finally, smell plays a crucial role in detecting spoiled dogs, as fresh ones have a distinct, slightly salty aroma. If you notice any off-putting, sour scents, it’s probably time to discard those hot dogs.

Eating spoiled hot dogs poses health risks, such as food poisoning due to harmful bacteria like Staphylococcus aureus or Salmonella. So, always proceed with caution when uncertain about whether your hot dogs are still good to eat.

Proper Storage Techniques to Extend Shelf Life

How Long Are Hot Dogs Good for After Opening? Expert Advice 14

Proper storage of hot dogs can make all the difference in preserving their freshness and preventing any unintentional bacteria growth. Storing hot dogs in the refrigerator at a temperature between 32-40°F is imperative. In addition, be sure to keep them away from the refrigerator door or any uncooked foods to prevent cross-contamination.

It’s always best to use air-tight packaging, like plastic wrap, to keep bacteria from settling on your hot dogs. For the storage masters out there, consider vacuum sealing your hot dogs to minimize air and bacteria exposure.

Contrary to what some may believe, hot dogs can be frozen. Freezing hot dogs extends their shelf life significantly, allowing them to last for 1-2 months. When it’s time to thaw and enjoy, place them in the refrigerator to defrost safely.

FAQs

Is there a general rule for the freshness of hot dogs stored in the fridge?

Indeed, unopened hot dogs typically have a two-week shelf life in the refrigerator. However, things change once you open the package, and it’s best to savor them within 3-7 days. For utmost safety, follow the storage guidelines on the packaging.

Wondering if freezing hot dogs is possible? Want to prolong their freshness?

Absolutely! Placing hot dogs in the freezer is a fantastic way to extend their shelf life. Tightly wrapped, they’ll remain fresh for up to 1-2 months. When you’re ready to indulge, thaw them properly in the refrigerator.

How can I spot expired hot dogs?

Keep an eye out for color, texture, and aroma alterations to identify spoiled hot dogs. If you see any grey tones, detect sliminess, or sniff an unpleasant odor, it’s time to discard them.

Health risks from expired hot dogs – what should I know?

Ingesting bad hot dogs may cause food poisoning, which can stem from dangerous bacteria like Staphylococcus aureus or Salmonella. This can lead to nausea, vomiting, diarrhea, and fever – not a delightful experience!

On the hunt for the optimal method to store hot dogs? Want longer shelf life?

To ensure maximum freshness, stash hot dogs in the refrigerator within 32-40°F, and use air-tight packaging to prevent bacterial invasion. As a bonus tip, consider vacuum sealing your franks for optimal results.

Curious about how to pick fresh, mouthwatering hot dogs at the grocery store?

It pays to be vigilant when choosing hot dogs. Inspect the expiration date on the packaging and scrutinize the product for spoilage indicators. Vibrant pink hues, a mild salty fragrance, and no signs of sliminess are the marks of fresh, delectable hot dogs.

The Ultimate Guide to Shelf Life of Carnation Evaporated Milk – FAQs, Tips, and More

Whether you’re an experienced baker or a newbie in the kitchen, understanding the shelf life and storage tips of ingredients such as Carnation Evaporated Milk is essential. Moreover, knowing how to spot a spoiled can of evaporated milk can help you avoid using a bad product in your recipes.

In this article, we will walk you through what Carnation Evaporated Milk is, its shelf life, and storage tips to maximize its quality and taste.

What is Carnation Evaporated Milk?

shelf life of carnation evaporated milk

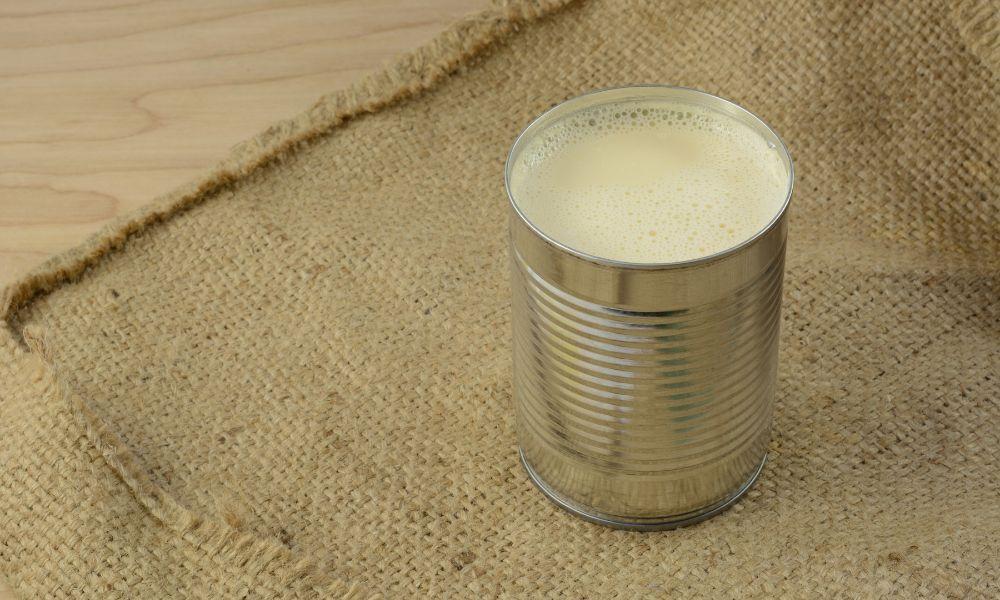
Carnation Evaporated Milk is a widely used ingredient that consists of fresh milk with about half of the water removed, giving it a thick, rich, and creamy consistency. Originating from the Swiss company Nestlé, Carnation Evaporated Milk boasts a long history of excellence, dating back to 1899, when it first began producing this milk variety.

There are several varieties of Carnation Evaporated Milk available today, including regular and low-fat options. These different types cater to varying dietary needs and preferences, making it an even more versatile ingredient.

Understanding the Shelf Life of Carnation Evaporated Milk

Shelf life refers to the time frame within which a product maintains its quality, taste, and nutritional value before it starts deteriorating. Various factors impact the shelf life of Carnation Evaporated Milk, such as:

  • Packaging: Carnation Evaporated Milk usually comes in airtight cans, which help preserve its freshness and extend its shelf life.
  • Storage: Proper storage is essential to keep your evaporated milk fresh and safe to use. Exposure to direct sunlight, high humidity, or fluctuating temperatures might adversely affect the shelf life of Carnation Evaporated Milk.
  • Temperature: Ideally, evaporated milk should be stored at a cool temperature without drastic fluctuations to help prolong its shelf life.

To identify if your can of Carnation Evaporated Milk has gone bad, look for signs such as a swollen or bulging can, an off smell, or an unusual taste. If you detect any of these factors, discard the product immediately to ensure food safety.

How Long Does Carnation Evaporated Milk Last?

As for shelf life, Carnation Evaporated Milk can be a bit different based on the stage:

Type of MilkStorage MethodShelf Life
Unopened cans of Carnation Evaporated MilkStore in a cool, dry place away from direct sunlightUp to 1 year beyond the date on the can
Opened cans of Carnation Evaporated MilkTransfer to an airtight container, refrigerate4 to 6 days
Homemade evaporated milk using Carnation Evaporated MilkPrepare, open, transfer to an airtight container, refrigerateConsume within a few days
  • Unopened cans of Carnation Evaporated Milk: Unopened cans can typically stay fresh and maintain their quality for up to one year beyond the date stamped on the can when stored properly. However, it is crucial to follow proper storage methods to ensure this longevity.
  • Opened cans of Carnation Evaporated Milk: Once opened, evaporated milk should be transferred to an airtight container and stored in the refrigerator. When properly stored, it can last for up to four to six days.
  • Homemade evaporated milk using Carnation Evaporated Milk: For those who prefer making their own evaporated milk at home, it’s important to remember that once prepared and opened, it also needs to be refrigerated and consumed within a few days, similar to opened cans.

Tips for Properly Storing Carnation Evaporated Milk

The Ultimate Guide to Shelf Life of Carnation Evaporated Milk - FAQs, Tips, and More 15

To maintain the quality, taste, and freshness of your Carnation Evaporated Milk, follow these storage tips:

  1. Unopened cans: Store unopened cans of Carnation Evaporated Milk in a cool, dark, and dry area away from direct sunlight or heat sources.
  2. Opened cans: Transfer the remaining evaporated milk from opened cans to an airtight container and refrigerate immediately. It’s essential to keep it covered to prevent it from picking up odors or flavors from other items in the fridge.
  3. Homemade evaporated milk: Once prepared, store the homemade evaporated milk in an airtight container in the refrigerator and consume within a few days for the best taste and quality.

By following these simple storage tips, you can extend the shelf life of your Carnation Evaporated Milk and enjoy its rich and creamy taste for longer.

FAQs about the Shelf Life of Carnation Evaporated Milk

There are a number of questions that often come up when it comes to the shelf life and proper storage of Carnation Evaporated Milk. We’ve compiled a list of frequently asked questions and provided clear, concise answers to help clarify any concerns or doubts.

Does evaporated milk spoil?

Yes, like any other dairy product, evaporated milk can spoil if not properly stored or if consumed past its shelf life.

Can you drink evaporated milk?

Absolutely! Many people enjoy drinking evaporated milk straight, while others choose to reconstitute it by adding an equal amount of water to achieve a regular milk-like consistency.

How long does Carnation evaporated milk last in the fridge?

Opened cans of Carnation evaporated milk, once transferred to an airtight container, can last for up to four to six days in the refrigerator.

Does evaporated milk need to be refrigerated?

Unopened cans of evaporated milk do not require refrigeration, but once opened, the remaining milk must be stored in the refrigerator to maintain freshness and quality.

Can you substitute evaporated milk for regular milk in recipes?

Yes, you can substitute evaporated milk for regular milk in recipes. To do so, simply mix equal parts of evaporated milk and water to achieve the desired consistency.

Can Carnation evaporated milk be used in coffee?

Yes, Carnation evaporated milk is a delicious and creamy alternative to regular milk or creamer in coffee. Try adding it to your favorite coffee drink for a richer, smoother taste.

How does evaporated milk differ from condensed milk?

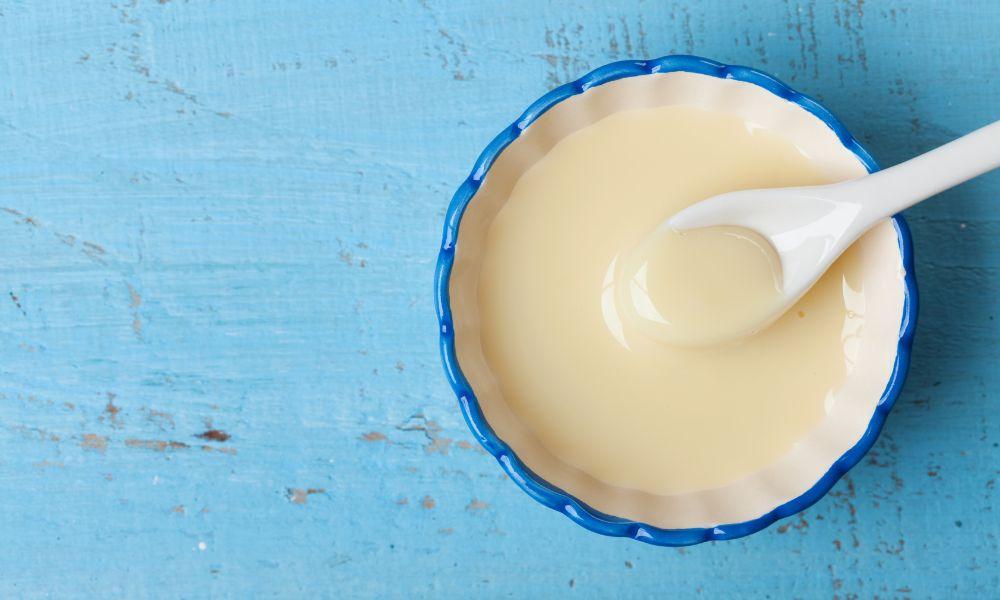
The main difference between evaporated milk and condensed milk lies in the sugar content. While evaporated milk is unsweetened, condensed milk contains added sugar, making it much thicker and sweeter.

Can you make your own evaporated milk at home?

Yes, you can make your own evaporated milk by gently simmering regular milk until approximately half of its water content has evaporated.

Conclusion

In conclusion, understanding the shelf life of Carnation Evaporated Milk and following proper storage methods can help you enjoy its amazing taste and quality to the fullest. A can of unopened evaporated milk, when stored correctly, can last up to a year beyond the date stamped on the can, while an opened can or homemade evaporated milk lasts for about four to six days in the fridge.

Knowing how to properly store Carnation Evaporated Milk and how to spot signs of spoilage will ensure that you always have a fresh and wholesome ingredient on hand for all your cooking and baking needs.

Can Canned Tomato Sauce Go Bad? Here’s What You Need to Know

Canned tomato sauce is a versatile and popular pantry staple that many of us have come to rely on for quick and easy meals. With so many uses, from spaghetti sauce to pizza toppings, it’s no wonder that we often find ourselves with a few cans tucked away in our cupboards.

However, does tomato sauce expire? And if so, how can we ensure that we are using it safely and effectively in our cooking? In this article, we will delve into the world of canned tomato sauce, exploring its shelf life, proper storage methods, and how to incorporate it into your culinary creations.

Understanding Canned Tomato Sauce

does canned tomato sauce go bad

Before we dive into the nitty-gritty of canned tomato sauce shelf life and storage, it’s essential first to understand what canned tomato sauce is and why it has become such a popular ingredient in our kitchens.

What is canned tomato sauce?

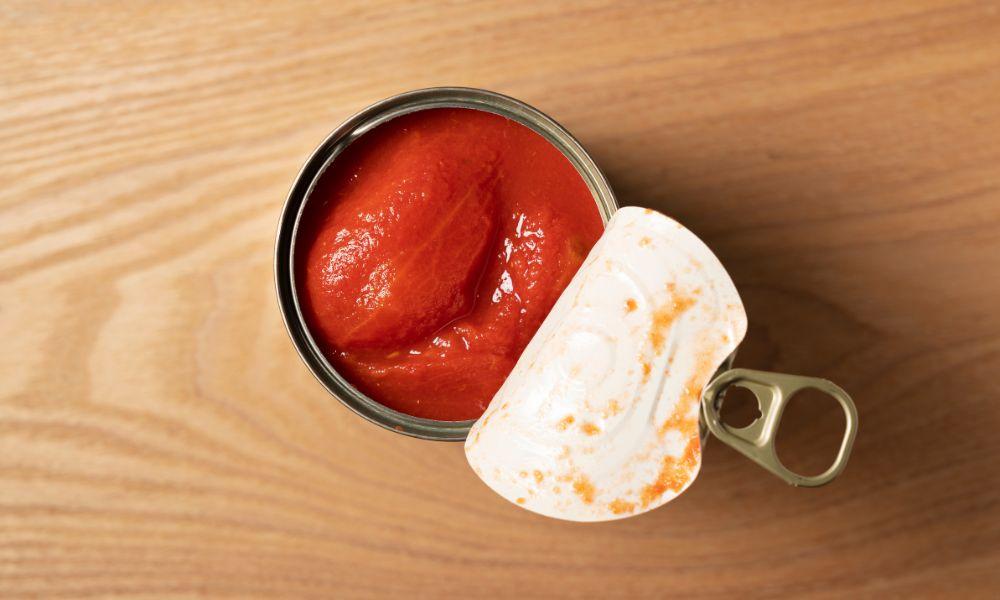
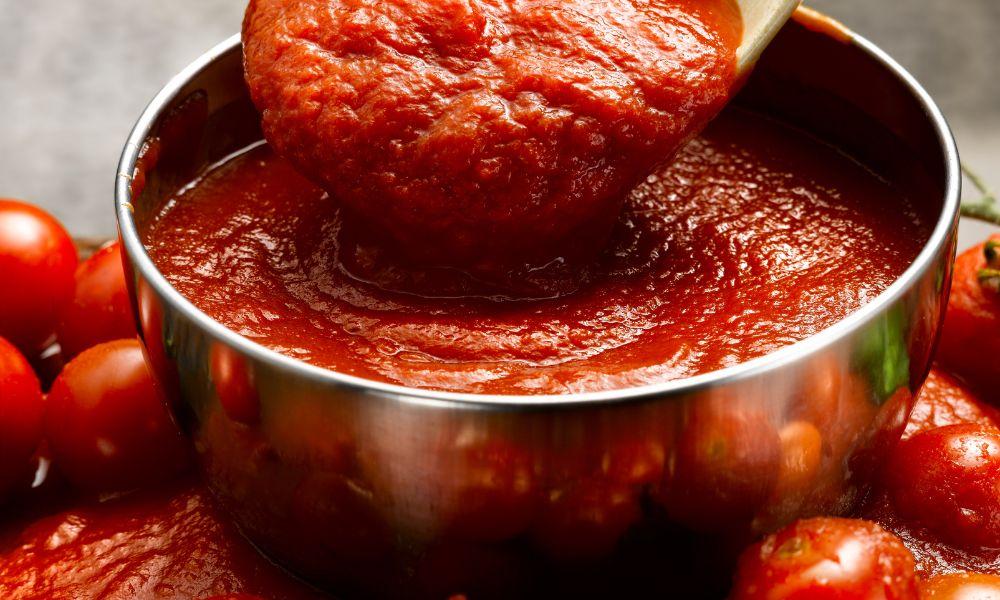
Canned tomato sauce is a type of tomato product made by cooking and pureeing tomatoes, then adding seasonings and other ingredients to create a thick, rich sauce. It is then canned and sealed to preserve the sauce for extended periods.

Canned tomato sauce has become a popular ingredient for several reasons.

First, it’s an incredibly versatile pantry staple that can be used in a wide variety of dishes, from pasta to casseroles, soups, and stews.

Second, it’s a time-saving option for busy home cooks, as it eliminates the need to prepare fresh tomato sauce from scratch. Finally, canned tomato sauce offers a consistent flavor and texture, making it a reliable choice for many recipes.

Types of canned tomato sauce

Canned tomato sauce is available in various forms, including plain, seasoned, or flavored with additional ingredients such as basil, garlic, or onions. You can also find canned tomato sauces with varying levels of thickness, from a thinner sauce that’s perfect for soups and stews, to a thicker, more robust sauce ideal for pizza and pasta dishes.

Nutritional value of canned tomato sauce

Canned tomato sauce is packed with essential nutrients, including vitamin A, vitamin C, potassium, and fiber. It is also a good source of antioxidants, specifically lycopene, which has been linked to numerous health benefits, including reduced risk of heart disease and certain types of cancer.

However, it’s essential to be mindful of added sugars and sodium in some canned tomato sauces, so always check the nutrition label before making your purchase.

Shelf Life of Canned Tomato Sauce

Can Canned Tomato Sauce Go Bad? Here's What You Need to Know 16

Now that we have a better understanding of canned tomato sauce let’s dive into how long it lasts and the factors that affect its shelf life.

How long does canned tomato sauce last?

ConditionShelf Life
Unopened canned tomato sauce12 to 18 months (check expiration date)
Opened, refrigerated5 to 7 days
Opened, frozenUp to 6 months

Unopened canned tomato sauce typically has a shelf life of 12 to 18 months when stored correctly. However, this can vary depending on the brand and specific product, so it’s best to refer to the tomato sauce expiration date printed on the can.

Once opened, canned tomato sauce should be transferred to an airtight container and will last in the refrigerator for 5 to 7 days. If you find yourself with leftover tomato sauce, you can also freeze it for up to 6 months to extend its shelf life.

Factors that affect the shelf life of canned tomato sauce

Several factors can impact the shelf life of canned tomato sauce, including:

  • Temperature: Store canned tomato sauce in a cool, dry place, ideally below 75°F (24°C) to prevent spoilage.
  • Humidity: High humidity can cause cans to rust, potentially compromising the seal and allowing bacteria to thrive.
  • Direct sunlight: Prolonged exposure to sunlight can affect the can’s integrity and, over time, alter the flavor and texture of the tomato sauce.

Signs that canned tomato sauce has gone bad

Watch for these warning signs that your canned tomato sauce may be spoiled or unsafe to consume:

  • A bulging, swollen, or damaged can: This may indicate that the can has been compromised, and harmful bacteria have been introduced.
  • A foul or off smell when opening the can: This is a key indicator that the sauce has spoiled.
  • Mold, discoloration, or an unusual texture: These can also signal that the sauce is no longer safe to eat.

It’s crucial never to consume canned tomato sauce if you suspect it has gone bad or if the can appears damaged, as this can potentially lead to food poisoning.

Storing Canned Tomato Sauce

Can Canned Tomato Sauce Go Bad? Here's What You Need to Know 17

Proper storage methods play a crucial role in ensuring the shelf life and safety of canned tomato sauce. Here, we’ll outline how to store canned tomato sauce and common storage mistakes to avoid.

Proper storage methods for canned tomato sauce

To ensure the longevity and quality of your canned tomato sauce, follow these storage guidelines:

  1. Store unopened cans in a cool, dark, and dry place such as a pantry or cupboard.
  2. Once opened, transfer the remaining sauce to an airtight container and store it in the refrigerator.
  3. Label and date the container to keep track of how long the sauce has been stored.
  4. If freezing the sauce, portion it into freezer-safe containers or plastic bags, removing any excess air to prevent freezer burn.

Common mistakes to avoid when storing canned tomato sauce

To prolong the shelf life of your canned tomato sauce and prevent spoilage, be sure to avoid these common storage mistakes:

  • Storing cans in damp or humid areas
  • Storing cans near heat sources or in direct sunlight
  • Storing opened tomato sauce in the original can in the fridge
  • Failing to label and date containers for easy tracking of freshness

By following proper storage methods and avoiding common mistakes, you can enjoy the delicious taste and nutritious benefits of canned tomato sauce for longer periods.

Cooking with Canned Tomato Sauce

Can Canned Tomato Sauce Go Bad? Here's What You Need to Know 18

Now that we know how to store canned tomato sauce properly, let’s explore safe cooking practices and delicious ways to incorporate this pantry staple into your meals.

Safe cooking practices with canned tomato sauce

To ensure safety and quality, follow these guidelines when cooking with canned tomato sauce:

  1. Always examine the can and the sauce for signs of spoilage before using it in a recipe.
  2. Do not use expired canned tomato sauce or sauce from a damaged can.
  3. Use a clean utensil each time you scoop sauce from the container to prevent cross-contamination.
  4. Discard any unused sauce after the recommended fridge or freezer storage times have passed.

Can cooking canned tomato sauce affect its shelf life?

Cooking canned tomato sauce will not necessarily affect its shelf life, but it’s essential to store your sauce properly once it’s cooked to avoid spoilage. Store leftover cooked sauce in an airtight container in the fridge, where it will typically last for 3 to 5 days, or freeze it for up to 6 months.

Recipes using canned tomato sauce

Canned tomato sauce is incredibly versatile and can be used in a wide range of dishes. Here are a few ideas to get you started:

  1. Spaghetti sauce: Combine canned tomato sauce with ground meat or vegetables, seasonings, and additional canned tomatoes for a simple yet flavorful spaghetti sauce.
  2. Pizza sauce: Use canned tomato sauce as a base for your homemade pizza, topping it with your favorite cheese, meats, and veggies.
  3. Chili: Boost the flavor of your chili by incorporating canned tomato sauce with the rest of the ingredients before simmering.
  4. Enchilada sauce: Transform canned tomato sauce into a tasty enchilada sauce by adding spices like chili powder, cumin, and garlic powder.

How to incorporate canned tomato sauce into your diet

Canned tomato sauce can be easily added to various dishes to enhance their flavor and nutritional value. Here are some suggestions:

  1. Stir canned tomato sauce into casseroles, stews, or pasta dishes for an extra layer of flavor and richness.
  2. Use canned tomato sauce as the base for homemade soups or curries.
  3. Mix canned tomato sauce with additional spices and seasonings to create a flavorful barbecue marinade for meats or vegetables.
  4. Combine canned tomato sauce with your favorite beans or lentils for a delicious and protein-packed vegetarian meal.

FAQs

Now let’s address some frequently asked questions surrounding the shelf life, storage, and cooking uses of canned tomato sauce.

How long can unopened canned tomato sauce last?

Unopened canned tomato sauce typically has a shelf life of 12 to 18 months when stored correctly. However, always refer to the expiration date printed on the can for a more accurate estimation.

Can you eat canned tomato sauce after the expiration date?

If the can is undamaged and shows no signs of spoilage, it may still be safe to consume canned tomato sauce shortly after the expiration date. However, it’s important to use caution and discard the sauce if it exhibits any signs of spoilage, such as an off smell, mold, or an unusual texture.

How do I know if canned tomato sauce has gone bad?

Look for signs of spoilage, including a bulging or damaged can, foul or off smell, mold, discoloration, or an unusual texture.

What happens if I consume expired canned tomato sauce?

Consuming expired canned tomato sauce can potentially lead to foodborne illnesses if the sauce has spoiled. Always exercise caution and avoid consuming canned tomato sauce if you suspect it has gone bad.

Can I freeze canned tomato sauce to extend its shelf life?

Yes, you can freeze canned tomato sauce for up to 6 months in a freezer-safe container or plastic bag. Be sure to remove any excess air to prevent freezer burn and label and date the container for easy tracking.

Where is the best place to store canned tomato sauce?

Store unopened canned tomato sauce in a cool, dark, and dry place such as a pantry or cupboard. Once opened, transfer the remaining sauce to an airtight container and store it in the refrigerator.

Can I store canned tomato sauce in the fridge?

Unopened canned tomato sauce should be stored in a cool, dark, and dry place. However, once opened, transfer the remaining sauce to an airtight container and store it in the refrigerator.

How can I store canned tomato sauce for long-term use?

Unopened canned tomato sauce should be stored in a cool, dark, and dry place. However, once opened, transfer the remaining sauce to an airtight container and store it in the refrigerator.

How can I store canned tomato sauce for long-term use?

For long-term storage, consider freezing canned tomato sauce in a freezer-safe container, removing any excess air to prevent freezer burn. Label and date the container and use the sauce within 6 months for optimal quality.

Can I store canned tomato sauce in the pantry once opened?

No, once opened, transfer the remaining sauce to an airtight container and store it in the refrigerator to prevent spoilage.

How do I avoid spoilage when storing canned tomato sauce?

To prevent spoilage, store unopened cans in a cool, dark, and dry place, away from heat sources and humidity. Once opened, transfer the sauce to an airtight container, label and date it, and store it in the refrigerator or freezer.

What dishes can I make with canned tomato sauce?

Canned tomato sauce can be used in a wide variety of dishes, such as spaghetti sauce, pizza sauce, chili, enchilada sauce, casseroles, and more.

Does cooking canned tomato sauce affect its shelf life?

Cooking canned tomato sauce does not necessarily impact its shelf life, but it’s crucial to store the sauce properly after cooking. Store cooked sauce in an airtight container in the fridge for 3 to 5 days or freeze for up to 6 months.

Can I use expired canned tomato sauce in my recipes?

Using expired canned tomato sauce is not recommended due to potential spoilage and the risk of foodborne illnesses. Always check for signs of spoilage and discard the sauce if you suspect it has gone bad.

Conclusion

Canned tomato sauce is a versatile and invaluable pantry staple, but like any food product, it’s essentialto follow proper storage and safety guidelines to ensure its quality and longevity. By understanding the shelf life of canned tomato sauce, storing it correctly, and incorporating it into various dishes, you can enjoy the delicious taste and nutritional benefits it has to offer.

Remember, always remain mindful of the tomato sauce expiration date and never consume canned tomato sauce if you suspect it has gone bad. For more information on similar topics, check out this article on ketchup shelf life and storage.

How Long Does Frozen Chicken Breast Last? Your Ultimate Guide

Frozen chicken breast is a staple in many households due to its versatility, ease of cooking, and nutritional benefits. However, it’s essential to know how long frozen chicken breast lasts to ensure we’re consuming safe and quality food.

In this guide, we’ll cover various factors affecting the shelf life of frozen chicken breast, proper storage techniques, safe thawing methods, and recommended cooking times.

Understanding Frozen Chicken Breast Shelf Life

frozen chicken breast how long does it last

Frozen chicken breast refers to the breast portion of a chicken that has been preserved through the freezing process to extend its shelf life. Knowing the shelf life of your frozen chicken breast is crucial for food safety and avoiding waste. Let’s dive into some factors that affect the shelf life of frozen chicken breast, the average shelf life, and how to spot a spoiled one.

Factors that affect shelf life

  1. The temperature of your freezer: Maintain a constant temperature of 0°F or below to ensure the best quality and safety.
  2. The packaging: Proper packaging minimizes exposure to air, preventing freezer burn and extending the shelf life.
  3. The condition of the chicken before freezing: Fresh chicken breast should be frozen within two days of purchasing.

Average shelf life of frozen chicken breast

As per the USDA Food Safety and Inspection Service, frozen chicken breast can last up to 9 months when stored properly at 0°F or below. Please note that the duration may vary based on the factors mentioned earlier.

Signs of spoiled frozen chicken breast

  1. Unpleasant odor: Spoiled chicken breast may emit a strong or sour odor. If you’re unsure, trust your nose and discard it.
  2. Slimy texture: A slippery, slimy surface indicates bacterial growth, and it’s best to discard the chicken in this case.
  3. Discoloration: Off-white or greyish hues on the chicken breast are signs that it’s time to throw it away.
  4. Presence of mold, ice crystals, or freezer burn: While freezer burn doesn’t make the chicken unsafe to consume, it does affect the taste and texture.

Proper Storage Techniques for Frozen Chicken Breast

How Long Does Frozen Chicken Breast Last? Your Ultimate Guide 19

Proper storage techniques are crucial for preserving the quality and safety of frozen chicken breast. The following best practices help ensure the longest possible shelf life:

Temperature requirements for storing frozen chicken breast

Maintaining a consistent temperature of 0°F or below is essential in your freezer. Regularly check your freezer’s temperature with a thermometer, and make the necessary adjustments.

Best storage methods

  1. Plastic wrap: Wrap the chicken breast tightly in plastic wrap, ensuring there are no air pockets.
  2. Freezer bags: Freezer bags are specially designed to withstand cold temperatures and prevent freezer burn. Remove excess air before sealing the bag.
  3. Airtight containers: These are an excellent option for storing chicken breast as they provide a tight seal and keep the smell contained.

Tips for labeling and organizing frozen chicken breast

  1. Label the chicken breast with the date of freezing to track its shelf life.
  2. Organize your freezer in a way that allows for good air circulation; avoid stacking packages on top of each other.
  3. Rotate your chicken breast to follow the First In, First Out (FIFO) principle; consume the oldest packages first.

Safety Guidelines for Thawing Frozen Chicken Breast

Thawing frozen chicken breast is a crucial step in the cooking process. It’s important to be aware of the danger zone for chicken, which is between 40°F to 140°F. In this zone, harmful bacteria can multiply rapidly, leading to foodborne illness. Here are some safe thawing methods:

Safe thawing methods

  1. Refrigerator: Thaw the chicken breast in the refrigerator for 1-2 days before cooking. Place it on a plate or tray to contain any leakage.
  2. Cold water: Submerge the sealed chicken breast in cold water, changing the water every 30 minutes to maintain a constant temperature. A pound of chicken breast typically takes about an hour to thaw this way.
  3. Microwave: Use the defrost setting on your microwave for quick thawing, but be sure to cook the chicken breast immediately afterward.

Precautions to take during the thawing process

  1. Never thaw chicken breast at room temperature, as it can lead to harmful bacterial growth.
  2. Avoid cross-contamination by keeping raw chicken breast away from other food items, utensils, and surfaces.
  3. Wash your hands with soap and water for at least 20 seconds before and after handling raw chicken.

[^1^]: USDA Food Safety and Inspection Service. (2021). Chicken from Farm to Table. https://www.fsis.usda.gov/food-safety/safe-food-handling-and-preparation/poultry/chicken-farm-table

Cooking Frozen Chicken Breast

How Long Does Frozen Chicken Breast Last? Your Ultimate Guide 20

Cooking frozen chicken breast can be a simple and convenient process while maintaining its taste and juiciness. Here are the best cooking methods to try:

Best cooking methods for frozen chicken breast

  1. Baking: Preheat the oven to 375°F and bake frozen chicken breast for 25-30 minutes or until it reaches an internal temperature of 165°F.
  2. Grilling: On a preheated grill, cook the frozen chicken breast for 15-20 minutes on each side or until it reaches the safe internal temperature.
  3. Pan-frying: Cook frozen chicken breast in a skillet on medium heat for 20-25 minutes or until it reaches the desired internal temperature.
  • Baking: 25-30 minutes
  • Grilling: 15-20 minutes per side
  • Pan-frying: 20-25 minutes

Tips for ensuring fully cooked chicken

  1. Use a meat thermometer to ensure the chicken breast reaches an internal temperature of 165°F, as recommended by the USDA Food Safety and Inspection Service[^1^].
  2. Check that the juices run clear when you cut into the thickest part of the chicken breast.
  3. Avoid overcrowding the pan, oven, or grill to ensure even cooking.

FAQs

How long does frozen chicken breast last in the freezer?

Frozen chicken breast can last up to 9 months when stored properly at 0°F or below.

Can I refreeze thawed chicken?

Refreezing thawed chicken is not recommended, as it can negatively affect the texture and taste. Ensure you only thaw the portion you need.

Can I eat chicken that has freezer burn?

Chicken with freezer burn is still safe to consume, but it may have a dry and slightly tougher texture.

Can I cook frozen chicken breast without thawing it first?

Yes, you can cook frozen chicken breast without thawing it first. It typically takes 50% longer than thawed chicken to cook. Keep in mind the cooking times mentioned above for various methods.

Can I use expired frozen chicken breast?

It is generally recommended not to consume expired foods. However, if your frozen chicken breast has been stored correctly, it might still be safe to consume even if it’s past its expiration date. Always inspect the chicken for signs of spoilage, and when in doubt, discard it.