How to Reuse Coffee Bags: 5 Ways to Repurpose Your Daily Coffee!

You drink coffee every day and make a variety of drinks like lattes, macchiatos, and even the occasional Cortado or Café Lungo. But have you ever wondered what happens to your coffee bag after you toss them out? Wonder no more, because this article will show you how to reuse coffee bags!

Maybe you just want to minimize waste and help out the planet. Maybe you have a lot of DIY projects that need material. Either way, knowing how to upcycle coffee bags will save money and take you one step closer to a zero-waste lifestyle.

Keep reading for these nifty coffee bean bag ideas!

Are coffee bags recyclable?

The short answer is no.

Most of these types can’t be recycled because they have a foil lining that makes them too difficult for curbside pickup programs to handle properly and this type also adheres strongly when wet making it very hard if not impossible break down into its individual components so recycling becomes almost meaningless anyway since there’s nothing left worth picking over! Keep reading for our 5 easy ways to reuse coffee bag!

5 Easy Methods on How to Reuse Coffee Bags
how to reuse coffee bags

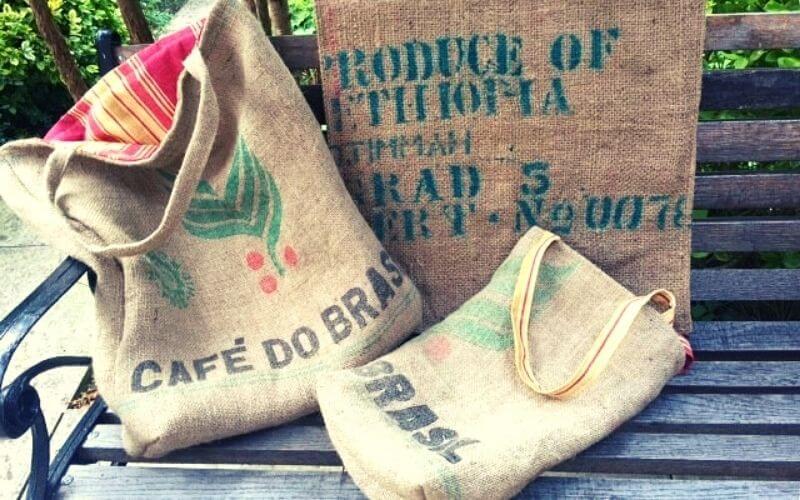
Can you recycle coffee bags? Coffee bags are usually made of aluminum and plastic, as well as a combination of other materials. Mixed products are difficult to recycle as separating these components is just too much work.

Instead, the best option is to reuse or upcycle them. Some people choose to buy from brands that offer recyclable coffee bags, but this can be expensive and hard to find. Coffee bags reusable are cheaper and easily available.

Here are a couple of things you can do to reusable coffee bags.

01. Use Them as Containers for Seedlings:
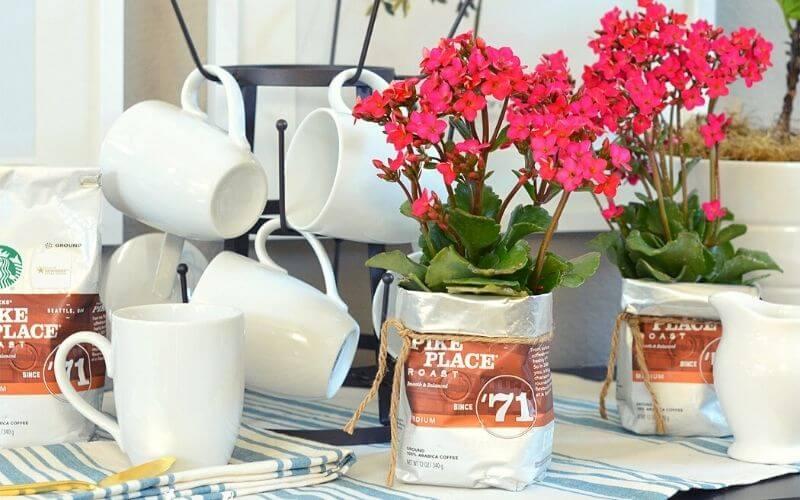
can you recycle coffee bags

If you have a green thumb or like planting, this idea is for you. This is an alternative to using plastic or clay containers for your plants. As a result, it makes for an inexpensive option for gardening, especially if you are a beginner.

Start with a clean and dry empty coffee bag(or plastic coffee bag). Then, puncture a few holes into the bottom of the bag. Fill the bag with potting soil, until the bag is two-thirds full. Next, plant your favorite seeds and allow them to germinate and grow.

Take care of the seedlings until they grow into young plants. Once they are too big for the coffee bags, cut the bags and repot the plants into a bigger container.

Think you’re done with the coffee bean bag? Think again! You can wash and reuse them for the next tip.

02. Repurpose Them for DIY Projects:

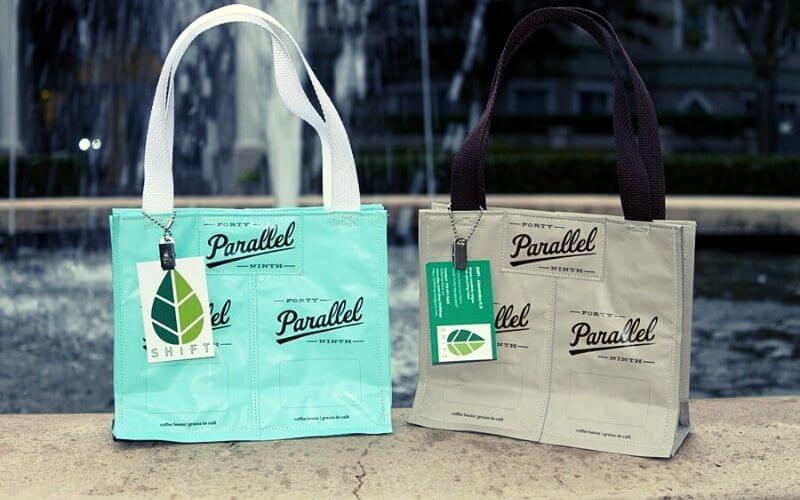
You can easily use fabric glue to turn a stack of empty coffee bags into a tote back. Or, you can use them to decorate jars and containers for herbs and spices, racks of stationeries, utensils, and kitchen tools.

Some people like reusing coffee bags to make clothing for dolls. These include shiny disco skirts, bags, bracelets, and even ribbons for their hair. 

On the other hand, many people into the frugal lifestyle utilize coffee bags as book covers and gift wrappers. This is super easy and affordable; all you need are a pair of scissors and some tape!

03. Turn Them into Easy Halloween Costumes:

‘Tis the season to be spooky, so why not reuse your stash of coffee bags to make a costume for Halloween. Whether you want to make a costume for children or something for yourself, coffee bags will be much sturdier than aluminum foil for silvery costume designs.

The bags can be used to make alien costumes. Just glue them onto some pants and a full-sleeved shirt to make a realistic Martian. You can also add detailing with paint to make a realistic-looking cyborg.

On the other hand, gluing coffee bags onto cardboard boxes makes a really good robot. If you are particularly good with arts and crafts, you can even turn your coffee bags into a Dalek costume.

04. Reuse Plastic Coffee Cans:

A good way to recycle Starbucks coffee bags or plastic containers is to turn them into other household items. For instance, with a handy glue gun and some DIY supplies, you can turn a coffee can into a cozy birdhouse.

On the other hand, an easier option would be to paint over the can and turn them into a holder for your pens and pencils, or even a flower vase. One of the best ways to reuse plastic coffee containers is to convert them to kitchen canisters and store whole spices and baking supplies.

05. Call Up a Recycling Program:

If you don’t want to go through the trouble of turning coffee bags and containers into other things, you can get others to do it for you. Your area may have a program that collects used coffee bags and recycles the ones that can be recycled.

This mainly applies to plastic coffee bags. The bags are melted and turned into solid sheet plastic. They can then be used to make other plastic goods.

Before you sign up for one of these programs, make sure your coffee bean bags can be recycled. Only send in clean, dry coffee bags as wet or dirty bags cannot be shipped to the recycling facility.

Can You Recycle Starbucks Coffee Bags?

Starbuck’s coffee bags are made from a plastic called Polyethylene Terephthalate (PET). This material can be recycled in most communities and the recycling process does not affect quality or taste of what is inside!

You may also like: How Long To Store Coffee Beans: Everything You Need To Know!

Frequently Asked Questions

Below you will find answers to questions people have about reusing coffee bags.

01. Are Coffee Bags Recyclable?

Most coffee bags aren’t recyclable because they are made of any layers of plastic and foil that are fused together. They cannot be separated easily, and so are not usually recycled. Bags made solely from plastic or foil have a better chance of being recycled.

02. How Long Will Coffee Last in Mylar Bags?

Coffee will taste fresh and flavorful for up to 7 weeks when stored in a Mylar bag. When combined with oxygen absorbers, coffee will stay fresh for years in these bags.

03. What Can I Do with Empty Coffee Cans?

As this article has shown, empty coffee cans have a myriad of uses. You can use them to store cookies and cupcakes, as airtight containers for herbs and spices, and even as vases and pen holders.

Wrapping Up

As you can see coffee bags are pretty useful and can be repurposed into a variety of things. If you want to learn how to reuse coffee bags, all you need is your imagination and some basic craft tools.

So the next time you feel guilty about throwing all your coffee bags and containers out, follow one of these tips mentioned above. You’ll have less waste, a fun time, and some useful items to use at home. Happy DIY crafting!
How to Make Cowboy Coffee Chew: The Best Smokeless Dip Alternative

So you’ve taken the first step and decided to quit smoking.

Maybe it was your New Year’s resolution for the year. Or maybe you just want to be a little bit healthier. Either way, it’s a big deal and a great idea.

But quitting smoking is easier said than done. You might be tempted to light a cigarette when you’re stressed, tired, bored, or in need of comfort and familiarity. And nicotine addiction is no joke─ you will feel terrible.

There are several things you can do to help the process of going cold turkey; using nicotine patches; using smokeless dips, and tobacco-free chews. And the cheapest method ever: we’ll tell you how to make Cowboy coffee chew.

Let’s get into this intriguing chewing tobacco alternative─ there’s a good deal to go through!

You may also like: How Much Ground Coffee Per Cup of Water

What is Tobacco Snuff?

Tobacco Snuff

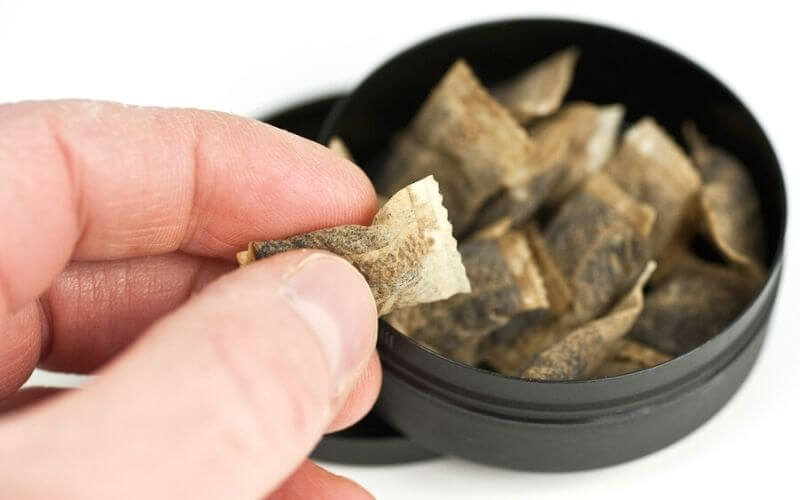
Traditional snuff or dip is finely ground dried tobacco. Snuff comes in two forms, dried or moist. The dried stuff is inhaled through the nasal cavity.

Moist snuff, also known as chew, is placed between your lower cheek or lip and gum. The nicotine is therefore absorbed into the bloodstream through the lining of the mouth.

This kind of chew is both harmful and addictive. While it can be helpful to people who don’t want to quit cold turkey, it may prevent you from eliminating nicotine from your life altogether. Store-bought snuff contains plenty of tobacco and nicotine, which can lead to cancers such as

  • Nasal and Sinus Cancers
  • Oral Cancer
  • Esophageal Cancer
  • Pancreatic Cancer

Other health risks associated with snuff tins include greater chances of strokes, heart disease, pulmonary issues, high blood pressure, heart attacks, and cardiac diseases. Moist snuff can also cause halitosis, tooth decay, yellowing teeth, and gum infections.

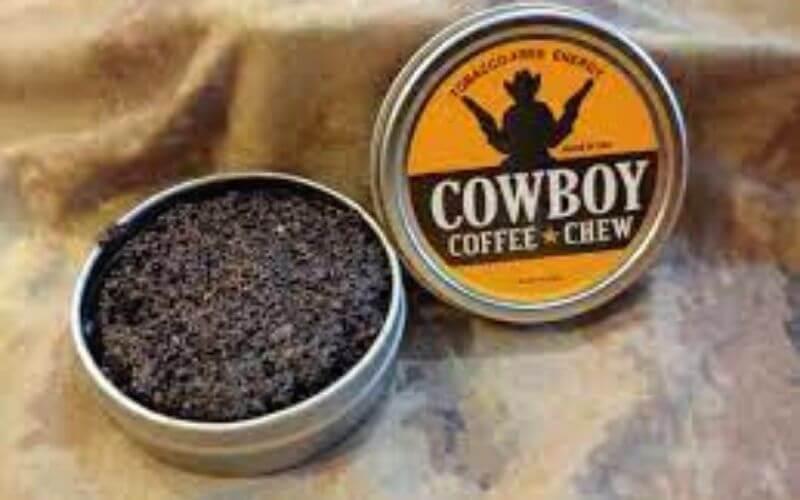
Instead of something that is so obviously bad for you, Cowboy coffee chews are a safer, healthier, and more pleasant alternative. Better yet, why not make them yourself?

Cowboy Coffee Chew: A Quick Intro

[amazon box=”B00PV0KUVI”]

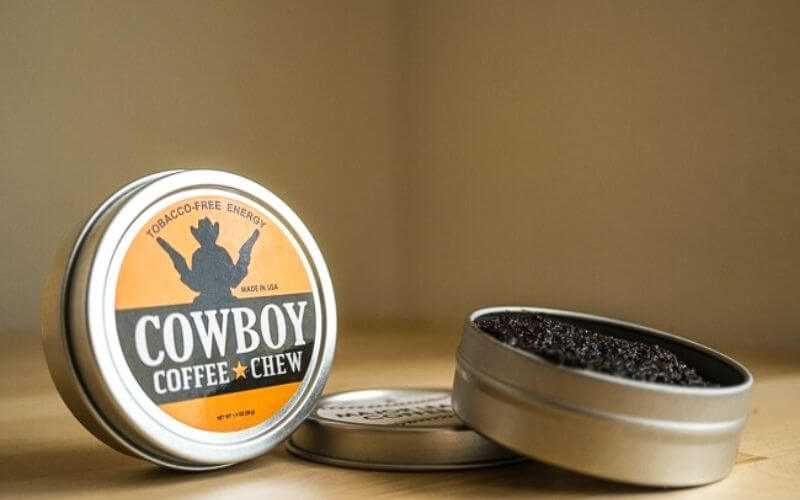
Cowboy Coffee Chew is a good option for those looking to quit smoking or chewing tobacco. It has no tobacco or nicotine, which makes it much safer and healthier for you while making it even faster for you to get over the urge to smoke.

This non-tobacco alternative is a great option for regular chewing tobacco or snuff. As it contains coffee, it has the ability to stimulate you through the caffeine present. 

This stimulating property acts as a substitute for the effects of nicotine. It also suppresses hunger and decreases appetite.

Cowboy coffee dip can be ordered online in bulk and you can easily get a month’s supply to handle your cravings for smoking. Cowboy coffee chew in stores is also a good option, although they might be a little more expensive.

Why is this product so popular? Well, cowboy coffee chew ingredients include things like coffee, honey, creamer, and sugar. As a result, it tastes a lot like a freshly brewed cup of coffee. 

Some people mix some of the coffee chew with a little smokeless tobacco dip during the earlier stage of nicotine withdrawal, as it makes the process easier.

Cowboy coffee chew reviews are full of praise as the product is effective, tastes great, and helps you get over the urge to smoke much more quickly. But if you feel like you need a giant supply of chews, repeatedly buying them can burn a hole through your wallet.

Instead, you can make them at home.

Cowboy Coffee Chew Recipe

how to make cowboy coffee chew

Making cowboy coffee chews at home is a cost-effective and easy way to ensure you have an endless supply of tobacco-free chews at home. Homemade cowboy coffee chew recipes are fairly straightforward, and chances are, you already have all the stuff needed.

The best part? One or two of these chews will give you the caffeine rush of a cup of coffee, so you’ll be alert, awake, and ready to take on the world!

What You Need:

Instructions:

  1. Before you start, line a large baking sheet or tray with parchment paper. Cut out small lengths of parchment paper─ you’ll need these to wrap the individual chews in later.
  2. Grind your coffee beans to a reasonably fine consistency. You don’t want them to be too coarse or ultrafine either. Chewing coffee grounds should be the texture of fine sand, not powder.
  3. In a large bowl, mix the ground coffee, corn syrup, creamer, and honey or molasses. Start with a little bit of the sweetener and add more if needed later. You should aim for the typical chew texture.
  4. Working quickly, pour the mixture onto the baking sheet lined with parchment paper, flattening it out. Once it is level and flattened, cut the chew into bite-sized pieces and wrap them in the lengths of parchment paper.
  5. Lastly, store the wrapped chews in a large airtight container or tin.

It is best to heat the corn syrup gently, as it will warm the chew and make it easier to work with. Some users also suggest warming the individual chews in your pocket or between your hands before putting them in your mouth.

What Makes Cowboy Coffee Chews So Special?

This product is a safer and cleaner version of cowboy chewing tobacco. It has the same texture and will trick your brain into thinking it is getting a dose of nicotine. But besides that, homemade cowboy coffee chews have the following benefits:

  • They contain less sugar
  • They do not have artificial flavoring or preservatives
  • The caffeine will keep you awake and alert
  • They don’t contain any tobacco or nicotine
  • You can add any flavor you want, like chocolate, cinnamon, or caramel
  • They are very cheap to make
  • The texture and flavoring are way better than regular snuff

Still Got Questions?

Here you will find answers to questions people tend to have about making cowboy coffee chew.

01. How Do I Store Cowboy Coffee Chews?

Cowboy coffee chews need to be stored in an airtight container and kept away from heat, light, and humidity.

02. How Much Caffeine is There in a Pinch of Chew?

As each small tin has 3 coffee cups worth of caffeine, a pinch contains enough caffeine to keep you awake for a bit.

03. Does Cowboy Coffee Chew Expire?

While people don’t really talk about their chew expiring, they do tend to become drier over time, until you can’t exactly use them anymore.

04. Can I Mix My Coffee Chew with Tobacco Snuff?

Yes, cutting a little snuff with a pinch of coffee chew is a good way to reduce your intake of tobacco and decrease your nicotine dependence.

05. What are Other Cowboy Chew Flavors?

You can buy Cowboy Chew in flavors like BBQ, sweet hickory, and steak. When made at home, you can add any flavoring you want, so the possibilities are endless.

In a Nutshell

Quitting smoke is a journey and there will be leaps of progress and days full of setbacks. Coping with nicotine dependence is rough and you are encouraged to use whatever it takes to get through the first couple of days. 

While nicotine patches help, we suggest shying away from snuff boxes and chewing tobacco. Instead, use smokeless tobacco alternatives like coffee chews.

Once you know how to make cowboy coffee chews, you have a fun project and can make large batches of these that last for ages. You can experiment with fun flavor combos, skip your morning coffee for a chew, and rest easy knowing that your tobacco alternative is safe and healthy.

How to Use Bunn Coffee Maker: The Ultimate Beginner’s Guide

Have you ever stumbled into your kitchen half-asleep at 6 in the morning, unable to speak until you’ve got your drip-coffee maker running and the first gulp of caffeinated goodness in you? If so, you have the inventor of the Bunn coffee maker to thank.

Why?

The company behind coffee makers like the Bunn GRB Velocity Brew, the Bunn-O-Matic, Bunn 52700 Speed Brew Elite, are credited for inventing pour-over drip coffee makers. The founder of Bunn also created the flat-bottom fluted coffee filter.

Whether you have been using Bunn coffee makers and want to upgrade to a newer model, or you want to start your foray into pour-over drip coffee machines, you may wonder how to use Bunn coffee maker.

Lucky for you, this article will tell you how to get your Bunn coffee maker up and running. If you want a simplified guide on using this line of coffee machines, keep reading to learn more!

What is a Bunn Coffee Maker?

What is a Bunn Coffee Maker

Bunn coffee makers are automatic drip machines that use the pour-over method to brew coffee. They come in a variety of models, but the main difference between them is the brewing capacity. 

You can get single-serve Bunn brewers that make just one cup of coffee, as well as 10-cup coffee makers that can make an entire carafe’s worth of coffee.

But that’s not all. These coffee makers are pretty easy to use, and they can brew a cup of coffee in just a few minutes!

However, most people ask how do Bunn coffee makers work? This is because they have a unique brewing mechanism and pour-over drip coffee makers work differently from automatic drip ones.

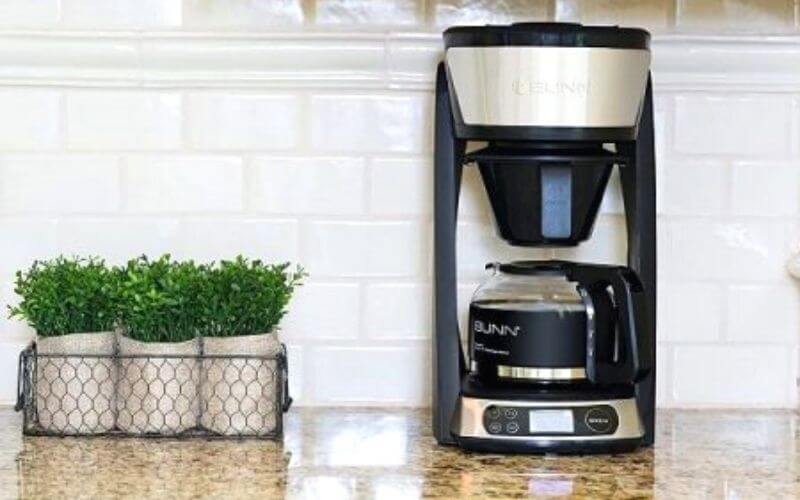
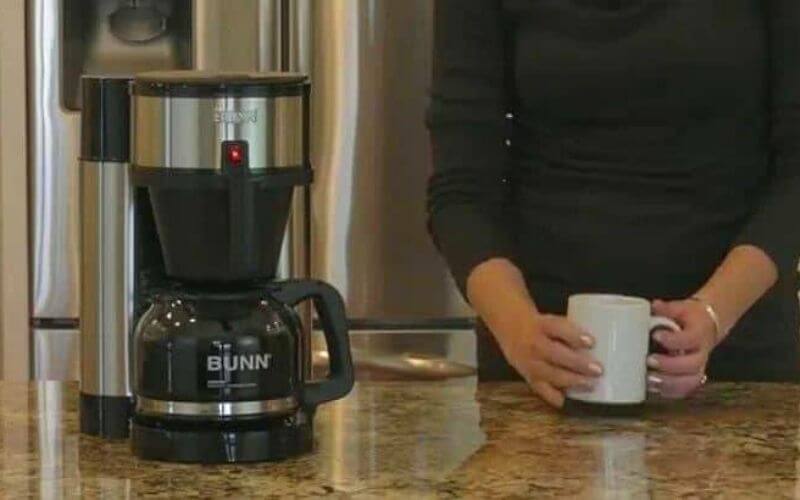
A Bunn coffee maker’s design is attached to its brewing mechanism. These coffee makers have a big tank in the back and a brewer funnel in the front. The front side of most Bunn machines is a carafe warmer that keeps your coffee warm after brewing.

Bunn coffee makers follow a pretty simple process. Once you pour filtered water into the brewer and close the lid, the brewer sends the water to the bottom of the tank via a special pipe. Since the water already inside the water tank is hot, the cold water will push it upwards.

During the brewing process, the showerhead of a Bunn sprays the coffee with hot water─ a bit like the manual pour-over method.

How to Use a Bunn Coffee Maker

how to use bunn coffee maker

If you’ve been wondering ‘How do you start a Bunn coffee maker for the first time?’, you’ve come to the right place. This coffee machine is extremely simple to use and you can use it in any kitchen or office space with a power source.

Along with your Bunn coffee maker, you will need the following things:

First-Time Setup:

If you just unboxed a brand-new Bunn coffee maker, you need to set it up before brewing your cup of joe. It’s not very difficult, but you need to know what you are doing. Remember, don’t plug in the brewer unit before setting it up completely.

Instructions:

  1. During this step make sure the machine is unplugged and switched off.
  2. The water heating switch is generally located on the right bottom side of the coffee maker. Again, make sure the switch is turned off, as it can damage your Bunn device.
  3. Make sure the brew funnel is in place, but do not insert a filter into the coffee maker just yet.
  4. After the machine is set up and the funnel is in the right place, fill the coffee maker with up to 10 cups of fresh water, depending on the model of your brewer. Then, close the lid of the Bunn.
  5. Place the carafe under the dispensing spout on the warmer. This way, if the machine starts brewing, you won’t have a mess on your hands.
  6. The water will take 3 minutes to flow into the tank. Once the reservoir is full, your Bunn coffee maker is ready to brew.

Making the Coffee:

Once your coffee maker is all set up and ready, you can move onto making a steaming cup of coffee.

What You Need to Do:

  1. When the reservoir is full and you are ready to brew coffee, plug the brewer into a power socket.
  2. Then, turn the heating switch on. It will take around 15 minutes for the water to heat up properly.
  3. After that, place your ground coffee and filter paper in the coffee maker.
  4. Fill a carafe with cold water and add it to the brewer. Then set the coffee maker to its brew function.
  5. Place the empty carafe under the brew funnel or dispenser to catch the coffee as it drips. As the coffee is dispensed, you can turn on the warmer function if your brewer has one.
  6. Once your coffee starts brewing, you will have a full carafe of rich and fragrant coffee in minutes.
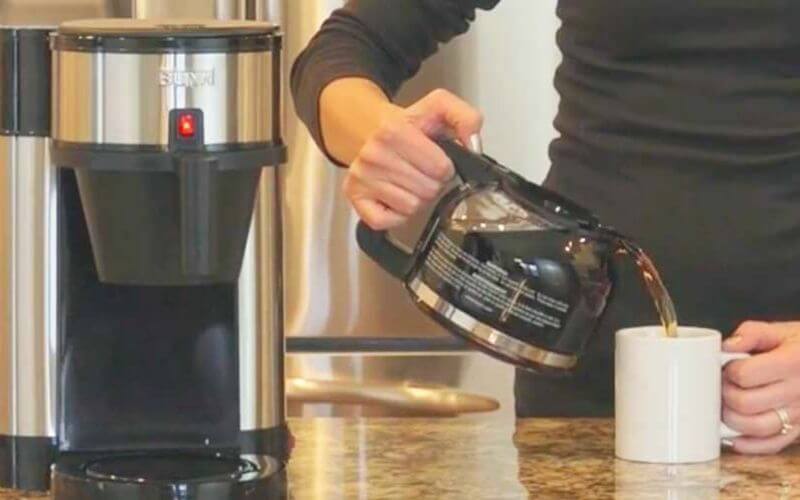
  7. Pour your coffee into a cup, add sweetener if you want, and enjoy!

Why isn’t My Bunn Coffee Maker Heating Up?

If you find that your coffee maker isn’t warming up the water properly, you need to troubleshoot to find out what is wrong with it. The most common reason is usually a faulty heating element or a thermostat not working properly.

However, your Bunn coffee maker can also experience issues with the control board, thermal fuses, and even an ill-functioning water heater switch.

The best thing to do with a Bunn coffee maker that refuses to heat up properly is to contact customer service. They will be able to tell you what to do next and how you may remedy the matter. In most cases, you will need to repair or replace the part of the coffee maker that is malfunctioning.

How to Empty a Bunn Coffee Maker

Draining a coffee maker to get rid of excess water is a good way to make sure you don’t have to make coffee with stale water. This will prevent moisture and fungi from flourishing in the moist environment, and ensure your coffee always tastes crisp and fresh.

  1. Unplug your Bunn coffee maker and place an empty carafe or decanter on the machine’s warming plate.
  2. Fill a second jug or carafe with cold water and pour it into the reservoir to cool the heating element inside the coffee maker. Let the machine rest for about 15 minutes once it has been unplugged and the cold water has been poured in.
  3. Next, remove the coffee carafe from the warming plate and pull the machine’s filter basket from the brewer. Empty the contents of the carafe and filter basket into a sink and rinse them under warm running water.
  4. Turn the round disc over the brew funnel in a counterclockwise motion until it comes off. This component is called the spray head and it helps to evenly spray hot water over the coffee grounds.
  5. Then, hold the Bunn coffee maker securely in your arms as you turn it upside down over a sink to pour out the contents of the tank.  Keep holding the coffee maker over the sink until water stops pouring from any part of the machine.
  6. Replace the spray head by screwing it back on into the brewer unit. Set the filter basket and glass coffee carafe back into their original positions and refill the reservoir with clean water if you want to brew coffee right away.
  7. Wait for at least 5 minutes before switching the Bunn coffee maker on again once it has been emptied and then refilled.

Still Have Questions?

Below you’ll find answers to questions we get asked the most about using a Bunn coffee maker.

01. How Long Does It Take for a Bunn Coffee Maker to Heat the Water?

It generally takes a Bunn coffee maker about 15 minutes to heat the water in it. However, this may vary slightly depending on the exact model you purchased.

02. Should I Always Leave My Bunn Coffee Maker on All the Time?

You can do so, but leaving water in your reservoir can invite a whole horde of bacteria and nasty germs to live there. Your coffee will also have a stale taste when brewed. 

Because of this, you need to fill the reservoir to keep the brewer on all the time, but empty it out and refill it with fresh water just before making coffee.

03. Can I Clean a Bunn Coffee Maker with Vinegar?

To remove deposits from inside your coffee maker, fill the brewer with equal parts water and white vinegar and run this mixture through the Bunn device. For more details, check out how to clean your coffee maker in detail.

04. How Much Coffee Do I Put in a Bunn Coffee Maker?

Depending on how strong you like your coffee, add one to two heaping tablespoons of coffee into the brewer for each cup.

05. Do Bunn Coffee Makers Use a Lot of Electricity?

Because Bunn coffee makers brew coffee in a very short time, they need a lot of electricity. As a result, this may translate to a steeper electricity bill.

In Conclusion

A good cup of coffee soothes the soul and bolsters the spirit on the bleakest of days. If you are always on the run, a good coffee maker like Bunn pour-over machines will whip up a quick cup of joe in no time at all. 

How to use a Bunn coffee maker may be a common question for those new to this kind of appliance, but once you use one a few times, you’ll get a hang of them quickly.

If you have a Bunn coffee maker sitting in its box in your kitchen, I hope this guide has inspired you to take it out, set it up, and brew yourself a lovely pot of coffee. Sit back with a nice dessert and enjoy your coffee─ you deserve a nice little treat!

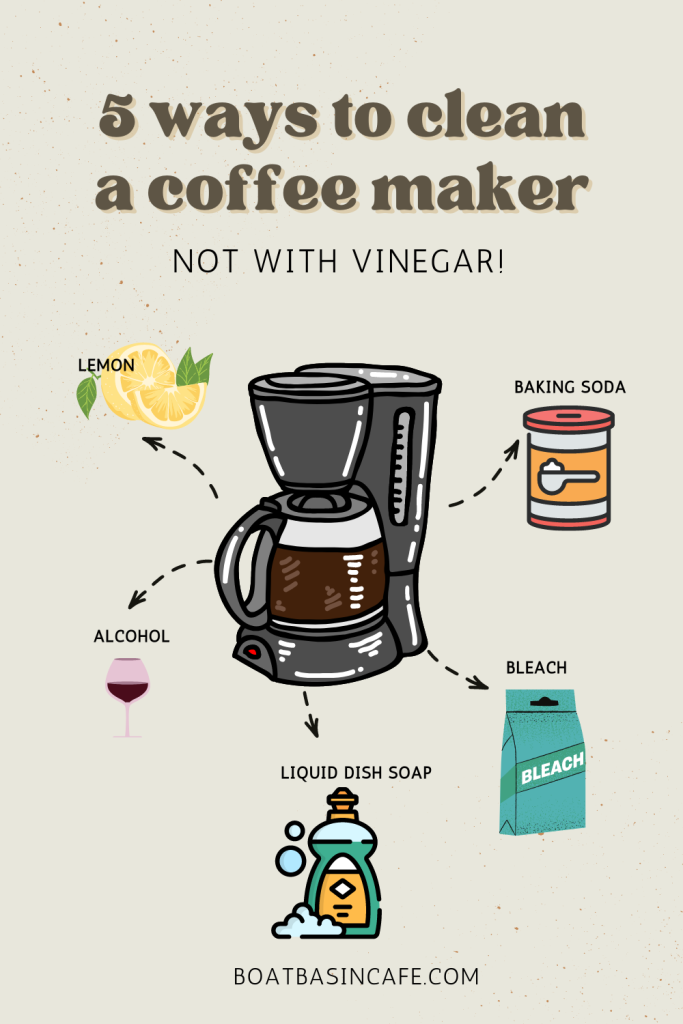
How to Clean a Coffee Maker (5 different ways But Not with Vinegar!)

There is nothing better than to start the morning with a good cup of coffee and its warm smell. La Roque called it “the King of Perfumes”. Whether it is to fix a hangover or to get a mid-day boost, we simply can’t live without coffee! 

As much as we love this bitter, roasted drink, do we ever invest the time to take care of the machine?

Cleaning a coffee maker is very important especially if you’re a regular coffee drinker. These machines collect residue and grime that can result in germs and bacteria. 

If you want to avoid this nasty situation, check out our key ways on how to cleanse coffee makers without vinegar!

The Problem with Vinegar for Coffee Maker

Vinegar is actually a very popular ingredient for cleaning up coffee machines and other kitchen gadgets. This is because vinegar does a good job in removing stains and bacteria; the downside, however, is the awful smell!

We might be able to handle the smell if used on countertops or the oven. But imagine making a fresh cup of coffee and smelling the vinegar in it. Is there anything more horrific than that? 

You might be wondering, can you use apple cider vinegar to clean a coffee pot? The answer remains the same. 

When you run vinegar through the coffee maker, it takes at least five/six sessions to properly remove the smell from the machine. The acidic nature of the vinegar can also interfere with the taste of your coffee. 

Besides, why even bother with vinegar when there are plenty of alternatives that work well if not better! The best way to rinse coffee makers is not with vinegar.

Here are our favorite ways to polish coffee makers without vinegar.

How to Clean a Coffee Maker with Lemon

Clean a Coffee Maker with Lemon

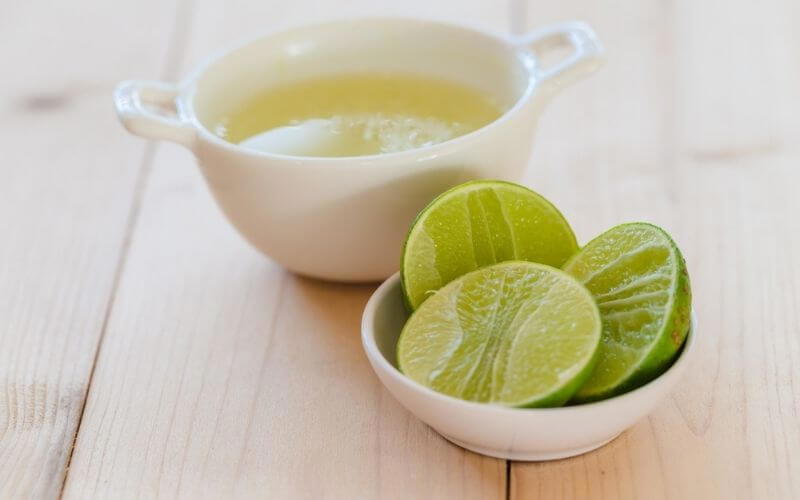
Lemon is a popular alternative to vinegar as both of them are highly acidic. They both deeply remove all the buildups and grimes from your coffee machine. 

But lemon smells wonderful and isn’t as abrasive as vinegar. It is one of the best ways to clean a coffee pot. 

So here’s how you use lemon to disinfect coffee makers

Step 1: Squeeze two lemons and dilute the juice with water

Step 2: Run a cycle using only water to soften the buildups and to remove as much coffee residue as possible.

Step 3: Add half a cup of lemon juice (two lemons) with the same amount of water and pour them into the water reservoir. 

Step 4: Let the mixture sit there for 10 minutes to break down the grimes and grease. Then add a filter and turn the machine on.

Step 5: Run the machine for one or two cycles until you see the water turning brown and dirty. 

Step 6: Remove the dirt water and continue the same brewing process using clean water two more times.

Tip: You can use denture tablets instead of lemon to remove all the buildup water particles.

Why Baking Soda is a Better Alternative

Baking soda is a mild alkaline substance that is safe to use on various surfaces, including the interior of your coffee maker. It is non-corrosive and non-toxic, making it a safer option than vinegar.

Additionally, baking soda is known for its ability to absorb odors, which can help eliminate any unpleasant smells in your coffee maker.

If you are concerned about using baking soda to disinfect your coffee brewing appliance, I entirely understand. After all, no one wants to endanger their favourite coffee maker or leave any harmful residues.

Still, I’d like to reassure you that using baking soda to clean your coffee maker is a safe and effective method. Baking soda is a natural and gentle disinfectant that can help remove any residue or blemishes from your coffee maker without causing any damage.

To clean your coffee maker with baking soda, simply mix a few teaspoons of baking soda with water to make a paste, then apply the mixture on the interior of the coffee maker and let it sit for a few minutes before washing it out with clean water.

You may also clean the inside of your coffee maker by running it through a mixture of water and baking soda.

How to Cleanse with Baking Soda

Cleanse with Baking Soda

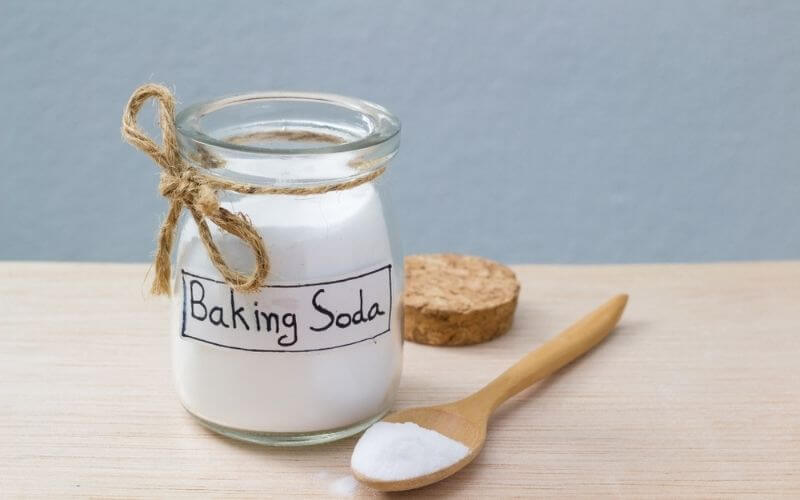
Baking soda is a very common cleaning ingredient that can be found in every household. So this method basically cost nothing!

Baking soda is a mild abrasive and natural agent for removing deep gunks. As it is not harsh enough, your precious coffee machine won’t be damaged in any way. 

Plus, it smells like nothing! So instead of descaling coffee maker with vinegar, wash it with baking soda.

Here’s how you use baking soda to sterilize coffee makers: 

Step 1: For your drip coffee maker, baking soda is a very quick and easy method. Take 1 cup of hot water and ¼ cup baking soda.

Step 2: Add the combination inside the reserve tank and let the soda dissolve.

Step 3: Do your usual brewing and let the baking soda to do its magic. It will run through the crate and slowly remove all the build-up grimes from the surface.

Step 4: Pour the dirty water into the skins and repeat the process if necessary. 

Step 5: If your pot is clean at this point, use fresh tap water to run two/three more cycles to remove the soda completely. repeat this until the water looks clean and clear.  

How to Cleanse Coffee maker with Bleach

Cleanse Coffee maker with Bleach

Although it seems quite intimidating and abrasive, bleach is a very good ingredient to deep-clean a coffee maker. This is only applicable if you haven’t washed your machine in a very long time. 

Of course, you are not going to use direct bleach! Direct bleach is very dangerous and can potentially damage your machine and even your skin. Instead, you will be using bleach water. 

Step 1: Mix 4 cups of water and 2 tablespoons of bleach into a bowl. That’s more than enough for your coffee machine.

Step 2: Place a filter paper in coffee makers.

Step 3: Pour the bleach-water mixture into the coffee maker and add more water if necessary. 

Step 4: Turn on the machine and let it run for a few minutes. Then turn the machine off and check if it needs another round of brewing or not. 

Step 5: Wash the coffee maker at least three more times with fresh tap water to remove all breach particles from the machine. The pot will become squeaky clean and look brand new!

Tip: Instead of bleach, you can also use hydrogen peroxide following the same method. 

Disassembling the Coffee Maker: Cleaning with Liquid Dish Soap

how to clean a coffee maker

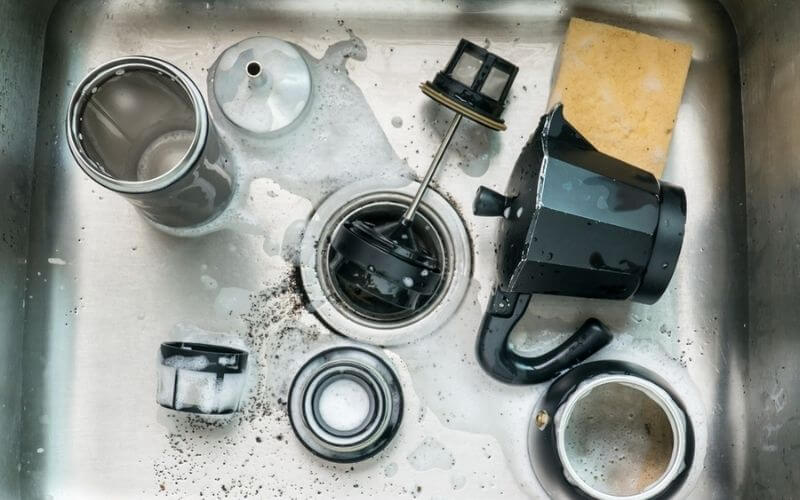
So far we have discussed how to clean the inner coffee-making pot. The other parts of coffee makers can harbor bacteria and mold too. 

You don’t have to do this every week. But doing thorough cleaning once a month can improve the performance and durability of your machine.

Step 1: Disassemble the brew basket, the pot, and all removable parts. 

Step 2: Submerge the parts in warm soapy water for half an hour. If the grime is too thick, you can leave them for an hour.

Step 3:  Use a dishcloth or a sponge to gently scrape off any water buildup, grime, and grease. Be careful with glass pots and they are easily breakable.

Step 4: Using a wet rag, gently wipe the outside of the coffee machine. You can utilize a little bit of soap if necessary. But be careful not to soak it with water. Wipe off all water using a dry towel after cleanup. 

Step 5: Dry each part and put them back in their respective places. Now you have a super fresh, clean coffee machine ready for a brew.

Tip: Some machines have parts that can be cleaned in the dishwasher. Check the manual of your coffee machine to see if it’s dishwasher safe or not.

What about Alcohol? 

Yup! You can use alcohol to wipe coffee makers, and it works superbly! 

Hard liquors such as gin, vodka, rum, whisky are really effective when cleaning up coffee makers. 

All you have to do is pour some of it straight into the water reservoir and run the alcohol-water through the brewing cycle. You will be needing around 25% alcohol to weaken the buildups. 

Easy Maintenance Tips for Coffee Makers

Even though cleaning coffee makers seems like a fairly simple task, we often make mistakes that cost us too much in the long run. So here is our list of some things to consider while cleaning coffee makers:

  • Always check the instruction manual and warranty of coffee makers. If there is some advice or warnings, you have to know. Some coffee makers strictly mention not using certain chemicals. If you do, there is a chance of losing the warranty. 
  • Keep the machine dry when you’re not using it. So a good idea would be to keep the lids open. 
  • Don’t keep water on the reservoir 24/7. This results in water buildup and gradual browning of the pot.
  • Rinse the brew basket after each use and make this a habit. 

Why You Should Sanitize Coffee Makers More!

Sanitize Coffee Makers

Let’s be honest, none of us cleans our coffee maker as much as we should. They are filled with leftover coffee gunks and water buildup. 

Apart from usual hygiene issues, there are much more severe things that happen if you don’t wash coffee makers properly. 

  • Your coffee won’t taste good. This is a pretty obvious one. Even if you buy the most expensive Brazilian beans, it would taste ordinary simply because of poor cleanups. 
  • A coffee machine is basically heaven for molds and bacteria. It’s wet, warm, damp, and dark. So if you’re not consistent with cleanup, you will be drinking little pieces or germs with each cup. Yech!
  • If you don’t polish coffee makers regularly, they will clog up and the water will stop flowing. Some even start to leak. 
  • Durability is another thing we need to keep in mind. Coffee makers are not cheap! They cost a substantive amount of money. Not cleaning it regularly shortens the lifespan of the device and you will end up replacing it a few years later.

Takeaway:

Regular cleanup not only keeps coffee makers looking shiny and new, but also enhances the flavor and taste of your coffee. 

Now that you know how to clean a coffee maker without vinegar, you can try one of our best ways to clean your coffee pot without making it smell bad and acidic. 

It doesn’t really matter which method you are following, as long as you are consistent and taking care of your favorite coffee maker, it will serve you for a long time. 

Do you have any other tips to easily clean a coffee maker? Let us know in the comments down below!

Pin Later

How to Clean a Coffee Maker (5 different ways But Not with Vinegar!)

How to Make Chocolate Covered Coffee Beans at Home : The Easiest Way

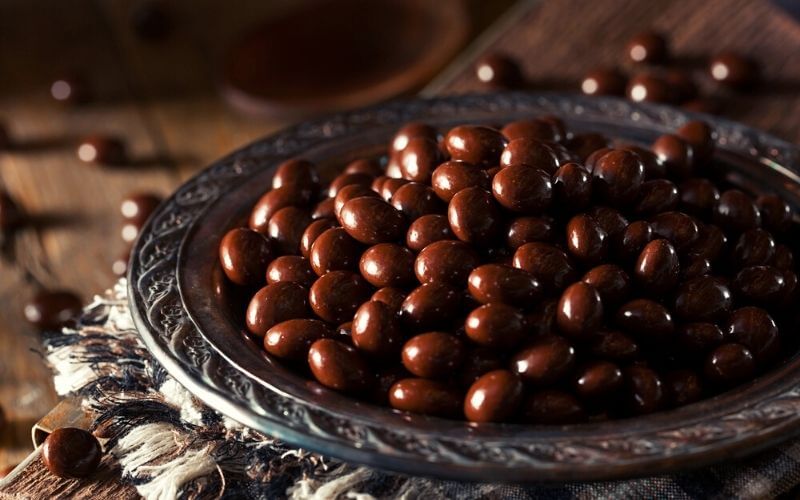
Although I am a passionate tea person, you bring a jar of chocolate covered coffee beans and I will lose my mind. They are so flavorful and delicious that it’s hard to stop eating them. How to make chocolate covered coffee beans at home?

I once made the mistake of having too many of them around 9 pm at night. You can guess what it did to my non-coffee-drinking body. I was awake till 5 am and wondered why I can’t fall asleep! 

These beans are like small capsules of energy that you can carry around as your mid-day snack. 

There are so many different brands that make various versions of these chocolate-espresso beans. Even starbucks has some! But guess what, they are pretty pricey to buy. And it’s so easy to make that I see no point of not doing it by myself. 

As a serial procrastinator, everything in life seems like too much work. So when I say, this recipe is easy, trust me. It only takes 10 minutes to make homemade chocolate covered coffee beans!

You may also like : How Much Caffeine in Chocolate Covered Espresso Beans?

How to Make Chocolate Covered Coffee Beans at Home : Chocolate Covered Coffee Beans Recipe

How to Make Chocolate Covered Coffee Beans at Home

Chocolate Covered Coffee Beans

How to Make Chocolate Covered Coffee Beans at Home : The Easiest Way 1

As a serial procrastinator, everything in life seems like too much work. So when I say, this recipe is easy, trust me. It only takes 10 minutes to make homemade chocolate covered coffee beans!

  • Measuring cup
  • Fork
  • 100 grams chocolate bar (or 1 bag of chocolate chips)
  • ⅓ cup coffee beans
  • Cocoa powder (optional)
  • Coconut flakes (optional)
  • Icing sugar (optional)
  • Melted white chocolate
  • Parchment paper
  1. Put a saucepan on the burner and boil some water. Then reduce the heat to simmer.  

  2.  Break your chocolate bar into small pieces and add it into a heat-proof bowl. You can also use chocolate chips to make the melting process faster. 

  3.  Put the bowl on the saucepan so the heat starts to melt the chocolates. Stir it continuously to have a smooth, buttery consistency. 

  4.  When all the chocolate melts properly, remove it from the what and set aside. 

  5. Bring out your cocoa beans and add them into the melted chocolates. Mix them thoroughly so each bean gets a generous coating of rich, creamy chocolate.

  6. Lay down some parchment paper on a baking tray. Then use a fork to carefully take out each one of the evans.

  7. Put the beans on the parchment paper. Do not put them too close to each other. Otherwise they will all stick together. 

  8. Transfer the trey immediately to your freezer and allow them to completely cool down and set. This might take 1 hour to 3 depending on the climate you live in. for colder climates, it might only take half an hour, 

  9. When you bring them out of the freezer, apply a light coating of cocoa powder or melted chocolate. You can add whatever coating you want to this. So go creative!

  10. And there you go! Your DIY chocolate covered cocoa beans are ready for consumption!

  • You can use a microwave to melt your chocolate. But for that, bring out the pot after every 30 seconds and give a stirr. Then put it back in the microwave. Continue this until everything is properly melted. 
  • Do a double dipping to get a thicker layer of chocolate. For that, freeze for 20 minutes then dip the beans into the chocolate again. 
  • Add crushed coconut flakes on top of the beans before putting them in the freezer. This will add a tropical flavor to the recipe. 
  • You can use different types of nuts following the same process to have a jar full of delicious chocolate treats! 
  • Put them in a glass jar and tie a ribbon around it. And now you have the perfect gift to give to your loved ones!

Milk Chocolate vs. Dark Chocolate

This is an endless debate that seems to have no right answer. Most chocolate covered coffee beans use dark chocolate as they have a higher caffeine content than milk chocolate. Dark chocolate coffee beans add a certain richness to the roasted coffee beans that feels very addictive.

On the other hand, the sweetness and creaminess of milk chocolate is a great companion for bitter coffee beans. These two together create a balanced favour in your mouth. So at the end of the day, it’s a preference thing.

Finding The Right Espresso Beans

How to Make Chocolate Covered Coffee Beans at Home : The Easiest Way 2

You might think all coffee beans should work for this but no! The market is saturated with low-quality beans that taste horrible. You need to look for ‘dark roasted beans’ instead of “espresso beans”. 

This is the part where spending some extra bucks is more than necessary. Chocolate coated coffee beans are not a regular food item, they are a luxury and a delicacy. So if you plan to make them at home, you have to choose the best ingredients available. 

Dark roasted beans have a great crunch to them. They are also much easier to chew. So your jaw won’t get tired after eating a few of them. You can basically binge-eat a whole jar in one setting.

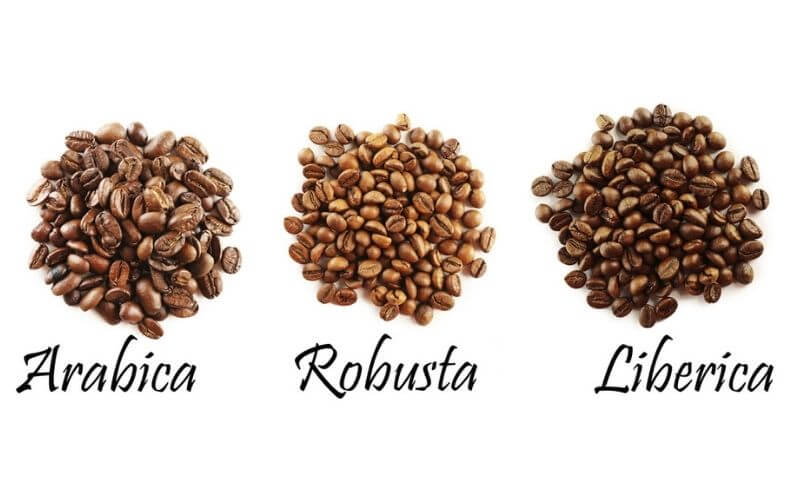
Now let’s talk about the type of coffee beans available. Some of the most popular types are: Arabica, Robusta, ibera and Excelsa. The one we would be discussing today are the first two.

How to Make Chocolate Covered Coffee Beans at Home : The Easiest Way 3

Arabica beans are the most common types to find around the world. If you go to any local coffee shop and order a coffee, chances are they will prove you an espresso made with arabica beans. 

They are very rich in quality and taste delicious. The bitterness is not too intense making them perfect for chocolate-covered snaking. 

Robusta beans are 40% of the world’s whole coffee consumption. They are mostly found in instant coffee, espresso and filler in grounded coffee blends. Their other name is coffea canephora. 

They taste much bitter and earthy compared to Arabica beans. This is due to their high caffeine level. So might not be the best choice for making chocolate-covered coffee beans snack.

Liberica beans are mostly found in Liberica hence the name. They are quite large compared to average coffee beans. This can be a downside if you are looking for smaller bite size options. 

Liberica beans are also quite rare to find in local markets. But if you can get a hold of them, surely try as they have a very rich flavor profile.

Excelsa beans are a fairly new option as they were only discovered a century ago. They are unfortunately not that common either. However, they have a similar taste to Arabica beans.

Are Chocolate Covered Coffee Beans Caffeinated?

They are individual pieces of coffee beans, of course they have caffeine in them. Whether that number is significant or not is a whole other story. 

If you are planning to eat this snack as an alternative to regular coffee, you won’t get the same amount of caffeine in your system unless you consume a considerable amount, of course. Now the next question you might have is, how much caffeine is in chocolate covered coffee beans?

An average chocolate covered coffee bean has around 3mg of caffeine in it. So for 20 pieces, you only consume 60-70mg of caffeine. 

Compare this to a cup of coffee. A standard cup of coffee contains around 200mg of caffeine! The difference needs no explanation. 

So if you are trying to limit your caffeine intake, there probably isn’t a better way than this. 

Are Chocolate Covered Coffee Beans Bad for Health?

dark chocolate coffee beans

Quite the opposite actually. Chocolate covered coffee beans are one of the healthiest chocolate-based snacks as it contains little to no sugar. Apart from this, there are other health benefits as well:

Antioxidants:

These small bite size snacks are jammed with antioxidants. Both coffee and dark chocolate contain a type of antioxidant called flavanols. This antioxidant is known for its ability to fortify the cells and fidgeting vascular diseases.

So if you are a heart patient or have type 2 Diabetes, this is a very healthy, nutritious thing for you to try. Some studies believe that dark chocolate can help reduce blood pressure level. 

If you suffer from heavy menstrual cramps every month, this snack can really help to decrease the lower body pain. 

65% dark chocolate is known for their ability to reduce the risk of high cholesterol. So whoever says chocolate makes you fat, knows nothing. Chocolate does not increase your weight, sugar does. 

Energy Boosters:

As we have mentioned these chocolate coated coffee beans contain little doses of caffeine, they are going to boost your energy level. Maybe not as much as a cup of coffee, but good enough to keep you energized throughout the day. 

Munching on coffee beans is much healthier than drinking cups after cups of coffee all day. Plus your breath doesn’t stink of old coffee anymore! Win-win for me!

Healthy Midday Snack:

If you’re anything like me, you need something to chew or bite right after having a big lunch. I don’t know what it is, but I immediately crave something around 4 o’clock in the afternoon. 

That time is not practical enough for a high-calorie snack. So having something like this in a jar right at the desk is super convenient. 

If you’re on a diet and trying to limit your calorie intake, trying this snack is  a great way to keep your mouth busy while not consuming too much. And of course, it does not feel like a diet at all as these beans are rich and delicious. Starbucks chocolate covered espresso beans is an easy option if you don’t want to make it at home.

What Happens If You Eat Too Many Chocolate-Covered Coffee Beans?

How to Make Chocolate Covered Coffee Beans at Home : The Easiest Way 4

Although dark chocolate coffee beans have a very small amount of caffeine in them, binge eating an entire bag of them will add up. Eating coffee beans has a faster effect on our blood caffeine level than drinking them. Studies show that you will feel the effect of caffeine faster if you consume them through chewing.

Now that this is clear, let’s talk about what would happen if you eat too much chocolate-covered espresso beans. Firstly, you will get a spike of caffeine in your bloodstream which can result in restlessness, dehydration, sleep deprivation and headache

For pregnant women, they can experience high anxiety and nausea. Although none of these symptoms are long lasting, they surely do not feel good. The caffeine will go out of your system within 8 hours but during that time, you might feel bloated, heartburn and even diarrhea. 

So consume edible coffee beans in moderation and treat this snack as the delicacy that it is!

Verdict 

There you have it. The internet is filled with many different recipes and they can feel too confusing. 

We tried to provide you the easiest way to make this delicious treat. We just love the idea of consuming coffee and chocolate in a healthy, tasty manner. 

So what are you waiting for? Go and make some right now. They only take 5 minutes of preparation anyway!

Happy Caffeinating!

Pin Later

How to Make Chocolate Covered Coffee Beans at Home : The Easiest Way

How to Make Drip Coffee: Brewing A Robust, Hearty Cup of Joe

A simple cup of drip coffee may be one of the most underrated beverages out there. Of course, nothing beats a cup of lovingly brewed espresso. And we get the charms of things like pour-over coffee or the machinations of a Moka pot.

But sometimes, like during a quick break at work, or the end of a long day, you need a decent cup of coffee that brews quickly, doesn’t need 30 minutes to prepare, and simply fills you with that caffeinated warmth and comfort.

Besides that, a manual drip coffee maker is one of the cheapest ways to make a strong cup of coffee. And if you want to up your game and put your coffee maker at home to good use, we’ll tell you how to make drip coffee properly.

You may also like: How to make homemade cowboy coffee chew

What You Need: The Right Components

How to Make Drip Coffee

When it comes to making a slow drip coffee maker (or any kind of coffee really), you get what you give. Because of this, you need good ingredients and the right kind of equipment for a solid brew.

Coffee Beans:

To make a good cup of coffee, you need to start with great coffee beans. If you have a drip coffee maker, steer clear of pre-ground coffee. Get quality coffee beans and grind them yourself.

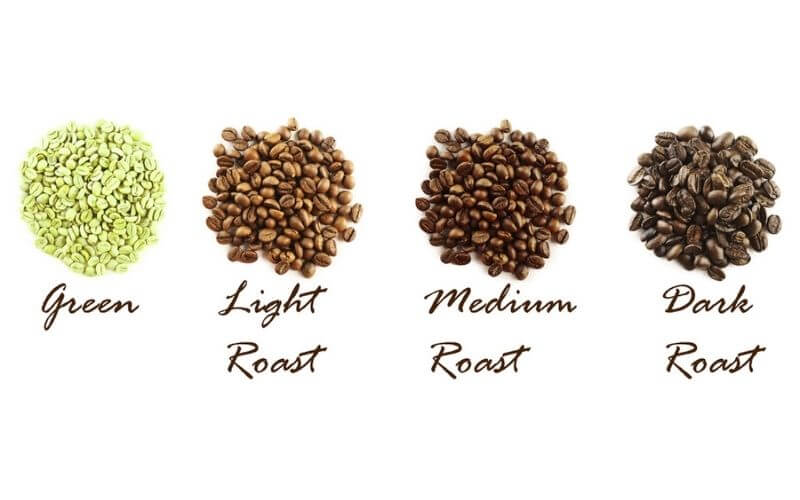
A medium or dark roast is a good idea, especially if you want a chilled drink like those made with Japanese drip coffee.

Grind Size:

If your coffee beans are ground too finely, your coffee will be over-extracted and bitter. You need to strike the right balance with your drip coffee grind size.

On the other hand, if the coffee grains are too big the water will pass through them quickly, resulting in under-extracted coffee that is flat and weak.

For most auto-drip coffee makers, you will need a fine or medium grind based on the kind of drip coffee filters. If you have flat bottom filters, a medium grind with a sand-like texture is best. A medium-fine grind works well with cone-shaped filters.

The Right Ratio:

Unlike espresso, you can make drip coffee without precise measurements. However, you still need the right amounts for a good tasting brew.

The drip coffee ratio is something like one tablespoon of coffee for every cup of water. In other words, you need two tablespoons of ground coffee for every 16 ounces of water.

Water:

This might sound like a no-brainer. Any kind of water should do, right? Wrong.

Tap water contains lots of minerals and these alter the taste of your cup of coffee. Filtered water is the best way to go.

Temperature:

Brewing temperature is one of the most important factors when brewing drip coffee or any other brewing method.

The best temperature for drip coffee is between 195- and 205-degrees Fahrenheit. Using a thermometer is the best way to ensure a great cup every time.

The Drip Coffee Maker:

Most people think you can only make a good cup of coffee with an expensive espresso machine. But this couldn’t be further from the truth. You need just a basic automatic coffee maker and not one of the pricier models.

While we suggest avoiding the super cheap ones as they make poor coffee and break down easily. You can get a one cup drip coffee maker or pour over drip coffee maker that is convenient and affordable.

A hand drip coffee maker, like the Blue Bottle drip coffee works because you pour the water over the ground coffee.

Pour-over coffee instructions are easy and you have total control over the process. A drip coffee maker does the pouring for you, so it is a good idea to make sure it does the job well.

How to Brew Coffee with an Automatic Drip Coffee Maker

How to Make Drip Coffee: Brewing A Robust, Hearty Cup of Joe 5

In this section, we outline how you can make coffee with a drip coffee machine in the fastest and easiest way.

  1. Grind your roasted coffee beans to the right grind size (medium-fine in most cases).
  2. Place a coffee filter in the filter basket. All automatic drip coffee makers come with a filter basket located usually right under the brew head (where the hot water is dispensed). Make sure your filter has been rinsed thoroughly.
  3. Add one tablespoon of coffee to the paper filter for every cup (8 oz) of coffee you want to make. You can a little more or less if you want a weaker or stronger cup.
  4. Fill the reservoir with cold and filtered water. For every cup of coffee, you want to make, add 8 ounces of water.
  5. Press the start button to start the coffee maker’s brew cycle. A majority of automatic drip coffee makers will have a simple “start” button that is easy to locate.
  6. Kill the heat as soon as your coffee is done brewing. This will prevent any burnt or bitter flavors in your brew. The best pour-over coffee method works because after they are brewed, the coffee can settle into its flavor without disruption. 

On the other hand, the hot plate of a drip coffee maker overheats the coffee and wrecks the taste. Remove the carafe from the coffee maker as soon as possible.

Customizing Your Cup of Coffee

Here’s how you can make your cup of drip coffee taste much better.

  • For a strong cup of coffee, use a finer grind or use 6-4 ounces of water instead.
  • For a milder cup of coffee, use a coarser grind, or a smaller amount of coffee.
  • If you want a coffee with fruity or floral notes, brew light or blond roast coffee beans.
  • If you want a coffee with woody, smokey, or cocoa notes, brew darker roast beans.
  • You can also use flavored syrups or dairy to include notes of caramel, toffee, hazelnut, mocha, or vanilla in your coffee.
  • Pour your brewed coffee into a thermal carafe instead of leaving it in the glass carafe on the hot plate. Using a hot plate will add an unwanted bitterness as the coffee compounds get burnt and over-extracted.
  • Measure your ingredients by weight instead of volume. This will give every cup of coffee a consistent taste and make it taste more like something you would get in a restaurant or coffee shop. Using 15 grams of coffee for every 225 grams of water is a good place to start.

FAQs

Here we answer questions people often have about brewing coffee with drip coffee makers.

01. How Do You Use Drip Coffee Maker?

Using a drip coffee maker is pretty straightforward. You just have to add the needed amount of ground coffee to the filter basket and pour water into the reservoir. Press the start button and wait for the machine to dispense the brewed coffee.

02. What is a Pour Over Coffee Maker?

The pour-over method involves pouring hot water over ground coffee in a filter. The water drains through the coffee and filter, so the brewed coffee pours directly into the carafe or mug.

This tells us that there isn’t much of a pour-over coffee maker, as you just have to pour hot water from a kettle directly over the grounds.

03. How Do You Make Pour-Over Coffee?

  1. Bring around 600 grams (20 oz) of water in a kettle to a boil.
  2. Grind 30 grams of coffee (3 tbsp) until they have the texture of sea salt. Using light or medium roast coffee gives the best flavor for this method of brewing.
  3. Set a filter in the cup or carafe of your choice. You might have to wet the filter first.
  4. Add the ground coffee to the filter and gently tap or shake it to level the surface of the grounds.
  5. Pour just enough water to cover the ground coffee which lets the coffee “bloom.” Then wait 45 seconds. This step allows the carbon dioxide to escape from the coffee which helps improve the overall flavor.
  6. After the coffee has bloomed, begin pouring the remaining hot water over the coffee in small circular motions. Focus the pouring mostly in the inner circle, pouring near the edges occasionally the grounds keep the grounds wet. For the first pour, add about 7 ounces of water.
  7. If you pour slowly, you can maintain a constant pour and let it filter at the same rate (which is ideal for the best flavor). Or you can pour in 7-ounce batches at a time. Make sure the grounds don’t dry up.
  8. After the coffee is brewed, remove the filter and enjoy your drink.

04. How Do You Make Cafe Bustelo in a Drip Coffee Maker?

  1. Use a drip coffee maker and a washable filter, just like many any cup of coffee.
  2. Place a rounded tablespoon of the coffee into the coffee maker’s filter. The amount of ground coffee depends on how you like your Café Bustelo.
  3. Add water to the coffee maker’s reservoir.
  4. Once you’ve completed the steps above, hit the switch button on the drip coffee maker. Let the brewing begin.

Final Thoughts

A good cup of coffee takes time, patience, and good ingredients. Once you have the basics nailed down, you can enjoy a good cup of coffee, whether it is a quick cup of drip coffee or a fancy espresso.Knowing how to brew drip coffee will make the bitter office brew much more bearable. Also, once you find out how to make drip coffee, you can put your coffee maker at home to good use.

On chilly days, you enjoy a hot cup of coffee without having to leave the house. So why not give drip coffee a try?

Pin Later

How to Make Drip Coffee.jpeg