Reheat Smoked Turkey Legs Like a Pro: Juicy Leftovers Every Time!

Hey there, grill masters! I’ve been smoking up turkey legs for years, and let me tell you, getting that perfect balance of smoky flavor and juicy tenderness is an art. Getting that smoky flavor just right while keeping the meat nice and moist takes skill and know-how.

After plating up pile after pile of succulent smoked turkey legs at the now-closed Boat Basin Cafe in New York, I’ve learned a few tricks of the trade. Now I’m bringing my chef expertise to help you revive leftovers and achieve tender, juicy perfection every time.

Ready to ditch dry, flavorless leftovers? Buckle up, because we’re about to learn how to reheat smoked turkey legs like a pro! 🍗🔥
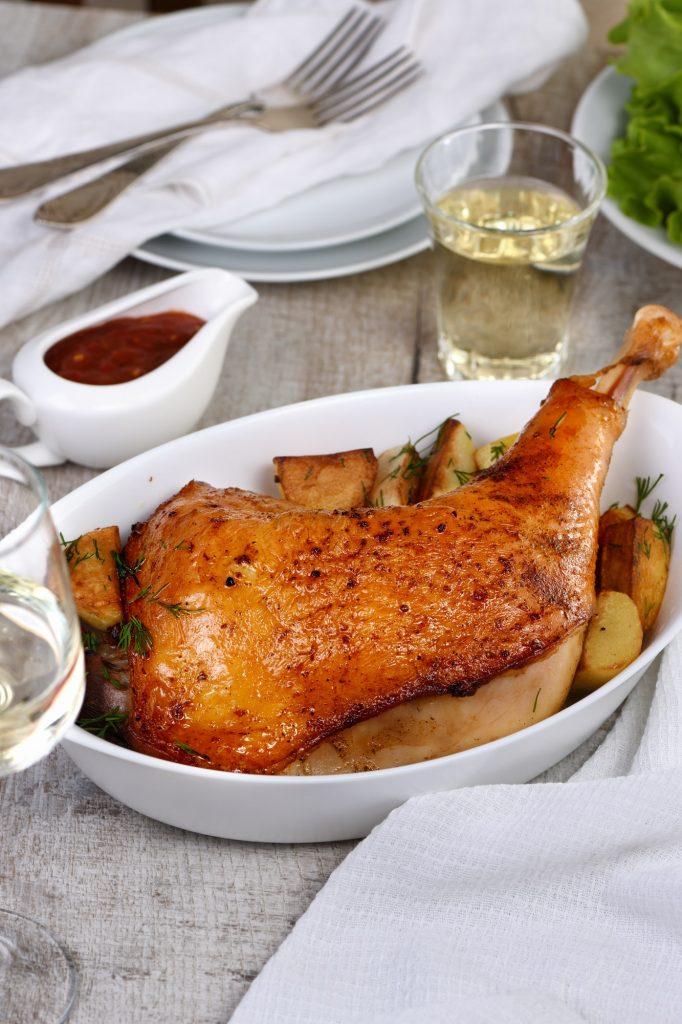
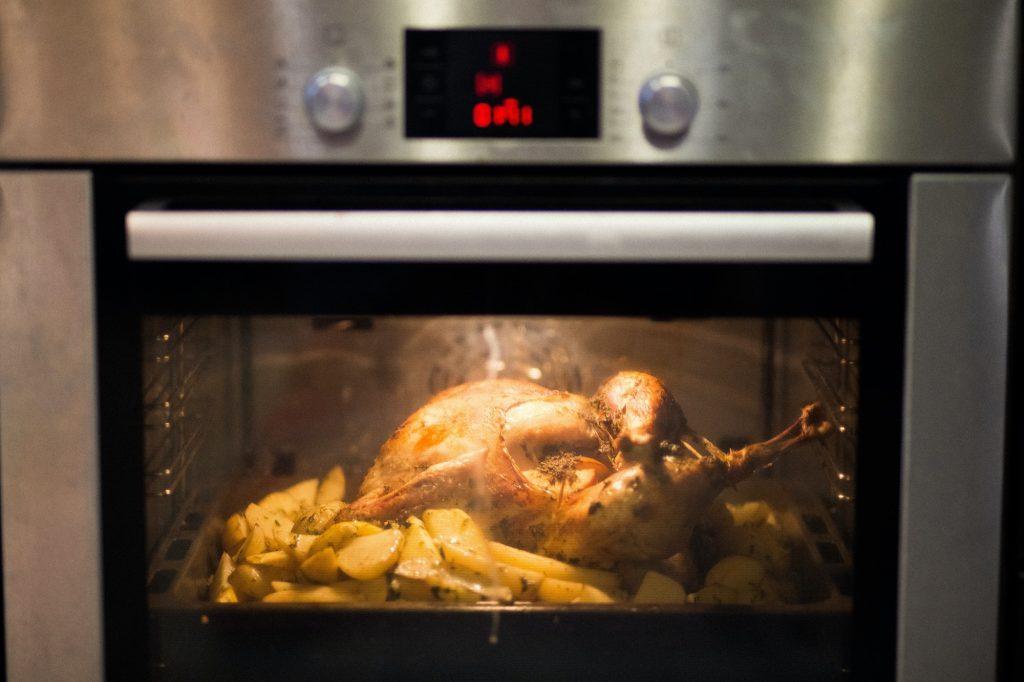
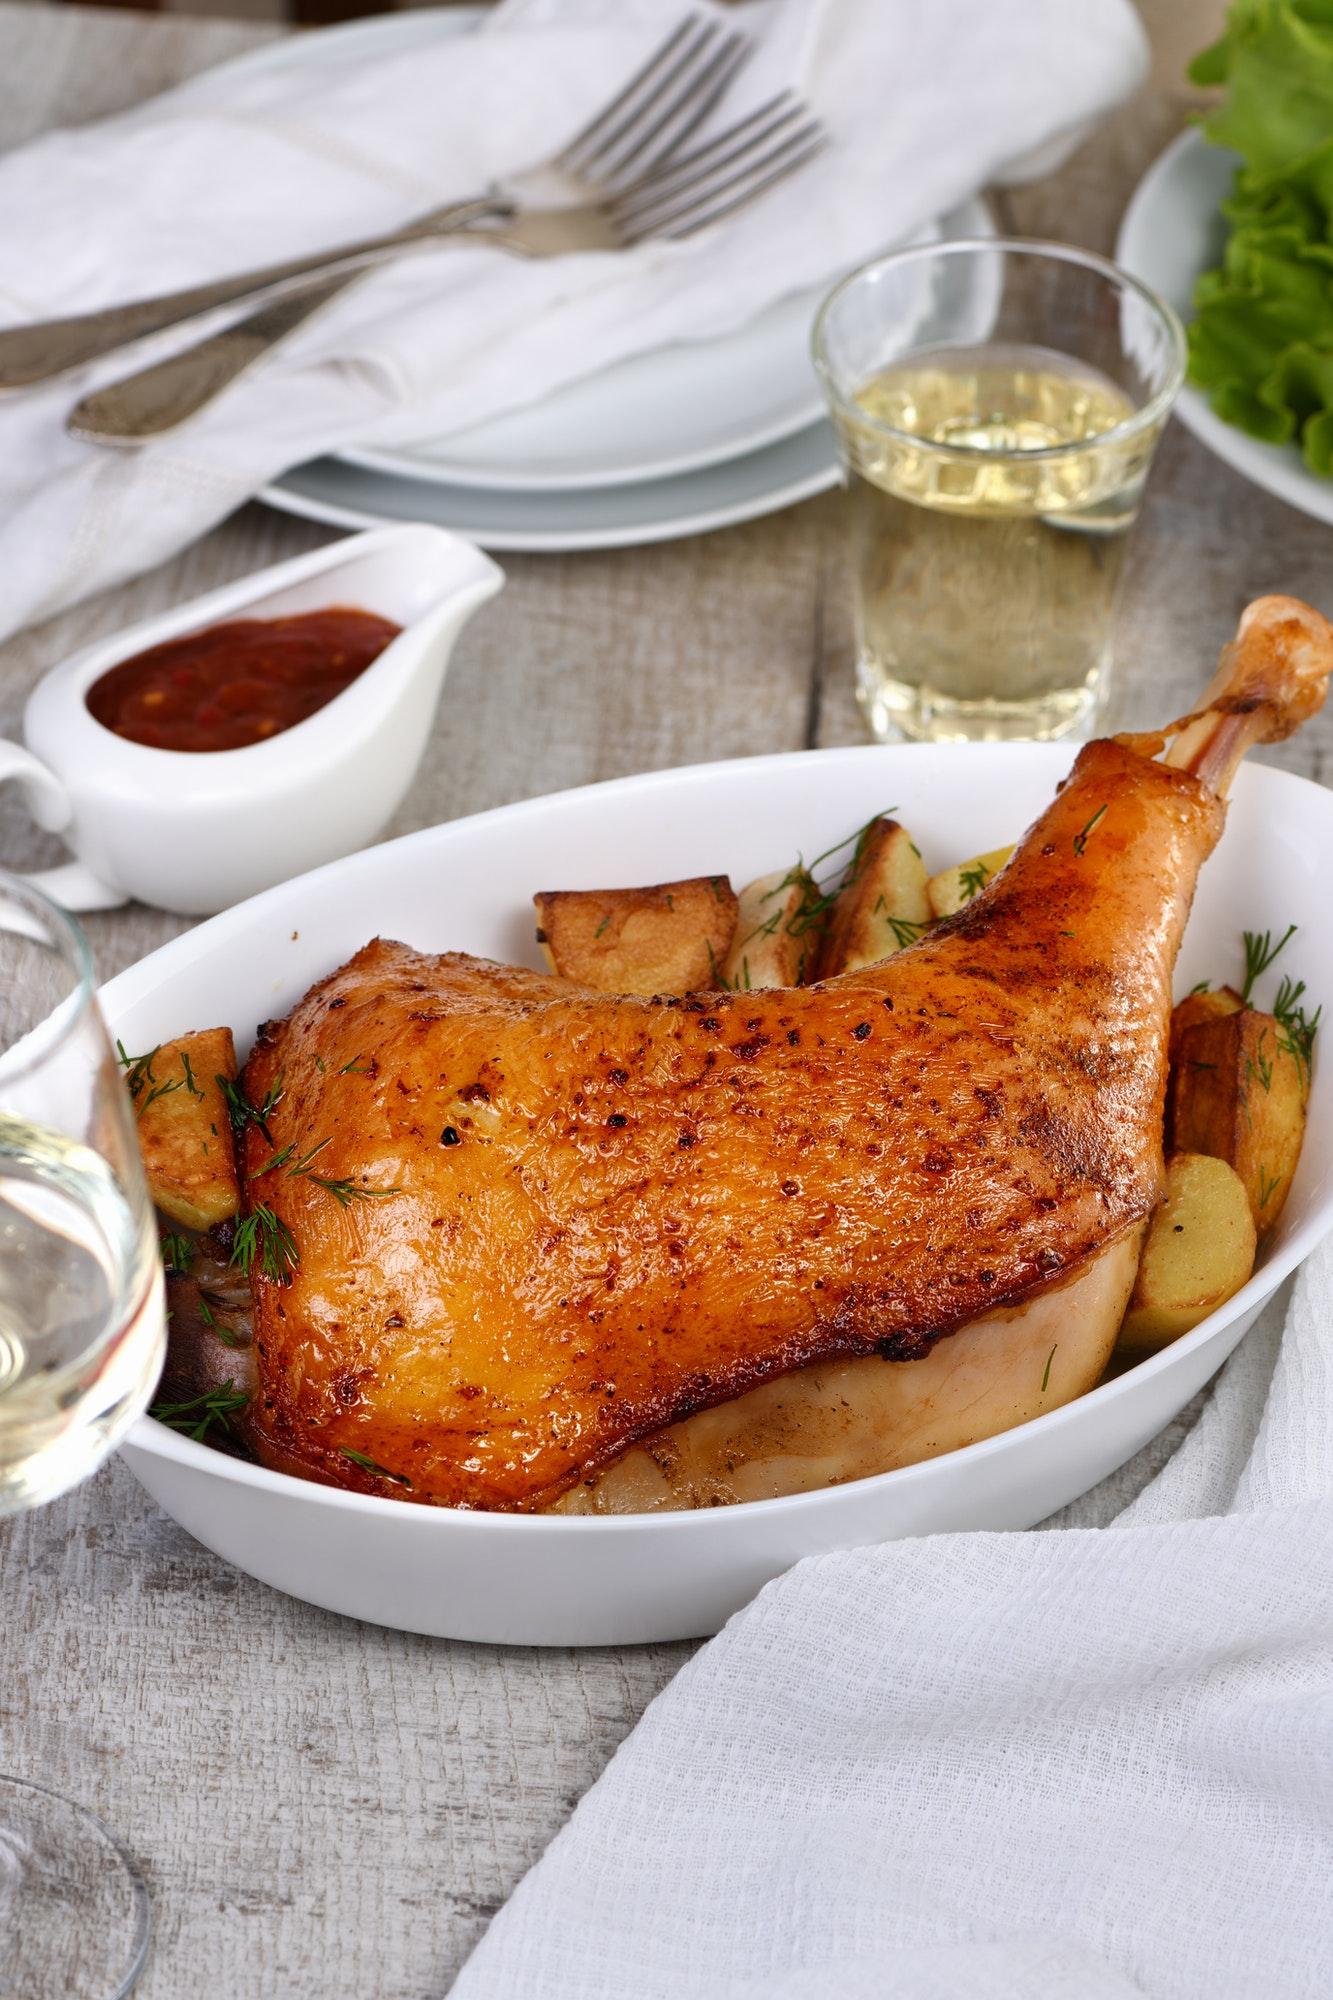
Roasted turkey leg with potatoes on the dinner table

Quick Answer: how to reheat smoked turkey legs

⏰ Short on time? No worries! Here’s the lowdown:

Oven Bliss

Preheat your oven to 325°F (163°C). For the ultimate flavor boost, use chicken, turkey or apple cider broth instead of plain water. About 1/4 cup of broth does the trick.

You can also add aromatics like garlic, onion, and herbs for extra depth.

Wrap your smoked turkey leg tightly in foil to trap steam and moisture. Different cuts will have different reheating times:

  • Turkey drumsticks take 30-35 minutes
  • Larger turkey thighs need 35-45 minutes

Bake until the thickest part of the meat reaches an internal temperature of 165°F. Use an instant-read thermometer to test doneness.
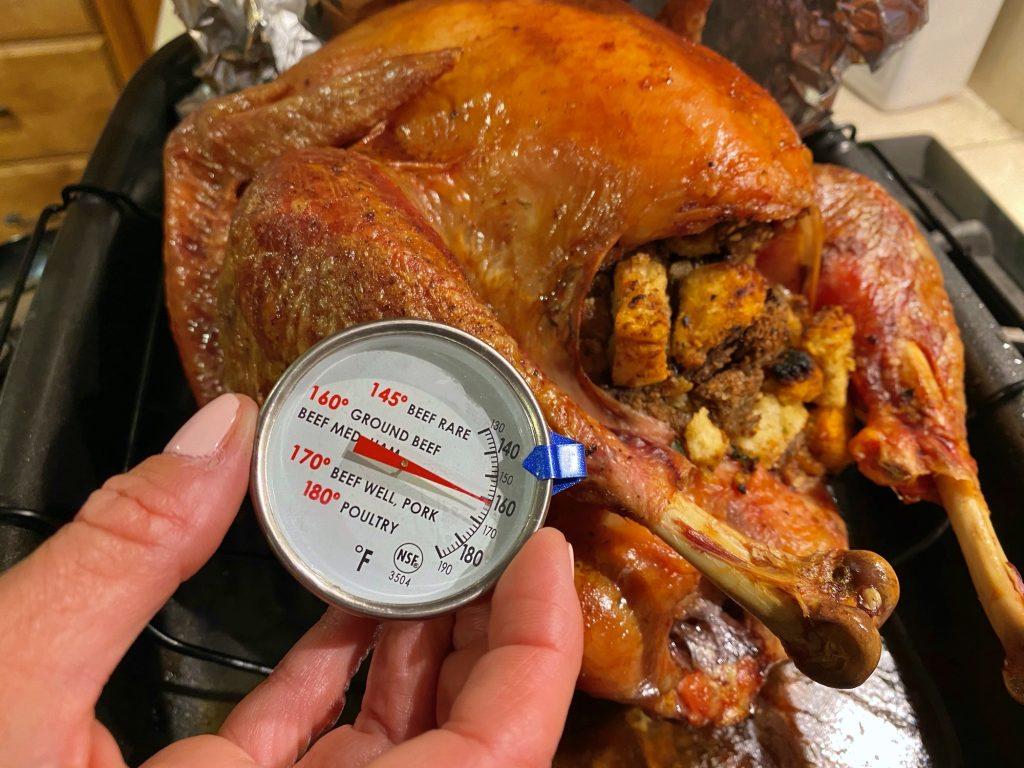
Checking the temperature of the turkey. It's not cooked enough yet, only 160

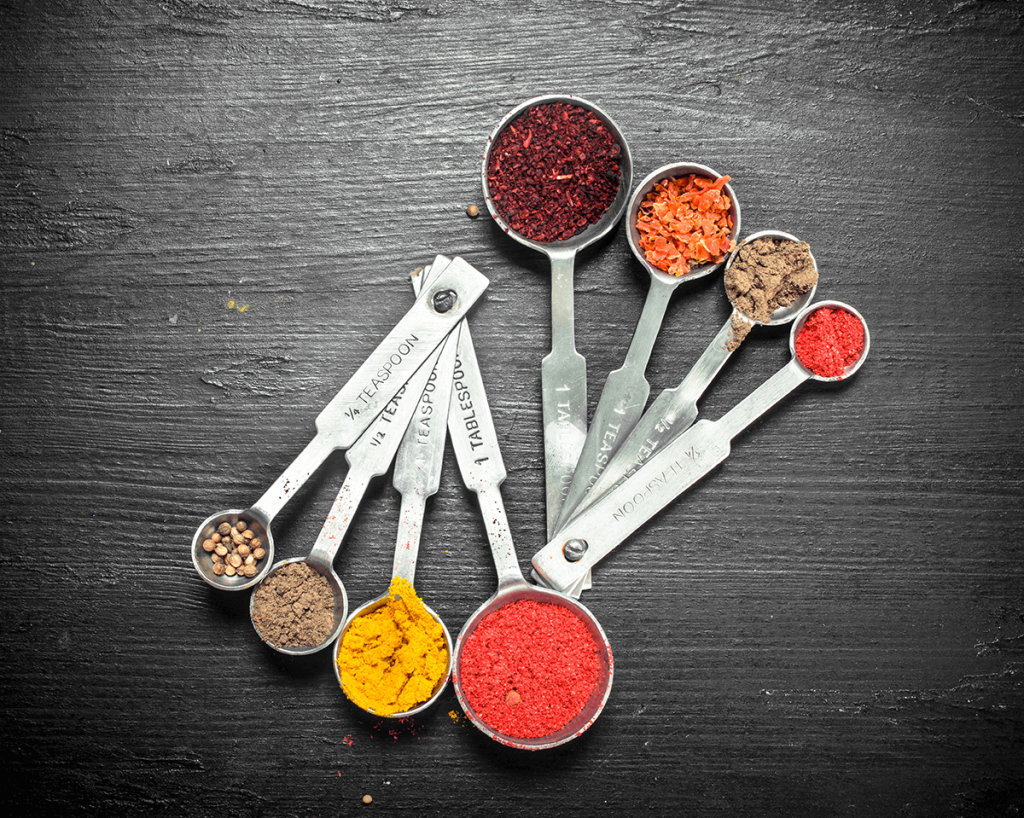
For even more flavor, try rubbing the turkey with a spice blend before foil wrapping. Here is my go-to 5 spice turkey rub:

  • 1 tablespoon brown sugar
  • 1 tablespoon paprika
  • 2 teaspoons garlic powder
  • 1 teaspoon salt
  • 1/2 teaspoon pepper

Mix ingredients then generously coat the turkey leg before wrapping it in foil. The spice rub adds a burst of sweet, savory flavor!

Wrap those turkey legs in foil like a cozy blanket! It traps all that steam, keeping the meat moist and delicious. This is my reliable, fuss-free method for reheating moist and tasty smoked turkey legs.

Microwave Magic

Don’t underestimate the microwave for reheating juicy smoked turkey legs! The key is using the right power level and cook times.

👉 Step by step:

  • Place your turkey leg on a microwave-safe plate.
  • Add 1-2 tablespoons of broth, water, or wine for extra moisture.
  • Cover with a microwave-safe lid or vented plastic wrap to trap heat and steam.

Instead of loosely covering it with a paper towel, I recommend using a microwave-safe lid or vented plastic wrap. This traps more heat and steam for even cooking.

Microwave using lower power levels so food heats gently and evenly from the inside out. The timing depends on the size and thickness of your particular turkey leg:

Microwave Cooking Instructions

Turkey PartPower LevelTime
Small drumsticks50% power2-3 minutes per pound
Larger thighs40% power5-7 minutes per pound
  • Flip the turkey leg halfway through cooking to ensure even moisture absorption.
  • Check the temperature with an instant-read thermometer to ensure it reaches 165°F.
  • If needed, add more liquid and continue microwaving in 30-second bursts to avoid drying out.

📝 Key Tips for Success

  • Be patient: Quality reheating takes time.
  • Use an appropriate lid to ensure moisture retention.
  • Lower the power to prevent uneven heating and drying out.
  • Adjust cooking time based on the thickness of your turkey leg for perfectly reheated, juicy results.

Ready to Dive Deeper? Unleash the Flavor!
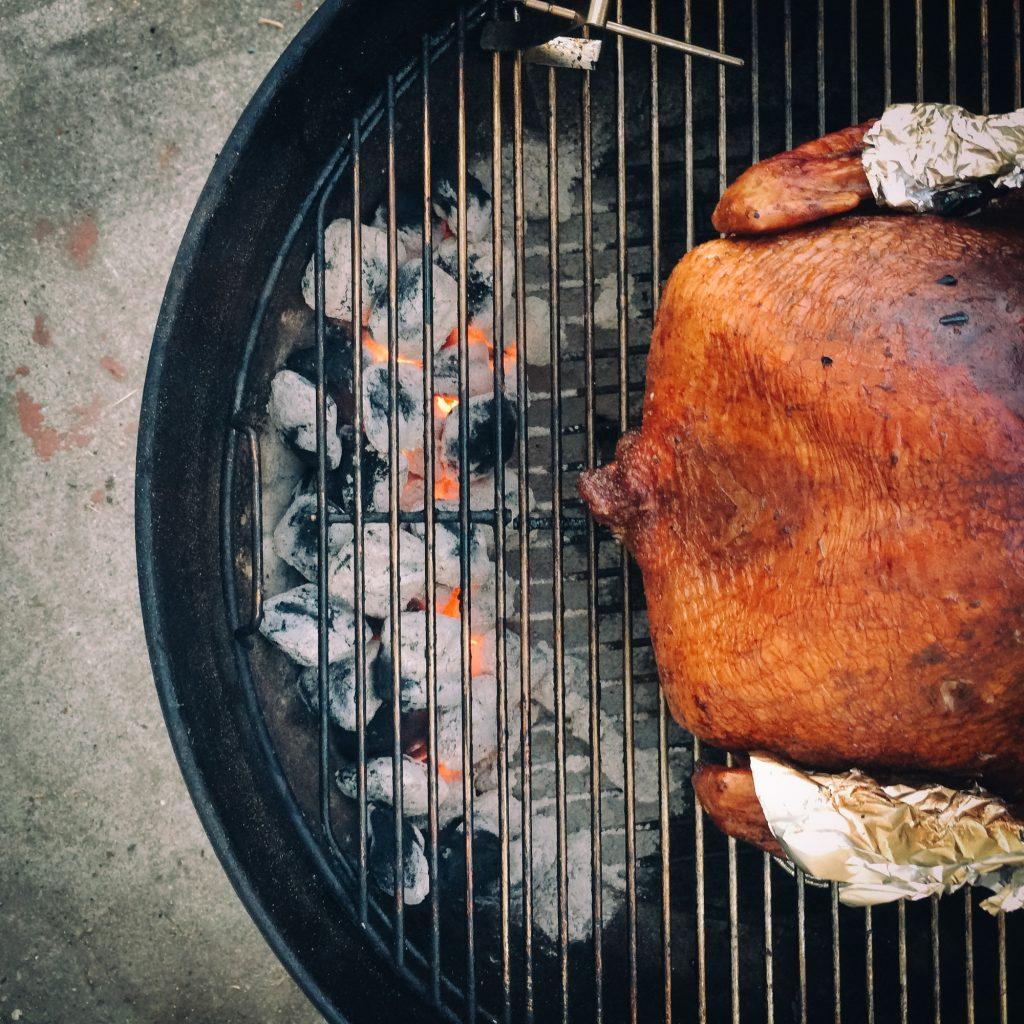
Smoked turkey on bbq grill during the holidays

Take your reheated smoked turkey legs to the next level with these advanced flavor-boosting techniques.

Smoke it Again (Lightly)

A second round of smoking reinvigorates that sweet, smoky essence. But avoid over smoking which can make meat bitter and dry. The goal is just a kiss of supplemental smoke – about 15-20 minutes.

Tailor wood chips to your flavor preferences:

  • Applewood: Sweet, fruity smoke
  • Hickory: Robust, bacon-like smoke
  • Cherry: Mildly sweet, delicate smoke

For more smoke flavor sans drying, pair light smoking with moist reheating methods like broth basting or foil wrapping.

Flavorful Broth Boost
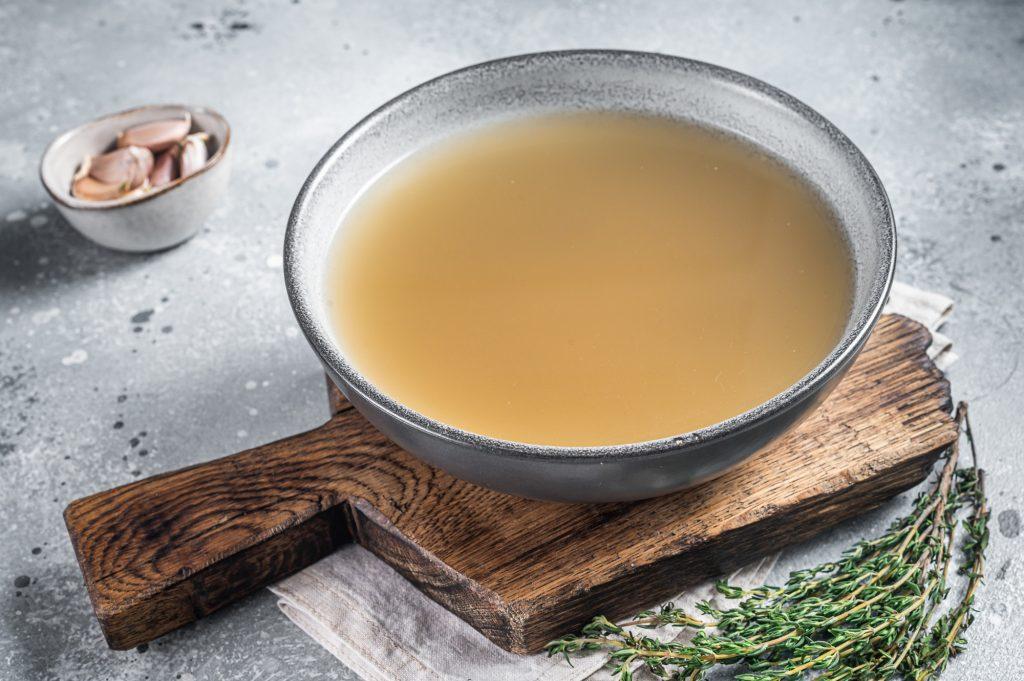
Bone meat chicken broth in a plate. Gray background. Top view

Rather than plain water or oil, use flavor-packed broths!

BrothFlavor NotesGood For
Chicken BrothSavory, classicOven or stovetop
Apple CiderSweet, tangyOven or foil pouch
Beef BrothHearty, richSlow cooker or sous vide
Coconut MilkCreamy, exoticOven or microwave

For a budget option, make flavorful infused water with garlic, onions, peppers, citrus, herbs and spices. Use aromatics aligning with your cuisine theme – Mexican, Moroccan, Indian, etc.

“Ditch the boring water and boost the flavor with some yummy broth! Chicken, apple cider, even coconut milk – the possibilities are endless! These broths pack a real flavor punch, infusing your turkey with deliciousness.” I learned as a chef.

Spice Up Your Life

Kick up leftovers from boring to bold with zesty spice rubs. Try these recipes I crafted over the years:

Rub NameIngredients
Everyday BBQ Rub2 tsp paprika, 1 tsp brown sugar, 1 tsp garlic powder, 1⁄2 tsp salt, 1⁄4 tsp pepper
Moroccan Magic2 tsp cumin, 2 tsp coriander, 1 tsp cinnamon, 1⁄2 tsp cayenne
Tex-Mex Fiesta1 TB chili powder, 1 tsp cumin, 1 tsp oregano, 1 tsp lime zest

Additional Tips:

You can also use store-bought dry rubs like Meat Church or Traeger blends. Get creative with spices! ✨

💦More Moisture Masters

Lock in turkey moisture and savoriness with these advanced techniques:

Sous Vide Magic
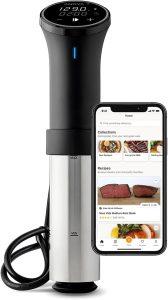
Reheat Smoked Turkey Legs Like a Pro: Juicy Leftovers Every Time! 1

Sous vide uses precise temperature-controlled water baths for even, gentle cooking. Benefits include:

  • Retains more moisture
  • Delivers very tender meat
  • Infuses flavor thoroughly
  • Ensures consistent doneness

You need an immersion circulator like this Anova Precision Cooker along with a large pot or tub for the water bath. Read my guide on How to Reheat Smoked Turkey to learn more.

Then simply submerge turkey leg in 160°F (71°C) water for 1-2 hours before finishing to desired crispness under the broiler or on the grill. Tenderlicious!

Foil Packet Power

For easy oven steaming, tightly wrap turkey legs in foil with:

  • Butter or olive oil
  • Lemon slices
  • Fresh rosemary and thyme
  • Sliced garlic cloves
  • Diced onion or shallots

These aromatics permeate the turkey with lovely flavors as it steams.

Breading Surprise

For an ultra-crispy crust, first dip legs in egg wash then coat them with Japanese panko breadcrumbs or crushed buttery crackers, potato chips, or pretzels. The crunchy exterior seals in luscious juices!

Beyond the Oven: Next-Level Leftover Techniques

Take your reheating game up a notch with these appliances designed for low, slow cooking with built-in tender-loving moisture!

Slow Cooker Sanctuary
Baby girl prepare dinner at home kitchen with slow cooker and releases steam from the steamer.

A slow cooker’s indirect heat and steamy environment transforms even dried-out turkey legs into fork-tender masterpieces. Benefits include:

  • Very even, gentle heating
  • Locks in natural moisture
  • Infuses flavors thoroughly
  • Minimal checking or effort needed

Cook times:

  • Small drumsticks: 3-4 hours on Low
  • Large thighs: 6-8 hours on Low

I love tossing legs in the slow cooker overnight or before leaving for work. Come home to insanely tender, perfect turkey!

Air Fryer Fiesta

Plate of tasty Mexican flautas with cheese and guacamole

Air fryers use rapidly circulated hot air to create crispy exteriors while retaining interior moisture – perfect for reviving turkey skin.

Preheat air fryer to 350°F (177°C) then cook:

  • Turkey drumsticks: 8-12 minutes
  • Turkey thighs: 12-18 minutes

Flip halfway through and brush with oil or dry rub for extra crispness and flavor.

Make easy dipping sauces like honey mustard, barbecue sauce, or flavorful aiolis. I love pairing crispy skin with cool, tangy sauces!

Conclusion

Let’s get cooking and make some amazing leftover turkey! Now get out there, my friend, make some magic happen, and wow those tastebuds. The delicious leftovers await! 😋

FAQS

How do you reheat smoked turkey leg without drying it out?

The keys are to use gentle, indirect heat and add extra moisture. Recommended methods include oven baking wrapped in foil with broth at 325°F until 165°F internal temperature; slow cooker with broth on low for 3-4 hours; or sous vide cooked in 160°F water bath for 1-2 hours.

How do you reheat a fully cooked smoked turkey?

Slice smoked turkey and place in a baking dish with turkey or chicken broth. Cover tightly with foil and bake at 350°F for 15-20 minutes until heated through (165°F). For crispier skin, unwrap the foil last 5 minutes.

Are smoked turkey legs already cooked?

Yes, smoked turkey legs sold fully cooked. They just need reheating to the desired temperature before serving. Reheat pre-cooked smoked turkey legs to 165°F.

How do you reheat smoked turkey legs in an air fryer?

Pat turkey legs dry, rub with oil, and place in air fryer basket. Air fry at 370°F for 8-10 minutes flipping halfway, until skin is crispy and internal temperature reaches 165°F.

Is smoked turkey good reheated?

Yes, properly reheated smoked turkey makes delicious leftovers! The keys are gentle reheating, moisture addition, and getting it hot enough (165°F) without overcooking. Handled right, reheated smoked turkey can taste as good, if not better, than the original.
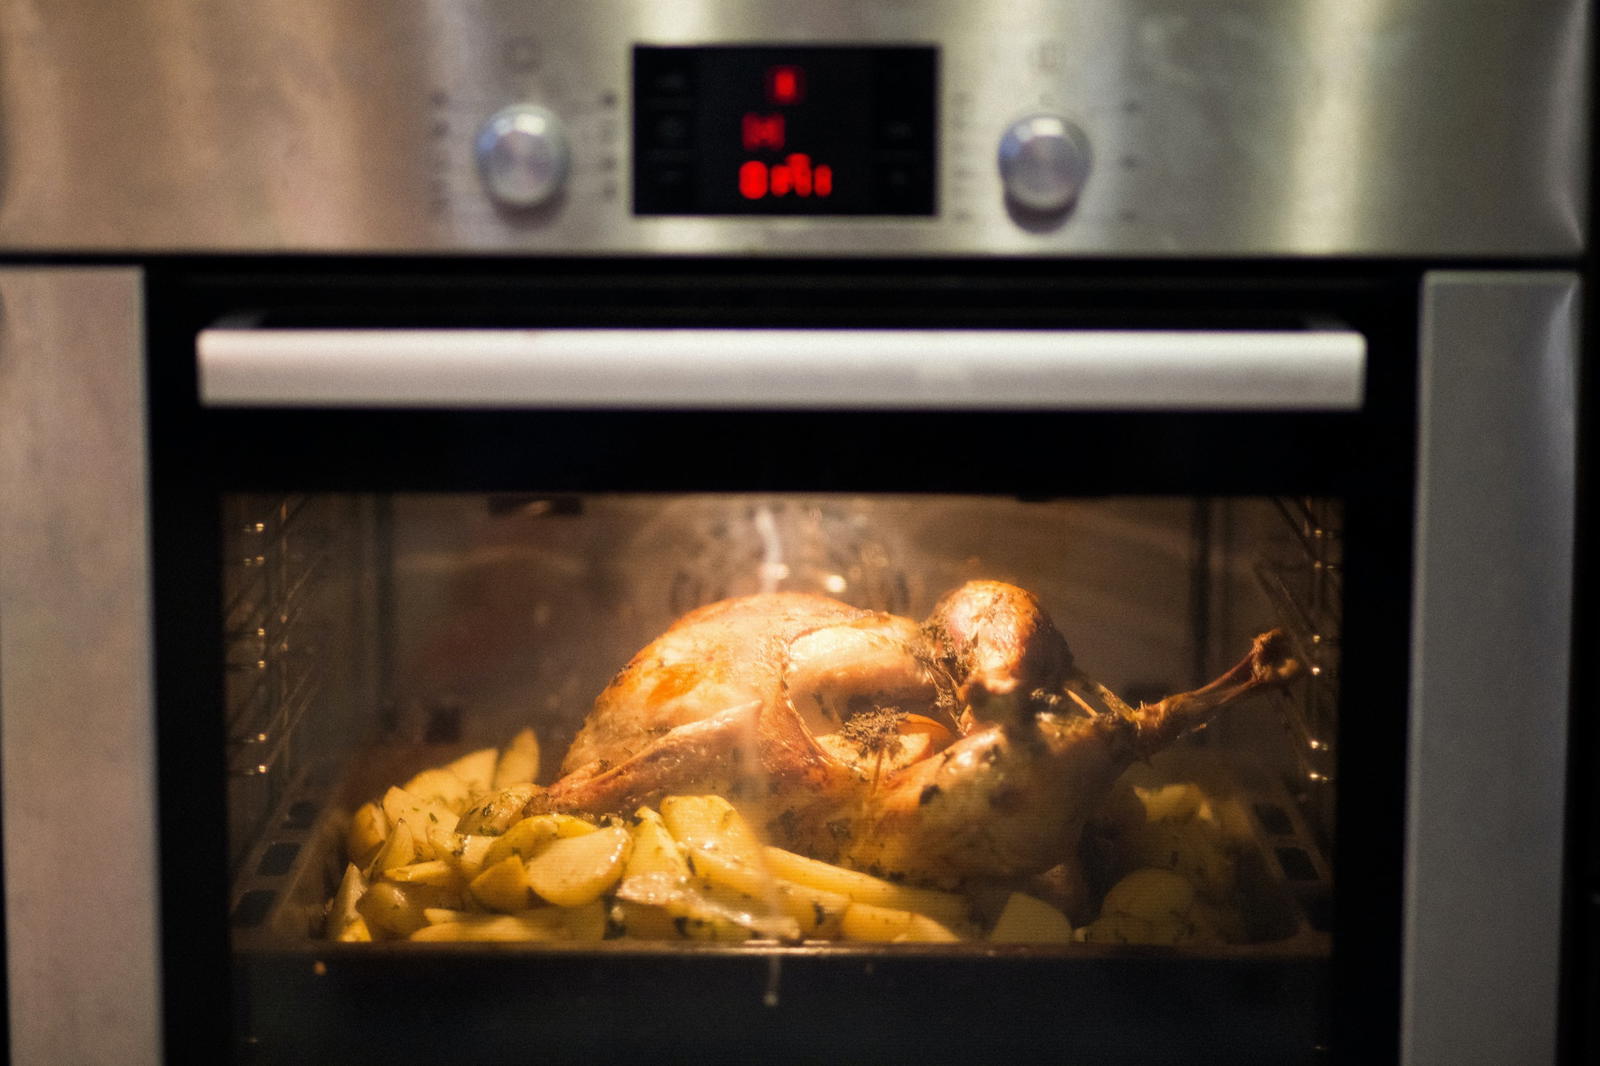
How Long to Reheat a Smoked Turkey?

Tired of dry, flavorless leftover smoked turkey? Let’s ditch the disappointment and unlock a world of juicy, delicious possibilities! Whether you’re a seasoned pitmaster or a kitchen newbie, this guide has everything you need to reheat your smoked turkey like a pro.

Quick Answer: How Long to Reheat a Smoked Turkey? ⏱️

Smoked turkey on bbq grill during the holidays

The magic number depends on the size and method, but generally aim for 10-15 minutes per pound at 325°F. But wait, there’s more!

Science Secrets to Smoking Success

Smoke Escape: Reheating can be a smoke thief! To keep the flavor magic alive, add smoky spices like paprika or chipotle powder to your reheating liquid. ‍♀️

Or, smoke your turkey a little longer initially, knowing some smokiness fades during reheating. (Remember this tip)

Moisture Mission: Dryness is our enemy! Combat it with gentle, indirect heat. The sous vide method is a champion, reheating at precise temperatures (like 140°F) to lock in moisture.

But don’t worry, oven lovers! Wrapping your turkey in wet cheesecloth under foil creates a steamy haven. ‍♀️

Beyond the Oven: Reheating Revolution!

A large chicken or turkey is baked in the oven for Thanksgiving or a family celebration.

Forget boring reheats! Let’s get creative with these awesome techniques:

Smoky Resurrection: Lost that smoky punch? Give your turkey a 30-60 minute cold-smoking revival for a flavor boost without extra cooking.

Turkey Flautas Fiesta: Shred your leftovers and stuff them in tortillas. Deep fry for a crispy, fun twist that’ll have everyone cheering!

Plate of tasty Mexican flautas with cheese and guacamole

Gumbo Gold: Elevate your gumbo with the unique smokiness of shredded turkey. Bonus points for using leftover drippings in the roux for extra flavor depth. ✨

Ramen Remix: Take instant ramen to gourmet heights with smoked turkey slices, a drizzle of smoky pan drippings, and a soft-boiled egg for a satisfying, unexpected twist.

Want to dive deeper and discover even more creative ways to reheat your smoked turkey? Check out the full blog post here.

💁🏻‍♂️ Flavor Pairings to Wow

CategorySubcategoryDescription
Flavor Pairings to WowSweet & SmokyCranberry sauce, chutney, or even a drizzle of maple syrup for a delightful contrast.
Flavor Pairings to WowSpicy KickChipotle crema or a sprinkle of cayenne pepper for a surprising flavor punch.
Flavor Pairings to WowHerbal InfusionReheat with fresh thyme, rosemary, or sage for an aromatic twist that elevates your senses.
Reheating CommandmentsTemperature is KingAlways use a meat thermometer to ensure your turkey reaches a safe internal temperature of 165°F, no matter the method.
Reheating CommandmentsRest for PerfectionLet your reheated turkey rest for 10-15 minutes before serving. This allows the juices to redistribute for maximum moistness and flavor.

With these tips and tricks, you’ll be a smoked turkey reheating rockstar! Now go forth and conquer those leftovers!

P.S. Don’t forget to check out the handy recipe cards at the end for even more inspiration!

FAQs

Q: How long does it take to warm up a precooked smoked turkey?

A: It usually takes around 2-3 hours to fully and evenly reheat a 10-12 lb precooked smoked turkey in the oven. Check the internal temperature with a meat thermometer to make sure it reaches 165°F.

Q: Is smoked turkey good reheated?

A: Yes, smoked turkey holds up very well to reheating. The smoking process helps retain moisture in the meat. As long as you reheat it gently and don’t overcook it, reheated smoked turkey can be just as tasty.

Q: How do you reheat a precooked turkey?

A: The best way is in the oven. Place the turkey in a roasting pan, cover loosely with foil, and reheat at 325°F, allowing about 15 minutes per pound. Baste every 30 minutes with turkey stock or broth to help keep the meat from drying out.

Q: How do you reheat a whole smoked turkey without drying it out?

A: Reheat the turkey covered in the oven or a turkey roasting bag at 325°F, allowing 15 minutes per pound. Baste frequently with chicken or turkey stock to add moisture. Serve sauce or gravy on the side for extra moisture. Check the thickest part of the breast for 165°F. Let it rest 15 minutes before carving.

Keurig K-Supreme Not Brewing? Don’t Sweat It! ☕️ Quick Fixes & Insider Tips (2024 Guide)

Oh no, is your Keurig K-Supreme single serve coffee maker on the fritz? Most baristas have been there! Before you panic and call time of death on your beloved brewer, take a deep breath alongside expert John Bird of Boat Basin Cafe.

We’re here to help you troubleshoot like a pro. Drawing from over 10 years of coffee and culinary experience, this comprehensive guide shares insider tricks for reviving that won’t turn on Keurig K-Supreme to its coffee-crafting glory.

From quick power resets to technical resets, we’ve got your early morning caffeine needs covered. So grab your favorite mug and let’s solve this dilemma together! ☕️

keurig k supreme wont turn on

👉Troubleshooting Your Keurig K-Supreme: Steps to Follow

As an experienced barista, the first things I check when a coffee maker is on the fritz are the simplest possible issues. You’ll be amazed how often basic troubleshooting steps get overlooked in the panic of caffeine withdrawal!

Let’s walk through some quick power plays to get your Keurig machine turn on before we dive into more complex solutions:

IssueCauseFix
No power/Screen not lighting upFaulty outlet or loose power cordCheck & reconnect power cord firmly, try a different outlet
Still no power after cord checkInternal issue or failed power reset attemptHold power button for 10+ seconds for a force reset

If a power reset doesn’t restore functionality, it’s time to sleuth other potential gremlins that could be afflicting your device…

Thirsty Keurig:

  • Is the reservoir filled with fresh water?
  • Make sure it’s properly inserted and the contacts are clean for optimum connectivity.
Error MessageLikely IssueSolution
No waterReservoir empty or not fully insertedRefill & firmly reinsert reservoir

Blinking Blues:

  • Learn the meaning behind Keurig’s light codes – they provide hints to the underlying problem! Resources like this guide can help decipher.
LightMeaningNext Steps
Blue blinkingDevice heating upWait for solid blue light

Bonus Tip: Unlock the Reservoir Reset Magic ✨

Here’s a unique trick developed from years as a barista troubleshooting cranky brewers:

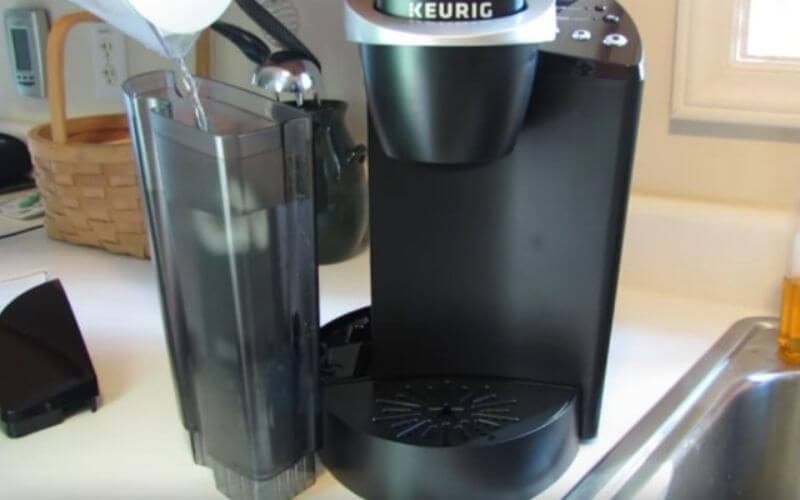
If the reservoir isn’t activating properly, remove it completely and thoroughly clean the contacts with a melamine foam eraser. Then firmly reinsert the reservoir and hold down the power button for a full 10 seconds. This reservoir reset can shock even the most stubborn Keurig machine won’t turn on!

IssueLikely CauseSecret Reset Ritual
Reservoir error message shows despite refillingMineral buildup on contacts preventing full connection1. Remove reservoir <br> 2. Clean contacts well <br> 3. Reinsert reservoir <br> 4. Hold power 10 secs

Why try this special voodoo? In my experience, fully removing and replacing the water reservoir reconnects sensors and lets fresh water hydrate machinery. That combined 10 second force reboot tells the coffee maker to stop throwing a tantrum! 😉

Give it a shot next time those reservoir sensors seem to malfunction or your brewer throws a hissy fit! You may just coax out some cooperation.

Beyond the Basics: Unveiling the Mystery Inside Your Keurig ⚙️

how to turn on keurig without power button

Disclaimer: Safety first! If feeling uncomfortable with electrical components, please consult a professional technician

When basic troubleshooting fails, it’s time to peer under the hood at potential issues plaguing internal machinery. Here are some commonly overlooked gremlins:

Thermal Troubles

Contrary to popular belief, it’s often not the fuse but the thermal cut-off switch causing Keurigs to stop heating. This small component regulates internal temperature to prevent overheating damage. Understanding the root issue provides insight into disruptive behavior! However, replacing the switch requires soldering expertise.

PartSigns of FailureFix
Thermal cut-off switchBrewing stops mid-cycleProfessional replacement needed

Sensor Snafus: Unmasking the Hidden Culprits

Mineral buildup causes all sorts of issues by disrupting internal sensors:

  • Blocked water lines trigger false “descale needed” messages, leaving users scratching their heads over phantom errors. Refer to troubleshooting code WL007-WL008.
  • Scale accumulating inside the heating element confuses the temperature regulator. It fails to heat properly, flashing confusing codes like H001-H004.

Keurig Not Descaling? Troubleshooting Tips and Maintenance Guide

Run cleaning cycles with citric acid instead of chemical descaler to break down this stubborn mineral buildup clogging sensors. And consult sensor-related troubleshooting guides when cryptic messages appear on screen.

Coffee Ground Gremlins

Don’t let pesky coffee grounds interfere with smooth functioning! They can clog machinery and garble control panel sensors.

IssueSolution
Display panel acting upThoroughly clean panel and interior

Run a rinsing brew with fresh water post descaling to flush residual solution from machinery. Failing to do so leaves acidic residue that curdles future brews!

📝Additional Troubleshooting Tips for Keen Coffee Lovers

Leftover K-Cup Blues: Sometimes, a leftover K-Cup stuck in the machine can prevent power flow. Check for and remove any leftover pods before troubleshooting further.

Protect that precious device from electrical surges! Damaged circuit boards manifest in erratic behavior.

  • Consider a surge protector to avoid replacement costs

Needle Reinsertion Rescue: Believe it or not, simply removing and reinserting the brewing needle can sometimes fix power issues due to loose connections. Give it a try!

While mostly similar, be aware Keurig K-Supreme Plus has slightly different troubleshooting than the original. And models like K-Duo, K-Select have their own common issues outlined here:
Keurig Won’t Turn On? Try These Quick Solutions

Magnet Magic (Use with Caution!): In rare cases, placing a strong magnet near the power button for a few seconds might reset internal components in Keurigs prone to power glitches. But proceed at your own risk!

Resetting finicky thermal switches seems straightforward but contains serious risks:

  • Wires can short if improperly reconnected after testing continuity
    • Overheating damage likely without proper gauging

Warranty Wizardry: Did you know registering your Keurig extends the warranty? Protect your investment by registering yours today!

💁🏻‍♂️When All Else Fails: Seeking Help & Support Like a Pro Barista

Even as an experienced specialist, sometimes an extra set of trained eyes is needed when problems persist. Here’s my advice for seeking assistance:

Contact Keurig Customer Support

Don’t hesitate to leverage available expertise! Keurig’s customer service team can be reached at:

I’ve found their troubleshooting guides helpful even as a barista – two heads are often better than one!

ResourceUse When
Keurig Customer SupportStumped even after troubleshooting
Repair DirectoryMachinery damaged/needs replacement

Seek a Qualified Repair Technician

For intricate electrical issues requiring intricate repairs, trust only seasoned experts. Consult:

  • Local coffee shop staff for trusted repair referrals
  • Online directories like Coffee Maker Guides to find properly vetted regional specialists

Remember: You’re Not Alone in Your Coffee Quest!

Keurig K-Supreme problems might seem never-ending but solutions abound with some persistence. By methodically working through fixes together here, your device will be whipping up perfect cups in no time! 🏆☕️

And for any lingering grumpiness, leverage available support teams to source that missing puzzle piece. With so many coffee connoisseurs out there, you never have to suffer caffeine troubles alone! 🤝

Conclusion

Don’t despair if your Keurig K-Supreme won’t turn on. With these tips, you’re well-equipped to fix common issues. If all else fails, professional help is available.

Stay calm and remember, a solution is often just a few steps away. Enjoy your coffee!

Keurig Won’t Turn On? Try These Quick Solutions

As a long-time barista, I’ve brewed my share of piping hot cups over the years. And when my own trusty Keurig kaps out at home, I feel that desperate, coffee-less panic creep in. But this caffeine-craving chef knows a trick or two for troubleshooting!

I’ll never forget the fateful day last year when my trusty Keurig K55 started flashing cryptic error codes instead of brewing my precious morning elixir. After some frenzied Googling and digging through manuals, I realized there was a clog in the intake tube filter from mineral buildup.

Some meticulous dismantling and cleaning later, I nursed my beloved brewer back to perfect health! You can read more about diagnosing mysterious coffee maker error codes on this CoffeeFolk blog.

While I may not have the European flair of Nespresso or high-tech specs of Breville’s spaceship appliances, this barista can strategically diagnose those frustrating Keurig errors and degunk with the best of ‘em. Consider yours truly your personal coffee coach!

Inside this fun yet practical guide, you’ll discover my foolproof troubleshooting advice from embarrassingly simple to ingeniously unconventional fixes. Apply these customized tips to resuscitate your K-Supreme or wake your K-Classic from its caffeine-less coma!

how to turn on keurig without power button

☕️🛠️ Keurig Troubleshooting Quick Guide

IssuePossible CauseSolution
Not brewingUnpluggedCheck power connections
Won’t turn onPower button jammedCarefully loosen button
Leaking waterMisaligned water reservoirReposition reservoir
Weak coffeeClogged filter basketClean/replace filters
Flashing lightsDescale neededRun descaling solution

🔍Troubleshooting Guide: Decode the Coffee Conundrums

As any coffee kitchen alchemist knows, desperate times call for Caffeinated measures. When your brewer starts acting up, stay calm and break out your homemade barista bat-belt! We’ll confront these coffee crises with gusto.

First up in our troubleshooting training, let’s start simple and investigate the…

☕️Coffee Catastrophe Basics: Oopsie-Daisy Disasters

We’ve all been there – stumbling half-asleep to our precious coffee pot, only to be cruelly doused with…nothing. Just sad silence from our suddenly stubborn steamer. Before you panic, let’s break down the blunders of coffee calamity 101:

Troubleshooting StepActionNote
Check Power ConnectionMake sure the brewer is plugged in.A common oversight with an easy fix.
Power Button CheckPress the power button firmly but gently.Power button location varies by model; consult the manual.
Test the OutletUse another device to test the outlet.Determines if the issue is with the brewer or the power supply.
Morning Blurry-Eye Syndrome CheckDouble-check all actions taken.Simple mistakes are more common when half-asleep.
  • Is it even on?? Make sure your brewer is securely plugged into the wall. I know it seems silly, but with blurry morning eyes those squints at the outlet can betray. Take a second look! My neighbor Jason once urgently called me to investigate why his Keurig K-Slim had mysteriously stopped working. After 20 minutes disassembling and scrutinizing internal parts, I noticed the power cord plug lying askew on the counter… Whoops!
  • While you’re checking cords, firmly prod the power button on the back or top right of your machine model. Consult manuals if unsure – location varies! Be assertive but gentle, coaxing your machine to gurgle to life.
  • If lights stay dark, grab a nearby device and plug it into the same outlet. Did someone forget to pay the electric bill or is there a sneaky wiring issue? Better sort that before diagnosis continues!

Have no fear mistaking these morning mishaps for full-on equipment expiry. Once solved, you can revel in the amusing realization that your java genie was indeed ok, just a bit…clueless without caffeinated guidance!

💁🏻‍♂️Intermediate Interventions: Strategic Troubleshooting

Alright, no silly slip-ups with buttons or plugs. Time to get down to some strategic problem-solving! When your brewer starts playing games, don’t get mad – get investigating! Here are some sneaky issues that may be thwarting that magical caffeine flow:

  • Water Woes: Lift the lid of your water reservoir and peer down intensely. Is there enough fluid in there to brew the divine nectar? Check the fill line – you need to play by the rules!While inspecting H2O levels, ensure the reservoir is seated properly in place.
  • Overzealous cleaning can bump it out of alignment. Shove it decisively back into position with authority!Feeling lazy? If there’s questionable grime in your water tank, do like I once did in college and toss in a handful of uncooked rice then swish vigorously to scrub those walls! Gets the job done in a pinch.
  • Filter Fiascos: Mineral deposits from water can clog up filters over time. Lift out the water filter cage and inspect closely. See any scale, residue, or debris? Rinse clean or plop in a fresh filter.
  • Descale or Die: The dreaded descaling demon! Mineral buildup is no joke, coating your machine’s innards with crusty calcium obstacles. Combat scaling with descaling solutions or good ol’ white vinegar. Follow instructions closely – then flush thoroughly.

Now, let’s organize this information into a table for clarity:

IssueWhat to Look ForSolution
Water Woes– Not enough water in the reservoir.- Reservoir not seated properly.– Ensure the fill line is met.
– Realign the reservoir.
– Use uncooked rice for cleaning.
Filter Fiascos– Scale, residue, or debris in the filter.– Rinse the filter or replace it.
Descale or Die– Mineral buildup inside the machine.– Use descaling solution or white vinegar.
– Follow descaling instructions and flush thoroughly.

Advanced Alchemy: Become the Brewer Whisperer

keurig drain brewer

Uh oh, you’ve tried all the usual troubleshooting tricks but your brewer still won’t brew. Before you rage quit coffee forever, break out your artisan brewer decoder ring! Let’s confront those cryptic flashing lights and error codes to revive your finicky machine.


I’ll never forget the time my roommate Daisy’s Keurig K-Compact started violently flashing red. After consulting coffee machine technician expertise on typical causes, I studied the advanced manuals for her exact model number.

A-ha, those 7 ominous flashes indicated a bad thermal fuse! With some masterful dissembling, cleaning out trapped grounds, and installing a replacement fuse, I single-handedly defeated the despicable descaling demon and freed that fateful brewer from the error code time loop it was trapped in!

When your brewer starts angrily blinking like a Vesuvian discotheque, don’t freak – get researching! Each brand has a special diagnostic language to understand. Once decoded, you can strategize targeted fixes.
Scan model numbers, then head online to access official manuals

And here’s a simple table format to organize the troubleshooting steps mentioned:

StepActionPurpose
1Identify flashing lights or error codesUnderstand the issue
2Consult advanced manuals for specific model numberFind exact cause
3Disassemble and clean out trapped groundsClear any blockages
4Replace bad thermal fuseRepair the hardware issue
5Decode the diagnostic language of the brandStrategize fixes
6Access official manuals onlineGet detailed instructions

🌿Brew an Eco-Friendly Cup

Want to lighten your environmental impact while delighting your tastebuds? As a proud partner with Grounds for Change coffee company, I’m excited to offer readers an exclusive 15% off your first order of their carbon-neutral, Fair Trade certified coffee pods!

Experience the smooth, guilt-free flavor that only shade-grown, bird-friendly beans can deliver while aligning with your values. Support sustainable coffee farmers with every aromatic cup.

Brew your favorite roast in a reusable pod to reduce waste even further! Check out these handy resources for responsibly disposing of traditional K-Cups:

  • Keurig® Recycling Program
  • K-Cup Recycling Guide

And be sure to compost those grounds to nurture your garden or houseplants! Let’s nourish our bodies and the planet, one conscious cup at a time.

And here’s a table summarizing the key points and resources for a clearer presentation:

Key PointDescriptionResource
Exclusive Discount15% off first order of carbon-neutral, Fair Trade coffee pods.Grounds for Change
Environmental BenefitsShade-grown, bird-friendly beans. Sustainable farming support.
Waste ReductionUse of reusable pods.
Responsible DisposalGuides for recycling traditional K-Cups.Keurig® Recycling Program, K-Cup Recycling Guide
CompostingEncouragement to compost used coffee grounds.

🎉 Customer Service

You have most probably busted the spooky Keurig trouble by now, but if you could not, then the problem with your device is more complicated. It is a great idea to call Customer Care and let the manufacturer have a look. They are just a call away.

📞 Contact Information

Dial the toll-free number 1-866-901-BREW (2739) to reach Keurig Support.

🎁 Bonus Just For You

Don’t worry; here is a bonus just for you — Some of the best K-cups coffee makers!

Have a happy coffee day! ☕


FAQs

How do you reset a Keurig that won’t turn on?

If your Keurig won’t power on, try unplugging from the power outlet for 30 seconds, then firmly plug back in. Press the POWER button on top to turn it back on. This resets the machine. If still not turning on, inspect the plug connections, try another outlet.

What causes a Keurig to not turn on?

Common reasons a Keurig won’t turn on include unplugged cord, loose plug connections, faulty outlet, stuck Power button, or internal fuse/wiring issues. Check each part systematically to determine root cause. Don’t immediately assume device is broken.

Why is my Keurig suddenly not working?

If a previously functioning Keurig stops working, suspect water flow blockages like k-cups jammed in chambers or inlet needles clogged from mineral buildup. Descale buildup inside lines. Check reservoir alignment. Inspect all parts involved in brew process.

When I press the button on my Keurig nothing happens?

If Power button doesn’t respond, unplug and firmly reconnect cord. Still unresponsive? Gently pry around edges of button in case internal mechanisms are jammed. Contact Keurig if button is damaged.

How long do Keurigs last?

With proper maintenance like descaling, cleaning, using filtered water, Keurigs can last 5-7 years depending on model. Budget models average 2-3 years lifespans. Quality and care are key for longevity!

How do you tell if your Keurig is clogged?

Signs of clogged Keurig include weak coffee output, full pods not puncturing, leaking water from machine, odd noises, and error codes. Inspect inlet needles and chambers for grounds trapped around entry points blocking water flow.

🍕 Keeping Party Pizza Piping Hot – Tips from the Boat Basin Cafe

I’ll never forget the time I was catering a wedding reception at the Boat Basin Cafe, where I worked there as chef and barista  before it closed down.

As I was serving up pie after pie from the kitchen, lovingly topped with fresh mozzarella and spices, I overheard a guest complain that their slice had already gone cold! 

🥶 After my initial dismay, it only made me more determined to discover failproof methods to serve hot, delicious pizza at parties.

how to keep pizza warm for a party

 How to keep pizza warm in the oven?

Low & Slow: Target 150°F-200°F for gentle reheating, preventing overcooking and dryness.

Preheating Matters: Warm the oven beforehand to create a radiant heat environment.

Pizza Stone Power: Utilize a preheated stone for even heat distribution and crispier crusts.

❓ How to keep pizza crust from getting soggy?

Embrace Moisture: Don’t fear steam! Use a damp paper towel over the box or mist the pizza lightly to trap steam and soften the crust.

Bowl of Hot Water: Place a small bowl of water in the oven to create gentle humidity.

❓ What cheese melts best for pizza parties?

Shredded Mozzarella: Forget fresh balls! Shredded offers more surface area for melty goodness and retains heat better.

Provolone Power: Mix mozzarella with provolone for a blend that stays supple and smooth, even during delivery.

➕ Bonus Snippet-Friendly Tips:

Strategic Slicing: Cut pizza just before serving to minimize heat loss. Pre-slice a few for convenience.

Digital Thermometer: Monitor oven or platter temperatures precisely.

Revive & Reheat: Flash-chill pizza in a hot oven for 2-3 minutes to restore its glory.

Get Creative with Toppings: Add fresh herbs, chili oil, or balsamic glaze just before serving for a burst of flavor.

🔥Perfecting Low, Slow Reheating Methods

Instead of blasting the pizza at really high temps to reheat it, I actually put it in a 150°F to 200°F oven. This more gentle heat allows the pizza box itself to act as an insulator, slowly releasing steam and warmth without overcooking.

Here’s a quick guide to choosing the right low oven temp:

Oven TemperatureBenefits
150°FPrevents drying out, keeps cheese meltya
175°FGood middle ground for most pizzas
200°FCrisps up the crust nicely

Preheating matters: Don’t just rely on the pizza box for insulation. Preheating the oven to a low temperature (150-200°F) creates a warm environment that gently radiates heat, preventing overcooking and dryness.

You’ll still need that initial 500°F blast in the oven to bake the pizza. 

But once it cools for easy handling, popping the box in a low oven will keep slices hot and delicious far longer than you’d think!

Now let’s talk about a secret weapon for moisture and heat retention: the pizza stone.

Harnessing Heat: Pizza Stones & Preheating Strategies

Pizza stones

Pizza stones are thermal masses that absorb and distribute heat evenly. I preheat my pizza stone in the oven before putting the box on top. This allows the chilled pizza to “borrow” back heat slowly for the best texture.

Think beyond the box: Consider using a pizza stone or cast iron skillet for even heat distribution and crispier crusts. Experiment with preheating these alongside the oven for optimal results.

Here are the benefits of using a preheated pizza stone:

Benefits of Pizza StoneReasons Why
Crispier crustStones crisp from bottom heat
Superior heat retentionThermal mass stores and radiates warmth
Prevents soggy bottomAllows moisture to evaporate

Steam: Your Crust’s Best Friend for Staying Soft

Contrary to popular belief, dry heat is not the way to keep pizza warm. Allowing moisture to escape leads to dried out, leathery crusts. For the best results, create a humid environment that traps steam and softens the dough.

My favorite trick is to loosely drape a damp paper towel🧻 over the box. As the hot pizza slowly releases moisture, the towel helps hold it close so the crust stays supple. You can also keep a small bowl of hot water in the oven to gently steam the box.

Moisture is your friend: Contrary to popular belief, dry heat dries out pizza. Use a damp paper towel over the box, a small bowl of hot water in the oven, or even mist the pizza lightly to trap steam and keep the crust supple.

Here are some pointers on managing moisture:

Moisture TipsBenefits
Damp towel over boxTraps steam to soften crust
Bowl of hot water in ovenCreates humidity; avoids drying out
Mist box with water bottleQuick way to boost moisture

Proper moisture regulation is key for keeping pizza oven-fresh, especially for large party catering orders. Now let’s talk about an ingredient that can make or break your pizza party….cheese!

🧀Cheese Choices for Optimal Melty Appeal

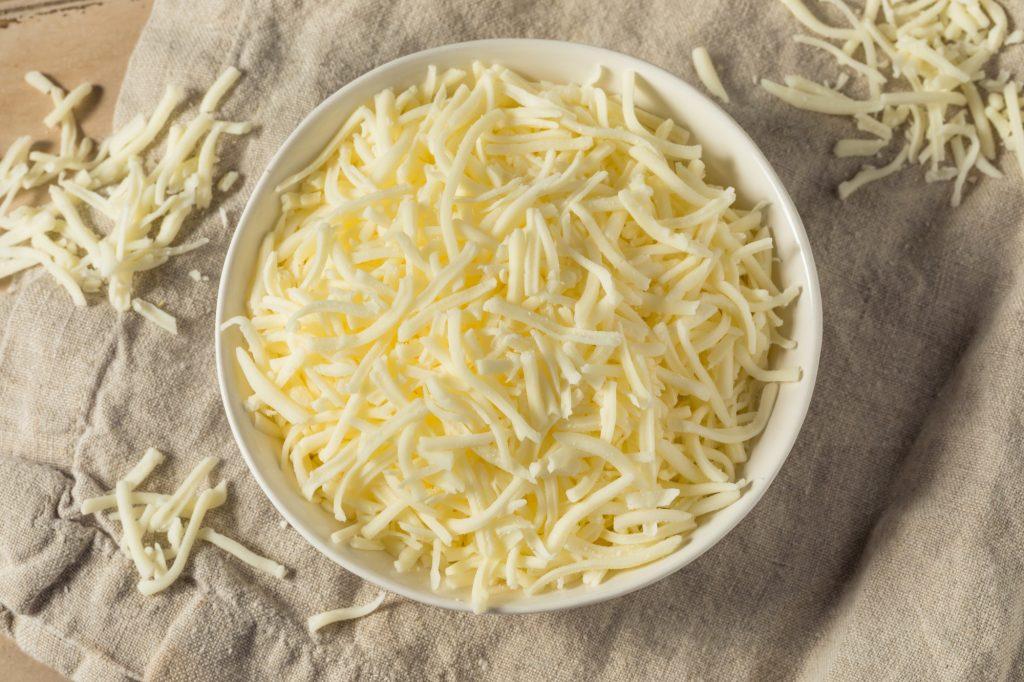
Organic Shredded Mozzarella Cheese

In my long pizza career, I’ve learned not all cheeses are created equal when it comes to melting appeal and heat retention abilities.

For party pies, I strongly advise using shredded mozzarella rather than fresh mozzarella balls. The shredded variety has more surface area, allowing it to melt into gooey deliciousness faster. It also tends to hold onto warmth better over time.

Now for a special Boat Basin Cafe secret: we mix the mozzarella with a bit of provolone cheese. This combination stays supple and smooth for hours – even during pizza delivery sessions across NYC!

It resists drying out or becoming rubbery as heat diminishes. So embrace the cheese blend for your next pizza bash!

🍳 Ovenless Magic: Creative Ways to Keep Pizza Hot 🍳

Sometimes ovens aren’t available, like at a park picnic or during pizza delivery. Luckily, with some creative thinking you can keep slices hot for hours without electricity!

The power of the crockpot

Crockpots cook at lower temperatures which makes them perfect for gently warming individual slices without overcooking. Simply set it to low, throw in your pizza, and lid it up. I’ve kept pies perfectly hot this way for entire football games!

Crockpot magic: Don’t underestimate the power of a slow cooker! Set it to low, place individual slices inside, and enjoy perfectly warmed pizza for extended periods, ideal for potlucks or outdoor gatherings.

Rice to the rescue

Here’s an unusual hack using uncooked rice. Place slices in any insulated bag and add a few handfuls of rice. As the rice slowly absorbs moisture, it releases gentle steam and heat without getting soggy. I once delivered piping hot pizza across NYC using this neat trick!

The rice trick: Need to transport pizza long distances? Pack slices in an insulated bag with uncooked rice. The rice absorbs moisture and releases gentle steam, keeping the pizza warm without getting soggy.

DIY warming station

For large parties, create an elegant hot pizza station with chafing dishes and wire racks. Place discs of sterno fuel beneath to warm platters from below. Your guests can grab freshly warmed slices anytime. Use decorative plexiglass to contain heat.

DIY warming station: For larger parties, set up a dedicated pizza station with chafing dishes and warming trays. Use sterno fuel for gentle heat and plexiglass shields to retain warmth, creating an elegant and functional serving area.

😎 Boat Basin Cafe Bonus Tips

lifting slice of pizza with supreme toppings close up

After years perfecting party pizza, I’ve gathered some additional pointers:

🔪 Slice strategically: Cut pies just before serving to minimize heat loss. But pre-slice a few for convenience.

Slice strategically: Instead of pre-slicing the entire pizza, cut only what’s needed immediately. This minimizes heat loss and ensures fresh slices for hungry guests.

🌡️ Digital thermometer: Precisely monitor oven or platter temps.

⚡️ Revive and reheat: Flash chillled pizza in a hot oven for 2-3 minutes to restore its glory.

Stagger your approach: If serving a large group, consider pre-heating individual slices in a low oven while keeping the main pizza warm in a box. This allows for a steady flow of hot slices without overwhelming the oven.

Embrace low and slow: Resist the urge to blast the pizza with high heat for reheating. Lower temperatures (around 200°F) maintain warmth gently, preventing cheese from burning and toppings from wilting.

📝Bonus Tip: Get creative with toppings! While some toppings wilt under heat, others can be added just before serving for a burst of freshness and flavor. Think fresh herbs, chili oil, or a drizzle of balsamic glaze.

FAQs

How do you keep pizza warm for a large party?

For large parties, create a DIY warming station. Set up chafing dishes or slow cookers to keep multiple pizzas hot. Use sterno fuel, wire racks, and decorative plexiglass shields to contain the warmth. You can also keep slices warm in a low oven (150-200°F) and bring them out batch by batch.

How do you serve hot pizza at a party?

Slice pizzas just before serving to prevent heat loss
Use preheated pizza stones or cast iron skillets for crisp, hot crusts
Consider heating individual slices in a low oven while storing the rest in boxes
Set up warming trays, chafing dishes and slow cookers to maintain temperature

How do you keep pizza warm on a buffet table?

Chafing dishes with fuel inserts are great for buffet tables
Use wire racks to elevate pizza over the fuel for more even heating
Arrange pre-sliced pizza in a single layer so steam can escape
Place crust side up to prevent sogginess
Cover with aluminum foil, leaving some openings for ventilation

How long will pizza stay warm in the box?

The pizza box helps insulate and will keep pizza warm for up to 30 minutes. For longer warmth, use a preheated pizza stone inside the box. Well-insulated boxes can keep pizzas hot for over an hour. Check temperatures periodically and reheat as needed in a low oven.

Party Food Warm-Up: 8 Heat Hacks for Happy Guests


That sad day
I served cold short ribs at a party taught me the power of food temperature over success. Now, I’m sharing expert tips on how to keep food warm for a party🎉 – from years of experience as a chef and barista.

This guide covers foolproof classic techniques like oven wizardry alongside unconventional hacks like repurposing tube socks as heating pads.

[su_quote cite=”Chef Alice Waters, founder of Chez Panisse Restaurant”]Proper food temperature is crucial for food safety, preservation of quality, and an enjoyable dining experience.​[/su_quote]

how to keep food warm for a party

🔥The Importance of Keeping Food Warm

Serving warm food is key at any party or event. Warm food tastes better and is also safe to eat. Keeping food warm is important for any event. Here’s why.

Taste Explosion

Warm food tastes better. The flavors “pop” more when hot. At the cafe, soup and pasta were 100x tastier hot. Heat enabled us to create an explosion of textures and flavors.

Food Safety First

Bacteria multiply fastest between 40° and 140°F. This “Danger Zone” can make people sick. 🤢 Keeping food above 140° kills bacteria and viruses so guests stay healthy. In 2018, 25% of food poisoning cases were linked to improper heating.

Freshness Forever

Heat keeps food moist and fresh. Cold pizza ends up cardboard-y. The warmth maintains textures and stops delicate foods like lettuces from wilting. My regulars loved that cafe soups stayed hot for refills without losing consistency.

Guest Delight Guaranteed

Warm food makes people happy! At the cafe, I saw cold dishes send smiles south fast. But hot spinach dips, sizzling fajitas and steamy pasta bowls delighted guests. The key lesson? Heat = happy guests ready to party!🎉

[su_box title=”Fact” style=”default” box_color=”#DC1182″ title_color=”#FFFFFF” radius=”3″]According to the USDA, hot food should be kept at or above 140°F (60°C) to prevent bacteria growth.[/su_box]

🌡️Party Food Warm-Up: Classic and Beyond

we will unlock the secrets to flawless food temperature with 8 must-know warming methods, ranging from classic techniques every chef swears by, to unconventional, budget-friendly hacks.

First, we will explore 4 classic approaches with unique chef twists:

  • Towering Towel Tents
  • Next-Level Insulated Containers
  • Slow Cooker Mastery
  • Chafing Dish Wizardry

Then, we take creativity up a notch with 4 unexpected, innovative hacks:

  • Coffee Maker Magic
  • Fantastic Foil Boxes
  • Amazing Hayboxes
  • Spectacular Sock Warmers

💁🏻‍♂️Classic Methods with a Chef’s Twist

MethodCostCapacityDurationTipsProsCons
Towel WrappingCheapSmall batches1-2 hoursHeat towel firstInexpensive, reusable, compactSmall capacity, can dry some foods
Insulated ContainersVariesDepends on container size4+ hours if preheatedMany options like Cambro boxesMaintain temp hours, reusable, size optionsCan be bulky, needs preheating
OvensMediumLarge batchesAs long as oven is onUse lowest suitable tempLarge capacity, prevents drying, crispingUses electricity, access needed
Chafing Dishes$50-$100Holds 1-3 hotel pans/large platters2+ hoursReplenish sterno fuel every 1-2 hrsKeep food hot hours, inexpensive fuel, great for buffetsNeed cleaning, heavy

01 Towel-Wrapped Brilliance

Party Food Warm-Up: 8 Heat Hacks for Happy Guests 2

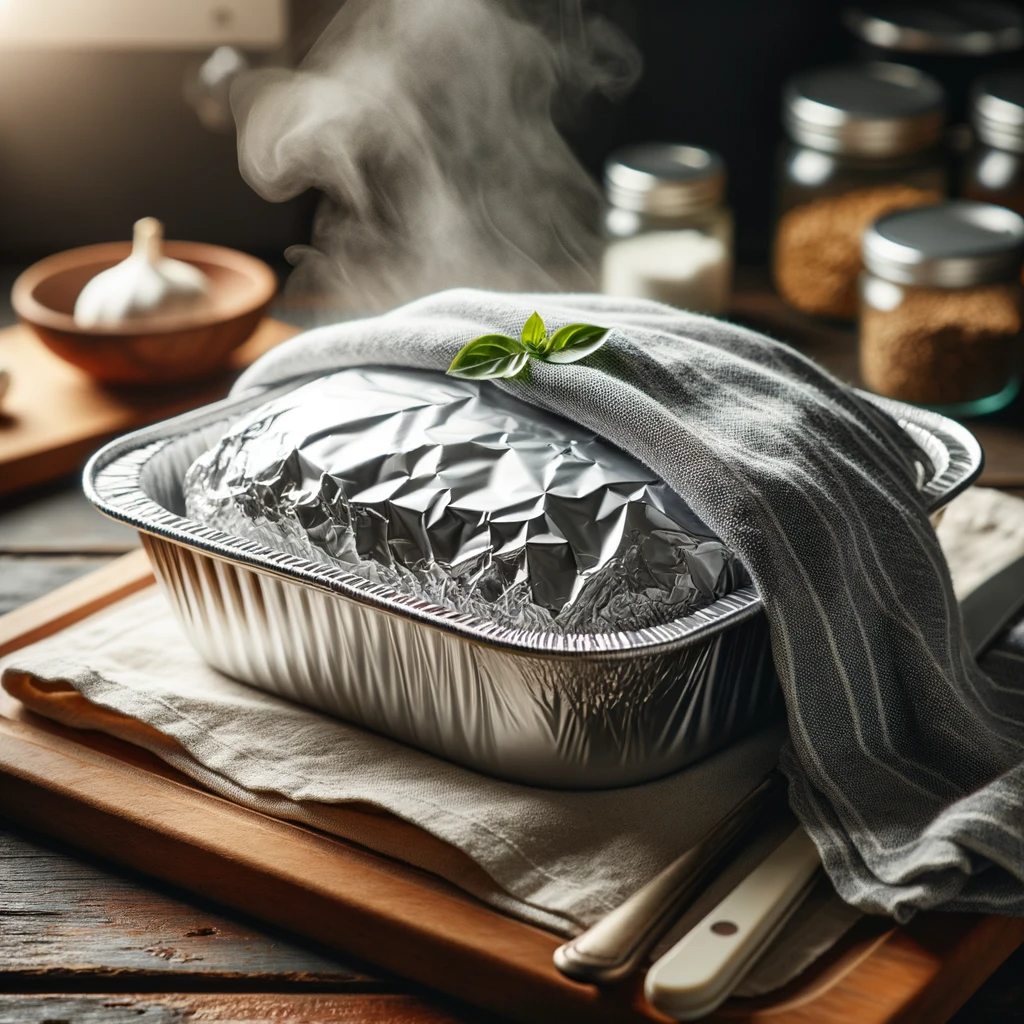
Dish towels retain heat wonderfully. At the cafe, we’d wrap food in a hot, clean towel to keep plates warm for service. It’s cheap and easy!

Preheat the towel for max warmth – I nuke mine for 60 seconds. Keep it wrapped snug around the dish, folding any excess underneath. This hack buys you 1-2 hours of piping hot food.


02 Insulated Adventures

Party Food Warm-Up: 8 Heat Hacks for Happy Guests 3

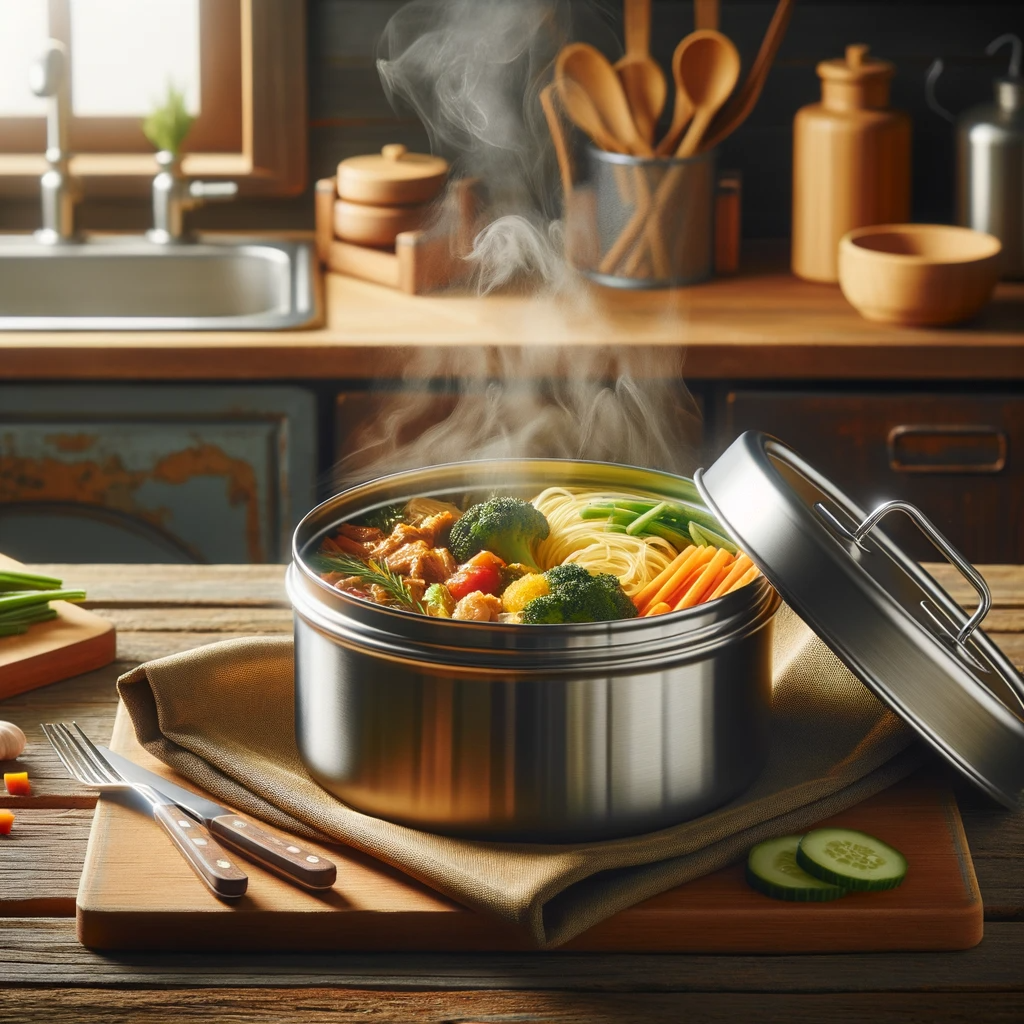
Insulated containers

are a party staple for a reason – they work! We used Cambro containers daily at the cafe to hold soups, sauces and more.

If you preheat the box, it will stay hot for over 4 hours! I fill mine with hot tap water 10 minutes before use. Dump the water and load in hot food. For extra chill, pack ice cream bars around the dish as mini cold packs!

On-the-Go Options: Insulated Bags for Travel and Packed Lunch

Party Food Warm-Up: 8 Heat Hacks for Happy Guests 4

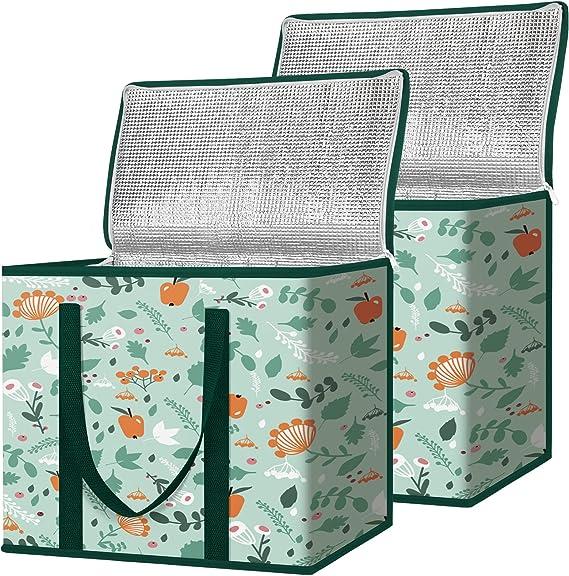
If you’re on the go, consider using an Insulated Bag. These bags offer effective Thermal insulation, reducing the heat transfer rate. They’re perfect for Traveling and keeping a Packed lunch warm in a Lunchbox or Bento.

[su_box title=”Fact” style=”default” box_color=”#DC1182″ title_color=”#FFFFFF” radius=”3″]Insulated Bag – A bag with thermal insulation that reduces the heat transfer rate.[/su_box]


03 Oven Magic (Low & Slow)

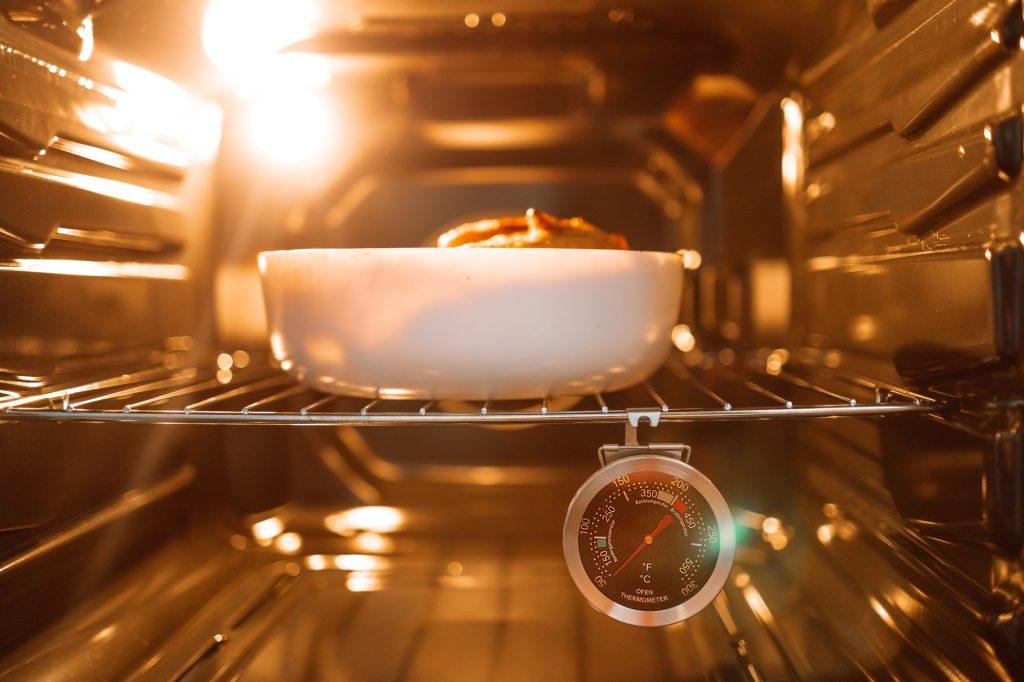
Oven temperature for cooking

Ovens seem obvious but have hidden tricks. For big-batch warming, use the lowest temp that works – try 200°F. It keeps food perfect without drying or overcooking.

I leave my oven cracked open about an inch. This allows steam to escape so textures stay ideal. For crispy apps and sides, bake uncovered on low until the tops are crunchy. Guests devour these every time!


04 Chafing Dish Charisma

Closeup shot of a female who takes delicious food from a warm chafing dish

Chafing dishes served us well at the cafe for years. The lid traps heat and moisture around the food, keeping it irresistible for hours.

Use sternos rated for 2+ hours. Top off fuel every hour for parties over 2 hours. Check food texture and moisture level periodically. Add a splash of water or broth for braised meats if they dry out. Voila – happy guests!

💁🏻‍♂️You may also like: How to Keep Fish and Chips Warm in the Oven


🛠️ Unconventional Hacks for Food Fanatics

Step aside slow cookers and sternos – we’re getting creative! At the cafe I learned you don’t need fancy gear to keep food hot. Simple household items can save parties and impress your friends.

MethodCostCapacityDurationTipsProsCons
Coffee CarafeLow, already ownedSmall1-2 hoursDon’t boil dryAlready own, self heating, compactSmall capacity, may crack
DIY Foil BowlsLow if reuseMedium30-60 minutesn/aCheap, reusable, custom sizesFloppy if large, needs hot food
HayboxMedium, needs storageLarge4+ hoursn/aAll natural, holds heat very wellBulky storage, fire risk
Thermal SockLowSmall30-60 minutesReheat as neededReusable, eco-friendly, moldableSmall capacity, needs reheating

05 Coffee Carafe Surprise

Coffee makers keep java piping hot for hours. Use that power to keep dips and sauces irresistible!

Fill the carafe with hot dip or gravy. Put the lid on and plug it in. The heating plate circulates warmth for 1-2 hours easy! Just don’t let it boil dry. Add water or stock if needed.

06 DIY Foil Insulation

Party Food Warm-Up: 8 Heat Hacks for Happy Guests 5

Foil sheets make instant insulated hot boxes. Line serving bowls with 2 layers of heavy duty foil, pressing it up the sides.

Pour your hot casseroles, sides or breads into the foil. Wrap the top tight and plates stay hot for 30-60 minutes! For sturdier insulation, use foil sheets layered between serving platters.

07 Haybox Harmony

Before slow cookers, people used hayboxes. Fill a box with hay, wrap your hot pot in more hay or towels, close it up and voila – a warmer!

I use an insulated cooler or lidded bucket instead of hay. Wrap your cooked dish in towels, put the lid on and leave it alone for hours. It’s ideal for stews, roasts and rice on outdoor trips. No electricity needed!

08 Thermal Sock Savvy

Party Food Warm-Up: 8 Heat Hacks for Happy Guests 6

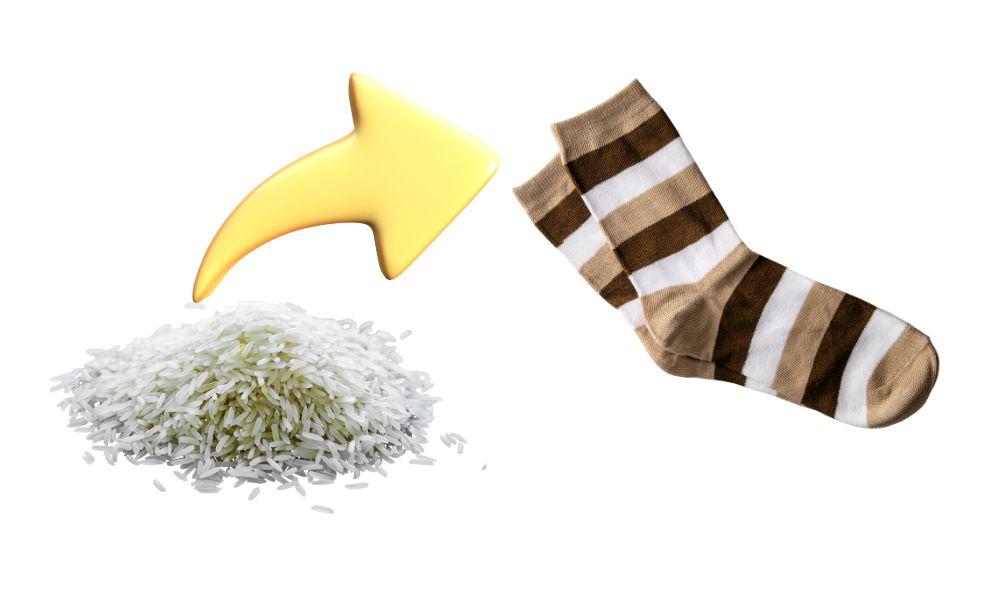
At the cafe, keeping finger foods hot on platters was tricky. Then I discovered the wonders of thermal socks stuffed with rice!

Fill clean cotton tube socks 3/4 full with uncooked rice. Tie them shut. Microwave for 1-2 minutes until piping hot. Arrange them around the edges and bottom of your platter.

The rice holds its warmth and radiates heat into the platter for 30-60 minutes. I use this hack every time I cater parties now! Guests love the hot spinach-artichoke dip and other appetizers.


Seasonal Solutions for All-Weather Celebrations

Party warming needs change with the weather. I’ve hosted events rain-or-shine, in summer heatwaves and winter storms. Here are my best tips for battling the elements while keeping food irresistible.

Winter Warmth Warriors

Frigid weather works fast to cool food off. Turn up the oven and break out backup insulation!

For kids’ winter parties, use insulated lunch bags to keep pizza, nuggets and more piping hot. Arrange bags open on tables and stuff with hot servings.

👉More tricks on how to keep pizza warm for a party, read this article.

Tailgating? Point car heaters (gently!) at covered dishes for backup warmth. Position them to avoid direct blasts and prevent drying. Rotate platters closer to the heat as needed.

Humidity Hustle

Party Food Warm-Up: 8 Heat Hacks for Happy Guests 7

Humidity hides the heat – according to FDA Food Code, hot foods can cool up to 25% faster in humid conditions as moisture evaporates. Luckily, we can outsmart muggy air with smart planning and equipment.

First, adjust your cooking approach. In humid weather, reduce oven temperatures by 25°F to prevent overcooking. Grill 15-20 minutes less to allow carryover cooking later after guests serve themselves.

Outside, create wind barriers around food using tarps, tents or beach umbrellas secured in heavy bases. These portable shelters block moisture-laden breezes from accelerating cooling.

Within the shelters, arrange dishes over preheated stones. Line baking sheets with 1-2” river rocks. Heat at 400°F for 30 minutes then transfer under chafing dishes or platters. The rocks radiate dry warmth for 30+ minutes.

Or go high-tech with portable food warmer shelves. These stainless steel uprights support shelving racks to hold multiple dishes above sternos or burners. Enclose with disposable foil oven tents to lock in heat.

With the right preparation and gear, you can overcome the humid hot air trying to sabotage your perfect party spreads! 🥳👏

Table: Seasonal Party Heating Hacks

SeasonChallengesTips
WinterFrigid tempsInsulated bags, car heaters
SummerFast cooling from humidityWind barriers, adjusted cook times, preheated rocks
RainExtra moisturePortable shelters, foil oven tents, warmer shelves

👷‍♀️Equipment Maintenance and Safety

When using warming gear, safety comes first. Follow these tips from my cafe days for safe and effective heating.

Chafing Dish Cleanliness

Party Food Warm-Up: 8 Heat Hacks for Happy Guests 8

Chafing dishes collect grease, sauce splatter and more. Allow them to cool completely after use before cleaning.

Wash in hot, soapy water with a soft brush. Rinse and dry thoroughly – moisture causes rust over time.

Check fuel levels before storing to prevent leaks. Store upside down with the lid off for air circulation and moisture prevention.

Slow Cooker Safety Features

Modern slow cookers have handy safety additions like:

  • Auto shut-off – Turns off automatically after 12 hours in case you forget.
  • Temperature sensors – Maintain heating between 190- 280°F without scorching.
  • Cool touch handles and knobs – Lets you grab and go worry free.

When using, keep them away from children, flammable items like curtains, and surfaces prone to water damage.

Food Safety and Temperature Guidelines

Preventing foodborne illness relies on proper heating and monitoring. Follow these pro tips:

Again! ⛔️The “Danger Zone” for bacterial growth lies between 40-140°F – keep hot food above 140°! Use a food thermometer to test temperatures.

Insert the thermometer into thickest dish parts avoiding bone, fat or gristle which read higher temps.

Reheat leftover party food to 165°F. Hold hot items at 140°F or higher.

USDA Food Safety and Inspection Service – Provides official guidelines and resources for safe food handling, including temperature recommendations for keeping food hot.

Table: Minimum Internal Temperatures

FoodMinimum Safe Temperature
Soups, Sauces165°F
Roasts145°F
Poultry165°F
Ground Meat160°F

Conclusion

Keeping food hot might seem complicated but just remember the basics – retain moisture, maintain air flow, and insulate dishes from cold.

Experiment with unconventional hacks like granite stone solar warmth and repurposed coffee carafes. Avoid the “Danger Zone” of 40-140°F. Use a thermometer and trust your senses too – hot food smells amazing!

I still think back to that fateful cold spinach dip at the Boat Basin Cafe. But now I’m prepared to save parties everywhere from lackluster flavor fails! Give these tips a try and let me know how your next event goes. Just be careful not to burn any fingers on those piping hot dishes along the way. 😋

FAQS

How do you keep food warm for a large party?

For big groups, use chafing dishes with sternos, slow cookers, and warming trays. Keep your oven on the lowest temperature (170°F) with the door propped open to hold additional batches. Use insulated thermal boxes for easy transport to buffet stations. Maintain temperature by stirring hot dishes frequently.

How can I keep food warm while waiting for guests?

Preheat your serving dishes in a 200°F oven for 20 minutes before filling them with hot food. Use towel tents or breathable foil over top to retain moisture. Place dishes over trays lined with rice-filled socks heated in the microwave. Set dips in preheated coffee carafes to take advantage of the hot plate.

How do you keep food warm for an hour?

Insulated aluminum pan carriers with lids will keep casseroles and roasted meats hot for over an hour. For small batches, wrap plates thoroughly with towels preheated in the dryer or microwave. Stuff towels between dishes on a sheet tray, cover tightly in foil, and keep sheet pans in your warming oven.

How do you keep food warm for a party without an oven?

Try a haybox! Line a cooler with blankets and lid tightly. The insulation traps steam and retains heat amazingly. Use slow cookers on the buffet for stews and dips. For crispy foods, wrap platters in foil then dishtowels and place in an insulated carrier. Position near a heat source like a fireplace or radiator to maintain warmth.

Water in Bottom of Dishwasher? Quick Fixes!

A busy summer shift at the Boat Basin Café introduced me to the frustration of water pooling in dishwashers. The experience of a malfunctioning dishwasher and the resulting pile-up of dishes highlighted the need for quick fixes to this common household problem.

This guide is going to help you efficiently resolve and prevent water accumulation in your dishwasher, ensuring your kitchen runs smoothly. 🚰🍽️”

[su_quote cite=”John Smith, a certified appliance repair specialist
” ]To minimize water pooling, regular maintenance is essential. This includes cleaning the filter and ensuring the drain hose is free of blockages. Such steps are crucial for your dishwasher’s efficiency.​[/su_quote]

Water In The Bottom Of Your Dishwasher (6 Quick Solutions)

Problem:

Water remaining in the bottom of your dishwasher poses several risks, including mold growth, clogged pumps, unpleasant odors, and reduced cleaning effectiveness.

Diagnosing the cause of this issue can be challenging, but as an experienced “dishwasher doctor,” I am here to help you quickly resolve it and restore efficient dishwasher operation.

Solution:

My expertise in dishwasher drainage stems from my experiences as a barista and chef. Combined with extensive research and discussions with repair professionals, I offer effective solutions for these problems.

This guide will provide you with practical troubleshooting tips to not only fix your dishwasher but also assist others with similar problems. Let’s dive into solving these water issues!

💧 Troubleshooting the Tide:

 If your dishwasher is holding water instead of draining it, it’s time to distinguish between normal moisture and signs of malfunction.

Normal vs. Not Normal Moisture Levels

Normal🙂Not normal, Houston we have a problem! 😱
A few water droplets.Large pools of water covering most of bottom.
Slight water film/sheen.Puddles over 1 inch deep.
Damp surfaces but not saturated.Soggy or saturated interior surfaces.

As you can see, the volume of water is what separates the slight moisture of a functioning machine vs. standing water signaling an underlying problem.

🔍 Quick Check CSI:

Before panicking about major malfunctions, let’s eliminate easy but surprisingly common reasons for extra moisture sticking around:

  • Confirm cycle 100% finished, didn’t prematurely stop. Sometimes distracted users open mid-cycle assuming completion.
  • Run just the drain cycle if available on your model. Double checks for obstructions.
  • Ensure dishes loaded properly, not blocking spray arms. Improper loading => incomplete washing and stagnant spots.
  • Check for dishware like plastic containers touching heating element, warping and obstructing flow.

Minor adjusts like these may already restore your dishwasher’s moisture balance! But if sizable pools remain, we need to call in…drumroll please…the filter!! 🥁

💁🏻‍♂️You may also like: How to Dispose of a Microwave: 8 Methods+Checklist

🧹 Filter Frenzy:

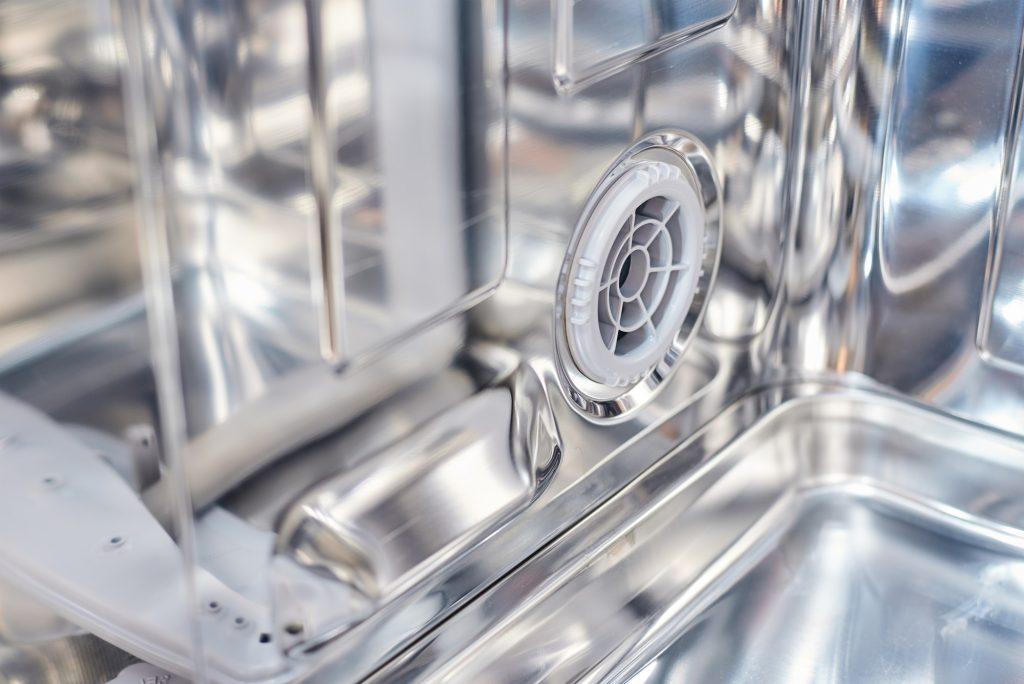
a dishwasher machine filter close up. Domestic kitchen appliance parts

The filter, typically located along the bottom or side wall, serves as the first line of defense against food particles and debris that could clog interior workings.

But diligent rinsing doesn’t always prevent grease and grime buildup. Follow this breakdown based on common models to reveal and refresh your filter:

For Bosch filter along floor 👇:

  1. Locate round filter screw cap near bottom center and turn counterclockwise to release. Lift out carefully.
  2. Remove filter tray underneath also turning counterclockwise if necessary.
  3. Rinse filter pieces individually until water runs clear. Use soft brush if needed to dislodge gunk.
  4. Confirm no stray food bits remain in socket filter sits inside.
  5. Return filter parts aligning arrows in same orientation originally. Press down firmly and lock by turning clockwise.

For Frigidaire style filter behind lower spray arm 🔙:

  1. Find spray arm along dishwasher right side and gently pull straight up to detach. Set carefully aside without bending.
  2. Locate round filter behind spray arm space. Twist counterclockwise and lift out vertical cylinder shape.
  3. Rinse cylinder and screen mesh piece inside until clear of debris.
  4. Return filter aligning original direction. Twist clockwise to lock back in place.
  5. Finally replace spray arm pressing straight down until fixed. Confirm it rotates freely.

Vigilant filter maintenance foils much unwanted moisture! But if sizable pools remain after checking here, our investigation continues…

🕵️‍♂️ Drain Detective:

Water in Bottom of Dishwasher? Quick Fixes! 9

Moisture escaping down the drain allows fresh water entering for pristine washing. When this balance goes awry, backups begin. Let’s explore what’s causing congestion below:

As you can see in Table below,, there are a few key areas we need to check for potential clogs disrupting drainage flow. Food particles and gunk are usually the culprits.

Key Drain Components

PartDescriptionClog Suspects
Drain HoseCurved pipe carrying wastewater to sink drain or standpipe.Food debris, suds accumulation
Air GapOpening along countertop or sink rear channeling water. Prevents backflow into machine.Mineral deposits narrow passage
Drain PumpSmall motorized pump actively pumping water out to drain.Broken bits of plastic, glass, small toys

Now that we know the prime suspects for drainage disruption, let’s start snooping! We’ll move methodically from exterior hoses back into the internal workings. If the issue persists after checking here, the notorious drain pump lies next…

🐍 Kinked Culprit

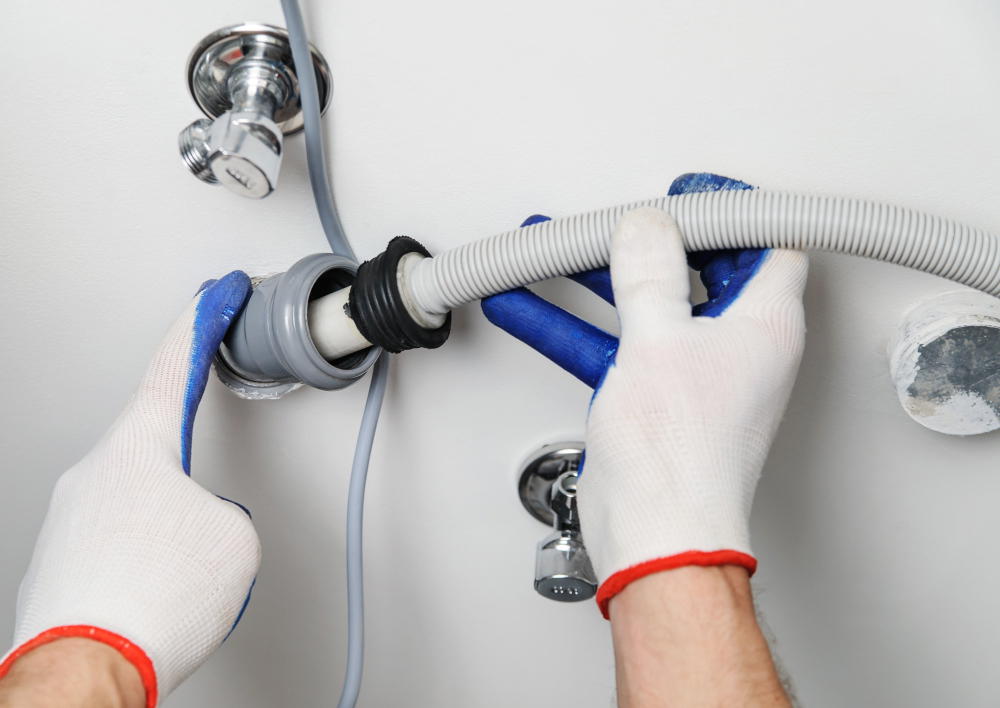
Since the flexible drain hose runs along the rear exterior, it’s vulnerable to kinks from pushing machines in too tightly. A common mistake! Let’s inspect:

  1. Pull dishwasher out carefully watching for snags. Tip: Place towels underneath to catch leaks.
  2. Examine drain hose along backside for sharp bends and kinks.
  3. Straighten any tight angles gently by hand. Don’t force or tear rubber.
  4. Confirm hose outlet has no obstructions. Remove debris.
  5. Test by running a rinse cycle and checking if water flows freely.

Hose handled? Now we ascend into the abyss itself…first stop, the mystical air gap! 🕳️

☁️ Air Gap Enigma

Caring For Your Dishwasher

Like the atmospheric layer allowing jets to soar 🛩️, the air gap gives your dishwasher ventilation room preventing water overflows.

This opening along the far top edge of sink and countertop collects escaping water from the drain hose and diverts it into the garbage disposal or sink plumbing.

But mineral deposits from the drainage itself can accumulation and clog this vital passage. Let’s prevent the backup:

  1. Locate the air gap opening, usually along back rim of sink or countertop near wall. Remove outer cover if necessary.
  2. Shine flashlight inside. Confirm passage isn’t narrow or obstructed. If so, scrape gently with toothpick or pipe cleaner.
  3. Mix vinegar and baking soda into a foamy paste. Apply and let sit 5 minutes loosening deposits. Rinse until clear.
  4. Replace cover securely. Test dishwasher drainage and observe air gap doesn’t overflow.

🚿 Pump Patrol

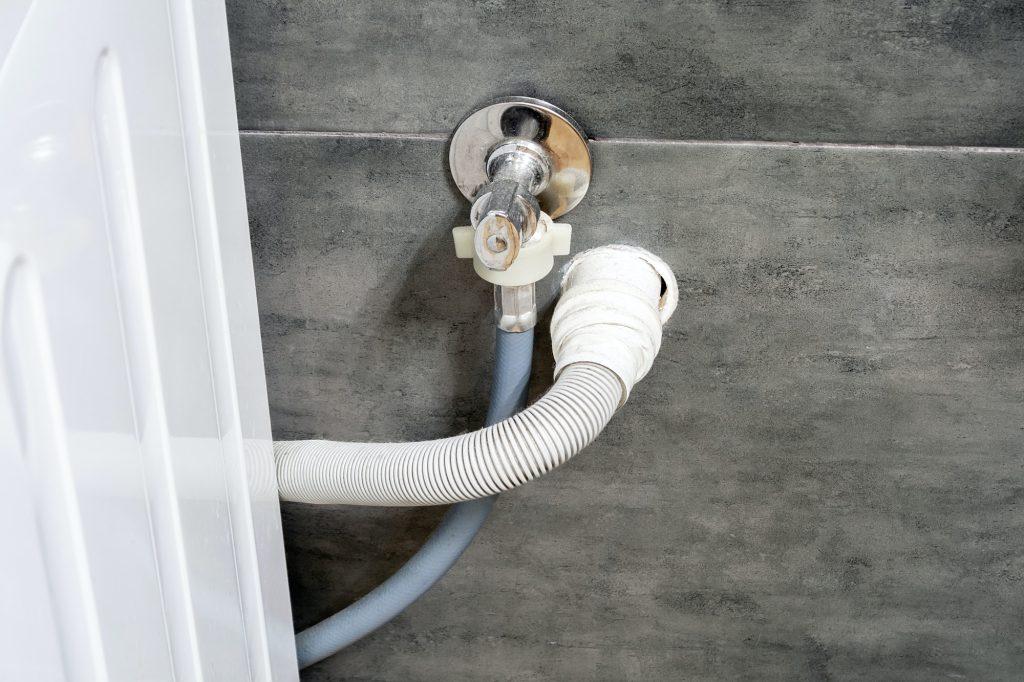
Dirty drain and water hoses for the washing machine running into a wall

Pump Power

The drain pump is the motorized mechanism actively pumping water out from the tub to the drainage system. Powered by electricity, this small impeller blade centrifugally spins moving water along similar to a household fan circulating air. Any debris passing the filter gets flung out here.

Minor Mishaps

If a small clog reaches the pump impeding rotation, it will fail to drain properly. Try these DIY remedies before replacing:

  • Use a tiny flexible brush or straightened paperclip to gently dislodge obstructions through the drain filter opening. Don’t scratch plastic.
  • Alternately pouring a few cups each of hot vinegar water and baking soda solution then running a cycle may break up some gunk through chemical reaction.
  • Carefully insert a narrow plastic straw into the impeller chamber to loosen debris. Don’t force!

Pro Power Needed

But if the pump motor is making loud noises, leaks water, the machine trips your electrical breaker, or water remains standing despite these attempts, it likely needs professional service. Improper DIY tinkering can further damage the pump or dishwasher. Know your limits!

🧪 Scum Science and Sparkling Secrets

Scum Symphony

Dishwasher scum originates from food residues and mineral deposits in the water bonding together in layers over time. Starch, protein, grease, and oils left on dish surfaces act as bonding agents enabling minerals like calcium and magnesium to stick.

Natural Nirvana

Environmentally-friendly citric acid solutions help dissolve this layering without harsh chemicals:

  • Fill dishwasher detergent cup with 1 cup baking soda then pour 1 cup white vinegar directly into the tub. Run empty on full hottest cycle allowing reaction to permeate.
  • Mix lemon juice from 5 lemons with 2 quarts warm water. Scrub inside tub walls with sponge then run empty on low temp cycle for residue-free rinse.

Maintenance Magic

Prevent scum recurring with these tips:

  • Monthly use dishwasher cleaner tablets targeting interior buildup in the cycle.
  • Air dry dishwasher interior after cycles finish by propping door open slightly until surfaces are completely dry.
  • Pre-rinse excess soils from dishes before loading, especially burnt on or greasy casserole pans.

🎁 Bonus Round

Surprise your dishes with these refreshing ideas!

🍋 Citrus Surprise

Deodorize and brighten by running cycle with lemon slices or orange halves along detergent cup’s edges. Adds a fresh scent and helps descale mineral buildup over time.

🧊 Ice Cube Advantage

For rapid drying and reducing water spots, throw a few ice cubes into the bottom tub just before starting final hot rinse cycle. As cubes melt, steam created prevents droplets remaining. Plus dishes stay cooler for easier handling unloading.

Conclusion

By now, you should feel well-prepared to tackle various dishwasher drainage issues! 🕵️‍♀️ You’ve already begun collecting clues on common moisture mishaps, unclogging tricky filters, flushing away funky odors and even accelerating drying time. Nice work!

But a detective’s job never ends, so consider bookmarking this guide for future reference or sharing with fellow dishwasher damsals in distress. Together we can banish standing water! I’ll also be updating with new content as I continue my appliance investigations.

Have your own dishwasher struggles or genius tricks? Join the drainage diva community in the comments – we want to hear your stories! Let’s keep the intel and inspiration flowing. 💬

FAQs

What causes standing water in a dishwasher?

Food debris clogging the drain system – This is the most common reason water can’t properly drain out. Small food particles can accumulate over time and block water from draining.
Kinked drain hose – If the drain hose gets kinked or pinched, it can prevent proper water flow. Check that the hose is free of any tight bends.
Clogged dishwasher pump – Food debris and grease can clog the pump impeller so it can’t pump water out quickly.
Drain clog – If you have a garbage disposal, standing water may indicate the drain line connected to the disposal is clogged.

How do I unclog my dishwasher drain?

Remove the drain filter and clean out any food particles trapped in it. Rinse thoroughly.
Use a zip-it style drain cleaner to pull hair and debris from the drain line.
Disconnect drain hose and check it for kinks and clogs. Flush it out with hot water.
Use a dishwasher cleaner product to break up grease in the pump. Run an empty wash cycle afterwards.

Is it safe to run my dishwasher with some standing water?

It’s generally not recommended. A small amount of water may drain out over time. But running full cycles with several inches of water in the bottom can lead to poor cleaning and may damage internal components. The best bet is to fully unclog the drain before running additional loads.

How to Reheat Smoked Turkey: Unlock Maximum Flavor & Avoid Dryness

Tired of dry, leftover turkey? Reheat smartly to unlock its juicy, flavorful potential and turn your leftovers into meals you’ll crave.

[su_quote cite=”Sarah Jones, Home Chef & Leftover Enthusiast
” ]Smoked turkey isn’t just for holidays! With simple reheating tricks and creative recipes, turn those leftovers into mouthwatering meals all week long.​[/su_quote]

How to Reheat a Smoked Turkey

If you just want to know how long to reheat a smoked turkey, click here.

🔑 Key Things to Know

Smoked turkey offers convenience but requires safe handling. Before cooking up this tasty bird, keep these key guidelines in mind:

  • Store in the fridge for up to 4 days or freeze for 4 months.
  • Reheat to 165°F to ensure safety.
  • For gentle reheating, use oven at 225°F, grill on low, or sous vide at 150°F.
  • Wrap tightly and store in the coldest part of the fridge, away from the door.
  • Use older leftovers first for freshness.
  • Before reheating, brine turkey slices and use broths, foils, or water pans to prevent dryness.

🍗 Why Smoked Turkeys?

Smoked turkey has a uniquely sweet, woody flavor that sets it apart from oven-roasted turkey. We often eat turkey only as Thanksgiving leftovers, but smoked turkey is versatile and can be enjoyed all year.

The delicate smoky aroma and tender meat make smoked turkey an exceptional filling for sandwiches, wraps, salads, and more.

Add shredded smoked turkey to egg scrambles for a perfect breakfast on lazy weekends. Diced smoked turkey breast transforms leafy salads from mundane to crave-worthy.

Beyond its versatility, smoked turkey keeps beautifully as leftovers. Sliced smoked turkey stays fresh in the refrigerator for up to four days.

This simplicity helps in quickly preparing weekday lunches like pitas, subs, or Caesar salad wraps. With just a little creativity, smoked turkey can be so much more than an annual holiday tradition.

Benefits of Reheating Smoked Turkey 

  • Saves Money
  • Shredded turkey works in many easy, tasty meals like omelets, lettuce roll-ups, hot dishes, and soups.
  • Getting creative with leftovers saves cash instead of making boring turkey sandwiches again.
  • Reduces Waste to Help Environment
  • Reusing turkey cuts down on food sent to landfills, with over 20% of all trash being wasted food.
  • Also saves resources used in turkey transportation and production.
  • Makes Weeknight Meals Easier
  • Shredded leftovers can quickly assemble into quesadillas, flatbreads, grain bowls, and more.
  • Preparing some ingredients ahead of time makes fast, healthy dinners easy on busy nights.

Reheating smoked turkey means:

✅ Save money

✅ Help the planet

✅ Less stressful weeknights

It’s a triple win!💪

🥗 The Nutritional Benefits of Smoked Turkey

Smoked turkey packs an impressive nutritional profile. With just 3 ounces (85 grams) providing 24.9 grams of satiating protein, smoked turkey serves as a nutritious and versatile ingredient.

NutrientAmount Per 3 oz (85g) ServingBenefits
Protein24.9gMuscle building and repair; keeps you feeling full
Vitamin B618% Daily ValueSupports brain function, immunity, red blood cell production
Niacin24% Daily ValuePromotes healthy skin, digestion, nervous system function
Selenium25% Daily ValueBoosts immune system, thyroid health, antioxidant protection
Sodium19% Daily ValueImportant for fluid balance, muscle contraction, nerve signaling
Iron6% Daily ValueFacilitates red blood cell formation and energy metabolism
Zinc15% Daily ValueAllows nutrient conversion to energy; enables bodily processes
Vitamin B127% Daily ValueEssential for red blood cell formation and energy metabolism

Protein and Muscle Health

The high protein content promotes muscle growth and repair while keeping you feeling fuller longer. This makes smoked turkey an excellent addition to meals when trying to lose or maintain weight.

Immunity and Antioxidant Defense

Smoked turkey contains selenium and vitamin B6, which strengthen the immune system and thyroid function. It also provides niacin to support healthy digestion.

Energy Production

As a good source of iron and vitamin B12, smoked turkey aids red blood cell formation and energy metabolism. The zinc it supplies further facilitates bodily processes that convert nutrients to fuel.

🔥🍖 How Reheating Impacts Nutrients


Reheating smoked turkey has some surprising benefits
beyond just convenient leftovers. When you reheat smoked turkey, its collagen breaks down into gelatin. This released gelatin provides essential amino acids that support joint health.

Annually, the US alone wastes over 4 billion pounds of turkey meat. This waste burdens landfills and squanders resources used in raising turkeys.

By reheating your leftovers instead of tossing them out, you can directly reduce your environmental impact.

The EPA estimates a family of 4 wasting just half the average amount of turkey still conserves over 7 lbs of CO2 equivalent greenhouse gases.

Reheating also unlocks new nutritional value via a fascinating chemical process. Heating turkey breaks its collagen into gelatin.

This gelatin is rich in amino acids like glycine and proline that protect joints. For those facing inflammatory conditions or joint injuries, consuming reheated turkey in casseroles and broth-based dishes provides targeted nutritional support.

The University of San Francisco reported a 30% increase in joint-building proteins after collagen in turkey turns into gelatin upon reheating.

Mastering Smoked Turkey Reheating Methods

Roasted turkey breast in casserole on black background

Harnessing Science for Optimal Smoked Turkey Reheating

Understanding the scientific processes behind reheating unlocks better moisture, texture, and even flavor compared to casual leftovers.

Navigating the Moisture Loss Tightrope

Reheating temperatures must balance perfectly between drying out turkey and safely eliminating bacteria. At too low of heat, microbes can multiply and proteins stiffen.

Too hot, and cellular water rapidly evaporates. The 130-150°F “goldilocks” zone gently rewarms turkey without squeezing out precious moisture through protein shrinkage and tightening.

Reviving Dried Meat with Brine Power

Osmosis and diffusion science resuscitates even badly dried smoked turkey. Soaking in a broth brine before reheating allows water migration into turkey cells, restoring much needed hydration.

Seasonings simultaneously infuse, amplifying flavor. Through this controlled rehydration, brining helps prevent desiccation during the reheating process itself.

Blending Tradition with Technology

While ovens suffice for basic leftovers, modern tech like sous vide provides unmatched moisture control and tenderness by gently cooking vacuum-sealed turkey in a precise temperature water bath.

Likewise, grills can quickly imbue bonus smoky notes through vaporized drippings. Creatively blending these advanced methods with traditional oven approaches unlocks superior reheated turkey.

By understanding the science from a molecular level up, we can truly reinvent leftovers instead of just preserving them. Turkey reheated with care emerges revitalized, juicy and full of flavor possibility.

MethodBest ForTemperatureTimeTips
OvenWhole turkey225°F10-15 min per lb– Cover in foil
– Add shallow pan of water
– Use meat thermometer (140-165°F)
StovetopSliced turkeyMedium-low heat2-3 min per side– Slice into 1/4″ pieces first
– Use oil & herbs for flavor
– Add broth to prevent drying
Sous VideTurkey slices or shreds150°F1-2 hours– Creates incredibly moist, tender texture
GrillTurkey slicesLow heat5-10 minutes– Add wood chips for smoke flavor
– Char edges slightly

🦃🔥Oven Method: Ideal for Whole Smoked Turkeys

The oven allows you to gently reheat a whole smoked turkey leg, drumsticks, or breast to retain moisture and texture.

  • Pre-heat the oven to 225°F and place the fully cooked smoked turkey meat in a roasting pan. Cover with foil to prevent overcooking.
  • Use a meat thermometer inserted into the thickest part of the turkey breast. Heat until it reads 140-165 degrees for food safety.
  • Placing a shallow pan filled with water on the oven bottom adds moisture to keep the reheating turkey legs and meat from drying out.

🍳🍗Stovetop: Quick Reheating for Sliced Smoked Turkey

You can quickly reheat sliced smoked turkey cut from the breast, legs or wings in a skillet on the stovetop.

  • Prepare the smoked turkey for reheating by cutting it into 1/4 inch slices first.
  • In a pan over medium-low heat, add olive oil and herbs like rosemary or thyme for added aroma and flavor.
  • Cook the turkey slices for 2-3 minutes per side just until heated through, flipping halfway. Add broth to prevent drying.

🌡️🔥Unexpected Methods: Sous Vide and Grilling

Go beyond traditional reheating by experimenting with sous vide cooking or firing up the grill:

  • Sous vide smoked turkey in a water bath at 150°F for 1-2 hours to achieve incredibly moist, fork-tender reheated meat.
  • Infuse grilled flavor by reheating smoked turkey slices directly on a hot grill over low heat with aromatic wood chips. Char the edges slightly before serving.

📝Pro Smoked Turkey Storage Tips

reheat turkey

Correctly storing your smoked turkey legs, breast or whole bird preserves safety, freshness and moisture. Learn more about the shelf life of turkey in the fridge in our detailed guide.

  • Store smoked turkey tightly wrapped in the coldest section of the refrigerator (below 40°F) to inhibit bacteria growth.
  • Frozen smoked turkey breast or leftovers keep for 2-4 months when sealed airtight in freezer bags or containers to prevent freezer burn or ice crystals.
  • Clearly label packages with the date and contents for easy identification. Tracking freshness ensures you use the smoked turkey within recommended 3-4 day refrigeration or 2-4 month frozen time period.
  • Avoid areas like the refrigerator door that fluctuate in temperature during daily open/close cycles. These temperature swings degrade smoked turkey quality quicker through moisture loss.

Reheating & Storing Leftovers

  • Reheat smoked turkey no more than once. Multiple reheats increase risk of dangerous bacterial growth.
  • After carving roasted smoked turkey from the bone, store slices and shredded meat tightly sealed in bags/containers in the coldest refrigerator spots for 3-4 days maximum.

For guidelines on storing raw turkey, see our detailed article on safe fridge storage practices.

🌿Beyond Reheating: Creative Leftover Transformations

As a longtime chef constantly seeking global inspiration, I’m always amazed by smoked turkey’s versatility for fusion flavor.

My New York cafe guests often didn’t realize how effortlessly turkey transforms into internationally-inspired small plates perfect for happy hour pairings. Let me share some of my cherished creations.

Smoked Turkey Bibimbap

Bowl of bibimbap

Korean flavors work deliciously with smoked turkey’s sweetness. Sliced turkey breast slices tangles with mushrooms, shredded carrots, sprouts and spinach over sesame ginger rice. The runny fried egg and gochujang sauce complete the flavor profile.

Jerk Spiced Smoked Turkey Wraps

Men's hands wrapping traditional shawarma wrap with chicken and vegetables

Seeking an lighter option, I combined shredded smoked turkey breast with sautéed bell peppers, sweet plantains and beans de lima beans punched up with my homemade jerk dry rub.

Spooned into crisp bibb lettuce leaves, every crunchy, lightly spicy bite transports you to the Jamaican coastline. Adding some mango salsa ties it all together.

Smoked Turkey Cranberry Empanadas

Turkey empanadas

These handheld baked pastries were a guest favorite at my café. Flaky dough cradles a savory smoked turkey filling amplified by tart dried cranberries, oozy Italian fontina and caramelized onions.

Adding a touch of nutmeg, cinnamon and allspice gives these turkey empanadas a warmth that leaves you craving more than one. I love serving them with a kicked-up avocado salsa verde.

I hope my global leftover turkey creations inspire you to think beyond the usual boring sandwiches.

With some imagination and willingness to fuse flavors from around the world, smoked turkey transforms into an anytime meal full of flavor and flare your guests will adore.

FAQs

How do you reheat a smoked turkey without drying it out?

Use gentle heat like an oven or microwave, take it slow, and add moisture. Cover the turkey in broth, foil, or an oven bag before reheating it slowly to an internal temp of 165°F. Adding a water pan to the oven provides humidity. Resting it afterwards locks in juices.

Is smoked turkey good reheated?

Yes, smoked turkey retains its flavorful smoky taste and tender texture after being properly reheated. Use lower oven temps or quick stove top methods. Check internal temp with a meat thermometer to prevent overdrying.

How do you reheat smoked meat without drying it out?

With all smoked meats, gentle reheating is key. Opt for slower oven, crockpot, or sous vide methods. Slice meats thinner before reheating. Cover or wrap to seal in moisture. Spritz with broth and rest meat after reheating to absorb juices.

How do you reheat a smoked turkey bag?

Preheat your oven to 300°F and place the sealed smoked turkey bag directly on a baking sheet. Heat turkey for 10-15 minutes per pound, checking internal temp with a meat thermometer inserted through the bag. Rest turkey for 15 mins before carefully removing from hot bag.

How do you reheat a smoked turkey and keep it moist?

Use foil or an oven roasting bag to cover and seal in moisture. Baste frequently with turkey broth or pan juices. Allow the turkey to rest tented in foil after reheating so steam can gently finish cooking and moisten the meat.

How do you reheat turkey so it’s moist?

Slice turkey thinner before gentle reheating methods like baking at 275°F or microwaving with broth. Keep leftovers sealed and buried in their juices. Quick stove top sautéing in butter prevents drying. Brining resuscitates dried out portions before reheating. Let sit after heating.

Take Your Smoked Turkey Leftovers to New Heights

Hopefully this guide has empowered you to go beyond basic turkey sandwich leftovers. With the reheating tips and creative food transformation ideas, you can rediscover the possibilities of your leftover smoked turkey.

Now it’s your turn to experiment with these techniques and invent your own twists. Does sous vide turkey come out juicy or dry? What unique spice rub pairing can liven up grill reheated slices? Which salad combo is your new signature turkey leftover go-to?

Share your smoked turkey victories and lessons learned by engaging with your fellow readers. Trade storage observations, safety best practices and even radically inventive leftover recipes in the comments below.

What Alcohol Can I Drink on a Diet? Guilt-Free Booze Hacks for Weight Loss Wins

Wish you could enjoy refreshing summer drinks without sacrificing your health goals? Good news! Say goodbye to high-calorie daiquiris. Choose refreshing, low-calorie drinks that are tasty and healthy.

This guide offers many tips, tricks, and recipes. Learn to enjoy low-calorie drinks like an expert. So start using your shaker, add fresh mint, and prepare to enjoy drinks that make you happy and healthy!

🍹 Rethinking Your Drink: The Best Choices for Dieters

When it comes to alcohol, some options are better than others if you’re watching your weight. Here’s a quick look at the top diet-friendly alcohol picks so you know what to look for:

  • Vodka Sodas: The classic with a twist! Ditch sugary highballs and muddle in fresh berries or lime for a vibrant, calorie-conscious fizz (around 100 calories per serving).
  • Dry Wines: Cheers to heart-healthy resveratrol! Dry white wines like Pinot Grigio or Sauvignon Blanc hover around 120-130 calories per glass, boasting lower sugar and carb counts than their sweeter counterparts.
  • Ultra-Light Beers: Not all light beers are created equal. Dive into the world of ultra-lights like Michelob Ultra, with a mere 95 calories per 12 oz. Be mindful of ABV percentages, as some “light” beers pack a hidden calorie punch.
  • Hard Seltzers: My favorite choice! For about 100 calories and about 5% ABV, the delicious fun flavors and bubbles make summer fantastic!
  • Spirits on the Rocks: Keep it simple and sophisticated with gin, vodka, rum, or tequila. These pure spirits clock in at around 100-105 calories per shot and are carb-free. Elevate your experience with a squeeze of fresh citrus or a splash of unsweetened iced tea.

While most alcoholic beverages should still be enjoyed in moderation on a diet, some options lend themselves better to weight management goals than others. The key is being an informed and mindful imbiber. Pay attention to overall calorie counts, added sugars, and carbohydrate content when evaluating diet-friendliness.

Out of beer, wine, and spirits, distilled liquors like vodka, tequila, gin, and rum tend to have the lowest calorie counts per serving. Opting for these straight up or on the rocks makes for easy portion control. For an extra dash of flavor, spice them up with a spritz of citrus, a splash of seltzer, or antioxidant-rich iced tea.

Beyond spirits, dry wines and light beers can fit into a balanced diet when consumed responsibly. Just be vigilant about creeping ABV percentages in supposedly “light” beers – more alcohol means more calories! And don’t forget the ultimate diet drink MVP: hard seltzers! With fun fruity flavors, hearty carbonation, and an average of 100 calories per can, it’s my go-to summer sipper for staying satisfied while keeping trim.

woman drinking a glass of wine

🍺 Regular vs. Ultra-Light Beers: Exact Calorie Counts

When it comes to beer, going ultra-light makes a big difference calorie-wise. Here’s a breakdown:

Beer TypeCalories per 12 oz
Budweiser145
Coors Light102
Michelob Ultra95
Heineken Light99
Corona Light99

As you can see, those last three all hover right around 100 calories, making them the best diet-friendly options. Remember, checking labels and ABV percentages is key!

Remember, Moderation is the Masterpiece. Even low-calorie choices still contain calories. Stick to two drinks per day at most to keep health goals on track. Prioritize hydration with water in between, and always listen to your body’s cues.

What Alcohol Can I Drink on a Diet? Guilt-Free Booze Hacks for Weight Loss Wins 10
Photo by Rachel Claire

🍹 Putting Yourself in Control: Why Make Your Own Drinks

DIY is the key, my friends. Toss those sugar-loaded store-bought mixes and start embracing some homemade magic! When it comes to crafting delicious, lower-calorie drinks, fresh is best. I’m talking freshly squeezed orange or grapefruit juice, lively seltzers infused with cucumbers or herbs, unsweetened teas – let real ingredients shine! And don’t shy away from getting creative with muddled berries, edible flowers, fruit slices. Your tastebuds will thank you.

Now for a little substitution wizardry – swap out high-cal liqueurs for muddled fruit. Lose the sugary syrups and mix in some bubbly flavored seltzer instead. Trust me, your waistline will thank you too! And you can always experiment with making your own infused combos at home, like a refreshing cucumber-mint or sweet rosemary-grapefruit.

Don’t underestimate the power of seltzer and sparkling water. They add delightful bubbles without the extra calories! Opt for the flavored kinds to get a hint of sweetness or play around with fruit garnishes. Mix up some magic and toast to your delicious, guilt-free creations! I’ve written an article on whether seltzers could be good for diabetics due to its low sugar content, great taste, and good hydration.

To make your own sparkly drink, you can use a reusable system like the SodaStream Terra. Easy to use and allows you to control the amount of sugar.

🥤Mixers Matter: Crafting Low-Calorie Combinations

Putting thought into your mixer choice makes all the difference in crafting skinny cocktails. As a general rule of thumb, keep it simple:

  • Seltzer or soda water – 19 to 100 calories
  • Fresh juice like lemon, lime, grapefruit – 25 to 75 calories
  • Herbal tea or diet soda – 0 to 5 calories

Compare that to store-bought mixes like margarita mix (200-300 calories per cup) or tonic water (130 calories per cup).

Below is a handy chart to reference:

MixerCalories per Cup
Store-bought margarita mix268
Schweppes tonic water130
Simply Lemonade220
Homemade Strawberry Lemonade112
La Croix seltzer0

With some easy homemade substitutions, you can save over 150 calories per drink!

Choosing Low-Sugar Spirits

When it comes to liqueurs and aperitifs, the sugar content can vary widely. Ones made from wine or herbs tend to be lower on the glycemic index, while flavored or cream-based ones spike faster.

Some of my favorite low-sugar standbys are:

  • Campari – light and refreshing bitters, perfect for a spritz with soda water or a Negroni with a twist.
  • Aperol – vibrant orange and herb flavors, ideal for an Aperol Spritz or a sunset-inspired low-cal Bellini.
  • Dry vermouth – herbaceous without the sweetness, adds complexity to classic cocktails like Dry Martinis or Manhattans.
  • Drambuie – a smooth blend of Scotch whisky and honey, adds a touch of warmth and depth to cocktails or can be enjoyed neat on ice.

These low-sugar options let you add a punch of flavor to your drinks without derailing your health goals.

🍸 Crafting Low-Calorie Cocktails: A Recipe Guide

Now, let’s get mixing! Here are some step-by-step instructions for some of my go-to low-calorie creations:

Skinny Blood Orange Margarita

Ingredients:

  • 1.5 oz tequila
  • 1 oz triple sec (can be replaced with soda water for even fewer calories)
  • 1/2 cup fresh blood orange juice
  • 1 tbsp lime juice
  • Ice, orange wheel to garnish

Combine all ingredients in a shaker filled with ice. Shake vigorously and pour into a salt-rimmed glass. Garnish with an orange wheel for a vibrant touch.

Total calories: 242 (with triple sec) or 150 (without triple sec)

What Alcohol Can I Drink on a Diet? Guilt-Free Booze Hacks for Weight Loss Wins 11
Photo by ELEVATE

🍷 Red Wine: A Heart-Healthy Indulgence

Transitioning to lighter sips, I get lots of questions about the health impact of wines. The antioxidant resveratrol in red wine can provide cardiovascular benefits, but of course, this doesn’t justify drinking too much. I always emphasize enjoying in moderation – no more than one 5 oz glass per day. Choose dry varieties like Pinot Noir rather than sweet dessert wines.

Here’s a comparison of calorie counts by the glass:

Wine TypeCalories per 5 oz
Riesling (sweet)165
White Zinfandel (sweet)150
Pinot Grigio123
Chianti Classico125
Cabernet Sauvignon125

Dry reds like Cabernet Sauvignon or Chianti offer the best balance – you get flavor along with the potential health perks.

Beyond Alcohol: Non-Alcoholic Alternatives

While this guide focuses on lower-calorie alcoholic options, I know many people opt for non-alcoholic alternatives for health or personal reasons. That’s why I always have delicious zero-proof options on hand!

The world of non-alcoholic drinks is constantly evolving, offering exciting choices like:

  • Hop waters with a refreshing burst of hops without the beer buzz.
  • Seedlip spirits, crafted with botanicals that mimic the complexity of gin or whiskey.
  • Citrusy Rad NRs, a bubbly and flavorful alternative to traditional sodas.

These let you craft complex “mocktails” so you can join in the fun without the alcohol. Some Boat Basin favorites include:

  • Rose Spritzers: Hibiscus tea, rosewater, lemon juice, and soda water for a floral delight.
  • Sunset Sparklers: Orange juice, ginger ale, grenadine, and lime for a taste of summer.
  • Mojito Mocktails: Lime, mint leaves, simple syrup, and club soda for a refreshing twist on the classic.
What Alcohol Can I Drink on a Diet? Guilt-Free Booze Hacks for Weight Loss Wins 12
Photo by Skitterphoto

Embrace Guilt-Free Sipping!

Remember, mindful choices and delicious drinks can coexist. With this guide as your compass, you can navigate the world of low-calorie beverages with confidence.

Experiment with fresh flavors, explore zero-proof options, and most importantly, savor the journey. Cheers to a healthier, happier you, one sip at a time!

FAQS

I have diabetes. What are some low-calorie alcohol choices that won’t spike my blood sugar?

Dry wines, light beers, straight shots of liquor on ice, and vodka sodas are all good options at under 100 calories that minimize carbs and sugars. Always check with your doctor too.

I’m on a keto diet. What drinks can I enjoy that won’t affect ketosis?

Clearliquors like vodka, tequila, mezcal, and gin have zero carbs and won’t throw you off when enjoyed straight or simply mixed with soda water and lime. Sauv Blanc wines can work too.

I’m gluten-intolerant. What are some gluten-free alcohol options?

Most distilled liquors like rum, vodka, tequila are gluten-free. Many ciders, wine varietals, and some alternative grain beers tested below 20ppm of gluten are also safe bets.

How can I politely turn down sweet cocktails or craft beers that friends offer me?

“That looks delicious, but I’m sticking to vodka sodas tonight to reduce calories/carbs. But please let me know if you try anything else good!” Most people respond positively to politerefusals citing lifestyle needs.

If I’m not drinking, what are some tasty zero-proof beverages I can order at bars or parties?

Many bars now offer “mocktails” featuring fun blends of juices, herbs, spices and soda water that let you join inthe festivities. Ask what zero-proof options they have or order club soda with cranberry & lime for a classic.

Are there any appetizers or snacks I can pair with my low-cal drinks?

Shrimp cocktail, crudité veggie platters, grilled chicken skewers, and half an avocado sprinkled with sea salt make tasty lighter pairings. Enjoy a few bites slowly between sips.

Featured image by MART PRODUCTION

Mastering Dry Measuring Cups: Accuracy, History, and Tips for Bakers

Why did my cookies come out burnt even though I measured the sugar perfectly? Dry measuring mistakes! I was so sure I added the sugar perfectly. But my cookies came out burnt and overcooked.

Later, I realized my packed solid sugar cup had 25% too much sugar. This taught me how critical proper measuring is for great baking.

🍰 How do air pockets and scooping affect dry ingredients?

When filling a dry cup, small air pockets can change the volume. Here is a trick I recommend – gently spoon the powder in, then sweep off anything extra.

I am scooping right from the bag packs, which are usually too tight. For dense powders like flour, don’t tap to settle, either. This makes those sneaky air pockets smaller.

🧁 Moisture Content in “Dry” Ingredients

Even stuff we call dry has a little moisture. Packed brown sugar often has up to 10% moisture. That sticky stuff means you can pack the cup too tight easily.

IngredientMoisture Content (up to)
All-purpose flour14%
Granulated sugar0.5%
Light brown sugar10%
Dark brown sugar12%

I flatten brown sugar with a metal knife versus a straight edge to fix this. Adapting to how ingredients act improves accuracy a lot. For moist brown sugar, underfilling just a bit helps, too.

Can you use the same cup for dry and liquid ingredients? The short answer is no, I explain the reasons in this article.

🥄 Beyond Measuring Cups

While handy for baking staples, cups have limitations. Achieving true precision requires alternative tools like measuring spoons. I utilize this diverse approach in my cafe recipes.

Why Measuring Spoons Matter

mastering dry measuring cups

Tiny amounts in baking add up fast. Just 1/8 teaspoon of too much baking soda can ruin the chemistry of your cupcakes. For less than one tablespoon, measuring spoons works best. Their slim design slides right into jars without making a mess.

I keep at least three sizes for pinch/dash amounts. Below 5 grams, spoons can vary in volume a bit. My go-to is that one teaspoon = 5 grams. That lines up better for baking very small portions.

📚 Debunking the Scooping and Leveling Myth

puddle of crated cheese

Many bakers think scooping right from the bag and then leveling off makes dry ingredients exact. But that overpacks, as I found in testing! Scooping first adds extra through visual tricks. We naturally heap too much when something looks “too empty.”

I scooped flour five times without adjusting for the excess. The weight went up nearly 20% by the 5th one! Now, I always lightly spoon flour and sugar into empty cups first. Skipping the biased scooping improved my accuracy. It helps me calculate costs and nutrition values correctly, too.

Kitchen Scales: The Ultimate Accuracy Tool

Some recipes use weights instead of volumes, especially when the Cup amounts differ hugely between countries! Grams give a standard baking language – making substitutions easier. Especially when it comes to liquids, cups are a nightmare to use.

Plus, scales make precision easier. Getting tiny weights, exactly 7 grams of yeast, is hard with cups and heaping. For finicky things like macarons, I always grab my scale over cups. It prevents expensive fails when a fraction of an ounce alters outcomes.

The scale I typically recommend is this Etkcity Multifunction electronic scale. Simple to use, accurate enough for cooking, and comes with a battery!

🍪 How to measure brown sugar without packing it too tight

teaspoon of brown sugar into pot

Not all dry goods behave the same. Brown sugar needs perfect leveling across the top. But lighter things like oats often settle lower than the line you want.

For those, I spoon the oats into the cup. It comes out more accurate usually. Learn how each ingredient acts for the best results.

The Rise of Dry Measuring Cups in Home Baking

While standard cups return to their ages, dry measuring cups for the home have emerged more recently. As packaged baking mixes got big in the 1900s, companies like Pillsbury gave out free metal cups to promote their stuff.

But those cups were dented and needed to be fixed. My friend Barb remembers when plastic cups came out in the 1970s. Durable and easy to read, they became a must-have item. She still use the red plastic set Barb to this day! Personally, I prefer the Pyrex 3-piece glass measuring cup set. The glass is much more versatile than plastic and is easier to read.

🥯 Tips for Advanced Bakers

Mastering Dry Measuring Cups: Accuracy, History, and Tips for Bakers 13

Serious bakers depend on being precise, especially when inventing recipes. But you need more than just measuring ingredients – you must calibrate your tools. This is big with kitchen scales, which can get thrown off over time.

Check your calibration monthly using a small weight. Digital scales often do this automatically, but doing it manually ensures accuracy. Below is how to calibrate different types of scales:

Scale FunctionCalibration MethodFrequency
Digital Kitchen ScaleManual, with calibration weightMonthly
Digital Food ScaleAuto-calibration featureBefore each use
Analog Food ScaleSet needle to zero pointBefore each use

🔄 Ingredient Substitutions by Weight

muffin pans

Folks avoiding gluten need precise substitutions since alternative flours act uniquely. Be careful around volume swaps for health needs – densities and moisture contents likely differ.

I substitute a 1:1 ratio by weight for my gluten-free muffins for AP and cassava flours. This keeps the right texture.

IngredientWeightVolume
All-purpose flour120g3.5 cups
Almond flour120g3 cups
Oat flour120g4 cups

🧾 Hidden History: Origins of the Standard Cup Measurement

The use of “cups” as a measurement in recipes stretches back centuries, with early American cookbooks referencing whatever cup happened to be nearby – often teacups. With great variability in teacup sizes between households, this yielded unreliable and inconsistent baking results.

In the late 19th century, advocates like Fannie Farmer of the Fleishmann’s brand began pushing for cup standardization, providing mini measuring cups in attempts to promote a reliable standard. While the precise timeline and success of Fleishmann’s efforts are unclear, they undoubtedly contributed to a broader trend towards measurement uniformity.

Over decades of gradual adoption, through both government standardization efforts and industry collaboration, the 8-fluid-ounce (240 ml) cup size we use today was popularized and formalized. However, the metric 250 ml cup remains in parallel use across many countries. And while we may now take consistent cup measurements for granted, it was a long road to get there.

So next time you precisely level off a cup of flour, you can ponder the hidden history behind one of cooking’s most ubiquitous standards.

Wrapping Up: Achieving Precision in Your Baking Journey

Whether you struggle with measurements or want to step up advanced recipes, grasp these dry measuring tips for success. Follow density filling rules, use kitchen scales, and debunk biases for serious accuracy upgrades.

I hope peeking behind the scenes at my years baking at Boat Basin Cafe helps unlock the science and joy of precision for your baking. Share your baking hacks and dry measuring tips in the comments! Let’s learn from each other!

FAQs

Do you need to level dry measuring cups?

Yes, it’s crucial to level dry ingredients for accuracy. Simply scooping often packs in extra volume through air pockets and visual biases. Leveling creates a precise, standard fill line.

Why level dry measuring cups?

Leveling eliminates excess air pockets and overflowing heaps for reliable measurements every time. It prevents the natural human tendency to visually overfill cups that seem “too empty” after scooping.

What happens if you don’t level dry measuring cups?

No leveling can yield extra-dense baked goods, poor texture, misshapen tops, and other failures. It also causes inaccurate nutrition data. Adding even 25% too much sugar severely alters recipes!

What is the best way to fill dry measuring cups?

The best method is spooning powder gently into an empty cup, then sweeping off any excess heap with a straight edge. Avoid packing tightly with direct scoops from ingredient bags. Follow density-specific filling tips.

Can I use a kitchen scale instead of dry measuring cups?

For ultimate precision, a kitchen scale provides superior accuracy over cups, especially for small quantities. Scales facilitate weight-based substitutions for gluten-free and international recipes too. Just be sure to calibrate monthly.

What’s the difference between dry and liquid measuring cups?

Dry cups are for powdery ingredients like flour and sugar. Liquid cups have extra space at the top and are intended for wet ingredients like milk or oil. Using the right cup improves accuracy.

Why do some recipes say “scoop and level” vs “dip and sweep”?

“Scoop and level” works better for dense items like brown sugar. “Dip and sweep” is best for lighter flours to avoid too much settling. Technique depends on the density of each ingredient.

My cake didn’t rise – did I measure flour wrong?

It’s possible. Too much flour can result in dense cakes that don’t rise properly. Make sure to lightly spoon flour into cups without packing it down before leveling for the most accurate, fluffy measurement.

I don’t have measuring cups – can I use spoons?

Yes, you can substitute based on the conversions: 1 tablespoon = 3 teaspoons, 1/4 cup = 4 tablespoons, 1/3 cup = 5 tablespoons + 1 teaspoon, 1/2 cup = 8 tablespoons. Or look up your ingredient’s weight online to divide up the quantity.

How do I measure gluten-free flour differently?

Gluten-free flours tend to be lighter and absorb more liquid. Start with about 10-20% less gluten-free flour than the recipe states, then increase if the batter seems too thin. This prevents dense results.