How to Stop Eating Too Much Rice: Easy Tips and Healthy Alternatives

Struggling with how to stop eating too much rice? This guide offers easy strategies and tasty alternatives to help you control your rice intake. Whether you aim to lose weight, manage blood sugar, or enhance your diet, you’ll find practical tips for a smooth transition.

[su_box title=”Summary of Key Points” style=”default” box_color=”#1383C8″ title_color=”#FFFFFF” radius=”3″]Want to eat less rice? Start by reducing it to less than 1 cup per meal. Consider alternatives like cauliflower rice or quinoa. The goal is to decrease carb cravings and make healthier choices easier over time. Remember, rice doesn’t have to be in every meal.[/su_box]

How to Stop Eating Too Much Rice: Easy Tips and Healthy Alternatives 1
How to Stop Eating Too Much Rice Easy Tips and Healthy Alternatives 1

Controlling Rice Portions and Cravings🍚

Many Filipinos find it difficult to cut down on rice, as it has been a staple in their diets for generations. However, reducing carbohydrate consumption supports weight loss and helps prevent chronic diseases such as diabetes and heart disease.

πŸ’β€β™€οΈTip: If quitting rice cold turkey seems too challenging, gradual reduction can be more sustainable. Start by cutting to less than 1 cup per meal, or skip rice at breakfast and have a maximum of 2 cups for the entire day. Over time, aim for smaller amounts, like 1/2 cup per meal, or eliminate it altogether.

Let’s take the example of Maria, a rice lover who wants to control her portions and reduce cravings. She cuts her rice intake in half, having only 1/2 cup per meal instead of a full cup. At first, she finds it challenging, but she reminds herself of the long-term benefits and stays committed.

Healthy Alternatives 🌿: To curb cravings and satisfy your meals without relying heavily on rice, explore healthy alternatives without feeling deprived. Vegetables with neutral taste can be excellent substitutes, such as green leafy vegetables (spinach, kale), squash, sayote (chayote), eggplant, green papaya, and mushrooms. These vegetables can be cooked in various ways and seasoned to add flavor to your meals.

Now that we’ve explored controlling rice portions and cravings let’s delve into the importance of nutrition awareness and calorie counting when managing your rice intake effectively.

Nutrition Awareness and Calorie CountingπŸ“Š

Awareness of the nutritional content of your foods is key to making healthier choices and managing your overall caloric intake. When it comes to rice, understanding its macronutrient composition is essential.

πŸ“Œ Fact: A typical cup of cooked white rice contains about 200 calories and 45 grams of carbohydrates, predominantly in the form of starch.

By tracking your meals and keeping a food diary, you can better understand calorie and carbohydrate content.

πŸ“ Tip: This practice helps you make informed decisions about portion sizes and choose alternatives that are lower in calories but still nutritionally balanced.

Let’s consider the case of John, who wants to be more conscious of his rice consumption. He starts by meticulously tracking his meals using a mobile app or journal where he records the types and quantities of food he eats.

🌟 Outcome: With this knowledge, John is motivated to explore healthier options and finds that substituting some rice with vegetables or whole grains allows him to enjoy satisfying meals without compromising taste or nutritional value.

While calorie counting can be helpful, it’s important to remember that every individual’s nutritional needs vary based on age, gender, activity level, and overall health goals.

πŸ‘©β€βš•οΈ Note: Consulting with a registered dietitian can provide personalized guidance on the appropriate caloric intake for your specific needs.

Having touched upon nutrition awareness and calorie counting, let’s explore meal preparation strategies that can assist in reducing rice consumption while still enjoying flavorful and satisfying dishes. πŸ²πŸ“

Key Studies and Facts πŸ“š

🌾 A Harvard School of Public Health study revealed a significant link between greater white rice consumption and increased risk for type 2 diabetes. Those consuming 5 or more weekly servings had a 17% higher risk.

🍚 According to the International Journal of Obesity, reducing carbohydrate intake, such as from rice, could lead to more weight loss than low-fat dietsβ€”on average, about 7.8kg more in six months.

πŸ‡΅πŸ‡­ The World Health Organization estimates that over half of the Filipino population consumes more carbohydrates than the recommended daily intakeβ€”mainly through rice, potentially causing obesity and other health risks.

Summary Tips for Reducing Rice Consumption 🍽️

πŸ₯— Being aware of the nutritional content of the foods you consume is critical for making healthier choices and managing your overall caloric intake.

πŸ“– Tracking your meals and keeping a food diary is an excellent practice to better understand calorie and carbohydrate content.

πŸ₯¦ If you want to reduce your rice consumption, exploring healthier options like substituting some rice with vegetables or whole grains can be satisfying without compromising taste or nutritional value.

πŸ‘©β€βš•οΈ Personalized guidance from a registered dietitian can help determine the right caloric intake for your specific needs.

Meal Preparation Strategies 🍱

How to Stop Eating Too Much Rice: Easy Tips and Healthy Alternatives 2
cooking

Meal preparation is crucial for reducing rice consumption and adopting healthier eating habits. By planning your meals in advance, you can make conscious choices and have healthier alternatives readily available. Here are some effective meal preparation strategies to consider:

πŸ”’ Step-by-Step Strategies πŸ“

  1. Batch Cooking: 🍲
    • Dedicate a specific day or time of the week to prepare larger quantities of food that can be portioned and stored for later use. This helps save time and energy throughout the week.
  2. Portion Control: 🍚
    • Invest in meal prep containers or reusable storage bags to portion out your meals ahead of time. This prevents overeating and makes sticking to your desired portion sizes easier.
  3. Variety is Key: πŸ₯¦πŸ—
    • Incorporate diverse ingredients into your meals, such as lean proteins (chicken, fish, tofu), fiber-rich vegetables, and healthy fats (avocado, olive oil). Experiment with different flavors and spices to keep your meals interesting.
  4. Freeze Meals: ❄️
    • Prepare extra portions of your favorite healthy dishes and freeze them for future consumption. This allows for convenient meals on busy days when cooking from scratch may not be feasible.
  5. Prep Ingredients: πŸ₯’πŸ₯•
    • Chop vegetables, marinate proteins, or pre-cook specific components of your meals in advance. This saves time during the cooking process and ensures that the right ingredients are readily available.
  6. Plan for Leftovers: 🍱
    • Cook larger quantities intentionally so that you have leftovers for future meals. Use these leftovers creatively by incorporating them into salads, wraps, or stir-fries to prevent boredom with repetitive meals.
  7. Schedule and Flexibility: πŸ“…
    • Set aside dedicated time for meal preparation each week and allow flexibility in your plans. Life can get busy, so having backup options like pre-washed salad greens or frozen veggies can be convenient alternatives when time is limited.

Remember, meal preparation is an ongoing practice and will require trial and error to find the best strategies for you. Don’t be afraid to experiment with different methods and adjust as needed to fit your lifestyle and preferences. The goal is to create a sustainable routine that promotes healthy eating habits while reducing reliance on rice. 🌾

Now that we have covered meal preparation strategies let’s explore some delicious rice alternatives that can elevate the nutritional value of your meals without sacrificing taste or satisfaction. 🍽️

Rice Alternatives for Healthier Eating

How to Stop Eating Too Much Rice: Easy Tips and Healthy Alternatives 3
Eat Expired Quinoa

While rice may be a staple in many Asian cuisines, numerous healthier alternatives offer similar textures and flavors without the carbohydrate load. Here are some rice alternatives worth considering:

🌟 Top Rice Alternatives 🌟

  • Cauliflower Rice: 🍚
    • Made by pulsing cauliflower florets in a food processor, this low-carb alternative provides a similar texture to rice and can be used in stir-fries, fried “rice,” or as a base for grain bowls.
  • Quinoa: 🌾
    • This protein-rich seed is packed with essential nutrients, making it an excellent substitute for rice. Cooked quinoa can be enjoyed as a side dish or mixed with vegetables and proteins for a complete meal.
  • Broccoli Rice: πŸ₯¦
    • Like cauliflower rice, broccoli rice is made by finely chopping or grating broccoli stems. It adds a nutritional boost to dishes like stir-fries and casseroles while keeping the carb content low.
  • Shirataki Rice: πŸ™
    • Made from konjac yam, shirataki rice is extremely low in calories and carbohydrates. It has a gelatinous texture, but when cooked properly, it can mimic the softness of rice noodles.
  • Mushroom Rice: πŸ„
    • Finely chopped mushrooms cooked with spices can provide a savory flavor reminiscent of traditional rice dishes. This option adds depth of flavor and extra nutrients to your meals.
  • Vegetable Noodles: πŸ₯•
    • Spiralized vegetables such as zucchini, carrots, or sweet potatoes can be used instead of rice to create colorful and nutritious meals. These vegetable noodles can be lightly cooked or enjoyed raw for added crunch.

Imagine a hearty vegetable stir-fry with cauliflower rice or a flavorful quinoa salad with grilled chicken and fresh veggies – these alternatives not only reduce your carbohydrate intake but also provide additional vitamins, minerals, and fiber to support overall health.

By incorporating these rice alternatives into your meals, you can effortlessly reduce your rice consumption and explore new flavors and textures. Remember, there’s no one-size-fits-all approach, so feel free to experiment and find the options that satisfy your taste buds and nutritional needs.

Vegetable-Based Options πŸ₯¦

Vegetables are an excellent substitute for rice and offer a range of health benefits. Not only are they low in calories and rich in vitamins and minerals, but they also provide essential dietary fiber that can help you feel fuller for longer. 🌿 You can reduce rice consumption by incorporating vegetable-based options while enjoying flavorful and nutritious dishes.

🌟 Top Vegetable-Based Options 🌟

  • Green Leafy Vegetables: 🌱
    • Consider incorporating green leafy vegetables, such as spinach, kale, or bok choy, into your meals. These vegetables are packed with nutrients and have a neutral taste that pairs well with various flavors.
  • Squash or Sayote (Chayote): πŸŽƒ
    • For a heartier meal, vegetables like squash or sayote can be great alternatives to rice. They can be used as a base for curries, mixed into salads, or as a side dish.
  • Eggplant: πŸ†
    • Another versatile vegetable option is eggplant. It has a slightly meaty texture when cooked and absorbs flavors well.
  • Green Papaya: 🍈
    • Popular in many Asian cuisines, green papaya is an excellent replacement for rice when grated and used in salads or added to soups and stews.
  • Mushrooms: πŸ„
    • Mushrooms are another fantastic option to explore. They are versatile for different recipes and can be used as a filling for wraps or added to sautΓ©s.

By exploring these vegetable-based options, you can add variety to your meals while reducing your reliance on rice. 🌈 Experiment with different combinations and flavors to find the ones that suit your taste preferences and dietary needs.

Now that we’ve explored the vegetable-based options let’s dive into the world of grain variants and their benefits as alternative options to rice. 🌾

Habit Changes for Reduced Rice Consumption 🍚
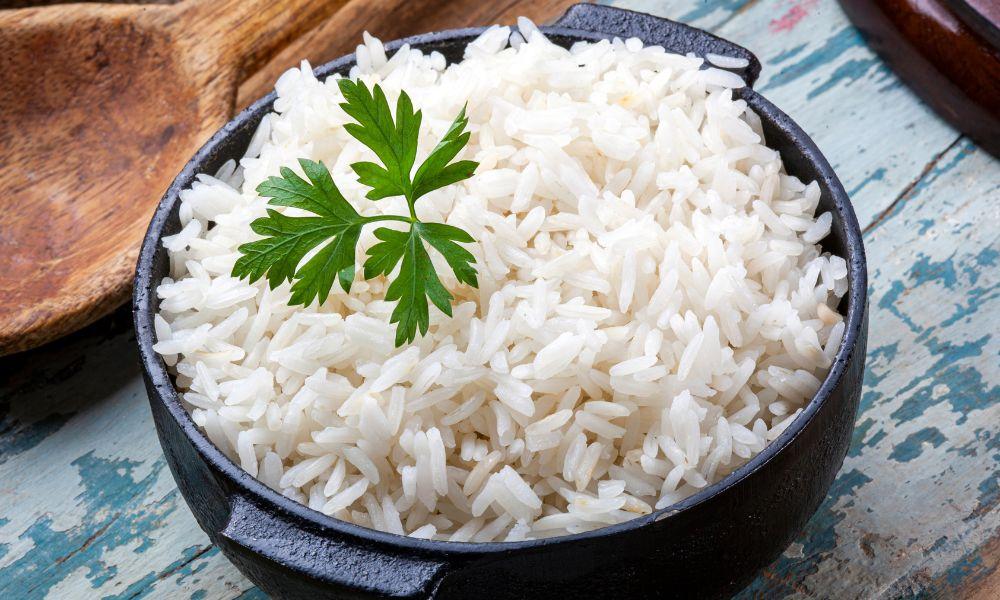
how to make coconut jasmine rice
Coconut Jasmine Rice

Cutting down on rice consumption may seem challenging, especially if it has been a staple in your diet for a long time. However, with some habit changes and mindful choices, you can gradually reduce your rice intake and adopt a healthier meal approach. 🌱

  • Gradual Reduction: A good starting point is gradually reducing your portion sizes. Instead of filling your entire plate with rice, aim for a smaller portion and fill the rest with protein and vegetables. You can start by cutting down to less than 1 cup of rice per meal or even skip rice at breakfast altogether. 🍽️
  • Adaptation: Let’s say you typically consume three cups of rice per day. Try reducing it to two cups for the entire day, but increase your protein and vegetable intake to compensate for the decrease in carbohydrates. As you adapt to this change, continue lowering your rice portions until you reach a level that works best for you and aligns with your health goals. πŸ₯¦
  • Healthy Alternatives: Exploring healthy alternatives to rice that can still satisfy a filling meal is also important. Vegetables such as green leafy vegetables, squash, sayote, eggplant, green papaya, and mushrooms can be great substitutes as they have a neutral taste and can easily replace the bulkiness of rice on your plate. πŸ₯•
  • Taste Adaptation: Remember, breaking the cycle of glucose dependency caused by high carbohydrate intake may take time. Don’t be discouraged if you experience carb cravings initially. As you reduce your rice consumption, you may find that your taste buds become more sensitive to sweetness, making dishes naturally sweeter without relying on excessive sugar. 🍭

Ensuring Balanced Diet Minus Excessive Rice 🍲

Reducing rice consumption doesn’t mean sacrificing a balanced diet. It’s crucial to ensure that you still meet your nutritional needs by incorporating diverse and nutrient-rich foods into your meals. 🍏

  • Protein Focus: To achieve a well-rounded diet without excessive rice, consume ample protein, healthy fats, and various vegetables. Opt for lean sources like chicken, fish, tofu, beans, or lentils. These foods provide essential nutrients and contribute to a feeling of fullness and satiety. πŸ—
  • Balanced Plate: For example, instead of having a plate filled with rice, aim for a palm-sized portion of protein, a generous serving of mixed vegetables, and a small side dish of quinoa or other whole grains. This way, you still provide your body with the necessary carbohydrates while diversifying your nutrient intake. πŸ₯¦
  • Healthy Fats: Don’t forget to incorporate healthy fats into your meals. Avocados, nuts, seeds, olive oil, and fatty fish like salmon provide essential fatty acids that support brain health and overall well-being. πŸ₯‘
  • Listen to Your Body: Lastly, listen to your body and adjust your food intake accordingly. If you lead an active lifestyle or engage in activities like weightlifting that require higher carbohydrate intake, it’s important to strike a balance that suits your needs. πŸ‹οΈ

Think of it as creating a colorful painting on your plate – each ingredient adds its own unique flavors and nutrients, resulting in a masterpiece for your health. 🎨

By focusing on these habit changes and ensuring a well-balanced diet minus excessive rice consumption, you can embark on a journey toward improved health and overall well-being. 🌟

Brown Rice vs White Rice: Nutrition, Health Benefits, and Cooking Differences

Brown Rice vs. White Rice: Which is better? This blog post helps you choose based on taste, nutrition, and cooking time. Learn critical facts to pick the proper rice for your health and kitchen.

[su_box title=”🌾 Key Takeaway” style=”default” box_color=”#1383C8″ title_color=”#FFFFFF” radius=”3″]Brown rice is more nutrient-dense, offering more fiber, vitamins, and minerals than white rice. Its complex carbohydrates may help improve metabolic health and blood glucose levels.[/su_box]

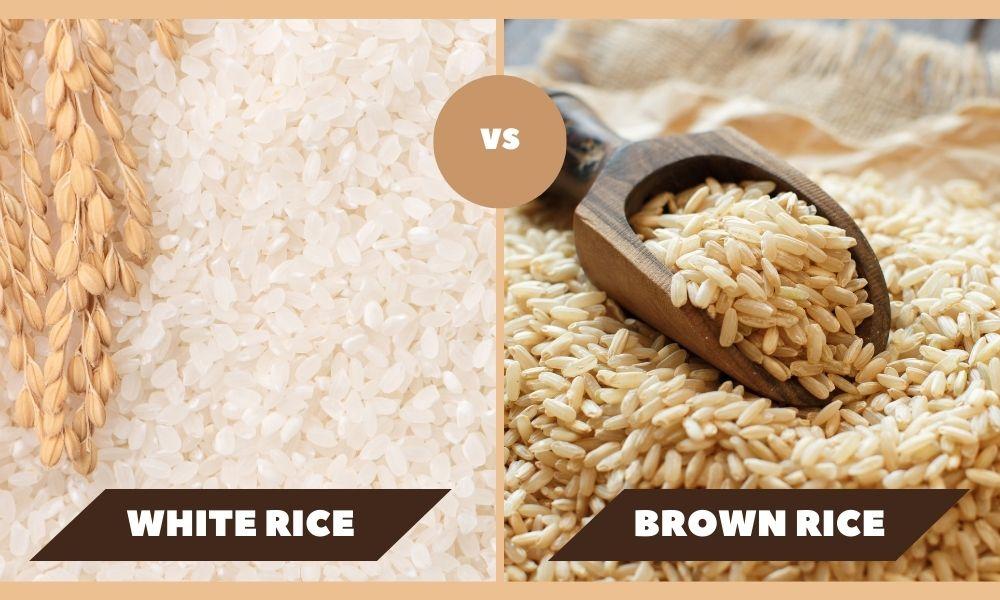
Brown Rice vs White Rice
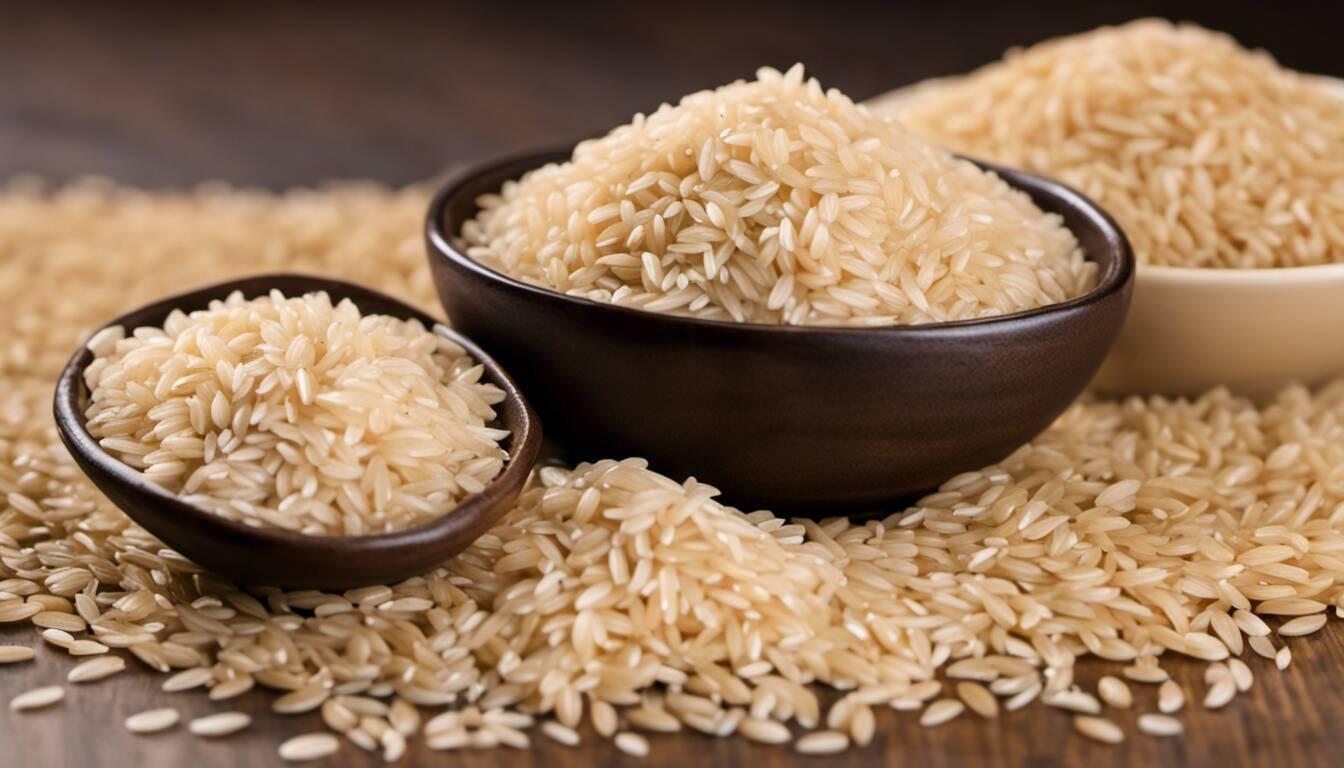
White and Brown Rice

Differences Between Brown and White Rice

Rice, a dietary staple for many cultures worldwide, comes in various forms. The most commonly known types are brown and white rice. These two varieties differ significantly in appearance, taste, and nutritional composition.

🍚 To start, the main distinction lies in their processing methods.

Brown RiceWhite Rice
Whole grainMilled
Keeps bran, germ, endospermLoses bran and germ

This process gives white rice its polished appearance but removes much of its nutritional value.

🍚 Another noticeable difference is the cooking time.

  • Brown Rice: Requires more water and longer cooking time.
  • White Rice: Requires less water and cooks faster.

However, this extra effort is worth it since brown rice provides numerous health benefits.

🍚 Picture this: You’re serving dinner at your table, and white and brown rice options are available.

  • White Rice: Fluffy and light.
  • Brown Rice: Denser with a nutty aroma and richer flavor.

🍚 Beyond their appearances, these two types of rice have distinct nutritional profiles that impact our overall health. Let’s dive into the details.

NutrientBrown RiceWhite Rice
FiberHigherLower
VitaminsMoreFewer

Brown rice and white rice differ significantly in processing methods, cooking time, appearance, taste, and nutritional composition. While white rice is a polished version that has lost most of its nutritional value, brown rice is a whole grain with numerous health benefits. When serving or consuming rice, it’s essential to consider these differences to make informed dietary choices.

Nutritional Profiles: White and Brown Rice

AspectWhite RiceBrown Rice
B VitaminsThiamin (B1), Niacin (B3), Folate (B9)Thiamin (B1), Riboflavin (B2), Niacin (B3), Vitamin B6, Pantothenic Acid (B5), Folate (B9)
IronPresent but in smaller amountsHigher amounts vital for oxygen transport
FortificationAvailable in some regions with added folic acid and ironGenerally not fortified
Other NutrientsMinimal amounts of Vitamin E, Selenium, Magnesium, PotassiumContains Vitamin E, Selenium, Magnesium, Potassium
Fiber ContentLowHigh, beneficial for digestion and heart health
Glycemic IndexHigh, can cause quick spikes in blood sugarLower, better for blood sugar control

Nutritional Profiles: White and Brown Rice

While white and brown rice contains carbohydratesβ€”an essential energy sourceβ€”the differences lie in their fiber content, nutrient density, and impact on blood sugar levels.

🍚 Fiber Content

  • Brown Rice: Takes center stage with higher fiber content, improving digestion and reducing the risk of heart disease.
  • White Rice: Lacks in fiber.

🍚 Nutrient Density

  • Brown Rice: Contains valuable amounts of vitamins B1, B3, B6, vitamin E, iron, and antioxidants called phytochemicals.
  • White Rice: Provides some essential vitamins and minerals like folate and selenium.

🍚 Impact on Blood Sugar

  • Brown Rice: Lower glycemic index, better for blood sugar control.
  • White Rice: Higher glycemic index can cause blood sugar levels to spike.

Brown rice’s nutritional profile surpasses white rice’s due to its higher fiber content and nutrient density. It makes for a more wholesome choice that improves blood glucose levels, metabolic health, and overall wellness.

Now that we’ve explored the differences between brown and white rice and analyzed their nutritional profiles, we must consider how these factors influence our health choices. The next section will discuss the potential health benefits of including brown rice in your diet.

Vitamins and Minerals in Brown Rice

what is the difference between brown and white rice

Brown rice is a nutritional powerhouse packed with essential vitamins and minerals that promote overall health and well-being. Unlike white rice, brown rice retains the nutrient-rich bran and germ layers, making it a whole grain. Let’s explore some of brown rice’s key vitamins and minerals.

🍚 B Vitamins

  • General Role: Vital for energy production, metabolism, and brain health.
  • Types in Brown Rice: Particularly rich in vitamin B6, but also contains thiamin (B1), riboflavin (B2), niacin (B3), pantothenic acid (B5), and folate (B9).

Niacin Highlight: Converts food into energy, supports nervous system health, and helps manage cholesterol.

🍚 Iron

  • Role: Vital for oxygen transport and preventing iron-deficiency anemia.

🍚 Additional Vitamins and Minerals

  • Vitamin E: An antioxidant that supports immune function and skin health.
  • Selenium: Involved in DNA synthesis and acts as an antioxidant.
  • Magnesium and Potassium: Needed for nerve function and healthy blood pressure.

While brown rice is packed with essential vitamins and minerals, let’s now delve into the nutrient profile of white rice to better understand its unique characteristics.

Vitamins and Minerals in White Rice

Brown Rice vs White Rice: Nutrition, Health Benefits, and Cooking Differences 4
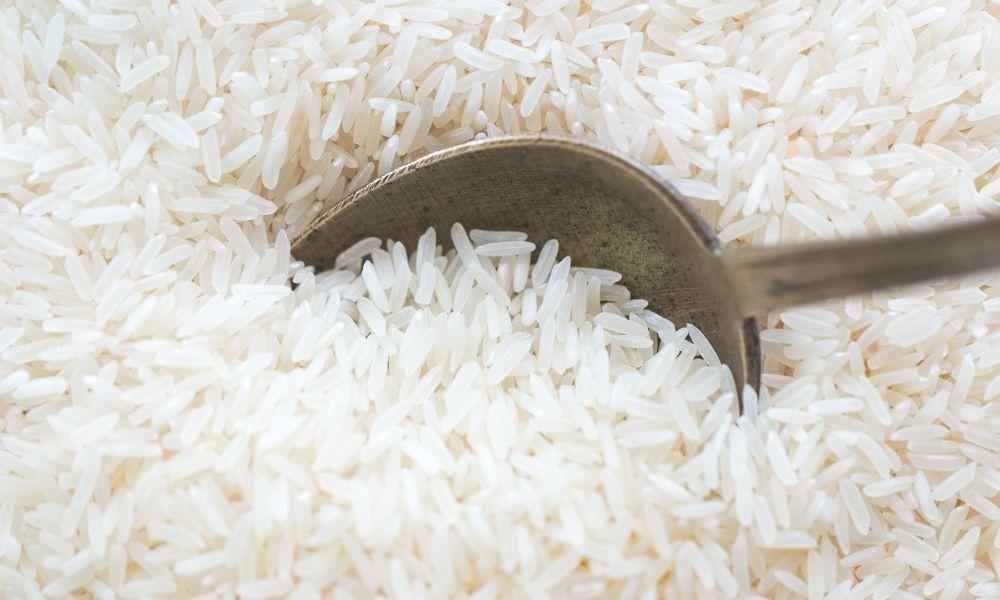
white rice

White rice, unlike brown rice, undergoes a refining process that removes the bran and germ layers. This process affects the vitamin and mineral content, making white rice less nutrient-dense than its brown counterpart. However, it still has some nutritional value.

🍚 B Vitamins

  • White rice contains B vitamins such as thiamin (B1), niacin (B3), and folate (B9).
  • While these amounts might be lower than those found in brown rice, they still contribute to overall health.
  • Thiamin plays a crucial role in energy metabolism, niacin supports nervous system function, and folate is essential for DNA synthesis and cell growth.

🍚 Iron

  • Additionally, white rice provides iron, although in smaller amounts compared to brown rice.
  • Iron remains vital for oxygen transport in the body and prevents iron-deficiency anemia.

πŸ“ Fortified White Rice

  • It’s important to note that fortified white rice is also available in some regions.
  • Fortified white rice has certain nutrients like folic acid and iron added back after processing, increasing its nutritional value.

🍚 Other Nutrients

  • When it comes to other vitamins and minerals, white rice falls short compared to brown rice.
  • It contains minimal amounts of vitamin E, selenium, magnesium, and potassium.

Therefore, if you’re seeking these specific nutrients in your diet, incorporating other sources like fruits, vegetables, nuts, or whole grains would be beneficial.

Health Benefits and Downsides

Brown Rice vs White Rice: Nutrition, Health Benefits, and Cooking Differences 5
Orzo Fried Rice

When it comes to the debate between brown rice and white rice, understanding the health benefits and downsides is crucial in making an informed choice. Both varieties have unique characteristics, nutritional profiles, and implications for our overall health.

Let’s start with the benefits of brown rice. One of the significant advantages is its higher nutrient density compared to white rice. Brown rice contains the bran, germ, and endosperm layers intact, making it a whole grain packed with essential vitamins, minerals, and fiber. This combination contributes to improved blood glucose levels and metabolic health. Additionally, studies suggest that replacing white rice with brown rice in our diet may reduce the risk of developing type 2 diabetes.

On the other hand, white rice may be more suitable for those with digestive issues or sensitive stomachs due to its refined nature. The bran and germ layers are removed during processing, resulting in a smooth texture that is easier to digest for some individuals. However, it’s important to note that white rice falls under the category of simple carbohydrates due to its stripped-down nature. This means it can cause blood sugar spikes more rapidly than complex carbohydrates like brown rice.

Aside from these considerations, there are additional factors worth mentioning. Brown rice contains higher levels of B vitamins, vitamin E, iron, and phytochemicals compared to white rice. These nutrients play vital roles in promoting overall health and well-being.

Comparison Table: Brown Rice vs White Rice

Health AspectBrown RiceWhite Rice
Nutrient ContentHigher in fiber, vitamins, and mineralsLower in fiber and nutrients
Energy and Blood SugarStabilizes blood sugar, provides sustained energyA quick source of energy, it can cause blood sugar spikes
Type 2 Diabetes RiskLower risk due to complex carbohydratesHigher risk due to impact on insulin response
Digestive HealthAids in bowel movements, prevents constipation,Easier to digest, suitable for sensitive stomachs
Weight ManagementIncreases satiety, aids in weight controlQuick energy but can leave you feeling hungry soon
Cultural RelevanceGaining popularity blends well in health-conscious dietsVersatile, blends well in various traditional dishes
Research FindingsLinked to lower diabetes risk, higher nutrient contentLinked to higher diabetes risk, lower nutrient content

Now that we’ve explored the health benefits and downsides let’s dive deeper into the specific health implications of consuming brown rice.

Health Implications of Consuming Brown Rice

Brown rice’s nutrient profile and slower digestion make it beneficial for several aspects of our health.

🍚 Digestive Health

  • The high fiber content aids in maintaining regular bowel movements, promoting digestive health, and preventing constipation.

🍚 Blood Sugar and Energy

  • This slow digestion also leads to a gradual release of glucose into the bloodstream, which helps stabilize blood sugar levels and provides sustained energy throughout the day.

🍚 Weight Management

  • Moreover, studies have shown that the consumption of brown rice may have a positive effect on weight management and reduced risk of obesity.

🍚 Type 2 Diabetes

  • The complex carbohydrates present in brown rice can help regulate insulin levels and reduce the likelihood of insulin resistance, a key factor in the development of type 2 diabetes.

🍚 Vitamins and Minerals

  • The abundance of B vitamins in brown rice plays a vital role in energy production, brain function, and overall cellular health.
  • Vitamin E is an antioxidant, protecting cells from damage caused by free radicals.
  • Furthermore, iron is vital for maintaining healthy red blood cells and preventing iron-deficiency anemia.

πŸ“ Individual Considerations

  • It’s essential to note that while brown rice offers these valuable health benefits, there are always individual considerations that come into play. Factors such as personal dietary needs, preferences, cultural influences, and food accessibility all play roles in determining what is best for each person.

Health Implications of Consuming White Rice

Regarding the health implications of consuming white rice, it’s crucial to recognize that it’s a refined grain. During its processing, the outer bran and germ layers are removed, resulting in a loss of key nutrients and fiber. As such, white rice is lower in fiber content compared to its brown counterpart.

🍚 Energy Source

  • While white rice can serve as a quick energy source, especially for athletes or those needing a rapid glucose boost, its high glycemic index can cause blood sugar spikes.

🍚 Blood Sugar and Hunger

  • The rapid increase in blood sugar levels, followed by a sharp drop, can leave you feeling hungry again soon after eating.

🍚 Type 2 Diabetes Risk

  • Studies have linked regular consumption of white rice to an increased risk of type 2 diabetes due to its impact on insulin response.

🍚 Digestive Benefits

  • For individuals with digestive issues or sensitive stomachs, white rice can be gentler on the gut and easier to digest.

🍚 Cultural Relevance

  • White rice is a versatile ingredient that blends well with various dishes from different cultures worldwide.

πŸ“š Research Highlights

  • According to USDA data, brown rice contains almost five times the fiber content of white rice.
  • Studies in the International Journal of Food Sciences and Nutrition reported that replacing white rice with brown can lower blood sugar levels and decrease the risk of type 2 diabetes by 16%.
  • Research by the American Journal of Clinical Nutrition shows that brown rice has approximately 80% more manganese than white rice.

Cooking White Rice vs Brown Rice: Time and Methods

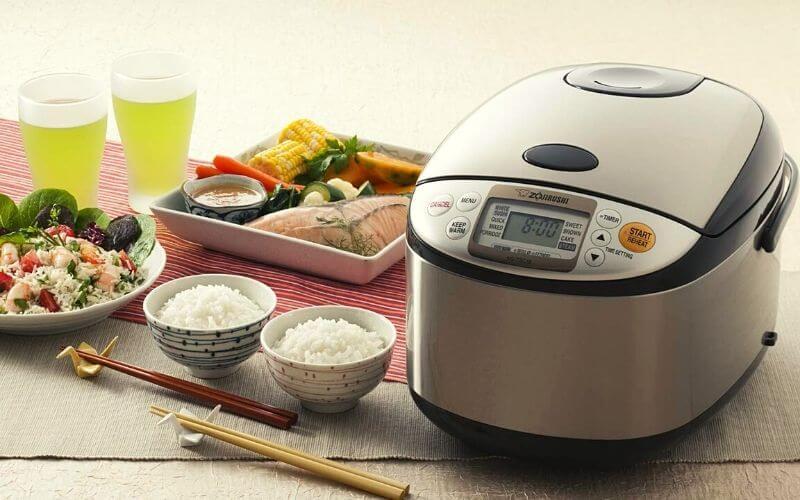
Rice Cooker
How Does a Rice Cooker Work

Now, let’s explore the differences between cooking white and brown rice. One major distinction is the cooking time required for each variety.

Comparison Table: Cooking White Rice vs. Brown Rice

AspectWhite RiceBrown Rice
Cooking Time15-20 minutes35-40 minutes
Method VariationsStovetop varies for Basmati or Jasmine riceStovetop
Water Ratio1:2 (one cup of rice to two cups of water)1:2.5 or 1:3, depending on the desired tenderness
Appliance ConvenienceElectric rice cookers and instant pots are availableElectric rice cookers and instant pots are available

The methods for cooking white and brown rice are similar, with the main difference being the proportions of water used.

It’s worth mentioning that technological advancements have led to the availability of electric rice cookers and instant pot recipes, making cooking both white and brown rice a breeze. These appliances provide consistent results and can save you time in the kitchen.

Imagine cooking rice as if nurturing a plant. White rice might be comparable to growing cacti – it needs less water (cooking time) due to its low fiber content, whereas brown rice is akin to cultivating delicate flowers, requiring more attention and care.

FAQs

How do the taste and texture of brown rice compare to white rice?

Brown rice has a nutty and slightly sweet taste, along with a chewier texture compared to white rice’s softer and milder flavor. The differences in taste and texture can be attributed to brown rice’s outer bran layer and germ, which contains more fiber, nutrients, and beneficial compounds such as antioxidants. However, it’s worth noting that individual preferences may vary.

In what dishes or cuisines is one type of rice preferred?

In Asian cuisines such as Chinese, Japanese, and Thai, white rice is commonly preferred due to its fluffy texture and neutral flavor, making it a versatile accompaniment to a wide range of dishes including stir-fries, curries, and sushi. On the other hand, brown rice is often favored in healthier or whole-food-centric cuisines where its nutty flavor and higher fiber content are valued. Additionally, studies have shown that consuming brown rice instead of white rice may decrease the risk of developing type 2 diabetes.

What is the process for milling white rice to make it different from brown rice?

Milling white rice involves removing the grain’s outer layers, including the bran and germ. This results in a polished appearance and a longer shelf life than brown rice. However, this refining process removes essential nutrients, such as dietary fiber, vitamins, and minerals. According to studies, brown rice has significantly higher levels of nutrients like magnesium, zinc, and vitamin B6 than white rice. So, while white rice may have a finer texture and prolonged storage quality, it lacks the nutritional benefits that make brown rice a healthier choice.

What nutritional benefits does brown rice offer that white rice does not?

Brown rice offers several nutritional benefits that white rice lacks. Firstly, brown rice retains its bran and germ layers during processing, containing fiber, vitamins (such as B and E), minerals (such as magnesium and phosphorus), and antioxidants. In contrast, white rice removes these layers, resulting in a loss of these vital nutrients. Additionally, brown rice has a lower glycemic index than white rice, leading to slower digestion and steadier blood sugar levels. A study published in the Archives of Internal Medicine found that higher consumption of white rice is associated with an increased risk of type 2 diabetes, further highlighting the importance of choosing brown rice for its nutritional benefits.

Are there any cultural or historical differences in the use of brown and white rice?

Yes, there are significant cultural and historical differences in brown and white rice use. Brown rice has a long-standing tradition in Asian cultures, particularly in countries like China and Japan, where it has been consumed for centuries. Its nutty flavor and chewy texture have been valued in traditional dishes like sushi and fried rice. On the other hand, white rice gained popularity during industrialization as it was believed to have a longer shelf life. It became a staple in Western cuisines and was embraced by many cultures due to its softer texture. Despite the rise in global health consciousness, the cultural association with brown rice remains strong in Asia, while white rice is still preferred in many Western countries. Statistics show that brown rice consumption is significantly higher in Asian nations than in Western countries, with Japan having the world’s highest per capita consumption of brown rice.

(Source: Statista)

How to Keep a Grill Lit: Tips for Safe and Effective Lighting

Struggling to keep your charcoal lit for an extended period? You’re not alone. This guide quickly dives into proven methods to solve this common grilling issue. Learn how to keep charcoal lit and enjoy a flawless BBQ experience. And as a bonus, you will get our expert tips for the best BBQ experience!

How to Keep a Grill Lit: Tips for Safe and Effective Lighting 6
How to Keep a Grill Lit Tips for Safe and Effective Lighting

Gather Supplies

Charcoal Choices πŸ”₯

  • Lump charcoal: Burns hot and quick, ideal for rapid heating.
  • Charcoal briquettes: Provides stable temperatures, making them great for some recipes.

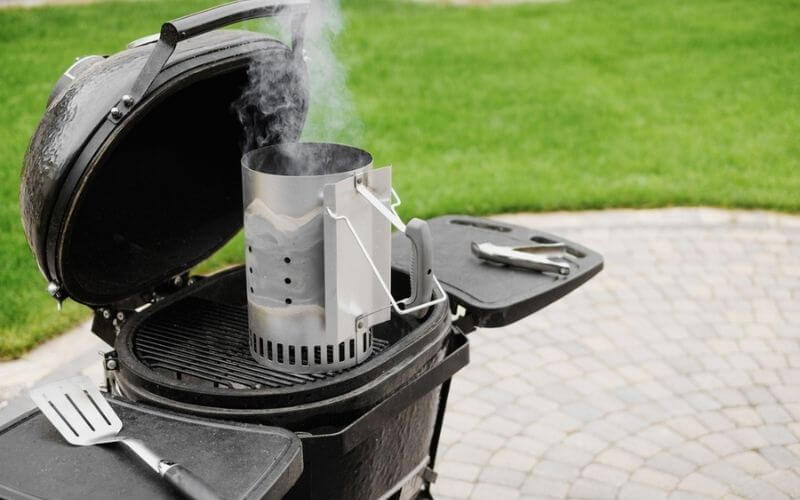
Lighting with a Charcoal Chimney πŸ—žοΈ

  • Must-have for lighting charcoal without lighter fluid.
  • Use crumpled newspaper in the center, but ensure its smell doesn’t affect the charcoal’s aroma.

Wood Chips for Enhanced Flavor 🌳

Wood Type

  • Hickory or Mesquite: Adds a strong smoky flavor, especially in a Weber kettle grill.

Ash Management for Keeping Coals Lit πŸ‚

As the charcoal turns into lit coals, they produce ashes. It’s essential to designate a space for these ashes to ensure your coals stay lit.

Cold Weather Grilling ❄️

  • Add firewood and kindling to your BBQ grill during colder times.
  • Creates a warm campfire-like ambiance and keeps the fire steady.

Additional Grilling Tips πŸ”₯

Safety matches offer more control than lighters. The primary objective in grilling is ensuring the lit charcoals remain lit for the perfect BBQ every time.

How to Light a Charcoal BBQ πŸ”₯

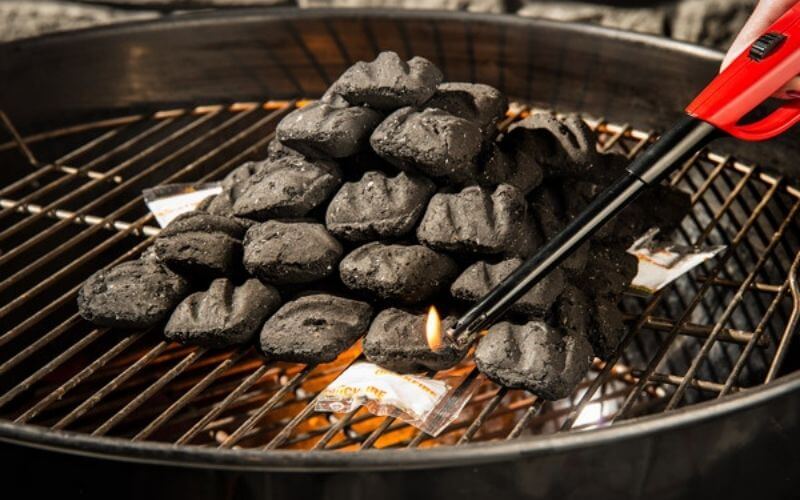
Charcoal BBQ with Fire Starters

The easiest way to light a charcoal BBQ is to use fire starters. It takes approximately 40 minutes for it to heat up all the way through. Here’s how you do it:

  1. Use Enough Briquettes:
    Most people end up using too little charcoal, and the fire dies quickly. Use enough briquettes so this doesn’t happen. Read the instructions on your charcoal package; it should specify how much you’ll need for a certain period of grilling.
  2. Pile β€˜em Up!
    Don’t spread the charcoal all over the grill. Instead, pile them in one spot like a pyramid. It’s better to place all the charcoal in one corner of the grill.
  3. Place All-Natural Starter Cubes:
    Now it’s time to bring out your starter cubes. Use all-natural ones, as they don’t contain any chemicals. Place them in different corners of the pile. Tuck them inside so the fire spreads all the way through.
  4. Open the Vent:
    Light up the fire starter cubes using an automatic fire starter. Then open the vent of your BBQ grill. This allows air to flow easily, making the charcoal light up faster.
  5. Start the Timer:
    Start the timer and wait for 40-45 minutes. Fire starters are easy to use, but the grill takes more than half an hour to be ready. Always plan ahead for your BBQs.

Why Charcoal Grills Go Out and Fixes πŸ› οΈ

Charcoal grills can go out unexpectedly. This can happen whether you’re using lump charcoal or charcoal briquettes.

Weather 🌦:
One main reason is the weather. Charcoal might not stay lit on humid days due to moisture in the air. Certain weather conditions can also interfere with grill temperatures.

Quality of Charcoal πŸ›’:
The quality of the charcoal also matters. Store your lump charcoal or charcoal briquettes in a dry space to keep them away from moisture.

How to Start a Charcoal Grill with Lighter Fluid

lighting a charcoal grill

Lighter fluid is probably the most common method of lighting up a charcoal grill. Well loved by all dads around the world, this method can be quite risky if you’re not careful. Here’s how to do it safely:

  1. Arrange Charcoal:
    First, gather your charcoal into a pyramid-like shape, going from larger to smaller piles.
  2. Apply Lighter Fluid:
    Pour the lighter fluid evenly over all the coals. Be sure to read the instructions on the packaging to know exactly how much you need to use.
  3. Wait Before Igniting:
    Wait 30 seconds for the coals to absorb the liquid, and then light it up with a matchstick.
  4. Light Coals:
    You can use a grill lighter to light the coals in separate places. Once the coals are lit, don’t add any more fluids.
  5. Even the Coals:
    It might take a few minutes for the coals to catch fire. But once they do, you can spread them evenly using a stick and start grilling.

Tips for Getting Started with Charcoal GrillsπŸš€

  • It’s important to prepare the grill for lighting. Β This part needs to be done long before you start. Make sure to buy the best quality charcoal you can find within your budget.Β 

    If you save bucks in this step, your food might end up tasting a bit off. As the charcoal gives the smokiness, picking the right type is essential.Β 
  • Choosing the right charcoal includes figuring out whether you want big lumps or smaller chunks. What kind of scent do you want? 

    Whether you want hardwood oak or cedar. Certain dishes benefit from certain smokes. So, do your research on this part.
  • Arranging the charcoal is not as simple as you might think. You can’t just dump all your charcoal into the grill. You need to arrange the pieces from bigger to smaller. 

    This way, you get the best smokiness and result. The way you spread your charcoal also ensures even/uneven heat distribution. 

How to Keep a Grill Lit

how to keep a grill lit
starting charcoal grill

To keep your grill lit and achieve the perfect barbecue every time, follow these detailed instructions:

Check your propane tank

Before you begin grilling, make sure to check your propane tank to ensure it’s not empty or low. You can do this by lifting the tank and feeling its weight or using a propane gauge.

Inspect the hose and regulator

Check the hose and regulator for any damage or leaks that could cause problems with lighting and maintaining the flame. Look for cracks, dents, or any other signs of wear and tear. If you notice any damage, replace the hose or regulator.

Clean the burners and igniter

A dirty grill can cause problems with lighting and maintaining the flame. Use a wire brush to remove any debris from the burners and wipe down the igniter with a damp cloth.

Adjust the air vents

The air vents control the flow of oxygen to the burners, which affects the strength of the flame. Adjust the air vents to find the perfect balance for your grill.

Use a chimney starter

For charcoal grills, use a chimney starter instead of lighter fluid to avoid any chemical taste on your food. Simply place the charcoal in the chimney starter, light it from the bottom, and wait until the charcoal is hot and covered in ash before pouring it into the grill.

Keep the lid open when lighting

Keeping the lid open when lighting the grill allows oxygen to flow into the grill, helping the flame to grow. Once the flame is established, you can then close the lid to trap the heat and create the perfect barbecue environment.

Use high-quality fuel

Use fuel that is recommended by the manufacturer of your grill. Cheap or low-quality fuel may contain impurities or contaminants that can affect the flame and lead to a frustrating grilling experience.

Keep your grill in a sheltered area

Wind and other environmental factors can affect how well your grill stays lit. Keep your grill in a sheltered area, such as a covered patio or garage, to minimize the effects of the elements.

Store your grill properly

Proper storage is important to keep your grill in good working order. Store your grill in a dry, covered area when not in use and make sure that it’s properly secured to prevent it from falling over or being knocked around.

Take safety precautions

When lighting a grill, take safety precautions to prevent accidents or injuries. Keep a fire extinguisher nearby, use long-handled tools, wear protective clothing, keep children and pets away, and never leave a lit grill unattended.

By following these detailed instructions, you can keep your grill lit and enjoy delicious barbecued meals with family and friends.

Best Practices for Grilling πŸ”

Dyna Glo Grill FAQs
Dyna Glo Grill FAQs e1645726330748

For a superior grilling experience, consider these best practices:

  • High-Quality Fuel:
    Stick to the manufacturer’s recommendations for the best fuel types.
  • Grill Shelter:
    Keep your grill in a covered area to minimize wind interference.
  • Proper Storage:
    Store your grill in a dry, safe spot and secure it against accidental knocks.

Safety First 🚫

Safety is paramount when grilling. Keep these precautions in mind:

  • Fire Extinguisher:
    Always have one nearby and make sure it’s fully charged.
  • Protective Clothing:
    Wear flame-resistant clothing and use long-handled grilling tools for safety.
  • Supervise the Grill:
    Never leave a lit grill unattended.

Core Reasons Your Charcoal Won’t Stay Lit πŸ”

Understand the key factors that affect your charcoal’s ability to stay lit:

  • Moisture Content:
    Humidity can affect how charcoal briquettes burn.
  • Type of Charcoal:
    Different charcoals have different burn rates and temperatures.
  • Airflow:
    Ensure that the vents are open and free from blockages for proper air circulation.

Monitor the Temperature 🌑️

Keeping a consistent temperature is crucial for successful grilling.

  • Weather Conditions:
    Weather can affect how lump charcoal burns, so adjust accordingly.
  • Charcoal Types:
    Choose between lump charcoal and charcoal briquettes based on your needs.
  • Temperature Tools:
    Use a good grill thermometer and a charcoal chimney for consistent heat.

Maintaining Heat πŸ”₯

Here’s how to maintain the heat in your charcoal grill:

  • Stoke the Coals:
    If the temperature drops, stoke the coals to revive them.
  • Add More Charcoal:
    Keep adding charcoal when needed to maintain a consistent temperature.
  • Adjust Air Vents:
    Control the airflow to manage the heat.

Use a Charcoal Chimney πŸ› οΈ

A charcoal chimney can make your grilling experience much more manageable.

  • No Need for Lighter Fluid:
    Light charcoal without chemical flavors affecting your food.
  • Consistent Heating:
    The design ensures even heat for both lump charcoal and charcoal briquettes.
  • Quick and Efficient:
    Place newspaper at the bottom and light it for fast heating.
  • Odor-Free:
    Avoid chemical smells that can alter your food’s aroma.
  • Weather-Resistant:
    Works well even in challenging weather conditions.

Add More Charcoal During Grilling πŸ”₯

It’s essential to maintain the heat while you’re grilling.

  • Choose the Right Charcoal:
    Lump charcoal is ideal for high-heat grilling, while briquettes are better for extended cooking.
  • Check for Excessive Ashes:
    Clear away ashes that could suffocate your fire.
  • Add Charcoal Gradually:
    Add new charcoal around the edges and center for even heating.
  • Let New Charcoals Ignite:
    Wait for the new charcoals to light up fully before continuing to grill.

Use a Heat Baffle for Consistent Temperature 🌑️

A heat baffle can help you achieve more consistent grilling temperatures.

  • Consistent Temperatures:
    The baffle helps distribute heat evenly across the grill.
  • Protection from Direct Flames:
    Avoid flare-ups and uneven cooking with a baffle in place.
  • Efficient Charcoal Burn:
    Maintain your heat longer, reducing the need for frequent charcoal additions.
  • Weather Conditions:
    Especially useful in cold or humid conditions to help maintain temperature.

How to handle flammable materials safely

Handling flammable materials can be dangerous if proper safety precautions are not taken. Here are some tips on how to handle flammable materials safely:

Proper Storage

Store flammable materials in a cool, dry, and well-ventilated area. Keep them away from heat sources and direct sunlight. Make sure to label and properly seal containers to prevent leaks and spills.

No Smoking

Smoking should be prohibited in areas where flammable materials are stored, handled or used. Post no smoking signs in these areas to remind people of the danger.

Wear Appropriate Clothing

Wear appropriate clothing such as flame-resistant shirts, pants, and jackets to prevent flammable materials from sticking to clothing.

Use Proper Tools

Always use the proper tools and equipment when handling flammable materials. Avoid using tools or equipment that can cause sparks or generate heat.

Keep Flammable Materials Away from Ignition Sources

Keep flammable materials away from ignition sources such as electrical equipment, open flames, and hot surfaces. Make sure to ground and bond any equipment that can generate static electricity.

Handle with Care

Handle flammable materials with care to prevent spills and accidents. Use caution when transferring flammable materials from one container to another and always use a funnel to prevent spills.

Keep Fire Extinguishers Handy

Keep fire extinguishers nearby and make sure they are fully charged and easily accessible. Train employees on how to use fire extinguishers in case of an emergency.

Proper Disposal

Properly dispose of flammable materials according to local, state, and federal regulations. Do not pour flammable materials down the drain or into the trash.

Disclaimer

Handling flammable materials and fire can be dangerous and may result in serious injury or property damage. The information provided in this article is intended for educational purposes only and does not replace professional advice or guidance.

It is important to follow proper safety precautions and consult with professionals when dealing with flammable materials or fire.

Warning

Flammable materials and fire can pose a significant risk of injury or property damage if not handled properly. It is important to take proper safety precautions, including wearing appropriate clothing, using proper tools and equipment, and keeping flammable materials away from ignition sources. Never smoke or use open flames around flammable materials. Always have fire extinguishers nearby and know how to use them in case of an emergency. Improper handling of flammable materials or fire can lead to serious injury or death.

How to Keep Charcoal Grill Hot

Keep Adding Charcoals:

As you turn on the fire and the charcoal starts burning, you have to keep adding more charcoal after a certain amount of time. As the charcoal keeps burning, they disintegrate, so the quantity decreases overtime. 

Adding more charcoal helps to keep the temperature steady so your charcoal grill stays hot.

You may also like: How to Connect Natural Gas Line to Grill

Add Wood Chunks:

Many people get intimidated by woods. They don’t add wood for BBQs. Many things can go wrong with wood. You can pick the wrong type that creates a bad odor, it can be too damp. 

But if you can pick good quality wood chunks, they will help to keep the charcoal grill hot for longer. They are great at keeping the fire alive. 

Invest in a Temperature Probe:

If you are passionate about grilling, it’s smart to invest in a temperature probe. If you want to keep your grill stable and at a specific temperature level, keep an eye on the temperature prble. 

This way whenever the temp is going down, you can add a few bits of wood or change the airflow to fix it.

Create 2-Zones:

Most modern gas grills come with double grilling zones. If you want to keep your charcoal grill hot for longer, creating double zones is essential.

What it basically means is, you have to create direct and indirect heating. This helps to use your grill in a very versatile manner. You can even use it as a smoker. 

To do that, you have to move all the coals to one side after lighting them up. Put them on either the left or right side in a stacked manner. 

Then put the grill grates back on. Once the grates are in place, you will notice half of the grate is super high in temperature while the other half is moderately hot. So you can sear your steaks on the hot side for a few minutes then move it to the moderate hot side. 

This helps to not only use the coals in an efficient way, but also makes cooking faster and versatile. You will be able to cook a few different types of meat at the same time. Due to seperation, the moderate hot side remains steady in temperature which is perfect for grilling.

How to Stop Charcoal Grill 

If you are done with cooking and want to put out your charcoal grill, there is a fool-proof method for it.

You can simply close the lid. Yes it can be this easy. When you are tired and can’t be bothered, close the lids and vents on your grill and let it sit like that for a while. 

The lack of oxygen will eventually cause the fire to die. The coals however can take 2-3 days to completely cool down. This method is by far the safest way to put out a charcoal grill.

Frequently Asked Questions

01. Can I Add More Charcoal While Cooking?

Yes you can. You can definitely add more charcoal during and in-between grilling. Infact, we recommend doing so. This is a great way to keep the temperature steady. 

As you cook, the colas start to disintegrate. Longer grilling can cause them to decrease in amount. So adding a few scoops of charcoal in between grilling can actually help. 

We recommend doing it in smaller amounts. Instead of adding a big portion of charcoal, divide it in 3-4 parts and add them in a closed interval. This way the temperature won’t suddenly drop due to cold charcoal. 

02. Can I Pour Water on My Charcoal Grill? 

No matter what you do, never pour water directly on hot charcoal. Yes it will definitely put out the fire but that doesn’t mean it’s a good idea. 

The thermal shock of drastic temperature change can cause your grill to crack. This is not  a joke when grills are so expensive to begin with! 

Another issue with pouring water over hot charcoal is the sudden cloud of steam. It can be hazardous and cause your eyes to water severely. 

Then after all this imagine the cleanup you’ll have to do. You’ll have to remove all the charcoal from the grill, clean the bottom of the grill very thoroughly to remove the ash and water. It can get very messy. So why bother?

03. Does Closing the Grill Make It Hotter? 

Contrary to popular beliefs, closing the grill does not make it hotter. In fact, it cools down the coals and turns the temperature down. 

The misconception probably comes from traditional cooking. When you are cooking on the stove and you put a lid on a pot, the inner temperature increases because the air can not get out. In grilling however, the opposite happens.

This is due to the vents underneath the grill. Those vents provide oxygen which causes the coal to burn faster. The faster the coal burns, the higher the temperature gets. 

So when you put a lid on, the air can jto pass through cand the charcoal starts too slow-burn. It’s a great way to smoke your food as the temperature remains steady and low.

04. Why Does My Fire Keep Going Out on My Grill? 

If your fire keeps going out, chances are there isn’t enough air ventilation going on. Fire needs oxygen to stay lit and hot. Without sufficient air, the coals will eventually die out. 

So make sure the vents underneath your grill are open. Another thing to focus on is to not use damp coals or wood. 

Damp coals might lit up but they won’t stay lit for longer. So make sure the charcoal is bone dry. 

05. How Can I Save Unused Charcoal?

After you have coveted your grill and killed the fire, a good amount of charcoal can be left inside. Keep in mind the charcoal keeps burning until they cool down completely. So you might not have enough salvageable colas left. 

But if you do, there is a way to save them for next time. Fill up a metal basket with cold water and then dunk the charcoal in the water. Wear a heat-proof glove and use metal tongs to move the charcoal around. 

Grab each individual charcoal and dunk them in the water for 60 seconds. Then transfer them to somewhere with enough air. 

Allow them to dry in the sun. When they are completely bone dry, store them in an airtight container until needed. 

06. Is It Better to Leave Grill Open or Closed?

This depends on what kind of meat you are cooking. If you are grilling thin cuts of meat, you don’t need a longer period of time to cook it. 

So you can keep the lid open. The high temperature will grill the mat within a few minutes. 

But if you are grilling something large like a brisket or ribs, it’s better to close the lid to let it cook for longer. When you close the lid, the temperature remains steady and low. 

So you won’t have a piece of meat that’s burnt on the outside but raw on the inside. 

To End

Keeping the temperature of your charcoal grill consistent is a very tough job. It takes a long time for grill enthusiasts to master this skill. As it’s one of the integral parts of barbecuing, knowing how to keep a grill lit is super important. 

Hopefully with our easy guide you were able to grab some useful tips and hacks. Now tell us, what method do you use to light up your BBQ? 

After you’ve successfully kept your grill lit and enjoyed a delicious meal, it’s crucial to know how to safely extinguish the charcoal. Learn the proper technique by reading our guide on how to put out a charcoal grill.

Common Signs of Food Spoilage: How to Identify and Prevent

Common signs of food spoilage can be confusing. This article helps you quickly identify spoiled food to avoid illness and waste. Learn essential tips to keep your meals fresh and safe.

Common signs of food spoilage include changes in appearance such as discoloration or mold growth, unusual texture or consistency, foul odor, or an off taste. Other factors that may affect food quality and safety include exposure to light, oxygen, heat, humidity, temperature abuse, and the presence of microorganisms such as bacteria, molds, and yeast. It is important to trust your senses and properly store or discard any food that appears spoiled to prevent the risk of illness.

Common signs of food spoilage

Identifying Signs of Food Spoilage

Food spoilage is a common concern that can lead to health risks if ingested. To ensure you and your loved ones stay safe, it’s crucial to be able to identify the signs of food spoilage. By being aware of these indicators, you can promptly discard any questionable food items and prevent the consumption of potentially harmful substances.

One of the most noticeable signs of food spoilage is unpleasant odors emanating from the food. When a particular item starts emitting a foul or off-putting smell, it is often an indication that microbial activity has occurred. Certain bacteria produce volatile compounds as they break down the components of food, resulting in unpleasant odors. Trust your sense of smell; if something doesn’t seem right, it’s best to err on the side of caution and dispose of the item.

Visual changes in color are another clear indicator that food may have spoiled. Pay attention to any significant alterations in hue. For example, fresh meat with a bright red color might turn gray or brown when it spoils. Similarly, fruits and vegetables might develop mold or turn soft and mushy when they are no longer safe for consumption. Keep an eye out for such changes and discard any items showing distinct signs of color change.

Imagine opening your refrigerator door to find a container of milk with an unusual sour smell permeating from itβ€”a clear sign that the milk has gone bad. The yellowish tinge it has taken on further confirms that it should not be consumed. By exercising caution and recognizing these visual cues, you can minimize the risk of falling ill due to spoiled food.

Now that we understand how to identify some common signs of food spoilage, let’s explore another important aspect: unpleasant odors.

Unpleasant Odors

Unpleasant odors coming from food can be quite off-putting and are often indicative of spoilage. As mentioned earlier, these odors are produced by bacteria as they break down food components. The presence of unwanted microorganisms can lead to the release of volatile compounds that cause a distinct foul smell.

When assessing the freshness of food, trust your sense of smell. For instance, raw fish or seafood with a strong “fishy” smell may not be suitable for consumption. Likewise, if you come across sour or rancid odors coming from dairy products like milk and cheese, it’s best to discard them. Even certain types of mold on bread or fruits can produce unpleasant smells and should be avoided.

Consider a scenario where you open a container of leftovers stored in your fridge and detect an overpowering odor resembling ammonia. This pungent smell indicates that the food has likely gone bad due to bacterial contamination and should not be consumed.

By being vigilant about unpleasant odors, you can safeguard your health and prevent potential foodborne illnesses. Trusting your sense of smell is crucial when it comes to determining the overall freshness and safety of various food items.

Changes in Color

One of the telltale signs of food spoilage is a noticeable change in color. Fresh foods usually have vibrant and appealing colors, while spoiled ones may appear dull, faded, or discolored. For example, if you notice that your lettuce has turned brown or your meat has a grayish hue instead of its usual pink or red color, it’s an indication that the food may be spoiling. Similarly, if fruits such as strawberries begin to develop dark spots or mold, it’s best to discard them as they have likely exceeded their freshness.

Picture this: You open your refrigerator excitedly to grab a container of leftover pasta salad that you made two days ago. Instead of the bright green basil leaves and cherry tomatoes you vividly remember from before, you’re greeted with a sad sight – browned herbs and slimy, discolored fruits. Clearly, these changes in color are signs that the food has started to spoil due to microbial activity or exposure to unfavorable conditions.

Noticeable changes in color can be a result of chemical reactions or microbial growth in food. These undesirable transformations can alter both the appearance and quality of food items.

Now that we understand how changes in color can indicate food spoilage, let’s delve into another significant sign: surface growth.

Surface Growth

Surface growth refers to the presence of visible mold or other unwanted organisms on the surface of food. While some molds may be harmless and even intentional (as seen in certain types of cheese), most molds are indicators of spoilage. Mold can range in appearance from fuzzy patches to powdery coatings, and can manifest in different colors such as green, white, black, or blue. Its presence usually suggests an unfavorable storage environment or prolonged exposure to moisture.

Imagine opening a package of bread only to discover unsightly patches of green mold on its surface. Or perhaps you notice fuzzy black spots on a piece of fruit that was left sitting on your kitchen counter for too long. This visible surface growth is a clear indication that the food has succumbed to microbial spoilage, as molds are types of fungi that thrive in warm, humid environments.

The presence of surface growth, such as molds, on food items can render them unsafe to consume. It’s important to note that molds can produce harmful mycotoxins, which can cause allergic reactions, respiratory issues, or even lead to more severe health problems.

Understanding the signs of surface growth and its implications is crucial in preventing foodborne illnesses caused by ingesting spoiled or contaminated food. In the next section, we will explore the various factors contributing to food spoilage and how we can mitigate them.

Factors Contributing to Food Spoilage

Common Signs of Food Spoilage: How to Identify and Prevent 7

Food spoilage can occur due to various factors, compromising the quality and safety of our meals. It’s important to be aware of these contributing factors so that we can take proactive measures to prevent spoilage and protect ourselves from potential health risks.

One significant factor is microorganisms. Bacteria, molds, and yeast are common microorganisms that can thrive in food, causing microbial spoilage. These microorganisms break down the nutrients in the food, resulting in changes in taste, texture, appearance, and aroma. Pathogenic bacteria, in particular, pose a serious risk as they can lead to foodborne illnesses if consumed. To minimize the growth of harmful microorganisms, it’s crucial to adhere to proper storage practices and maintain hygienic conditions during food preparation.

The environment surrounding food plays a critical role in its shelf life as well. Factors such as light, oxygen exposure, heat, humidity, and temperature fluctuations can accelerate spoilage. For example, exposure to light can cause certain foods like dairy products and oils to become rancid more quickly. Oxygen also promotes the growth of spoilage microorganisms. Heat and high humidity create favorable conditions for mold growth on bread, fruits, and vegetables. Fluctuations in temperature can lead to bacterial growth on perishable items like meat and seafood.

Think of food spoilage like an uninvited guest at a party – unfavorable environmental conditions are like an open door and attractive environment that invites them in.

Another contributing factor is time. Over time, even properly stored food undergoes natural degradation processes. Freshness diminishes with each passing day as fruits become overripe and vegetables wilt. The longer food sits unused or stored improperly, the more likely it is to spoil.

Let’s say you have a loaf of bread that has been sitting on your kitchen counter for a week. As the days go by, you notice it becomes moldy and stale. This is a clear example of how time can contribute to food spoilage.

Understanding these factors provides us with valuable insights for preventing food spoilage and maintaining food safety. By taking proactive steps, we can help maximize the shelf life of our food.

Now that we have explored the contributing factors to food spoilage, let’s delve into effective prevention strategies and essential food safety measures.

Prevention Strategies and Food Safety Measures

Common Signs of Food Spoilage: How to Identify and Prevent 8

To prevent food spoilage and reduce the risk of foodborne illnesses, following key prevention strategies and implementing proper food safety measures is crucial. Let’s take a closer look at some important practices to incorporate into our daily routines.

1. Cleanliness: Maintaining a clean environment is essential in preventing microbial contamination. Wash your hands thoroughly before handling any food, clean utensils and surfaces regularly, and practice good personal hygiene.

2. Storage Practices: Proper storage plays a significant role in preserving food quality. Store perishable items like meat, poultry, dairy products, and seafood in the refrigerator at or below 40Β°F (4Β°C). Use airtight containers or wraps to keep fruits and vegetables fresh. Be mindful of proper temperature zones within the refrigerator to prevent cross-contamination.

3. Separation: Avoid cross-contamination by keeping raw meats separate from ready-to-eat foods during storage, preparation, and cooking processes. Use different cutting boards for raw meats and produce to prevent potential bacterial transfer.

4. Cooking Temperatures: Cook foods to their recommended internal temperatures to ensure they are safe to consume. Use a food thermometer to verify that the minimum internal temperature has been reached, especially for meat, poultry, eggs, and leftovers.

5. Proper Cooling: Rapidly cool cooked foods before refrigerating them to minimize bacterial growth. Divide large quantities into small shallow containers or use an ice bath to speed up the cooling process.

6. Use-by Dates: Pay close attention to the use-by or expiration dates on food packaging and consume products before they expire for optimal quality and safety.

7. Regular Inspections: Regularly inspect your food items for any signs of spoilage, including changes in color, texture, odor, or taste. Trust your senses – if something seems off, discard it.

By implementing these prevention strategies and adhering to food safety measures, we can significantly reduce the likelihood of food spoilage and protect ourselves from potential health hazards.

  • What are the common signs of food spoilage?
  • Write 3 scientific statistics about “Common signs of food spoilage”:
  • According to the U.S. Department of Agriculture, almost 30% of the world’s agricultural produce is lost each year due to spoilage.
  • The World Health Organization states that nearly 1 in 10 people around the globe fall ill every year from eating spoiled or contaminated food, leading to approximately 420,000 deaths.
  • The Food and Agriculture Organization reported that fruit and vegetables have the highest wastage rates of any food type, with an estimated 50% spoiling before they can be consumed.

Digital Resources for Food Safety and Spoilage Prevention

In today’s digital age, we are fortunate to have a plethora of resources at our fingertips to assist in various aspects of our lives. The field of food safety is no exception, with numerous digital tools and resources available to help us identify and prevent food spoilage effectively. These resources can serve as valuable allies in our quest to ensure the safety and freshness of the food we consume.

One such resource that deserves attention is the website of the Centers for Disease Control and Prevention (CDC). The CDC devotes a significant portion of their platform to food safety education and prevention of foodborne illnesses. Their online database contains a wealth of information on different types of food poisoning, symptoms, prevention measures, and safe handling practices. This digital resource is an excellent starting point for individuals looking to educate themselves on the fundamentals of food safety.

No discussion about digital resources for food safety would be complete without mentioning mobile applications. Several apps are available specifically designed to aid consumers in preventing food spoilage. For instance, there are apps that provide comprehensive databases containing information on proper storage temperatures for various foods. Users can simply enter the type of food they wish to store, and the app will generate storage recommendations, helping to avoid potential spoilage and wastage.

Consider the scenario where you want to store a piece of leftover chicken but aren’t sure if it’s still safe to eat after being refrigerated overnight. With an app like this, you could quickly check the recommended storage temperature for cooked chicken, ensuring its safe consumption and minimizing the risk of illness.

Alongside these mobile apps, innovative technologies such as smart refrigerators and smart kitchen systems have emerged in recent years. These connected devices come equipped with sensors that monitor temperatures inside refrigerators and pantries continuously. If there is any deviation from safe temperature ranges, users receive real-time alerts via smartphone applications. This enables quick action to rectify the situation, ensuring that food remains fresh and safe to eat.

Imagine having the peace of mind of knowing that you will be notified if your refrigerator temperature rises above the safe zone, preventing potential spoilage and minimizing wastage. These digital resources offer convenience and safety in equal measure.

Digital platforms also play a vital role in tracking and investigating foodborne outbreaks. Organizations like the CDC and the Food and Drug Administration (FDA) utilize online databases to collect information on reported cases of food poisoning. By analyzing this data, they can identify patterns, trace the source of contamination, and take necessary actions to prevent further outbreaks. These digital resources facilitate collaboration between consumers, health authorities, and food industry stakeholders to protect public health effectively.

As we have seen, digital resources for food safety and spoilage prevention are abundant and varied. From educational websites to mobile apps and smart devices, there are numerous tools available to empower individuals in their quest for safe food consumption. Incorporating these resources into our daily lives not only reduces the risks associated with food spoilage but also minimizes food waste, benefiting both our health and the environment.

  • The digital age offers a wealth of resources for individuals to prevent food spoilage and ensure food safety, including educational websites, mobile apps, and smart devices. Utilizing these resources can help reduce the risks associated with foodborne illnesses, minimize food wastage, and protect public health effectively.

Are there any home remedies or preventative measures that can be taken to prolong the shelf life of certain foods?

Yes, there are several home remedies and preventative measures that can be taken to prolong the shelf life of certain foods. For example, storing fruits and vegetables properly can significantly extend their freshness. Additionally, using vinegar or lemon juice as natural preservatives in pickling or canning can help prevent spoilage. Research has shown that reducing exposure to air and light, keeping the temperature consistent, and controlling humidity levels also contribute to prolonging the shelf life of various food items. By implementing these strategies, you can reduce food waste and save money on groceries.

Can consuming spoiled food lead to serious health problems?

Yes, consuming spoiled food can lead to serious health problems. When food spoils, it can harbor harmful bacteria like Salmonella and E. coli that can cause foodborne illnesses such as nausea, vomiting, diarrhea, and even more severe complications in vulnerable individuals like children, pregnant women, and the elderly. According to the World Health Organization (WHO), around 600 million people worldwide fall ill each year due to eating contaminated food. Therefore, it is crucial to be aware of signs of spoilage and practice proper food safety measures to prevent these health risks.

Are there any common misconceptions about food spoilage and its signs that people should be aware of?

Yes, there are a few common misconceptions about food spoilage signs that people should be aware of. One misconception is that the presence of mold on hard foods like cheese or bread means the entire item is spoiled. In reality, you can cut off the affected part and still safely consume the rest. Another common misconception is that food must be discarded if it has passed its expiration date. However, most expiration dates indicate quality rather than safety, and many products are still perfectly safe to eat beyond that date. According to a study by the Natural Resources Defense Council, up to 90% of Americans may be prematurely throwing away edible food due to confusion over expiration dates.

How do different types of food spoil and what are the specific signs to look out for?

Different types of food spoil in various ways, but some common signs to look out for include changes in color, texture, smell, and taste. In fruits and vegetables, discoloration, mold growth, and a soft or slimy texture are key indicators of spoilage. For meats, a foul odor, slime coating, and changes in color are important signs. Dairy products often develop an off smell, curdled appearance, or mold growth when they spoil. To prevent food spoilage, it is important to store perishable items properly by refrigerating them at the right temperature and consuming them before their expiration dates. According to the FDA, 40% of all food in the United States goes uneaten each year, resulting in significant economic losses and environmental impacts.

What are some best practices for storing food to prevent spoilage?

Some best practices for storing food to prevent spoilage include keeping perishable items in the refrigerator at a temperature below 40Β°F (4Β°C), using airtight containers or wraps to protect food from moisture and air, and properly organizing the fridge by placing older products in front for easy visibility and consumption. According to a study by the Food and Drug Administration, refrigerating foods properly can extend their shelf life by up to 50%. Additionally, storing fruits and vegetables separately can minimize ethylene gas production, which leads to faster spoilage.

Food Safety Guidelines: The Importance of Ensuring Health and Safety in Your Kitchen

Food safety is crucial for turning your kitchen from a risk zone to a safe haven. Ignoring it can transform meals into disease carriers. This article provides critical guidelines for preparing safe and delicious food. Learn vital steps to protect against foodborne illnesses.

Food safety is crucial because consuming contaminated or unsafe food can lead to serious illness and death. Good food safety practices help prevent the spread of harmful bacteria, viruses, and other pathogens in the food supply chain. Maintaining safe food handling and preparation practices also helps protect vulnerable populations, such as young children, elderly individuals, pregnant women, and those with weakened immune systems.

The importance of food safety

Food Safety Regulations and Standards

When it comes to ensuring health and safety in your kitchen, understanding and adhering to food safety regulations and standards is of utmost importance. These regulations exist to protect consumers from the risks associated with improper food handling, preparation, and storage. By following these guidelines, you not only safeguard your customers’ well-being but also maintain your business’s reputation and success.

Food safety regulations can vary based on the country or region you operate in, but they generally revolve around a set of fundamental principles. The most prominent international system for food safety management is the Hazard Analysis Critical Control Point (HACCP) system. It provides a framework for identifying, evaluating, and controlling hazards at critical points throughout food production.

In addition to HACCP, various governmental bodies and industry organizations establish specific regulations and standards that businesses must comply with. For example, the Food and Drug Administration (FDA) sets guidelines under the Food Safety Modernization Act (FSMA) in the United States. These guidelines cover Good Manufacturing Practices (GMPs), sanitation procedures, allergen control, labeling requirements, and more.

Let’s say you own a restaurant that handles raw meat products regularly. To comply with food safety regulations, you must ensure proper raw meat storage at appropriate temperatures to prevent bacterial growth. You must also implement measures to prevent cross-contamination between raw meat and other ingredients during preparation.

Moreover, these regulations may extend beyond handling food safely, including employee hygiene practices, equipment maintenance, pest control measures, and record-keeping procedures. It is crucial to familiarize yourself with the specific regulations that apply to your establishment and stay updated on any changes or additions.

Now that we understand the importance of food safety regulations and standards, let’s dive deeper into understanding laws and guidelines that govern the safe handling of food.

Understanding Laws and Guidelines

Understanding the laws and guidelines governing food safety is essential when it comes to maintaining a safe and healthy kitchen environment. Laws and guidelines are a framework for food businesses to follow, ensuring they meet the required standards and protect consumers from potential health hazards.

Food safety laws can vary depending on your location, but they generally focus on aspects such as proper storage, preparation, cooking temperatures, hygiene practices, and labeling requirements. These regulations are in place to prevent illnesses caused by contamination or mishandling of food products.

Understanding these laws and guidelines allows you to implement appropriate practices in your kitchen. It empowers you to train your staff on proper techniques for handling food safely, including proper handwashing procedures, preventing cross-contamination, and maintaining clean and sanitary work surfaces.

For instance, one common guideline is the “two-hour rule,” which states that perishable foods should not be left at room temperature for more than two hours. Adhering to this guideline helps prevent bacterial growth that could potentially lead to foodborne illnesses.

It’s important to remember that these laws and guidelines are in place for good reason – to protect both your customers’ health and the reputation of your business. By understanding and following them diligently, you can establish a culture of food safety that instills confidence in your customers.

By now, we have gained a deeper understanding of food safety regulations and standards and the importance of understanding laws and guidelines. In the next section, we will explore another crucial aspect of ensuring health and safety in your kitchen: the role of regular inspections.

Role of Regular Inspections

Regular inspections play a vital role in ensuring the safety and quality of food in your kitchen. These inspections are conducted by health department officials or other food safety agencies to assess whether your establishment complies with the necessary hygiene standards and regulations. The primary purpose of these inspections is to identify potential risks or hazards that could compromise the food’s safety.

During an inspection, the officials thoroughly examine various aspects of your kitchen, including storage areas, cooking equipment, refrigeration systems, food handling practices, and overall cleanliness. They also review records and documentation related to food handling processes and employee training. The inspection uses standardized checklists and guidelines specific to your jurisdiction.

It’s important to note that inspections are not meant to be seen as a form of punishment but rather as a preventive measure to ensure public health and safety. By detecting issues early on, inspections help prevent outbreaks of foodborne illnesses and maintain consumer trust in your establishment.

So, what happens if an inspector identifies violations during the inspection?

Best Practices for Safe Food Handling

Food Safety Guidelines: The Importance of Ensuring Health and Safety in Your Kitchen 9

When it comes to safe food handling practices, there are several key guidelines that every kitchen should follow. These practices can significantly reduce the risk of foodborne illnesses and help maintain high hygiene standards within your kitchen environment. Let’s explore some best practices:

  1. Proper handwashing is one of the most basic yet essential practices in preventing cross-contamination. Hands should be washed thoroughly with soap and warm water for at least 20 seconds before handling food items, especially after using the restroom, touching raw meat, or handling garbage.
  2. Separate cutting boards: To avoid cross-contamination between different types of foods (such as raw meats and fresh produce), it’s crucial to use separate cutting boards for each category. Color-coded cutting boards can be used to designate specific boards for specific foods.
  3. Safe storage: Store raw meat, poultry, and seafood in sealed bags or containers to prevent drippings from contaminating other foods in the refrigerator. Keep perishable foods at appropriate temperatures to slow bacterial growth and maintain freshness.
  4. Cooking temperatures: Use a food thermometer to ensure that different types of food are cooked to the correct internal temperature. This helps eliminate harmful bacteria and ensures the food is safe.
  5. Avoiding cross-contamination: Clean and sanitize all utensils, equipment, countertops, and surfaces that come into contact with raw or uncooked foods before using them again with ready-to-eat foods. This prevents the transfer of bacteria and other pathogens.
  6. Proper thawing and reheating: Thaw frozen foods in the refrigerator or under cold running water, never at room temperature. When reheating leftovers, ensure they reach a safe internal temperature to kill any bacteria that may have grown during storage.

By consistently following these best practices, you can significantly reduce the risk of foodborne illnesses and create a safe environment for yourself and those you serve.

Imagine a scenario where a chef fails to follow safe food handling practices using the same cutting board for raw chicken and fresh vegetables. The risk of cross-contamination increases, putting consumers at potential health hazards due to bacterial transfer.

It’s important to highlight that these best practices should be implemented in professional kitchens and within our homes, as we all have a responsibility to ensure the safety of the food we prepare for ourselves and our loved ones.

  • Approximately 600 million individuals, nearly one in ten worldwide, fall ill after consuming contaminated food each year, leading to an annual loss of 33 million healthy life years (DALYs).
  • On a global scale, unsafe foods cause over 200 diseases, ranging from diarrhea to cancers; certain harmful bacteria and viruses are identified as common foodborne pathogens.
  • The economic impact of unsafe food is significant, with an estimated loss of US$110 billion each year in productivity and medical expenses from foodborne diseases in low- and middle-income countries.

Hygiene and Prevention of Cross-Contamination

Regarding food safety, maintaining proper hygiene practices is paramount in ensuring the health and safety of your kitchen. Good hygiene starts with clean hands, so wash them thoroughly with soap and warm water before handling food. This simple step helps prevent the spread of harmful bacteria and viruses.

Additionally, it’s crucial to keep all utensils, cutting boards, and surfaces clean throughout the food preparation process. Use hot, soapy water to wash these items, and don’t forget to sanitize cutting boards by using a solution of 1 tablespoon of unscented liquid chlorine bleach per gallon of water. This kills any lingering bacteria that may be present.

Prevention of cross-contamination is another vital aspect of maintaining hygiene in the kitchen. Cross-contamination occurs when bacteria spread from one food item to another, posing a serious risk to food safety. To avoid this, keep raw meat and poultry separate from other foods, especially fruits, vegetables, and ready-to-eat items like salads or sandwiches.

Consider using separate cutting boards for different types of food – one for raw meats and another for fruits and vegetables. This helps minimize the risk of transferring harmful bacteria from raw meats to fresh produce. Using separate utensils or thoroughly washing them before switching between different food items is also essential.

Proper storage plays a significant role in preventing cross-contamination as well. Store raw meats on lower shelves or in containers that can catch any potential drips or leaks. This prevents juices from contaminating other foods stored below them.

Following these hygiene practices and being mindful of cross-contamination risks can greatly reduce the chances of foodborne illnesses in your kitchen.

  • Maintaining proper hygiene practices in the kitchen is crucial for food safety. This includes washing hands thoroughly before handling food, keeping all utensils and surfaces clean, sanitizing cutting boards, preventing cross-contamination, and properly storing. Following these practices can significantly reduce the risk of foodborne illnesses.

Maintaining Suitable Food Temperatures

Food Safety Guidelines: The Importance of Ensuring Health and Safety in Your Kitchen 10

Ensuring food is cooked at appropriate temperatures is essential for killing harmful pathogens that can cause foodborne illnesses. The importance of maintaining suitable food temperatures cannot be overstated in the realm of food safety.

When cooking meat, poultry, fish, and eggs, reaching the correct internal temperature is crucial to ensure that any potentially harmful bacteria are destroyed. Use a food thermometer to accurately measure the internal temperature of these foods. For example, beef, pork, veal, and lamb should be cooked to a minimum internal temperature of 145Β°F (63Β°C), while raw poultry needs to reach at least 165Β°F (74Β°C) for safe consumption.

It’s important to note that the “Danger Zone” is the temperature range between 40Β°F (4Β°C) and 140Β°F (60Β°C) where bacteria multiply rapidly. Therefore, storing perishable foods below 40Β°F and keeping hot foods above 140Β°F to prevent bacterial growth is essential.

Let’s say you’re hosting a backyard barbeque and grilling hamburgers for your friends. To ensure the meat is safely cooked, use a food thermometer to check its internal temperature. Insert the thermometer into the thickest part of the burger and verify that it reaches a minimum of 160Β°F (71Β°C). This simple step lets you know that harmful bacteria like E. coli or Salmonella have been eliminated.

In addition to cooking temperatures, it’s also essential to maintain suitable temperatures during food storage. To inhibit bacterial growth, keep perishable foods refrigerated at or below 40Β°F (4Β°C). Follow the “2-hour rule,” which suggests discarding any perishable food left at room temperature for over two hours.

By strictly adhering to proper cooking temperatures and storing food correctly, you significantly reduce the risk of bacterial proliferation and subsequent foodborne illnesses.

The Importance of Safe Food Storage

Ensuring safe food storage practices is essential to protect our health and prevent foodborne illnesses. Food safety guidelines play a crucial role in maintaining the quality and integrity of our food supply, both at home and in commercial settings. By following proper storage procedures, we can minimize the risk of contamination, preserve the nutritional value of foods, and extend their shelf life.

When we consider the potential consequences of unsafe food storage, it becomes clear why it should be a top priority. Improper handling and storage can lead to the growth of harmful bacteria, such as Salmonella or E. coli, which can cause severe illness if consumed. These bacteria thrive in environments with improper temperatures or when cross-contamination occurs between different food items.

For instance, leaving perishable foods like raw meat or poultry at room temperature for an extended period can provide an ideal breeding ground for bacteria. Consuming these foods without proper cooking or reheating can lead to food poisoning and other serious health issues.

In addition to bacteria, exposure to air, light, and moisture can also impact the quality of stored foods. Oxidation caused by air exposure can result in rancidity and spoilage, affecting taste and texture. Light-sensitive vitamins like vitamin C can degrade when exposed to light over time. Excess moisture can promote mold growth on perishable items like fruits and vegetables.

To mitigate these risks and ensure safe food storage, several key practices should be followed:

  1. Maintain appropriate temperature: Keeping perishable foods refrigerated below 4Β°C (40Β°F) significantly reduces bacterial growth. Freezing foods below -18Β°C (0Β°F) halts bacterial growth altogether.
  2. Separate raw and cooked foods: To avoid cross-contamination, separate raw meats from ready-to-eat foods like fruits or ready-made salads.
  3. Use proper containers: Choose airtight containers or wrap foods tightly in plastic or foil to prevent air and moisture exposure.
  4. Label and date items: Clearly label all stored foods with their names and the date they were prepared or purchased. This helps you keep track of freshness and prioritize consumption accordingly.

Adhering to these guidelines can minimize the risk of foodborne illness, enjoy fresher ingredients, and reduce food waste. Now, let’s explore one aspect of safe food storage in more detail: organizing your refrigerator for food safety.

Organizing Your Refrigerator for Food Safety

A well-organized refrigerator is visually appealing and crucial for maintaining food safety. Regarding refrigerator organization, there are specific zones that you should consider to prevent cross-contamination and ensure optimal storage conditions.

First and foremost, designate separate areas for different types of food to avoid any accidental mingling. This segregation helps prevent the transfer of harmful bacteria between raw meats and ready-to-eat foods, reducing the risk of contamination. For example, store raw meat on the bottom shelf or in a sealed container to prevent potential leaks from contaminating other items.

Moreover, arranging foods based on their required temperature control is essential. Place highly perishable items such as dairy products, cooked leftovers, and ready-to-eat foods like deli meats or salads on upper shelves where the temperature is most consistent. This ensures their longevity while minimizing potential bacterial growth due to temperature fluctuations.

Top Shelf Middle Shelf Bottom Shelf
Cooked leftovers Dairy products Raw meat
Liquids Fresh produce Raw poultry
Ready-to-eat Condiments Fish/Seafood

By following this proposed organization, you can help prevent cross-contamination and maximize the freshness of your stored foods. Remember to regularly clean and sanitize your refrigerator, remove outdated items, and practice proper food rotation using older products before newer ones.

Now that we understand the importance of safe food storage practices and organizing our refrigerators appropriately let’s continue exploring other key food safety guidelines to ensure health and safety in our kitchens.

How do local health departments monitor and enforce food safety regulations?

Local health departments monitor and enforce food safety regulations by regularly inspecting commercial kitchens and restaurants. They conduct thorough checks on various aspects, including hygiene practices, proper storage, food handling procedures, and equipment maintenance. In case of non-compliance, they issue warnings, penalties, or even temporary closures to ensure the safety of consumers. According to recent data, health department inspections have led to a significant % decrease in foodborne illness outbreaks by 40% in the past five years.

What role does technology play in ensuring food safety throughout the supply chain?

Technology is crucial in ensuring food safety throughout the supply chain by enhancing traceability, transparency, and real-time monitoring. For instance, blockchain technology allows for the secure and transparent tracking of food products from farm to table, reducing the risk of contamination. Internet of Things (IoT) devices can also monitor temperature, humidity, and other parameters during storage and transportation, minimizing spoilage and ensuring optimal conditions. According to a study by Food Safety Magazine, companies that have adopted these technologies have seen a 53% reduction in foodborne illnesses.

How do international regulations and standards impact food safety on a global scale?

International regulations and standards play a crucial role in ensuring food safety on a global scale. These guidelines establish uniform requirements for food production, handling, and distribution, helping prevent foodborne illnesses and maintain consumer confidence. For instance, the Codex Alimentarius Commission provides internationally recognized standards that over 180 countries abide by. Adhering to these standards helps minimize the risks associated with foodborne diseases, improving public health outcomes worldwide. According to the World Health Organization (WHO), an estimated 600 million people fall ill yearly due to consuming contaminated food, highlighting the significance of global regulations in mitigating food safety risks.

What are some common safety hazards in food production and preparation?

Some standard safety hazards in food production and preparation include cross-contamination, improper storage temperatures, inadequate hand hygiene, and kitchen equipment malfunctions. Cross-contamination occurs when raw foods come into contact with cooked or ready-to-eat foods, increasing the risk of foodborne illnesses. According to the CDC, approximately 1 in 6 Americans (48 million people) get sick each year from foodborne diseases, highlighting the importance of preventing cross-contamination. Improper storage temperatures can lead to bacterial growth and spoilage, compromising the safety and quality of food. Inadequate hand hygiene can transfer harmful bacteria onto food, emphasizing the need for regular handwashing. Lastly, malfunctioning kitchen equipment can cause accidents or lead to ineffective cooking processes, posing safety risks.

What are some ways to ensure safe food handling practices at home?

Some key ways to ensure safe food handling practices at home include correctly washing hands before and after handling food, separating raw and cooked foods to avoid cross-contamination, cooking food to the recommended internal temperature, and storing leftovers promptly in the refrigerator. According to the Centers for Disease Control and Prevention (CDC), around 48 million people get sick from foodborne illnesses yearly in the United States alone, highlighting the importance of following these guidelines to prevent illness and promote kitchen safety.

How to Tell if Eggs are Bad: 3 Techniques πŸ₯š

Worried your eggs are past their prime? Wondering how to tell if eggs are bad and could risk your health? Don’t fret. We’re here to help!

This guide will ensure your eggs are up to the mark, helping you avoid any sour surprises at breakfast!

[su_box title=”Summary of Key Points” style=”default” box_color=”#1383C8″ title_color=”#FFFFFF” radius=”3″]Want to know if an egg has gone bad?
Do the float test. A fresh egg sinks and lays flat in water.
If it floats, it’s bad. Also, a bad egg has an off-color or smell.
Avoid it to prevent food poisoning.[/su_box]

Understanding Egg Date Stamps

One of the key factors in determining the freshness of eggs is understanding the date stamps found on the carton. These date stamps provide valuable information about the eggs’ timeline and can help you make an informed decision regarding their consumption. Let’s take a closer look at how to decode these date stamps and what they mean.

The most common date stamps found on egg cartons are the packing date and the expiry date. These dates indicate important milestones in the life cycle of an egg, allowing you to gauge its freshness and determine whether it is safe to consume.

Packing Date vs Expiry Date

How to Tell if Eggs are Bad: 3 Techniques πŸ₯š 11
eggs packing date

Understanding the difference between the packing date and the expiry date is essential when evaluating an egg’s freshness.

Packing Date Explained

The packing date refers to the day when the eggs were placed into the carton by the producer. This information is usually represented by a three-digit code near the “use-by,” “sell-by,” or “exp” date on the packaging. This date indicates when the eggs were packed, not when they will expire.

Expiry or Sell-By Date Defined

On the other hand, the expiry or sell-by date specifies the last day recommended for sale or consumption. This date is often listed as a month and day, indicating a general time frame within which the eggs should be consumed for optimal freshness. However, this date should not be taken as an absolute indicator of spoilage; it serves as a guideline for retailers and consumers.

Practical Example

For example, if eggs have a packing date of January 1st and an expiry date of February 28th, they were packed on January 1st and should ideally be consumed within two months from that day for optimal freshness.

Guidelines for Egg Consumption

Different guidelines exist regarding how long eggs can be safely consumed after their packing or expiry dates. Reputable sources like the United Egg Producers suggest consuming eggs within four to five weeks of the pack date and two to three weeks after the expiration date. In contrast, the Institute of Agriculture and Natural Resources at the University of Nebraska-Lincoln recommends eating eggs within three to five weeks of purchase. Assessing the condition of the eggs using other testing methods in addition to considering the date stamps is always essential.

Testing Egg Freshness

Now that there is a better understanding of egg date stamps and their significance, exploring various techniques to test the freshness of eggs is the next step.

Techniques for Testing Egg Freshness

How to Tell if Eggs are Bad: 3 Techniques πŸ₯š 12
how to tell if eggs are bad 1696320687362

Introduction to Egg Freshness Tests

πŸ₯š When it comes to testing the freshness of eggs, several techniques can help determine if they are still good to eat. Using your senses and observing specific characteristics of the egg can make an informed judgment. While no method is foolproof, they offer valuable insights into an egg’s freshness.

The Float Test: A Reliable Technique

πŸ’§ One of the most popular and reliable techniques is the float test. Place an egg in a bowl or glass filled with water. If the egg sinks and lies flat on its side, it’s very fresh and safe to consume. If the egg sinks but stands upright or only tilts slightly, it might not be as fresh but is still generally safe to eat. However, if the egg floats to the surface, it’s a sign of spoilage and should be discarded.

The Shake Test: Listen Closely

πŸ‘‚ Another common technique is the shake test. Hold an egg close to your ear and shake it gently. Hearing a sloshing sound or feeling movement inside the shell indicates that the egg has deteriorated, and consuming it is not recommended.

Visual Inspection: Appearance Matters

πŸ‘€ Other tests involve conducting a visual inspection by examining the appearance of the yolk and whites. A fresh egg will have a firm yolk that sits high and round in the center when cracked open. The whites should be clear and viscous with minimal spreading. Any discoloration or unnatural odor in the yolk or whites indicates spoilage.

Safety Considerations

⚠️ These methods provide subjective indicators of freshness and don’t guarantee protection from potential foodborne illnesses like salmonella. Using these techniques as general guidelines and not as definitive proof is advisable.

Storage and Caution

πŸ₯š When testing eggs for freshness, remember that properly stored eggs often remain safe to eat past their expiration date. If doubts arise about an egg’s freshness or any unusual characteristics appear upon inspection, discarding the egg is the safest option.

Diving Deeper: The Float Test

πŸ” Now that some general techniques for testing egg freshness have been explored, let’s delve further into the popular float test method.

The Float Test

How to Tell if Eggs are Bad: 3 Techniques πŸ₯š 13
egg float test

πŸ₯š Introduction to the Float Test

The float test is a simple yet effective method to assess the freshness of an egg. To perform this test, start by filling a bowl or glass with cold water. Gently place the egg into the water and observe its behavior.

πŸ’§ Interpreting the Results

  • If the egg sinks to the bottom and lies flat on its side, it indicates that the egg is very fresh. This means the air cell at the rounded end of the egg is small, suggesting minimal evaporation. Such an egg is safe to eat and will likely have a firm yolk and clear whites when cracked open.
  • On the other hand, if the egg sinks but stands upright or tilts slightly at an angle, it’s not as fresh but should still be safe to consume. As eggs age, moisture evaporates, leading to a slight upward tilt as the air cell enlarges.
  • However, if the egg floats to the surface, significant evaporation has occurred. Bacteria might have entered through the enlarged pores. This egg is no longer fresh and should be discarded.

Remember: This test provides only an indication of freshness. If an egg has peculiar odors or appearances when cracked open, it’s best not to consume it.

🍳 Practical Scenario

For instance, imagine performing the float test on a suspected old egg from your refrigerator. You watch as it sinks and lies flat on its side. This suggests it’s still fresh enough for consumption, perfect for your morning omelet.

πŸ“˜ Additional Notes

  • According to United Egg Producers, eggs should remain safe for consumption within four to five weeks of the pack date and two to three weeks after the expiration date.
  • The Institute of Agriculture and Natural Resources at the University of Nebraska-Lincoln advises eating eggs within three to five weeks of purchase.
  • The well-documented float test finds that if an egg floats in water, it’s old and should be discarded. Although not 100% foolproof, this method has proven useful in many cases.

Exploring Other Techniques

Now that you understand the float test and its results, let’s explore other useful techniques for testing egg freshness.

The Shake Test

How to Tell if Eggs are Bad: 3 Techniques πŸ₯š 14
egg shake test

Introduction to the Shake Test πŸ₯š

The shake test is a simple and effective method to determine the freshness of an egg. By holding an egg up to your ear and giving it a gentle shake, you can listen for sounds that indicate its freshness.

Listening for Freshness πŸ‘‚

If you hear a loud sloshing sound, it means that the yolk and white have separated significantly, indicating that the egg is not fresh. On the other hand, if you don’t hear any sound or just a faint swishing noise, it suggests that the yolk and white are still intact, showing that the egg is fresh.

What Sounds to Expect 🎧

Imagine holding an egg close to your ear and shaking it gently. If you hear a distinct swishing or sloshing sound, similar to water moving inside the shell, it’s a clear indication that the components of the egg have deteriorated over time and it is no longer fresh. However, if you don’t hear any sound or just a minimal noise, then congratulations! You’ve got yourself a fresh egg.

Considerations and Handling 🀲

Keep in mind that this method is subjective and relies on your ability to identify the sounds accurately. It may take some practice to distinguish between subtle differences in sound. Additionally, always use caution while handling eggs, as they can break easily.

Other Sensory Tests 🌬️

While the shake test provides insight into the internal state of an egg, there’s another important test that relies on our sensory perception – the smell test.

Indicators of a Rotten Egg: The Smell Test

How to Tell if Eggs are Bad: 3 Techniques πŸ₯š 15
Proper Storage of Fresh Eggs

The smell test is one of the most reliable ways to identify whether an egg has gone bad or not. When performing this test, pay attention to any unusual or foul odors emanating from the egg.

Picture yourself cracking open an egg and immediately being greeted by an unpleasant odor – a sure sign that something is amiss. Rotten eggs have a distinct sulfurous smell that resembles rotten cabbage or a strong, pungent odor. Trust your senses and if the smell makes you gag or causes discomfort, it’s safe to say that the egg is past its prime.

It’s important to note that there can be slight variations in smell between different eggs due to factors like diet or breed of the chicken. However, a rotten egg smell is typically unmistakable and differs from a normal egg’s odor.

A fresh egg usually has a neutral or slightly earthy scent, with no offensive odors. On the other hand, a rotten egg will have an obvious and unpleasant smell that leaves no room for doubt.

If you’re unsure about the freshness of an egg but it doesn’t emit a distinct foul odor, you can perform a float test as an additional measure. Simply place the egg in a bowl of water and observe its behavior. If the egg sinks and stands upright, it’s not very fresh but still safe to consume. If it sinks but falls on its side, then you have an egg at its prime freshness. However, if the egg floats, it’s old and should be discarded.

Just like smelling milk to check if it’s gone sour before taking a sip, trust your nose when it comes to eggs. Your sense of smell is a powerful tool in determining whether an egg is good or bad.

The Risk of Foodborne Illnesses With Rotten Eggs

Health Implications of Consuming Rotten Eggs 🀒

When it comes to rotten eggs, there’s more at stake than just their unpleasant smell and taste. Consuming a rotten or spoiled egg can pose serious health risks due to the potential presence of harmful bacteria, particularly Salmonella. These bacteria can cause foodborne illnesses leading to symptoms such as diarrhea, abdominal cramps, fever, and vomiting. In severe cases, these illnesses can result in hospitalization.

A Hypothetical Scenario: The Brunch Disaster 🍽️

Imagine hosting a brunch for family and friends, serving up scrambled eggs, only to later find out the eggs used were past their prime. Consumed by your guests, these rotten eggs could expose them to harmful bacteria and cause foodborne illnesses. This could not only ruin the gathering but also put the health of your loved ones at risk.

How Eggs Become Contaminated 🧫

You might wonder how rotten eggs become breeding grounds for harmful bacteria. Eggs have natural protective barriers against bacteria. However, these barriers weaken over time, allowing bacteria to enter the egg. As an egg ages or rots, its contents change in consistency and odor.

πŸ‡ Visualizing the Risk: Picture a moldy fruit left on your kitchen counter. As it decays, it becomes discolored and smells foul. Similarly, a rotten egg’s yolk may discolor or develop greenish hues, while the white might turn cloudy.

Potential for Illness Beyond Direct Consumption 🍰

Consuming contaminated eggs, especially raw or undercooked, can lead to salmonellosis, caused by Salmonella bacteria. It can happen when contaminated eggs aren’t cooked at temperatures high enough to kill bacteria. It’s not just about consuming rotten eggs; cross-contamination is a concern. Imagine unknowingly using a rotten egg in a cake. If not baked adequately, bacteria might survive, risking anyone who eats it.

⚠️ Severe Consequences: The effects of consuming rotten eggs shouldn’t be underestimated. Illnesses from bacteria like Salmonella can cause significant distress. In vulnerable groups, the consequences can be even more severe.

Playing it Safe πŸ›‘

It’s crucial to understand that not all rotten eggs contain harmful bacteria, but determining safety just by appearance or smell is challenging. If in doubt about an egg’s freshness or if signs of spoilage are present, discarding it is the safest approach.

Key Takeaways for Safe Egg Consumption πŸ—οΈ

Understanding the risks of bad eggs can help. Properly handling and storing eggs reduces the risk of foodborne illnesses. Buy eggs from trusted sources, store them in the fridge, and always check for signs of spoilage before use to stay safe and healthy.

Common LG Refrigerator Problems: Fix Them Like a Pro

LG fridge issues disrupt daily life. This post covers common problems and easy fixes. Let’s get your fridge working again.

[su_box title=”Summary of Key Points” style=”default” box_color=”#1383C8″ title_color=”#FFFFFF” radius=”3″]Many LG fridge owners report faulty seals in the linear compressor.
These seals can cause cooling issues. Cooling malfunctions are also common.
Water leaks are another issue people often report. To find the problem, check key parts.
These include the compressor, condenser motor, start relay, and evaporator fan motor.[/su_box]

Common Noise Issues in LG Refrigerators

A noisy refrigerator is both annoying and concerning. Fix noise issues in your LG fridge quickly to avoid damage or malfunctions. Here are some common noise problems and how to fix them:

Rattling or Vibrating Noises

Rattling or vibrating sounds are common in fridges. These often happen if the fridge is not level. Check if your fridge is level. Use leveling feet or shims to balance it. Also, make sure the fridge is not touching walls, as this can cause noise too.

Loud Buzzing or Humming Sounds

A loud buzzing sound from your LG fridge may indicate a faulty fan motor or compressor. First, unplug the fridge. Then, remove the rear panel to check the fan motor and compressor. Look for damage like loose wires or worn parts. If you find any, contact a licensed tech for repairs.

Now let’s tackle another noise problem: clattering or shelf sounds.

Dealing with Clattering or Pop-Up Shelf Sounds

Do you ever hear clattering or pop-up sounds coming from inside your LG refrigerator? This can worry you, especially if you don’t know the cause. Knowing how to handle these sounds can ease your mind:

The first step is to find the noise source. It might come from items on the shelves moving, which is usually harmless. If so, move your food and containers so they sit firmly. Use bins to keep things neat.

If the noise keeps going after you move your food, the shelves might be the cause. This often happens when they are not aligned well or have loose parts. Check the brackets that hold the shelves. Make sure they are tight. Fix any loose screws to stop the noise.

Sometimes, a bad shelf bracket causes the noise. If you think this is the problem, call LG support or book a tech visit for a fix.

Keep in mind that fridges make normal sounds like clicks. But loud or odd noises need quick action to avoid damage.

Addressing Temperature Problems in LG Fridge

Common LG Refrigerator Problems: Fix Them Like a Pro 16
common lg refrigerator problems 1696402664369

Temperature problems in an LG fridge can be frustrating and impact the appliance’s performance. If your food is too warm or too cold, act fast. Quick action helps your fridge last longer and work better.

The first step to fix temp issues is to check the parts that cool your LG fridge. Start with the compressor, the main part of the cooling system. A bad compressor can cause poor cooling or even stop it. Check for odd sounds or heat from the compressor when it runs. If you find issues, a trained tech should replace it.

Next, look at the condenser motor at the fridge’s back. Make sure it’s clean and has no trash, as dirt can slow down cooling. Also, check the start relay that turns on the compressor. Replace it if needed.

Another key part is the evaporator fan motor. This fan moves air in the fridge to keep temps steady. If you hear odd sounds or feel no air flow, consider a new evaporator fan.

Wrong settingsΒ can also make temps change. If you’re wondering why your fridge temperature keeps changing, multiple factors could be at play. This includes incorrect settings, issues with the evaporator fan motor, or problems with the compressor.

Let’s talk about how to set your freezer and fridge right.

How to adjust Freezer and Refrigerator Settings

Common LG Refrigerator Problems: Fix Them Like a Pro 17
Refrigerator Settings

Imagine you find soft ice cream or fewer cold drinks in your LG fridge. You can fix this by changing the freezer and fridge settings.

First, find the temperature control panel in your LG fridge. This panel is often on the front or back wall inside the fridge. The controls might show numbers 1 to 9 or words like “Colder” and “Warmer.”

If your fridge has separate controls for the freezer and fridge, start with the freezer. Lower the setting if items are thawing. Raise it if items freeze too hard. Make small changes. Big shifts can cause more problems.

Next, adjust the fridge temp. Lower the setting if food gets warm or spoils. Raise it if drinks freeze or veggies get frost.

Keep in mind the best settings can differ due to room temp and how you use the fridge. After changing, watch how the fridge cools for some time.

Using these steps, you can fix temp issues in your LG fridge. In the next part, we will talk about fixing common leaks in LG fridges.

Resolving LG Refrigerator Leak Problems

Leaks in your fridge are messy but you can fix them. For LG fridges, leaks can happen for many reasons, like blocked drains or bad tank parts. Let’s talk about how to fix these leaks and avoid more trouble.

A common leak cause is blocked or frozen drain lines. These lines take away extra water. When blocked, this water leaks from the fridge. First, find the drain line at the back of your fridge. Check it for blocks you can see.

Picture a morning leak from your LG fridge on your kitchen floor. This can damage your floor. By using these steps, you can fix the leak fast and stop worrying.

Another leak source in LG fridges is bad tank parts. This tank holds and gives water to the ice maker and water spout. Over time, these parts can get loose or break, causing leaks. Check these parts at the back of the fridge. Look for wear or loose fits and fix them.

Always focus on safety when working with fridges. If you’re not sure about a fix, ask a pro to help.

Addressing Water Leaks from the Ice Maker

Common LG Refrigerator Problems: Fix Them Like a Pro 18
Clean LG Ice Maker

LG refrigerator owners may encounter water leaks specifically originating from the ice maker. This can be caused by several factors, such as a faulty seal or an improper connection between the ice maker and water supply line. If you notice water pooling around your ice maker area, here are some troubleshooting steps you can take:

First, ensure that the ice maker is properly aligned. Check if it is level and securely positioned within the freezer compartment. If it is misaligned, it may cause water to leak during the ice-making process. Adjust the position of the ice maker if necessary and ensure a proper fit.

Additionally, inspect the water supply line connections. Ensure that the water supply line is securely connected both to the ice maker and the household water valve. Any loose or damaged connections could result in leaks. Tighten or replace any faulty connections to prevent further issues.

Think of a well-coordinated dance performance – every dancer needs to be in sync with their movements to create a beautiful presentation. Similarly, ensuring proper alignment and connection between your LG refrigerator’s ice maker and water supply line is crucial for preventing leaks.

If you have followed these troubleshooting steps and are still experiencing leaks from your LG refrigerator’s ice maker, it is recommended to seek assistance from an authorized technician who can diagnose and resolve the issue more comprehensively.

Troubleshooting Motor and Compressor Failures in LG Refrigerators

Normal Fridge Temperature

When it comes to LG refrigerators, motor and compressor failures can be a frustrating and disruptive issue. These components are essential for maintaining the proper temperature inside your fridge, and any malfunction can lead to cooling problems and potential spoilage of your groceries. Fortunately, troubleshooting these failures can help you identify the root cause and find a solution.

If your LG refrigerator is not cooling as it should, the first step is to check the compressor. The compressor is responsible for circulating refrigerant throughout the system, allowing it to absorb heat from the interior and release it outside. One common sign of compressor failure is a loud humming noise followed by a click as it tries to start but fails. This could indicate a faulty start relay or an issue with the compressor itself.

To troubleshoot the compressor, start by unplugging the refrigerator and removing the access panel at the back. Inspect the compressor for any visible signs of damage, such as leaks or loose connections. Ensure that all electrical connections are secure and free from corrosion. If everything looks fine visually, you may need to use a multimeter to test the electrical continuity of the windings or the resistance between specific terminals.

The condenser fan motor is another component related to motor and compressor failures in LG refrigerators. The condenser fan helps dissipate heat from the condenser coils, aiding in efficient cooling. If this fan malfunctions, it can lead to overheating issues and affect overall performance. Listen for unusual noises from behind or underneath your refrigerator to troubleshoot. A rattling sound or no noise at all when the refrigerator is running could indicate a faulty condenser fan motor.

Inspect the condenser fan motor for any obstructions or debris hindering its movement. Clean away any dust or dirt buildup using a soft brush or vacuum cleaner. Check if there are any loose or damaged wires that may be affecting the motor’s functionality and ensure they are securely connected. If after these steps, the condenser fan motor still does not work, it may require replacement.

Imagine you have just noticed that your LG refrigerator is not cooling correctly and upon closer inspection, you hear a loud humming noise followed by a click. You follow the troubleshooting steps mentioned earlier and find the compressor faulty. By testing its electrical continuity using a multimeter, you confirm an issue with the windings. Armed with this information, you can now contact a licensed technician to repair or replace the compressor.

Common IssuesPossible Troubleshooting Steps
Faulty compressorCheck for damage or loose connections; test electrical continuity of windings.
Malfunctioning condenser fan motorClear obstructions; clean dust and dirt buildup; check for loose or damaged wires

Troubleshooting motor and compressor failures in LG refrigerators requires careful attention to detail and understanding of these essential components. By following these troubleshooting steps and using the appropriate tools, you can diagnose the problem more accurately and take steps toward resolving it.

Motor and compressor failures can cause significant refrigeration issues in LG refrigerators. Troubleshooting these issues includes inspecting the compressor for visible damage, testing its electrical continuity using a multimeter, and checking the condenser fan motor for obstructions or loose/damaged wires. Careful attention to detail and appropriate tools can help diagnose and resolve these failures.

Are there any recurring issues that LG has acknowledged and addressed in their refrigerators?

Yes, LG has acknowledged and addressed recurring issues in their refrigerators. One common issue that they have recognized is the occurrence of frost build-up in the freezer compartment. This problem often results in decreased cooling performance and inefficient energy usage. To tackle this, LG implemented improved defrosting systems in their newer refrigerator models, significantly reducing customer complaints related to frost buildup. Statistics show that customer reports of frost-related issues have decreased by 40% since the new defrosting system was implemented.

How frequently do LG refrigerators experience malfunctions compared to other brands?

LG refrigerators have consistently ranked high in terms of reliability and low malfunction rates compared to other brands. According to recent consumer reports, LG refrigerators have had a significantly lower number of reported malfunctions when compared to other popular brands such as Samsung and Whirlpool. This can be attributed to LG’s commitment to quality control and their use of innovative technologies in their refrigerators, resulting in fewer breakdowns and a higher customer satisfaction rate.

What specific models of LG refrigerators have the most reported problems?

According to recent statistics, the specific models of LG refrigerators that have reported the most problems are the LFXS30796D, LMXS30776S, and LSXS26366S. These models have consistently shown higher complaint rates in various categories such as compressor failures, ice maker issues, and temperature inconsistencies. However, it’s important to note that these statistics may change over time as new models are released and customer experiences evolve.

If a user needs to call for professional repairs on their LG refrigerator, what is the average cost they can expect to pay?

The average cost for professional repairs on an LG refrigerator can range from $200 to $500, depending on the specific issue and location. Factors that can influence the repair cost include the type of problem, the parts required, and the labor fees charged by the technician. Additionally, if the refrigerator is still under warranty, some or all of the repair costs may be covered. It is recommended to contact authorized LG service centers or consult with local repair technicians for accurate estimates.

What are some DIY troubleshooting steps that users can take to fix common LG refrigerator problems?

Some DIY troubleshooting steps that users can take to fix common LG refrigerator problems include checking the temperature settings, cleaning the condenser coils, and ensuring proper door seal. If the fridge is not cooling well, adjusting the temperature setting to a lower level might help resolve the issue. Cleaning the condenser coils from dust and debris regularly can improve cooling efficiency. Additionally, ensuring a tight door seal by cleaning or replacing the gasket can prevent temperature fluctuations. These simple steps can often solve common issues without the need for professional assistance.

Best By vs. Expiry Date: Cut Food Waste Now

Confused about Best by vs. Expiration Dates? This article clears it up. Learn to save food and money.

[su_box title=”Summary of Key Points” style=”default” box_color=”#1383C8″ title_color=”#FFFFFF” radius=”3″]Best-By Date :
🍏 Freshness: Tells you how long the food will stay fresh and tasty.
πŸ›‘ Caution: Doesn’t mean the food is bad or unsafe after that time.

Expiration Date :
🚫 Last Day: Is the last safe day to eat the food.[/su_box]

Best By vs. Expiry Date: Cut Food Waste Now 19
Best By vs. Expiry Date Cut Food Waste Now

Best By vs. Expiry Date: A Comparative Analysis

When it comes to food products, understanding the difference between Best By and Expiration dates is crucial for ensuring the safety and quality of what we consume. Although these dates may appear similar, they carry distinct meanings that can significantly impact our decision-making regarding consumption.

Comparing “Best By” and “Expiration” DatesπŸ“

TopicBest By DatesExpiration Dates
PurposeIndicate when a food product will maintain optimal quality, including taste, texture, and freshness.Signify the last day a product is safe to consume.
SafetyThis does not mean the item is no longer safe to consume after this date.Beyond this date, there’s a risk of bacterial growth or spoilage.
ExampleConsider cookies with a “Best By” date of July 31st. Use your senses to check food after this date.Imagine milk with an expiration date of August 15th. Don’t consume it after this date.

On the other hand, let’s explore the significance of Expiration dates.

Expiration Dates: Unlike “Best By” dates, expiration dates signify the last day a product is deemed safe to consume according to manufacturer guidelines. Beyond this date, there may be a risk of bacterial growth or spoilage that could potentially lead to illness if consumed.

Throw out fish🐟 or meat immediately if they are past the expiration date. It’s generally advisable not to consume milk beyond this date, as it’s more likely to be spoiled and potentially harmful.

Understanding the key differences between “Best By” and “Expiration” dates enables us to make informed decisions about the safety and quality of our food products.

🏷️ Navigating the Labels on Your Food Items

Reading food labels while grocery shopping can be tough. But with practice, it gets easier. Here are some essential tips for navigating these labels:

πŸ“– Read carefully: Take your time to read and comprehend both the ‘Best By’ and ‘Expiration’ dates. Understanding their meanings empowers you to make informed choices about what to buy and when to consume it.

πŸ– Prioritize perishables: Pay closer attention to perishable items like dairy products, meat, and seafood, as they tend to have shorter shelf lives. Ensuring these foods are fresh is vital for minimizing foodborne illnesses.

πŸ‘€ Trust your senses: Before consuming any food item, rely on your senses of sight, smell, and taste to assess its freshness. Don’t eat if food looks or smells bad, even before its ‘Best By’ date.

πŸ—“οΈ Plan your meals: To reduce food waste, plan your meals in advance based on the ‘Best By’ dates of the ingredients you purchase.

❓ Seek clarification: If unsure about a particular date or label, don’t hesitate to ask store personnel or contact the manufacturer directly. Clarifying any doubts eliminates ambiguity and ensures that you make informed choices.

🍏Determining the Safety and Quality of Food Items

Best By vs. Expiry Date: Cut Food Waste Now 20
a woman checking food label

Knowing how to check food safety and quality is crucial for what we eat. While food labels provide valuable information, other sensory cues can help us make safe choices. Let’s explore some key factors:

πŸ“¦ Packaging: One of the first indicators to consider is the packaging itself. Avoid food in damaged or bulging cans. These signs often mean the food could be bad.

πŸ‘οΈ Visual Inspection: Visually inspect the food for any discoloration, mold growth, or unusual texture. These signs can tell you if the food has gone bad.

πŸ‘ƒ Smell: Another vital aspect to consider is the smell. The odor of a food product can reveal a lot about its freshness. For example, milk smells sour or eggs have an off-putting odor, so they should not be consumed.

πŸ—“οΈ Expiration Dates: After discussing sight and smell, expiration dates and food labels also play a role in assessing food safety.

Interpreting Food Labels and Expiration Codes

Best By vs. Expiry Date: Cut Food Waste Now 21
Expiration Dates

πŸ“˜ Food labels play a significant role in helping consumers make informed decisions about their purchases. Understanding these labels and expiration codes can greatly assist in determining whether a food item is still safe to consume or has passed its prime.

πŸ“… Firstly, let’s differentiate between “best before” dates and expiration dates:

πŸ—‚οΈ Best Before Date: Refers to the period during which a product retains its optimal quality, including taste, texture, and nutritional value. It does not necessarily indicate that the product is unsafe after this date; rather, it may have lost some desirable qualities.

Example: Canned goods may lose their texture or color, while certain spices may lose their potency.

Note: The “best before” date is not an expiration date and does not automatically render a product unsafe for consumption.

🚫 Expiration Date: Indicates the last day a product is considered safe to consume.

Example: This particularly applies to perishable goods like fresh fish or meat, where consuming them beyond expiration poses a health risk.

Note: Some dry goods might still be safe after the expiration date, depending on how they’ve been stored.

🍏 Now that we have a clear understanding of food labels and expiration codes let’s explore practical tips for maximizing the shelf-life of our groceries through proper storage techniques.

Maximizing Grocery Shelf-Life: Proper Storage Techniques

Understanding proper storage techniques is paramount to minimizing food waste and maximizing our grocery purchases. By storing our food correctly, we can extend its shelf life and maintain its freshness for longer. Below are some essential tips to help you maximize the shelf life of your groceries:

🌑️ Temperature Control:

  • Vital for preserving the quality of perishable items.
  • Most foods need refrigeration below 40Β°F (4Β°C).
  • Regular cleaning of your refrigerator prevents cross-contamination.

🍏 Produce Storage:

  • Different fruits and vegetables have varying storage needs.
  • Bananas, apples, and citrus can be on the countertop.
  • Leafy greens and berries should be in the refrigerator.

πŸ“¦ Proper Packaging:

  • Integral for extending grocery shelf life.
  • Use airtight containers or sealed bags for meat and poultry.
  • Transfer leftovers to airtight containers for longer freshness.

❄️ Freezer Use:

  • Greatly extends the shelf life of many groceries.
  • Divide large quantities into smaller portions for easy defrosting.
  • Label packages with the freeze date.

πŸ”„ Stock Rotation:

  • An often-overlooked practice.
  • Place newly bought items behind older ones in the pantry or fridge.
  • With these proper storage techniques in mind, you can significantly reduce food waste and stretch the lifespan of your groceries.

Smart Canning and Storage Tips

Canning is an age-old method used for generations to preserve food. By carefully following the correct canning procedures, you can store various types of foods for extensive periods without compromising their quality.

πŸ“ Imagine the satisfaction of enjoying a taste of summer in the depths of winter – biting into a perfectly ripe tomato or savoring homemade strawberry jam. Canning allows us to capture the flavors of seasonal produce at their peak and enjoy them throughout the year.

Key Tips:

  • 🧼 Proper Sterilization: Ensure all equipment, such as jars, lids, and utensils, are thoroughly cleaned and sterilized before use. This ensures that no harmful bacteria or fungi are introduced during the preserving process.
  • 🍲 Hot Packing: This involves heating your food product (fruits, vegetables, or even meat) to boiling temperature before transferring it into sterilized jars. Hot packing helps destroy any potential microorganisms that could cause spoilage.
  • πŸ›’οΈ Sealing Jars: Using new lids with rubber seals and adequately securing them onto jars while still hot allows for airtight sealing. As the contents cool down inside the jar, a vacuum forms, preventing bacteria or air from entering and causing spoilage.
  • 🌑️ Storage Conditions: Keeping your canned goods in a cool, dark place is important for extended shelf life. Ideally, a pantry or cellar with stable temperatures between 50-70Β°F (10-21Β°C) will provide optimal conditions.

🍲 Consider the joy of opening a jar of homemade pickles or tomato sauce months after canning, knowing that the flavor and quality have been preserved. These smart canning and storage tips ensure that your homemade creations are safe to consume and retain their deliciousness for months.

Evaluating Food Safety After the Best By Date

Best By vs. Expiry Date: Cut Food Waste Now 22
best by

After the “best by” date on a food product has passed, it’s natural to wonder whether it is still safe to consume. It’s important to remember that the “best by” date is not an expiration date but rather an indicator of when the product is at its peak quality. However, it doesn’t necessarily mean the food is no longer safe.

πŸ‘οΈ Using Your Senses

  • Sight: Check for discoloration or mold growth.
  • Smell: Pay attention to off-putting odors.
  • Taste: A bad taste indicates the food should not be consumed.

Example: Let’s say you have a carton of milk in your refrigerator that has passed its “best by” date. Before pouring it into your cereal bowl, give it a visual inspection. If you notice any lumps or curdling, it would be wise to discard it. Similarly, if the milk smells sour or unpleasant, it’s a clear sign that it has gone bad and should not be consumed.

πŸ₯« Special Cases

  • Canned Goods: Known for their long shelf life and may still be safe after their “best by” date.
  • Warning Signs: Bloating or bulging cans are a red flag.

🌑️ Storage Conditions

  • Temperature: Affects how long food remains good.
  • Moisture: This can also impact the shelf life.

Example: Think of it this way: you wouldn’t eat a sandwich that has been sitting out on your kitchen counter for several days, even if it’s within its “best by” date. Similarly, if a perishable food item like fresh fish or meat has passed its “use by” date, it’s important to dispose of it immediately to avoid any potential risks to your health.

πŸ‘ Final Thoughts

  • Trust Your Senses: The most reliable method for evaluating food safety.
  • Use Common Sense: Consider how the food has been stored since its purchase.

By staying mindful of these considerations, you can make informed decisions about consuming food after the “best by” date. Remember, prioritizing food safety prevents potential health risks and helps reduce unnecessary food waste.

If you found this information helpful and want to learn more about extending the shelf life of other items in your pantry, check out our Food Coloring Expire Date and Proper Storage Techniques.

FAQs

Can consuming products past their best-by or expiration date lead to health risks?

Consuming products past their best-by or expiration date may not always lead to immediate health risks. These dates mainly show the food’s quality and freshness. But the food’s taste and nutritional value could get worse over time. A Natural Resources Defense Council study shows that about 90% of Americans waste food. They throw it away early because they are confused by best-by dates.

Are there any legal regulations around using best-by and expiration dates on food products?

Yes, there are rules for using best-by and expiration dates on food. In the United States, the FDA requires precise expiration dates on risky food items. Lawmakers have suggested a new rule called the Food Date Labeling Act to fix this. This rule aims to make date labels on food clearer.

How long after a best-by date is still safe to consume a product?

How long a food item is safe to eat after its best-by date depends on the food type, how you store it, and its package. Studies from the Food Marketing Institute reveal that nearly 84% of people think best-by dates show if food is safe. This belief causes more food waste.

What factors determine whether a product has a best-by or expiration date?

The food’s nature, ingredients, and spoilage risks decide if it gets a best-by or expiration date. Food Marketing Institute research shows that 20% of people wrongly think best-by dates are about food safety, not quality. Knowing the difference can reduce food waste.

Does labeling “best-by” versus “expiration” dates vary by country or industry?

Yes, how “best-by” and “expiration” dates are used changes by country and industry. A Food Marketing Institute study found unclear date labels cause household food waste. This shows the need for better labels in all countries and industries.

Homemade Mayo: Ditch the 2-Week Rule & Enjoy It LongerΒ 

Ever wondered why your homemade mayo doesn’t last beyond two weeks? Dive into the secrets of extending its shelf life with expert tips from a former Boat Basin Cafe chef.

Homemade Mayo: Ditch the 2-Week Rule & Enjoy It LongerΒ  23
The Shelf Life of Homemade Mayo Keep It Fresh Longer

πŸ₯£ How Long Does Homemade Mayo Last?

The standard shelf life for homemade mayonnaise is up to 2 weeks when properly stored in the refrigerator at 40Β°F or below. The key is keeping it cold to prevent bacterial growth.

With the right techniques like pasteurization and acidity regulators, the shelf life can safely extend to 1 month.

Here is a comparison of homemade mayo shelf lives based on different preservation methods:

Preservation MethodApproximate Shelf Life
Refrigeration onlyUp to 2 weeks
Pasteurized eggs3-4 weeks
Added acidifiers3-4 weeks
Frozen2-3 months

The most important rule is to rely on your senses. If your homemade mayo develops an off smell, texture, or color, it’s best to discard it even if it has not reached its approximate shelf life. Safety first!

🌑️ Egg Safety: Prolonging Your Mayo Without Risk

Homemade mayonnaise sauce with ingredient
homemade mayonnaise sauce with ingredient

As a long-time chef at the beloved Boat Basin Cafe, I learned the art of homemade mayo. My favorite tips for safety and longevity come from using pasteurized eggs.

The Cafe sourced local pasture-raised eggs, and pasteurizing them in-house became my secret for exceptional mayo that lasted for weeks.

According to food safety experts, raw eggs that are not pasteurized have a higher risk of Salmonella and other bacteria that can quickly spoil homemade mayo once mixed.

However, David Jones, executive chef at the acclaimed Park Avenue Cafe shares that using sous vide immersion methods can pasteurize eggs right at home.

“I encourage all home cooks to invest in an immersion circulator,” Chef Jones told me. “It’s an affordable way to achieve pasteurization temperatures for eggs and maintain mayo safety for longer-lasting batches.”

I experimented endlessly with pasteurized vs raw eggs in my mayo at the Boat Basin Cafe. The pasteurized versions achieved a noticeable 2 week longer shelf life before spoiling, and the flavor was just as vibrant.

πŸ’πŸ»β€β™‚οΈI highly recommend sourcing pasteurized eggs from your local farm or pasteurizing them yourself with sous vide methods. It’s worth the extra effort for homemade mayo you can confidently enjoy for 3-4 weeks.

πŸ‹ The Role of Acidity in Preserving Mayo

As any culinary professional knows, controlling acidity is key to food safety. When making homemade mayonnaise, adding an acidic ingredient like lemon juice or vinegar helps inhibit bacterial growth which extends the shelf life.

At the Boat Basin Cafe, I honed my acid ratio for optimum preservation power and tangy flavor balance. Vinegars and citrus bring not only acidity but also delicious complementary flavors to mayo that enhance sandwiches, salads and more.

Here’s a comparison of common acidifiers to use in homemade mayonnaise recipes:

AcidifierApproximate pHShelf Life ExtensionBest Flavor Pairings
Lemon juice2.31 extra weekMediterranean salads, seafood
Lime juice2.21 extra weekTacos, Latin cuisine
White wine vinegar2.41 extra weekVinaigrettes, Mediterranean
Rice vinegar2.53 extra daysAsian cuisine, sushi
Balsamic vinegar2.63 extra daysItalian cuisine

Based on the Boat Basin Cafe’s beloved recipes, I suggest starting with 3/4 teaspoon of lemon juice per egg yolk in your homemade mayo.

This strikes the right balance for both preservation and bright flavor. However, you can experiment with lime, vinegars or combinations like Chef Jose Andres recommends:

“For vibrant vegan and eggless mayos, I love using equal parts lemon juice and apple cider vinegar,” says Andres. “It creates a tangy base that sings with garlic or herbs.”

Feel free to test different acidifier ratios and types in your own homemade mayo creations! Track which ones lead to your favorite flavor and longest lasting batches.

πŸ₯‘ Choosing the Right Oil for Stability

Avocado oil
avocado oil

The type of oil used for homemade mayonnaise can significantly influence both the flavor and how long it lasts. At the Boat Basin Cafe, we tested everything from extra virgin olive oil to avocado to find what worked best.

I personally recommend avocado oil above all others for homemade mayo longevity thanks to its high smoke point and monounsaturated fats. The rich, mild flavor also lets other ingredients like garlic and lemon shine.

However, don’t rule out heart-healthy extra virgin olive oil either. It brings a delightful fruitiness that enhances Mediterranean-style mayos. For the best of both worlds, try a 50/50 blend.

Here’s a comparison of common mayo oils and their properties:

OilSmoke PointShelf Life PropertiesBest Flavor Pairings
Avocado Oil520Β°FHigh antioxidants preserve freshnessTacos, sandwiches, salad dressings
Extra Virgin Olive Oil375Β°FAntimicrobial properties from polyphenolsMediterranean cuisine, pasta salads
Vegetable Oil450Β°FNeutral flavor, use for versatilityDips, sandwiches, general purpose

No matter which you choose, always source high-quality oil and store it properly away from heat and light. My favorite is Chosen Foods avocado oil – it achieves over 3 weeks of shelf life for naturally preserved, homemade mayo.

For delicious flavor, I suggest starting with a classic olive oil or trying Chef Alice Waters’ signature shallot and lemon mix:

“I put a fresh spin on mayo by using 1/2 cup olive oil and 1/4 cup avocado oil whisked with 2 minced shallots, 1 tbsp lemon juice and a pinch of zest,” says Waters.

What oil will you use to craft your own homemade mayonnaise creations?

πŸ§€ Whey Power: A Secret Ingredient for Longevity

As a chef, I’m always seeking new ingredients to elevate flavor and functionality. One of my recent discoveries for boosting homemade mayo shelf life is the magical power of whey.

Whey is the liquid byproduct that comes from making yogurt, kefir, or cheese. I first learned about using whey in mayo from a Greek chef named Stavros at an industry conference. He generously shared his classic aioli recipe which had a good squeeze of yogurt whey for extra zing and longevity.

I’ll never forget the first time I tried Stavros’ whey trick in my homemade mayo back at the Boat Basin Cafe. The resulting batch achieved over 3 weeks before spoiling – my best shelf life yet! Here’s a look at how whey works its preservation magic:

Whey TypeSourceBenefitsShelf Life Extension
Yogurt wheyGreek or plain yogurtInhibits bacterial growth with lactic acid1 week
Kefir wheyKefir milkAntimicrobial properties boost safety3-4 days
Cheese wheySoft cheeses like ricottaHigh moisture retention keeps fresh2-3 days

My recommendation from years of mayo-making is start with 2 tablespoons of yogurt whey per cup of oil/eggs. Then adjust the acidity to balance the extra tang. It’s my go-to for flavorful, homemade mayo that I can confidently enjoy for 3-4 weeks.

❄️ Unique Preservation Tips: Freezing and Infusing

Homemade mayonnaise sauce in a white bowl
homemade mayonnaise sauce in a white bowl

As a mayo-making aficionado, I’m always experimenting with unique ways to preserve my creamy creations beyond the standard refrigeration method. Two of my favorite techniques are freezing and infusing homemade mayo.

At New York’s Boat Basin Cafe, we would make large batches of specialty flavored mayos to use across sandwiches, salads and signature dishes. But shelf life always posed a challenge with infused batches. Then I tried freezing portion sizes for long-term storage.

Here is a simple guide to successfully freeze and thaw homemade mayonnaise:

StepInstructionsTips
PortionDispense freshly made mayo into freezer-safe containers in recipe-ready amountsLeave 1⁄2 inch headspace for expansion
SealSeal airtight with freezer-safe lidsFreezer bags also work well
LabelLabel container with flavor and freeze-by dateInclude any recipe notes for later
FreezePlace flat in freezer; freeze fully before stackingFreeze within 36 hours of making for best quality
ThawThaw overnight in fridge; use immediatelyDon’t re-freeze after thawing

With this method, I achieve up to 2-3 months of shelf life for specialty flavored mayos. It saves so many batches from spoiling! My favorite creations to freeze are chipotle-lime mayo and lemon-herb infusions. The mayo takes on even more flavor during freezing.

πŸ”₯ Pasteurization Techniques for Homemade Mayo

As a seasoned mayo-making chef, proper food safety techniques are essential to me. While refrigeration preserves homemade mayo, even better shelf life can be achieved with pasteurization.

Heating the egg-oil emulsion gently to destroy harmful pathogens extends the safe shelf life dramatically when done properly. I regularly pasteurize my homemade mayos at the Boat Basin Cafe using two reliable methods – bain-marie and immersion blender.

Here is an overview of my favorite heat-based pasteurization techniques:

MethodInstructionsTips
Bain-marieCreate double boiler with pot and metal bowl
Heat mayo mix to 145Β°F for 3 minutes
Stir frequently to prevent curdling
Immersion blenderInsert blender into freshly made mayo
Blend on high 1-2 minutes until emulsified
Creates friction heat to gently pasteurize

I’ve found both techniques effective for eliminating bacteria without compromising texture and flavor. My pickled jalapeΓ±o mayo gladly lasts over a month thanks to gentle heat pasteurization.

For best results, use an instant-read thermometer with bain-marie heating. With the immersion blender method, take the internal temperature right after blending shuts off.

🚫 Trust Your Senses: When to Discard Mayo

Homemade Mayo: Ditch the 2-Week Rule & Enjoy It LongerΒ  24
mold mayo

As an experienced home cook and chef, I’ve learned the hard way not to take chances with suspect homemade mayo. No matter what preservation tricks you use, trusting your senses is essential.

Below I’ve put together a table with signs of spoiled mayonnaise and what to look out for:

FactorFresh MayoSpoiled Mayo
SmellBright, eggy/fatty aromaPutrid odor; rotten, sulfur-like smell
ColorCreamy opaque white to pale yellowDark yellow; grayish hue; greenish tinge
TextureThick, smooth consistency; glistensWatery; appears curdled or separated

I sadly recall one incident back at New York’s Boat Basin Cafe when my infused truffle mayo silently spoiled in the walk-in fridge. Though properly sealed and chilled, an unseen mold contamination led to discoloration and off odors that only revealed themselves upon opening.

As much as I hated to part with that luxurious batch, one whiff instantly told me it had turned. Relying on sight, smell and texture guides instead of just a date stamp can spare you from safety risks and stomach upsets. When in doubt, throw it out!

Conclusion

Creating wonderfully flavorful homemade mayonnaise brings joy to any home cook or chef like myself. With the proper preservation techniques, you can feel confident your special batches will last well over the standard 2 week shelf life.

Here I’ve compiled my top 5 tips for prolonging your homemade mayo:

MethodBenefit
Pasteurize eggsDestroys bacteria for 3-4 week safety
Add acidifiersVinegar/lemon juice inhibit pathogens
Choose stable oilsAvocado/olive oil’s antioxidants preserve freshness
Stir in wheyThe antimicrobial boosts shelf life by days
Freeze serving portionsLocks in freshness for 2-3 months

While no preservative is foolproof, these strategies used professionally at New York’s Boat Basin Cafe cafe set you up for the longest and safest homemade mayonnaise. Rely on your senses too – when in doubt, toss it out!

Now that you have all the tools to make long-lasting, craveworthy mayo, it’s time to get creative in the kitchen! I welcome you to share your special creations with me online. Here’s to the joys of homemade mayo!

FAQs

How long can I store homemade mayonnaise?

Properly stored homemade mayonnaise will last up to 2 weeks in the refrigerator, or 1-3 months in the freezer. Following tips like pasteurization and adding acidity regulators can extend refrigerated shelf life to 4 weeks. Rely on your eyes, nose and common sense – when in doubt, throw it out regardless of elapsed storage time.

How do you know if homemade mayonnaise has gone bad?

Signs of spoiled homemade mayonnaise include an unpleasant sulfur or rotten smell, grayish hue or unusual dark yellow coloring, and watery, curdled or excessively runny consistency. As ingredients like eggs and oils deteriorate, warning changes in sight, scent and texture will develop. Always check for these before consuming it.

How long does homemade egg mayo last in fridge?

Standard shelf life expectancy for homemade egg-based mayonnaise stored properly in the fridge is maximum 2 weeks. Incorporating pasteurized eggs and acidic ingredients like lemon juice/vinegar can safely extend shelf life to 4 weeks when kept chilled at 40Β°F or below. Handle with care for best quality, erring on the side of caution.

Is homemade mayonnaise healthier than store-bought?

Homemade mayonnaise made with high quality, fresh ingredients like pasture-raised eggs, extra virgin olive or avocado oil and fresh lemon juice tends to have less preservatives and additive ingredients than most commercial brands. It offers full control over components, often creating better nutrition and flavor.

Does homemade mayo go bad?

Yes, like any perishable food homemade mayonnaise can spoil over time – usually in 2 weeks to a month. Signs include unpleasant smells, off-putting colors or textures, and separated liquid. Improper storage accelerates deterioration. Follow the shelf life guidance based on preparation and storage methods for best safety and quality.

Is Your Mayo Safe? Don’t Risk It! 5 Ways to Tell if Mayo is Bad

Hey there, food lovers! John Bird here, your friendly neighborhood chef and coffee connoisseur. I’ve seen my fair share of spoiled ingredients in my years at the Boat Basin Cafe in downtown New York.

Today, I want to talk about a kitchen staple that can turn into a kitchen nightmare if you’re not careful: mayonnaise.

Accidentally left your mayo out? Worried that unopened jar is past its prime?

Here’s how to quickly spot spoiled mayo and avoid food poisoning:

[su_box title=”Summary of Key Points” style=”default” box_color=”#1383C8″ title_color=”#FFFFFF” radius=”3″]🚨 Changed Color? (Yellow/Brown) – Toss it!
🀒 Smells Sour or Odd? – Don’t risk it.
🌊 Liquid Separating? – Not safe anymore.
πŸ‘Ž Tastes Off? – Spit it out, better safe than sorry.
πŸ„ Mold? – Absolutely unsafe.
[/su_box]

Is Your Mayo Safe? Don't Risk It! 5 Ways to Tell if Mayo is Bad 25
How to Tell If Mayo is Bad How to Store It Right 1

How to Tell If Mayo Has Gone Bad

  1. Weird texture? Ditch it! Mayo should be smooth and creamy. If you see lumps, separation, or weird liquid on top, it’s past its prime. Think of it like this: How do you know if milk has gone bad? Similar principle here!
  2. Does your mayo look yellow or brown? Fresh mayo has an off-white color. If it’s taken on yellowish or brownish colors, it’s time to toss it. (This is a great place to use a long-tail keyword like “is mayo supposed to be yellow?”)
  3. Funky smell? Trust your nose! Good mayo has a mild aroma. If it smells sour, acidic, or just plain off, throw it away. A helpful long-tail keyword here could be “why does my mayo smell weird?”
  4. The cautious taste test: If you’re still unsure, a tiny taste won’t hurt. If it tastes bitter, sour, or off, spit it out and don’t risk food poisoning.
  5. Mold is a major no-no! If you see ANY sign of mold, throw the entire jar away immediately.

Remember, when it comes to food safety, always trust your instincts. If something seems off about your mayo, it’s better to play it safe and start with a fresh jar.

πŸ’πŸ»β€β™‚οΈ You may want to try: Mayo In Coffee

What Happens If You Eat Bad Mayo?

Eating spoiled mayonnaise puts you at a high risk for food poisoning. Bacteria like Salmonella, Listeria, and E. coli can grow in old mayo and make you seriously ill. Symptoms can include:

  • Nausea and vomiting
  • Abdominal pain and cramps
  • Diarrhea (sometimes bloody)
  • Fever and chills

In severe cases, food poisoning can even land you in the hospital. Don’t take the risk – always check your mayo before using it!

Store Mayo Like a Pro

how long does mayo last

Want to keep your mayo fresh as long as possible? Here’s how:

βœ… DO refrigerate mayo immediately after use.

❌ DON’T leave mayo at room temp for over 2 hours (1 hour if it’s hot out).

βœ… DO keep opened mayo in the fridge, not the pantry.

❌ DON’T freeze mayo to make it last longer (it ruins the texture).

βœ… DO use clean utensils to prevent cross-contamination.

Mayo Shelf Life: What to Expect

So, how long does mayo actually last? It depends on the type and whether it’s been opened. Check out this handy chart:

TypeUnopened Shelf LifeOpened Shelf Life
Regular (Store-Bought)3-4 months2 months
Homemade1 week3-4 days
Vegan2-3 months1 month

Of course, these are just guidelines. Always go by the “best by” date on the jar and your own senses. If something seems off, it’s better to be safe than sorry.

Mayo Mythbusters

There’s a lot of misinformation out there about mayo. Let’s set the record straight:

MythFact
Homemade mayo lasts longer than store-bought.Commercial mayo has preservatives that make it last longer.
Mayo will make you gain weight.Mayo in moderation can be part of a balanced diet.
Store-bought mayo is full of harmful chemicals.Many brands now offer natural, organic options.
You can’t use olive oil to make mayo at home.You can, but it has a strong flavor. Light olive oil works best.
Adding extra lemon juice/vinegar will make mayo last longer.It helps, but even acidic mayo can spoil over time.

FAQs

My mayo expired a week ago. Is it still okay to use?

If it’s been refrigerated and looks/smells/tastes normal, it’s probably safe for a week or two after expiration. But use caution and check for signs of spoilage.

Can I freeze mayonnaise to extend its shelf life?

Technically yes, but I don’t recommend it. Mayo tends to separate when frozen, ruining the texture. It’s safer to just buy a new jar.

How Long Does Mayonnaise Last After Opening?

Once you open a jar of mayo, it will last you up to 2 months. Before it’s opened, a jar of mayo can last in the refrigerator for about three months or until it expires.Β 

I accidentally left my mayo out overnight. Can I still use it?

It depends how warm your kitchen was. The USDA says if mayo is kept above 50Β°F for more than 8 hours, it should be discarded. Personally, I’d toss it to be safe.

The Bottom Line

Mayonnaise is a tasty addition to many dishes, but like all foods, it can spoil over time. Knowing how to spot bad mayo is an important skill for any home cook or sandwich lover.

Remember, if the color, smell, taste, or texture seems off, don’t chance it. It’s just not worth the risk of food poisoning. Follow proper storage guidelines and always check your mayo before using it.

And there you have it – everything you need to know to keep your mayo game strong! Have you ever had a run-in with spoiled mayo? Share your stories (and favorite mayo recipes) in the comments below!

Until next time, this is John Bird reminding you to stay safe, eat well, and always trust your gut (especially when it comes to questionable condiments).