Japanese Sushi Knife: Guide To The Types Of Sushi Knives

A guide to Japanese sushi knife and the styles they come in along with their features and uses so that you can choose the best sushi knife. 
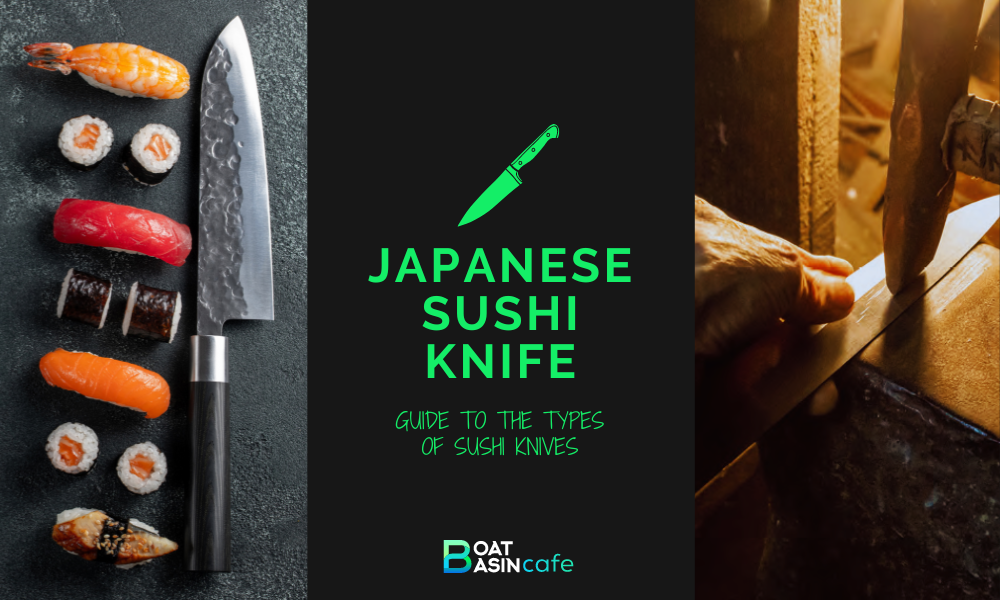
Japanese Sushi Knife: Guide To The Types Of Sushi Knives
Japanese Sushi Knife Guide To The Types Of Sushi Knives

The Japanese sushi knife has been around for centuries, and its popularity is only increasing.  Today, these knives are used by sushi chefs all over the world. 

Japanese sushi and sashimi knives are designed specifically for slicing fish, vegetables, and other seafood. 

The blades of these knives are usually long and thin with a pointed tip. This allows for precise slicing with less effort.

If you’re considering getting a sushi knife, it’s important to know what to look for. 

In this guide, we’ll tell you everything you need to know about Japanese sushi knives.

Japanese Sushi Knife: A Brief History

Japanese Sushi Knife: Guide To The Types Of Sushi Knives 1
1378px 1802 woodblock print detail from Tachi shi 職人三十六番 The Swordsmith MET DP123637 cropped

The Japanese sushi knife has a long and interesting history.

The techniques used by Japanese knife makers to fashion these knives date back more than a thousand years

Japanese handcrafting techniques for swords can be traced to the 14th century when swordsmiths made knives and samurai swords. 

In the 1850s, Japan opened up to trading with other parts of the world and it is during these times that the swordsmiths made more knives and fewer swords or katana. 

After the end of the Second World War, everyone was banned from carrying samurai swords, and thus, the transition to designing sushi knives was complete.

But even today, the sushi knife has the design of the samurai sword at its core – sleek, sharp, and precise.

In Japan, Seki City has been renowned for bladesmithing for 800 years. 

From this region, one of the top blacksmithing families that produce world-class sushi knives is Fujiwara Kanefusa.

Another famous brand from the same area is Sakai Takayuki which belongs to a family of blacksmiths that have been in practice for hundreds of years. 

A second-generation swordsmith from this region is Takeshi Saji with the “Traditional Master Craftsman” certificate under his belt. 

Basic Terms Used For Japanese Sushi And Sashimi Knives

Before we delve further into the topic of sushi knives, we should discuss some basic terms used for knives for better understanding. 

Blade

A blade is a thick piece of steel that can’t cut through ingredients unless its edge has been sharpened to do the job of cutting and chopping. 

Bevel

The bevel is the ground angle and the shape of the blade’s edge. 

A double-bevel or double-edged knife has angles on both sides, usually in a 50:50 ratio, giving the blade edge a V shape

The ratio means that if one side of the blade edge has been ground at 11 degrees, the other side has also been honed at 11 degrees, bringing the total to 22 degrees. 

Single-bevel or single-edged knives have a single angle on one side. 

They have an asymmetrical edge that is ground to a thinner thickness with ratios of 70:30, 60:40, and 90:10.

Using the single-bevel knife takes special skills that the user needs to learn before using. 
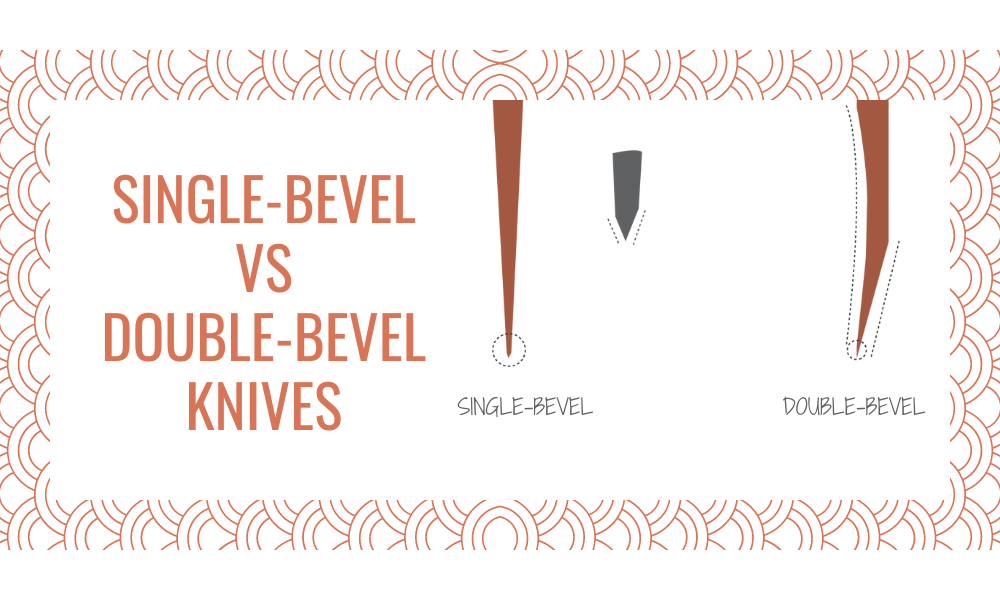
Basic Terms Used For Japanese Sushi And Sashimi Knives
Single Bevel Vs Double Bevel Knives

Knife Grinds

The different ways of creating the knife’s edge to perform different kinds of cuts and slices are known as knife grinds. 

Tang

The part of the steel blade which extends to the handle of the sushi knife. 

A full tang knife runs down the entire length of the knife while a half tang does not. 

Wa-Handle

Traditional Japanese handles include the Wa-Handle. 

They typically feel lighter overall and balance the blade forward as there is less steel inside the handle.

What Are The Main Parts Of A Sushi Knife?
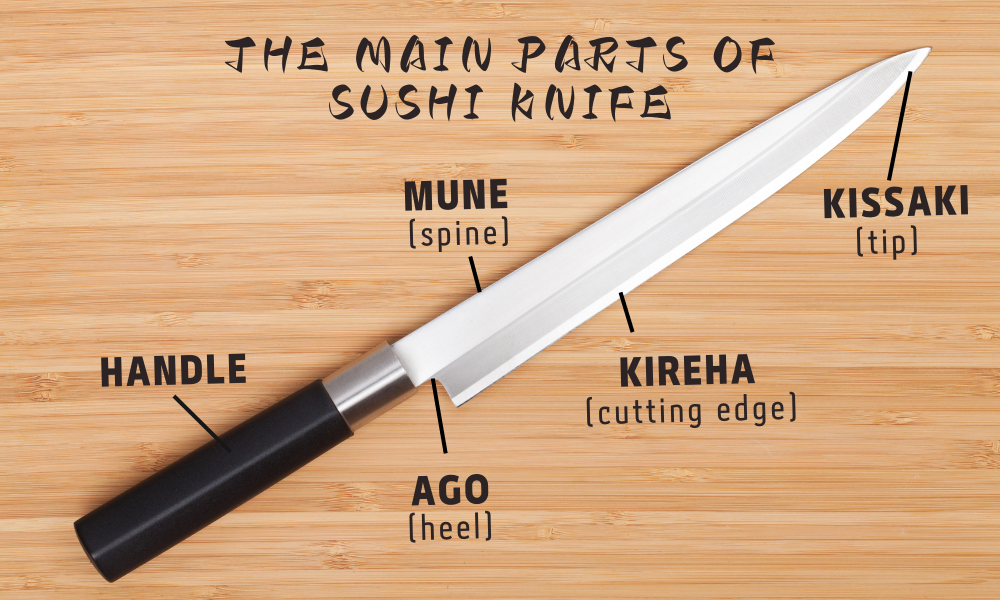
What Are The Main Parts Of A Sushi Knife?
The Main Parts Of A Sushi Knife

The main parts of the sushi knife are:

  1. Handle
  2. Kireha or cutting edge
  3. Kissaki or tip
  4. Mune or the spine
  5. Ago (the chin or heel)

The sushi knife’s cutting edge, which actually does the cutting, is like the basic sections of a kitchen knife. 

Sushi knives are single-beveled, meaning that only one side of the blade is completely sharpened and the other has a slightly concave edge to facilitate cutting food.

The cutting edge of a blade is on the right side for a right-handed person and on the other side for a left-handed person.

While the spine of the blade is where you rest your index finger for a better hold, the tip, or kissaki, is the sharp, pointy portion of the sushi knife. 

The area closest to the handle and the thickest section of the blade is called the chin or heel. 

When cutting tough items, the chin or heel prevents any damage. 

With the wooden handle, you can control the knife movements easily as it gives you a good grip. 

Chef’s Knife: How Is It Different From Traditional Japanese Sushi Knife?
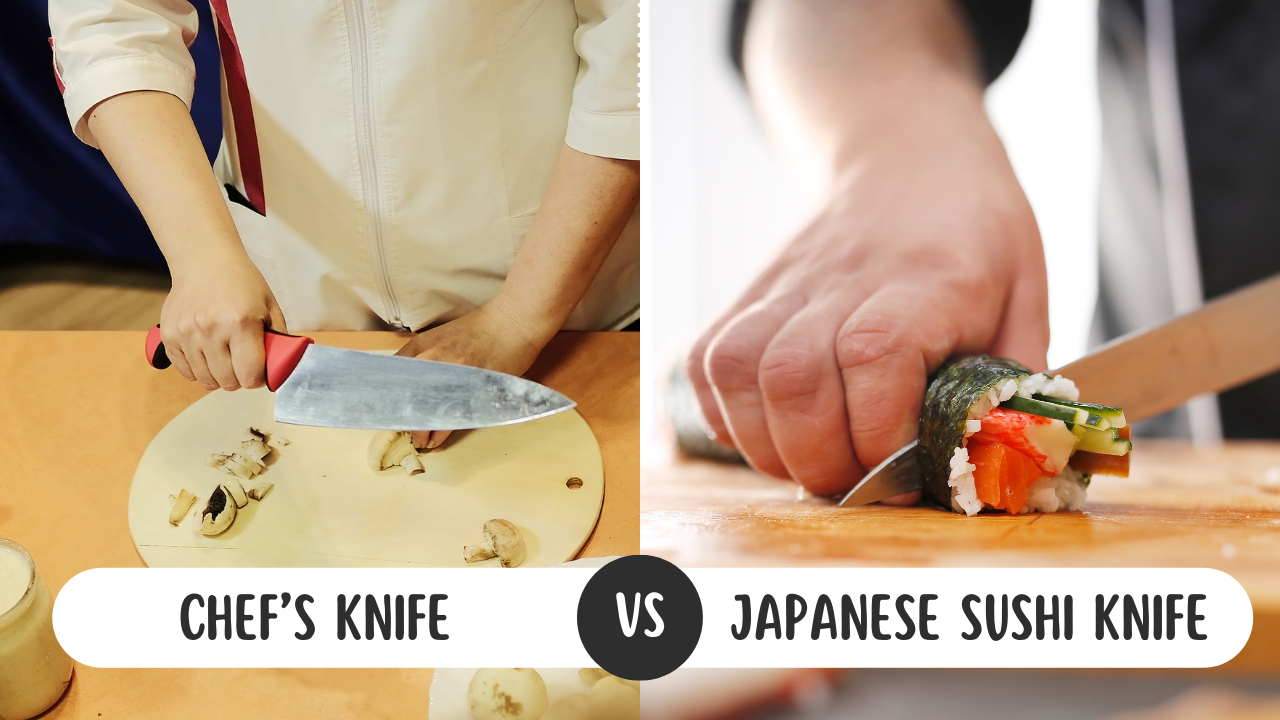
Chef’s Knife: How Is It Different From Traditional Japanese Sushi Knife?
Chefs Knife How Is It Different From Traditional Japanese Sushi Knife

The regular chef’s knife you have at home is different in a few aspects from the traditional Japanese sushi knife. 

Bevel

The bevel or the angle of the blade’s edge is the key distinction between traditional Japanese sushi knives and blades in the chef’s knives used in the West. 

The bevel in the chef’s knife is sharpened at an angle on both sides in a 50:50 ratio, creating a V shape, and therefore, called a double-edged knife.

This can be used by both right- and left-handed users.

In a Japanese sushi knife, the blade is sharpened at an angle on only one side, creating a chisel-like shape. 

The ratios, as mentioned earlier, are 70:30, 60:40, and 90:10.

The sushi knife is usually honed on the right side, making it perfect for right-handed users. 

For left-handed users who need one that has been sharpened on the left side, they need to order a special one like this

💡Japanese sushi knives are single beveled, but chef’s knives made in the West are double beveled. 

Shape Of The Blade

The shape of the blade is another point of difference. 

While the typical Japanese sushi knife has a straight blade, the chef’s knife in the Western style is usually curved along the blade.

Angle Of The Bevel

The Western chef’s knife has the bevel at an angle between 20 to 30 degrees

The higher the angle, the better it is to chop or cut thick vegetables and meat. 

On the other hand, the bevel angle is quite low in the sushi knife – a maximum of 5 degrees. 

When slicing delicate fish, shellfish, meat, and vegetables, this creates an extremely fine or sharp edge.

Sharpness Of The Cutting Edge

Japanese sushi knife that is single-beveled is extremely sharp. 

This is because only one side needs to be sharpened, making it simpler to cut an angle much smaller and sharper. 

This makes it possible to slice, dice, and cut precisely—a necessary skill in Japanese cuisine, especially when making sushi.

Additionally, a single bevel knife enables the cook to create long, uninterrupted cuts that resemble wafers, which is crucial when preparing several Japanese veggies (for example: peeling daikon). 

Whereas, the chef’s knife doesn’t have a very sharp cutting edge. 

That’s because it is used for cutting tougher meat and vegetables like pumpkin. 

Use Case

The use of a chef’s knife is to cut through tough ingredients like bones and meat. 

But the sushi knife is meant to use for more delicate slicing of fish, meat, and vegetables. 

Using a sushi knife to cut through dense ingredients will not only ruin the blade of the knife but will also spoil the structural integrity of the meat or fish and spoil their texture. 

Types Of Sushi Knives
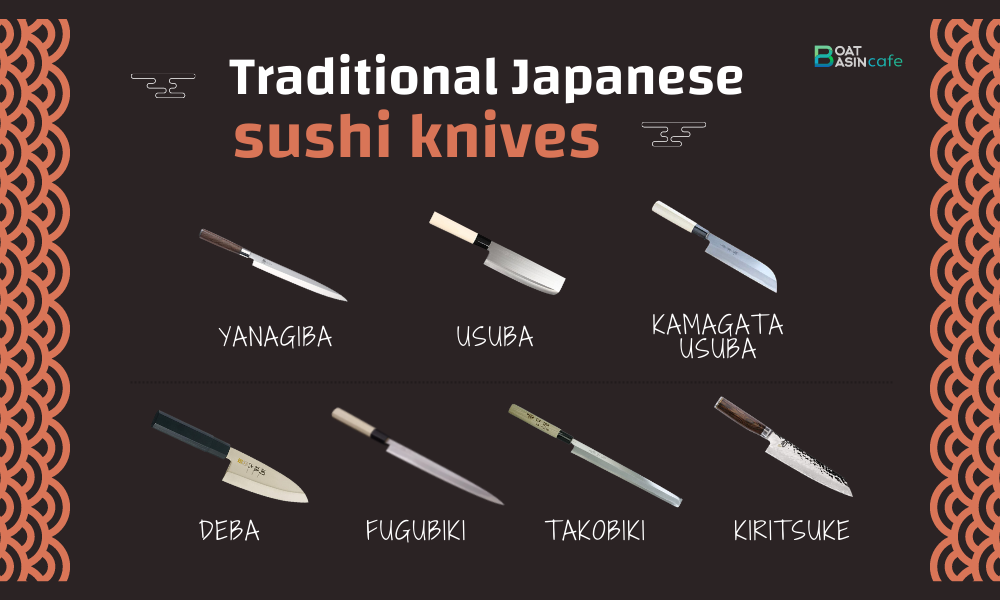
Japanese Sushi Knife: Guide To The Types Of Sushi Knives 2
Types Of Sushi Knives 1

There are different types of sushi knives depending on the specific purpose for which they are used. 

Sushi knife types depend on the blade length, blade material, and handle material. 

There are two broad categories of sushi knives with different styles under each.

One is the traditional Japanese knife that is sharpened on one side of the blade.

The second one refers to the Western-style sushi knife that is sharpened on both sides of the blade and has a Japanese influence in the design. 

This influence can be seen in the angle of the blade. 

Instead of the typical chef’s knife that has a 50:50 ratio to give the blade a V shape, the ratios are such to give the blade an asymmetrical shape – 70:30, 60:40, or 90:10. 

The following are traditional Japanese sushi knives:

  • Yanagiba (AKA Shobu)
  • Usuba
  • Kamagata Usuba
  • Deba
  • Fugubiki
  • Takobiki
  • Kiritsuke

Yanagiba (AKA Shobu)

The Japanese word for Yanagiba is “willow leaf blade.” 

With its origins in the Kansai region, it is a typical sushi knife made in Japan that is between 210 and 360 millimeters (8 5/16 – 14 3/16 inches) long. 

This knife is commonly referred to as the “Shobu” by people from the Kansai region since it means “iris leaf.” 

Due to its resemblance to the Japanese iris plant, which has spear-shaped leaves, this name was given.

Features

  • A thin and long blade with a pointed tip is required to get thin slices for boneless fish filets. 
  • Single-beveled on the right side with a concave edge on the left side so that the food does not stick to the blade but falls off smoothly. 
  • The unique shape of the blade can cut through the delicate skin of fish without spoiling the texture. 
  • Either D-shaped handles or Wa-handles that are oval or octagonal. 

Purpose

Yanagiba knife uses include making clean slices of raw fish for sushi and sashimi dishes as well as for making fish filets.

The proper techniques required to make the most of using the Yanagiba knife are the following:

  • Usuzukuri

This technique translates to “fine cuts.” It is used by sushi chefs for cutting raw fish into incredibly thin pieces

By slicing the fish in this way, cooks can highlight how translucent white fish is and accentuate its springy feel.

  • Hirazukuri

To create long, thin slices of fish, chefs pull-cut perpendicularly across the body of the fish. 

Chefs prepare fatty fish, such as salmon and tuna, in this manner.

  • Sogizukuri

Pull-cutting in the direction of the fish’s skin or scales at an angle of roughly 45 degrees. Slices produced using this method are both long and thick. 

Sushi is more enticing and satisfying to eat when the salmon is cut in this manner.


Usuba

With a thin blade and a sharp cutting edge, the Usuba is a rectangular knife with a straight edge that hails from the Kanto.

It’s ideal for chefs who want to glide through slicing jobs easily and precisely.

Features

  • A long, flat, straight-edged blade comes into contact with the cutting surface, it is perfect for cutting nori sheets and veggies.
  • The thin blade makes it easy to maneuver the knife, making it ideal for fileting fish, chopping components, and cutting veggies with precision into smaller pieces. 

Sushi chefs can put pressure on the ingredients without damaging the food structure. 

  • A Wa-handle that’s light and is either oval, octagonal, or D-shaped. 
  • The sharp blade is perfect for making crosscuts on fish, slicing vegetables, and chopping through small bones without breaking them.

Purpose

The Usuba knife is also referred to as the vegetable knife as it can make delicate and precise cuts

Thanks to the thin blade, the vegetables can be sliced thinly without ruining the texture. 

The Usuba knife has the bonus advantage of enabling you to make decorations with vegetables for outstanding food presentations. 

You need to have total concentration when using the very special Usuba knife. 

Only after handling many other types of Japanese sushi knives will you be able to handle this one comfortably. 


Kamagata Usuba

Unlike the Usuba that originated in Kanto, the Kamagata Usuba has its origins in Osaka. 

Features

It’s a traditional Japanese knife featuring a pointed tip to make delicate cutting an easier and more precise job.

Purpose

The Kamagata Usuba is used to make thin sheets of vegetables. 


Deba

A strong Sushi knife with a thick spine, a cutting edge, and a pointed tip is called a “deba.” 

It has a single bevel, or one side of the blade is ground totally flat. 

The thickness of the spine makes it more resistant to wear and less likely to sustain injury when slicing through dense flesh.

Features

  • The blade is sharp, tough, and between 5-9 millimeters (3/16 – 5/16 inches) thick, giving you the perfect balance and good control when handling tough cuts like chopping off fish heads.
  • The long blade is wide at the chin or heel and narrows down as it nears the cutting edge. 
  • A sharp tip makes it easy to cut through bones and fibrous tissue.
  • A 180-millimeter-long (7 1/16 inches) blade is recommended by sushi chefs. 
  • The high carbon steel blades in the Deba ensure the durability of this knife. 
  • The Wa-handle could be octagonal, oval, or D-shaped. 

Uses

The Deba knife is the best type of knife to use for handling whole fish. 

It is used by chefs to filet fish, behead fish, and cut through bones. 

Some chefs use its weight to cut through birds’ flesh and small bones.

However, it’s not recommended to use the Deba knife to cut through the tough bones as that would break or chip the blade and weaken it.

The tough heel helps to remove the head and tail of the fish easily without damaging the blade. 

The tip of the Deba can be used to feel the bones of the fish before making the cut to get filets. 

Since the middle part of the blade is thick, it’s ideal to chop through tough meat without damaging it, making it more long-lasting. 

You can easily remove the skin of the fish too with the Deba. 


Fugubiki

Deriving from blowfish or fugu in Japanese, the Fugubiki is another traditional knife used for slicing fish. 

Features 

Similar to the Yanagi, it is, however, not recommended to use the Fugubiki for the same purpose as the Yanagi. 

The Fugubiki is a specialty knife and it’s lighter, thinner, and shorter than the Yanagi. 

Purpose

Slicing specifically blowfish as the custom in Japan is to serve this fish on a painted plate with extremely thin fish slices so that you can see the design of the plate through them. 


Takobiki

Originating in the Tokyo region of Kanto, the Takobiki is a close cousin of the Yanagi.

It derives its name from the octopus, “tako”. 

Features

The special features of the Takobiki include a blunt tip with a thin body and a balanced weight. 

Purpose

You can use the Takobiki to make straight-cut sashimi slices easily with its thin body. 

With its balanced weight and blunt tip, it’s easier to work with the Takobiki on tough ingredients like the octopus. 


Kiritsuke

Kiritsuke is a mix of Yanagiba and Usuba.

Translated into English, Kiritsuke means to “slit open” in Japanese. 

You can get the Kiritsuke knife measuring between 240 and 330 millimeters (9 7/16 – 13 inches). Experts suggest you get one that’s 270 millimeters (10 5/8 inches) long.

Borrowing features from the Yanagiba and Usuba, the Kiritsuke can be used to make fish filets or make thin vegetable slices. 

Kiritsuke is the ultimate symbol of expertise and seniority as the knife can be used only by head chefs in typical Japanese restaurants. 

Features

  • The blade features a clip-point tip and a sword-like look. 

Sushi chefs can make precise cuts with its straight-edge blade, especially for fileting fish.

  • With a flat heel, it is easier to use the push-cut technique. 
  • With an angled tip, making clean and straight slices is possible, especially when it comes to fileting fish or cutting through bones.
  • A sharp and sturdy single bevel cutting edge. 
  • The spine of the knife has a flat area that extends up to the curved tip.
  • The Wa-handle is either D-shaped, octagonal, or oval. 

Uses

A multipurpose and versatile knife, the Kiritsuke is great for cutting, slicing, and fileting. 

What’s more, you can also use it to debone poultry and chop vegetables. 

However, massive training is needed before you can make the optimum use of this knife and use the angle of the blade and the handle in ways that suit your purpose. 

The Kiritsuke knife is also used both as sushi and a sashimi knife. 

Styles Of Traditional Japanese Sushi KnivesFeaturesPurpose
YanagibaThin, long, pointed blade
Single-beveled
Concave edge
D-shaped or Wa-handles
Clean slices of raw fish for sushi and sashimi
UsubaLong, flat, straight-edged blade
Wa-handle
Precise cutting of vegetables and nori sheets
Fish fileting
Kamagata UsubaPointed tipMaking thin sheets of vegetables
DebaSharp, tough, long, and thick blade for durability
Single-beveled
Wa-handle
Handles whole fish by cutting through small bones and for chopping fish head and tail
FugubikiLighter, thinner, and shorter than YanagiMaking very thin slices of blowfish to
be able to see the design of the plate on which it’s served
TakobikiThin body with a blunt tip and balanced weightFor making straight-cut sashimi
KiritsukeStraight-edged blade with flat heel
Angled tip
Single-beveled
Wa-handle
Cutting, slicing, fileting
Deboning poultry

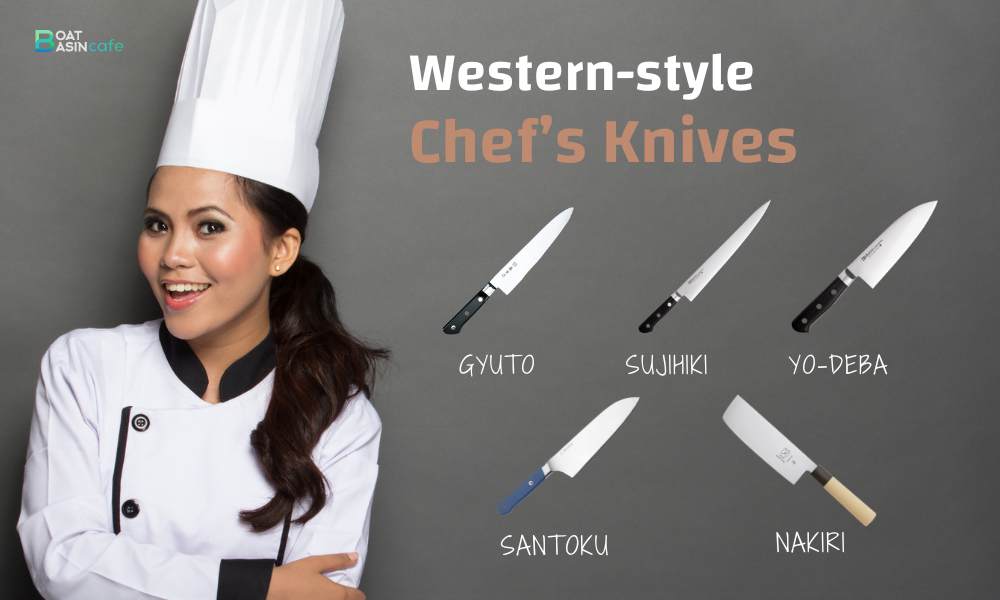
The Main Western-style Chef’s Knives

Japanese Sushi Knife: Guide To The Types Of Sushi Knives 3
The Main Western style Chefs Knives

  • Gyuto
  • Sujihiki
  • Yo-Deba
  • Santoku
  • Nakiri

Gyuto

The Japanese equivalent of the traditional Western chef’s knife is called a Gyuto

It is a real multi-purpose knife that is suitable for chopping through meats, seafood, vegetables, and fruits. 

Features

A pointed tip for precise cutting and working in small spaces. 

The heel or chin of the Gyuto is flatter to make cutting, mincing, or chopping with the rocking technique more comfortable. 

In this technique, the knife is moved in a back-and-forth motion from the tip to the heel to mince, chop, or cut. 

It’s also tall enough to chop with a tapping motion on the middle or tip of the blade

The thinner and lighter blade tends to balance toward the tip.

Purpose

A multi-purpose knife used for chopping meat, fish, vegetables, and fruit. 

It can also be used for mincing and dicing.

You can do both a pull-cut and a push-cut with ease with the Gyuto. 


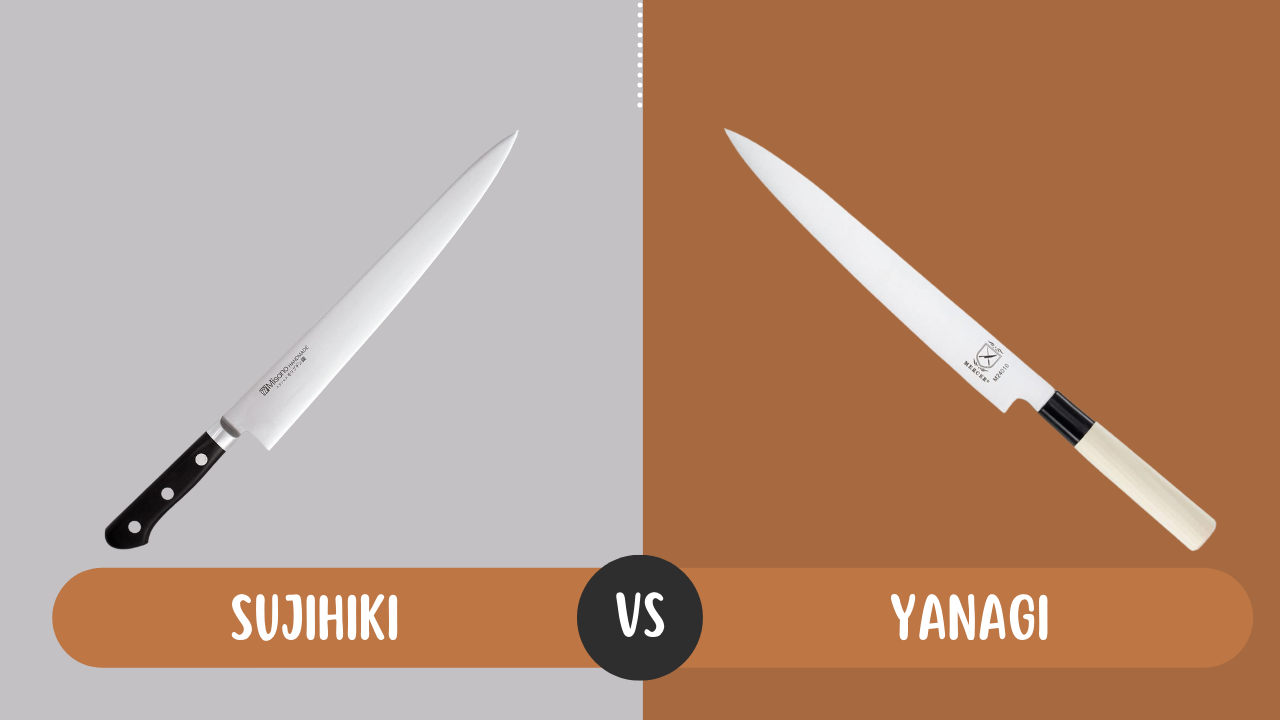
Sujihiki

The Sujihiki is a slicer with a long and narrow blade with which you can cut meat or fish with just one drawing motion from the heel to the tip. 

Features

A long and thin blade for slicing meat and fish with one stroke. 

Blade with an acute edge angle for making it easier to cut with the knife.

The sharp edge, angle, and cutting technique contribute to slicing with minimum damage to the cells and surface of the ingredients. 

Purpose

The Sujihiki is great for skinning and fileting fish, removing sinew and fat from meat, and making thin slices of boneless fish and meat

The sharp edge and angle of the blade preserve the texture and flavor of the ingredients.


Yo-Deba

The Yo-Deba is one of the western style knives that are heavy-duty butcher knife types to get through all your meat-cutting needs.

Features

Heavier with a tougher cutting edge for tough use and durability. 

Purpose

The Yo-Deba is used for cutting through semi-frozen foods, fish, shrimps, lobsters, and chicken with bones. 

However, it’s not advised to use this knife for cutting frozen foods. 


Santoku

Santoku means “three virtues” and it can handle fish, meat, and vegetables with ease.

Features

With a lightweight blade, the Santoku knife is of medium size and features a spine that curves toward the tip and a cutting edge that is slightly curved or straight.

Purpose

Great for chopping, dicing, and slicing meat, fish, and vegetables. 


Nakiri

The Nakiri has a thin blade and is double-beveled, perfect for chopping and cutting light ingredients like vegetables. 

Features

A thin, straight, and lightweight blade for slicing vegetables with precision.

The blade is taller than a Gyuto to make more clearance space for the knuckles above the cutting board.

Purpose

Precision cutting, chopping, and mincing vegetables and fruits.

Not recommended for cutting bones and other tough ingredients.

The Nakiri is a good choice for push- or pull-cutting and tap chopping.  

Western-Style Chef’s KnivesFeaturesPurpose
GyutoThin and light with a sharp, pointed blade
with a relatively flat heel or chin
Cutting meat, fish, fruit, and vegetables for
Western cuisine
Rock chopping or mincing
Both pull-cut and push-cut
SujihikiLong and narrow blade with acute angleFileting and skinning fish
Trimming fat and sinew from meat
Making fine slices of boneless fish or meat
Yo-DebaHeavy and tougher cutting edgeCutting through semi-frozen food and bones
SantokuMedium-sized with a lightweight blade, a straight or
slightly curved edge with the spine curving toward the tip
Chopping, slicing, and dicing meat, fish, and
vegetables
NakiriDouble-beveled edge with a thin, straight and tall blade
Lightweight
Slicing, mincing, cutting vegetables and fruits with precision

✍️Note: Sushi chefs generally use three types of sushi knives – Yanagiba, Deba, and Usuba.

Sujihiki Vs Yanagi
Sujihiki Vs Yanagi
Sujihiki Vs Yanagi

The Yanagiba is revered by some of the top chefs in the world, particularly those who specialize in meat and fish. 

When used with discipline and competence, it is a tool that is tremendously sharp and articulate. 

It’s possible that you already have at least one in your toolkit if you work as a professional at a sushi restaurant. 

However, Sujihiki would be a better option if you’re a home or amateur chef looking for something simpler to handle, sharpen, and utilize to make straight cuts

A Sujihiki is what you need if the majority of your work includes cutting ham, prime rib, or turkey.

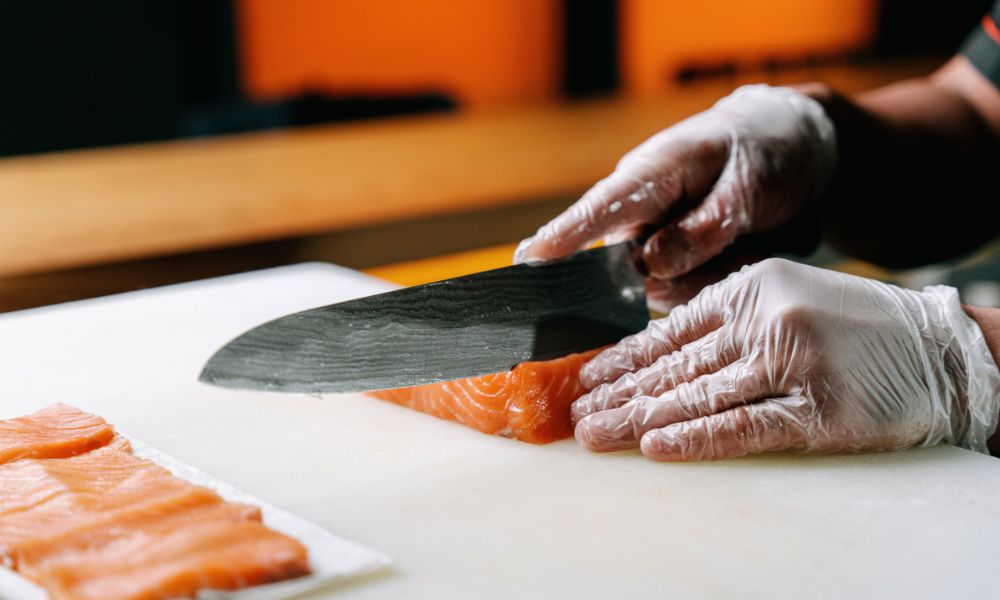
Is There Any Difference Between Sushi Knife And Sashimi Knife?
Is There Any Difference Between Sushi Knife And Sashimi Knife?
Sashimi Knife

Before we go into the differences between sushi and sashimi knives, let’s get to know what’s sashimi.

Sashimi is raw fish, seafood, or meat consumed with soy sauce. The fish or seafood is usually in paper-thin slices. Sashimi is presented by itself without any other ingredient. And that’s where the main difference lies between sushi and sashimi. 

Sushi is made with rice mixed with salt, sugar, and vinegar. Then it’s either rolled with nori sheets with fillings of raw or cooked fish or vegetables inside or shaped into rice balls and topped with cooked or raw seafood or vegetables along with some wasabi

Sashimi can be cut into a number of different forms, such as flat slices, thin strips, rectangles, cubes, or diagonal slices.

Now. let’s get back to the main topic – is there any difference between sushi and sashimi knives?

Sushi and sashimi are two alternative methods for preparing raw fish

To preserve the integrity of the item when preparing sushi, you must use precise cutting techniques. 

Since it may be used to cut vegetables, fish, and sushi rolls, a sushi knife is more functional.

Sashimi knives, however, serve a more narrowly defined function

The sashimi knife uses its thin blade to make paper-thin slices of raw fish that are presented on a platter. 

Sashimi knives are therefore best used for slicing raw fish. 

Because sashimi knives have thinner blades, sashimi chefs find it easy cutting raw fish without sacrificing the texture’s quality.

Types Of Steel Used In Sushi And Sashimi Knives

Three types of steel are used to manufacture Japanese and western style knives.

The materials vary in terms of durability, maintenance, and price.

Carbon Steel

This kind of steel has the sharpest edge possible but needs the most upkeep and is susceptible to rust. 

Therefore, if you get a sushi knife made of high carbon steel, you will need to sharpen it more frequently than a knife made of another type of steel and you will need to be very careful to keep the blade thoroughly cleaned and dry.

Stainless Steel

Stainless steel has the benefit of not rusting but on the flip side, it doesn’t have the sharpness of carbon steel or composite steel. 

This brings us to the last type of steel used for making sushi knives. 

Composite Steel

Composite steel has the benefits of stainless steel in that it doesn’t rust easily and therefore, doesn’t need high maintenance. 

It has the advantage of being sharper than stainless steel sushi and sashimi knives. 

One possible downside is the price of composite steel knives – it’s higher than both carbon and stainless steel knives. 

Best Sushi Knives For Value Seekers

Best sushi knives for beginners who are looking for one within a low-end budget include: 

Masahiro Stainless Steel Yanagiba 240-millimeter 

This Masahiro Yanagiba is a perfect combination of affordability and good quality. 

Japanese Sushi Knife: Guide To The Types Of Sushi Knives 4
71PV IRjZ5L. AC SL500

Check price on Amazon.

Features

  • Rust-resistant – made from original stainless steel by Masahiro, it’s a low-maintenance knife as it is resistant to rust. 
  • Sharp – the stainless steel blade is extremely sharp for making precise cuts. 
  • Water-resistant and durable – a combination of compressed laminated wood and resin makes the handle resistant to water, thereby making it durable and anti-slip. 

Tojiro DP Gyuto 8.2-Inch

This knife has a core made of cobalt alloy steel that’s covered by outer layers of chromium stainless steel.

Japanese Sushi Knife: Guide To The Types Of Sushi Knives 5
51IP8chFUIL. AC SX679

Check price on Amazon.

Features

  • Durability – Made with alloy steel in the core and VG-10 high-quality outer steel for durability. 
  • Sharp – VG-10 steel makes the cutting edge very sharp. 
  • Good value for money – perfect entry-level Japanese knife under $100.
  • Ergonomic – the handle is made from reinforced laminated material and fits well.

Best Sushi Knife Names For Experiencers

For those who can afford to spend a little more and get better at making sushi and sashimi, they can choose the following.

Yoshihiro 8.25 Inch Damascus Gyuto

This Yoshihiro sushi knife, like all others of the same brand name, is made in Seki City, Japan. 

As Seki is the city that has made sushi knives for centuries, it’s naturally a mark of high quality when your sushi knife is made there.  

Japanese Sushi Knife: Guide To The Types Of Sushi Knives 6
61qUIJp56EL. AC SX679

Check price on Amazon.

Features

  • Durable – made from high-end VG-10 Japanese steel for added strength and durability.
  • Stronger – with 1% carbon content, this high-carbon knife has stronger steel. 
  • Sharp – the stronger steel enables the blade to be sharpened to get a finer edge.
  • Rust-resistant – 15% Chromium content makes it rust-resistant. 
  • Ergonomic – Octagonal handcrafted lightweight and ergonomic handle.

Sakai Takayuki 17-Layer Damascus VG-10

This knife is a beauty to look at and functions superbly with its sharp and durable blade. 

Japanese Sushi Knife: Guide To The Types Of Sushi Knives 7
41RzbrACQyL. AC SX679

Check price on Amazon.

Features

  • For both right and left-handed users – The double-beveled knife can be used ambidextrously.
  • Sharp – extremely sharp blade that’s slanted like a Japanese sword for delicate cuts.
  • Durable – VG-10 stainless steel to make the knife long-lasting. 
  • Great looks – hammered pattern on 17-layered Damascus steel and mahogany handle that’s water-resistant.

Yoshihiro Inox Honyaki Stain Resistant Steel Wa Gyuto

Top-class knife with supreme versatility, check Amazon for the price of this Honyaki knife.

Japanese Sushi Knife: Guide To The Types Of Sushi Knives 8
61Ep03gZbjL. AC SY300 SX300 QL70 FMwebp

Features

  • Aesthetics – beautifully handcrafted and mirror-finish polish.
  • Strong and durable – INOX Aus-10 steel that is forged at temperatures reaching thousands of degrees and then cooled down for strength and durability. 
  • Multipurpose – can be used for slicing, dicing, and chopping. 

Sakai Takayuki Ginryu Dragon Premium Honyaki Japanese Chef’s Yanagiba(Sashimi) 270mm

A razor-sharp and efficient sushi knife for those who are aspiring to be a sushi chef.

Check price

Features

  • Extremely sharp blade – made from top-quality Swedish stainless steel.
  • Exceptional rust resistance – made from a special stainless steel alloy with a low amount of impurities to prevent the formation of rust. 
  • Hard edge with excellent retention – the Honyaki process produces a very hard edge that retains sharpness. 

Sushi Knives For Big Spenders

For professional chefs or those who want only the best money can buy, check out the following sushi knives.

Yoshihiro Kasumi Knife Shitan 3-Piece Set

Yoshihiro is one of the top sushi knife brands and this knife set has three different knives to suit all your chopping and cutting needs.

Japanese Sushi Knife: Guide To The Types Of Sushi Knives 9

Check price on Amazon.

Features

  • Versatile – the Yanagi, Usuba, and Deba knives in the set can be used for all cutting and slicing purposes.
  • Sharp – Shiroko high-carbon white steel core ensures superior sharpness and retention. 
  • Superior craftsmanship – handcrafted rosewood handle with rosewood bolster. 
  • Durable – Outer layer of forged softer iron ensures durability. 

Japanese Chef’s Knife ARITSUGU Blue Steel Honyaki Yanagi

This 14.17-inch knife is not for the faint-hearted! 
Check price on Amazon.

Features

  • Superior construction – made from stainless steel, Blue steel, and ceramics for durability. 
  • Personalization – you can have your name carved on the blade. 
  • Extreme sharpness – the alloy steel is hard and gives a sharp cutting edge for making extraordinary sushi and sashimi.

Benefits Of A Good Sushi Knife
Japanese Sushi Knife: Guide To The Types Of Sushi Knives 10
Benefits Of A Good Sushi Knife

You need to invest a bit in a good quality sushi knife to get the full benefits of using one. 

  1. For the finest results, use good quality sushi knives to slice your fish and veggies. 
  2. They work to ensure that your contents are distributed and proportioned properly so that your sushi maintains its structural integrity.
  3. High-carbon stainless steel is used to make a high-quality sashimi knife, which is extremely robust and have razor-sharp blades.
  4. High-quality sushi knives have been ergonomically constructed to allow for prolonged use.
  5. Sushi knives with a variety of blade types, weights, and sizes will suit your demands more effectively.

There are plenty of reasons why you shouldn’t use a cheap alternative. 

The cheaper alternatives that are touted on online marketplaces may end up getting you more frustrated instead of motivating you to make sushi and sashimi at home. 

A cheaper knife will not be durable and its blade will be more susceptible to breaking. 

In the long run, you end up buying more of these cheaper knives and spending more unnecessarily when you could be using better quality and pricier knives from the start. 

Besides, cheaper sushi knives are not made from top-quality materials and won’t be razor-sharp – a must-have quality for sushi chefs.

Only sharp blades can help you cut slices of fish and vegetables with precision and ensure that your sushi is intact.

Handles of cheap sushi knives are not well-crafted and might easily slip, creating hazards in the kitchen. 

Last but not least, using cheaper knives will leave your sushi looking messy with uneven cuts. 

This won’t make you look good as a chef, nor will it make the sushi look appetizing. 

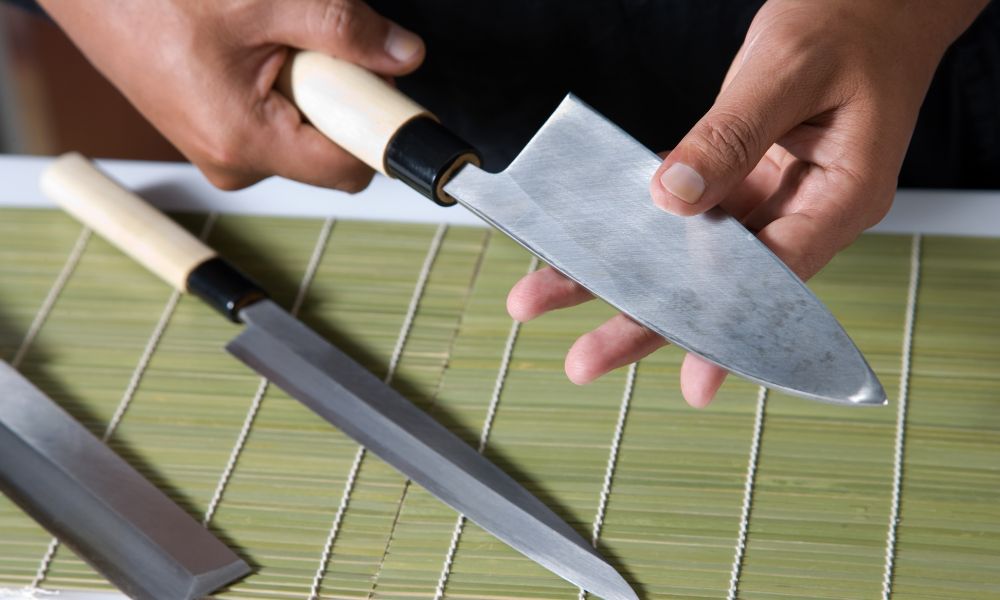
How To Choose The Best Sushi Knife
How To Choose The Best Sushi Knife

Look for these factors when choosing the best sushi knife. 

After all, you don’t want to keep changing from one knife to the next, so it’s better to be patient and choose a high-quality knife rather than regret it later. 

Purpose

First, you need to decide what you’re going to do with a Japanese sushi knife. 

For example, if you want to use it to cut through small bones or chop off the head and tail of a whole fish, then Deba should be your choice. 

If you are looking for super-thin slices of raw fish and vegetables for sushi or sashimi, Yanagiba is your best bet. 

Materials

As discussed earlier, choose high-quality materials with which the sushi or sashimi knife has been made. 

Otherwise, you will have to compromise on the quality of cuts, the appearance of the final dish, the durability of the blade and handle, safety when operating in the kitchen, and saving money in the long run. 

Choose knives made of carbon steel as this is a popular material for making traditional Japanese knives. 

Due to their high purity content, knives made from this material are sharper although they are not rust-proof. 

Handle

The handle of Japanese knives is made from wood. 

Before you buy a sushi or sashimi knife, check out the handle. 

Feel it in your grip and see how comfortably your hand fits in the handle.

The handle should have an ergonomic design to prevent the hand from slipping.

If the handle is D-shaped, it’s likely to be handled more comfortably when used for a long time period. 

Also, look for signs of whether the handle is full tang or partial tang. 

A full tang knife handle with the steel blade running across the full length gives you more balance and won’t tire out your wrists. 

Such a handle also increases the weight of the knife.

A partial tang or a rat-tail tang tapers down toward the end of the handle and is covered by the wooden handle.

These knives that have a partial tang are less expensive and weigh less. 

If you buy a knife with a partial tang, its lightweight feature will cause you less stress. 

However, knives with a partial tang will not be as durable as full tang ones. 

Moreover, you can’t use a half tang knife for cutting through tough materials like pumpkin or melon. 

Before you buy a sushi knife, check if the blade can be seen between the end of the visible part of the steel blade and the part where the wooden handle begins. 

If you can see it, don’t buy it as it shows it’s not been secured properly and the blade will come off the handle.

Blade 

The blade is the most important part of the sushi knife as it is THE part that cuts the food.

Choose a sushi knife made from high-grade materials – preferably high carbon stainless steel – so that you know you have the best blade at your disposal that won’t give away while you’re working. 

Moreover, the material will keep the blade durable, and resistant to rust, stains, and corrosion while maintaining its sharpness.  

Check the sharpness of the blade to ensure you get exactly the cuts you want. 

While you check the blade construction, check its length as well. 

With a length ranging from 9 to 10.5 inches, Yanagiba knives are often substantially longer than other sushi blades. 

The length of other sushi knives, like Nakiri or Santoku knife, is often between 6 and 7 inches.

Thinking about the type of sushi you want to eat and selecting the right length for the task are the keys to getting the best sushi knife for your needs.

How To Sharpen Sushi Knives
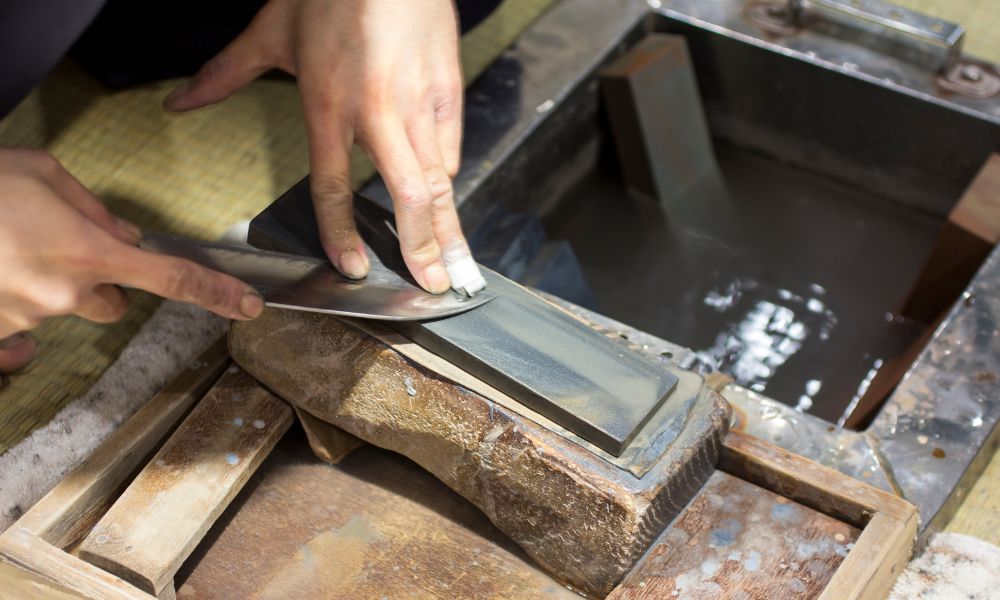
How To Sharpen Sushi Knives

It’s normal for sushi chefs to keep the tool of their trade sharpened on a regular basis.

It’s widely believed that cleaning and sharpening the knife every day and letting it rest overnight improves the taste of food. 

Sushi chefs like to hone the blade of their knives before it gets too blunt. 

This keeps the knife sharp and saves them from spending a lot of time getting back the desired sharpness. 

If you recall, traditional Japanese-style sushi knives are sharpened on one side of the blade or single-beveled. 

On the other hand, western style knives are sharpened on both sides of the blade or are double-beveled.

This difference also creates different ways to sharpen sushi knives.

Prepping The Whetstone

Whether you’re sharpening a single – or double-edged knife, preparing the whetstone is essential. 

Here’s how to do it. 

Soak the whetstone and stone fixers in water for 10 minutes or until you don’t see any more air bubbles before sharpening your knife on it. 

Using the stone fixer, level down the sides of the whetstone and sand the top of it to make it flat.

On a damp towel, place the whetstone with the narrow end pointing away from you. 

The towel will help the whetstone stay in place when sharpening the sushi or sashimi knife. 

Speaking of whetstones, there are three main types that you need to know about.

Each type of whetstone is used for varying levels of damage on the blade. 

  1. Arato

It’s a coarse grit stone to fix damaged edges and create new ones. 

The average grit of the Arato varies between 400 and 600 and can go either above 600 or below 400. 

  1. Nakato 

For creating a sharper edge and for slight repairs, the Nakato whetstone is used as it has a medium grit between an average of 1000 to 1200.

  1. Shiage

The Shiage is a fine-grit stone used for polishing or finishing.

It has an average grit of 6000 to 8000. 

If you’re a home chef and wondering which whetstone is best for you, choose a combination stone with Nakato on one side and Shiage on the other. 

Note: You leave tiny scratches on the metal’s surface while sharpening with medium-grade grit (Nakato). 

Moving to the finer grit (Shiage) polishes out those dings to produce a polished, sharp edge.

In order to polish along the same lines and in the same direction as you did when you formed them with the more abrasive stone in the previous stage, it is crucial to maintain a constant angle of the knife to the stone during the entire sharpening process.

How To Hold The Sushi Knife When Sharpening

Your thumb should be on the flat section of the knife’s blade, your index finger should be on the spine, and the remaining three fingers should be wrapped around the blade.

Hold it comfortably, but not in a way that would be similar to cutting with it. 

Although it can range from 45 to 80 degrees, the angle between the knife and the stone should be between 60 and 70 degrees. 

Maintain a constant angle for the best results. 

How To Sharpen Single-Edged Knives

You should know how to sharpen traditional Japanese knives that are single-beveled to prevent the blade from getting damaged, bent, or rusted.

Follow the steps below to sharpen a single-edged sushi knife. 

  1. Put two or three fingers of your left hand, starting at the tip, near the edge of the knife while holding the knife against the front of the stone closest to your body.
  2. When you push the knife down the stone, apply equal pressure to the blade edge where your fingers are because here is where the sharpening is taking place.
  3. Place the knife along the length of the whetstone and push. 

When you move the knife forward and back to the beginning position once more, let go of the pressure on your fingertips. 

Before moving on to the next portion of the blade, repeat this action one more time. 

This is particularly true for the Yanagiba due to its more delicate and thin blade.

Finish off the current part of the blade with no more than 5 or 6 strokes.

  1. As you proceed down the blade, be sure to maintain the same angle of the knife to the stone and the blade edge to the stone.
  2. Look out for the burr forming along the edge of the blade as you start to sharpen it. 
  3. Once the burr shows along the whole length of the cutting edge, put the blade on its reverse side flat on the far side of the whetstone and perpendicular to it. 
  4. Put your left hand’s middle and index finger against the edge of the blade while softly pressing your thumb against the spine.
  5. By applying gentle pressure on your fingers, pull the blade toward yourself. 
  6. Proceed to the next section of the blade until burr forms on the entire length. 
  7. Remove the burr with a clean cloth to finish off the sharpening process. 

✍️Note: Sprinkle water on the stone as necessary to lubricate it, but leave the sludge that accumulates because it helps the sharpening process.

How To Sharpen Double-Edged Knives

Western style Japanese knives like Nakiri or Gyuto are double-edged and need to be sharpened differently.

Consult the manufacturer’s guide to find out the angles of the front and back edges of the blade. 

If you can’t do that, here’s how you can find out the angles:

  1. Put the blade’s face flat against the whetstone. 
  2. Put your fingers half on the whetstone and half on the edge of the blade. 
  3. Raise the knife slowly to feel the flat touch of the bevel on the stone. 

You want to sharpen this side at this angle.

  1. Repeat the above step for the other side of the blade. 
  2. Continue to sharpen both edges of the blade in the same way as you would sharpen a single-bevel knife.

Care And Maintenance Tips
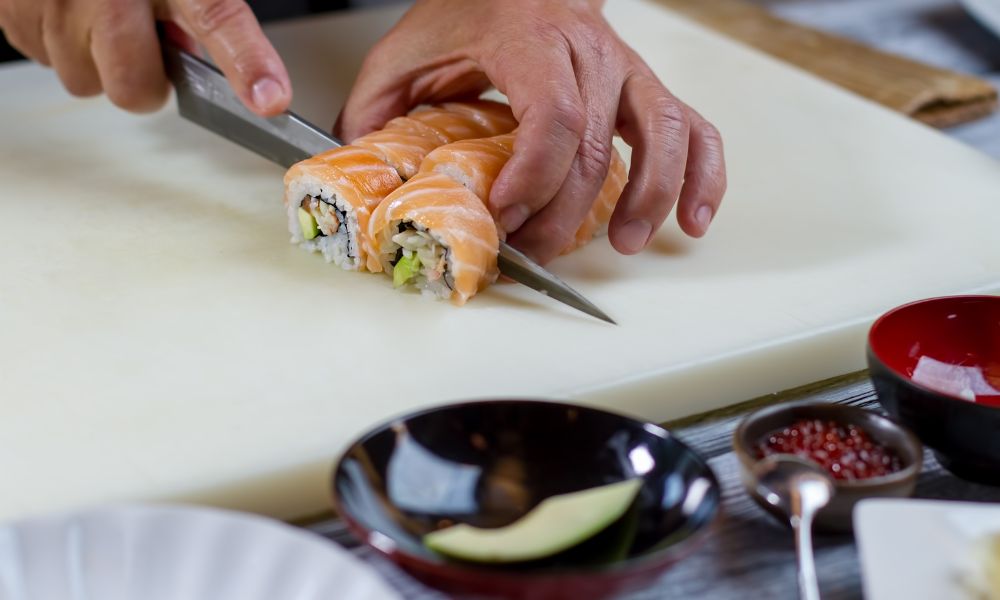
Care And Maintenance Tips
  1. Do not cut frozen food or tough bones with a sushi knife as it will dull and damage the blade. 
  2. If you are using your sushi knife to cut ingredients that are acidic like lemons, sushi (with vinegar), or apples, make sure to wash and wipe the knife often.
  3. Never use a sharpening steel to sharpen your sushi knife. Always use a whetstone or a water stone as suggested by the manufacturer. 
  4. Always handwash your sushi knife after each use with soapy water and give a final rinse with hot water. 
  5. Use tissue paper or a towel to dry your sushi knife especially if your knife is made of carbon steel. This material is prone to rust and leaving water droplets will cause the blade to rust. 
  6. Never try to roast the knife over a fire to dry it quickly as this would affect the sharpness of the blade. 
  7. If you do notice discoloration due to rust on the sushi knife blade, wet the knife and place it on a chopping board. Sprinkle with a powder cleanser to cover the area of rust evenly. Take a cork and put it in water. Use the wet cork to rub the area of rust while making sure the blade doesn’t move from its place. 
  8. Never wash your sushi knife in a dishwasher. 
  9. Before putting it away, add a thin layer of any plant-based oil with tissue paper, wrap your sushi knife in a newspaper, put it in a case, and store it in a separate space either on a rack or in the drawer. The newspaper contains some oil as well and will prevent any rust from forming. 
  10. As the blades are more delicate in traditional Japanese knives, apply caution when using them as direct contact with bones, stones, or any hard material can damage the blade. 
  11. Avoid twisting the blade when you are removing the knife from the raw fish to prevent the blade from bending and losing its shape. 
  12. For sterilizing the knife, always use hot water, never an open fire. 

FAQs

What Is A Japanese Sushi Knife Called?

“Wa-bocho” is the term that refers to traditional style Japanese sushi and sashimi knives. 

What Kind Of A Knife Is Best For Cutting Sushi?

Yanagiba is the best knife for cutting sushi. 

What Is Special About A Sushi Knife?

Their single-beveled edge, the flat part of the blade that prevents the food from sticking to the blade, the multifaceted blade that can cut vegetables, fish, and roll, a D-shaped handle for comfort, and the tang or part of the blade that can either run the full length or partial length of the knife. 

What Kind Of Knife Is Used For Sashimi?

For sashimi, you need a knife with a long and narrow blade like a Yanagiba.
How Long Does It Take For Ice to Freeze – and How to Speed It Up

Forget those warm drinks on your next boat trip! We’ll break down how long ice takes to freeze, how to get those cubes ready in a pinch, and pro tips to keep your cooler frosty all day long.

As a chef and barista from the Boat Basin Cafe in New York, I’ve learned a thing or two about the importance of ice on boating adventures.

Whether you’re casting lines or catching rays, a chilled beverage can make all the difference. So, let’s dive into the science and strategies behind the perfect ice for your cooler.

How Long Does It Take For Ice to Freeze - and How to Speed It Up 11
How Long Does It Take For Ice to Freeze

How Long Does It Take for Ice to Freeze?

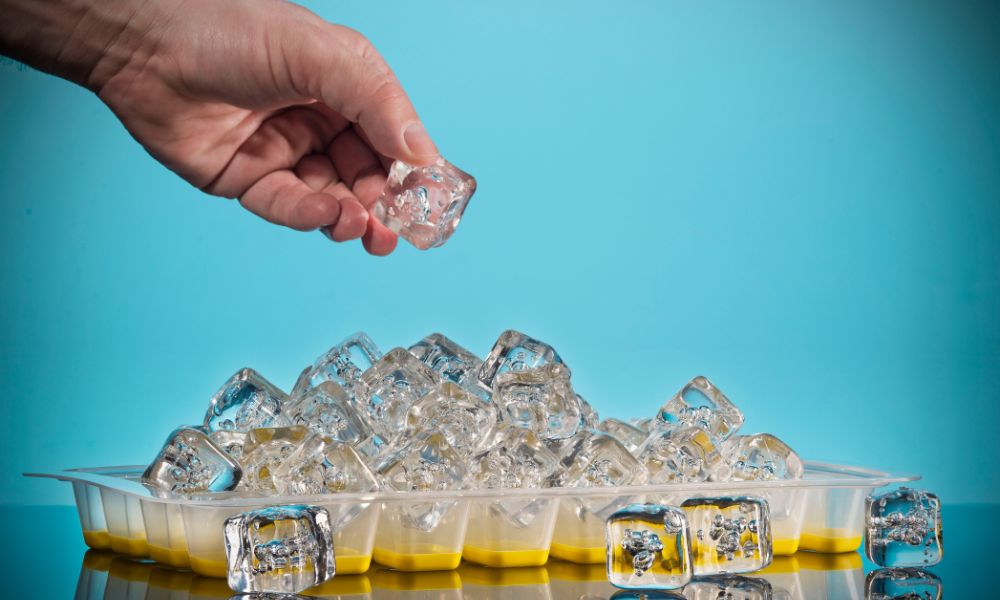
Boat coolers get put to the test! Typically, ice cubes take 3-4 hours to freeze in your home freezer.

But what if you’re stocking up for a day on the water?

Let’s explore the factors that can speed up or slow down those ice cubes.

How Long Does It Take For Ice to Freeze - and How to Speed It Up
How Long Does It Take for Ice to Freeze How to speed it up

The Freezing Process

The freezing point of pure water is 0°C (32°F). As the temperature drops, water molecules slow down and begin to form crystalline structures – aka, ice!

But not all ice is created equal.

Here are some key factors that affect freezing time:

FactorImpact on Freezing Time
Cube SizeSmaller cubes freeze faster
Water TemperatureHot water can freeze faster (Mpemba effect)
Tray MaterialMetal conducts cold better than plastic
Freezer TemperatureColder = faster freezing

As Food Network chef Alton Brown notes, “The more surface area exposed to the cold, the faster the freeze.” So, those mini ice cube trays aren’t just cute – they’re speedy!

Tips to Freeze Ice Faster

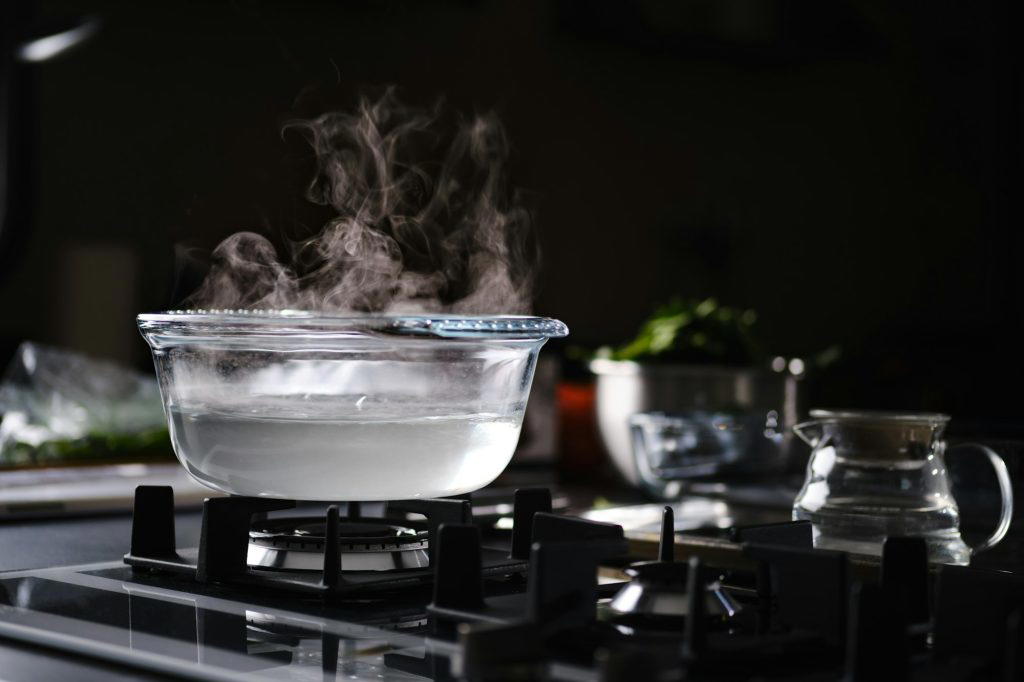
Hot water in pot on gas stove
hot water in pot on gas stove

In a rush to set sail? Try these tricks to expedite your ice:

  1. Use hot water: It seems counterintuitive, but hot water can freeze faster than cold due to the Mpemba effect. Give it a shot!
  2. Pre-chill your cooler: Before loading ice, pop in a few frozen water bottles to get it cold – your ice will last longer.
  3. Optimize your freezer: Clear some space and crank the temperature down for max efficiency.

Keeping Ice Frozen on the Boat Sun, salt, and sea spray – the marine environment is tough on ice!

Here are some pro tips to keep your cubes cool:

StrategyWhy It Works
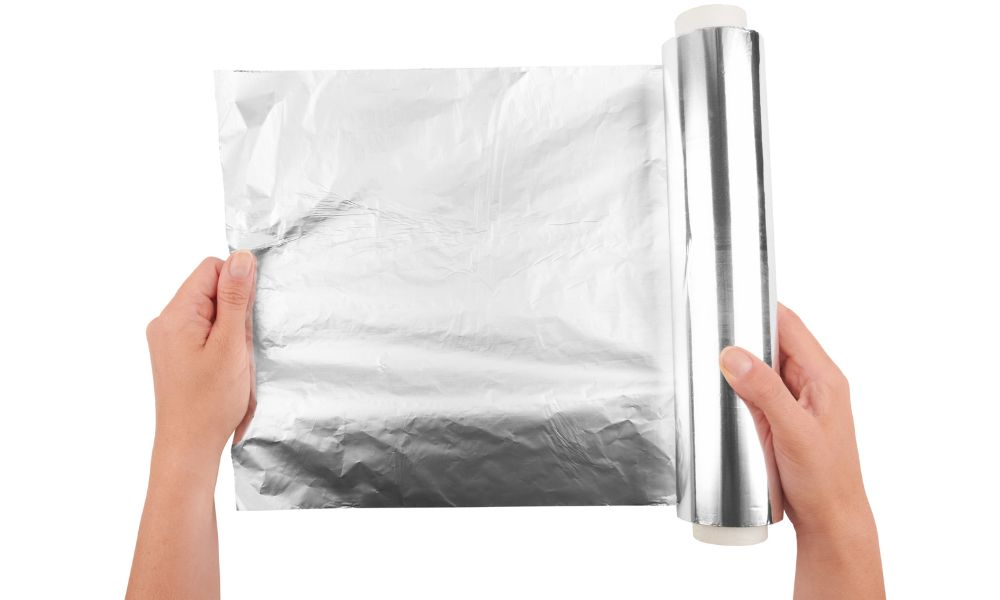
Reflective rescueLine your cooler lid with foil to deflect heat
Wet = coldA damp towel on top encourages evaporative cooling
Pack it tightFill cooler completely to eliminate air pockets
Insulate, insulate, insulateSurround your cooler with towels, blankets, or even newspaper

As seasoned skipper and blogger John Doe puts it, “On the water, your cooler is your best friend. Treat it right, and it’ll keep you hydrated and happy all day long.”

Case Study: Icing Down for a 3-Day Trip

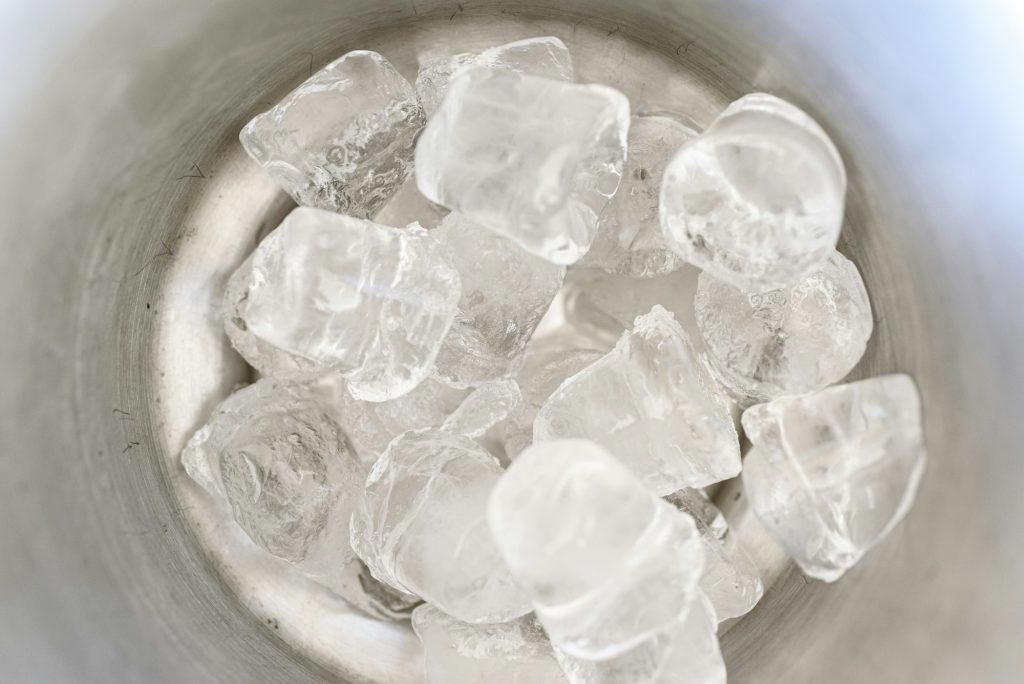
Cubed ice inside an ice bucket.
cubed ice inside an ice bucket

Last month, I put these techniques to the test on a weekend fishing getaway.

By pre-chilling the cooler, using a combination of block and cube ice, and religiously draping a wet towel over the top, we enjoyed frosty drinks from dawn till dusk – no ice runs required!

Frequently Asked Questions

Can I freeze ice directly in my bait cooler?

It’s better to freeze ice separately and then add it to your bait cooler. This avoids potential contamination and allows for more flexible temperature control.

What’s the best ice-to-contents ratio?

Aim for a 2:1 ratio of ice to drinks/food. Don’t be afraid to pack it in – more ice means longer-lasting chill!

The Bottom Line

Whether you’re a seasoned sailor or a landlubber looking to keep your drinks cold, the key to ice success is a combination of science and strategy. By understanding the factors that affect freezing time and employing some clever cooling hacks, you can ensure that your boat beverages stay refreshingly frosty, no matter where the tides take you.

So, grab your ice trays, load up the cooler, and set sail for adventure – with these tips, you’ll be chilling in style!

Is Pyrex Microwave Safe? The Quick Guide to Microwaving Pyrex Products

Looking to find out if your Pyrex product is microwave-safe? This article gives you the inside scoop in discovering if it is!

Is Pyrex Microwave Safe? The Quick Guide to Microwaving Pyrex Products 12
Is Pyrex Microwave Safe 1

You may have acquired a new Pyrex bowl, or you have a collection of Pyrex products.

Now, you’ve got a dish you refrigerated for some time. Or maybe you’ve been cooking and looking for ways to store and reheat your food.

You want to reheat it and microwave Pyrex glass bowls. Or maybe you have something you want to heat up in an empty Pyrex cup.

But you’re worried. You have the option of a microwave oven or a toaster oven.

Could Pyrex glass be microwave-safe?

We’re here to answer your question. Yes, Pyrex glass is microwave-safe, but there are certain things you have to look out for. Read our article to know more!

What is Pyrex?

Is Pyrex Microwave Safe? The Quick Guide to Microwaving Pyrex Products 13

Pyrex is a brand of kitchen cookware and laboratory glassware that’s been around since 1915.

They started as a brand by using borosilicate glass. Borosilicate glass cookware is less likely to be subjected to thermal stress. As a result, borosilicate glass, or Pyrex glass, can withstand higher temperatures than usual.

Later on, soda-lime glass was also used for their glass cookware.

In any kitchen, you can find everything from a Pyrex glass measuring cup to Pyrex bowls. You may also find some people who collect vintage Pyrex dishes – or that may be you in this case!

Is Pyrex Glass Different?

Is Pyrex Microwave Safe? The Quick Guide to Microwaving Pyrex Products 14
Pyrex Glass

Yes, Pyrex glass is quite different from other common glass cookware.

Pyrex glassware products are known for their high heat-resistant properties.

The Pyrex brand in Europe is still made of borosilicate glass, but the North American manufacturers have since changed their products into tempered glass.

The use of tempered glass still makes Pyrex shatter-resistant, while keeping the price point low.

The 10 pcs Pyrex set is a must have in any home – they’re perfect for packing lunches especially if you’re worried about leakage.

The point is: Pyrex products, may it be a Pyrex jug, Pyrex cup, or Pyrex bowl, can all withstand wider ranges of heat in comparison to other glass products.

Is Pyrex Microwave Safe?

Is Pyrex Microwave Safe
Is Pyrex Glass Microwave Safe

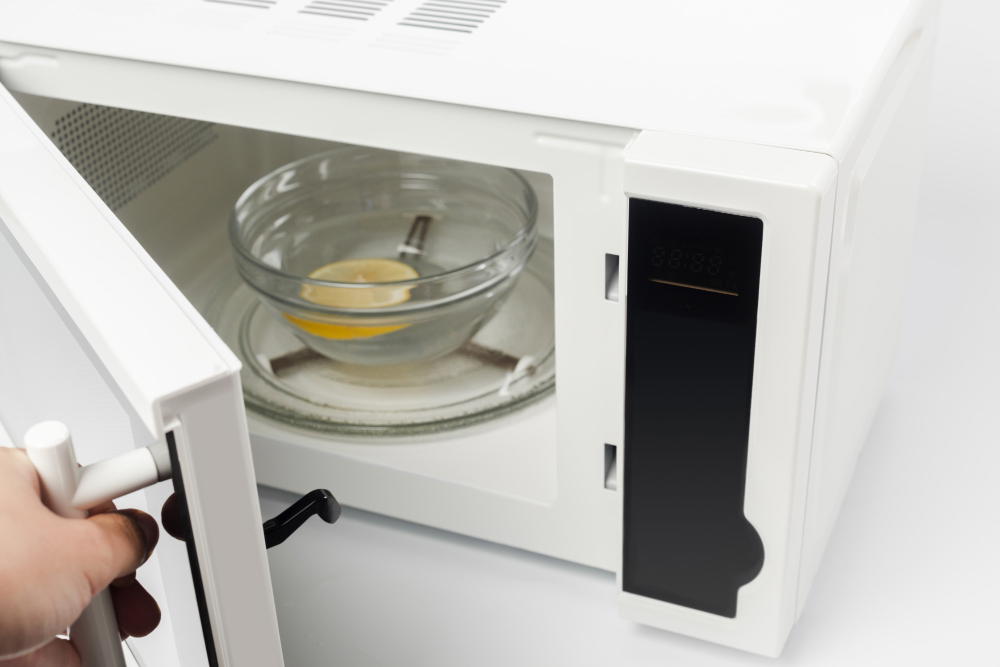
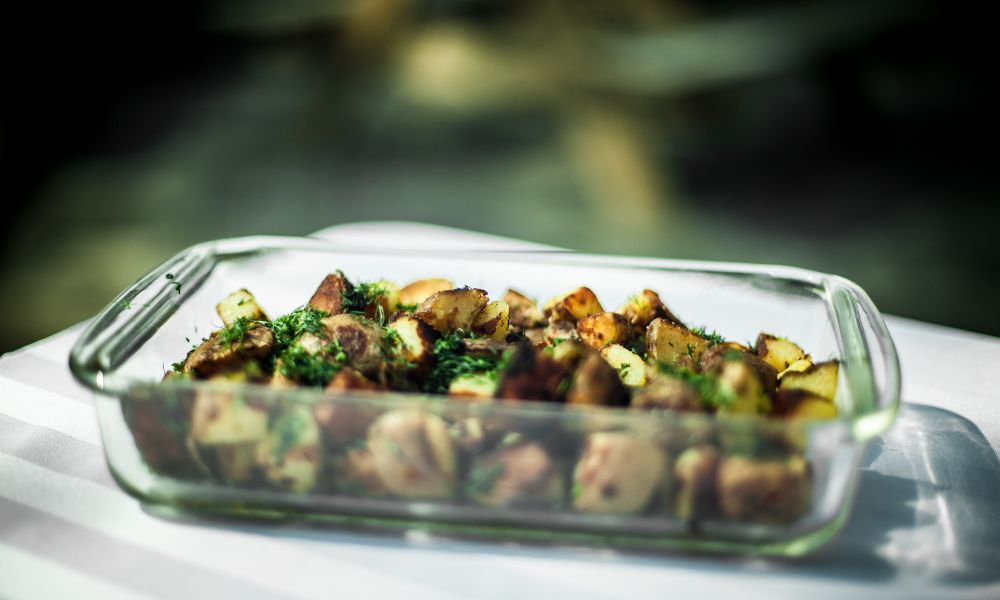
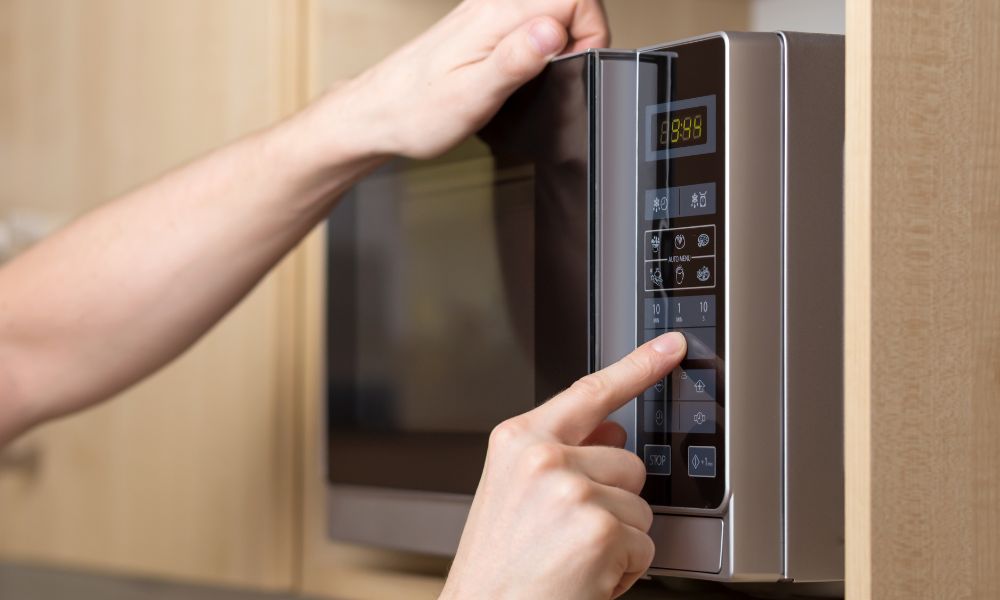
Yes, you can microwave Pyrex! However, it can depend on the type of product.

You can microwave both plastic and glass Pyrex products. Thankfully, plastic Pyrex is microwave-safe and BPA-free.

You can also microwave Pyrex lids in a microwave oven.

However, do take a second look at your Pyrex dishware. If it’s decorated with gold leaf or other metallic decorations, it may be incompatible with microwave ovens.

Don’t microwave Pyrex that has these decorations, or you may risk shattering inside your microwave oven!

Is Pyrex Glass Also Oven-Safe?

So you can microwave Pyrex. But is it safe if you’re heating food or cooking using an oven?

Yes, Pyrex glass cookware is oven-safe.

However, the same cannot be said for plastic Pyrex cookware. Be especially careful with plastic lids.

While heat-resistant, there’s a risk of Pyrex lids reaching a melting point with high heat inside a conventional oven.

Is Pyrex Glass Dishwasher-Safe?

Is Pyrex Microwave Safe? The Quick Guide to Microwaving Pyrex Products 15
Dishwasher

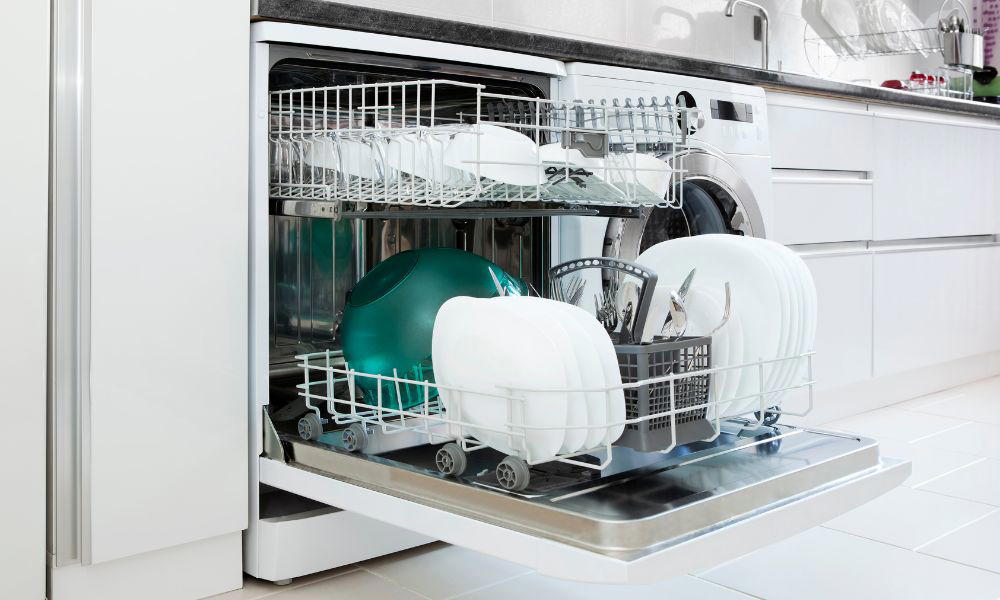
Yes, Pyrex glass is dishwasher-safe! You can opt to wash your plates by hand or have them go through the dishwasher.

However, you should still be careful. Dishwashers can slowly etch Pyrex glassware.

Make sure to keep plastic lids and glassware away from heating in the dishwasher. While Pyrex glass is absolutely microwave-safe and heat-resistant, we don’t know what could happen with the heating elements in a dishwasher!

You may also like: Water In The Bottom Of Your Dishwasher (6 Quick Solutions)

Is Pyrex Glass Freezer-Safe?

As long as you follow manufacturer’s instructions, your Pyrex can thrive in a freezer.

The manufacturer’s instructions include allowing it your Pyrex cool before inserting it into the freezer. Be careful in handling the Pyrex as well so it won’t break or hit any utensils.

Pyrex can survive a very cold surface — up to negative 40 degrees Celsius, to be exact.

How to Make Sure Pyrex Glass Doesn’t Shatter

Is Pyrex Microwave Safe? The Quick Guide to Microwaving Pyrex Products 16
pyrex glass safe

Sure, Pyrex is safe to go through your microwave oven. But there are still safety tips you must follow when cooking, heating food, or using a microwave.

01 Avoid Drastic Temperature Changes

Yes, Pyrex can technically withstand any drastic temperature. That’s why it’s safe to microwave in the first place!

But a drastic temperature change can break your dish.

Glass products, after all, are still vulnerable to thermal expansion. If you move Pyrex glass bowls from cold temperatures to high temperatures suddenly, the extreme temperatures can make it break.

If you’re going to microwave a cold dish from the freezer, make sure it cools down a little before transferring it inside a microwave oven. Cold Pyrex glass may shatter if you microwave it right away!

Plus, we advise you not to pour hot liquid into a cold Pyrex glass, or put hot Pyrex on a cold surface. Thermal shock may occur, which will lead the Pyrex to shatter, too.

02 Use Dry Mitts When Handling Cookware

If you’re getting your Pyrex from a microwave or oven, use dry mitts.

This is especially advised if you’re handling or cooking a hot dish. Not only does it save you from getting burned, it also makes sure the glass doesn’t break as easily.

03 Don’t Use Glass Cookware For Cooking With High Heat Techniques

Extreme temperatures will eventually get to the glass you’re using. A microwave is fine, but broiling and grilling using your glass cookware is not advisable.

How to Take Care of Your Pyrex Glass Dishes

Aside from making sure your Pyrex glass is safe to microwave, you can go the extra mile to make sure you take care of your Pyrex glassware.

From food storage to cleaning tips, we have the guide to taking care of your Pyrex collection below:

01 Avoid Temperature Changes – Especially with a Hot Pyrex Dish

Extreme temperature changes can break your Pyrex glassware. While Pyrex is usually heat-resistant and microwave-safe, temperature changes will still affect them and they may go into thermal shock.

For example, you should avoid dousing a hot Pyrex dish in cold water. Don’t pour hot liquids on cold Pyrex either, or put a cold Pyrex on a hot stove.

Instead, let the Pyrex bowls or dishes cool at room temperature, then soak them in warm water. Don’t let a hot Pyrex dish touch even a wet cloth!

Otherwise, your Pyrex dish could go through thermal shock.

Thermal shock occurs when sudden temperature changes cause tension in the material, causing it to break.

Broken Pyrex could potentially injure you as well.

If your Pyrex dish came from a refrigerator, however, you can microwave cold Pyrex or place it in a conventional oven right away. It’ll be safe as the cold Pyrex dish will change its temperature evenly.

The same goes when you want to microwave cold Pyrex. It’s still safe to microwave as long as the heat is distributed evenly.

To make sure you safely microwave Pyrex, however, it may be advisable to let it cool down to room temperature first.

02 Use Mild Abrasives for Tougher Residue

Even the best dish can leave some residue on your Pyrex dish after cooking and eating.

Usual residue on your Pyrex dishes can be removed by soaking it in warm water. Remember, if you have a cold Pyrex dish, let it get back to room temperature first.

After soaking the dish in warm water, you can go forward with your usual dishwashing process and scrub the area clean with liquid soap, a sponge, and water.

Tougher residue can benefit from mild abrasives. However, it’s best if you avoid abrasives on painted and decorated surfaces of your Pyrex dishes.

03 Handle Your Pyrex Glass Dishes Carefully

Careful handling is essential to the maintenance of your Pyrex dishes!

The lids don’t fit as tightly on Pyrex glassware in comparison to other products. Make sure to hold your Pyrex dishes carefully with both hands when transferring them from one place to another.

Pyrex glassware are usually heat-resistant and durable, but they’re still breakable. Proper handling will make your Pyrex glassware last longer.

04 Store Them Properly

Proper storage also goes a long way with Pyrex. Make sure all the shelving and racks you use are sturdy, and can reasonably support several Pyrex dishes’ weight.

Try to avoid sharp corners or any material that may scratch or mar your Pyrex glassware. Stack them according to size to avoid breakage.

05 Don’t Use a Dishwasher

Pyrex is also dishwasher-safe, but it’s not advisable to put Pyrex through a dishwasher. Instead of safely cleaning your Pyrex cookware, all it will do is slowly etch the glass — damaging it in the process.

Instead of using a dishwasher, you can choose to wash Pyrex glassware and Pyrex lids by hand.

FAQs

Are Pyrex Measuring Cups Microwave-Safe?

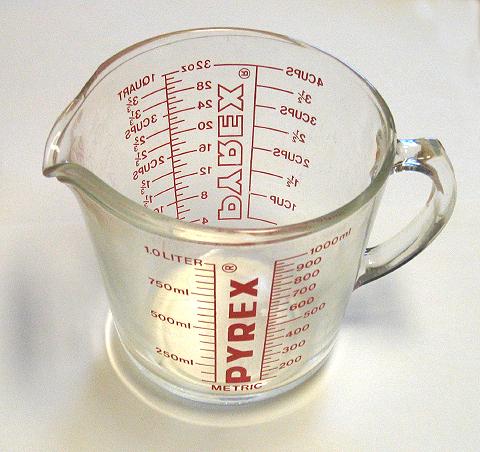
Yes! Just like all other Pyrex products, Pyrex measuring cups are also microwave-safe.

Is a Vintage Pyrex Safe?

While mostly safe, vintage Pyrex does have lead in it. You might be curious as to the safety of these products and their impact to your health. Remember that no product is 100% lead-free!

Does Oil Go Bad? All Cooking Oils Explained

Wondering if it’s safe to keep cooking with oil after it’s been opened? Here’s a guide on how long oil lasts and when it goes bad.

Does Oil Go Bad?All Cooking Oil Explained
Does Oil Go BadAll Cooking Oil

Cooking oil is a staple in any pantry.

However, after your oil has been sitting in the cupboard for some time, you may be wondering: could oil go bad?

After all, none of us want to use expired ingredients for our recipes!

The truth is, vegetable oil can go bad, with certain oils lasting longer than others.

In this article, we’re covering shelf life, proper storage conditions, and tips on how to tell when your oil has spoiled. How long does vegetable oil last? Read on!

Does Oil Go Bad? How Long Does Vegetable Oil Last?

Does Oil Go Bad? All Cooking Oils Explained 17
Vegetable Oil

The shelf life for most cooking oils vary. Oils with polyunsaturated fats like canola oil can spoil quicker in comparison to those with monounsaturated fats. Olive oil is an example of the latter.

Freshness also depends on how you store cooking oil, and whether the bottle has been opened or not. There’s also more chance of it lasting when you store oil in a cool and dark place.

Everything we provide below is only a rough estimate of an oil’s shelf life. You can check the best by date to make sure when your oil will spoil!

Vegetable Oil Shelf Life: The Complete List

Types of Cooking OilUnopened Shelf LifeOpened Shelf Life
Canola Oil2 years6 months to a year
Olive Oil18-24 months12-18 months
Corn Oil1 year6 months
Avocado Oil1-2 years6 months
SoyBean Oil1 year2-3 months
Peanut Oil1 year6 months
Sunflower Oil2 years1 year
Sesame Oil1-3 years9-12 months
Safflower Oil2 years1 year
Palm Oil1 year6 months
Grapeseed Oil6 months3 months
Coconut Oil2 years1 year
Almond Oil1 year6 months

How to Know When Oil Has Gone Bad

Does Oil Go Bad? All Cooking Oils Explained 18
How to Know When Oil Has Gone Bad

Shelf life is good to remember. However, there may be times where you have no idea when you bought or opened vegetable oil.

In that case, how can you tell if vegetable oil has gone bad?

It’s pretty easy to tell with these signs:

01 Pungent Odor

Open the vegetable oil bottle and give it a sniff. Expired oil smells like chemical solvent.

If your oil smells like old paint fumes or nail polish remover, it may be time to get rid of it and buy fresh oil at the store. Remember: fresh oil must have a neutral aroma. Rancid oil will make itself known!
02 Sour Taste

While you’re giving it a sniff, a taste test can confirm your suspicions, too.
Rancid oil will taste sour, instead of the neutral flavor we all know well.

03 Mold Around The Seal

Sometimes, you may not have to go as far as smelling or tasting anything. Taking a look at the unopened vegetable oil seal is enough.

If there’s mold growing around the seal, it’s time to throw that vegetable oil in the trash and buy a new one.

Tips to Store Cooking Oil Properly – and Make It Last

Tips to Store Cooking Oil Properly - and Make It Last
Tips to Store Cooking Oil Properly and Make It Last

How long vegetable oil lasts depends on proper storage. Here are our tips and tricks to make sure your cooking oil is stored properly:

01 Use Tightly Sealed Containers

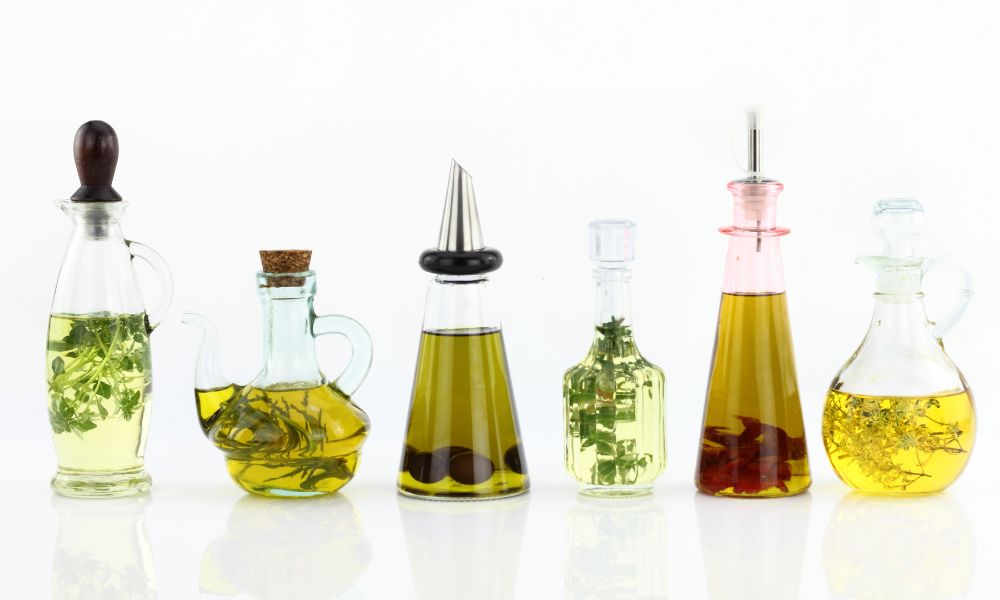
Vegetable oils deteriorate faster once exposed to oxygen. Use tightly sealed bottles or jars to make sure oxidation doesn’t happen while you’re not using your oils!

A secure container also makes sure your vegetable oil doesn’t accidentally spill.

02 Make Sure The Container is Opaque

If your cooking oil is away from light as much as possible, then it won’t go bad as quickly. Opaque containers or dark glass can help!

However, most cooking oils come in transparent, plastic bottles. You can either transfer your vegetable oil to a different, airtight container or store it in a cool, dark place.

03 Place Vegetable Oil Away From Heat

We don’t just mean the sun! You should also place your cooking oil away from heat-generating appliances in your kitchen, like the stove or microwave.

04 Store Cooking Oil in a Dry Place

Water and oil don’t mix well, and can actually make the vegetable oil go bad. Make sure your oil is stored in a dry and cool place.

05 Don’t Freeze or Refrigerate Vegetable Oils

Vegetable oil doesn’t work the same way food does! Instead of keeping the oil fresh longer when you refrigerate it, it will spoil much faster.

The cold temperature, for one thing, won’t make it have a longer shelf life.

Plus, once you thaw out the oil, the oxidation process will be quicker. As a result, you’ve cut down on the oil’s shelf life instead of extending it.

However, you shouldn’t worry if you’ve refrigerated your oils. They may look cloudy or have become solidified, but they should still be good for some time.

Remember: oil shelf life is best extended without exposure to heat, light, and air. Store vegetable oils in proper storage conditions. Keep oil inside a cool and dry place.

Can Expired Oil Make You Sick?

Does Oil Go Bad? All Cooking Oils Explained 19
Can Expired Vegetable Oil Make You Sick

No, expired oils won’t make you ill right away. However, once vegetable oil is bad, the rancidification process will have adverse effects on your body over time. Your immune system will take a hit!

Even if rancid vegetable oil won’t make you sick or kill you, it will leave your dishes with an unpleasant taste. Trust us — the food won’t be as tasty with rancid oil.

It’s best not to take a risk. Store vegetable oil properly, and look out for signs of spoilage. Do a taste test, sniff out the oil, and look for signs of mold at the seal.

Where to Use Your Cooking Oils

If your vegetable oil is slowly approaching its best-by date, it’s best to use them up before they go bad. Just letting the oil sit there as it turns rancid isn’t advisable!

As long as the vegetable oils still retain quality, you can use them for the following:

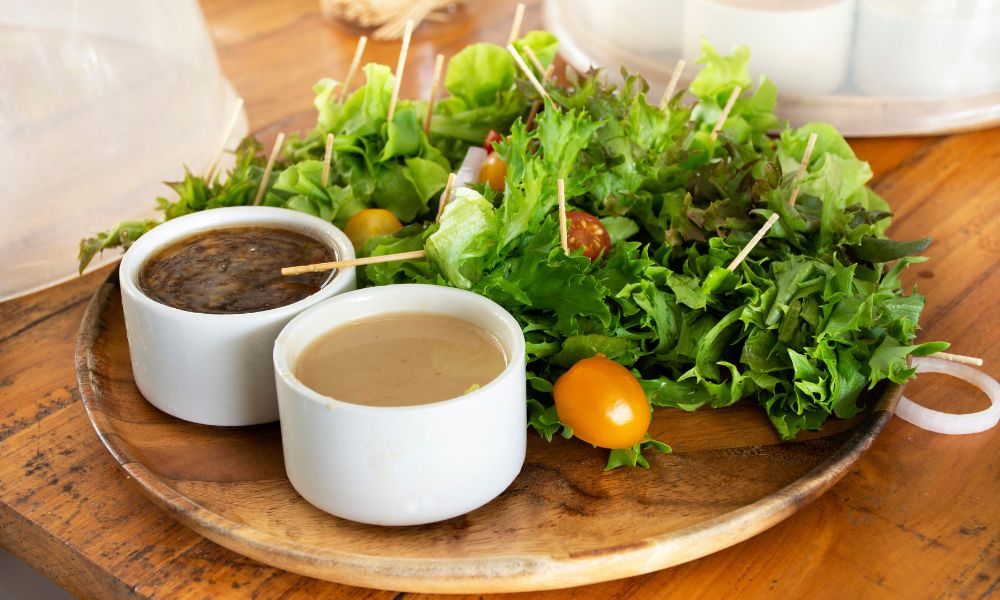
01 As Salad Dressing

Does Oil Go Bad? All Cooking Oils Explained 20
Salad Dressing

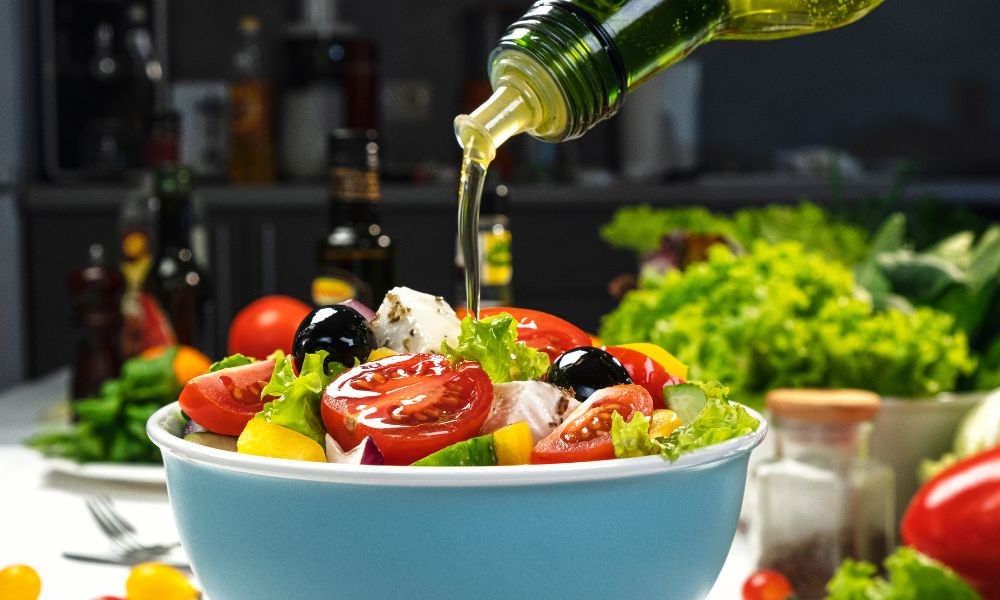
You can use a variety of oils for salad dressing! Sesame oil, extra virgin olive oil, peanut oil, avocado oil, soybean oil and almond oil will bring out delicious flavors in your salads. You can mix and match other oils with vegetables to see which one fits your dish the best.

Aside from using just the oils themselves, you can also mix them with different vinegars to make a vinaigrette. You can also store them for longer in the fridge.

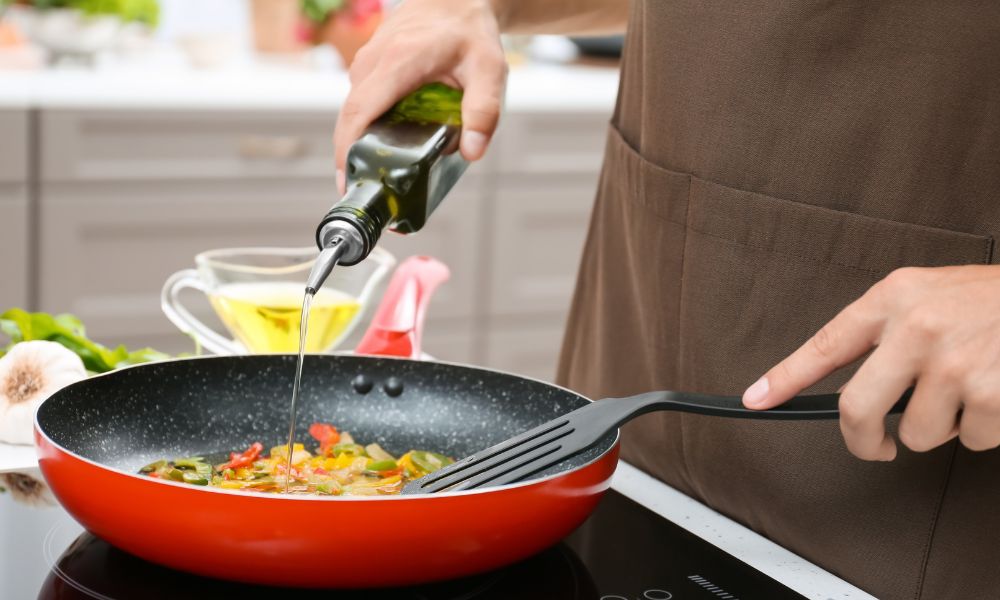
02 As Cooking Oil for Pan Frying and Deep Frying

Does Oil Go Bad? All Cooking Oils Explained 21
oil for pan frying

Common oils can be used whether you’re sautéing, making Asian dishes such as a stir fry, or just frying something simple in the pan.

Canola oil, corn oil, and coconut oil, for example, are great for just about everything — from sautés to deep frying.

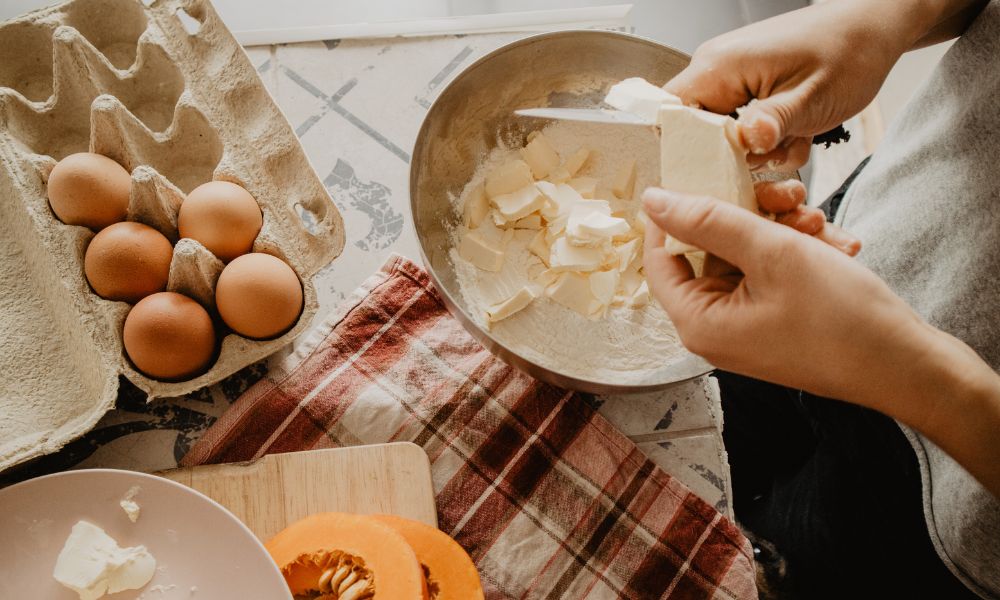
03 As Solid Fat Substitutes

Does Oil Go Bad? All Cooking Oils Explained 22
baking

If you love baking, you can use the extra vegetable oil you’ve got in the pantry! Olive oil, for instance, is a great substitute for butter and eggs.

If you ever find out that your ingredients are lacking for your baking needs, vegetable oils can be a good substitute.

04 As Skincare

Does Oil Go Bad? All Cooking Oils Explained 23
skincare

Oils extracted from plant seeds can benefit your skin.

Nut oils such as almond and peanut oil can revitalize your hair, along with your skin’s outer layer. Aside from being anti-inflammatory, nut oils are also notorious for their anti-oxidants.

Sunflower oil and olive oil can also make you glow with their anti-inflammatory and moisturizing properties as well! Sunflower oil in particular is non-comedogenic, so it won’t clog your pores as it moisturizes your skin.

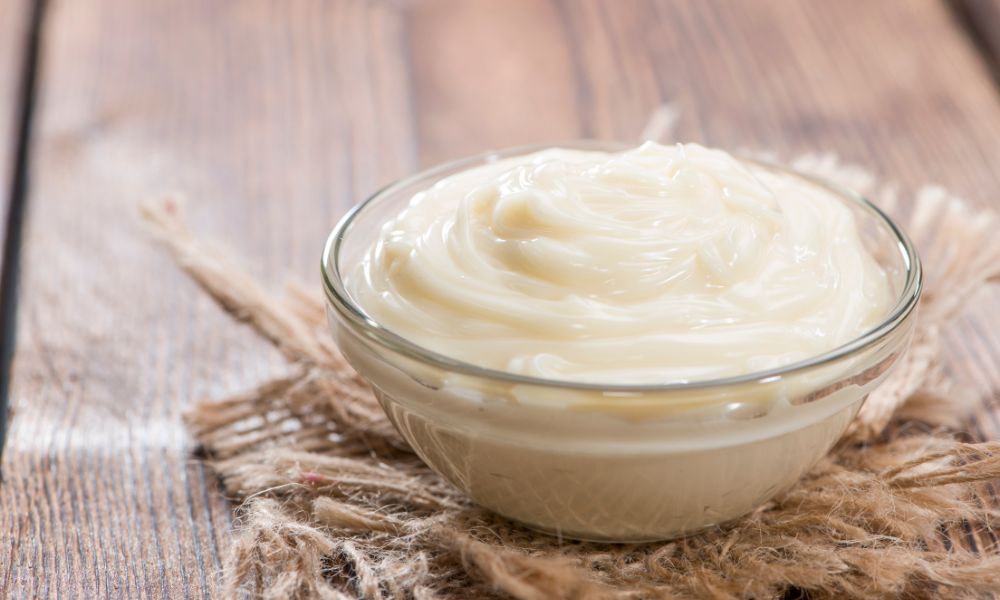
05 As Mayonnaise Ingredients

Does Oil Go Bad? All Cooking Oils Explained 24
Mayonnaise 1

Who wouldn’t love homemade goods? Vegetable oil can also be used to make your very own homemade mayonnaise.

You can use different kinds of oil to make it, too. Sunflower oil, sesame oil, and olive oil all work great to make mayonnaise. All you have to do is make sure that the eggs are the same temperature as the oil, and mix the ingredients well.

Remember: you should be able to tell if vegetable oil has gone bad in your pantry! Using rancid oil for our examples above would be unwise with food safety.

What Can You Do With Expired Vegetable Oil?

Does Oil Go Bad? All Cooking Oils Explained 25
What Can You Do With Expired Vegetable Oil

So you do have rancid oil. That doesn’t mean that the only thing left for you to do is to throw it away!

You don’t have to worry about how long vegetable oil lasts if you can reuse it for the following:

01 Protect and Remove Rust from Materials

If you have metal tools and materials you want to keep from rusting, vegetable oil is a good temporary coating.

You can also choose to remove rust with oil. Vegetable oil can take away rust from cast-iron pans quickly!

02 Use as Lubrication

Got squeaky hinges and joints? Douse it with a good amount of vegetable oil and it’ll be good as new.

03 Use as Pest Control

Mix a teaspoon of mild dish soap and vegetable oil with a quart of water. You can drive pests away with the concoction, keeping your skin and your home safe.

If you want to throw away your expired oil, read our article: Safe And Effective Ways On How To Dispose Of Cooking Oil to get more information about disposing of cooking oil.

The Health Benefits of Using Vegetable Oils

Does Oil Go Bad? All Cooking Oils Explained 26
The Health Benefits of Using Vegetable Oils

Hesitant to use up your vegetable oil in the pantry? Here are some benefits that may change your mind:

01 Improves Heart Health

There are some heart-healthy oils that you can use! Monounsaturated and polyunsaturated fats in olive oil, canola oil, and safflower oil are some examples. Use them as dressing or for frying!

What you should avoid are hydrogenated oils, which are high in trans fat. They increase the probability of heart disease instead of lowering it!

02 Are Nutrient and Vitamin-Dense

Plant-based oils offer a multitude of nutritional benefits. Vegetable oil, for instance, can be a source of vitamins C, D, E, and K. That’s not counting in the fatty acids you get as well!

03 Brings Out Yummy Flavors

Neutral oils already bring out the best in many dishes. Olive oil, for example, is an excellent, flexible dressing you can have for your salads.

If you want to fancy it up, you can bring out more flavor in your food by infusing your oils with herbs and aromatics. You can make garlic oil for mashed potatoes, or rosemary oil for grilled meats.

04 Promotes Better Metabolism

Some commercial vegetable oils can promote the regulation of your metabolism. A study showed that it also has anti-inflammatory properties.

05 Promotes Better Digestion

There are some oils that can boost your digestion as well. If you have coconut oil that needs to be finished in your pantry, use it for a dish or two. Coconut oil contains those medium-chain fatty acids that metabolize quickly!

Olive oil, meanwhile, can leave you feeling full without causing constipation. It aids in digestion as a lubricant as well. 

FAQs

Is It OK To Use Expired Oil?

No, it’s not okay for your health or your dishes to use oil past its expiry date. Find a way to reuse the oil or throw it out!

How Long Is Vegetable Oil Good After Expiration Date?

If there are no signs that vegetable oil has gone rancid, vegetable oil may be good for a month or two after its expiration date. However, it’s still more advisable to buy fresh, new oil instead!

How Long Can You Keep Vegetable Oil After Opening?

Oil is best consumed within two to three months of opening. It’s still best to go by the best-by date and see until when you can use the vegetable oil!

How long does queso last in the fridge? + Tips to make it last longer!

Avoid the risk of consuming bad queso. Go through this post to know how long does queso last in the fridge, before consuming it.

How long does queso last in the fridge? + Tips to make it last longer!
How long does queso last in the fridge

I love the creamy texture that queso brings to any delicacy. In fact, I use it for everything from changing the texture of the body to garnishing when making cheese nachos. However, queso is not exactly cheap. That is why refrigeration is the best option to go with when you have some leftover queso.

Before you place it in the refrigerator, find out how long the queso lasts in the fridge. Below, I will go into the details of the exact procedure to store it.

How long does queso last in the fridge?

Depending on the queso variant, it can last anywhere from 2 days to even one month in the fridge. Check the table below for more details.

 Queso VariantHomemadeCanned (Opened)Canned (Unopened)
Queso Fresco3 to 6 days2 to 3 daysBest by date
Queso BlancoUpto 4 daysUpto 5 daysBest by date
Queso Panela2 to 3 daysUpto 4 daysBest by date
Queso OaxacaUpto 1 weekUpto 1 weekBest by date
Queso Manchego3 to 5 days6 daysBest by date
Queso Chihuahua3 to 5 daysUpto 5 daysBest by date
Queso Cotija3 to 4 weeksUpto 1 monthBest by date

✍️ Note- Beyond the “best by date” queso might be edible but the taste might vary. Hence it is best to consume it by that date.

About queso cheese variants

How long does queso last in the fridge? + Tips to make it last longer! 27
queso cheese variants

Now that you know the shelf life of different queso types, it is time to look at the variants and how they differ.

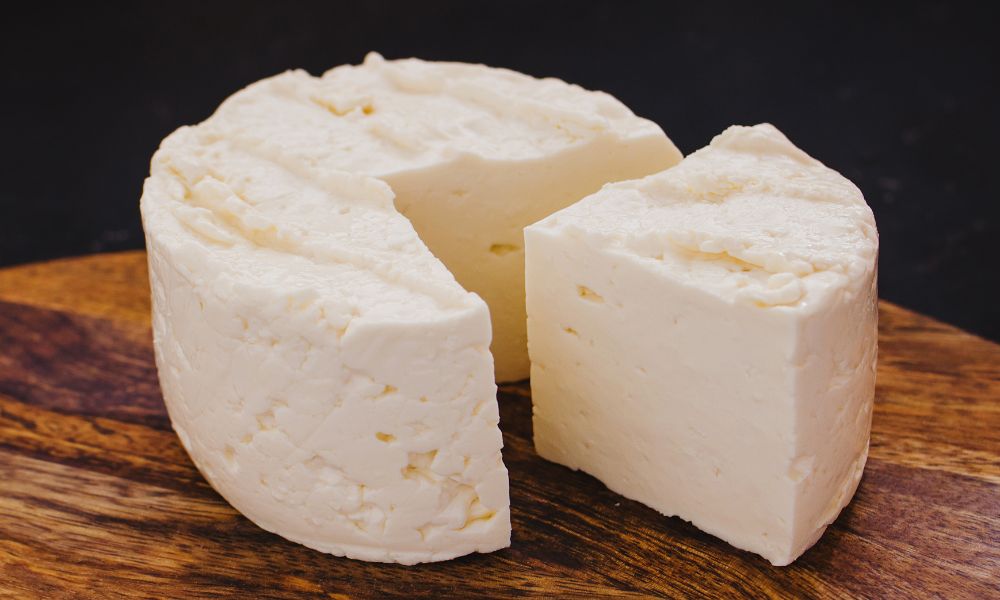
Queso Fresco

Usually, queso Fresco is made from cow’s milk. According to Harvard, Cow’s milk consists of 87% water and other nutrients. The high quantity of water limits the fridge’s shelf life of queso fresco.

Queso Blanco

You might have noticed in the table above that Queso Blanco has a slightly higher shelf life than Queso Fresco. To make Queso Fresco, milk is first curdled with lemon juice or vinegar.

According to USGS, Milk without any additives has a pH level of 6.3 to 6.6, making it slightly acidic. Curdling reduces its pH level to approximately 5, making it more acidic. According to Dr. Wendy Keenleyside (BSC in microbiology), the ideal pH level for bacterial growth is 6-7. As a result, there aren’t many bacteria that can survive in such acidic conditions, allowing queso blanco to last a little longer.

Queso Panela

Queso Panela is made from pasteurized cow milk. Pasteurized milk contains lower bacteria than raw milk, but it can still last only 3-5 days, as per research done by Cornell University. It is best to consume this cheese in 2 to 3 days.

Queso Oaxaca

Queso Oaxaca is made from curd. Curd is made by converting lactose in milk into lactic acid, thereby decreasing the pH level of milk. Add to that the limited water content in this cheese, and it is easy to see why it lasts longer than most other queso variants.

Queso Manchego

Queso Manchego is usually made from sheep milk. However, its shelf life is still limited because of the water content in sheep milk.

Queso Chihuahua

Queso Chihuahua is a semi-hard cheese made from raw or pasteurized cow milk. The semi-hard texture is achieved by draining excessive water. That is why it can last slightly longer with the right preservatives (like in the canned version).

Queso Cotija

The secret of the long shelf life of Queso Cotija in the fridge lies in its manufacturing process. The cotija cheese-making process involves a step to remove moisture which increases its shelf life to almost a month.

How long can byproducts of Queso last in the fridge?

Queso byproductsShelf life in the fridge
Queso cheese sauce4 weeks
Queso dip6 to 7 days
Chihuahua cheese sauceUpto 5 days
Queso homemade cheese sauce1 week
Tostitos queso 10 to 14 days
Chipotle queso4 days

 Things to note

  • To ensure the byproducts of Queso cheese last for the time mentioned above, always keep them refrigerated.
  • The above time frames assume that you have already opened the packaging or the can of the Queso cheese product. In case you have not, the byproducts can usually last long. In most cases, the manufacturer provides you with the date before which you should consume it. For canned byproducts, they can last even longer than the date advised by the manufacturer. That is because the date indicates the period in which their taste is retained. It doesn’t indicate the period in which the product deteriorates.
  • Whether you’re buying a cheese sauce or cheese dip, the label will often have the refrigeration instructions, and it is best to stick to those.

Why do canned/store-bought queso cheese variants and byproducts last longer?

In both the tables above, you would have noticed that store-bought Queso cheese and byproducts last longer. This phenomenon is not just limited to Queso. Even if you compare the shelf life of commercially bottled salsa, for example, with the one you’re making at home, the commercially bottled one will have a higher shelf life.

Wondering why it is so?

Read the reasons below to understand the same.

1. Elimination of bacteria before packaging

According to National Center for Home Food Preservation, the right canning procedure can prevent the growth of harmful bacteria, growth of yeast, and mold in the foodstuffs. 

Additionally, canning helps to remove the oxygen from the can or the container. The acidic ingredients added are not conducive for bacterial growth.

So, store bought cheese dip lasts longer than the home-cooked one. 

2. Sterile cans 

Most people do not have sterilization equipment at home. That is why the container might contain some bacteria or pathogens even when storing homemade Queso Fresco. It certainly reduces the shelf life of homemade Queso Fresco.

In the canning process, however, all cans are sterilized before filling them up with the contents/ingredients. Appropriate care is taken to ensure that the interiors of the cans or the containers remain sterilized till sealed. It reduces bacterial growth and increases shelf life.

3. Higher preservatives

Have you read the label on a queso fresco dip container?

If not, check it out the next time around. It will have one or more preservatives in the ingredient list. It is also why commercial establishments serving Mexican dishes often use packaged queso variants or byproducts since they are less likely to get spoiled.

4. Appropriate storage

When Queso or its byproducts do not have any preservatives, you must keep them under ideal conditions. Refrigerate Queso as soon as possible and avoid long exposure to room temperature.

Canned Queso products must be stored in a cool and dark place without refrigeration. This helps them last longer. It means that storage becomes easy and ideal conditions are more lax because of the controlled environment inside the cans.

How long can Queso sit out?

Whether you’re speaking about homemade queso or store-bought leftover one, you can keep it at room temperature for only two hours after opening. Anything longer than that and the bacterial growth will be too high for safe consumption. The two-hour deadline is not just true for Queso but also for other types of cheese like Monterey jack cheese.

What’s the correct way to store Queso in the fridge?

There are essentially three methods to store Queso in the fridge with their pros and cons.

Method 1- Using aluminum foil

How long does queso last in the fridge? + Tips to make it last longer! 28
aluminum foil

This method works great for homemade Queso. It is the most inexpensive method to store Queso. Also, it is suitable only if you plan to use Queso the next day and not store it for long.

Step 1- Place the Queso in an aluminum foil and fold it tightly.

Step 2- Keep the foil package in the veggies section of the refrigerator with a temperature set below 40°F (4°C)

This method will work when storing Queso in its pure form. If it is already part of a recipe or has other ingredients, do not use this method.

Method 2- Using airtight container

How long does queso last in the fridge? + Tips to make it last longer! 29
airtight container

Replace the aluminum foil with an airtight container to maximize the shelf life up to the limit listed in the table above. Airtight containers work great even when trying to store store-bought or canned Queso. In that case, remove it from the plastic container or can, put it into an airtight container, and follow the two steps highlighted above.

Method 3- Vacuum sealing

How long does queso last in the fridge? + Tips to make it last longer! 30
Vacuum sealing

When you vacuum seal a hard cheese, you can store it for up to 4 to 8 months. However, Queso being a soft one can be stored only for a couple of weeks extra than its usual shelf life when vacuum sealed.

Before I share the method, remember that it is only viable when dealing with Queso in bulk, like in Mexican restaurants. You will need a vacuum sealer (we recommend Potane Vacuum Sealer Machine because it has a soft mode and comes with seal bags) to accomplish this procedure.

Step 1- Dab queso on a paper towel to remove extra moisture.

Step 2- Wrap it in parchment paper and vacuum sealing bags. The parchment paper will further absorb the moisture.

Step 3- Use your vacuum sealer’s moist or delicate mode to seal Queso. In case, your sealer has a preset mode for cheese, use that it.

Step 4- Place the entire bag in the fridge and ensure the temperature is below 40°F (4°C).

That’s it!

This method works great if you want to eat queso fresco after a couple of weeks or so. It is also ideal to store dishes like nacho cheese rather than Queso.

To store it even longer, freeze queso fresco (or any other queso variant) which makes it last two months.

Caution- Freezing does change the texture of Queso but increases its shelf life.

How can I know if Queso is bad?

Knowing how to store leftover queso is not enough. Equally important is to know if queso cheese has gone bad.

  • Sunken cheese

Sunken cheese indicates that mold might have started growing. Even if you aren’t able to detect any green or white spots, sinking means that it is best to discard this Mexican cheese.

  • Mold growth

Green or white spots on the cheese indicate mold growth. This sign is universal across cheese and cheese byproducts like leftover cheese dip, Tostitos Queso, or any other dairy based dip. Once you notice any of them consuming homemade cheese or store-bought one is a strict no.

  • Sour smell

Most queso variants have milky-odor. The byproducts might have an aroma depending on their ingredients, but the cheese does not. Consequently, if you notice any sour smell in the cheese or the byproducts, especially when dealing with something like leftover restaurant queso Blanco, it indicates that the Mexican cheese has gone bad.

  • Slimy texture

A slimy texture over queso fresco cheese or any other variant indicates that it is not fit for consumption. Ideally, when you touch it, it should have a creamy texture.

  • Sour taste

A sour or rancid taste indicates that queso is not fit for consumption.

Tips to follow while refrigerating queso

Even though I have highlighted the exact step-by-step procedure to refrigerate queso above, there are a few additional tips to follow.

1. Avoid plastic wrap

It is best to avoid plastic wrap while refrigerating queso. That is because it is common for queso fresco cheese to shed some moisture during refrigeration. Plastic wrap won’t absorb this moisture and will turn queso into a watery mess.

2. Label the date

Before you put the airtight container/freezer bag/aluminum foil into the refrigerator, label the date of packaging. So, you will know by when you should consume the same.

3. Store in the vegetable drawer

It is best to refrigerate queso in the vegetable drawer. The temperature should be set below 40°F (4°C).       

Does queso change when stored in the fridge?

Yes, queso changes when stored in the fridge, especially for more than 24 hours. The two most distinct changes include-

• The water contained inside will convert into icicles and change the texture.

• It is common for queso to lose water during refrigeration and harden.

However, if you reheat it correctly, you can reverse these changes.

How to use queso after refrigeration?

How long does queso last in the fridge? + Tips to make it last longer! 31
queso

It is easy to use queso after refrigeration. The steps include-

Step 1– Extract it from the refrigerator and the container/aluminum foil and expose it to room temperature for 15 minutes.

Step 2– Drain off excess water after 15 minutes and use it in the recipe as you please.

However, if you’re dealing with queso dip, heat it to return to room temperature sooner. Otherwise, you might have to wait hours to bring it to the right temperature. The procedure to heat queso dips is as follows-

Step 1– Pull the queso dip from the refrigerator and put it into a microwave-safe container.

Step 2– Add some milk to the dip in a limited quantity of milk so that the density does not change much.

Step 3– Set the microwave to 180°F or 82.22°C and heat the dip for thirty seconds.

Step 4– Stir the dip every thirty seconds to avoid burning it. Use a microwave safe spoon and mitten while doing so.

Step 5– Repeat this process for three cycles; the queso should be at the proper temperature for consumption.

Before you ask, you can only heat queso dip once or twice. Reheating it again and again in a microwave will increase bacterial growth and make it unfit for consumption.

FAQs

Can I eat queso that’s been left out? 

Yes, you can eat queso that’s been left out only if it has been at room temperature for less than two hours. The two-hour limitation is for any other type of cheese, like mozzarella cheese, cheddar cheese, etc. The same is true when it is used in Mexican food.

How long is queso made with Velveeta cheese good for? 

Queso made with Velveeta cheese dip is good at room temperature for 2 hours and 3 to 5 days in the fridge.

What is the best method to melt queso cheese? 

The procedure to melt queso cheese after refrigerating it is simple.
Step 1- Place a saucepan on the burner at the lowest heat settings.
Step 2- Move the queso cheese from the bag/parchment/airtight container to the saucepan and heat it for 10 minutes.
Step 3- Ensure you consistently stir the cheese during those 10 minutes to prevent it from burning and provide it with even heat.
Thus if you, like me, love melting queso, it is the way to do it right.

Can you put the queso back in the fridge?

Yes, you can put queso back in the fridge if it was out for less than 2 hours. Before doing so, sniff it to ensure there is no foul odor.

How Many Tablespoons in a Stick of Butter? (Conversions + Pro Tips)

Kitchen query? Here’s how many tablespoons are in a stick of butter, plus bonus tips and tricks! While butter adds unbeatable flavor and a rich, tempting aroma to your favorite recipes, remember to enjoy it in moderation as part of a balanced eating pattern.

How Many Tablespoons Is A Stick Of Butter?
How Many Tablespoons Is A Stick Of Butter

Understanding US Butter Sticks

Butter in the US is most commonly sold in 1-pound packs containing four sticks. Each stick is ¼ pound, or 4 oz.

The sticks are individually wrapped and labeled with tablespoon measurements.

How Many Tablespoons is a Stick of Butter?

How Many Tablespoons in a Stick of Butter? (Conversions + Pro Tips) 32
How Butter Is Sold In The US Vs Elsewhere

One stick of butter equals 8 tablespoons.

Butter Conversions: Sticks, Cups, and More

  • 1 stick of butter = 8 tablespoons (½ cup)
  • 2 sticks of butter = 1 cup
  • 1 stick of butter = ¼ pound = 4 ounces = 113 grams
  • 1 pound of butter = 4 sticks = 2 cups
Butter in SticksButter in Tablespoons (TBSP)Butter in Teaspoons (TSP)
4 sticks32 tablespoons96 teaspoons
2 ½ sticks20 tablespoons60 teaspoons
2 sticks16 tablespoons48 teaspoons
1½ sticks12 tablespoons36 teaspoons
1¼ stick10 tablespoons30 teaspoons
1 stick8 tablespoons24 teaspoons
⅔ sticks5 ⅓ tablespoons16 teaspoons
½ stick4 tablespoons12 teaspoons
¼ stick2 tablespoons6 teaspoons
⅛ stick1 tablespoon3 teaspoons

The Best Way to Soften Butter: Tested!

How Many Tablespoons in a Stick of Butter? (Conversions + Pro Tips) 33
How Many Tablespoons Is A Stick Of Butter

Need softened butter but forgot to take it out of the fridge? We tested four popular methods to find the best one:

  1. Microwave: Cut butter into tbsp-size pieces. Microwave on 10% power in 5-second bursts until softened (about 20-30 sec total).
  2. Countertop: Cut butter into tbsp-size pieces. Let sit at room temp for 30 min.
  3. Warm Glass: Put stick in a glass, fill with hot tap water. Let sit 5 min. Pour out water, cover butter with the warm glass, inverted. Wait 5-10 min.
  4. Beating: Cut cold butter into small chunks. Beat with a mixer until smooth, 2-3 min.

The microwave method was fastest, but risked melting. The countertop and glass techniques gave a nice, evenly softened texture. Beating worked but left the butter slightly greasy.

💁🏻‍♂️Our pick? The inverted glass – softens without melting and is faster than waiting on the counter. Here’s a visual of the process:

Try This: Easy 3-Ingredient Shortbread Cookies

Perfect for using exactly 1 stick of butter!

Mix 1 stick softened butter, ½ cup powdered sugar, and 1 cup flour until a dough forms. Press into an 8-inch square pan and prick all over with a fork.

Bake at 325°F for 30-35 minutes until lightly browned. Cool completely and cut into squares.

FAQs

How do I measure 3 tablespoons of butter?

Find the 4 tablespoon mark on the wrapper and cut off 1 tablespoon.

My recipe calls for 1/3 cup butter – how many sticks is that?

1/3 cup is 5 tablespoons plus 1 teaspoon, or 2/3 of a stick.

What’s a quick way to get 6 tablespoons of butter?

Cut a stick in half right on the wrapper’s middle line – each half is 4 tablespoons. Then just cut 2 more tablespoons from one half.

Conclusion

As a chef, I always recommend using real butter for optimal flavor, especially in baking. Renowned pastry chef Stella Parks agrees: “Butter’s low moisture content is crucial to creating tender, flaky layers in croissants and puff pastry. Substitutes simply can’t compare.”

I hope these butter basics help make your cooking and baking adventures a little easier and a lot more delicious! For more kitchen tips and tasty recipes, visit www.boatbasincafe.com.


Exactly How To Reheat Ribs – I Test 10 Methods

Reheat ribs in one of the ten ways to get flavorful and juicy results so that you will never again have to throw away leftovers or settle for dry ribs.

How To Reheat Ribs: Top 10 Ways You Didn't Know!
How To Reheat Ribs

So, you had a grand barbecue night, went a bit overboard with one of the best gas grills, grilled too much meat, and now you’re left with a pile of leftover ribs. 

The first thing to do is to safely store them in the fridge or freezer within two hours. 

The next thing? Well, reheat the ribs, of course! But do you know how to reheat ribs in one of the ten ways?

Pick the method based on the amount of time you have and the results you are looking for.

You may also like: Reheating Smoked Chicken: The Best Ways To Do It Without Drying Out The Meat

reheat ribs in microwave

Different Reheating Methods

10 Ways To Reheat Ribs

Reaheat Ribs in Microwave

Although reheating ribs in the microwave is a bit of a challenge as it tends to dry out the meat, by following the steps below, you may still retain the juiciness. 

  1. Slice the ribs to allow the pieces to reheat uniformly and faster. 
  2. Place them on a microwave-safe dish and splash some water, stock or apple juice. Add some extra sauce if you want. 
  3. Cover with a damp towel.  
  4. Microwave on Medium for 60 seconds
  5. Continue reheating in 30-second increments until the ribs show an internal temperature of 145°F (63°C). Be sure to use a meat thermometer for accuracy. 

Using a Medium power ensures you don’t have overheated and dry ribs.

The microwave oven isn’t great at even reheating, so you should take 30-second breaks in between. 

Reheat Ribs in Air Fryer

To reheat ribs in the air fryer, this is what you need to do. 

  1. Preheat the air fryer to 350°F (180°C) to ensure the meat is thoroughly warmed with no chance of any bacteria left in it. Here’s a lesson on how to preheat an air fryer. 
  2. Slice the rib racks into separate pieces for uniform and faster warming. It’s also more convenient for you to place them in the air fryer basket without overcrowding. 
  3. Use a sauce or some oil to cover the ribs to keep the meat moist and result in a crisp exterior. 
  4. For 5 to 8 minutes, heat the ribs and check the temperature halfway through.
  5. After the temperature is high enough at 145°F (60°C), remove the ribs from the air fryer and serve.  

💡Pro Tip: When laying out the sliced ribs in the air fryer basket, keep enough space in between the pieces to allow the air to circulate through. 

Some say that the circulating air inside the fryer helps to retain moisture.

Others believe that it dries out the meat and that only ribs with a higher fat content should be reheated in it. 

But everyone agrees that the air fryer gives a nice crisp texture to the ribs. 

Reheat Ribs in Oven

When you’re faced with the dilemma of how to reheat ribs, the oven is the best way to reheat ribs. Slow and low heating of beef ribs in the oven retains all the moisture and flavor.

  1. Allow the ribs to come to room temperature by removing them from the refrigerator 30 minutes before reheating.
  2. Set the oven’s temperature to 250°F (120°C). 

Use bbq sauce to cover the ribs.

This will pack in extra moisture when you reheat ribs.

  1. Carefully double-wrap the ribs in aluminum foil to prevent the sauce’s liquids and sugar from scorching and leaking out.
  2. Put the ribs in a baking tray and reheat for 20-30 minutes until their temperature is 145°F (63°C). 
  3. Unwrap the ribs from the foil and cook uncovered for 10 minutes

By doing this, the sauce will caramelize and develop an even richer, sweeter flavor.

  1. Remove the ribs and before serving, give them a 10-minute rest.

Pro Tip: If your ribs were covered in a spice rub instead of sauce, wait until they are reheated and apply more dry rub before serving.

Bonus Tip: Reheat baby back ribs at a lower temperature.

Because they are cut thinner, baby back ribs may dry out much more quickly as they are more heat-sensitive. For 45 minutes, reheat them at 225°F (107°C).

Reheat Ribs on Grill

Exactly How To Reheat Ribs - I Test 10 Methods 34
Reheat Ribs on Grill

Grilling leftover ribs retain the fresh, right-of-the-grill vibes and you also get the same charred taste when you first grilled them.

While setting up the grill will take a little more time and it’s also dependent on fair weather, it’s worth it to reheat ribs on the grill. 

  1. Allow the ribs to come to room temperature by removing them from the refrigerator 30 minutes before reheating.
  2. Set the grill to high heat while you wait for the ribs to come to room temperature.
  3. Use leftover sauce or additional liquid, such as water, stock, or apple juice, to baste your ribs.
  4. Wrap the ribs in foil, loosely. 

There should be a little breathing room because the ribs will be directly exposed to the grill’s heat.

  1. After the grill has been preheated, turn it to medium heat
  2. Reheat ribs for 8 to 10 minutes and remember to flip them halfway. 
  3. Once the meat thermometer shows the ribs are at an internal temperature of 145°F (63°C), take them out. 
  4. Allow a standing time of 10 minutes before serving. 

Note: If possible, set up a two-zone grill (i.e. only heat one side directly) for reheating pork ribs on the unheated portion.

This is milder than utilizing direct heat and imitates a convection oven.

Reheat Ribs in Slow Cooker

Exactly How To Reheat Ribs - I Test 10 Methods 35
slow cooker

Although you won’t get a crisp texture if you reheat ribs in a slow cooker, you will certainly get tender and juicy meat. 

A slow cooker will obviously take longer than other methods of reheating ribs. 

  1. Get the ribs out of the fridge 30 minutes before you plan to reheat them so that they come to room temperature. 
  2. Turn the slow cooker on medium-high heat
  3. Add about ¼ inch of water, apple juice, or chicken stock in it.
  4. Place the ribs in the slow cooker after basting them with any leftover sauce or any extra BBQ sauce.
  5. Set the thermostat to a warm or low setting and heat for 30 to 60 minutes with the lid on.
  6. Check after the first 30 minutes to see if the internal temperature is getting close to 145°F (63°C).
  7. Once you’re satisfied with the temperature, turn off the slow cooker and take out the ribs.
  8. Before serving, let the ribs sit in the juices for 10 minutes.

Reheat Ribs in Steamer

Exactly How To Reheat Ribs - I Test 10 Methods 36
steamer ribs

Another reheating method is the steamer. 

If you don’t have one, you can make a temporary one using a pot and a colander. 

The benefit of using a steamer is that it will keep the ribs moist and it’s also healthy for reheating ribs without oil. 

  1. You can start by boiling a broth in the pot. 

For flavor, use apple juice or orange juice, or even ale. 

Use ¼ cup of whatever liquid you choose. 

  1. Slice the rib racks for faster warming. 
  2. Once the liquid starts to boil, place the ribs on the steamer basket and put it above the broth. 
  3. Cover the pot and steam the cooked ribs for 30 minutes

Don’t remove the lid while steaming as the steam will escape, turning the temperature low in the pot and taking more time to reheat the ribs. 

  1. If you want the ribs to be very juicy, then steam for 45 minutes. 
  2. When 30 minutes are over, check the internal temperature of the ribs. It should be 145°F (63°C).

Otherwise, steam for longer to bring the temperature up. 

  1. Plate the ribs and cover them with the liquid left in the pot for a full blast of flavor and moisture. 

Reheat Ribs in Skillet

Exactly How To Reheat Ribs - I Test 10 Methods 37
Reheat Ribs in Skillet

The cast iron skillet could be your go-to tool for reheating ribs if you have less than 30 minutes on your hands. 

The meat will be juicy enough but not as much as you would expect when reheating ribs in the oven, grill, or steamer. 

  1. Warm a deep cast iron skillet over medium heat and add some water or stock or leftover juices from the meat or apple juice. 
  2. Take your favorite BBQ sauce or any sauce of your choice and cover the ribs with it.
  3. Into the skillet, put the ribs without crowding them together, and cover with a lid.
  4. Without removing the lid, heat the skillet for 10 minutes, swirling it around to make sure the ribs get warmed up evenly and don’t get scorched. 
  5. Once the meat temperature is 145°F (63°C), remove it from the skillet and allow 10 minutes of standing time before serving. 

You can also chop up the meat from the ribs and reheat the shredded meat in the skillet. 

In this case, you will need to stir the meat in the skillet over medium heat for 5 to 10 minutes until the meat gets heated through. 

Serve immediately. 

💡Pro Tip: Instead of water, use stock or juice to retain or add flavor as water tends to dilute the flavor. 

Reheat Ribs in Water Bath

A hot water bath or sous vide is a French way of cooking food at a low temperature by placing the food in a plastic bag in a water bath and letting it cook or reheat through indirect heat. 

Store your leftover ribs in a vacuum-sealed plastic bag in the fridge or freezer so that you can put them directly into the water bath without waiting for the ribs to come to room temps. 

Another beauty of using this method to reheat ribs is that you don’t need to add extra sauce or any liquid as it’s already in the bag.

If you don’t have sous vide machine, no need to worry as you can use a large pot instead. 

  1. In a vacuum-sealed bag, put the ribs and seal the bag using a vacuum sealer.
  2. Bring the temperature of the large pot full of water or the sous vide machine to 155°F (68°C).
  3. Put the vacuum-sealed bag with the leftover ribs in the water bath and reheat for 45 minutes to an hour, keeping the water temperature constant.
  4. Count 45 minutes of reheating time for every inch of thickness in the ribs. 

You need to factor in an additional 30 minutes of reheating time if put a frozen pack of leftover ribs in the water bath.

  1. Remove from the water bath and serve immediately. 
  2. This step is optional. Broil the reheated ribs in the oven for a few minutes to caramelize the sauce. 

Reheat Ribs in Broiler

The broiler is a fast way to reheat leftover ribs. 

It also caramelizes the sauce nicely, leaving it sticky instead of runny. 

The downside of using a broiler is that it requires more attention and dries out the meat a bit.

  1. Place the top rack of the oven 4 to 5 inches below the grilling part as otherwise the sauce will burn and the ribs won’t be heated thoroughly. 
  2. Bring leftover ribs to room temperature. 
  3. Now put them bone side up on a baking pan lined with a sheet.
  4. Broil for about 3 to 4 minutes or until you notice the sauce starts to bubble. 
  5. Flip the ribs to the other side and heat for 3 minutes. 
  6. Take the reheated ribs out of the oven and cover them loosely with foil. 
  7. Allow cooling slightly under the foil for 4 minutes before serving. 

Reheat Ribs in Toaster Oven?

The toaster oven is not a gadget that would come readily to your mind when thinking about how to reheat beef ribs. 

However, let me say that this is a neat little way of reheating cooked ribs if you have only a few pieces of pork ribs. 

You’ll have warm and juicy ribs within just 20 minutes. 

  1. Take the cooked ribs out of the fridge 30 minutes before you reheat them so that they can cool down to room temperature.
  2. Preheat the toaster oven to 250°F (121°C).
  3. Grab your favorite bbq sauce and slather it on the ribs to cover them completely if you don’t want to have dry ribs. 
  4. Cover the ribs tightly with double foil to keep all the juices in and prevent the sauce from getting burned. 
  5. Put the pork or beef ribs on a baking tray and heat in the toaster oven for 15 to 20 minutes or until the temperature in the ribs hit the mark of 145°F (63°C).
  6. Let the reheated ribs rest for 10 minutes before serving so that all the juices and flavors can combine and you can enjoy them to the fullest.

💡Pro Tip: Check the temperature after the first 10 minutes as reheating time will depend on the thickness of the ribs. 

Pros and Cons of Reheating Ribs in Various Ways

Reheating ApplianceProsCons
1MicrowaveFaster heatingDries up meat
Fresh grill flavor is lost
Sauce gets too watery
Doesn’t heat uniformly
2Air FryerWorks fast
Gives a nice crisp
Good for ribs with more fat
Meat dries up
3OvenRetains moisture and smokey flavorTakes time
4GrillFresh,
off-the-grill flavor
Charred taste
Weather-dependent
Setting up takes time
5Slow CookerTender and juicy meatCrispiness is missing
Takes more time
6SteamerKeeps meat moist
Healthier as uses no oil
Sauce melts
7SkilletProvides better moisture
than microwave
Less juicy
Takes longer than the microwave method
8Water BathPrevents overcooking
No need to add sauce or juices to retain moisture
Can be placed directly from the fridge or freezer
Takes time
9BroilerFast method
Leaves the sauce sticky, not runny
Dries out the meat a little
10Toaster ovenFast methodSuitable for fewer pieces

Tips for Reheating Your Ribs

Here’s how you can make sure your ribs taste like you just got them off the grill:

  • Slow and steady temperature. Cooking the ribs on low heat for 30-40 minutes will make your ribs soft and tender, and juicy.
  • Add a broiling pan. If you are worried about the ribs losing too much moisture on the oven or grill, add a pan of hot water over the burner. It will steam some moisture into the meat.
  • You can even add coke, root beer, apple juice, or stock for exciting flavors.
  • Let them rest. Give your ribs some time to settle in their juices before cutting into them.

How Long Do Leftover Ribs Last In The Fridge?

Exactly How To Reheat Ribs - I Test 10 Methods 38

If stored properly in an airtight container and at a temperature of below 40°F (4°C), leftover ribs will last for three to four days in the fridge

It’s best to add all the juices or barbecue sauce in which you cooked the ribs inside the container or a vacuum-sealed bag. 

This ensures the meat is juicy and flavorful.

How To Freeze Ribs?

The key to freezing spare ribs in the freezer is to get a tight seal in the container. 

Vacuum-sealed bags work best but you can also place the ribs in a Ziploc or freezer bag, or even foil as long as there is no opening to let any air in. 

The benefit of freezing ribs in vacuum-sealed bags is that you can put them directly in the sous vide machine for reheating ribs. 

If stored properly, the ribs will last for 6 to 12 months in the freezer

How To Thaw Frozen Ribs?

How to reheat ribs after freezing them?

Leave the frozen ribs in the fridge overnight to thaw. 

Keep them on the bottom shelf of the fridge and in a container that has high sides so that any dripping from the defrosting ribs doesn’t contaminate the other food in the fridge.

FAQs

How To Reheat Ribs In The Microwave?

Slice the ribs and place them on a microwave-safe dish. Splash some water or stock or apple juice or sauce. Cover with a damp towel and microwave on Medium for 60 seconds. Continue reheating at 30-second intervals until the temperature is 145°F.

How Long Do Leftover Ribs Last In The Fridge?

If the temperature is below 40°F, you may keep your leftover ribs in the refrigerator for 3 to 4 days. Keep your ribs in an airtight container or vacuum bag to prevent moisture loss for optimum preservation.

How Do You Freeze Ribs?

Your ribs can be kept in the freezer for six to twelve months if you properly seal them. The best bags are vacuum bags because they can be put directly into the sous vide machine. However, a zip-lock bag, plastic wrap, or foil with a tight seal will also work well.

Can You Eat Cold Ribs?

Yes, you can eat cold ribs if you had smoked them to an internal temperature of 145°F (63°C) and refrigerated them in an airtight container or sealed plastic bag.

How Much Turkey Do You Need Per Person On Thanksgiving?

Learn how much turkey do you need per person on Thanksgiving to fill the hearts and bellies of your guests and have leftovers too to enjoy in various ways. 

How Much Turkey Do You Need Per Person On Thanksgiving?
421 How Much Turkey Do You Need Per Person On Thanksgiving

Turkey is the centerpiece of Thanksgiving, no Thanksgiving dinner is complete without it.

It is a tradition for many families to gather around the table and enjoy a classic Thanksgiving feast. 

While everyone has their own traditions, one thing most people seem to agree on is that you need enough turkey to go around. 

In addition to the turkey, you will need a stuffing mix, cranberry sauce, green beans, pumpkin pie, and whipped cream for topping.

This article will explore how much turkey per person you should consider and the size and number of birds you will need. 

How Much Turkey Per Person Do I Need?

How Much Turkey Per Person Do I Need?
How Much Turkey Per Person Do I Need

Well, it all depends on how many people you invite or expect to grace your home on Turkey Day.

As a rule, you should consider one pound of uncooked turkey per person if you’re eyeing a whole turkey. 

A large bird will give you more meat so you could consider ¾ pound per person. 

On the other hand, a smaller turkey has more bones and less meat so you could consider about 2 pounds per person. 

How much turkey per person will also depend on if some of the guests are big eaters.

For them, it’s better to go with one and a half pounds or 24 ounces of bone-in turkey per person.

Remember that one pound or a pound and half of the flesh include the bones. Plus, all the parts of the portion are not edible like cartilage.

If you’re buying only boneless breasts, then you should count half a pound or eight ounces per person. 

It won’t hurt to have generous amounts of Thanksgiving leftovers to enjoy later in a sandwich or pot pies.

Is It Better To Buy A 20-Pound Turkey?

How Much Turkey Do You Need Per Person On Thanksgiving? 39
Is It Better To Buy A 20 Pound Turkey

Before reaching for that plump 20 or 24-pound turkey, factor in how long a turkey takes to defrost, how much space in your refrigerator it will take up while it thaws, and how much time roasting a turkey will take up in your oven.

If you’re an expert, then a large bird weighing 20 to 22 pounds can be your thing if you’re expecting 20 guests.

But remember that cooking large turkeys takes a lot of time and you need top culinary skills to cook evenly and get moist meat at the same time. 

If you land up with uncooked turkey, be prepared to do some extra work in the kitchen!

I personally recommend getting two smaller turkeys instead to save you from all the hassle. 

Or, you can opt for one whole turkey and one breast. 

Even better if you buy breasts and thighs and cook them separately if you are sure your guests enjoy white meat more. 

And if you want to sit like a queen or king instead of struggling in the kitchen, just get pre-cooked smoked turkey breast!

But be sure that you’re storing the leftover turkey in the fridge properly so that you can enjoy them later. 

Which Turkey Size Is The Best For Thanksgiving?

Number of GuestsTurkey Weight in Pounds
45 lbs
68 lbs
810 lbs
1013 lbs
1215 lbs
1520 lbs
2025 lbs
2532 lbs

The size of the turkey is crucial since it will affect how much food each guest is served and how much will be there as Thanksgiving leftovers.

Make planning your holiday dinners easier by following this simple formula:

Number of guests * 1.25 = Turkey weight

However, this applies when you want to serve 1.25 pounds of turkey per person. 

Just change this number to adjust for more or less serving per person. 

For example, if you have 10 people and you’d like each to serve 1.5 pounds of turkey per person, you will need a turkey size of 10 * 1.5 = 15 pounds.

Conversely, a serving size of 1 pound per person for 10 guests means you need to buy a turkey that’s 10 pounds. 

To save you from calculating, we have the following table for you considering 1.25 pounds of meat per serving. 

💡Pro Tip: A 14 to 15-pound turkey is the best size if you want the dark meat to be cooked and the breast meat to be juicy and tender. 

After all the planning and speculation, if you feel at the last moment that the bird is too big for you to handle efficiently, you can always chop off the legs and cook them separately. 

Try to slow-roast or grill them a day before Thanksgiving so that they turn out to be really tender with a smokey flavor. 

And while the rest of the turkey is in the oven, you can reheat smoked turkey legs and get a head start. 

How Much Stuffing Should I Make Per Person?

How Much Turkey Do You Need Per Person On Thanksgiving? 40
How Much Stuffing Should I Make Per Person

How much food you need per person on Thanksgiving not only includes the big bird but also stuffing, side dishes, cranberry sauce, pies, and others. 

Dressing, stuffing, and filling are terms used for the same broad category of side dishes served on Thanksgiving.

This could consist of a herb-and-bread or green beans casserole or mashed potatoes, or sausage stuffing. 

While stuffing means literally stuffing the cavity of the turkey while it’s being roasted, dressing is made separately from the turkey so that the bird is cooked evenly throughout the breasts and the dark meat on the underside. 

Nowadays, people prefer to bake the turkey without the stuffing inside it so that there’s no chance of contamination and food poisoning from the turkey juices getting mixed with a vegetable stuffing.  

¾ cups of stuffing per guest should be suitable. 

Here’s a small table to help you plan stuffing per person better.

Number of GuestsStuffing In Cups
43
64.5
86
107.5
1612
2015
2418

If you’re serving cornbread dressing like a typical southern family, you should keep half a cup of dressing for every guest

This translates to:

Cornbread Dressing Serving in Cups As Per The Number Of Guests

Number of GuestsTotal Stuffing in Cups
42
63
84
105
168
2010
2416

💡Remember that part of planning the stuffing is figuring out how much oven space you have. 

You need to time everything carefully so that the turkey is evenly cooked, the stuffing is baked to perfection, and if you’re baking the pumpkin pie, it’s done on time. 

Potatoes

Roasted fingerling1 -2
Medium Yukon gold
Large russet½ to 1
Sweet potato1

If you’re more of a mashed potato kind of person, here’s how you can figure out how many sweet potatoes or other types of potatoes you need per person.

If you’re using roasted fingerling potatoes, you will need one or two per person.

For medium-sized Yukon gold potatoes, consider 1½ potatoes for every guest. 

For large russet potatoes, half to one potato per person should be enough. 

Also, if you are going to serve sweet potatoes, one per person should yield enough. 

As a general rule, you can use ⅓ pound of potatoes for every person

So, if you’re making a mash with sweet potatoes for 6 guests, you will need 2 pounds of potatoes.

Cranberry Sauce

How Much Turkey Do You Need Per Person On Thanksgiving? 41
Cranberry Sauce

Cranberry sauce is a must for Thanksgiving dinner and day-after leftovers, whether you serve it from a can or make it yourself. 

Half a cup or 4 fluid ounces of canned cranberry sauce should be enough for each guest. 

Four people can be served with a 16-ounce of canned cranberry sauce.

It’s always better to have more cranberry sauce at hand than less. 

We wouldn’t want any guests leaving with their bellies and hearts half-full!

Gravy

How Much Turkey Do You Need Per Person On Thanksgiving? 42
Gravy

Gravy is not too far from being a Thanksgiving favorite next to the turkey. 

After all, what’s mashed potato, turkey, or stuffing without a drizzle of gravy made from the pan drippings for a rich and flavorful forkful?

For every guest, make sure you have to half a cup of gravy allotted. 

So, if you have 10 guests, you should have 5 cups of gravy. 

You can always double or halve the amount as per the number of guests. 

Pie

How Much Turkey Do You Need Per Person On Thanksgiving? 43
pie

To end things off on a sweet note and to savor the full flavor of Fall, there’s nothing better than a pie.

A single 9-inch pie is enough to serve six guests. 

You can slice the pie into six slices or cut each in half to serve more guests. 

Otherwise, you can have a variety of pies like pecan pie, pie made from sweet potatoes, and the all-time favorite apple pie to give your guests more dessert options.  

Two to three pies for 12 guests would be enough to satisfy the sweet tooth and maybe have some leftovers to pair with a nice cup of coffee the next morning. 

What’s The Ideal Number Of Side Dishes For Thanksgiving?

How Much Turkey Do You Need Per Person On Thanksgiving? 44
Whats The Ideal Number Of Side Dishes For Thanksgiving

To figure out how many side dishes you should have on the Thanksgiving table, consider three things:

  • Family traditions
  • Number of guests
  • Oven space

Thanksgiving is a tradition all over the US and every family has its own way of celebrating it. 

If you’ve always associated walnut stuffing with your grandma, then the rest of the family would probably appreciate it if you made it. 

But always keep oven space on your radar when planning to make side dishes. 

Most importantly, your number of guests will determine the number of side dishes you should make. 

Four sides should be fine if you consider two vegetable side dishes and two starch-based ones for 8 to 10 guests. 

Basic Thanksgiving Dinner Menu For 8 Guests

Here’s a full breakdown of how much food you should serve if you have eight guests. 

It covers the whole range from turkey to sides to pies. 

  • Whole turkey: 8 – 10 lbs.
  • Potatoes: 2½ – 3 pounds
  • Dry mix stuffing: 8 oz
  • Butternut squash: 3½ pounds
  • Green beans: 2 pounds
  • Brussels sprouts: 2 containers of 10 oz each
  • Frozen creamed spinach: 3 containers of 10 oz each
  • Cranberry sauce: 2 cans of 16 oz each
  • Dressing: 4 cups
  • Pie: 1 to 2 pies, each 9 to 9.5 inches

Simply adjust the above by halving or doubling or multiplying by three if you have 4, 16, or 24 guests.

FAQs

How Much Turkey Do I Need For 7 People?

Apply the formula 1.25 * number of guests to calculate the turkey weight. 
For 7 guests, you need 8.75 pounds of turkey if you are serving 1.25 pounds to each guest. 

How Much Turkey Do I Need For 10 Adults?

For 10 adults, you need 1.25 * 10 = 12.5 pounds of uncooked turkey. 
If you want to serve 1.5 pounds per person, then you will need 15 lbs. of turke

How Many People Will A 16-Pound Turkey Feed?

A 16-pound turkey will feed 12 people with leftovers if you serve 1.25 pounds turkey per person. 
If you serve 1.5 pounds per guest, then the 16-pound size turkey will feed 10 people comfortably. 

How Much Turkey Do I Need For 6 to 8 People?

You need 8 to 10 lbs. of whole turkey for 6 to 8 people.

Reheating Smoked Chicken: The Best Ways To Do It Without Drying Out The Meat

Learn tricks of reheating smoked chicken in the microwave, oven, air fryer, smoker, or stove, and when reheating chicken what temperature to look out for. 

Reheating Smoked Chicken: The Best Ways To Do It Without Drying Out The Meat
Reheating Smoked Chicken The Best Ways To Do It Without Drying Out The Meat

There are a number of different ways to reheat cooked chicken, and each has its own benefits and drawbacks.

You should choose the best way to reheat smoked chicken based on the size of the chicken pieces. 

Thankfully, the reheating process is a breeze with various kitchen and cooking appliances. 

Let’s find out how to reheat leftover chicken without drying them out. 

What Is Smoked Chicken?

Reheating Smoked Chicken: The Best Ways To Do It Without Drying Out The Meat 45
smoked chicken

Chicken that has been cooked on a smoker on low heat with a burning, fragrant wood fire. 

As a result, the chicken has a sweet, slightly smokey flavor and a soft texture, thanks to the smoke from the burning wood. 

Can You Reheat Smoked Chicken?

5 Ways To Reheat Smoked Chicken

Yes, you can reheat chicken in several ways – smoker, stovetop, oven, microwave, or air fryer. 

Before you reheat chicken, it’s essential to store it properly so that all the smokey flavor is packed in and the texture remains intact. 

Use a vacuum sealer to package the smoked chicken for storage. 

This will prevent oxygen from getting to the chicken and allowing bacteria to grow and overdrying the meat and ruining its texture due to freezer burn.

How long to reheat smoked chicken depends on the chicken pieces, whether it’s a bone-in chicken or skinless and boneless pieces of smoked chicken. Best Methods to Reheat Chicken below:

OvenLarge, bone-in pieces of chicken but it takes longer.
StoveSkinless, boneless chicken
Air FryerTo get back crispiness in fried chicken or chicken tenders
MicrowaveQuick method but can leave the chicken soggy
SmokerSlow method but retains original flavor and texture

When reheating chicken what internal temperature should you check it at? 

The magic number is 165°F or 75°C.

How To Reheat Smoked Chicken In The Oven

Reheating Smoked Chicken: The Best Ways To Do It Without Drying Out The Meat 46
How To Reheat Smoked Chicken In The Oven

The oven is your best bet when it comes to reheating whole smoked or rotisserie chicken. 

Because the size is large and you have all the bones, you can pop it inside the oven and let it reheat. 

Follow the steps below to reheat chicken in the oven.

  1. Take the chicken out of the fridge and take off any plastic wrap. Preheat the oven to 350°F (177°C). Let the chicken sit at room temperature on the counter while you wait for the oven to heat up.
  2. To reheat chicken thighs, place the chicken on a baking dish and add a few tablespoons of water or chicken stock, just enough to cover the bottom of the pan with a very thin layer of liquid.
  3. Then use two layers of aluminum foil to tightly cover the pan. The steam formed inside will keep the chicken moist.
  4. Put the pan with the meat in the oven and keep it there until it gets warmed up enough. It’s already cooked so you won’t need to wait long. Use a meat thermometer to check if the internal temperature of the chicken is 165°F (74°FC).
  5. Let the smoked chicken wrapped in foil sit for a couple of minutes before serving. 

To reheat poultry in the oven is alright as long as you’re not looking for an outer crispy skin. 

If you are, simply place the chicken under the broiler for a few minutes to get the skin crispy.

How To Reheat Cooked Chicken On The Smoker

Reheating Smoked Chicken: The Best Ways To Do It Without Drying Out The Meat 47
How To Reheat Cooked Chicken On The Smoker

If the weather and time permits, you can fire up your smoker to reheat cooked chicken to get the maximum original flavor

Whether you want to reheat chicken quarters or whole smoked chicken, the smoker can handle either with ease if you follow the steps below. 

  1. Remove any plastic wrap and spray the roasted chicken pieces with chicken or beef broth or apple juice to keep the meat moist. 
  2. If you had refrigerated the leftover smoked chicken instead of freezing it, chances are you still have some of the juices left from the first smoke. If so, pour it over the chicken pieces. This will ensure that the reheated smoked chicken thighs or quarters are adequately moistened. 

💡Pro Tip: As you don’t want to steam the smoked chicken, just use ¼ part of the liquid for each pound of meat.

  1. Cover the whole thing with aluminum foil without any opening through which air can escape. 
  2. Set the smoker temperature to 225°F (107°C). A higher temperature will cook the meat instead of warming the already-cooked meat. 
  3. Put the aluminum foil-wrapped meat pieces in the smoker and heat to your desired temperature level
  4. A good rule of thumb is to reheat smoked chicken for 10 to 15 minutes per pound of meat. 
  5. Allow a standing time of 2 minutes before serving so that the reheated chicken absorbs all the liquid and flavor. 

Steps To Warm Smoked Chicken Breast On The Stovetop

Reheating Smoked Chicken: The Best Ways To Do It Without Drying Out The Meat 48
Steps To Warm Smoked Chicken Breast On The Stovetop

Skinless and boneless chicken pieces are easier to warm on the stovetop. 

When you’re planning to reheat chicken wings or thighs, it’s better to remove all bones. 

For any small leftover chicken pieces, reheating them on the stovetop can save you time. 

Here’s how:

  1. Remove bones and cartilage from the chicken pieces. If you’re warming up skinless chicken breast, cut it into inch-thick cubes. 
  2. Get a cast iron skillet or a nonstick pan
  3. Turn the flame to medium-low heat. 
  4. Add some butter or oil to the pan. The alternative is to add enough water to cover the bottom of the pan. 
  5. Once the oil or butter is warm, add the smoked chicken thighs. If you’re using water, wait until the water simmers before you add the meat. 
  6. Don’t be tempted to turn on the heat to high to rewarm the chicken pieces faster. It will only burn the outside of the meat while leaving the inside cold. 
  7. After about a few minutes, flip to warm the other side. 

If you were wondering how to reheat smoked chicken wings, this is how to do it when you’re running out of time. 

How To Reheat Smoked Chicken Quarters In An Air Fryer

Reheating Smoked Chicken: The Best Ways To Do It Without Drying Out The Meat 49
How To Reheat Smoked Chicken Quarters In An Air Fryer

Ideal for reheating fried chicken or chicken tenders, the air fryer is versatile enough to accommodate smoked chicken thighs, wings, and other small pieces for perfect reheating.

It retains the great, crispy texture of the chicken without letting it become dry. Here’s how to do it.

  1. Preheat the air fryer for 5 minutes at 375°F (190°C) after you have read the instructions manual for your particular model. Make sure you are aware of how to preheat air fryer
  2. Arrange the smoked chicken quarters in a single layer without stacking them. 
  3. This step is optional. You can brush a layer of oil or butter to prevent the smoked chicken from getting dry while reheating. 
  4. Heat the chicken quarters for 2 minutes and then shake the basket or tray. 
  5. Continue heating for another 2 minutes
  6. Check if the internal temperature of the chicken quarters is 165°F (74°C).
  7. Remove from the tray/basket and serve. 

How To Reheat Smoked Chicken In The Microwave

Reheating Smoked Chicken: The Best Ways To Do It Without Drying Out The Meat 50
How To Reheat Smoked Chicken In The Microwave

Although the microwave is the last resort to reheat chicken, it is still a good idea to use it when you don’t have the time to reheat smoked chicken thighs or other parts on the stovetop or in the oven. 

For the best results, follow these steps:

  1. On a microwave-safe dish, arrange the chicken so that the smaller pieces are in the middle and the larger ones are close to the plate’s edge. 

This will prevent the smaller pieces of smoked chicken from drying out.

  1. Brush the chicken pieces with a mixture of water and olive oil

Alternatively, you can use any sauce, chicken broth, or salsa to moisturize the chicken to preserve its crispiness and also give it an added flavor. 

  1. Use a microwave-safe plastic wrap to cover the chicken. We recommend covering it with a food plate cover
  2. Remove the plate from the microwave after one minute on full power, then check to see if the chicken is reheated. 
  3. If not warm enough, flip and warm at 30-second intervals to reheat smoked chicken thighs thoroughly. 

Ways To Reheat BBQ Chicken

Reheating Smoked Chicken: The Best Ways To Do It Without Drying Out The Meat 51
Ways To Reheat BBQ Chicken

The best way to reheat BBQ chicken is to pop it on the BBQ. 

Put the chicken on a BBQ-safe dish and brush on BBQ sauce or any other sauce you like on the chicken for the meat moist. 

With the BBQ lid on, heat the BBQ chicken on a slow flame until the internal temperature of the chicken reaches 165°F (74°C).

If reheating on the BBQ is not an option, you can always pop the BBQ chicken in the oven within a temperature range of 300-325°F (148 -163°C) for warming it up.  

Reheating Shredded Chicken The Right Way

Reheating Smoked Chicken: The Best Ways To Do It Without Drying Out The Meat 52
Shredded Chicken

Shredded or pulled chicken is a great solution for quick meals. To store shredded chicken, you can choose either the fridge or the freezer. For freezing shredded chicken, you need to cool the cooked chicken and then freeze it in an airtight container within two hours.

You can reheat shredded chicken on the stovetop, in the microwave, or in the oven.

On the stovetop, simply put a skillet on medium heat and add butter or oil. Add the shredded chicken and stir until the temp clocks at 165°F (74°C). 

If you want to use the microwave to reheat shredded chicken, put it in a microwave-safe bowl and cover it with a damp paper towel to prevent drying. Microwave on High at one-minute intervals for five minutes. Stir after every minute. Remove the towel and serve. 

Reheating shredded chicken in the oven will require you to defrost the chicken overnight in the fridge if it’s frozen. Then put the chicken in an oven-proof dish and cover it with aluminum foil. Keep in the oven at 425°F (218°C) for 20 minutes or until the temperature of the chicken reaches 165°F (74°C). Stir in between to ensure uniform heating. 

FAQs

How To Reheat Pulled Chicken?

You can reheat pulled chicken in the same way as shredded chicken – in the oven or microwave or on a stovetop. 

Can You Reheat BBQ Chicken?

Yes, you can. Reheating BBQ chicken requires you to fire up your BBQ and reheat the chicken with the lid on and on a slow flame until the chicken hits the internal temp of 165°F (74°C). 

Can You Reheat BBQ Chicken In Air Fryer?

Yes, you can reheat BBQ chicken in an air fryer by preheating the air fryer for 5 minutes at 375°F (190°C), placing the chicken in a single layer, and reheating for 4 minutes. After 2 minutes of heating, you can brush the chicken with some BBQ sauce for moisture. 

Uncooked Turkey 101: What To Do If Turkey Is Not Fully Cooked

Learn how to handle a turkey uncooked, how to recook an undercooked turkey, tips to cook it properly, and how to know when it’s done to avoid embarrassment.  

Turkey Uncooked 101: What To Do If Turkey Is Not Fully Cooked
Turkey Uncooked 101 pin

Cooking turkey is essential during the Thanksgiving family gatherings. 

It’s been the poultry of choice since 1841 and is a popular dish as a single turkey can feed a large family, its meat is tender and juicy, and it’s also more affordable than other types of meat. 

You should cook turkey well to remain within food safety guidelines. 

But what happens if you find pink turkey meat after you carve the roast?

Let’s find out more about what it means and what to do if you have undercooked Thanksgiving turkey in front of you and a living room full of guests behind.

What Does Undercooked Turkey Look Like?

Uncooked Turkey 101: What To Do If Turkey Is Not Fully Cooked 53
What Does Undercooked Turkey Look Like

When you pierce the thickest part of the turkey meat – the thigh or breast – the juices should run clear. If the juices look pinkish or reddish, then the turkey has not been cooked through. 

You may come across a situation where the turkey is cooked but the juices are pink.

According to USDA, if you find that the internal temperature has reached 165°F (74°C) throughout the whole turkey, it’s good to eat even if the juices are pinkish.

Undercooked turkey meat will be pale in color and soft and squishy to the touch. 

Cooked turkey meat is firm when you touch it, not hard or tough like an overcooked turkey.

What To Do If Turkey Is Not Fully Cooked?

How To Recook Undercooked Turkey

Can you recook undercooked turkey? Thankfully, yes!

Follow the steps below:

  1. Turn the oven to 375°F (190°C).
  2. Chop off the breasts and legs of the turkey. 
  3. Put these undercooked parts on a baking sheet and in a roasting pan
  4. Pour chicken broth on top and cover with heavy foil to keep the meat from drying.
  5. Put the turkey pieces in the oven.
  6. After every 15 minutes, check the internal temperature until it reaches 165°F (74°C). 
  7. Pierce with a fork in the thickest parts to see if the juices run clear.
  8. Slice and serve. 
  9. For the rest of the undercooked turkey, pour on top the juices from the pan or some butter, cover with foil, and put it back in the oven after turning down the temperature to 325°F (163°C).

Is It Okay If Turkey Is A Little Pink?

What Causes Turkey Meat To Appear Pink

Pink turkey meat doesn’t necessarily mean the meat is raw. 

Here’s why the turkey can be slightly pink:

Nitrates and nitrites are naturally present in turkey meat which gives it a pink tint. 

Myoglobin is a protein found in meat. When treated to high heat, it turns brown but at lower temperatures, it retains a pinkish hue. 

That’s why grilled or smoked turkey meat is pink.

Due to the natural smoke and liquid smoke flavor used in professionally smoked turkey, the meat is typically pink.

Gases in the oven react with the myoglobin in the turkey meat and turn it pink.

Young turkeys have less fat and thinner skin. When they are cooked, the heat from the oven penetrates the meat, cooks it at a deeper level, and activates the enzymes that turn the turkey meat pink.

Also, the porous bones of young turkeys allow hemoglobin to bleed into the meat, making the meat near the bones appear pink. 

What To Do When You Find Out The Bottom Of Turkey Not Cooked?

Uncooked Turkey 101: What To Do If Turkey Is Not Fully Cooked 54
What To Do When You Find Out The Bottom Of Turkey Not Cooked

When you start to carve the turkey, you discover that the dark meat on the bottom of the turkey is not cooked even though the turkey breast is at 165°F (74°C).

In this case, remove the fully cooked breast meat and to keep it warm and moist, set it aside and cover it to prevent it from drying.

Make a broth on the stove by using chicken bouillon or pan juices mixed with water. 

Chop the uncooked dark meat and add to the broth when it comes to a boil. 

You can also pour the broth over the uncooked turkey after removing the breasts.

Then stick it in the oven after covering it with heavy foil.

Keep track of the temperature so that you don’t have overcooked turkey. 

Hope that answers your question can you cook a partially cooked turkey?

If Turkey Is Chewy Is It Undercooked?

Yes, when the turkey is chewy, the surface is overcooked and dry but the inside is undercooked. 

This happens as a result of slow cooking at a low temperature for a long time. 

What Happens If You Eat Undercooked Turkey?

Uncooked Turkey 101: What To Do If Turkey Is Not Fully Cooked 55
What Happens If You Eat Undercooked Turkey

Eating undercooked turkey is not only an underwhelming experience but also hazardous to your health

Salmonella from undercooked turkey can cause severe food poisoning with the following symptoms:

  • Diarrhea
  • Abdominal cramps
  • Fever
  • Runny tummy
  • Nausea
  • Vomiting

Tips To Avoid Serving Undercooked Thanksgiving Turkey

Uncooked Turkey 101: What To Do If Turkey Is Not Fully Cooked 56
Thanksgiving Turkey

Here’s the cooking process to make sure your turkey is fully cooked:

  1. Buy the turkey as per the number of guests you will have. It’s one to two pounds per guest
  2. Consider 13 to 15 minutes of cooking time per pound of turkey.
  3. Preheat the oven.
  4. The turkey needs to be cooked at a higher temperature at the beginning at 450°F (232°C). Reduce the temperature to 350°F (177°C) after 15 minutes.
  5. You will need 4 hours to cook a 15-pound whole turkey
  6. The top of the meat should be brown and the baking pan should have a lot of juices. 
  7. You should allow the turkey to rest for 15 to 20 minutes if it’s small or 20 to 30 minutes if the bird is larger before carving.

The resting time raises the internal temperature, keeping the turkey warm.

If you want to save time on cooking, you can buy a smoked turkey. And if there are leftovers, you should know how to reheat a smoked turkey for the best taste and texture. 

How To Tell When Turkey Is Done

Here are some signs to tell when your turkey is ready to serve:

  1. Use a food thermometer to measure the internal temperature of the turkey for 165°F (74°C). The thermometer shouldn’t touch the bone
  2. If possible, check the internal temperature before taking the turkey out of the oven. Otherwise, put the turkey back in the oven after pulling it out.

You can get a probe-style thermometer that can be inserted into the turkey throughout the cooking process. 

  1. If you don’t have an instant-read thermometer at hand, pierce the part where the thigh and breast meet to see if the juices run clear. If it’s still red or pinkish, you should cook the turkey for some more time. 
  2. Take the temperature of the stuffing if you have put a stuffed turkey in the oven. It should be 165°F (74°C).

The Bottom Line

Let’s face it – cooking a whole turkey is a lot of work. 

But with proper planning and timing, you can do a stellar job of cooking a beautiful turkey and score brownie points with your friends and family.

Just follow the tips to avoid serving uncooked turkey and you should be fine. 

Your work won’t end with the Thanksgiving meal though!

It pays to know how long does turkey last in the fridge to make the best of the leftovers. 

FAQs

How Long Is Turkey Good For In The Fridge Uncooked?

Uncooked turkey is good for up to two days in the fridge. 

Can Turkey Be Slightly Undercooked?

There’s no room for even slightly undercooked turkey as salmonella can grow and cause food poisoning. 

How Do You Know If Turkey Is Uncooked?

If the internal temperature in the middle of the thigh or breast meat has not reached 165°F (74°C), the turkey is uncooked. 

Can I Put Turkey  Back In The Oven If Undercooked?

Yes, you should remove the breast and legs and cook them again in the oven separately from the rest of the uncooked turkey. 

Why Did The Bottom Of My Turkey Not Cook?

The bottom of the turkey or dark meat – wings, thighs, and drumsticks – take longer to cook. That’s why you need to measure the temperature in the thighs to see if it is 165°F (74°C).