How to Use Fagor Pressure Cooker: Way Easier Than You Thought!

Want to know a little secret?

I’ve always been rather terrified of pressure cookers. My mom was always wary of them, and we had both heard stories of injuries sustained from exploding pressure cookers. Because of this, I preferred to cook the old-fashioned way, even though it meant a much longer cook time.

But since moving out, I’ve had little time to indulge in cooking. Gone are the days when I could spend an hour boiling dried beans on the stovetop. So, I got myself a Fagor pressure cooker and tried to get over my fears.

As I unpacked my new Fagor appliance, I asked myself: How to use Fagor pressure cooker? I had to go through a lot of trial and error when getting the hang of using a pressure cooker, but you don’t have to!

Instead, this set of a comprehensive set of Fagor pressure cooker directions will have you cooking like you’ve used pressure cookers all your life.

What is a Fagor Pressure Cooker?
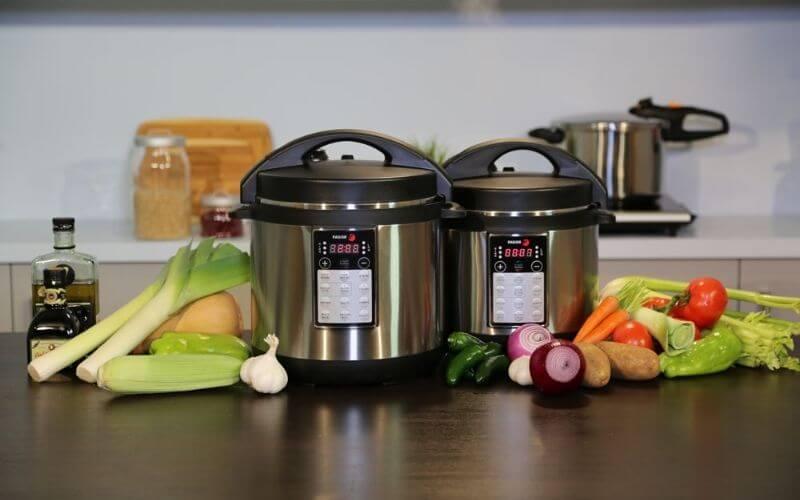
how to use fagor pressure cooker
fagor pressure cooker

Fagor is a manufacturer of home appliances, specializing in kitchen and laundry goods. Their most popular products are their range of pressure cookers. But Fagor gets its specialty because their pressure cookers are different from conventional ones.

How so? For starters, they have a slightly different construction. Fagor pressure cookers are made of 18/10 steel, which allows for meat and vegetables to be directly browned in the cooker. 

As a result, stews and curries will be much more flavorful as the browning produces a richer taste.

However, the main difference between Fagor and older cookers is the safety feature. Fagor pressure cookers are much safer when compared to older models of pressure cookers, so they have fewer chances of exploding in your face.

These cookers have a lock button and a pressure indicator. The pressure will not build up in the cooker unless the lock button is pressed down, preventing any accidents. 

Moreover, the pressure indicator will show you that the pot is under pressure and ensures that the food is cooked through.

Different Types of Fagor Pressure Cookers

As mentioned before, Fagor has different kinds of pressure cookers, with slightly different functions. Each cooker is designed to suit different cooking needs.

For instance, the Fagor stovetop pressure cooker like the Innova Pressure Cooker can be used on gas, electric, and induction cooktops. Meanwhile, a Fagor Electric Pressure Cooker needs to be plugged in for it to cook.

On the other hand, the Fagor Rapid Express pressure cooker is a stovetop cooker that can cook up to 8 quarts of food in no time at all. The Fagor Splendid pressure cooker has a 6-quart capacity and 15 PSI. Fagor pressure cooker settings can also vary from model to model.

The Fagor pressure cooker cooking times are pretty much consistent regardless of device. They are also similar to those of more conventional pressure cookers. 

How to Use a Fagor Pressure Cooker

Now let’s dive straight into the meat of the matter. Fagor pressure cooker instructions usually come in a manual with the cooker itself. But in case you tossed out yours, or you’ve inherited a second-hand pressure cooker, this section is for.

Here’s how you should use your pressure cooker safely for the best results:

  1. Check your pressure cooker gasket for cracks or breaks. Ensure that the gasket is flexible and properly set in the lid. Examine the lid and pressure valves to make sure they are clean and free from food residue.
  1. Put the food into the pressure cooker. Remember to adapt recipes for cooking in the pressure cooker as the cooking time is reduced to 1/3 of the original cooking time. Brown meats and vegetables in the cooker if directed in the recipe.
  1. Don’t go beyond filling the cooker over 2/3 full. Foods that expand like rice and soups, stews, and stocks shouldn’t surpass 1/2 the volume of the cooker.
  1. Add the liquid as this is what produces the steam. Use at least 1/2 cup of liquid for cooking times of 10 minutes or less. 

    Two cups of liquid are required for cooking times over 10 minutes. Water, broth, stock wine, and even juice can be used.
  1. Cover with the lid. The mark on the lid should be parallel with the mark on the top of the pot. Press the lid down gently and rotate the lid handle to align the pot and lid handles.
  1. Press the pressure-lock button to lock the lid and allow the pressure to build and turn on the heat.
  1. Select the pressure level suggested by your recipe. Heat the cooker over high heat if using a stovetop cooker until the pressure indicator button rises, showing that the cooker is at the recommended pressure level.
  1. Reduce the heat and time the recipe. Maintain the heat so that a gentle, steady stream of steam is released.
  1. Remove the pressure cooker from the heat once cooking is finished. Reduce the pressure by turning the steam release valve to slowly release the pressure.
  1. Knowing how to open a Fagor pressure cooker may be the most important part. Remove the lid when the pressure has been lowered and the pressure indicator button shows that the pressure is down.
  1. The lock will then release so that the cooker can be opened. Open the lid facing away from you to prevent getting burned by escaping steam.

How to Lock Fagor Pressure Cooker

Lock Fagor Pressure Cooker

Locking your pressure may be the most important part of cooking, as this prevents your pressure cooking from blowing up in your face.

Set the lid of your cooker. The mark on the lid should be aligned with the mark on the top of the pot. 

Press the lid down and rotate the lid handle until the pot and lid handles are parallel to each other. Press the yellow pressure-lock button to lock the lid and this will let the pressure build-up.

You can find out how to use your pressure cooker here.

How to Clean Your Fagor Pressure Cooker

Cleaning and maintaining your pressure cooker after each use ensures that it works well and lasts longer without any hiccups. Here’s how you should go about doing it.

  1. Unplug your pressure cooker and let it cool down if you just cooked in it.
  1. Take out the lid and interior pot. Set them in the sink for the time being and let them soak in some warm water if needed.
  1. Clean the exterior of your pressure cooker. Do not ever dunk your pressure cooker in the water. Use a mild soap and dishcloth to get rid of the grime and crumbs on the outside of the cooker.
  1. Hand wash the lid and its components with dish soap and a sponge.
  1. Remove the steam-release handle and check for food particles. You can use a damp dishcloth or sponge to get rid of oil and crumbs.
  1. Next, remove the anti-block shield. Remove this from the underside of the lid to wipe the steam valve clean.
  1. Take out the float valve and silicone ring. Wipe both pieces down with a damp cloth sprayed with diluted vinegar solution.
  1. Let all these parts dry. You can pat everything down with a microfiber cloth or take the time to air dry these parts.
  1. Clean the sealing ring. This is what seals the lid closed and should be cleaned frequently to remove any lingering smells and then left to air dry.
  1. Wash the inner pot and steam rack. It is best to wash by hand unless specified by the manufacturer to be dishwasher safe.
  1. Once everything is dried completely, reassemble the pressure cooker and use it as needed.

You may also like: How to clean electric kettle with vinegar

Frequently Asked Questions 

Below you’ll find answers to questions we get asked the most about using the Fagor pressure cooker.

01. Is Fagor a Good Brand?

For most home cooks, Fagor is a good and reliable brand that makes a range of pressure cookers. They are particularly favorable because you can get electric and stove top options.

02. Are Fagor and Zavor the Same?

Fagor and Zavor are two different entities and do not have any affiliation with each other.

03. How to Cook Rice in a Fagor Pressure Cooker?

Add the water and rice to the pressure cooker, set it to 15 PSI, and let it cook for 5-12 minutes depending on the kind of rice used, as brown rice takes longer to cook.

04. How to Use Fagor Pressure Cooker Steamer Basket?

Let the water boil for 10 minutes before you add the basket with the food inside and close the cover. Wait the time mentioned in your recipe for your food to get steamed.

In Brief

Knowing how to use Fagor pressure cooker appliances can significantly cut down the time you spend in the kitchen. As we’ve established before, Fagor pressure cookers are much safer than you’d expect pressure cookers to be, so even beginners can use them without fear. 

So, what’s stopping you from upping your meal prep game with one of these?
How to Clean Non Stick Griddles: It’s Easier Than You Thought!

It doesn’t matter if you invest a lot of money on your nonstick griddle and pans only to clean them in the dishwasher and ruin them within a few months!

Yes, the griddle might look like a hefty kitchen tool that can withstand the water pressure of the dishwasher, but we can assure you, it’s not. 

Just because your griddle looks clean, doesn’t really mean it’s properly clean. Also what about those moments when you have totally burned your food and can’t seem to scrape off the layer?

Well, aren’t you in luck as we have a simple and quick guide to make cleaning very easy and efficient. Let’s be honest, cleaning isn’t the most fun thing we can do with our time. So why not make it as fast as possible?

In this article, we will find out, how to clean non stick griddles to make them look brand new again! Let’s remove the burnt-on gunk together. 

You may also like: How to clean sticky grease off kitchen cabinets

What You Need for Cleaning a Non-Stick Griddle

  • Sponge
  • Dish soap
  • Washcloth
  • Silicon scrubbing brush
  • Hot water
  • Vinegar
  • Baking soda
  • Napkin 

How to Clean Non-Stick Griddle

how to clean non stick griddle
clean non stick griddle
  1. If you have just used your non-stick griddle pan, it’s better to let it cool down completely before cleaning it. You can make your dinner and then go enjoy the food. By the time you’ll be done with your food, the grilled will be ready for cleaning.
  2. Non-stick griddles have a coating on top that can get damaged pretty easily. So you should hand wash your griddle. 
  3. Take a silicone scrubbing brush or sponge and remove the stubborn grease off of the griddle.
  4. You might need to scrub with some elbow grease if the pan is severely burnt. You can use baking soda or vinegar to weaken the tricky areas if necessary
  5. After you have removed the excess bits of burnt food from the griddle, use dish soap to remove all traces of oil and grease. 
  6. Rinse the griddle thoroughly under running water and get rid of all soapy residue. There shouldn’t be any traces of detergent left on the griddle as it can damage the surface of the pan.
  7. Use a cotton kitchen towel to dry the pan completely before you store it. 
  8. Try to hang your griddle and pans in hooks instead of storing them in a closed cupboard. Open storage helps to keep the griddles moisture-free.

How to Remove Burnt Food from Non Stick Pan

remove burnt oil from pan

Probably one of the biggest nightmares for any homecook is cleaning the pots and pans afterward. And if it’s burnt severely with food and grease, we just don’t feel like doing it.

Hot Water and Soap:

In most cases, you might not need to do anything too fancy to remove the burnt grease. Our day-to-day cooking doesn’t usually cause too much damage to the griddle. 

For light burnt food, all you need is some lukewarm water and dish soap. After the pan has cooled down completely, add a few drops of dish soap and lukewarm water into the pan and let it sit for 5-10 minutes. 

After that, use a silicone scrubber to remove the burnt food. It should come off without much effort. 

Salt:

You need some kind of mild abrasive to remove burnt food from the pan. Salt is an excellent accessible option that can be found in every household.

To use salt, first cool down the pan completely and wet the burn with water. Then sprinkle some salt only on the burnt area and leave it for 10-15 minutes. Then use a scrub to remove the burnt grease off of the pan. 

Baking Soda:

When the griddle is very badly burnt and you can not remove the food with either of those methods, baking soda is your savior. It can remove any tough grease and stickiness from your pan. You might need to put some muscle into the act but it will be worth it.

Simply covers the burned area with a paste of baking soda. Then use some foil paper to cover the griddle and leave it for 20 minutes. Be careful to not leave the pan for longer than half an hour. 

Bicarbonate of soda is quite harsh so leaving for too long can damage the non-stick layer. The alkaline substance can cause the non-stick to chip off.

After 20 minutes, use a scrubber and scrub till everything looks squeaky clean.  Rinse under cold water and dry the griddle completely.

How to Clean Non Stick Cookie Sheets

remove grease from pan

As we all are into baking nowadays, cleaning the cookie sheets has become a very regular thing to do. So here’s how you do it the right way:

  1. Sprinkle a generous amount of baking soda on top of the cookie sheets
  2. Make sure the layer is thin and evenly distributed. Emphasis on the soiled areas of the sheets more. 
  3. Pour white vinegar on top of the baking soda. It will start to fizz up but that’s totally normal. 
  4. Let the mixture sit for 30-40 minutes like this. The fizz will help to remove all the tough stains and marks from your cookie sheets.
  5. After the pan has been sitting for a while, grab your nylon scrubber and start to scrub the sheets in circular motions. Get in there and use some elbow grease!
  6. The baking soda and vinegar will act as a natural detergent and remove all the burnt food particles from the cookie sheets. 
  7. Once you have scrubbed off the whole pan, rinse it off under running water. You can use dish soap to get rid of any grime and grease. 
  8. At this point, you will notice your cookie sheets are looking all shiny and clean. This is our favorite and most affordable way to get the cleaning done. 

Non Stick Griddle Cleaning Tips 

  • Always make sure that the griddle is cooled down completely before cleaning it. The drastic temperature change can be damaging to the non stick layer. That’s what you shouldn’t put your hot pan into the cold water to clean. 
  • Never use a metal scraper, knife, or scouring pad to clean your nonstick griddle. Abrasive sponges can damage the non stick layer severely and it will start to peel off. So always use soft sponges or cotton fabrics. 
  • Use a scraping tool to scrape off burnt food from the griddle surface. Never use metal spatulas. There are many affordable pan scrapers that make this job very easy. 

How to Clean an Electric Griddle 

An electric griddle can get a little too dirty in time. But how do you clean it properly — without damaging anything in the process? Here’s how: 

  1. Remove Debris From the Surface

You can remove debris from the surface in two ways: either through heating the griddle up or letting it be cleaned unplugged. 

When it’s heated up, you can scrape off the excess grease with a flat spatula, removing the debris along the way. 

If you choose to unplug it, let it fully cool off first. You may have to wait for several minutes for this. 

Use a paper towel or a piece of cloth to remove surface debris. Rub lightly to get rid of oils, crumbs, and liquids. 

  1. Use Soap and Sponges 

For a more thorough cleaning, it’s time to get your soaps out. 

Heat up some water first, then make a mixture of baking soda and vinegar with the heated water. This mixture will help in fully taking away the debris you have stuck on your electric griddle. Any burnt food will be taken away, too! 

If there is more debris that is stuck to the surface, use a blend of soap and the baking soda mixture to clean it up. You can also use the spatula again to gently scrape it off. If the remaining debris is really stubborn, let it sit in the water first before attempting to scrape and clean it up again. 

  1. Rinse and Let Sit 

Rinse the griddle thoroughly with warm water. Once all the soap is gone, wipe it down with a piece of cloth or paper towel. To make sure it fully dries, let it sit first before coming back to the cleaning process! 

  1. Finish Off The Cleaning Process with Cold Water 

To make sure all the grease is gone, rinse the griddle again with cloth and cold water. Let it dry again — this time, your griddle is fully clean and ready for brand-new use! 

If your electric griddle is non-stick, make sure not to use any metal or abrasive cleaning accessories. Instead, use a cleaning pad, scrub sponge, or piece of cloth. 

How to Clean a Stove Griddle 

A stove-top, cast-iron griddle is also quite straightforward to clean. Just follow the steps below: 

  1. Let Cool 

After using the griddle, set it aside. Don’t worry too much about the cleaning process at this step and let it cool first. Take out paper towels, cloth or sponge, soap, scraper, hot water, and vegetable oil. Yes, some seasoning is needed if you want your food to not stick to the griddle when cooking! 

  1. Clean Away Surface Debris 

Grease, oils, crumbs, and liquids should be wiped away with paper towels or cloth. A scraper may also be used to loosen stuck-on food and debris. Don’t use a metal scraper — you may risk damaging your griddle!

  1. Wash and Dry 

Use a sponge to thoroughly clean the griddle’s surface. Some soap, like dishwashing liquid, may be necessary for this portion. Rinse with hot water and dry with more paper towels or a piece of cloth. 

  1. Season and Store 

Before stowing away your griddle, get around a teaspoon of vegetable oil, and use paper towels to distribute it throughout the surface of the griddle. Wipe away the excess oil before heating the griddle up on your stove for five to ten minutes. 

After seasoning your griddle, set it aside to cool. Once it’s cool and dry, store the griddle in your cupboards or pantry. Your cleaning is all done! 

Care and Maintenance Tips for Non-Stick Pans

clean a nonstick electric griddle
  • Don’t use the dishwasher to wash your nonstick pans and griddles. The dishwasher uses a lot of water pressure to clean pans. 

    This can damage the non stick layer. So hand wash your kitchen utensils. 
  • Let your pan dry completely before you decide to store it in the cupboard. Moisture can be damaging to the pan so make sure it’s totally moisture-free. 
  • Apply oil after washing and drying. Apply a teaspoon of vegetable oil and use a paper towel to gently apply a thin layer of it. This helps to keep the non-stick surface protected. 
  • Clean your pans after each use. This might seem like too much work but you will notice a longer lifespan for your pots and pans. Most of the time you might not even need water and soap to clean. Gently wipe the surface with a paper towel and that’ll be enough.
  • Never heat your pans empty. What we mean by that is, always apply a  bit of oil or butter to the pan before heating it up. Even though it’s nonstick, it still needs a lubricant to keep it from being scratched. 
  • No metal utensils are allowed. Only use wooden or silicone spatulas as they are not abrasive on the pan surface.
  • Do not stack your pots and pans in the cupboard. This can cause them to scratch each other and ruin the nonstick layer. 

Instead, hang them on the kitchen wall or put paper towels in between each pot and pans before stacking. 

Frequently Asked Questions

01. Will Vinegar Hurt Non-Stick Pans?

Standard nonstick pans are designed to be quite resistant to abrasive ingredients, vinegar won’t be able to damage them. If you have a PTFE/Teflon non stick pan, vinegar is nothing to be worried about. 

Other types of nonstick pans such as aluminum and ceramic are also unaffected by vinegar. Vinegar is an excellent cleaning agent and can remove tough stains pretty easily. 

So be sure to use it for your non-stick pans and pots. You can use vinegar for your cast iron pans as well. As it gets diluted with water, it can not damage the surface. 

02. Why are Eggs Sticking to My Non-Stick Pans?

Even if you are using a nonstick pan, you need to use at least a few drops of oil. Nonstick pans are not supposed to be used without any oil or butter. They only reduce the amount you would need normally. 

So if your eggs are sticking to your nonstick pan, chances are you are not using any oil to cry them. Eggs are like glue, so it’s no surprise that they are sticking to the pan. 

The oil acts as a protective layer between the nonstick and the eggs. It helps to not let the egg bond with the metal. Try using a few drops of oil to see whether that solves the issue or not. 

Another reason can be, you are adding the eggs to a cold pan. Let the pan get hot enough before adding your eggs. This way it won’t stick to the surface. 

03. Does Olive Oil Ruin Non-Stick Pans?

We are not sure where this myth comes from,  but a lot of people believe olive oil damages the non stick layer. Maybe they think so because olive oil is quite acidic in nature. 

But don’t worry, olive oil can not damage your nonstick pots and pans. In fact, it’s a good idea to rub a teaspoon of olive oil on your cold pan before you use it. 

This helps to keep the non stick layer protected from any burn or scratch. The oil acts as a lubricant and keeps the pan all shiny and new. Any type of oil is okay to use on nonstick surfaces. 

04. How Do I Make My Non-Stick Pan Non-Stick Again?

If your nonstick pan has lost its smoothness over time, maybe it’s because of the grime build-ups from all the cooking. If you tend to burn your pan a lot, a thin layer of burn can stay on the surface and cause it to feel uneven and textured. 

To fix that, pour a cup of water and 2-3 tablespoons of baking soda into the pan. Then add half a cup of vinegar to it. Let it sit on the stove for 10 minutes until it starts to boil. 

When it begins boiling, bring it out of the stove and let it cool down completely. Then wash as usual with a scrub and dishwashing liquid. 

Then apply a teaspoon of vegetable oil on the surface and rub using your fingers or a paper towel. The nonstick should feel smooth again.

If your pan does not feel nonstick after this, maybe it’s time to toss out this pan. All nonstick pans have an expiration date. When the non-stick layer starts to peel off, it becomes toxic and you shouldn’t use it anymore. So be careful of it. 

05. Should Griddle be Sticky after Seasoning?

No, it should not. If you are using a cast iron griddle and season it to keep it in its top shape, it should not feel sticky. 

Cast iron pans are highly porous, so when you use oil to season it, it absorbs the oil and creates a resistant coating on top. The heat sort of solidifies the oil and produces a durable coating. 

This coating feels smooth to the touch and not sticky whatsoever. If your griddle feels sticky after seasoning, chances are you applied too much oil to season the griddle. 

You only need a teaspoon of oil on a griddle. As you coat the oil using a paper towel, most of it gets absorbed and only a little stays on the cast iron surface. This is why it never feels sticky or greasy. 

Try washing the pan and reseasoning using less oil next time. Make sure to remove the excess oil with a towel every time you season. 

Takeaway

Didn’t we say cleaning non stick griddles is super easy to do? Not only are these tips easy to follow, they actually extend the life of your griddle pans. As it’s the most used item in our kitchen, we need to take proper care of it!

Was it helpful? Do you have some tips of your own? Comment down below to let us know!

More Related Guides:

Why are Weber Grills So Expensive? Let’s Get to the Bottom

Whether it’s coal, gas, electric, or propane, Weber has ruled every type of grilling industry. When we think of a grill, we automatically think of Weber. They didn’t get such a high reputation for no reason!

A lot of us campaign about Weber’s high price range. Nowadays, we all are suckers for a good deal. We want the latest product within a lucrative price point. But quality and affordability do not go hand in hand. 

So why are Weber grills so expensive? Well, let’s figure it out together!

History of the Weber Grill

why are weber grills so expensive
why are weber grills so

Weber is probably the most well-known barbecue brand in the world. There are some pretty solid competitors but somehow the popularity of Weber is still at its peak!

Weber started their grilling industry with a simple yet practical product: the kettle grill. There isn’t a single person in America who doesn’t know about this classic charcoal grill. 

At that time, all grills had an open-top design that easily interfered with the cooking process. A simple breeze of wind could mess up the temperature and make the meat all ashy and dusty, or it could turn into a smoke hazard. 

Grilling wasn’t as fun as it is now. So in 1952, Weber created a closed lid grill design. The genius of this invention was, not only does the smoke not bother the cook, it actually coats all around the meat and adds an intense smokiness. 

Flavors like that were very hard to recreate at home. This simple design changes the whole grilling industry. Weber pushed the boundaries of food technologies at that time and hasn’t stopped since then. 

High-Quality Materials

When you spend a few hundred bucks on something, you want it to last for a long time and to serve you well. Most of the mass-produced grills use cheap materials that rust and bend within a few years. 

Weber grills are made using premium-grade stainless steel or porcelain-coated enamel. They also use cast iron for a lot of their models. 

All of these materials cost more to build but creates a durable, resistant, and rust proof surface. 

Weber makes sure to quality control each of their units by testing them thoroughly. Each model is tested to survive up to 15 years of use. 

Another great thing about weber grills is how you can use them all year round. They are versatile and great for winter BBQs too. 

Well-Engineered Design

The term backyard grill was popularised by Weber due to their convenient kettle grill model. Since the 50s, Weber has stayed as a constant for all barbecue lovers and enthusiasts. This is due to their practical and functional designs. 

While most modern grills are equipped with fancy features and lights, Weber takes more of a classic approach to their design. All of their grills are extremely functional and durable yet they don’t have a single unnecessary feature just for the sake of looking cool. 

Weber spends a lot on their research and development team. They are constantly bringing out new models with better air circulations, better heat distribution, and better exterior. 

Each upgrade is thoughtful and useful. Practicality is what people think when they think of Weber grills. No wonder they have been beating down competitors for decades.

Energy Efficiency

Weber uses cast iron grill grates which means it uses far less fuel than other types of grills. Cast iron is known to retain temperature for longer thus being very energy efficient. 

Each Weber grill is designed to be energy efficient so you don’t end up spending too much money. 

If you are someone who loves to grill once or twice a week, those small numbers add up. So it’s only logical to go for Weber grills over others. 

Innovative Products

Weber grills started with innovation as they created the world’s first kettle grill back in the 1950s. They have just gotten better and better at it since then. Weber is known as a pioneer in the grilling industry for its unique and user-friendly designs. 

Even now, Weber successfully brings out models after models of striking new features, all with a contemporary design in mind. Even though they have remained classic in the basic design structure, they don’t put themselves inside a box and lock it. 

Weber understands that with changing times, people need different things. And they are willing to provide it. 

For example, weber is providing an iGrill app-connected thermometer for your grills. This helps to know exactly what temperature your food is. So when you’re grilling a steak, there is no fear of accidentally cooking it too well-done. 

Warranties and Repair

When you are spending so much money, a warranty is something you need to have. Weber has a solid warranty system. They are so confident in their products that you get at least a 10-year long warranty on their grills. 

For some models, it can be more. But that’s not even a worry as most weber grills last for decades. 

Weber also makes repairing super easy. Their grill parts are readily available so you can repair your broken grill at many different service centers. 

You can also buy those parts and repair them yourself as they provide easy instructions too. As grills are an investment, you need to keep these things in mind. 

Are Weber Grills Worth it?

The long-lasting, high quality Weber grills are worth every penny.

When compared directly against other brands in similar quality and price ranges we find that they offer incredible value while still providing amazing grilling performance!

How Long do Weber Grills Last?

Weber grills are made to last for a long time. They use high-quality materials such as stainless steel, cast iron, porcelain-coated aluminum, etc to create a durable and resistant grilling surface. Weber grills are water-resistant so you can use them all year long. 

Frequently Asked Questions

01. Which Weber Grill is the Best for the Money?

People love Weber grills not only for their smart design and durable construction but also for the wide range of options they carry. There is something for everybody whether you are looking for a budget-friendly pick or a premium one. 

Judging by the design, materials, and durability, we think the Weber Q 1400 electric grill is the best overall choice. It has all the features people love about Weber but comes at a pretty reasonable price point. 

Weber Q 1400 is easy to transport and can be used anywhere with a power outlet. This compact and powerful electric grill has cast iron cooking grates which provide even heat distribution. This easy-to-use unit is perfect if you want to invest in something easy and efficient. 

02. Is Weber Worth the Money?

Weber grills are definitely not the most affordable thing in the market. The price doesn’t stop them from being super popular. 

That’s because most of us look for quality products instead of something that’s cheap. Weber grills might not fall into the category of affordable but they last you for decades. 

If you calculate it by cost peruse, we bet it’s cheaper than other poorly made girls. You will only need to purchase one grill in your life. So spending a few extra bucks definitely pays off in the end. 

03. Is Weber Better than Char Broil?

Both Weber and Char Broil are fantastic grill brands but they have different target audiences. If you are looking for something that’s going to last you a long time with an excellent grilling experience, there is nothing better than Weber. 

But if you are a bit short on the budget and still want a quality grill, Char Broil is the one to go to. Char Broil provides budget-friendly grills with modern features. They won’t last you for decades but as long as they last, the experience will be very satisfying. 

Of course, as it’s a budget-friendly option, you are not going to get a premium product. For premium grills, there really isn’t anything better than Weber. We recommend saving up and spending your cash on a classic Weber model.

04. How Long Do Weber Grills Last?

Weber grills are made to last for a long time. They use high-quality materials such as stainless steel, cast iron, porcelain-coated aluminum, etc to create a durable and resistant grilling surface. Weber grills are water-resistant so you can use them all year long. 

With proper care and maintenance, your Weber grill can last for 12-18 years and sometimes even more. 

Weber provides an excellent warranty of 15-year along with reliable customer service. So if you happen to face any issues, they will fix them for you. Weber parts are available everywhere which means, repairing is not a hassle. No wonder they are so popular!

05. Can I Leave My Weber Grill Outside?

Weber grills are made using solid premium quality materials. As most of the Weber grills are made out of stainless steel, you can leave them outside as long as there is a shed on top of it. 

These grills are built to survive any weather conditions. So if you live in a humid, rainy climate or somewhere with tons of snow, Weber will be able to withstand it. 

If you do not have a shed, just use a cover to place it over your grill. It will protect it from dirt, dust, and moisture. This way you can leave your grill without having to worry about it. 

Epilogue 

Driven by a passion for grilling the best BBQs for friends and family and to make everyone a backyard barbecue chef, Weber has been working to create revolutionary products for half a century now. 

It’s no surprise that Weber grills are more expensive than their competitors. They are not just giving you a grill, they are giving their customers reliability and assurance of quality. 

When you don’t know which grill to pick, you can blindly pick a Weber model and it will be far better than anything else on the market.

How to Connect Natural Gas Line to Grill

As the barbecue season approaches, a lot of us are buying new gas grills to have some fun family time. But how do you set it up?

If you have a propane grill and you’re planning to convert it to a natural gas one, chances are it’s very confusing and complex. We have found a simple way to connect natural gas lines to the grill. 

Not only are natural gas lines safer, but they are also more affordable in the long run. In this article, we will figure out how to connect natural gas line to grill

What You Need to Connect Natural Gas Line to Grill

Connecting your natural gas line to the grill is not a single-tool project. It requires a few different pieces of equipment. Here’s a quick list of what you will need:

  • Gas shutoff valves
  • Pipe-joint sealant
  • Galvanized steel straps
  • Drill and drill bits
  • Spray water bottle
  • Dish soap
  • Quick connect shoe fittings
  • Rust-proof spray paint
  • Piper wrench
  • Pressure gauge
  • Standard wrench 

If you have all those things already, we suggest doing it by yourself. Otherwise, it’s easier to just call a professional to install the gas line instead of DIY-ing it. 

You may also like: How to tell if propane grill regulator is bad

How to Connect Natural Gas Line to Grill

how to connect natural gas line to grill

Step 1: First thing you need to do is check whether your home natural gas system has adequate capacity to support a BBQ grill. Most home gas systems are good enough for it. 

Step 2: Bring out your pipe wrench and turn off the main valve at the gas meter. 

Step 3: Then tap into the existing gas line and run a new line out to the location of your gas grill.

Step 4: Each connection should have a pipe-joint compound. Then tighten them with your pipe wrench. 

Step 5: It’s time to use those galvanized steel pipe hangers. Suspend the new mine from the floor joists using those changes.

Step 6: Install a new shutoff valve into the gas line. 

Step 7: Drill a hole in the wall to continue the gas line from the basement to the outside. 

Step 8: Install a shutoff valve just outside the house. 

Step 9: You have to pressure test your new gas line to make sure there are no accidental leaks. 

Step 10: To do that, spray liquid soap water into the threaded connections and check for leaks. 

Step 11: Let it sit like this for 30-40 minutes then check the pressure gauge to make sure the pressure hasn’t dropped. If it doesn’t drop, there are no leaks in the gas line. 

Step 12: Install a quick-connect hose fitting at the end of the gas line. 

Step 13: Apply rust-resistant spray paint into the new piping. Use cardboards to shield the house around the gas line before painting. 

Step 14: Then connect a new flexible quick-connect gas hose to the end of the gas grill

Step 15: This step is optional but if it’s necessary you can install an adapter to convert the grill from propane to natural. 

Step 16: Snap the end of the gas hose onto the quick-connect fitting on the new line. 

Step 17: Turn on the main gas valve. 

And that’s it. You have connected your natural gas line to your barbecue grill!

Why Use Natural Gas instead of Propane?

As the popularity of natural gas grill is increasing every day, one might wonder what’s the reason behind it. Natural gas grills have a lot of advantages over other types of barbecue grills. 

Cost-Effective:

Natural gas is the more economical choice in the long run. Yes, they might cost more to set up, but when you start to use the grill, the fuel cost is much lesser than propane. 

Natural gas prices are by default cheaper than propane. If you are a homeowner, natural gas is the obvious choice for you. 

Even though propane is more energy-efficient, the cost of natural gas is much lower than per cubic foot of propane gas. So when you judge it from all sides, natural gas wins this round. 

Safety:

Natural gas grills do not need to be filled once every couple of weeks or months. As they are filed at a specific spot, they are much safer to have at home. 

Natural gas also dissipates more quickly than propane gas when released into the atmosphere. So they are less likely to cause a serious fire hazard. 

Propane tanks also need to be under a certain temperature. Otherwise, they might burst. All these things make propane a risky choice especially if you have kids running around. 

Convenience:

Natural gas grills are just more convenient in every way. You don’t need to move a bulky propane tank around to refill it every few weeks/months, it doesn’t require any specific guideline to store and it’s fixed at a spot. 

As natural gas grills are connected to your main gas line it acts exactly like your stove or oven. It’s always one click away from heating up. 

What Not to Do While Converting to Natural Gas Line/Gas Grill

If you re new to using a natural gas grill, there are some things you need to focus one, some things you should never do:

  • You should never go over budget with buying the gas grill. Keep in mind the installation will cost you a good amount of money too. 

    You might need additional parts to set up the grill in place. So whatever your budget is, buy something under that limit. 
  • If you are not very skilled or familiar with gas lines, do not try to install the grill by yourself. Natural gas grills are not the same as propane grills. 

    They need proper tools and skills to set up. Instead, hire someone to do the job. 
  • Contact your house contractor to know your gas line pressure level. You need it to set up the regulator. 
  • Don’t ignore the permit requirements while setting up your natural gas line. It might cost you a lot in the long run. 

Frequently Asked Questions

01. Can I Hook In My Own Natural Gas Grill?

You definitely can hook up your own natural gas grill if you have all the right tools for it. If you don’t have prior knowledge of plumbing or you are not familiar with the tools, we recommend hiring a professional to do the job. 

As it’s natural gas, a small accident can be very detrimental and no one should take a risk. 

A plumbing or heating contractor can easily install your gas grill. It’s always better to go natural as it saves a lot of money and energy in the long run. 

You won’t have to refill those bulky propane tanks. As you won’t have to move around the tank at all, it’s safer too. 

02. How Much Does It Cost to Set Up a Natural Gas Grill?

Hooking up a natural gas grill is a task for a professional. Usually, it takes somewhere between $200-$400 depending on nowhere you live. They do all the things necessary from running the gas line to hooking it up with your gas grill. 

There are also high-end and low-end installations. It’s ideal to contact the people who do these tasks and negotiate a price depending on your needs. 

03. Can You Join a Propane Grill to a Natural Gas Line?

You can hook up a propane grill to your natural home gas line. Some grills come with a built-in adapter that provides a smooth transition from one fuel type to another. Others need an extra adapter for it. 

You should never hook your propane gas grill to your natural gas without converting it at first. Otherwise, it can turn into a fire hazard. To convert, you need certain tools and instruments. You can hire someone to do the task for you.

It is important to note that not all propane grills can convert to a natural line. Check the user manual of your grill or contact customer service to know whether your grill is compatible with switching. 

04. Do You Need a Regulator for Natural Gas Grill?

All-natural gas grills require a regulator to handle the pressure going into the grill. Natural gas grill requires a pressure rating of 4” WC. A regulator’s job is to make sure the pressure stays that way. 

As we run our natural gas line for many different home appliances like stove, oven, water heater, furnace, etc. the pressure always changes to fit the appliances. 

But for a gas grill, this pressure needs to remain steady. That’s why it’s so important to invest in a  good regulator. Consult your contractor to know more about it.

05. Are Natural Gas Grills Safe?

Natural gas grills are definitely safer than propane grills or charcoal grills. You need to move the propane tank around for a propane grill. When the tank is full, it can actually cause serious accidents in not being careful. 

You need to be careful about its heat and temperature too. There are so many stories of propane tank automatic combusting and then creating a fire hazard at home. So propane gas is not the safest thing out there. 

Charcoal grills are another risky option and arguably the trickiest to work with. If the grill gets knocked over, the hot coals can burn you and cause serious injury. Sudden air can cause small coal flakes to spread and cause a fire without you even realizing it. 

Many people are converting to natural gas grills for these reasons. They are fixed so you can not move them around which makes them much safer than any other options. 

06. Why are Natural Gas Grills So Expensive?

Natural gas grills are more expensive than other options but they are with the money. They are very convenient and easy to work with. 

The reason why natural gas grills are more expensive is that they come with long and fast connection fittings. These features cost more to make thus resulting in their higher price range. 

07. What is the Difference between Propane and Natural Gas Grills?

Both propane and natural gas grills are super popular and accessible to everyone. As charcoal grills are slowly exiting the market, propane and natural grills are dominating the industry. 

Both of these grill types are excellent but each comes with its advantages and disadvantages. 

Propane grills are more affordable and powerful. So you can use them at super high temperatures. They have more than twice the BTU of natural grills. 

Natural gas grills on the other hand are safer and more convenient for a busy household. If you have kids, you want something that is childproof. 

Propane tanks are known to cause fire hazards if not being very careful. They are also quite a pain to fill up. These bulky tanks are not easy to move around. 

Natural grills save a lot of energy and power. As it gets connected to your main gas line, you don’t have to worry about refilling every month. It’s cost-effective in the long run.  

08. Can My Weber Use Natural Gas?

This mainly depends on the model but most of the Weber grills can be easily converted to natural gas. Weber, however, does not permit gas conversions anymore. 

So make sure to contact customer service to know whether your specific model can be converted or not. 

Some of the models are not allowed conversion even though they can be done. You might lose your warranty by changing its fuel type. So make sure to know all the details. 

Verdict

And there you have it. Setting up your gas grill with the natural gas line is that simple. Hopefully, we were humble to answer everything you needed to know on how to connect natural gas lines to grill. 

Do you have any confusion? Feel free to ask us in the comments down below!

How to Clean Chemex and Keep Brewing Delicious Coffee

Coffee brewing style is a very personal thing to all coffee lovers. Each has its own favorite way of making it. One method that has stood the test of time and become a classic is the Chemex. 

Chemex is one of the easiest ways to brew coffee at home even if you have zero experience with it. It provides a pleasant tasting coffee in a relatively short time. 

In this article, we will explore how to clean your Chemex and take proper care of it. We also have a small guide to make the perfect morning coffee using Chemex Coffee maker. But first, let’s find out what a Chemex really is!

What is Chemex Coffee?

Chemex Coffee
Chemex Coffee

The Chemex Coffeemaker has been around for decades. It was first invented in 1941 and it totally changed traditional coffee makers. 

The shape of the Chemex is very unique and practical. Inspired by the Erlenmeyer flask, this coffee maker is built using thick glass. This helps to retain the temperature and makes brewing faster and better. 

There are many different brewing methods but Chemex has been a favorite among coffee enthusiasts for a reason. It’s easy, quick, and makes delicious coffee

What is a Chemex Filter?

Chemex filter is not just another coffee filter. It is 30% thicker than traditional filters. This means not a single piece of coffee ground can get past it. The result is thicker and smoother coffee. 

If you like to drink a  lot of Americano, which uses finely ground coffee, you need a filter that will catch all the ground when hot water is added. Only a handful of carafe can do that. Chemex has been a great option to brew all types of coffee grounds from coarse to fine.

Not only is Chemex one of the best pour-over coffee makers in the world, but it’s also very affordable.

Chemex filters are the best match for your Chemex coffeemaker. These filters are designed to remove every element of oil, coffee grounds, sediments, and fats from your coffee thus giving you the best coffee experience ever. 

The coffee made using Chemex filters is usually heavier and thicker compared to other non-branded filters you’d find.

Chemex filters are also super sturdy so even if you pour too much water, it won’t burst open. The thick filtration allows the coffee ground to get soaked into the hot water for longer. This is why you get such richer coffee with Chemex.    

How to Clean a Chemex: Our Easy Guide with Vinegar!

how to clean chemex
cleaning chemex baking soda

Things You’ll Need:

  • Hot water
  • White vinegar
  • Long-handled brush/ toothbrush 
  • Dish soap

Instructions:

  1. Let your Chemex cool down completely before you plan to clean it.
  2. Remove the handle from your Chemex. The wooden handle comes off pretty easily. 
  3. Use a brush or sponge to scrub the outside of the carafe. Use dish soap to remove stains and debris. Most stains should come off with gentle scrubbing. If it does not, follow the next steps. 
  4. Pour 50:50 warm water and vinegar into the carafe and fill it totally. Then let it sit for a few hours. 
  5. It’s ideal to leave it overnight as the vinegar helps to loosen the buildups and dirt. 
  6. After it’s been sitting for a while, throw away the vinegar water into the sink and use a bottle brush to scrub inside the carafe. Use warm water if necessary. 
  7. Once the carafe is properly clean, wash with dish soap one more time to remove the smell of vinegar from it. 
  8. Let it dry properly before using it again. 

Why Use a Chemex Filter?

If you don’t have a coffee maker and want to make coffee at home, drip coffee is probably what you go for. If you are going to try making drip coffee, it’s only obvious to try the best one ever. This is not even a debate. 

The Chemex is the first of the many drip coffee makers and even after almost 70 years, it remains a best seller. You can not become a household name just by sheer luck.

Chemex uses their unique filter that doesn’t let the coffee flow through quickly. This allows the coffee ground to get merged into the hot water for longer. 

The result is a smoother, cleaner, and better-tasting coffee. As the coffee ground gets more time to shine, coffee made using Chemex is more flavorful and aromatic. It’s truly an experience. 

How to Brew Coffee with the Chemex

How to Brew Coffee with the Chemex
How to Brew Coffee with the

Brewing coffee with your Chemex is relatively simple. To use your Chemex coffee maker, you need some boiling hot water and some ground coffee. 

Here’s our step-by-step guide to brewing coffee with the Chemex:

  1. Use a burr grinder to grind your coffee beans into your desired size. The grind size should be finer than a french press but not like powder or sand. 
  2. As Chemex creates a light brew, you don’t need as much water as you may otherwise use. The ratio should be 1 gram of coffee per 10 ml of water. Try first with this and then increase or decrease according to taste. 
  3. The water should not be above 96 degrees celsius. Some people prefer it super hot while some others prefer it moderately warm. The temperature can dramatically affect the coffee taste. So experiment as you go. 
  4. Pour the water in a circular motion and cover all the coffee grounds properly. The water should be an inch above the coffee grounds. 

Pour very slowly and take your time with it. Enjoy the process. This should take around three to five minutes depending on the grind size. 

  1. Once the water flow has stopped, remove the filter and coffee grounds and pour the coffee into a mug. Add cream and sugar if you like and enjoy!

Frequently Asked Questions

01. Can You Dishwash a Chemex?

The Chemex is dishwasher safe but you need to be careful with it. For starters, never put the wooden part of the Chemex in the dishwasher. Wood gets damaged and ruined so it’s ideal to hand wash that part. 

Remove the wooden part and put the glass in the dishwasher. It is ideal to handwash the Chemex to keep it in the best condition. 

02. How Do You Clean the Inside of a Glass Coffee Carafe?

Oftentimes, glass carafe gets stained that are tough to remove. If it’s the inside of the carafe, the job gets harder, doesn’t it? 

If you have the right ingredients, cleaning a glass carafe becomes an easy task. All you need is baking soda or vinegar. And sometimes, both!

Sprinkle a tablespoon of baking soda at the bottom and inside of your carafe. Add a few drops of water to form it into a paste. Then grab your glass cleaning brush and start scrubbing. 

If you don’t have a cleaning brush, use a toothbrush to scrub the carafe. Baking soda helps to remove even the toughest stains within minutes. Rinse the carafe afterward using dishwashing liquid. 

03. What Can I Use Instead of a Chemex Filter?

Needless to say, there are no better alternatives to Chemex filters than Chemex filters! But if you are looking for an alternative, we really like the Melitta Natural Brown #2 Cone Filters. They add a shine and flavor to your everyday brew. 

If you don’t like the idea of throwing away filters every day, go for an environmentally friendly option. There are many good metal filters available that you can rinse and reuse. The Able Cone is what comes to mind for its incredible compatibility with the Chemex Coffeemaker.  

04. Why is Chemex So Good?

The Chemex is a classic coffee maker that has been around since the 1940s. The reason why it stuck for so long is due to the quality. New inventions come and go but the Chemex stays the same. 

If you have ever tried a Chemex coffee and normal coffee side by side, you would notice how the Chemex one is thicker and more flavorful. The heavy filtration removes even the smallest coffee grounds. 

The result is a clean, smooth, and delicious cup of coffee. It also eliminates bitterness which is an additional bonus!

05. Can You Drink Ground Coffee Without Filtering?

You can definitely drink ground coffee without filtering but it might not have that smooth, flavorful kick we all love. To make ground coffee without a filter, all you have to do is put a few tablespoons of ground coffee into a pot. 

Pour hot water and let it sit like that for about five minutes. Keep the lid closed. Then slowly pour the coffee into a cup. Be careful to not let any coffee grounds transfer. And that’s it! Your unfiltered coffee is ready to enjoy!

06. Can You Use Any Coffee Filter With Chemex?

You can but it’s not the best thing to do. A Chemex is designed to be compatible with only Chemex filters. You can use normal filters with a Chemex but it might not catch all the coffee grounds. 

The classic Chemex coffee flavor comes solely due to its unique filtration system. So if you use a normal filter, it might not taste as clean or smooth as it’s known for. 

The filter basically determines how your coffee is going to taste. So it’s good to be picky with it.

Takeaway

Coffee addicts are obsessed with the Chemex coffee maker. Even those who have their own Breville Espresso Maker, still use Chemex for its convenience and clean tasting coffee. The only downside of a Chemex is how tricky it is to clean. 

But hopefully our easy guide, now you can clean your Chemex coffeemaker without too much worry! 

So, Did we solve a problem for you? Do you have better tips to share?

Comment down below! 

Till then, ciao!

Can You Freeze Ricotta Cheese? Why Freezing This Cheese Requires Special Care

I’ve recently had a little mishap when ordering my groceries. I messed up and ordered multiple items when I only needed one of each.

So instead of just a single tub of ricotta cheese (which was much more than I needed anyway), I ended up with 5 tubs.

Yeah, I know it was a pretty dumb move. And I’ll double-check my groceries from now on.

But in the meantime, I needed to use up four and a half tubs of ricotta before they went bad. I baked a lovely ricotta lemon pound cake. 

Then a ricotta cheesecake with raspberry compote. For dinner, the menu was a tomato and ricotta salad, followed by ricotta-stuffed pasta shells. And so many servings of lasagna with ricotta.

And then came the inevitable question: can you freeze ricotta cheese? After all, I’ve frozen cottage cheese and mozzarella before, so why not ricotta?

After a little research and experimenting, I have an answer to the question: can ricotta cheese be frozen? This article won’t just spill the beans on whether you can freeze ricotta; I’ll also go into the details on this underrated cheese.

Ricotta Cheese and Why You Shouldn’t Sleep on It

can you freeze ricotta cheese

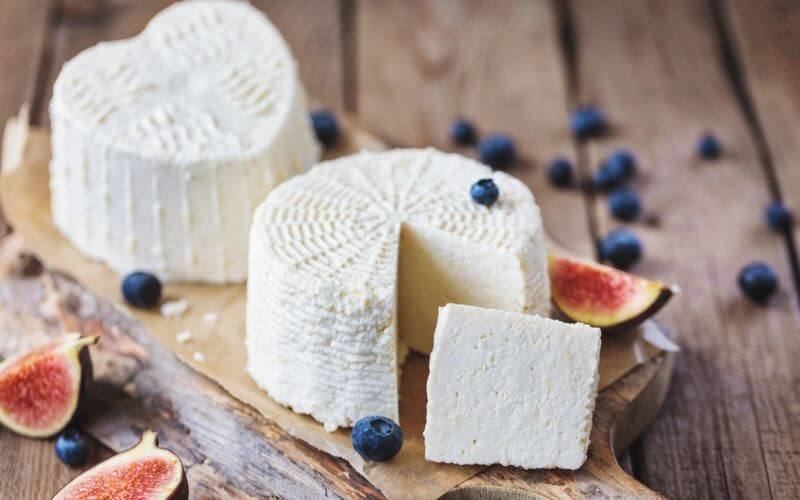
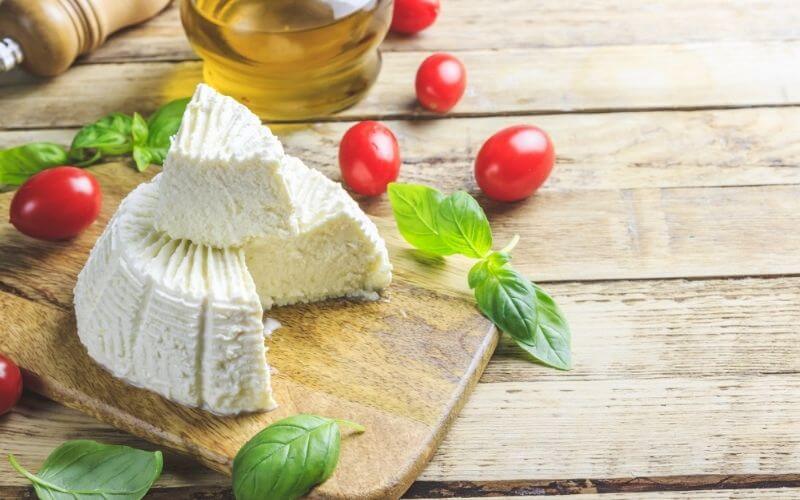
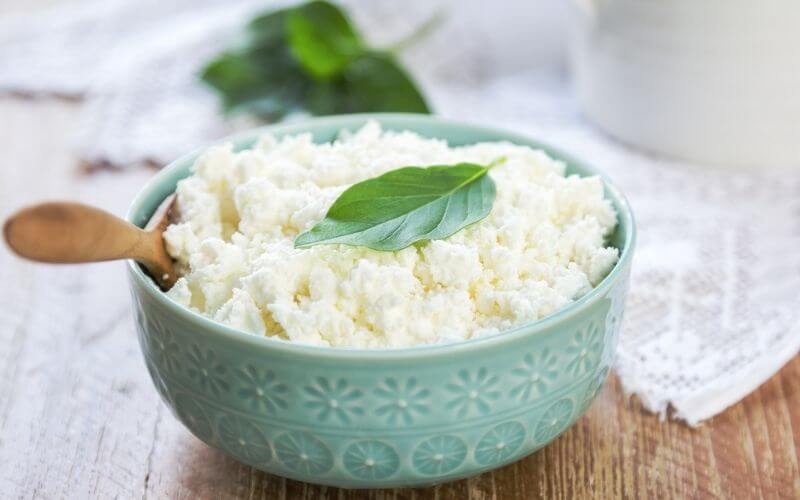
Ricotta is often ignored for mozzarella, parmesan, and mascarpone, but this cheese deserves more hype than it gets. Ricotta cheese is gloriously creamy and fluffy and this makes it great for baking, cooking and added fresh to salads and dips.

It is a whey cheese and is made by heating whey with milk. This is where the name comes from─ ricotta means recooked in Italian, as the whey produced from making yogurt or mozzarella is cooked again to make this cheese.

The whey is heated with a small amount of milk and once it reaches the desired temperature an acid (like vinegar or lemon juice) is added to curdle the liquid and create curds that coagulate. The curds are then drained of the excess whey in cheesecloth until they form the fluffy ricotta.

The process also means that ricotta is a soft, fresh cheese. There’s no drying or aging and the moisture makes it nice and spreadable. Aged cheeses like parmesan are hard and dry, while fresh ones like ricotta and cream cheese are soft and fluffy. 

The downside? Fresh cheeses go bad faster than aged ones. Store-bought ricotta needs to be consumed before the expiry date. Ricotta made at home is edible when stored in the fridge for a week.

But the advantages of ricotta cheese far outweigh this annoying drawback. For starters, it tastes amazing; light, tangy, and not overpowering. And it’s just so versatile. 

You can use it in quick meals like sandwiches and salads. It is great when used as spreads and added to dips. Ricotta is also a good substitute for cream cheese.

And the uses for baking go on and on. Classic ricotta cakes are delicious and they make for a great alternative to heavy cheesecakes.

When added to baked pasta dishes, they add lots of dimension and flavor. Add an egg and use it in moussaka and lasagna instead of store-bought cheese sauces or bechamel. 

Why put egg in ricotta cheese in lasagna? It helps the cheese bind to the layers of the lasagna or casserole and prevents the ricotta from oozing out in the oven.

In short, ricotta cheese is amazing and you should use it more often in your cooking.

Freezing Ricotta Cheese: Everything You Need to Know

can ricotta cheese be frozen

Now that I’ve sung all the praises of ricotta cheese, let’s settle down and talk freezing strategies. The one thing any home or pro cook will tell you is that ricotta is one of the worst cheeses for freezing.

Why? Ricotta has a high moisture content with lots of water in the whey. When frozen, the water will freeze and form ice crystals. 

When thawed, the crystals melt and this causes the whey to separate out from the cheese, altering its texture. But while the texture changes, the flavor will stay the same.

So how does one go about freezing ricotta cheese? Follow the steps below for the best results.

Freezing the Ricotta Cheese:

The freezing method mentioned below will preserve the texture as much as possible.

  1. If you want to store unopened ricotta cheese from the store, simply store the container in the freezer. If you have multiple containers, you can store them in a big Tupperware box or a large freezer bag.
  1. If you want to freeze previously opened containers of cheese, it is best to portion out the cheese and wrap them in cling film or plastic wrap. This will make it easier to take out the amount needed to thaw when cooking.
  1. Take the wrapped portions of cheese and stack them in a large freezer bag. Push as much air as you can from the bag before placing them in the freezer. 
  1. You can also put the wrapped portions in a separate container or box and freeze them. This double wrapped method is the best way to freeze ricotta, especially for storing over 3-4 weeks.

How long can you freeze ricotta cheese? Most cooking experts say that 2 months is the best time. Make sure you use up the ricotta by then.

Defrosting the Ricotta Cheese:

Knowing how to defrost ricotta the right way makes the cheese safe to eat, and easier to work with.

  1. Remove the ricotta from the freezer 4-6 hours before you need it for cooking.
  1. Do not defrost the cheese on your counter, as this can encourage microbial growth and cause food poisoning and other abdominal issues.
  1. Instead, defrost the cheese in the fridge for no longer than 5 or 6 hours, as this can alter the texture even further.
  1. As the ricotta defrosts, stir the cheese with a spoon or fork from time to time. This will mix the whey with the cheese curds and improve the overall consistency.

Using Defrosted Ricotta Cheese:

As I mentioned, the texture of the cheese changes after you freeze it. Because of this, you won’t be able to use it the same way you’d use fresh ricotta. The slightly gritty, grainy texture means that it won’t be easily spreadable and fluffy.

As a result, you should avoid using it in things like salads, sandwiches, as well as a topping or garnish. Instead, add it to cheese sauces made from scratch, or use it to give bechamel a tangy and flavorful touch.

Frozen ricotta works best in cooked or baked dishes like pasta dishes, mac, and cheese, lasagna, pastitsio, or moussaka. Ricotta can also be used instead of cream cheese to thicken alfredo sauce

It also works well in things like cheesy breads, pizza, and calzones. You can even use it in stuffed pancake recipes. However, stick to the fresh stuff when baking cakes or pies.

Tips for Freezing Ricotta Cheese

The following tips will make sure you can preserve the ricotta cheese’s texture as much as possible.

  • Remove the ricotta from its original container and place the cheese on layers of kitchen towels or napkins to absorb as much of the excess whey as possible.
  • As the ricotta freezes, stir the cheese with a fork or tiny whisk, as you would when making ice cream at home.
  • If you have already used some of the cheese, freezing it in airtight wrapping is your best bet.
  • Always double wrap when freezing and make sure that you push out as much air as possible with each plastic wrap or bag.
  • Write the date you froze the cheese on the plastic bag with a marker so you know when to use it safely.
  • To make equally sized portions, place pieces of clingfilm in an ice cube tray and freeze the ricotta in the tray. Once frozen, remove the wrapped pieces of cheese and place them all in a large freezing bag, pushing out the air before sealing and putting them back in the freezer.
  • If you can’t stir the melted whey into the cheese curds while thawing, drain the moisture by placing the defrosted cheese on a colander or strainer for 10-15 minutes. You can also set it on several paper towels.
  • Instead of freezing the cheese itself, make large batches of pasta or sauces with the ricotta and freeze them instead. A good idea would be freezing lasagna, cut up into individual portions for quick and easy thawing and reheating.
  • Can you freeze ricotta cheese with eggs in it? Yes, and the egg helps hold the cheese together and reduces its chances of splitting. This makes a great base for cheesecakes, as well as topping ziti, stuffing shells, and use in casseroles and pastitsio.

Making Ricotta at Home

homemade ricotta cheese

Instead of buying huge containers of ricotta and dealing with the chaos of freezing them, you can easily make a small batch of ricotta at home and use it immediately in recipes that call for it. 

Of course, it takes time and a little experience, but you’ll find that it makes for a fun project.

What You Need:

  • 2 quarts of whole milk (You can replace some of this milk with whey from yogurt or kefir.)
  • 1 cup of heavy cream
  • ½ teaspoon of salt
  • 2 tablespoons of white vinegar
  • Large colander or sieve
  • Cheesecloth or thin muslin

What You Need to Do:

  1. Line a large sieve or colander with a layer of cheesecloth and place it over a big pot or bowl.
  1. Bring the milk, cream, and salt to a rolling boil in a heavy pot over medium heat, stirring constantly to prevent scorching. You can also use a double boiler.
  1. Add the vinegar, then reduce heat to low and simmer, stirring constantly, until the mixture starts to curdle which takes a minute or two. Gradually the curds will coagulate and become one big mass.
  1. Pour this mixture into the lined sieve and allow it to drain for an hour.
  1. Discard the liquid, and then cover and chill the ricotta, letting it set.

Got Any More Questions?

Here you will find answers to questions people tend to have about freezing ricotta.

01. Can I Freeze Ricotta Cheese?

You can absolutely freeze ricotta, but be aware that the texture will change considerably.

02. How to Use Ricotta Cheese?

Ricotta cheese can be used in baked goods like cookies and cheese. It is also commonly used in lasagna, pastitsio, stuffed shells, and baked ziti, as well as mac and cheese.

03. How to Defrost Cheese?

Defrost cheese safely by putting it in the fridge to thaw for 4-5 hours before you need to use it.

04. How Long Does Frozen Ricotta Cheese Last?

Once in the freezer, ricotta will be good to use for up to 2 months.

05. Can I Freeze Ricotta and Spinach Together Safely?

Yes, mixtures of ricotta and vegetables, herbs, and eggs can be frozen; although the texture may change slightly in these mixtures.

To Summarize

Well, there you have it. The answer to the question can you freeze ricotta cheese? Yes, you can freeze it but you won’t end up with the soft fluffy clouds of cheese we know and love so well. 

Either way, it is a good way to have ricotta on hand for baked pasta dishes, moussaka, pizzas, and other rich dishes. So the next time you’re bombarded with excess containers of ricotta, you’ll know exactly what to do.

Can You Freeze Tortillas? Here’s How

In the realm of food, freezing leftovers is a very popular and practical method to preserve additional servings to enjoy later. Tortillas are a staple in many Mexican and Tex-Mex dishes which are often made or bought in bulk, making it into a category of food that often gets wasted.

Can You Freeze Tortillas? Here’s How
Can You Freeze Tortillas

This guide will help chefs or home-chefs to preserve various kinds of tortillas (corn and flour tortillas) safely and effectively so they may continue to enjoy this traditional meal for days to come.

If you have leftover tortillas or want to make a big batch to have on hand for quick and easy meals, freezing them is a great idea to extend their shelf life. However, when freezing tortillas, it is important to wrap them tightly, so they do not dry out or get crumbly.

Is Tortilla Bread? Tortillas can be soft or crispy, depending on how they are prepared. You can freeze tortillas to enjoy later, but it’s essential to do this properly to ensure food safety and maintain taste.

Can You Freeze Tortillas?

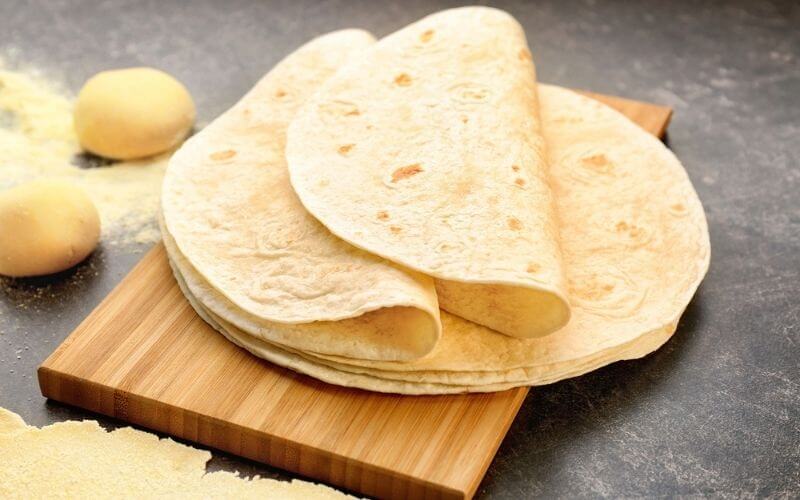
Tortillas are versatile ingredients that can be used to cook a variety of food, from tacos to quesadillas and enchiladas. While you can buy unopened flour tortillas and corn tortillas pre-made at the store, they’re also easy to make at home.

And if you find yourself with a surplus of tortillas, one question that may pop into your head instantly is, can you freeze tortillas?

The answer is yes, you can freeze tortillas! Tortillas are freezer friendly; can be frozen raw or cooked and will last for months.

When freezing raw tortillas, you can stack them between sheets of wax paper to prevent them from sticking together. Cooked tortillas can be wrapped in tin foil before being placed in the freezer.

How to Freeze Tortillas?

What are Tortillas
What are Tortillas

If you’re like me, you always have a stash of tortillas in your freezer. But sometimes, they can be a little tricky to work with.

Here’s a step-by-step guide to how can you freeze tortillas so that they’ll be easy to prepare your favorite recipes later.

Step 1: Selecting

Start with fresh tortillas. If you’re using store-bought tortillas, make sure they’re soft and pliable. If they’re stiff or dry, they’re not going to freeze well.

Step 2: Cutting

Tortillas can be frozen whole or in halves. If freezing in halves, place them on a baking sheet lined with parchment paper, making sure that the halves do not touch.

Tortillas can also be cut into strips or triangles before freezing. Again, place them on a baking sheet lined with parchment paper so that they do not touch.

Step 3: Freezing

Now, freeze the tortillas for 1-2 hours, or until solid.

Step 4: Wrapping

Once the tortillas are frozen, transfer them to a freezer bag. Stack them on top of each other and wrap the tortillas tightly in plastic wrap before putting them in the container.

Be sure to squeeze out as much excess air as possible before sealing the bag.

Step 5: Labelling

Label the package with the date and contents, then place it in the freezer.

Step 6: Thawing/Heating

When you’re ready to use the tortillas, take them out of the freezer and let them thaw. If they’re still frozen in the center, you can microwave them for a few seconds to soften them up.

Once the tortillas are completely defrosted, they’re ready to cook. Enjoy!

Now that you know how to freeze tortillas, put them to good use in your favorite dishes!

Choosing the Right Tortillas to Freeze

When it comes to freezing tortillas, there are a few things to consider to choose the right type:

How You’ll Be Using

First, think aboutwhat you’ll be using the tortillas for once they’re frozen. If you plan on using them for cooking tacos or burritos, then you’ll want to choose a soft tortilla so it will be easy to roll.

If you plan on using them for chips or tostadas, then a harder shell tortilla will work better. Also, it is best to freeze them in pairs. This way, they will thaw at the same rate and be the same size.

The Size of the Tortilla

If you’re freezing them for burritos or tacos, then you’ll want to choose a smaller-size tortilla so it will be easy to roll.

If you’re freezing them for chips or tostadas, then a larger size tortilla will work better.

The Type of Tortilla

If you’re looking for a healthier option, then choose whole wheat tortillas.

If you’re looking for a traditional option, then choose white flour tortillas or corn tortillas.

Once you’ve considered all these factors, then you’re ready to choose the proper tortillas to freeze.

How Long Do Tortillas Last in the Freezer?

can you freeze tortillas
how to store tortillas

This is a question we get a lot, and it really depends on how you store them. The quality will decline after approximately 10 days if you keep fresh homemade tortillas or an unsealed bag of store-bought tortillas in the refrigerator.

If you store them in freezer bags following the abovementioned steps, they will last about 2-3 months.

If you store them in a freezer-friendly airtight container, they will remain fresh longer and last 6-8 months; but it will also make it harder for you to spread them out flat on a baking sheet before cooking them up later on (another great way to use up stale tortillas).

However, keep in mind that freezing tortillas for longer will cause them to lose their shape and become more brittle over time as they thaw out.

Freezing also results in a loss of volume and moisture content (like any food), which means that they won’t keep as well after thawing out. That’s why we suggest not keeping the wheat flour tortillas and corn tortillas in the freezer for more than a month.

How Do I Thaw Frozen Tortillas?

The best way to defrost frozen tortillas is to place them in the refrigerator overnight. This will allow them to thaw slowly and evenly.

Just place the stack of tortillas in a covered dish or plastic bag and set them in the fridge before you go to bed. In the morning, they should be thawed and ready to use.

However, it’s always a bummer when you’re in the middle of preparing your meal and realize you forgot to take the tortillas out of the freezer.

But don’t worry, there are a few easy ways to thaw them out quickly so you can get back to your meal prep.

Microwave

If you’re in a hurry, you can place the flour/corn tortillas in a microwave-safe dish and heat them on low power for 30-60 seconds.

Be sure to rotate the tortillas during cooking so they thaw evenly. This will thaw the tortillas quickly, but they may not be as evenly thawed as if you’d used the refrigerator method.

[Pro Tip: Place the frozen tortillas in a damp paper towel before putting them in the microwave; this will help to soften them up so they’re easy to work with.]

Traditional

If you don’t have a microwave, you can also defrost tortillas by placing them in a sealed zip-top bag and then running them under warm water for a few minutes.

Once they’re pliable, you can remove them from the bag and proceed with your recipe.

Once your tortillas are thawed, you can use them just like you would fresh tortillas. They’ll be soft and pliable, and ready for all your favorite fillings.

So, the next time you find yourself with the task of defrosting tortillas, don’t panic! Just follow these simple steps and you’ll have thawed tortilla warmer ready to use in no time.

Is It Better to Just Refrigerate Homemade Tortillas?

How to Store Homemade Tortillas

It looks like a lot of work to store tortillas in the freezer, right? In fact, it is. So, you might be wondering, why not just refrigerate tortillas rather than freeze them. The answer is: it depends on you.

If you want tortillas that are more pliable and you’re sure to use them within the next few days, refrigerating is the way to go.

Tortillas stored in the fridge will last for about a week and will be more flexible than frozen tortillas. Also, this helps you to avoid the procedure of separating, wrapping, freezing, thawing, and warming.

However, be sure to cook your fresh tortilla within a few days. They won’t last as long and might not taste as fresh after 3-4 days, as they will start to become stale after that in the refrigerator.

If your scenario needs keeping the tortillas for a week or longer, however, you are now aware of safe methods to do so.

Whether you choose to store tortillas in the freezer or refrigerator, be sure to enjoy them while they are fresh! Nothing beats fresh, warm tortillas straight from the oven or grill.

FAQs

Can You Freeze Flour Tortillas?

Yes, you can freeze flour tortillas. They should be wrapped tightly in plastic wrap or placed in a zip-top freezer bag. Then, put the bag in the freezer. To thaw, remove from the freezer and allow to thaw at room temperature or place in the microwave for 30-60 seconds.

Is It Okay to Eat Tortillas After the Expiration Date?

It depends on how long after the expiration date the tortillas are. If they are only a few days past the expiration date, they are probably still okay to eat. The tortillas may not be of their best quality, but they are still safe to eat. However, if they are a week or more past the expiration date, they are probably not safe to eat.

Can You Freeze Corn Tortillas?

Yes, you can also freeze corn tortillas like you freeze flour tortillas. Just place them in freezer bags and seal them tight. They should stay fresh for up to three months. When you’re ready to use the corn tortillas, just thaw them out at room temperature or in the oven, the same way as flour tortillas or homemade tortillas.

How Do I Know If Tortillas Are Bad?

You can tell if tortillas are bad if they have mold on them, if they are dry and crumbly, or if they have an off/sour smell. They may also taste sour or have a slimy texture. If you are unsure, it is best to throw them out. Better to be safe than sorry!

How Long Do Corn Tortillas Last?

Corn tortillas keep fresh 3-4 days in the cupboard, up to 10 days in the fridge, and nearly 8 months in the freezer.

How Long Do Flour Tortillas Last?

Wheat flour tortillas also last from 7 to 10 days in the fridge and up to 8 months in the freezer.

How Long Do Tortillas Last in the Fridge?

Most tortillas can be stored in the fridge for up to 10 days but are best used within 3-4 days.

How Can I Defrost Tortillas?

Simply leave them out on the counter and they will thaw in an hour.

Can I Refreeze Tortillas?

As long as your tortillas aren’t moldy or soggy, you can safely refreeze them.

Can You Freeze Celery? Find Out Awesome Celery Storage Tips!

Celery is just one of those vegetables that no one ever buys in bulk. It’s more of a supporting character in dishes, as opposed to the star of the show.

Because of this, there’s a good chance that you have a good deal of leftover celery stalks after making a big batch of soup or setting up a relish tray for guests.

But what are you supposed to do with extra celery stalks? Throwing them out is wasteful and I haven’t met anyone who likes munching on celery as a fun snack just to get them out of the way. 

This brings us to the question: can you freeze celery? How to keep celery fresh for longer?

I’ll answer these questions, and any other celery adjacent questions you might have right here. We’ll look at the best way to store celery for maximum freshness, the best tips on how to freeze celery, and what you can do with your frozen celery.

Aromatics and stalks are always rather tricky when it comes to long-term storage. Questions like can you freeze carrots and celery? Or, can you freeze leeks? 

They are pretty commonplace questions, so this article aims to clear the mystery surrounding frozen celery.

So, with all that out of the way let’s dissect the mystery of this aromatic veggie.

You may also like: How long can you freeze salsa

Celery 101: The Ultimate Healthy Snack

Celery is a stalk with leaves and has been consumed by people since antiquity. It is well-known for its high fiber and water content, which makes it a healthy vegetable for people on diets or trying to eat better.

Celery is considered an aromatic and is the prime ingredient of mirepoix─ a base of aromatics used in soups made by sautéing diced celery, carrots, and onions. The high content of water makes celery a crispy, crunchy stalk that is often served as an appetizer with relish, sour cream, or Greek yogurt as a dip.

What to do with celery leaves? Can you eat celery leaves? Celery leaves are often added to salads, used as a herb like parsley or coriander, minced and used as a garnish or topping, and sometimes included in green smoothies or shakes.

Celery is extremely healthy because it also contains plenty of antioxidants, and is rich in vitamins and minerals. At the same time, it aids in digestion, reduces inflammation, and has just 10 calories per stalk! Having a stash of celery seems like a good idea indeed.

How long is celery good for? When wrapped tightly in aluminum foil or cling film, celery will stay fresh in the drawer of your fridge for up to 2 weeks. 

However, it will become drier over time and lose crispness. For longer-term celery storage, you need to keep it in the freezer.

Freezing Celery: How to Store Celery in Freezer

can you freeze celery
can you freeze fresh celery

All this leads to the issue: can celery be frozen? Can you freeze fresh celery? 

Freezing celery is definitely doable but there is a method to the process. The following steps mentioned will show you the best way to store celery in a way that retains both flavor and freshness.

Preparing Your Celery Stalks:

Before you get to freezing your celery, you need to prep the celery tops. This will ensure a longer freezing time, and keep your celery tasting fresh when added to a dish.

  1. Separate the celery stalks. Use a small knife to split any attached stalks, trim off the root area at the bottom, and remove any leaves.
  1. Cut off any coarse stringy bits, as well as discolored sections of the celery stalks.
  1. Thoroughly wash the stalks and make sure there is no visible dirt on them. Soil tends to cling to the stalks, so you may need to rub them with a scrubber or your fingers.
  1. Chop celery into the size needed. Some recipes call for thin julienne slices of celery, while others need roughly diced pieces. On the other hand, many recipes need minced celery. This video will show you how to dice celery like a pro.

Blanch the Celery:

Blanching celery is an optional step, but it helps keep the celery crisp and fresh while frozen. It also increases its freezer life. Fresh celery lasts just 2 months in the freezer, while blanched celery lasts for up to a year.

  1. To blanch celery, boil water in a large pot. Once the water is boiling, add your celery and simmer for around 2-3 minutes. This is enough time to kill any microbes that can cause the celery to go bad.
  1. Then, strain out the water and tip the blanched celery pieces into a bowl of cold water with ice cubes. This will ‘shock’ the celery and stop them from being cooked any further.
  1. Once the celery is cool to touch, pat them dry with several sheets of kitchen towels.

Freeze the Celery:

This happens in two stages: first, the celery is flash-frozen, and then kept in the freezer for longer-term storage.

  1. To flash freeze the celery, lay them out in a single layer on a sheet tray. Place the tray in the freezer for a couple of hours and let wait for the pieces to freeze solid. This step prevents the pieces of celery from sticking to each other and makes using them later much easier.
  1. Next, take the frozen pieces of celery and place them in a Ziploc bag or ice cube trays. Putting them in ice cube trays makes it easier to remove specific portions when cooking. You can de-mold the cubes and store them in a container or freezer bag for more convenient storage.
  1. Make sure that you push out the air from your Ziploc or freezer bags to avoid freezer burn. This will also leave more space in your freezer for additional storage.

Using Frozen Celery in Cooking:

After celery is frozen, it loses a good deal of its crispness. Because of this, you can’t serve it up as an appetizer with dip, or add it to salads. In short, it’s a good idea not to use frozen celery raw.

Instead, cook it down in stews and similar recipes like braised celery and mirepoix for the best results. (Can you freeze mirepoix? Yes, but it will be rather mushy.) For the ideal flavor and texture, experts recommend cooking celery that has been frozen.

Tips for Freezing and Cooking with Celery

store celery in freezer

These handy hacks will help you choose the best celery and freeze them the right way, which in turn will make your dishes taste much better.

  • Buy celery stalks that are firm and upright. They should snap when pulled, not bend.
  • Fresh celery will have crisp leaves that are green in color. Avoid the ones with wilted brown or yellow leaves.
  • You can also steam the celery before freezing them as this will also help preserve flavor.
  • When using frozen celery, don’t wait for them to thaw out, as this takes time. Add the frozen celery right into the pot, and any excess water releases will be cooked off.
  • For the best flavor and texture, eat your celery within 7 days of purchase, or store it in the freezer.

Celery Recipes for When You’re Bored of the Usual Stuff

Celery Recipes
Celery Recipes

As I said, celery is usually added to amp up other ingredients in recipes, or as a lousy snack. Why not try a recipe where celery is the star?

Crab Tostada:

This scrummy lunch features a crunchy tostada that is topped with a crab salad. The salad features things like creamy avocado slices, crisp minced celery, cherry tomatoes, and crab meat sauteed in butter. It is also a good appetizer if you plan on serving frozen steaks or roasts.

Classic Stuffing:

If you’re one of those people who prefer stuffing to turkey, this Thanksgiving staple is meant for you. Crusty rustic-style or even homemade bread, fennel, and celery are the prime ingredients of this recipe and are complemented by the addition of herbs like sage, thyme, parsley, and rosemary.

Celery Kombu:

Say goodbye to the sad sour cream-and-celery stick combo, this will be your new favorite appetizer. Celery stalks are sliced and the strings are removed. They are then smothered in a mix of furikake, sesame oil, soy sauce, and toasted sesame oil.

This light and flavorful starter is ideal if you are planning on serving something heavier like a brisket or monkfish as a main dish.

Khoresh-e Karafs (Celery Stew):

This Persian stew features celery as the main ingredient. It can be prepped with beef or cremini mushrooms, so you can alter it to fit a vegetarian diet. 

These 2 ingredients are stewed with aromatics like garlic and onion and seasoned with peppers, dried chili flakes, black pepper, dried mint, and parsley. Fresh lime juice and saffron take this humble stew to a whole new luxurious level.

Scallops on Pureed Celery:

For a simple yet elegant dish, sear some scallops and serve them on a blanket of pureed celery. The celery adds a fresh and green dimension to the meaty scallops. Add shavings of truffles to elevate the dish to a 5-star level.

Still Got Questions?

Below you will find answers to questions people often have about freezing and storing celery.

01. Should I Freeze Whole or Diced Celery?

People often wonder: can you freeze chopped celery? The answer is yes, and it is the best way to store frozen celery and it can be difficult to cut up a whole stalk once it has been frozen.

02. How Long Does Celery Last in the Fridge?

When wrapped carefully and stored in the vegetable crisper, celery lasts up to 2 weeks in the fridge.

03. Why Do I Need to Blanch Celery before Freezing?

Blanching kills any bacteria on the celery which speeds up the process of decomposition. It also helps the celery retain color, texture, and flavor once frozen.

04. Do I Need to Blanch Carrots before Freezing Them?

Like celery, carrots need to be cleaned, diced, and blanched before being frozen. The process of freezing them is exactly the same as that of celery.

05. Can I Freeze Cooked Celery?

Celery-based stews, braised celery, and soups can all be frozen in freezer-safe containers for a couple of months.

Final Say

Knowing how to preserve celery will mean that you always have a fresh veggie on hand to use as a base in soups, stews, and even certain curries. 

Next time you have a handful of celery stalks you don’t need right away; you won’t have to ask yourself can you freeze celery? 

Instead, bust out the ice cube trays and freezer bags and get ready to blanch and dice a whole lot of celery for future meals!

Discover the Ideal Palm Sugar Substitute for Your Cooking!

If you’ve ever tried making Thai or Indian dishes, you may have noticed that palm sugar is a pretty important ingredient. And while you might have thought that swapping it for white sugar was a good option, it really isn’t a proper palm sugar substitute.

Palm sugar has certain characteristics that give it a unique flavor, making it almost indispensable in dishes like Pad Thai noodles, South Asian and Thai curries, and Indo-Malaysian cuisine. But since it can be a tricky ingredient to find, chances are you need to find a proper palm sugar alternative.

And that’s why I’m here to present you with 5 ingredients that you can use as a palm sugar alternative. They have a flavor profile pretty comparable to palm sugar, so you will be able to achieve similar results.

But that’s not all. You will also learn which of these ingredients work best for different dishes and cuisines, and the things that you should avoid them in as well. The article will also provide a rundown of the best products and where you can find them.

What is Palm Sugar?

palm sugar substitute
Palm Sugar

Palm sugar is a kind of sweetener derived from the sap of palm trees. The sap is extracted from the coconut palms and then boiled and simmered until the excess water dries up and a thick, rich syrup is formed. This syrup is also sold for consumption, but most of the time is crystallized to form the more conventional version of palm sugar.

The palm sugar crystal is a warm brown and is sold in block or granular form. Because it isn’t treated with chemicals, it is a ‘natural’ sweetener and is rich in vitamins and minerals. Compared to the more processed white sugar, it is a borderline healthy choice of sweetener.

In terms of taste, palm sugar has a unique flavor, it has deep smoky notes and a hint of caramel. It also tastes a lot more complex and richer when compared to both brown and white sugar. This makes a great choice for adding great depth to many Thai and Malay sauces and curries. In South Asia, it is sometimes added to curries and dals.

The region of Bengal is well known for its love of palm sugar. Besides adding it to curries, palm sugar syrup and its granular form are added to countless traditional dessert dishes, eaten with Rotis, and are a staple in many kinds of rice pudding.

It is also added to chai, replacing white sugar to give it a smokier and richer flavor. In recent times, many innovative recipes use palm sugar syrup in ice creams, cakes, souffles, and mousses.

Wondering where to buy palm sugar from? Your local Indian, Asian, and even Middle-Eastern grocery stores are most likely to have some form of palm sugar. You can also try ordering some quality palm sugar online. If you can’t find any at all, the rest of this article will come in handy.

5 Best Alternatives for Palm Sugar Replacement

Now that we’re all on the same page about palm sugar, let’s look into alternatives. This list includes both granulated and liquid sweeteners that try to match the smokey, complex notes of palm sugar, so you’re bound to get similar results in your cooking.

01. Coconut Sugar:

[amazon box=”B00PRGU6BA”]

Coconut sugar is produced from the buds of coconut tree flowers. Because they are both sourced from palm trees, they come pretty close to each other in terms of flavor. Like palm sugar, coconut sugar has a deep, smokey taste and looks a lot like granulated palm sugar as well.

Many people don’t understand palm sugar vs coconut sugar comparisons as they assume both mean the same thing. However, they are each sourced from different parts of the palm tree.

Because of this, you can easily replace palm sugar with coconut sugar and no one will notice the difference. They are both mildly sweet, which makes them great for curries. Coconut sugar is also seen as a healthier alternative and is often added to shakes and coffee instead of white sugar.

You can buy coconut sugar in both liquid and crystal form. The granulated form is the easiest to use, as is the syrup. Dealing with a whole block of coconut sugar is harder as you need to shave chunks of it off with a sharp knife or pound it until it disintegrates.

Best For: Any kind of recipe that requires a sweetener, palm sugar, or otherwise.

Not Recommended For: People who are allergic to coconut.

Product Recommendations: Organic Coconut Palm Sugar and Anthony’s Organic Coconut Sugar.

02. Maple Syrup:

[amazon box=”B0011311LM”]

As far as liquid sweeteners go, maple syrup is the best replacement for palm sugar syrup. And I’m not talking about the crappy caramel-flavored corn syrup versions. But pure 100% maple syrup has that woody, smokey flavor that comes pretty close to palm sugar.

The butterscotch, caramelized flavor of real maple syrup makes it a great choice for desserts, drinks, and even things like porridge, oats, and even coffee. If you want to make the famous pal sugar chai but with more accessible ingredients, use a spoon or two of maple syrup instead.

Maple syrup is also a much milder sweetener when compared to refined sugar. It is safe for people with IBS, those on a FODMAP diet, and is a good choice for diabetics when taken in moderation.

Most cooking experts advise using 5 tablespoons of maple syrup for every 100g of palm sugar mentioned in a recipe. However, you can scale it up or down according to your preferences.

Best For: Desserts, beverages, and recipes that call for palm sugar syrup

Not Recommended For: Curries and sauces

Product Recommendations: Maple Grove Farms Pure Maple Syrup and Hidden Springs Organic Vermont Maple Syrup.

03. Brown Sugar:

[amazon box=”B008XJWZM6″]

Rich and dense, brown sugar is a decent replacement for palm sugar in sweet and savory recipes. It is also a great substitute for coconut sugar in baking. It looks a lot like palm sugar too, so this adds to the illusion as well.

Brown sugar has a deep, molasses flavor which makes it a little similar to palm sugar. It is moist and sticky, so baked goods made with brown sugar end up being super chewy, rich, and soft. Brown sugar is literally white sugar with molasses added to it, so it is a good alternative.

This is because molasses is an effective substitute for palm sugar as well. The dark and slightly smoky taste is present in both but is less pronounced in brown sugar. This makes brown sugar a good addition to curries and sauces as well.

If you don’t have any brown sugar around, other versions like Muscovado and Turbinado sugar will also work in a pinch.

Best For: Baked goods, beverages, curries, and sauces

Not Recommended For: South Asian dessert dishes

Product Recommendations: Woodstock Brown Sugar or Domino Dark Brown Sugar.

04. Molasses:

[amazon box=”B00M1ZYF9E”]

Molasses is another staple in many South Asian dishes. Molasses is extremely rich and sweet and is very similar to palm sugar syrup. It is dark and viscous and has complex gourmand notes and a smoky flavor, so it is pretty similar to palm sugar.

As a result, it makes a good replacement for recipes that call for the liquid version of palm sugar. It goes well with puddings, mousses, and treacle. Some sauces also call for a little molasses to sweeten them.

If you want to replace granulated palm sugar with molasses, just add a little molasses to some regular white sugar. A good rule of thumb is to add two tablespoons of molasses to a cup of white sugar.

This is in effect, brown sugar and can be used instead of palm sugar. Moreover, molasses is much sweeter than palm sugar, so use them sparingly as a substitute.

Best For: Desserts and dipping sauces

Not Recommended For: Curries and most savory dishes

Product Recommendation: Golden Barrel Black Strap Molasses and Grandma’s Molasses

05. Honey:

[amazon box=”B00CMQD3VS”]

You might not have molasses or coconut sugar in your pantry, but there’s a good chance that you always have some honey in the kitchen. As a last resort, you can use honey instead of palm sugar in many different recipes, both sweet and savory.

As far as texture goes, honey is pretty similar to palm sugar syrup or liquid jaggery. Honey is a lot less sticky and viscous than molasses, so it is much easier to handle and cook with. Like palm sugar, it has a similar level of sweetness and nutritional content.

Because it is in liquid form, it is best to add half the amount of palm sugar as mentioned in the recipe. As a rule, it is a good idea to use honey in things like baked goods, iced beverages, porridges, puddings, and dipping sauces. Honey is also used in marinades as it has tenderizing properties as well.

It contains similar levels of fructose and glucose to palm sugar. Using liquid honey will require the need to adjust the other liquids in your recipe. Also, honey is sweeter than palm sugar, so you may need to decrease the amount used when compared to the portion of palm sugar needed.

Bear in mind that baked goods sweetened with liquid honey are prone to browning more quickly than use those that use granulated sweeteners. (By the way, you can find other substitutes for honey here!)

Best For: Desserts, baked goods, beverages, sauces, and marinades

Not Recommended For: Curries and stews

Product Recommendation: Nature Nate’s 100% Pure, Raw & Unfiltered Honey and Happy Belly Clover Honey.

Any Further Questions?

Below you will find answers to questions that are asked the most about substitutes for palm sugar.

01. What Can I Use Instead of Coconut Sugar?

Palm sugar, brown sugar, and even date sugar can be used as substitutes for coconut sugar with similar results.

02. Is Palm Sugar a Healthy Option?

While all sweeteners are inherently unhealthy, palm sugar is much healthier than refined sugar as it isn’t processed, is completely natural, and contains a good number of vitamins and minerals.

03. Can I Substitute Coconut Sugar for Brown Sugar?

You can easily substitute coconut sugar for brown sugar in a 1:1 ratio without any major changes in flavor.

04. Can I Replace Brown Sugar with Palm Sugar?

Palm sugar and brown sugar can be used interchangeably in a 1:1 ratio and you won’t find a dramatic difference in the end result.

05. Can I Use Honey Instead of Palm Sugar?

Honey is an effective substitute for palm sugar, although it is quite sweeter than palm sugar. However, in most sauces and desserts, it works very well as a replacement.

06. What Is the Difference Between Palm Sugar and Regular Sugar?

The main difference between these two sugars is their source. Palm sugar is made by boiling the sap from palm trees. On the other hand, regular sugar is made from sugar canes and is treated heavily with chemicals. Palm sugar is also brown in color, and regular sugar is white and bleached.

07. Is Palm Sugar the Same as Coconut Sugar?

Palm sugar and coconut sugar look and taste very similar, but are made from different parts of the palm tree. Palm sugar is made by extracting the sap from the palm tree, while coconut sugar is made from the sap of flower buds from the palm trees.

08. Is Palm Sugar and Jaggery The Same?

Yes, palm sugar is also known as jaggery in many places.

09. Is Coconut Palm Sugar Better Than Cane Sugar?

Palm sugar is a completely natural sugar, derived from plants and is processed without any chemicals. These features make it a much healthier choice over refined cane sugar. Also, it has a lower glycemic index and is rich in vitamins and minerals, making it a better option.

Wrapping Up

Palm sugar has replaced refined sweeteners in many households, due to health reasons and because it is used in so many cuisines. People even use palm sugar in coffee now! If you haven’t made the switch, but would like to dabble in making things like Penang curry and pithas, using a palm sugar substitute is a good idea.

Proportions and ratios are other important factors you have to consider when substituting honey or molasses for palm sugar. You might need to experiment a bit before getting used to using molasses too.

While some alternatives work better than others, a mix of coconut sugar and molasses or maple syrup will give you the closest results to actual cane sugar. Once you get the hang of it, your culinary horizons will stretch far and wide!

What To Substitute For Rosemary When You Have Run Out Of It!

Learn what substitute for rosemary works well in the right ratios in beef, pork, lamb, chicken, mushroom, and other dishes to give you a similar flavor profile. 

What To Substitute For Rosemary When You Have Run Out Of It!
What To Substitute For Rosemary When You Have Run Out Of It

Your kid will be home from college and you’re excitedly preparing her favorite Mediterranean dishes when you notice athere’s no rosemary in the cupboard. 

Your spouse is away and there’s nobody to run a quick errand to the supermarket.

If you’ve ever been in this situation like me, you’ll know exactly what I’m talking about and how frustrating it is.

But there’s an easy solution – substitute for rosemary.

I know that substitutes don’t do full justice, but you need to get the job done.

But what spice can you use in place of rosemary?

There are a few herbs similar to rosemary.

Let’s find out!

What Is Rosemary?

Health Benefits of Rosemary

The arid and rocky Mediterranean region is home to the fragrant and versatile herb rosemary. 

The rosemary is a perennial plant with needle-like leaves and lives for two years. 

It is used as a culinary seasoning since ancient times in Rome and Greece, in creating personal fragrances, and possibly even for health reasons.

Along with many other herbs, including oregano, thyme, basil, and lavender, rosemary is a member of the mint family Lamiaceae.

It can be used both in its fresh and dried forms. 

The herb is a good source of iron, calcium, and vitamin B6 in addition to tasting good in recipes like rosemary chicken and lamb.

Rosemary has been praised for its therapeutic qualities and has long been used to ease muscle soreness, enhance memory, strengthen the immune and circulatory systems, and encourage hair development.

How Does Rosemary Taste?

substitute for rosemary

Coming from the mint family, rosemary does have a minty taste. 

Like sage – a substitute for rosemary – rosemary has a peppery and woody taste and leaves a slightly bitter aftertaste if you eat fresh rosemary leaves.

The strong flavor of rosemary makes it a perfect spice for cooking meat dishes, stews, soups, and poultry. 

If you don’t want this herb to drown out other flavors in your food, use it in moderation and gradually up the proportion as per your liking. 

When you’re using rosemary in cooking, you should add it early on so that it has enough time to release all its oils and flavors with it. 

What Does Rosemary Smell Like?

What Does Rosemary Smell Like?
What Does Rosemary Smell Like

Rosemary smells fresh and clean flavor with hints of pine and lemon

Having it in your kitchen is like having something evergreen and refreshing. 

The smell of rosemary and garlic is to die for!

Being very aromatic, rosemary can be added to enhance the natural flavors of food like fish, poultry, beef, pork, lamb, and even salads and vegetables. 

Due to the pungent nature of rosemary, the best part is that its flavor doesn’t diminish with cooking. 

That’s why you can use it in stews and soups for a fragrant bowl of comfort food. 

Substitute For Fresh Rosemary

Did you know you can simply substitute dried rosemary with fresh and vice versa?

However, keep in mind that dried rosemary is more pungent and stronger than fresh rosemary.

That’s why you should consider the amount of dried rosemary you are using.

It’s good to use a teaspoon of dried rosemary for every tablespoon of fresh rosemary

Another tip to remember is that dried rosemary is best used in cooking as its brittle texture is not easy to chew. 

It takes a while for dried rosemary to absorb moisture from the cooking and become easily chewable. 

That’s why it’s not recommended to use it as a garnish or add it toward the end of cooking. 

As mentioned earlier, you can use fresh rosemary as a substitute for dried rosemary.

In this case, if you need to use a teaspoon of fresh rosemary, replace it with ¼ teaspoon of dried rosemary. 

Top Substitutes For Rosemary

Substitute For RosemarySuitable ForHow To Use
Dried rosemaryRoast rubs
Cooked dishes
1 teaspoon of dried rosemary for
1 tablespoon of fresh rosemary
ThymeSalads
Cooked dishes
Equal parts
SageEgg and meat dishes1 part rosemary to half part sage
TarragonFish, chicken,
salad dressing,
French cuisine
1 tablespoon of rosemary to half
tablespoon of tarragon
MarjoramMeat dishes
Mushroom
SavoryEuropean cuisineUse little as summer savory
can be spicy
Caraway seedSoup
Meat
Vegetables
Bread
Sausage dishes
Start with little
Italian seasoningCooking only,
not for salads or
roasted meat
1 tablespoon of rosemary to be substituted with half tablespoon of Italian seasoning
OreganoEqual parts
BasilEqual parts

The best substitute for rosemary depends on what you’re cooking as it can vary according to meat or poultry or fish dishes. 

For example, sage could serve as a rosemary replacement in a chicken dish but if you’re making Italian cuisine, the closest substitute for rosemary is oregano.

Rosemary also pairs well with other spices and can give your dish a very well-blended flavor.

So, you need to think a bit before reaching out for the best rosemary seasoning substitute.

If you get confused and think about what can I use instead of rosemary, don’t worry as there are quite a few options. 

  1. Thyme

A native Mediterranean herb, thyme comes from the perennial mint family.

It’s one of the key ingredients in Herbes de Provence seasoning spice.

As rosemary leaves substitute, use thyme in equal parts

The same rule applies to either fresh or dried thyme. 

Although thyme has a milder flavor than rosemary, it works well with a number of cooked dishes as well as salads. 

The herbal flavor of thyme with distinct flavors of grass, wood, and florals is not too different from rosemary and will not give your dish a new twist. 

Although fresh thyme has more flavor than dried one, if preserved carefully, dried thyme can retain a lot of flavors.

If you want to use lemon thyme as a rosemary alternative, keep in mind that the flavor and taste of the dish will change as it would emit a citrusy aroma.

Pro Tip: For lamb dishes, mix thyme, peppermint, and bay leaf in equal parts and use it as a substitute for rosemary. 

  1. Sage

With a pine-like flavor with notes of eucalyptus, lemon, and mint, and a stronger taste, sage can be used as a rosemary spice substitute. 

It’s a great option for seasoning poultry, as pork and poultry stuffing, and in sausages.

You can try it in egg and meat dishes too for a unique taste.

As it has a stronger flavor profile, use it carefully. 

Start by adding a little bit of sage – half part for every part of the rosemary. 

For example, if your recipe calls for a teaspoon of rosemary, use half a teaspoon of sage

This should be followed for both fresh and dried sage to replace fresh and dried rosemary.

Then you can gradually add more and more until you find the perfect balance.

  1. Tarragon

You can find wild tarragon across North America and Eurasia.

Among the few variants, the most popular in the culinary world is the French tarragon.

Tarragon is not only used in seafood, soups, fish, and poultry dishes but also in French cuisine that has fish, chicken, eggs, or cheese in it.

Salad dressings also use tarragon as a way to add a fresh flavor.

It has a quite strong flavor of anise and licorice so you should be careful while using it as a rosemary powder substitute. 

Depending on how strong you like the flavor of tarragon to be in your dish, start by using half a tablespoon of tarragon for every tablespoon of rosemary.

You can adjust the amount according to your preference.

  1. Marjoram

You can find this plant native to Turkey, the Arabian peninsula, the Mediterranean, Western Asia, Cyprus, and the Levant. 

This plant came to the British Isles in the Middle Ages and much later on in the US, after the Second World War.

Although you can confuse marjoram for rosemary as they appear almost the same, the taste is a bit different.

Having said that, the similar flavor profile of citrus and pine makes marjoram a good rosemary substitute. 

The well-balanced sweet and bitter taste of marjoram complements the earthy flavors of both meat and mushroom dishes. 

It’s also used to season soups, stews, sauces, herbal teas, and salad dressings.

You can use a 1:1 ratio to replace rosemary as an alternative and you can always tweak the amount to suit your palate. 

  1. Savory

There are two types of savory – winter and summer. 

Hailing from the mint family and grown in the Mediterranean region, it’s often used in European cuisine to add flavor to beans and also to season meat. 

It’s one of the main ingredients of Herbes de Provence

While summer savory has a sweet and spicy flavor and taste, winter savory is more earthy with notes of pine and sage. 

Both winter and summer savory have notes of thyme, mint, and marjoram.

You can use either fresh or dried savory as a rosemary substitute.

Use in equal parts, that is, in a 1:1 ratio. 

However, as the summer savory might be a bit spicy, start by using a lesser amount and change it as you go along. 

Summer savory can withstand long cooking times so it’s a good condiment when simmering soups, stews, and sauces. 

The only downside is that it’s a rare herb and not a kitchen staple that you can reach for any time. 

  1. Basil

Basil comes from the same mint family of plants and is believed to be native to India. 

There are a few varieties of basil including Thai, Italian, holy, lemon, and lettuce-leaf basil. 

It adds a sweet flavor with lots of warmth in your dish. 

You will find a lot of Italian dishes using copious amounts of this flavorful and aromatic herb to bring freshness to your palate. 

If you visit any streetside stall in Thailand and order spring rolls, they will always come with a bunch of fresh basil leaves to complement the savory bites. 

Use in equal parts when replacing rosemary with basil. 

Pro Tip: Add basil leaves as whole or as cut into strips toward the end of the cooking as otherwise they will wilt and diminish in flavor when cooked for a long time. 

  1. Caraway Seed

Found abundantly in North Africa, Asia, and Europe, the caraway seeds are small seeds that pack quite a bit of pungency. 

Also known by the names of Persian cumin and meridian fennel, caraway seeds belong to the carrot family and have a distinct flavor, resembling anise and adds a slight hint of licorice flavor in dishes. 

An earthy taste with a suggestion of lemon and pepper makes it a good substitute for fresh or dried rosemary.

Its widely used in British and European cuisine. 

Due to the strong flavor, it’s better to use caraway seeds as a rosemary substitute for pork chops or pork roast.

It’s advised to use caraway seeds in small amounts and gradually add more if needed. 

  1. Oregano

Oregano has its origins in the Mediterranean area but has spread wide and far. 

A close cousin of marjoram, both oregano and marjoram have a special place in cuisines from Italy, France, Spain, Mexico, Greece, and Turkey. 

Dried oregano has a stronger flavor than the fresh one. 

The warm and earthy flavor of oregano has a bit of a bitter taste.

As it pairs well with Italian spices used in cooking, it’s no surprise that it’s mostly used in southern Italy where people prefer their fare more spicy.

Fried, roasted, and grilled vegetables, meat, and fish are often treated to this delightful mix of dried herbs for a nice flavor. 

Turkish cuisine uses this herb to season lamb and mutton.

In Portugal, it’s used as a topping in a simple cucumber and tomato sandwich.

You can also find traces of it in a Greek salad and it’s also used to flavor lemon-olive sauce that’s served with casseroles and grilled fish or meat.

As a rosemary substitute, use either fresh or dried oregano in equal parts.

  1. Italian Seasoning 

Italian seasoning is a mix of various herbs including some listed above as rosemary substitutes. 

You can find hints of thyme, basil, marjoram, oregano, rosemary, savory, cilantro, and others. 

That’s why it can be easily used as a rosemary alternative.

The best part is that you can make Italian seasoning at home and control the proportions of the various herbs to make it suitable for your palate or for the dish you’re cooking. 

Italian seasoning is best used in dishes that doesn’t use a whole lot of other spices as you can get a subtle mix of earthy, savory, and sweet flavors of all the herbs blended well.

The Best Substitutes For Rosemary In Specific Dishes

What To Substitute For Rosemary When You Have Run Out Of It! 1
Rosemary In Specific Dishes

It pays to have rosemary substitute ideas for specific dishes to get the full flavor of the dish without compromising on the taste. 

Instead of going through a list of spices that work as rosemary alternatives, you can take a quick glance at the dish type and then decide which dried or fresh herbs to use. 

Soup

Thyme and parsley are good substitutes for rosemary as they will enhance the natural flavor of the soup.

Fish

Sage, parsley, dill, or chives work well on dark and oily and lean, white fish whether you cook or grill them. 

Start with a 1:1 ratio to replace rosemary with any of the above and adjust as per taste. 

Beef and Steak

Thyme is the best substitute for rosemary when it comes to steak as we don’t want anything else to overpower the taste and flavor of steak and want to let it stand on its own. 

When making anything with beef, you can also use sage as substitute for rosemary and thyme. 

Chicken

A great rosemary substitute for chicken can be basil, Italian seasoning, or sage. 

You can also combine thyme and sage to use in chicken and other poultry meat like turkey. 

Use thyme in equal parts but if you’re using sage to substitute rosemary, use half part of sage to one part of rosemary otherwise the flavor may get too powerful. 

Potatoes

Potatoes with rosemary is something else altogether but if you have run out of rosemary, you can use thyme or parsley to substitute rosemary. 

Although the flavors won’t be exactly the same, but you won’t regret it!

Lamb, Mutton, Goat

You can combine peppermint, bay leaf, and thyme as rosemary substitute for mutton, goat, or lamb dish. 

Mix each of these herbs in equal parts to get the right mix for seasoning. 

Then use one part of the mixed seasoning to replace one part of rosemary.

Mushroom-based dishes

Marjoram is the best substitute for recipes made with mushrooms as it enhances the earth mushroom flavors. 

In a 1:1 ratio, you can use marjoram instead of rosemary. 

You can also try combining basil, oregano, parsley, tarragon, and chives to take a mushroom-based dish to another level. 

Pork and Sausage Dishes

Take things another notch up by adding carraway seeds as a rosemary substitute for pork and beef sausages.

Sage is another alterative to rosemary that you can use in sausage dishes. 

Use half part of either of the substitute for every part of rosemary that the recipe requires. 

As always, you can change the substitute amounts to suit your taste buds. 

And if you’re wondering how to master the art of cooking Italian sausage in the oven, you will need to have rosemary substitutions at hand if you don’t have the real thing.

Specific Dish TypeRosemary Substitute
SoupThyme
Parsley
FishSage
Parsley
Dill
Chives
Beef and SteakThyme
Sage
Chicken, Turkey, PoultryThyme
Basil
Italian Seasoning
Sage
PotatoesParsley
Thyme
Lamb, Mutton, GoatMix of peppermint,
thyme, and bay leaf
Mushroom dishesMarjoram
A mix of basil, chives,
parsley, tarragon, oregano
Pork and Sausage DishesCaraway seeds
Sage

FAQs

What Can I Use If I Don’t Have Rosemary?

If you don’t have rosemary, you can use many other herbs for seasoning and as garnishes. 
It depends on what you’re cooking and the type of flavor and taste profile you prefer. 
Stronger rosemary substitutes include caraway seeds, tarragon, and oregano while milder substitutes for rosemary are thyme and marjoram. 

What Can I Substitute For Rosemary Leaves?

To replace fresh rosemary, use dried rosemary as a substitute. 
You need to use a teaspoon of dried rosemary instead of a tablespoon of fresh rosemary leaves as the dried version has a stronger flavor profile. 
If you don’t have dried rosemary at hand, use dried thyme , fresh or dried sage, and other dried herbs as listed above.

What Is The Closest Herb To Rosemary?

The closest herb to fresh rosemary includes sage, oregano, marjoram, basil, and mint. 
If you want to replace dried rosemary, the best substitutes are dill, thyme, savory, tarragon, bay leaf.

What Can I Substitute For Rosemary Essential Oil?

Best rosemary substitutes in the essential oil category include eucalyptus, hyssop, and tarragon. 

ry, tarragon, bay leaf.

What Can I Substitute For Rosemary Essential Oil?

Best rosemary substitutes in the essential oil category include eucalyptus, hyssop, and tarragon.