Don’t toss it just yet: Canned Coconut Milk Past Expiration Date

Is your canned coconut milk past its expiration date? Don’t toss it just yet! Learn how to tell if it’s still safe to use, plus tips for making it last longer and delicious recipes for using up slightly older coconut milk.

Important: Signs of Spoilage
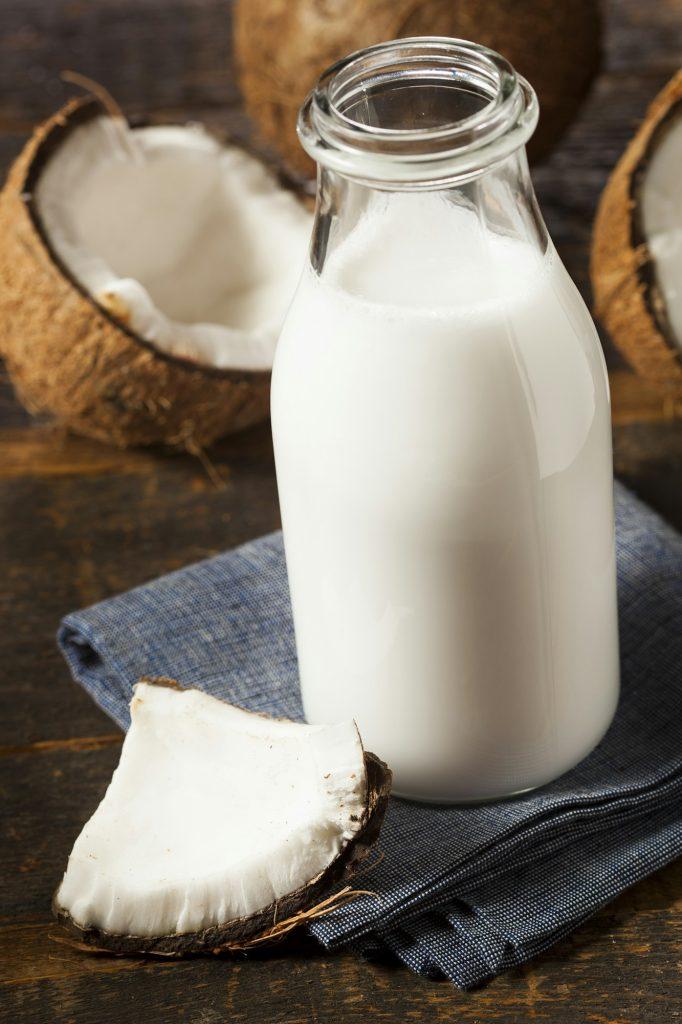
Fresh Organic Coconut Milk
fresh organic coconut milk

Before using any canned coconut milk, especially if it’s past the expiration date, always check for these signs of spoilage:

  • Foul or rancid smell: If the coconut milk smells “off” or unpleasant, it’s best to throw it away.
  • Mold: Any visible mold on the surface or inside the can means the coconut milk has gone bad and should not be consumed.
  • Unusual changes in color or texture: If the milk appears slimy, chunky, or has a significantly different color than usual, it’s a sign that it has spoiled.

If you notice any of these signs, discard the coconut milk immediately to avoid potential food poisoning.

Understanding Expiration Dates
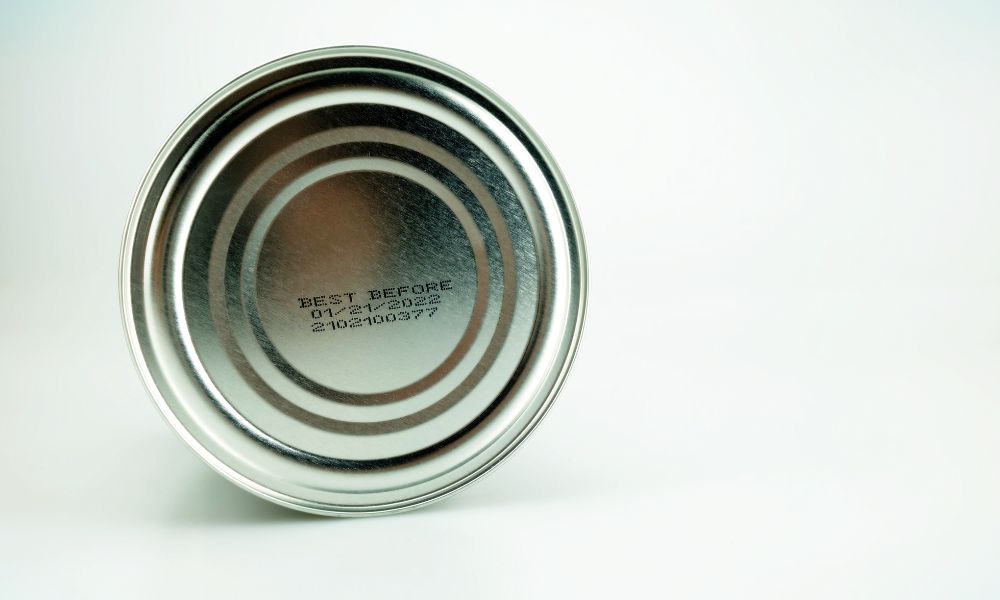
Don't toss it just yet: Canned Coconut Milk Past Expiration Date 1
Expiration Date

When it comes to canned coconut milk, it’s essential to understand what expiration dates really mean. These dates, often labeled as “best by,” “use by,” or “sell by,” are more about quality than strict safety guidelines.

While coconut milk may still be usable past its expiration date, the taste and texture can change over time.

It’s always best to follow food safety guidelines and use your senses to determine if the coconut milk is still good. If you’re unsure, err on the side of caution and throw it out.

How to Make Coconut Milk Last Longer
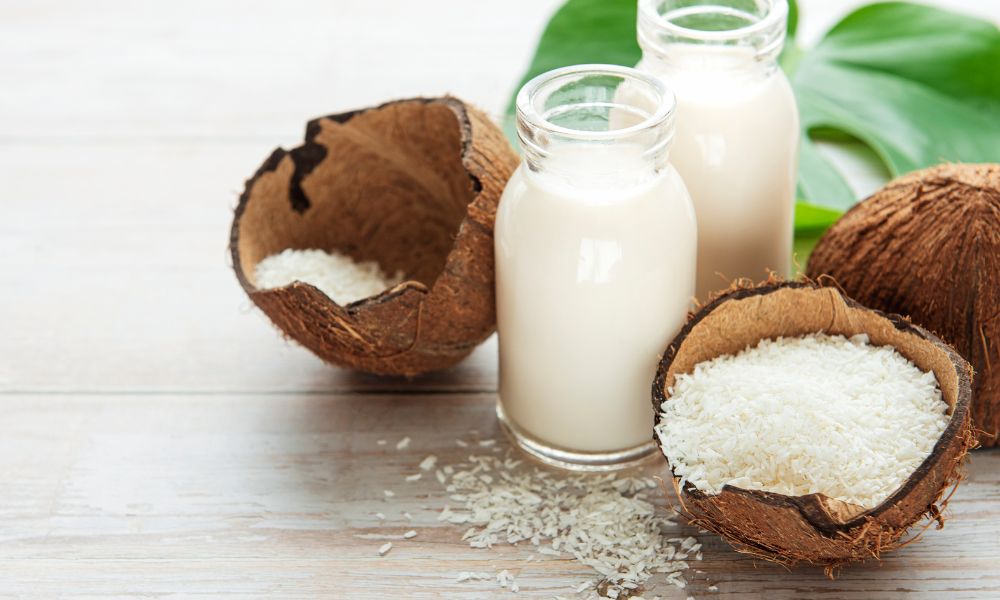
Don't toss it just yet: Canned Coconut Milk Past Expiration Date 2
Coconut Milk

To maximize the shelf life of your canned coconut milk, follow these simple tips:

  • Store properly: Keep unopened cans in a cool, dry place away from direct sunlight or heat sources.
  • Inspect the can: Avoid using cans that are dented, bulging, or rusty, as these can indicate a compromised seal or bacterial growth.
  • Refrigerate after opening: Once you’ve opened the can, transfer any unused coconut milk to an airtight container and store it in the refrigerator. Use within 3-4 days for best quality.

The Ultimate Guide to Freezing Coconut Milk
homemade kefir yogurt

Freezing coconut milk is an excellent way to prolong its shelf life and reduce waste. If you find yourself with extra coconut milk nearing its expiration date, consider freezing it for later use.

Here’s everything you need to know:

How to Freeze Coconut Milk

  1. Shake the can well before opening to ensure the milk is evenly mixed.
  2. Pour the coconut milk into ice cube trays or small freezer-safe containers.
  3. Freeze for 2-3 hours, or until solid.
  4. Transfer the frozen cubes or portions to a freezer-safe bag, removing as much air as possible.
  5. Label the bag with the date and use within 1-2 months for best quality.

Texture Changes and Best Uses

Coconut milk separates and can become grainy after freezing. Once thawed, it may not be ideal for use in smooth sauces or beverages. However, it works well in:

  • Smoothies: Blend frozen coconut milk cubes with fruits and vegetables for a creamy, refreshing drink.
  • Curries and soups: The texture changes are less noticeable in these hearty dishes.
  • Baked goods: Thawed coconut milk adds moisture and flavor to cakes, muffins, and bread.

Special Recipe: Tropical Frozen Coconut Smoothie
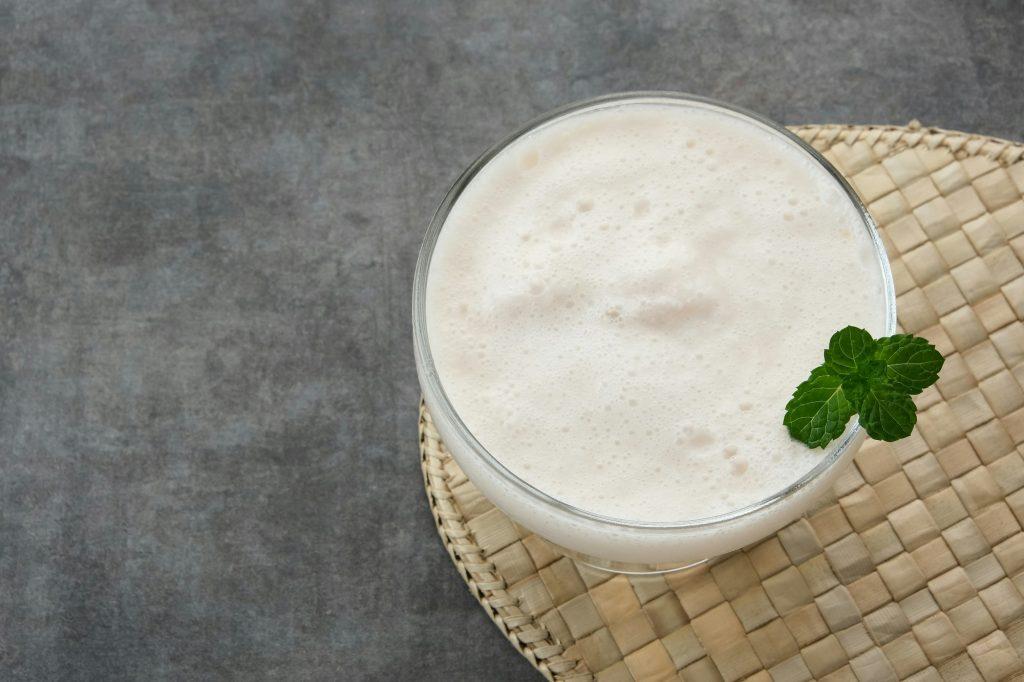
Coconut Milk Smoothies

Ingredients:

  • 1 cup frozen coconut milk cubes
  • 1 frozen banana
  • 1/2 cup frozen mango chunks
  • 1/2 cup frozen pineapple chunks
  • 1/2 cup coconut water

Instructions:

  1. Add all ingredients to a blender.
  2. Blend until smooth and creamy.
  3. Enjoy immediately for a refreshing tropical treat!

Recommended Uses for Older Coconut Milk

If your coconut milk is nearing or slightly past its expiration date, but still smells and looks fine, consider using it in recipes where minor changes in texture are less noticeable, such as:

  • Curries and soups: The bold flavors and hearty textures of these dishes can mask any slight changes in the coconut milk. Try our delicious Thai Green Curry or Creamy Coconut Lentil Soup [link to recipes on your site].
  • Smoothies: Blend older coconut milk with fruits, veggies, and your favorite smoothie ingredients for a delicious and creamy treat.
  • Baked goods: Use slightly expired coconut milk in cakes, muffins, or bread for added moisture and a subtle coconut flavor. Our Coconut Milk Banana Bread is a reader favorite [link to recipe on your site].
  • Coconut whipped cream: Chill a can of full-fat coconut milk overnight, then whip the solid cream for a dairy-free whipped cream alternative.

Learn more about using canned coconut milk in your coffee.

Case Study

Cooking with Slightly Expired Coconut Milk We conducted a small experiment to see how slightly expired coconut milk performs in a recipe.

We used a can that was one week past its expiration date but showed no signs of spoilage in a simple curry recipe.

The result? The curry tasted delicious, with no noticeable off-flavors or textures from the older coconut milk.

However, always prioritize safety and discard any coconut milk that shows signs of spoilage, regardless of the expiration date.

Canned Coconut Milk Storage Guide

Storage ConditionsShelf Life
Unopened can (cool, dry place)18-24 months
Unopened can (poor storage)6-12 months
Opened can (refrigerated)3-4 days
Frozen1-2 months

Don’t let expiration dates scare you! By understanding safety signs, proper storage methods, and creative ways to use older coconut milk, you can reduce waste and enjoy its delicious versatility for longer.

Now, go whip up something amazing!

FAQs

What is the shelf life of canned coconut milk?

Unopened canned coconut milk can usually last between 18 months and 2 years when stored properly in a cool, dry place. Once opened, however, the shelf life is significantly reduced, making it necessary to refrigerate and consume it within 3-4 days.

Can I use coconut milk after the expiration date?

Yes, if it shows no signs of spoilage (off smells, mold, texture changes).

Can you freeze canned coconut milk?

Yes, coconut milk can be frozen to extend its shelf life. For instructions and tips on how to freeze coconut milk, visit this detailed guide. Keep in mind that the texture and separation may change after freezing, but it is still suitable for most recipes.

How do you properly store canned coconut milk?

Store unopened cans in a cool, dry place away from direct sunlight or heat sources. Once opened, transfer the coconut milk to an airtight container and refrigerate for up to 3-4 days. If you wish to store it longer, refer to the freezing guide mentioned earlier.

What’s the shelf life of unopened canned coconut milk?

18-24 months when stored properly.
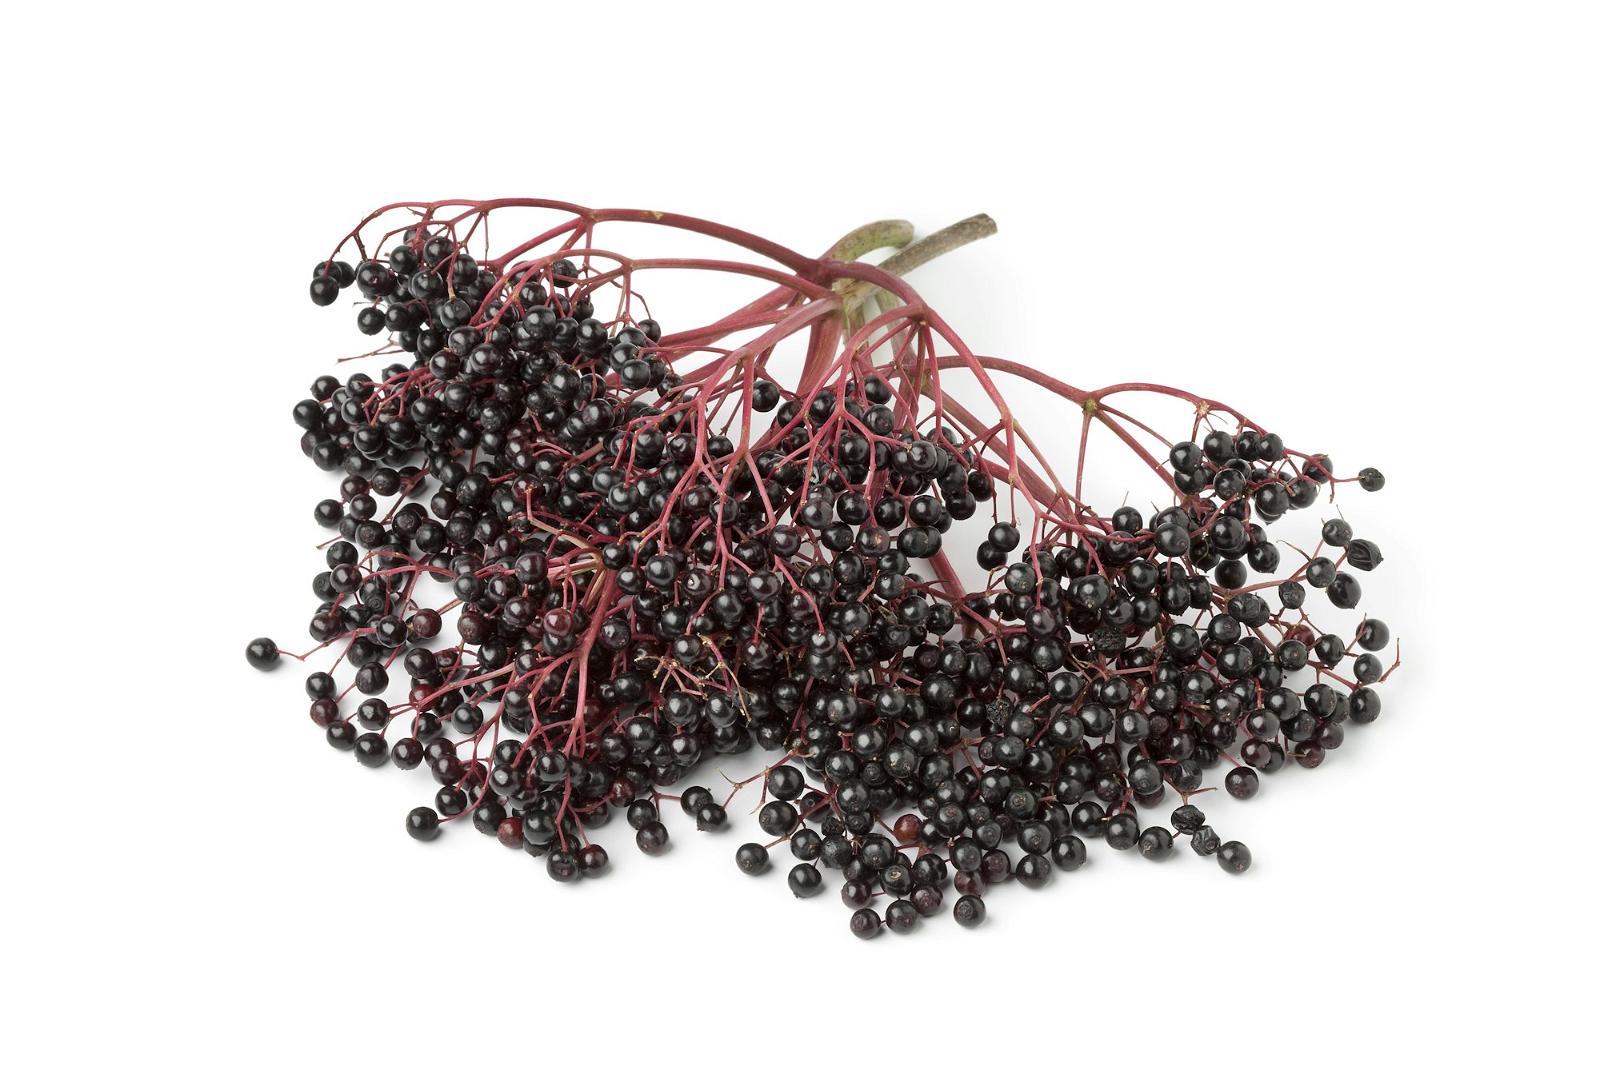
Can You Freeze Elderberry Syrup? YES!

Double your elderberry syrup’s lifespan and save money! Freezing is the secret to enjoying this immune-boosting elixir year-round. As a former chef and barista at Boat Basin Cafe, I’ve seen the power of preservation firsthand.

Elderberry syrup has become a wellness staple in many households, thanks to its delightful taste and potential health benefits. In this guide, we’ll explore the ins and outs of freezing elderberry syrup, so you can reap the rewards without breaking the bank.

Can you freeze elderberry syrup? YES! Here’s why…

how to store elderberry syrup
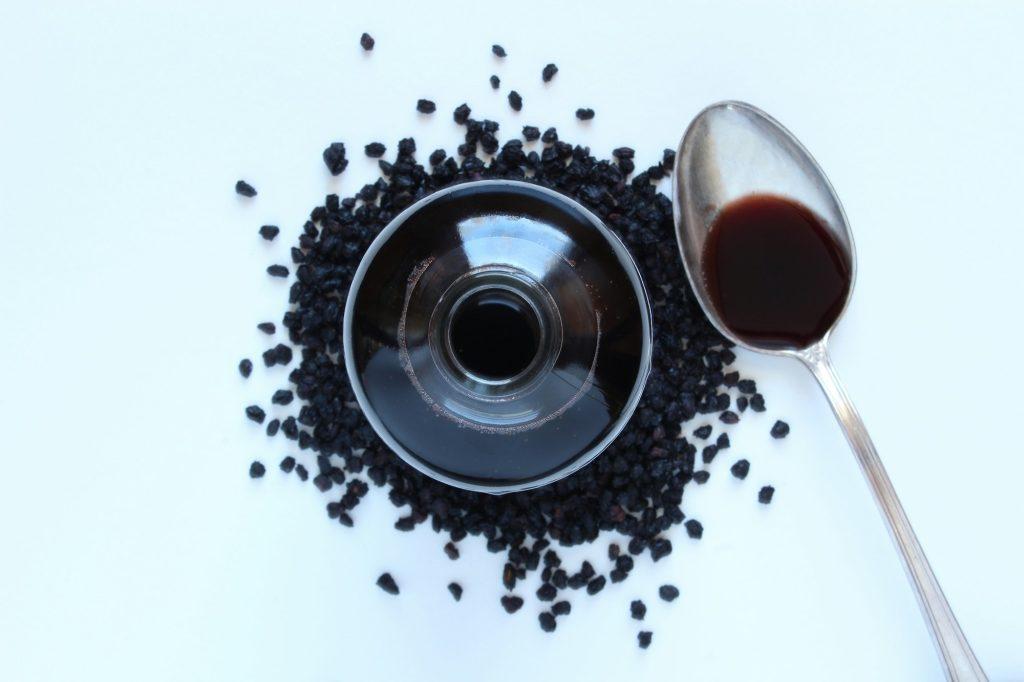
bottle of elderberry syrup berries and spoon

Freezing elderberry syrup is a safe and effective way to preserve it for long-term use. When properly frozen, elderberry syrup can last for 6-12 months, compared to just 3 months in the refrigerator. This means you can make larger batches and enjoy the benefits of this purple elixir for an extended period.

While freezing may cause slight changes in taste and texture, these changes are minimal. The advantages of having ready-to-use syrup far outweigh any minor differences.

Dr. Sarah Johnson, a nutritionist, says, “Freezing is a fantastic method for preserving elderberry syrup. It maintains the syrup’s nutritional properties while preventing spoilage.”

The Benefits of Freezing Elderberry Syrup

✔️ Extended shelf life: Frozen elderberry syrup can last 6-12 months, compared to just 3 months in the refrigerator.

✔️ Cost-effectiveness: Making larger batches and freezing them saves money in the long run, especially when buying ingredients in bulk during peak season.

✔️ Convenience for busy lifestyles: Having frozen elderberry syrup on hand means you can quickly thaw a portion whenever you need an immune boost.

According to a study published in the Journal of Functional Foods, elderberry extract has been shown to support immune function by increasing the production of cytokines, which are essential for fighting off infections (source).

How to Freeze Elderberry Syrup the Right Way

men hand open fridge door

Follow these simple steps to freeze your elderberry syrup correctly:

  1. Choose the right container:
    • Glass jars with airtight lids
    • BPA-free plastic containers
    • Ice cube trays (for smaller portions)
  2. Leave headspace: Fill containers, leaving about an inch of space at the top to allow for expansion during freezing.
  3. Label with the date: Use a marker or label maker to clearly write the preparation date on each container.

Thawing Your Frozen Elderberry Syrup

When you’re ready to use your frozen syrup, transfer the container from the freezer to the refrigerator. Allow it to thaw slowly and naturally to maintain the syrup’s consistency and flavor while preventing bacterial growth.

Can I thaw elderberry syrup at room temperature?

It’s not recommended to thaw elderberry syrup at room temperature. While it might seem faster, it can lead to uneven thawing and potential bacterial growth.

Stick to thawing in the refrigerator for the best results.

Can I re-freeze thawed elderberry syrup?

Refreezing thawed elderberry syrup is not advisable, as it can affect the texture and quality of the syrup. It’s best to thaw only the amount you need and keep the rest frozen until required.

How Long Can You Freeze Elderberry Syrup?

Storage TimeQuality
0-6 monthsBest
6-12 monthsStill good
12+ monthsMay start to decline

As a general guideline, frozen elderberry syrup maintains its best quality for 6-12 months. However, always check for signs of spoilage, such as off odors, flavors, or colors, before consuming.

Beyond Immune Support: Surprising Benefits of Elderberry

Fresh Elderberries
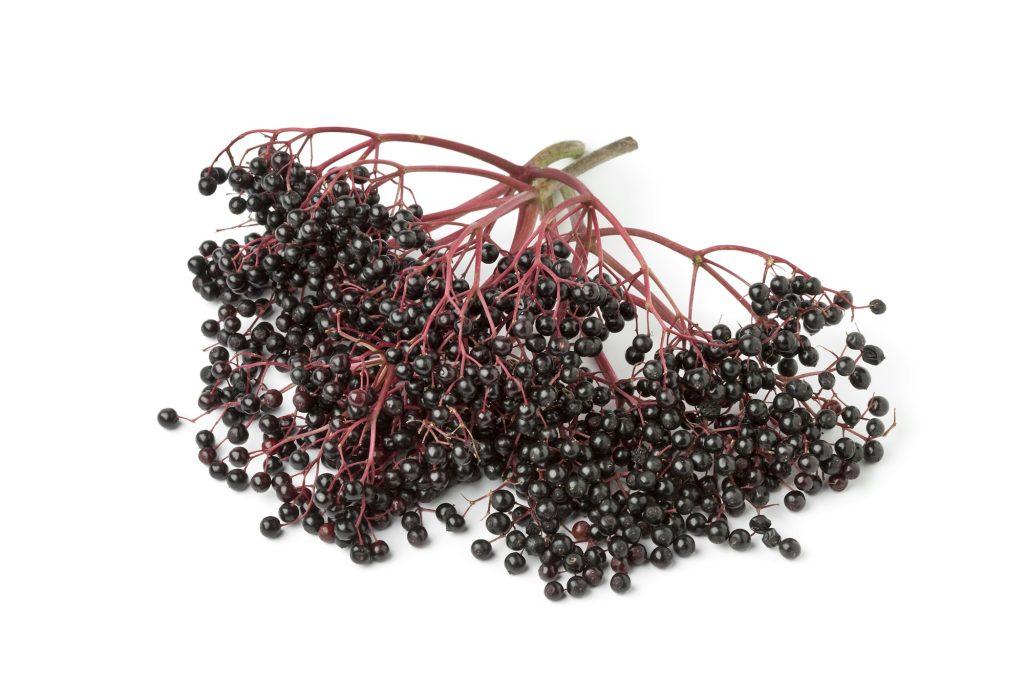
fresh elderberries

Elderberry offers a range of potential health benefits beyond immune support:

  1. Heart health: Studies suggest that the anthocyanins in black elderberry may help reduce inflammation, improve circulation, and lower cholesterol levels (source).
  2. Skin benefits: Elderberry’s anti-inflammatory properties may help soothe and nourish the skin, promoting a healthy, youthful glow.

📝A Note on Elderberry Varieties

When making elderberry syrup or exploring other elderberry recipes, it’s crucial to use the right variety. Sambucus nigra, or black elderberry, is the safest and most common variety for culinary and medicinal use.

Other varieties, such as Sambucus racemosa (red elderberry), can be toxic if consumed raw or improperly prepared.

Creative Ways to Use Frozen Elderberry Syrup

Try these delicious and creative ways to use your frozen elderberry syrup:

  1. ✔️ Elderberry Popsicles
    • Pour thawed syrup into popsicle molds and freeze for a refreshing, immune-boosting treat.
    • [Insert simple recipe with detailed instructions]
  2. ✔️ Elderberry Smoothie Booster
    • Add a spoonful of thawed syrup to your favorite smoothie for an extra dose of antioxidants.
    • [Insert simple recipe with detailed instructions]

For more flavor inspiration, check out our article on Fermented Elderberry Syrup: Is It Safe? Benefits, Safety, & How-To.

FAQs

How long does homemade vs. store-bought elderberry syrup last frozen?

Homemade elderberry syrup can last up to 6-12 months in the freezer if stored properly in an airtight container. Store-bought elderberry syrup may have a slightly longer shelf life due to added preservatives, but it’s best to check the manufacturer’s guidelines and use it within the recommended time frame.

Is there a quality difference between fresh and frozen elderberry syrup?

While freezing can slightly alter the texture and flavor of elderberry syrup, the overall quality and nutritional benefits remain largely intact. Frozen elderberry syrup may be slightly thicker or have a more concentrated flavor than fresh syrup, but it still provides the same immune-boosting properties.

What are creative uses for frozen elderberry syrup besides popsicles?

Stir a spoonful into your morning oatmeal or yogurt for a flavorful, immune-boosting breakfast.
Blend it into smoothies for a refreshing, antioxidant-rich treat.
Use it as a base for a fruity salad dressing or marinade.
Drizzle it over ice cream or frozen yogurt for a unique dessert topping.

Can I freeze elderberry syrup made with honey instead of sugar?

Yes, you can freeze elderberry syrup made with honey. However, honey tends to crystallize and thicken when frozen, so the syrup’s consistency may change slightly upon thawing. To minimize this effect, stir the syrup well before freezing and again after thawing.

How can I tell if my frozen elderberry syrup has gone bad?

If your frozen elderberry syrup develops an off-odor, flavor, or appearance upon thawing, it may have gone bad. Other signs of spoilage include mold growth or a sour taste. If you notice any of these signs, it’s best to discard the syrup.

Can I use frozen elderberry syrup in hot drinks, like tea or coffee?

Absolutely! Stirring a spoonful of thawed elderberry syrup into your favorite hot beverage is a delicious way to enjoy its flavor and health benefits. The heat may slightly alter the syrup’s consistency, but it will still provide a tasty, immune-boosting boost.

Is it better to freeze elderberry syrup in glass or plastic containers?

Both glass and plastic containers can be used for freezing elderberry syrup, but each has its pros and cons. Glass is non-reactive and won’t absorb flavors or odors, but it can crack or shatter if not handled carefully. BPA-free plastic is lightweight and less likely to break, but it may absorb flavors over time. Ultimately, the choice comes down to personal preference and what works best for your household.

Can I freeze dried elderberries and reconstitute them later for syrup?

Yes, you can freeze dried elderberries and reconstitute them later to make syrup. To do this, place the dried berries in an airtight container or freezer bag and store them in the freezer for up to 12 months. When you’re ready to make syrup, simply thaw the berries and follow your favorite recipe. Keep in mind that the reconstituted berries may have a slightly softer texture than fresh berries, but they’ll still work well for making syrup.

Conclusion

Freezing elderberry syrup is a game-changer for those who want to enjoy its immune-boosting properties and delightful flavor year-round. By following proper freezing and thawing techniques, you can extend the shelf life of your syrup, save money, and always have this wellness elixir on hand.

In this comprehensive guide, we’ve explored the numerous benefits of freezing elderberry syrup, as well as its potential beyond immune support. So, go ahead and make a big batch of your favorite elderberry syrup recipe, freeze it, and enjoy the goodness of this remarkable berry in various creative ways.

Why not start by trying our delicious Elderberry Popsicle or Smoothie Booster recipes? Share your own elderberry creations with us in the comments below, and let’s inspire each other to harness the power of this incredible berry!

Fermented Elderberry Syrup: Is It Safe? Benefits, Safety, & How-To

Have you heard the latest buzz about elderberry syrup? It seems like everyone is talking about this dark, richly-flavored syrup and its potential health benefits.

But with the rising popularity of fermented elderberry syrup and recent news about raw elderberries being potentially harmful, many people are wondering: is the fermented version truly safe to consume? 🤔

In this article, we’ll dive deep into the world of fermented elderberry syrup, exploring not only its safety but also the unique benefits that set it apart from other elderberry preparations.

As a chef and former barista at the renowned Boat Basin Cafe in New York, I’ve seen firsthand how proper fermentation can transform ingredients, enhancing their flavors and health properties.

While science is important, I still think the best sign fermented elderberry syrup works is that my customers at Boat Basin couldn’t get enough of it!

So, let’s embark on this journey together and uncover the truth about fermented elderberry syrup! 🚀

Dried elderberry and syrup. Immunity boosting for flu season.
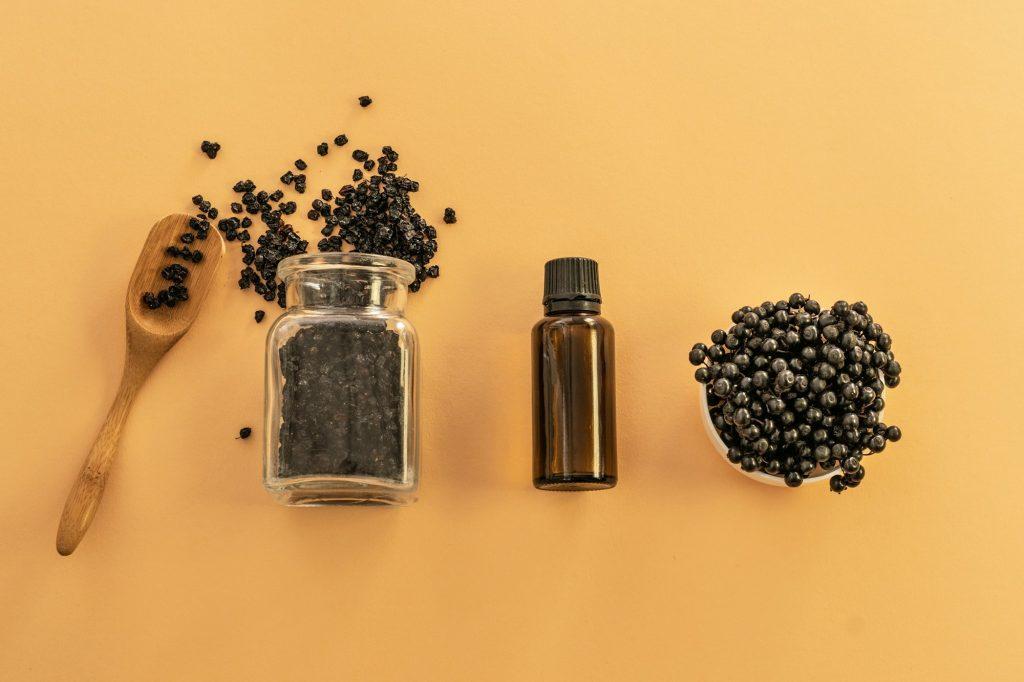
dried elderberry and syrup immunity boosting for flu season

🧐 Is fermented elderberry syrup safe?

Yes, generally, fermented elderberry syrup is safe when prepared the right way. 👍 It’s important to understand why fermentation is key to elderberry safety, though.
Why You Shouldn’t Eat Raw Elderberries

Raw elderberries contain certain compounds that can be troublesome for your digestion in large quantities. Fermentation (or cooking) breaks down these potentially harmful compounds, making them much safer.

The Benefits of Fermentation

Not only does fermentation make elderberries safer, but it also adds beneficial microbes to the mix! These little guys can give your immunity an extra boost. 💪

💁🏻‍♂️ My Experience with Elderberry

I personally love adding fermented elderberry syrup to my routine, especially during cold and flu season. Of course, homemade elderberry extract is excellent too and allows me to customize recipes easily. I always try to find organic elderberries for the best quality. Sometimes I even try my hand at different elderberry recipes!

🍎 Elderberries: Cooked vs. Raw vs. Fermented

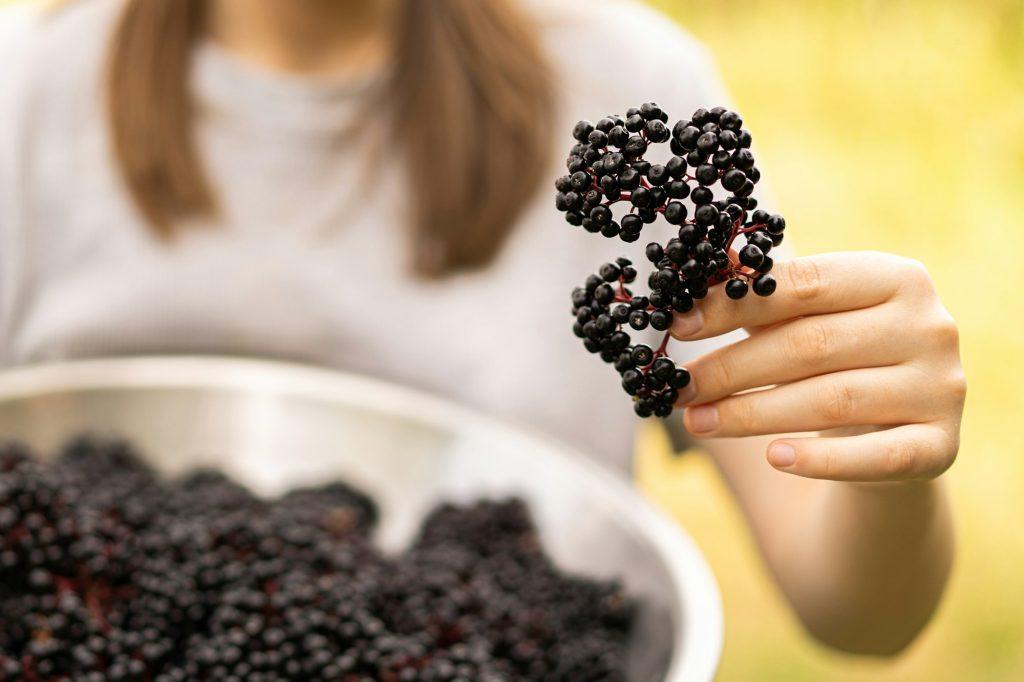
Girl holds in hands clusters fruit black elderberry (Sambucus nigra). Elder, black elder
girl holds in hands clusters fruit black elderberry sambucus nigra elder black elder

As a chef at the Boat Basin Cafe, I quickly learned that proper preparation is key when it comes to working with any ingredient, and elderberries are no exception.

It’s crucial to understand the differences between raw, cooked, and fermented elderberries to ensure both safety and optimal health benefits.

Preparation MethodSafetyNutritional Impact
RawPotentially harmful due to lectins and cyanogenic glycosidesNutrients intact, but not easily absorbed
CookedSafe, as heat neutralizes harmful compoundsSome loss of heat-sensitive nutrients, but safer to consume
FermentedSafe, as fermentation breaks down harmful compoundsEnhanced bioavailability of nutrients, plus added benefits from probiotics

As you can see, fermenting elderberries not only reduces the levels of potentially harmful compounds found in raw berries but also introduces beneficial microbes that can enhance the health properties of elderberry syrup.

I remember when we first started fermenting our homemade syrups at the cafe – the depth of flavor and the way the syrup made us feel was a game-changer! 🌟

Dr. Andrew Weil, a well-known physician and founder of the Andrew Weil Center for Integrative Medicine at the University of Arizona, states, “Fermentation can increase the bioavailability of nutrients in foods, making them easier for our bodies to absorb and utilize.

This means that the beneficial compounds in elderberries, such as antioxidants and vitamins, become more readily available to our bodies when the berries are fermented.

🦠 The Power of Fermentation in Elderberry Syrup

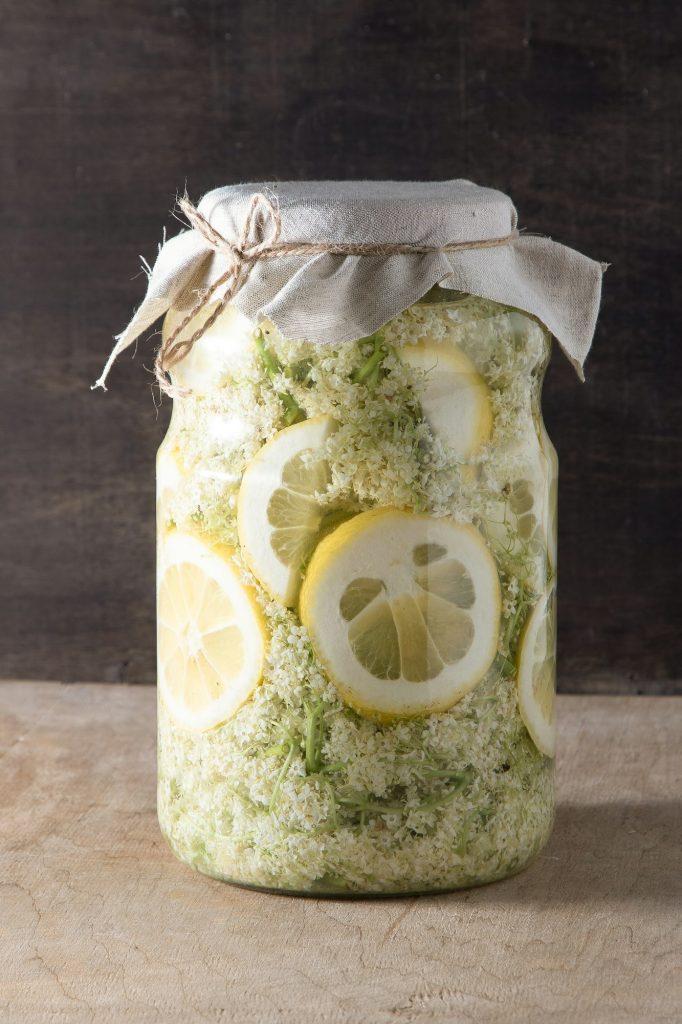
Elder flowers drink glass. White flower shrub. Harvesting buds for making syrup and drink. Cooking
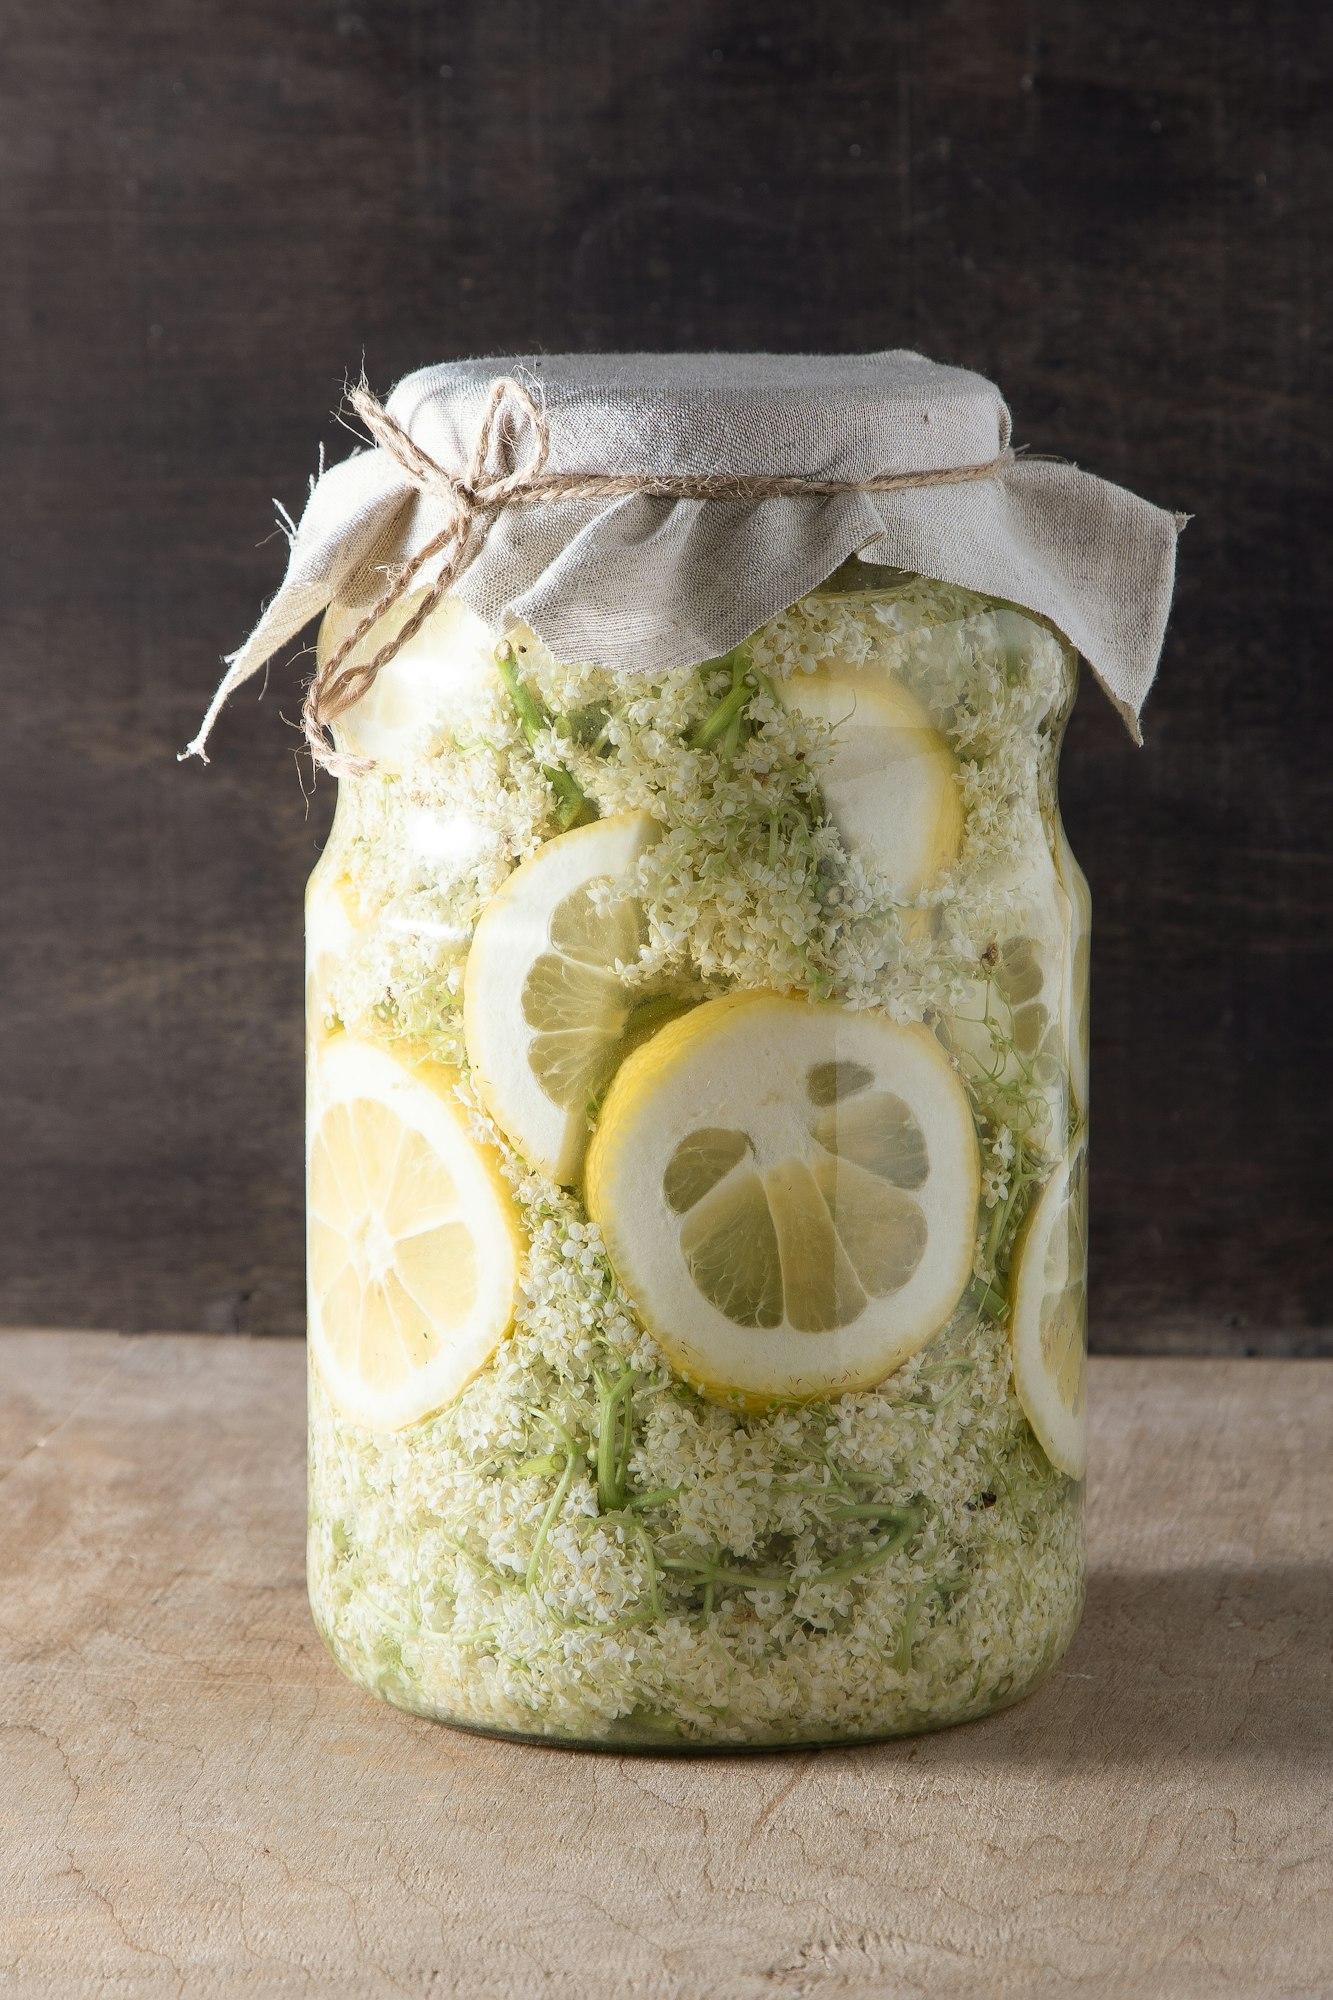
elder flowers drink glass white flower shrub harvesting buds for making syrup and drink cooking

Fermentation isn’t just about adding a tangy flavor to your elderberry syrup. It’s a powerful process that can potentially boost the health benefits of this ancient remedy. 💪

When elderberries undergo fermentation, the friendly bacteria and yeasts break down complex compounds, making the syrup’s antioxidants and other beneficial compounds more easily absorbed by the body.

This process is similar to what happens when you ferment other foods like sauerkraut, kimchi, or kefir.

Fermented FoodHealth Benefit
SauerkrautImproved digestion, boosts immunity
KimchiRich in probiotics, supports gut health
KefirEnhances calcium absorption, supports bone health

While more research is needed specifically on fermented elderberry syrup, the general benefits of fermented foods for gut health are well-documented.

In fact, a study found that consuming fermented foods can help maintain a healthy balance of gut bacteria. 🦠💚

⚠️ Things to Keep in Mind: Safety Considerations

While fermented elderberry syrup is generally safe, there are a few important things to keep in mind when consuming it.

  1. Individual Differences: Not everyone reacts the same way to fermented foods. Some people may experience mild digestive upset, especially if they’re new to consuming fermented products. 🤢 When I first started incorporating fermented foods into my diet, I remember feeling a bit bloated and gassy. However, my body quickly adapted, and I now enjoy the benefits of these probiotic-rich foods. Start with a small amount and see how your body responds.
  2. Medical Conditions: If you have existing gut issues or a compromised immune system, it’s always best to consult with your doctor before adding fermented elderberry syrup to your diet. 👨‍⚕️👩‍⚕️
  3. Mold Risk: Proper fermentation techniques are crucial to avoid mold growth. If your homemade elderberry syrup develops a fuzzy layer on top or smells off, it’s best to discard it. 🍇❌ Check out this recipe for fermented elderberry honey to learn more about safe fermentation methods.
  4. Alcohol Factor: Fermentation can produce small amounts of alcohol as a byproduct. While the alcohol content in fermented elderberry syrup is generally low, it’s something to be aware of, especially if you’re sensitive to alcohol or avoiding it for personal or religious reasons. 🍷🚫
Safety ConsiderationWhat to Look Out For
Individual DifferencesDigestive upset, allergic reactions
Medical ConditionsExisting gut issues, compromised immune system
Mold RiskFuzzy layer on top, off smell
Alcohol FactorLow alcohol content, sensitivity to alcohol

For more information on elderberry safety, check out this helpful article from Mount Sinai.

As a former barista at the Boat Basin Cafe, I always prioritized the safety and well-being of our customers.

When it comes to fermented elderberry syrup, it’s essential to be informed and cautious, just like when trying any new food or beverage. 💡☕️

🤔 FAQs

Why did my homemade elderberry syrup ferment unexpectedly?

If your homemade elderberry syrup ferments when you didn’t intend it to, it’s likely due to the presence of wild yeasts on the berries or in the air. To prevent unintentional fermentation, make sure to use clean equipment and store your syrup in the refrigerator.

How can I tell if my fermented elderberry syrup has gone bad?

If your fermented elderberry syrup develops mold, has an off smell, or tastes unusual, it’s best to discard it. Trust your senses – if something seems off, it’s better to be safe than sorry! 🚫

What’s the best way to store fermented elderberry syrup?

Fermented elderberry syrup should be stored in an airtight container in the refrigerator. This will slow down the fermentation process and help preserve the syrup’s flavor and quality.

Can I use dried elderberries to make fermented syrup?

Yes, but you’ll need to rehydrate them first. Use about 1 cup of dried berries for every 3 cups of water.

Is it safe to consume fermented elderberry syrup during pregnancy?

While elderberry is generally considered safe, it’s always best to consult with your healthcare provider before consuming any herbal remedies during pregnancy.

Can I add honey to my fermented elderberry syrup?

Absolutely! Elderberry honey is a delicious way to sweeten your syrup. Just keep in mind that the honey will ferment along with the elderberries, so the final product will have a different flavor profile than a syrup made with sugar.

💡 Did You Know? Fun Elderberry Fact

Elderberries have been used for centuries not just for their potential health benefits, but also as a natural dye. The rich, dark color of elderberry extract can be used to dye fabric, giving it a beautiful, deep purple hue. 🎨👗

When I worked at the Boat Basin Cafe, we once experimented with using elderberry syrup to color our homemade ice cream. The result was a stunning lavender-hued dessert that our customers couldn’t get enough of! 🍨💜

Important Notes ❗️

While fermented elderberry syrup can be a tasty and beneficial addition to your wellness routine, it’s essential to remember that it’s not a magic cure-all. If you’re experiencing severe or persistent health issues, always consult with a qualified healthcare professional. 👩‍⚕️👨‍⚕️

Certain individuals should exercise caution when consuming elderberry or any herbal remedy. Pregnant and breastfeeding women, as well as those with autoimmune disorders or taking immunosuppressant medications, should always consult their doctor before adding elderberry syrup to their diet. 🤰🍼

For more information on the safety and potential interactions of elderberry, visit the National Center for Complementary and Integrative Health’s elderberry fact sheet.

Conclusion 🌟

In conclusion, fermented elderberry syrup can be a safe and delicious way to incorporate the potential health benefits of elderberries into your diet, as long as it’s prepared properly and consumed in moderation.

By understanding the key differences between raw, cooked, and fermented elderberries, as well as the safety considerations and individual factors to keep in mind, you can make an informed decision about whether fermented elderberry syrup is right for you.

Be sure to check out our article on how to store elderberry syrup to ensure that your homemade or store-bought syrup stays fresh and potent for as long as possible.

Why Soak Liver in Milk? (Tastes SO Much Better)

😲 Ever been turned off by that strong, metallic taste in liver? There’s a simple trick that can change everything… As a chef at the Boat Basin Cafe in New York, I’ve seen my fair share of skeptical diners when it comes to liver.

🤝 I get it – liver isn’t for everyone. But trust me, when prepared correctly, it can be absolutely delicious!

❓ Soaking chicken livers in milk is a classic kitchen technique, but why does it work? Let’s dive in and find out!

At Boat Basin Cafe, I learned that a dish is only as good as its ingredients. So, let’s unlock the science behind perfectly soaked livers!

Why Do You Soak Chicken Livers in Milk? (The Short Answer)

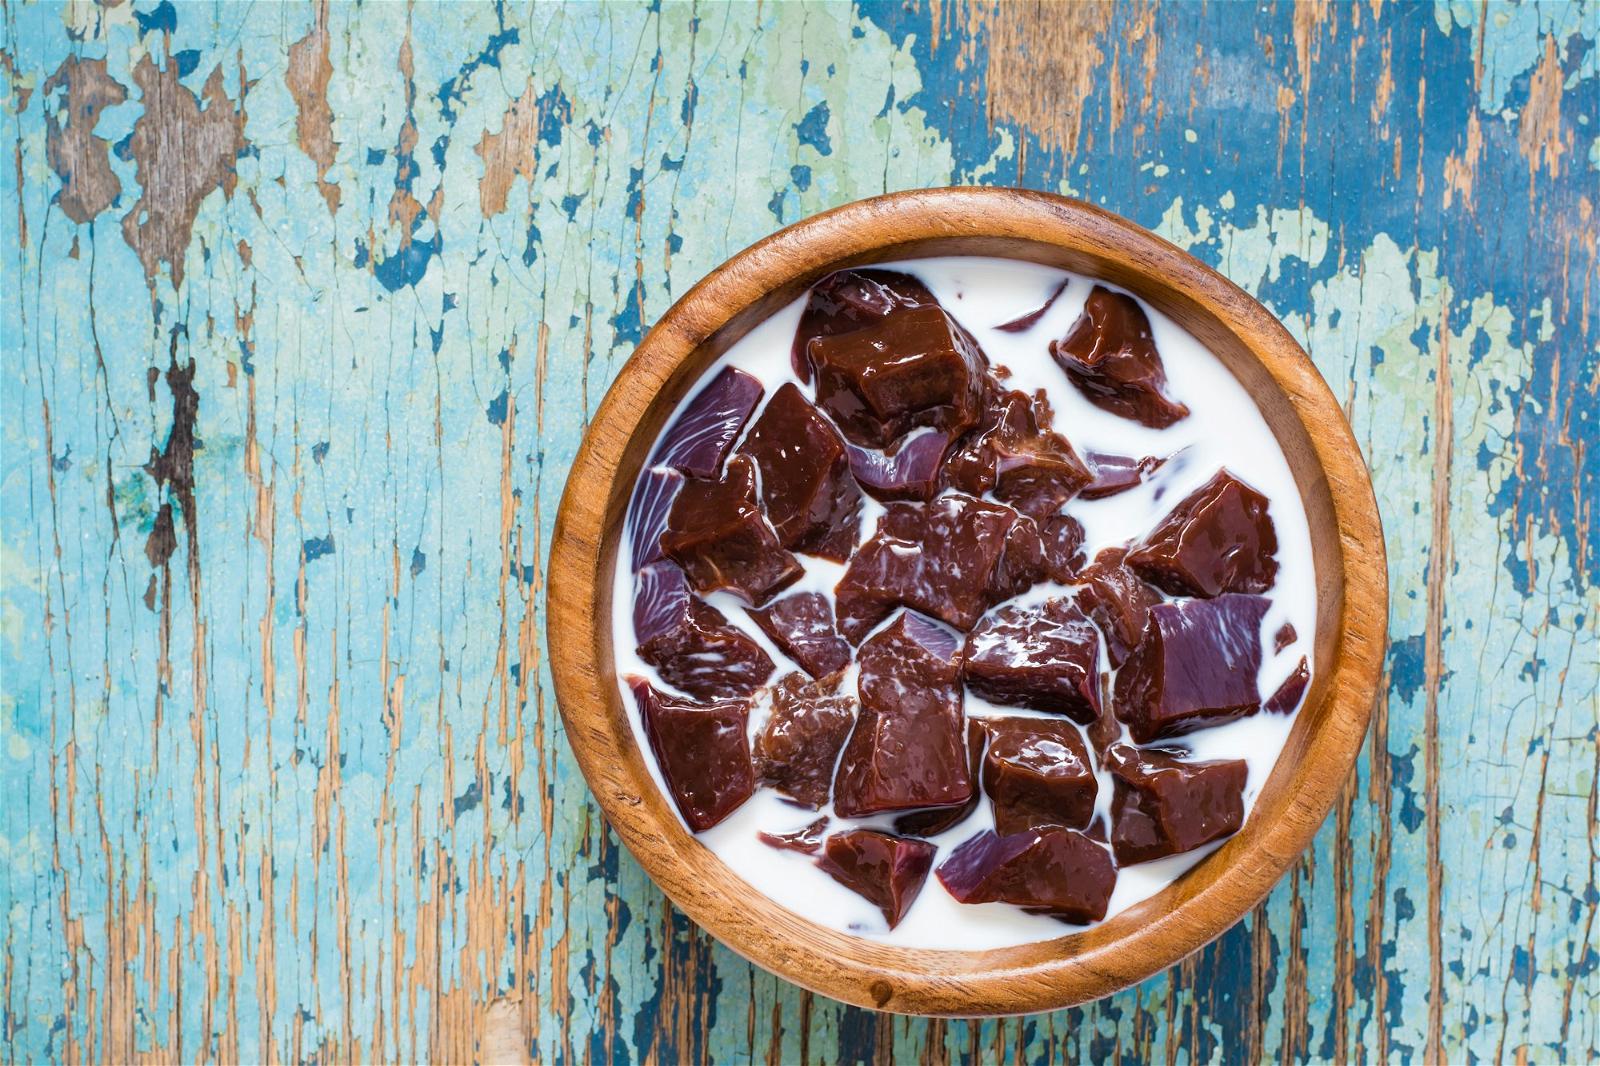
Why Do You Soak Chicken Livers in Milk
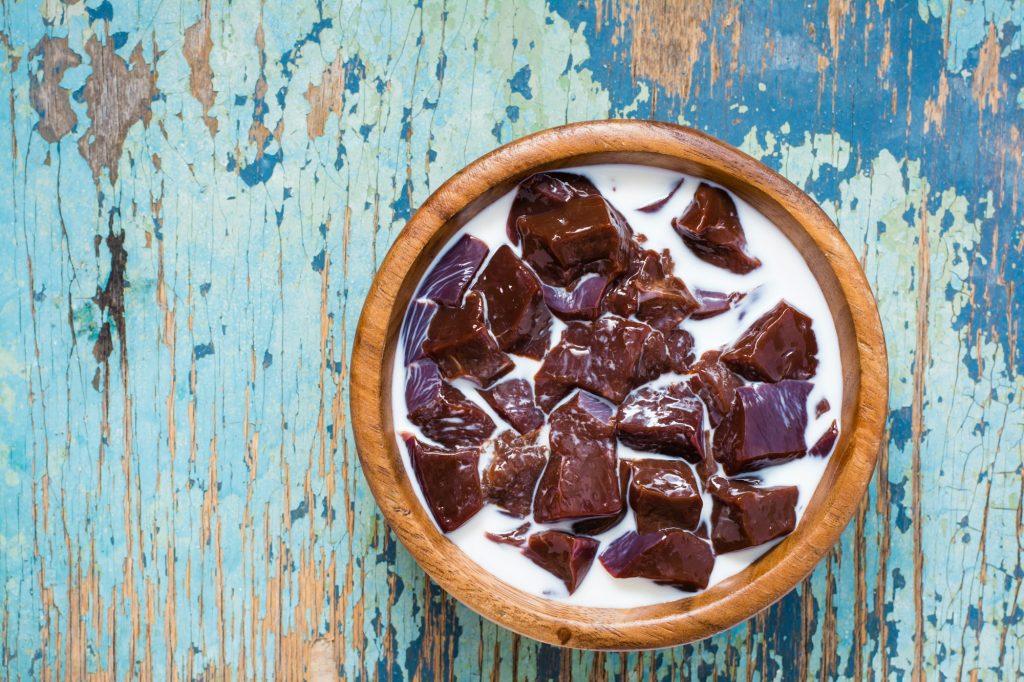
slices of raw beef liver soaked in milk in a wooden bowl on the table top view

✅ Soaking chicken livers in milk helps to tenderize them and remove some of the metallic taste. This simple process can make liver much more enjoyable to eat.

😋 With the right preparation, even liver skeptics might be surprised at how delicious it can be!

Here’s a quick comparison of the effects of soaking vs. not soaking chicken livers:

Soaked Chicken LiversUnsoaked Chicken Livers
Tender, creamy textureTougher, chewy texture
Milder, less metallic tasteStrong, metallic taste
Yielding, melt-in-your-mouth feelDense, less palatable
More enjoyable for manyOff-putting for some

Check out👉 Chicken Liver Salad: Is it Healthy? Recipes + Expert Tips

Milk Magic: How Soaking Transforms Liver

🔬 Let’s get a bit nerdy – the science behind soaking liver in milk is pretty fascinating. Milk contains lactic acid, which acts like a natural tenderizer, breaking down those tough fibers to make the liver way more melt-in-your-mouth delish!

🥛 Whole milk, buttermilk, and skim milk can all be used, but many chefs prefer buttermilk for its extra tanginess.

Interestingly, it’s not just the iron content that gives liver its strong flavor. Ever wonder why? Turns out, compounds formed from the breakdown of hemoglobin in the blood also contribute to the metallic taste.

A study by the Journal of Food Science found that soaking liver in milk helps neutralize these compounds, resulting in a milder, more palatable flavor.

Beyond Milk: Alternatives + Tips

🍋 If you’re short on time, soaking liver in lemon juice or vinegar can work similarly to milk, as the acidity helps tenderize the meat. Just keep in mind that these options will impart a slightly tangy flavor.

🧂 Here’s a surprising tip I learned from a fellow chef: add a teaspoon of salt per cup of milk when soaking the livers.

The salt initially draws out some moisture, but then the liver reabsorbs that liquid, plumping it up for maximum juiciness and tenderness!

Does Soaking Chicken Livers in Milk Ruin the Nutrients?

chicken's liver with vegetables
chicken s liver with vegetables

🧠 For health-conscious foodies, the idea of soaking liver in milk might raise concerns about nutrient loss.

✅ But don’t worry – good news! Even after its milk bath, liver remains a superfood powerhouse. Let’s talk iron…

Check out this table comparing the iron content of soaked vs. unsoaked chicken liver:

Serving Size (100g)Iron Content
Unsoaked Chicken Liver8.5 mg
Soaked Chicken Liver7.2 mg

As you can see, soaked liver still packs a powerful nutritional punch!

🐓It’s Not Just for Chicken!

🐮 While we’ve focused on chicken livers, this soaking technique works wonders for other types of liver too! Beef, lamb, and even pork liver can benefit from a milk bath, though soaking times may vary.

In my experience at the Boat Basin Cafe, I’ve found that lamb liver, being a bit tougher, does well with a longer soak.

🍽️ For adventurous eaters, I highly recommend trying livers from different animals. Each type has its own unique flavor profile worth exploring. Duck and goose liver, for example, are prized in French cuisine for their rich, buttery taste. They’re the star ingredients in the famous pâté de foie gras!

AnimalSoaking TimeTaste Profile
Chicken30 mins – 2 hrsMild, slightly sweet
Beef1-2 hoursStronger, more robust
Lamb2-4 hoursDistinctive, almost gamey
Pork1-2 hoursRich, slightly nutty

When branching out into other types of liver, it’s always a good idea to consult a trusted recipe or guide on cooking with offal for specific preparation tips.

How Long to Soak Chicken Livers in Milk: Finding Your Perfect Timing

⏰ Now, let’s dive into the nitty-gritty of soaking times. The general rule of thumb is to soak chicken livers for a minimum of 30 minutes, up to 2 hours. However, the exact time will depend on a few factors:

  • Size of the livers
  • Freshness
  • Personal taste preferences

👃 Here’s a handy tip: give your soaking livers a sniff test! If the aroma is still quite strong, let them soak a bit longer. You’re looking for a milder scent, which indicates that the milk has worked its magic.

Putting It to the Test: My Liver Experiment

🧑‍🍳 At the Boat Basin Cafe, we were always tinkering with recipes and techniques. So, I decided to put the milk-soaking method to the test! I prepared three batches of chicken livers:

  1. Soaked in whole milk for 30 minutes
  2. Soaked in buttermilk for 1 hour
  3. Unsoaked, as a control group

🥇 After pan-frying each batch, I sampled them side-by-side. The buttermilk-soaked livers were the clear winner in my book! They had a tender texture and a pleasantly mild flavor that paired beautifully with caramelized onions.

If you’re curious about the exact preparation method, check out this easy chicken liver recipe that showcases the power of soaking.

Conclusion

🍽️ So, are you ready to give liver another chance? Armed with the knowledge of how milk-soaking transforms this often-overlooked ingredient, I hope you’ll be inspired to whip up a delicious liver dish in your own kitchen.

👋 Happy cooking, and don’t forget to share your liver adventures with us! If you have any favorite liver recipes or tips, I’d love to hear them. Shoot me an email or leave a comment below. Until next time, this is Chef John Bird, signing off from the Boat Basin Cafe blog.

For more fascinating food facts and kitchen tips, be sure to check out our nutrition facts page, where you’ll find handy information like detailed chicken liver nutrition info. Happy exploring!

Hemp Seed Shelf Life: How Long Do They Really Last?

As a passionate chef and barista with over a decade of experience, I’ve witnessed firsthand the incredible rise of hemp seeds as a superfood staple.

My journey with these nutritional powerhouses began at Boat Basin Cafe, a beloved spot in downtown New York. There I honed my culinary skills and discovered the secret to keeping hemp seeds fresh for our signature smoothies and dishes.

💁🏻‍♂️ About Me

Hi, I’m John Bird! I’ve dedicated my career to exploring wholesome, plant-based ingredients. With a background in nutrition and a keen interest in food storage techniques, I want to help you make the most of your favorite healthy ingredients, like hemp seeds.

🌱The Importance of Fresh Hemp Seeds

At Boat Basin Cafe, we were known for our innovative use of hemp seeds. But as any chef knows, unlocking the full potential of an ingredient lies in proper storage.

Through trial and error, and a lot of research, I discovered the best methods for keeping hemp seeds fresh, nutty, and packed with nutrients.

📝What You’ll Learn

In this article, I’ll share my insights, experiences, and practical tips to help you master the art of storing hemp seeds.

Whether you’re a health-conscious home cook, a smoothie enthusiast, or simply curious about this incredible superfood, you’ll find valuable information here.

Let’s get started!

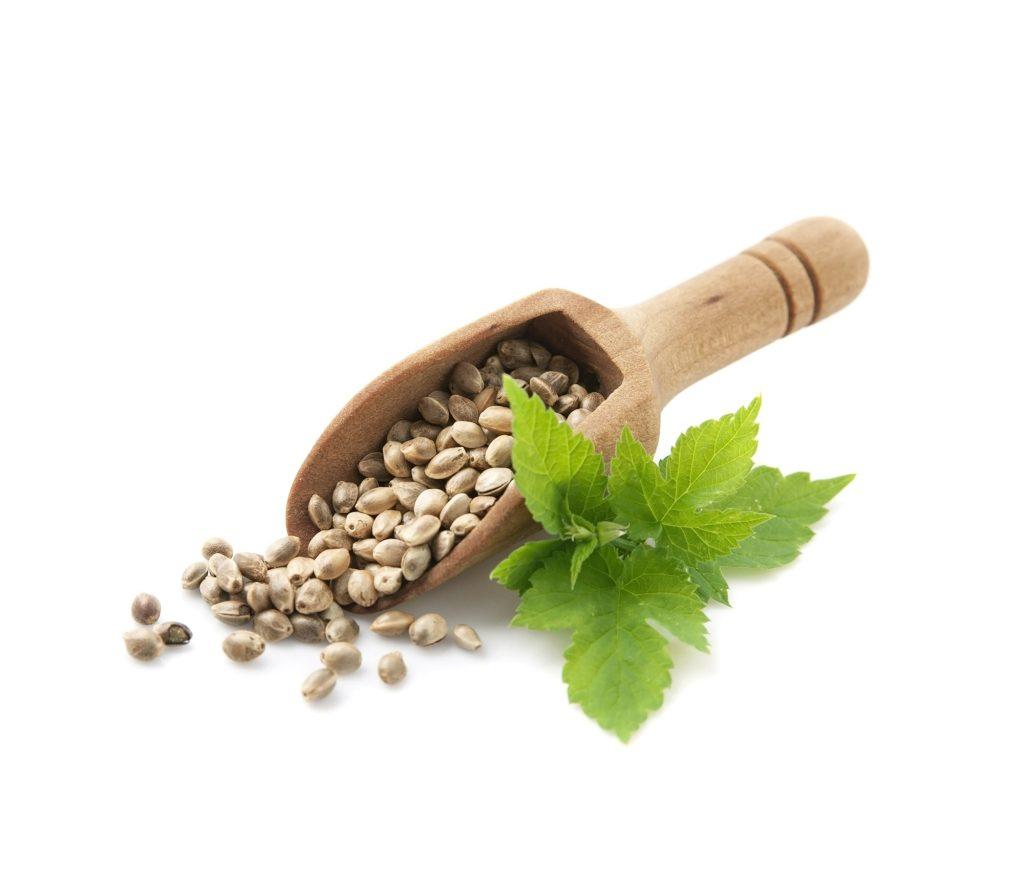
Hemp seed
hemp seed

🧐 How Long Does Hemp Seed Last?

One of the most common questions I get asked about hemp seeds is, “How long do they last?” It’s definitely important to know, especially if you buy in bulk or want to get the most out of your superfoods.

I used to use hemp seeds all the time at Boat Basin Cafe – they were a super popular ingredient!

I know not everyone uses them that often, so let’s talk about how long they stay fresh, both shelled and unshelled.

Storage MethodShelled Hemp SeedsUnshelled Hemp Seeds
Room Temperature3-4 months6-12 months
Refrigerated6-12 months12-18 months

Unshelled hemp seeds last a lot longer because they have that protective outer hull. But these are just guidelines – other things can impact how long your hemp seeds stay fresh.

🔑Key Factors that Affect Hemp Seed Freshness:

  • Exposure to light, heat, and oxygen: These elements can degrade the quality and nutritional value of hemp seeds.
  • Packaging: Airtight containers are essential to prevent oxidation and moisture absorption.
  • Quality of the hemp seeds: Start with fresh, high-quality seeds for optimal shelf life.

💁🏻‍♂️Important Tip: Just like at Boat Basin Cafe, always store your hemp seeds in an airtight container in a cool, dry place away from sunlight.

Whether you’re a hemp seed enthusiast or new to using them, understanding how long they last will help you enjoy their full benefits!

🤔 Factors That Affect How Long Hemp Seeds Last

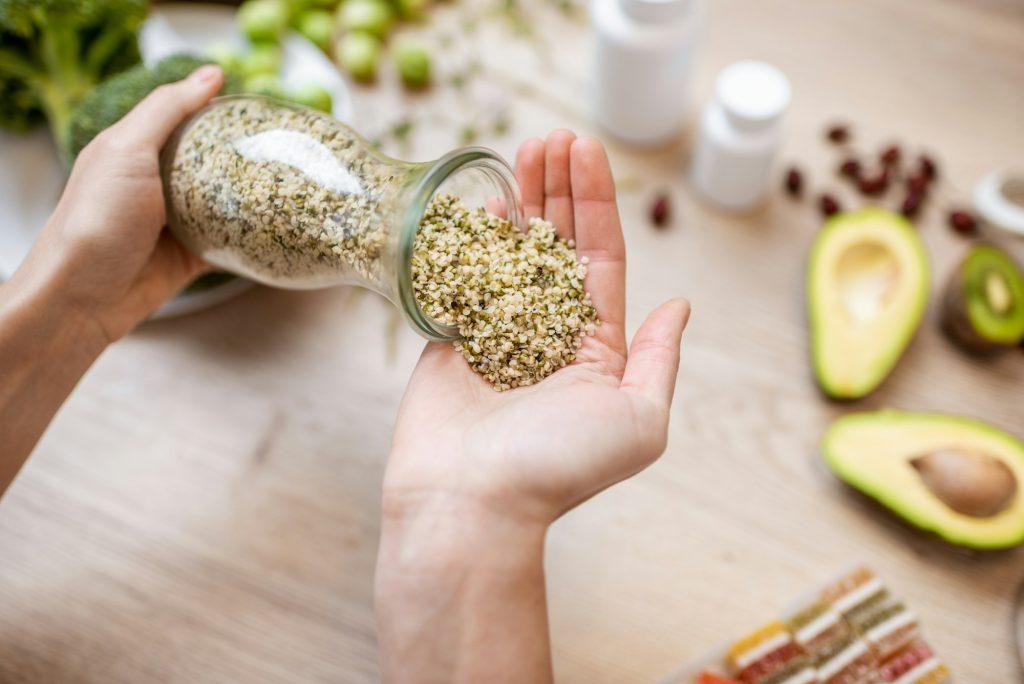
Hemp seeds with food ingredients
hemp seeds with food ingredients

At Boat Basin Cafe, I learned a lot about keeping hemp seeds fresh. Here’s what impacts how long your hemp seeds stay good:

The Shell Factor: Does it have a shell or not?

  • Unshelled: Last much longer thanks to their protective outer hull. We found they stayed good 2-3 times longer than shelled ones!
  • Shelled: Great for everyday use, but for the longest shelf life, unshelled is better.

Oil Content: The Rancidity Risk

Hemp seeds are packed with healthy fats (especially omega-3s!), which is great for you but does make them go bad faster. Think of it like this:

  • “Can hemp seeds go rancid?” Yes, and it’s usually the oil content that’s the issue.
  • Proper storage is key to slow down this process.

Freshness From the Start

At Boat Basin Cafe, we always used fresh, high-quality hemp seeds. Here’s why this matters:

  • Buying from a reputable supplier means you’re starting with better seeds that will last longer.

Light: The Nutrient Enemy

  • Light makes hemp seeds go bad quickly. They lose flavor and nutrients.
  • How do you store hemp seeds to prevent light damage? Always use dark, airtight containers.
FactorEffect on Shelf Life
ShellUnshelled seeds last 2-3 times longer
Oil ContentHigh oil content increases rancidity risk
FreshnessStarting with fresh seeds is crucial
LightExposure to light degrades nutrients

💁🏻‍♂️My Hemp Seed Storage Experiment

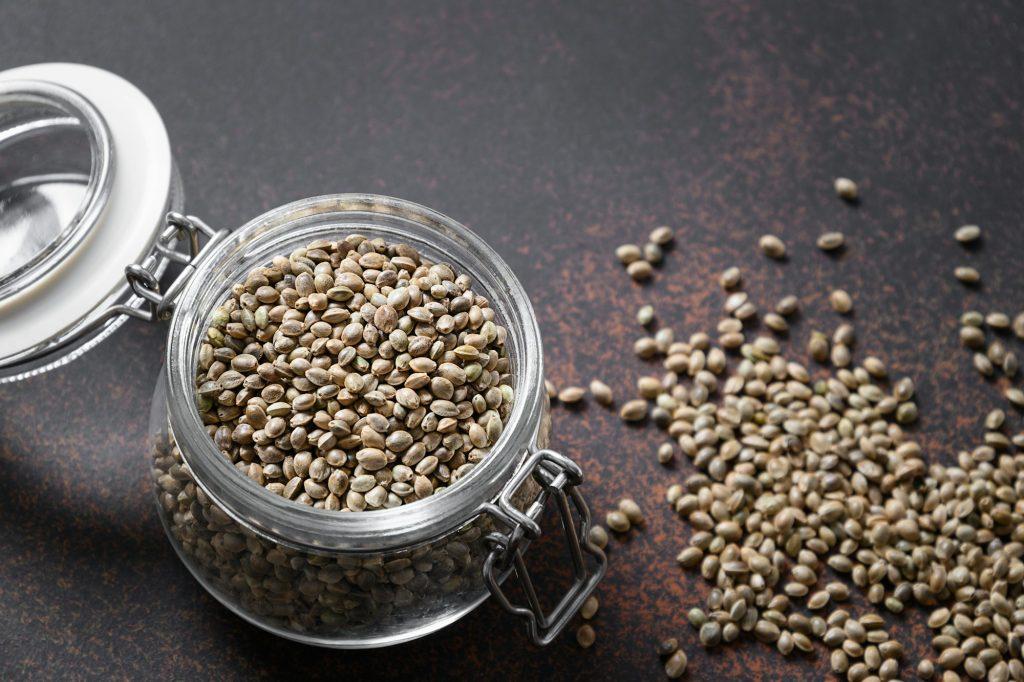
Hemp seeds in glass jar on brown. Close up
hemp seeds in glass jar on brown close up

I wanted to see this in action, so I tried a little experiment at home:

  • I stored shelled hemp seeds in different ways: Clear container on the counter, dark container in the pantry, and airtight dark container in the fridge.
  • The clear container seeds went bad the fastest! The pantry ones started to lose flavor. Only the refrigerated ones stayed fresh and delicious.

👉Key Takeaways:

  • Always store hemp seeds in an airtight, dark container.
  • For the longest shelf life, put them in the fridge.

💪 Best Storage Practices for Maximum Freshness

Okay, so we know what makes hemp seeds go bad. But how do you store hemp seeds to keep them fresh? Here are the methods I swear by, both from my time at Boat Basin Cafe and at home:

❄️The Fridge is Your Friend

  • For everyday use, store hemp seeds in the fridge. The cool temperature is perfect for slowing things down that cause them to spoil.

Freezing in Batches

  • Got a big bag of hemp seeds? Freeze them in smaller portions. That way you only thaw what you’ll use right away.
  • “Can you freeze hemp seeds long-term?” Absolutely! I’ve even forgotten about some for months and they were totally fine.

Dehydration: The Long-Term Solution

  • Dehydrating hemp seeds makes them last a really long time. But, it changes the texture, so they’re better for grinding up.
  • Use a dehydrator at a low temperature until they’re completely dry.

Beyond the Basics: Opaque & Airtight

  • “Should hemp seeds be stored in a dark place?” Definitely! Light makes them go bad faster.
  • Airtight containers are key too. Keeps out oxygen, which also helps them last longer.
  • High-quality containers make a difference! I like food-grade ones to be sure they’re safe.
Storage MethodTemperatureContainerIdeal For
Refrigeration35-40°F (1-4°C)Airtight, opaqueEveryday use
Freezing0°F (-18°C)Airtight, opaqueLong-term storage
Dehydration115°F (46°C)Airtight, opaquePowders, baking

💁🏻‍♂️Pro Tips from Boat Basin Cafe:

  • Buy unshelled hemp seeds in bulk to save money and space – they last way longer! We’d shell smaller amounts as we needed them.
  • Vacuum-seal big batches before storing for even longer freshness.

📝Handy Resources:

  • USDA FoodKeeper App: Look up “hemp seeds” for storage info and how long they’ll last with different methods.

⚠️ How to Tell if Hemp Seeds Have Gone Bad

Girl holds glass jar with hemp seeds in zero waste shop
girl holds glass jar with hemp seeds in zero waste shop

Picture this: you’re ready to make a yummy hemp seed smoothie, but when you open the bag… yuck! Something smells off. Have my hemp seeds gone bad? Don’t worry, I’ve got you covered!

👃Your Nose Knows

  • Fresh hemp seeds smell mild and nutty.
  • “What do bad hemp seeds smell like?” Think old paint or really stale nuts – it’s not a good smell!
  • Trust your nose – if it’s bad, toss those seeds!

👀Look for These Signs of Trouble

  • Fresh hemp seeds: Creamy color, smooth, and shiny.
  • Bad hemp seeds: Mold, weird colors, or clumping means they’re done for.

🥹The Taste Test (If You’re Brave)

  • Still not sure? Try tasting a tiny bit.
  • Fresh hemp seeds are nutty and a little sweet.
  • Bad ones are bitter, sour, or just taste off. Yuck!

👉Important: Eating rancid hemp seeds probably won’t make you sick, but they’ll taste awful and won’t have any of the good nutrients left.

SenseFresh Hemp SeedsRancid Hemp Seeds
SmellMild, nuttySour, like old paint
SightUniform color, smooth surfaceMold, discoloration, clumping
TasteNutty, slightly sweetBitter, sour, off-putting

💁🏻‍♂️My Experience: That Rancid Smell

After years of using hemp seeds, I’ve learned they have a very specific smell when they’ve gone bad. It’s like old paint mixed with stale, bitter nuts.

If you smell that, don’t even bother tasting – just get a new bag!

💡Quick Tip: Store your hemp seeds right to keep them fresh longer!

🌱 Creative Ways to Use Hemp Seeds

Sure, we all know you can sprinkle hemp seeds on salads and yogurt… but what else can you do with them? Get ready for some tasty ideas!

Hemp Seed Shelf Life: How Long Do They Really Last? 3
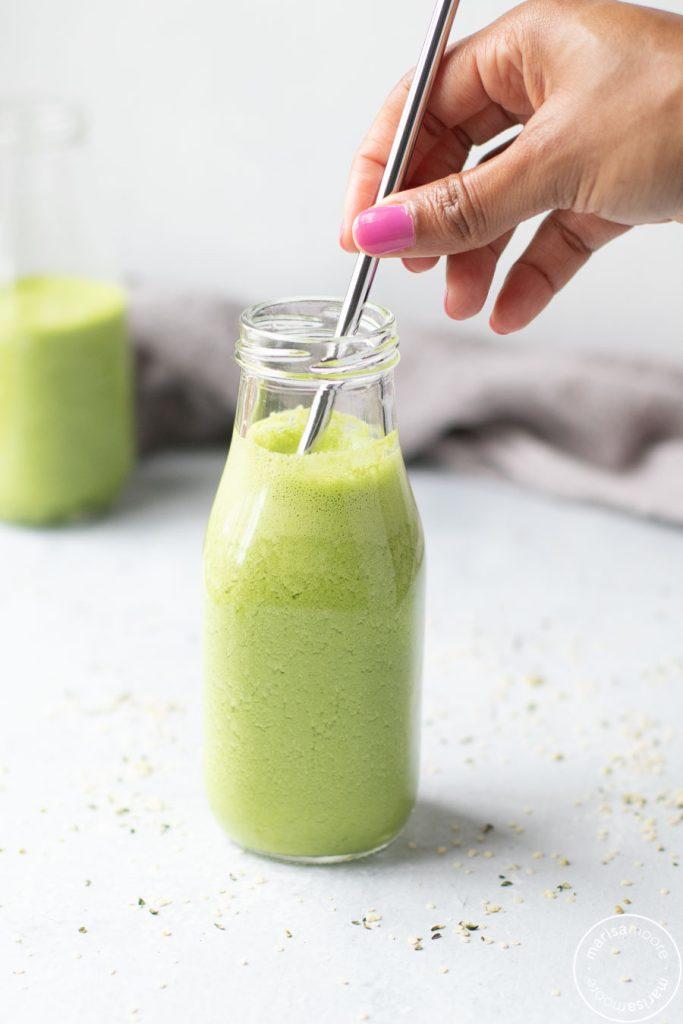
Hemp Seeds drink

💁🏻‍♂️My Cafe Favorites:

  • “Green Dream” Smoothie: At Boat Basin Cafe, we’d blend hemp seeds with spinach, banana, pineapple, and coconut milk for a delicious, healthy drink.
  • Granola Topping: We loved the nutty crunch hemp seeds gave our homemade granola!

🥘Recipe Inspiration:

  • Looking for more ways to use hemp seeds? Minimalist Baker has tons of great ideas, like:
    • Hemp seed pesto (sounds amazing!)
    • Chocolate hemp seed energy bites (perfect for snacking)

🤔Don’t Be Afraid to Experiment!

I love finding new ways to use superfoods like hemp seeds. Try some of these ideas, or get creative and see what you come up with!

💡Extra Tip: The Enzyme Factor

  • What makes hemp seeds go rancid? It’s mostly due to an enzyme called lipase. This breaks down fats (hemp seeds are full of healthy ones!), which can lead to that off-flavor.
  • Chefs know this! Understanding enzymes like lipase is important for keeping ingredients fresh.

🥶Fight Rancidity with Cold

  • “How do you stop hemp seeds from going bad?” The fridge or freezer are your best friends! Cold temperatures slow lipase way down.
  • Science says so: Dr. David Julian McClements (a food scientist) explains that low temperatures make enzymes work more slowly, which helps foods last longer.

❄️The Bottom Line: Store your hemp seeds in the fridge or freezer to keep them fresh and tasty for as long as possible!

❓FAQs About Hemp Seed Storage

Can expired hemp seeds make me sick?

While consuming expired hemp seeds is unlikely to cause serious harm, it can lead to an upset stomach and a loss of nutritional value. It’s best to avoid eating hemp seeds that have gone rancid, as they will taste unpleasant and offer fewer health benefits.

Do unopened hemp seeds go bad?

Even unopened hemp seeds can go bad over time, although they typically last longer than opened packages. According to a research on hemp seed storage, unopened hemp seeds can maintain their quality for up to 12 months when stored properly in a cool, dark place.

How long do hemp seeds last in the fridge?

When stored in an airtight container in the refrigerator, shelled hemp seeds can last for 6-12 months, while unshelled seeds can remain fresh for up to 18 months.

Can I freeze hemp seeds?

Yes, freezing hemp seeds is an excellent way to extend their shelf life. When frozen, hemp seeds can maintain their quality for up to 2 years. Just be sure to store them in an airtight, moisture-proof container to prevent freezer burn.

Conclusion

In this article, we’ve explored the ins and outs of hemp seed storage, from shelf life guidelines to the factors that affect their longevity.

Recap Key Points:

  • Shelled hemp seeds last 3-4 months at room temperature and 6-12 months refrigerated.
  • Unshelled hemp seeds last 6-12 months at room temperature and 12-18 months refrigerated.
  • Factors like the shell, oil content, freshness, and light exposure can impact shelf life.
  • Proper storage involves refrigeration, freezing, or dehydration, and using opaque, airtight containers.

💁🏻‍♂️My Cafe Takeaway: At Boat Basin Cafe, fresh ingredients were non-negotiable. We always went the extra mile to ensure that our hemp seeds were stored properly and used at the peak of their freshness.

I encourage you to treat your hemp seeds with the same care and attention – your taste buds and your health will thank you!

Remember, if you ever have questions about the shelf life of hemp seeds or any other food, the USDA FoodKeeper App is a fantastic resource to have at your fingertips.

So go ahead and stock up on those nutritious hemp seeds, knowing that you have the knowledge and tools to keep them fresh and delicious for all your culinary adventures!

How to Store Soursop Leaves & Keep Them Fresh

If you’ve got fresh soursop leaves🌿, the fridge is your friend! A simple method will keep them tasty for up to two weeks. Want to stock up for the long haul or try something different? Freezing and drying soursop leaves open up a world of delicious possibilities!

🌿 How to Store Soursop Leaves

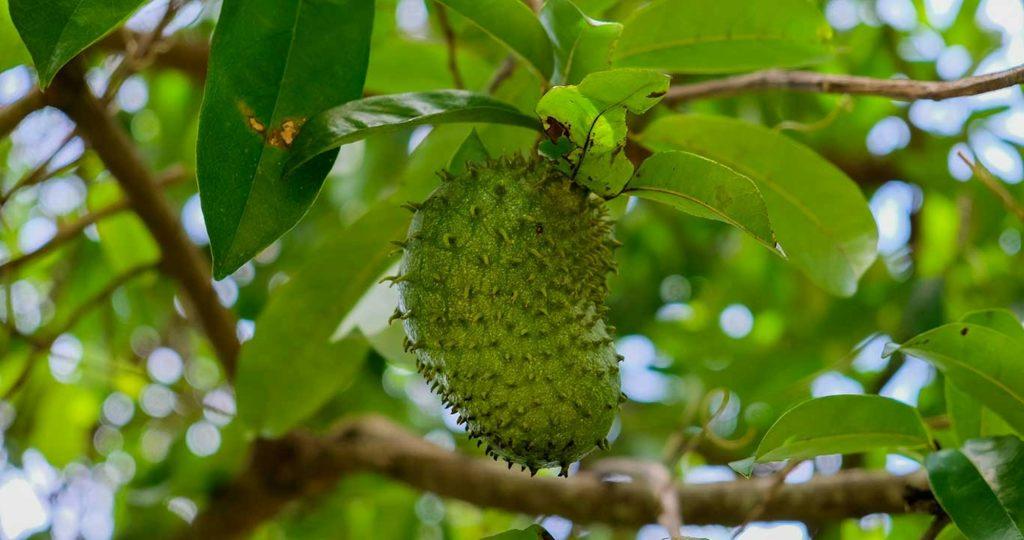
Soursop fruit cultivated by agriculture in Haiti
soursop fruit cultivated by agriculture in haiti

A Former New York Chef’s Guide

If you’re a fan of soursop (also known as guanabana), you know the importance of using fresh leaves. Whether you love the grassy notes in a refreshing soursop tea or the surprising touch they add to desserts, storing them properly makes all the difference.

🤔Why Freshness Matters for Soursop Leaves

Soursop leaves are rich in antioxidants and other beneficial compounds. But these can start to break down over time.

Here’s why fresh is best:

  • Flavor: Fresh soursop leaves have a vibrant, grassy flavor with a hint of sweetness.
  • Health Benefits: Fresher leaves may offer more potential health benefits due to higher levels of active components.

❄️How to Store Fresh Soursop Leaves (Easy Refrigerator Method)

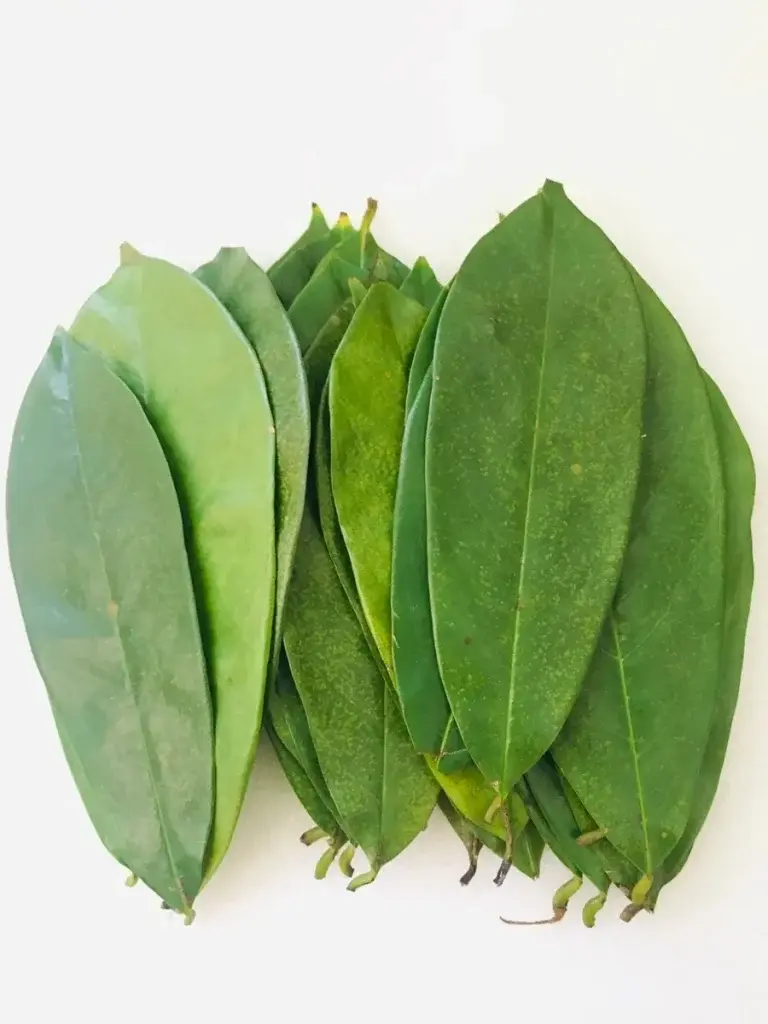
how to store soursop leaves
Soursop Leaves
  1. Rinse & Dry: Gently wash the leaves and pat them completely dry with paper towels.
  2. Layer: Place the leaves in an airtight container (I prefer glass) lined with paper towels to absorb extra moisture.
  3. Crisper Drawer: Store your container in the crisper drawer of your fridge for the ideal temperature.

📝Your leaves should stay fresh and delicious for up to two weeks!

🥶 Freezing Soursop Leaves for the Long Haul

Got a bunch of soursop leaves? Freezing extends their shelf life!

Here’s how to flash-freeze them to prevent clumping:

  1. Single layer: Spread washed and fully dried leaves on a baking sheet lined with parchment paper. Make sure they don’t touch.
  2. Flash-freeze: Pop the sheet in the freezer for 1-2 hours until the leaves are completely frozen.
  3. Quick Transfer: Swiftly transfer the leaves to a freezer-safe zip-top bag, removing as much air as possible before sealing.

📝Frozen soursop leaves will keep for about 6-8 months.

💁🏻‍♂️My Pro Tips

  • I always try to use fresh soursop leaves for the best flavor and texture in dishes.
  • Frozen leaves lose a little of their texture but are still fantastic for teas and smoothies, delivering those important health benefits.

🌿Dried Soursop: The Convenience Option

How to Store Soursop Leaves & Keep Them Fresh 4
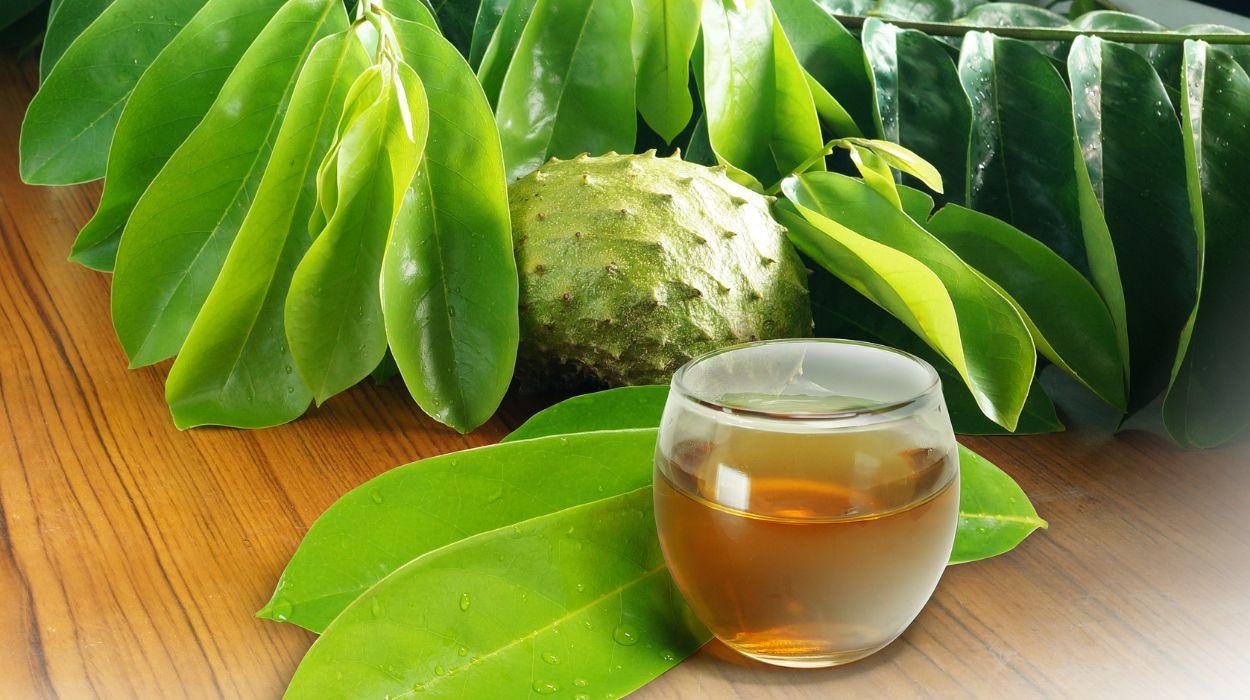
soursop tea

Want to make your own delicious and potentially health-boosting soursop tea? Drying your own soursop leaves is the best way to capture those benefits. Here are a few different methods:

Drying MethodTime RequiredEquipment NeededMaintenance While DryingResulting TextureDownsides
Air drying6+ hoursNoneCheck periodically for moldIntact, retains shapeNeeds very low ambient humidity
Oven drying2-3 hoursOvenCheck often to prevent burningCrisp, brittleCan destroy nutrients if overheated
Food dehydrator4-6 hoursMust purchase appliancePeriodic rotation for even dryingSomewhat brittleInvestment cost

💨Air Drying: The Low-Tech Option

  • This is the easiest way to dry soursop – just hang the leaves where they’ll get good airflow.
  • Humidity is a key factor! It needs to be below 60% to avoid mold.
  • For best flavor preservation, don’t let the temperature get above 95 ̊F.
  • This works well outdoors in dry climates or indoors with fans.
  • It’s labor-intensive but preserves those antioxidants well.

🔥Oven Drying: Faster But Tricky

  • Ovens get the job done quicker, but temperature control is key.
  • Under 115 ̊F risks mold, over 120 ̊F and you start losing vitamin C and beneficial enzymes.
  • I wouldn’t go above 115 ̊F if you want to maximize the health benefits of soursop.
  • You’ll need to rotate pans and check often until the leaves are super crispy.
  • This method preserves your dried soursop for a long time, but you’ll lose some of the good stuff.

💁🏻‍♂️My Favorite: Using a Food Dehydrator

I invest in a quality dehydrator for the best results, though models under $150 work too.

The adjustable 95-155 ̊F temperature lets me dial in the ideal 115°F. This warms gently avoids burning and retains more acetogenins, flavonoids, and antioxidants compared to oven drying.

The timer and rotating trays create even drying too. It takes 4-6 hours, which is hands-off. Look for models with fan options to handle more humid environments.

This approach reliably maximizes both convenience and nutrition👍!

💁🏻‍♂️ My Experience: Finding the Right Drying Method

I’ve experimented with all three drying methods and here’s what I’ve found:

  • Air drying is easy but can be unpredictable depending on your climate.
  • Oven drying is faster but risks over-drying the leaves, impacting their flavor and potentially reducing their nutritional value.
  • A food dehydrator has definitely given me the most consistent results.

The Trade-off: Shelf Life vs. Antioxidants

Dried soursop leaves have a significantly longer shelf life than fresh or frozen leaves. However, some antioxidant content is lost during drying.

It comes down to deciding whether convenience is your priority, or if maximizing the health benefits of soursop is your main concern.

🌿 Soursop Beyond the Cup: Get Creative!

If you think soursop leaves are just for tea, think again! As a chef, I’ve discovered so many creative ways to use these leaves and enjoy their unique grassy-floral flavor.

Get Creative with Soursop Leaf Powder

How to Store Soursop Leaves & Keep Them Fresh 5
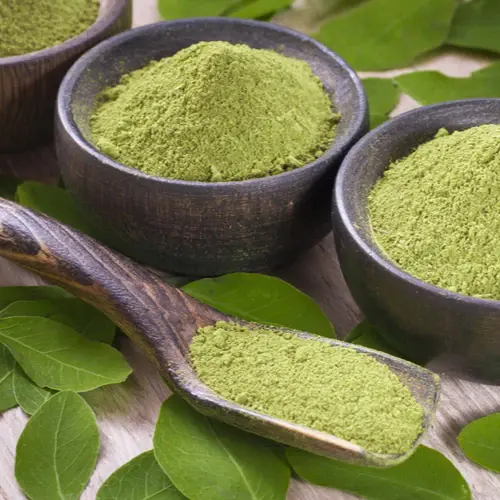
Soursop Leaf Powder
  • Secret Ingredient: Dried and powdered soursop leaves add a subtle boost of antioxidants and flavor to smoothies, sauces, and even spice rubs for fish or chicken.
  • Long Shelf Life: Soursop powder keeps well, so you can enjoy the benefits for months.

🍋 Beyond the Kitchen

  • Fragrant Potpourri: Dried soursop leaves add a lovely tropical touch to potpourri blends. Pair them with passionfruit, mango, or citrus for a delightful aroma.
  • DIY Bath Time: Infuse your bath with the relaxing scent of soursop leaves or add powdered leaves to a soothing face mask.

🥘Recipe Spotlight: Soursop Leaf Smoothie

Green smoothie
green smoothie

Want a delicious and healthy way to use soursop? Try this simple recipe:

🌿 Ingredients:

  • 1 cup of your favorite non-dairy milk
  • 1 frozen banana (sliced for easy blending)
  • 5 frozen mango chunks
  • 1 medjool date (pitted)
  • 1 tsp soursop leaf powder
  • 1 tsp maca powder (optional)

Instructions:

  1. Combine all ingredients in a high-powered blender.
  2. Blend until completely smooth and enjoy!

Soursop Leaves: Sweet, Savory, and Beyond Tea

How to Store Soursop Leaves & Keep Them Fresh 6
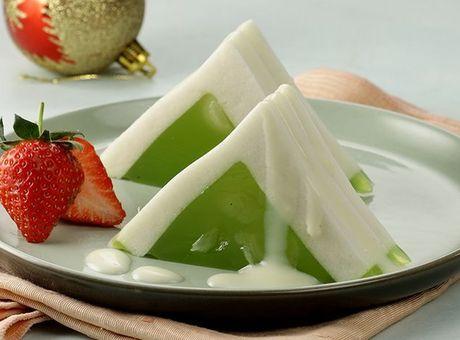
soursop dessert

If you love the fragrance of soursop flowers, you’ll be surprised at how soursop leaves can transform your desserts and more! They offer delicate floral notes without being too overpowering. Here are some ideas:

  • Creamy Delights: Infuse custards or cream with fresh soursop leaves for a subtle tropical flavor. Remember to strain them out before serving.
  • Frozen Treats: Blend young soursop leaves into ice cream or sorbet for a touch of earthy sweetness and unique texture.
  • Tropical Teas: Dried soursop leaves pair beautifully with teas and tisanes featuring mango, pineapple, and hibiscus.

FAQs

How do you store soursop after cutting?

If you’re dealing with freshly cut soursop leaves, treat them like herbs. Wrap them loosely in slightly damp paper towels, place them in a container, and store them in the crisper drawer of your fridge. They’ll stay fresh for up to two weeks.

What are the benefits of drinking boiled soursop leaves water?

Soursop leaf tea is traditionally believed to have several potential benefits, including reducing inflammation, boosting the immune system, and potentially aiding in relaxation. Keep in mind that more scientific research is needed to confirm these effects.

How long should I boil soursop leaves?

For making soursop tea, a gentle simmer is best. Bring water to a boil, add your leaves, then reduce the heat and simmer for 5-10 minutes. Avoid over-boiling to preserve flavor and potential beneficial compounds.

How long can I store soursop leaves?

Storage time depends on the method:
Fresh in the fridge: Up to 2 weeks
Frozen: 6-8 months
Dried: Up to a year or more if stored properly in an airtight container.

Which is better, dried or fresh soursop leaves?

It depends on what you want to do with them!
Fresh: Best for vibrant flavor and maximum potential health benefits.
Dried: Great for convenience and making soursop leaf tea. You’ll lose some flavor intensity, but they gain a long shelf life.

How to Store Elderberry Syrup: A Chef’s Guide

To keep your elderberry syrup safe and flavorful, the refrigerator ❄️ is your best friend! Cold temperatures slow down spoilage and help preserve those vibrant colors and beneficial nutrients.

For even longer storage, try freezing small portions in ice cube trays 🧊 – a super handy trick for adding an immune boost 💪 to drinks all year round!

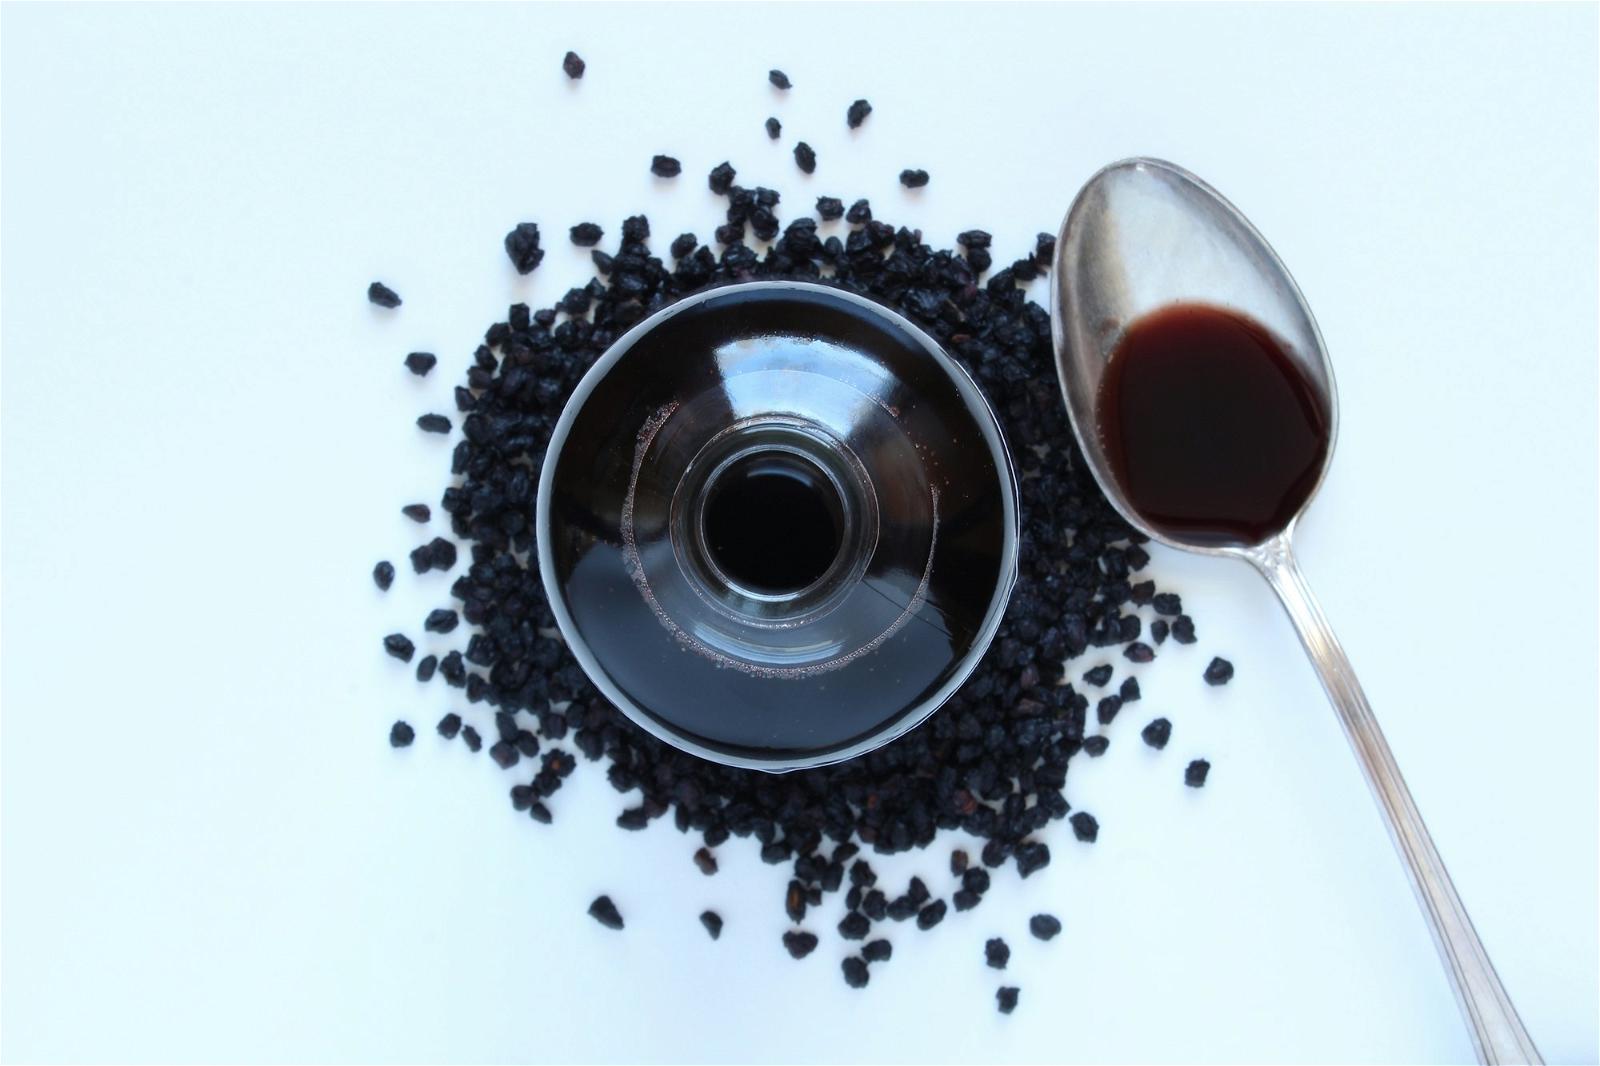
how to store elderberry syrup
bottle of elderberry syrup berries and spoon

📦 How to Store Elderberry Syrup (The Basics)

As a former chef at the Boat Basin Cafe, I understand the importance of proper storage for preserving the flavor and health benefits of ingredients like homemade elderberry syrup.

We used local elderberries to make syrups that added vibrancy to our cocktails and mocktails. After the cafe closed, I began experimenting with elderberry syrup recipes in my own kitchen, using both fresh or dried elderberries.

These simple storage tips will help you enjoy your homemade elderberry syrup for as long as possible.

Refrigerators Are Best

  • For maximum freshness and longevity, store your elderberry syrup in the refrigerator.
  • Aim for the coldest part of your fridge – ideally, the back of the bottom shelf or a produce drawer where temperatures are closest to 32°F.

Table 1: Recommended Storage Temperature for Elderberry Syrup

LocationTemperatureEstimated Storage Time
Refrigerator (Back Shelf)32° – 40°F2-3 months
Pantry or Cupboard50° – 70°F1 month

Homemade vs Store-Bought Lifespans

  • Homemade elderberry syrup lasts about 2-3 months in the refrigerator.
  • Store-bought syrup often contains preservatives and can last for 6 months or longer if unopened.

🤔Important Considerations

Store-bought elderberry syrups often include preservatives and are made in highly regulated facilities, reducing the risk of spoilage.

I recommend using my Homemade Elderberry Syrup within 8-12 weeks for the best quality.

💁🏻‍♂️ You may also like: The Sugar Wars: Maple Syrup vs Honey Syrup

👉 Why Storage Matters: Beyond Spoilage

Girl holds in hands clusters fruit black elderberry (Sambucus nigra). Elder, black elder
girl holds in hands clusters fruit black elderberry sambucus nigra elder black elder

Elderberries pack a nutritional punch with vitamin C and antioxidants called flavonoids. Proper storage is crucial for:

  • Preserving nutrients: Minimize degradation of those beneficial compounds that may offer immune support (though more research is needed).
  • Maintaining flavor: Keep that signature tangy elderberry taste at its peak.

💁🏻‍♂️My Experience: A Lesson Learned

At the Boat Basin Cafe, I loved using house-made elderberry syrup in cocktails. But I once made the mistake of leaving a clear glass bottle of syrup on my sunny kitchen counter.

Within days, the vibrant color faded and the flavor went flat🤣 – a lesson in how heat and light can damage those delicate compounds.

The Right Approach

To maximize both flavor and potential benefits of your homemade elderberry syrup:

  • Refrigerate: Cold temperatures help preserve everything good.
  • Use dark bottles: Protect the syrup from light degradation.

Maximizing Flavor and Benefits

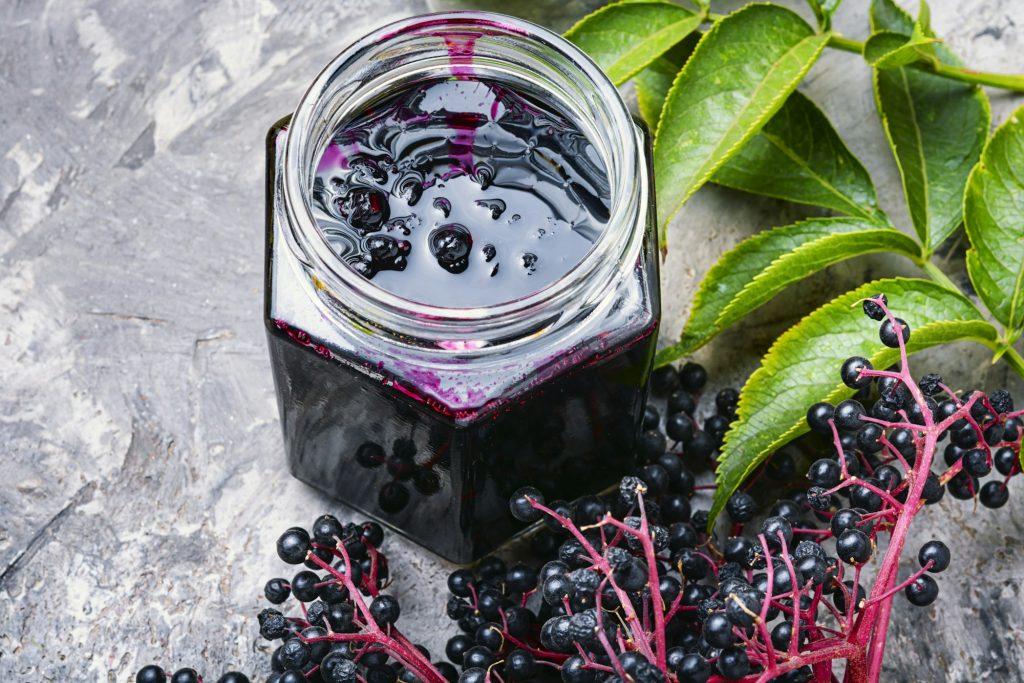
Elderberry autumn jam
elderberry autumn jam

Proper storage is essential for keeping your elderberry syrup’s nutrients and flavor at their peak.

Here’s how to get the most out of your homemade and store-bought syrups:

💡The Importance of Light

  • Elderberry syrup’s vibrant purple color comes from compounds that are sensitive to light.
  • Always store syrup in dark-colored glass bottles or jars – avoid clear containers.
  • I reuse wine bottles for large batches of my Homemade Elderberry Syrup; they block light and add a touch of charm.

🌡️ Temperature is Vital

  • Cold temperatures are essential for slowing down the chemical reactions that degrade syrup.
  • Refrigerate your syrup at 33°F – 40°F for optimal storage.
  • For extra-long storage, freeze small portions in ice cube trays. Freezing at 0°F or below preserves food safety and minimizes nutrient loss.

⁉️ Clever Storage Solutions

My years of experience with elderberry syrup have taught me some tricks for maximizing shelf life, even with large batches:

  • Freezing in Portions: Ice cube trays are perfect for freezing individual portions of your homemade syrup. Use silicone trays for easy removal. Thaw a cube or two for a quick immune boost in tea, smoothies, or sparkling water!
  • Smaller Batches Are Better: Make smaller batches more often to reduce exposure to air and bacteria. I try to stick with 500 ml batches at a time.
  • Is My Elderberry Syrup Still Good? Check for these key signs of spoilage:
    • Mold
    • Off-odor
    • Separation
    • Dull color

If it passes the look, smell, and taste test, it’s likely still good! A forgotten bottle in the back of my fridge once lasted over 9 months.

🫐 Elderberry Variations and Storage

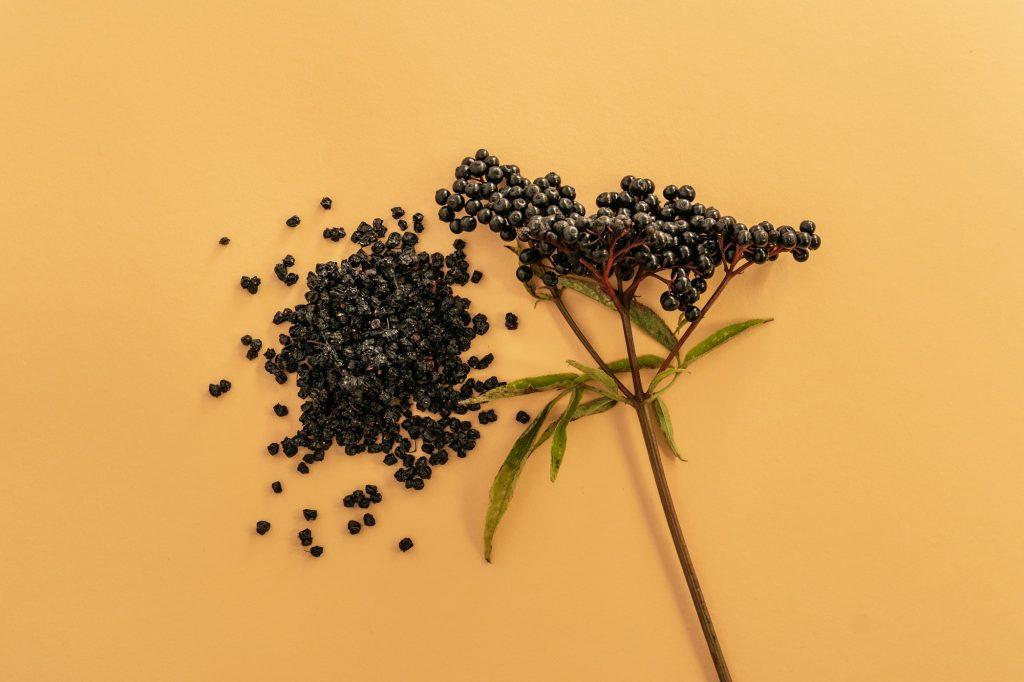
Dried elderberry. Immunity boosting for flu season. Black Elderberry
Dried elderberry

Remember, storage needs change depending on your elderberry syrup’s ingredients and preparation:

Elderberry ProductStorage RecommendationsNotes
Syrup (white sugar)Refrigerate in dark containerLasts 2-3 months
Syrup (honey or maple-sweetened)Refrigerate in dark containerSmaller batches recommended, may crystallize over time
Alcohol-preserved syrupRefrigerate in dark, sealed containerLasts up to 1 year, cook off alcohol if serving to children
Dried elderberriesCool, dry, airtight containerPrevent moisture exposure
Gummies/SupplementsFollow package instructionsOften recommend refrigeration or freezing
  • Honey vs Sugar Syrup: Syrups made with white sugar last longer in the refrigerator than those with raw honey or maple syrup, which can crystallize. Process honey-sweetened syrups in smaller batches.
  • Alcohol-Preserved: Alcohol acts as a preservative. At my old restaurant, we made boozy elderberry syrups that lasted up to a year in the fridge. If serving to children, cook off most of the alcohol.
  • Other Elderberry Forms:
    • Dried elderberries: Store in a cool, dry, airtight container.
    • Gummies/Supplements: Follow package instructions, often recommending refrigeration or freezing.

🔑Key Storage Tips for All Elderberry Products

  • Minimize temperature changes.
  • Limit light exposure with dark containers.
  • Prevent air contact by sealing containers tightly.

Conclusion

Proper storage is essential for safely enjoying elderberry syrup beyond its short season. My years at the Boat Basin Cafe taught me the value of smart storage for year-round use.

In my home kitchen, I follow these rules for safety and maximum benefits:

  • Refrigerate in airtight, dark glass bottles.
  • Don’t overfill containers.
  • Freeze to extend shelf life.
  • Portion servings to minimize contamination.

I hope my experience helps you confidently enjoy this immune-boosting staple long after elderberry season ends.

Share Your Tips!

Do you have any clever elderberry syrup storage tricks? Share your ideas and questions in the comments below! For more inspiration, check out my articles on easy DIY elderberry syrup recipes.

Chia Seeds Need Refrigeration? YES! (Plus Tips)

Absolutely! While you can technically store chia seeds at room temperature for a short while, the refrigerator is your best bet for keeping them fresh and tasty for as long as possible.

💁🏻‍♂️Think of it like this: your chia seeds are happiest in a cool, dark environment, and the fridge provides that perfect cozy space, away from the elements that can cause them to spoil faster.

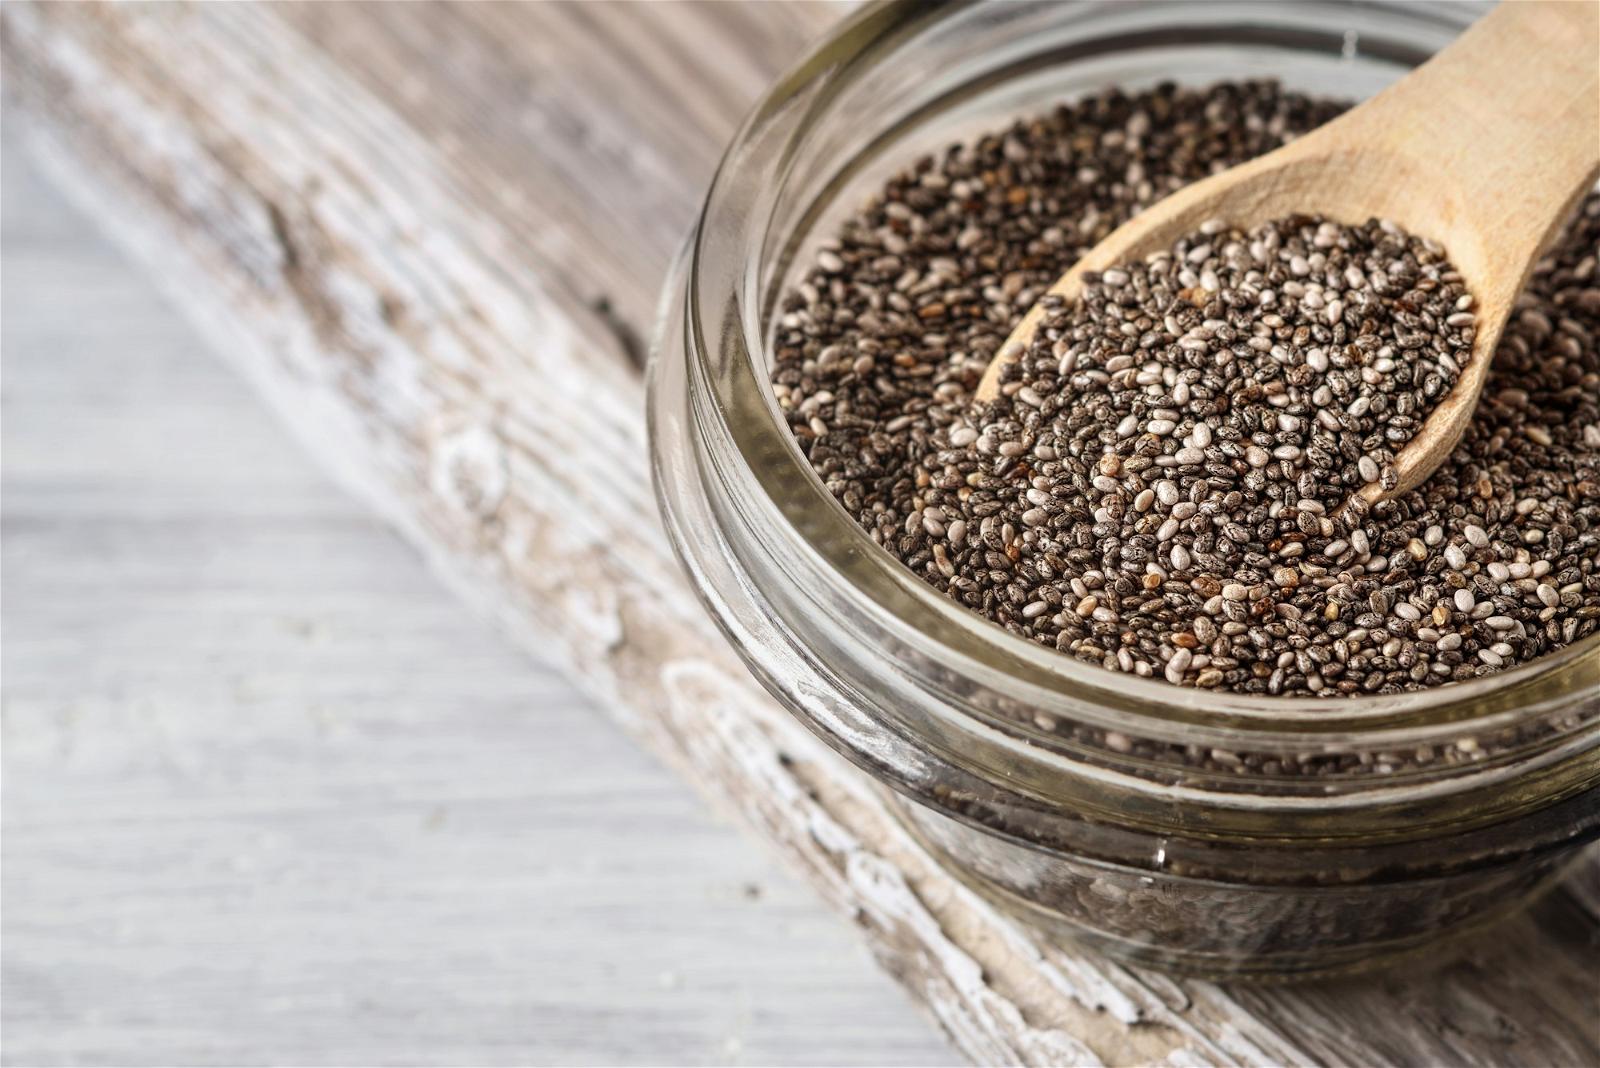
Chia seeds in a glass bowl

Do chia seeds need to be refrigerated after opening?

👍 The Short Answer: Yes, chia seeds will last longer if refrigerated after opening. Their high oil content makes them prone to rancidity at room temperature.

🤔 Why It Matters: Conscious cooks like you want to avoid wasting money and nutrition on spoiled superfoods. My guidance will help safeguard your precious chia seed investment through proper storage.

👍The Best Way to Store Chia Seeds

Storage OptionLocationTemperature RangeShelf LifeProsConsKey Tips
Fridge FactorRefrigerator34-40°F6-12 monthsExtends freshness up to a year past the “best by” date. Protects against oxidation and mold.Not necessary for immediate use. Risk of condensation in not fully airtight containers.Store in opaque, airtight containers at the back.
Pantry PowerPantry50-60°F2-4 monthsConvenient for daily use. Okay for short-term storage.Humidity or temperature changes reduce shelf life.Use opaque, airtight containers in a cool, dark corner.
Freezer OptionFreezerBelow 32°F1-2 yearsPrevents rancidity for long periods. Good for bulk purchases.Requires thawing before use. Less convenience.Pre-measure servings before freezing to avoid contamination and waste.

The Fridge Factor

The store-opened chia seeds in an opaque, airtight glass or plastic container at the back of the refrigerator. Temperature between 34-40° F protects freshness for 6-12 months.

Buy only what you can use before expiry.

Pros: Refrigeration can prolong the freshness of chia seeds by up to a year past any “best by” date on the package.

Since they are prone to oxidation and mold growth at room temperature, refrigerator storage gives chia the protection they need. This is especially helpful for people living in hot, humid climates.

Cons: Refrigeration may not be necessary if you plan to use chia seeds very soon after opening. There’s also a risk of condensation forming if cold seeds aren’t stored in an extremely airtight container.

Pantry Power

If refrigerating daily seems tedious, chia can be kept for 2-4 months in an extremely airtight container (glass/ceramic/stainless steel) in a cool, dark pantry between 50-60°F. But shelf life diminishes quickly above 60° so stick to the fridge for the long haul.

Pros: A sealed container in a cool, dark pantry can also be an okay short-term home for chia seeds, lasting around 2-4 months.

The convenience factor is nice for everyday use if you don’t want to trek to the fridge each morning for breakfast.

Cons: Any humidity or temperature fluctuations will shorten pantry storage life. So this works best for kitchens that maintain a relatively cool, dry environment year-round.

🔑 Key Tips: Choose opaque, airtight containers approved for low-moisture storage. Glass jars, Mylar bags, and some plastic containers meet this standard. Store in the coolest, darkest corner of your pantry. Buy chia seeds from stores with good turnover to start fresh. And remember, the fridge still reigns supreme for long-term storage.

The Freezer Option

For bulk buys, portion pre-measured servings into freezer bags or containers first. This prevents ice crystals from damaging their structure. Frozen chia seeds stay fresh for 1-2 years. Thaw serving sizes as needed.

Pros: Freezing chia seeds in an airtight container prevents rancidity almost indefinitely. It’s a smart approach for economical bulk buying. Frozen storage also gives you quick access to a staple ingredient that can be easily incorporated into smoothies, oatmeal, chia pudding, and more.

Cons: It takes slightly more foresight to thaw a frozen stash. The tradeoff for maximum shelf life is less instant grab-and-go convenience compared to frequenting the fridge or pantry.

💡 Pro Tip: Pre-measure your chia seeds into portion sizes needed for recipes before freezing. This prevents contamination each time you scoop from the bag. It also eliminates waste from any unused thawed portions.

👃How to Tell If Chia Seeds Have Gone Bad

Making Oatmeal with Chia Seeds
making oatmeal with chia seeds

It’s not always obvious just by looking at chia seeds whether they’ve taken a turn for the worse. Here are some simple ways to gauge freshness before using:

👃 The Smell Test: Fresh chia seeds are relatively neutral-smelling. If you detect bitter, unpleasant, or paint-like odors, trust your nose. Rancidity has likely set in.

👀 The Touch Test: Pour a sampling onto your palm. The seeds should have a dry, grainy texture without clumping or feeling slippery/oily. Discard any visibly moldy, discolored, or slimy bits.

📅 Expiration Check: An unopened package is typically fine up to a year past any “packaged on” or “best by” date. But once opened, all bets are off. Even if stored properly, chia seeds last just 6-12 months after opening.

My Chia Seed Secret Weapon

Hot delicious beef soup close-up. Homemade soup with meat, vegetables and gnocchi.
hot delicious beef soup close up homemade soup with meat vegetables and gnocchi

I swear chia seeds secretly thicken and add body to everything!

💁🏻‍♂️ My favorite trick is whisking a spoonful into soup near the end to add nutty flavor and thickness without getting gummy.

Here’s how:

Ingredients:

  • 1 Tbsp chia seeds
  • 1/4 cup liquid (broth, non-dairy milk, water)

Directions:

  1. In a small bowl, vigorously whisk chia seeds into a liquid for 30-60 seconds until fully incorporated into the gel. Let rest for 5 minutes.
  2. When the soup is finished cooking but still quite hot, scoop out a ladle full.
  3. Whisk in pre-soaked gel 1 Tbsp at a time until the desired thickness is reached. Adjust salt/seasoning to taste.

The chia gel bulks up soup beautifully without blunting flavors! It also blends in smoothly while adding fiber, protein, and nutrition. This simple solution helps stretch costly ingredients too.

👉 How to make Chia Seed Pudding

Chia Seeds & Moisture: What to Know

Chia pudding and raw chia seeds on white table
chia pudding and raw chia seeds on white table

To maximize the shelf life of your chia seeds, it’s equally important to limit their exposure to moisture through soaking or humid environments:

💧 Soaking: Pre-soaked chia gel should be used right away or stored in an airtight container in the fridge for up to 5 days. Freezing is another option if you meal prep batches of chia pudding in advance.

Humidity: Impermeable rigid containers are essential for storage in humid regions, along with consistent refrigeration or freezing. Air exposure accelerates spoilage, so buy only what you’ll use within 6-8 months max.

🌱 Extra Tip: Interested in sprouting? Chia seeds can be sprouted in water at room temperature for up to 3 days. Then they should be rinsed thoroughly and refrigerated in a covered container for up to a week of eating. Don’t freeze or dry sprouted chia seeds.

FAQs

Do chia seeds go bad if not refrigerated?

Yes! While they technically won’t spoil instantly, room temperature storage significantly shortens chia seeds’ lifespan. Heat, light, and humidity speed up rancidity, making them unpleasant and potentially unhealthy.

How do you store chia seeds after opening?

For maximum freshness, always refrigerate opened chia seeds in an airtight container. If you’re in a cool, dry climate and plan to use them quickly, pantry storage in a sealed container is okay for a few months. For bulk purchases, freeze pre-portioned servings.

Do you have to refrigerate soaked chia seeds?

Yes! Soaked chia seeds (like in chia pudding) are highly perishable. Refrigerate them in an airtight container and use within 5 days.

What is the best container for storing chia seeds?

Glass jars with tight-fitting lids are ideal. Opaque containers protect from light. You can also use resealable Mylar bags meant for dry foods.

How do you tell if chia seeds have gone bad?

Smell: Fresh chia has a neutral scent. If it smells bitter or paint-like, it’s rancid.
Texture: They should be dry and grainy. Slimy, clumped, or discolored seeds are no good.
Expiration: Unopened chia seeds are usually good for a year past the printed date. Once opened, even with proper storage, they last about 6-12 months.

When should you throw out chia seeds?

Toss them immediately if you notice any of the signs of spoilage mentioned above, or if they’re well past their expiration date.

What’s the difference between black and white chia seeds?

Nutritionally, they’re almost identical! Any color differences are purely aesthetic.

🔑 Key Takeaways

  • 🥣 Refrigerate opened chia seeds (34-40°F) in airtight containers for 6-12 month shelf life.
  • ❄ Portion and freeze for long-term storage up to 2 years.
  • 😵 Discard at first sight or whiff of gray, smelly, slimy rancidity.

My personal favorite way to use up chia is by stirring a spoonful into vanilla yogurt with fresh berries and toasted walnuts. The seeds add a delightful crunch alongside creamy tart-sweet flavors and textures. What’s your go-to recipe for using chia creatively? Share your inspiration in the comments!

Does Seltzer Expire? How to Keep Your Sparkle Alive

Ah, the Costco siren song. Luring you in with mountains of bubbly bliss for the price of a latte. We’ve all fallen for it, haven’t we?

Months later, though, you stumble upon a dusty can lurking in the pantry, and the inevitable question arises: “Is this still even drinkable?” Fear not, fellow seltzer enthusiasts, for this is your deep dive into the world of seltzer, bubbles and all!

[adthrive-in-post-video-player video-id=”lpXy9j3I” upload-date=”2024-01-07T07:05:54.000Z” name=”Does Seltzer Expire?” description=”” player-type=”default” override-embed=”default”]

🍋 What Exactly is Seltzer?

Think Mother Nature’s soda fountain! No fancy ingredients, just water infused with carbon dioxide for those delightful dance parties on your tongue.

Companies may add a splash of fruit or a dash of juice, but at its core, seltzer is pure, sparkling refreshment. Feeling adventurous? All you need is water, CO2, and a pressure-loving container – boom, homemade fizz for the win!

Seltzer’s close cousin hard seltzer adds a splash of alcohol to the mix, creating a refined drink for the 21+ crowd. Popular brands like White Claw and Truly offer fruit-flavored fizziness with about 100 calories and 5% alcohol per can – lighter than beer and tastier than vodka!

SeltzerPlain sparkling water
Hard SeltzerSeltzer with alcohol added, around 5% ABV
does seltzer expire?
Two glasses hard seltzer oranges rosemary

📜 History of Seltzer

Believe it or not, those first tingles trace back to the late 1700s! Seltzer emerged in Germany, captivating European aristocrats seeking a touch of health (fancy, right?).

By the 1830s, it crossed the Atlantic, dispensed in pharmacies as “soda water” for digestion or a hot day’s refreshment. Then came the early 1900s, and Jewish immigrants arrived with their single-serving “siphon” bottles, sparking a vibrant street vendor culture in NYC.

“Stop by for a bubbly shot of seltzer!” these iconic characters would call, defining decades of city life. But mass-produced bottles eventually eclipsed these hand-bottled rituals, leaving the vintage fizz feeling forgotten.

Not for long, though! Artisanal seltzer brands are reviving those bygone days, proving that seltzer’s bubbly magic never truly goes flat.

The “soda siphon” effect: When you open a can of seltzer, the rapid release of carbon dioxide creates a miniature sonic boom, hence the audible hiss. This is similar to the principle behind a soda siphon.

🧐 To Sip or Not to Sip: Does Seltzer Expire?

Rummaging through a forgotten backroom storage, I spot a fruity seltzer can way past its prime. Covered in dust, the pull tab labels it best by July 2022 – it’s clearly expired. But would it still be safe to drink?

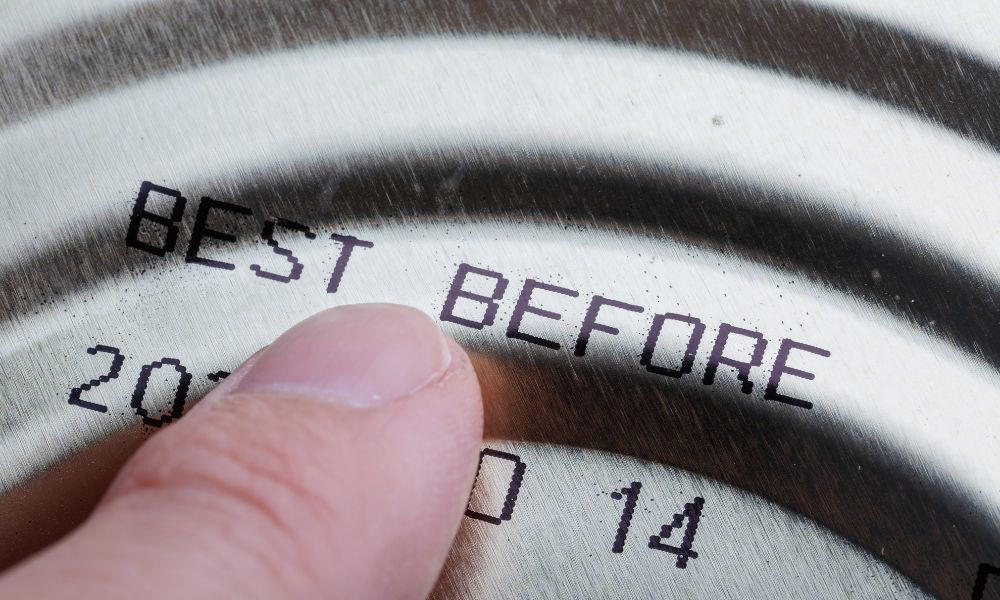
When it comes to food and beverages, expiration dates indicate quality, not necessarily safety. They signify the last day a company guarantees peak deliciousness.

An expired seltzer likely won’t make you sick – unless there’s severe corrosion or contamination. Light corrosion is usually fine as the contents of the cans aren’t directly in contact with the aluminum. However, significant corrosion causing leaks or breaches in the can lining could be a hazard. So while that dusty can won’t have quite the same lively lip-puckering bite, it’s probably still potable.

For optimal taste and fizz factor, I stick to seltzer cans within several months of the packaging date. But drinking one a few months past its prime (especially if refrigerated) usually just means somewhat flat flavor. Not a safety hazard – but personally, I’ll pass on flat seltzer! 🙅‍♂️

Does Seltzer Expire? How to Keep Your Sparkle Alive 7
best by

📅 Unopened Seltzer Shelf Life

In many ways, an unopened can of seltzer is like a time traveler – able to withstand the test of time before bringing refreshing fizziness to thirsty drinkers.

If stored properly at room temperature, seltzer lasts 5-6 months before losing its lively carbonation. And refrigeration can extend an unopened seltzer’s shelf life to about a year – that’s sparkly freshness lasting over 365 days! I found keeping seltzer cans out of direct sunlight in the Boat Basin Cafe’s cool basement was the best way to maintain bubbly bliss.

So what exactly causes a seltzer to go flat? Within each can, carbon dioxide gas keeps those delightful fizzies bouncing. But over time, CO2 molecules can slowly seep out through microscopic pores in the container. Eventually, enough Seltzer Soul escapes and flatness sets in.

Other gases present during manufacturing or sealing can also cause carbonation loss. And factors like transportation and storage temperature play a role too – heat speeds the escape of CO2 while cool temps preserve the fizzy essence.

Room Temperature5-6 months
RefrigeratedUp to 1 year

Hidden factors affecting seltzer longevity

  • Can lining: The type of lining inside the can significantly impacts carbonation retention. Some newer linings are designed to be extra gas-tight, allowing seltzer to stay bubbly for even longer.
  • Altitude: Living at high altitudes can actually make your seltzer go flat faster due to the lower atmospheric pressure. So, mountain dwellers, take note!
  • Fruit flavors: Seltzers with added fruit flavors may lose their fizz and aroma quicker than plain seltzer. This is because the sugars and acids in the fruit can interact with the carbon dioxide, causing it to escape more readily.

🍾 Opened Seltzer: A Race Against Time

Cracking open a can unleashes a magical battle against the clock. Once exposed to air, carbon dioxide starts its grand escape, day by day diminishing the flavor and fizz. For peak enjoyment, finish an opened seltzer within 2 to 4 days.

Storing them in sealed containers can help slow down the fizz clock, but remember, opened seltzer’s lifespan maxes out around a week – drink up!

Does Seltzer Expire? How to Keep Your Sparkle Alive 8
Photo by Tara Winstead

🕵️‍♂️ Spotting an Expired Seltzer

Check DateOn bottom rim or pull tab label
Inspect ContainerBulges, dents, rust, stickiness can accelerate expiration
Check Carbonation & ScentFlatness and faded aroma indicate expired freshness

Luckily, seltzer cans provide plenty of clues indicating freshness. Playing soda sleuth by checking labels, dates, container condition and contents can reveal if a questionable can is still consumable.

First check the expiration or Best By date printed in small type on the bottom rim or pull tab label. Cans more than 6-12 months past this timeframe likely contain flat, flavorless fizz.

Next, scrutinize the can’s condition. Bulges, dents, rust, sticky residues or any other defects can compromise integrity, causing quicker carbonation loss.

Pop the tab and inspect seltzer visually and aromatically. Flat, faded carbonation plus weak, stale seltzer scents signal expired freshness. But if lively bubbles are visible and it smells vibrant, cheers to sipping!

🥤 Safe Sipping: Is Expired Seltzer a No-Go?

Working the register one slow morning, a scruffy regular presented a tattered grocery bag filled with dusty, expired cans. “Think these are still safe to drink?” he asked hopefully. Yikes! 😬

While the taste of flat, aging seltzer might not be too thrilling, safety is seldom a concern. Unless cans show serious structural damage or visible contamination, the main worries with expired cans are lackluster flavor, scent and fizz – not hazardous health effects.

However, if you spot mold, rust, odd textures or powerful rancid smells, err on the side of caution – properly discard instead of drinking!

Unexpected uses for expired seltzer:

  • Weed killer: Believe it or not, flat seltzer can be used as a natural weed killer. The acidity can harm delicate weed seedlings while not affecting most established plants.
  • Hair rinse: The minerals in seltzer can add shine and volume to your hair. Simply pour some flat seltzer over your locks after shampooing and conditioning.
  • Cleaning agent: Flat seltzer can be used to clean windows, mirrors, and stainless steel surfaces. The acidity helps cut through grime and leaves a streak-free finish.

So for that desperate regular begging to buy expired stock? While legally I couldn’t sell past-date cans, I furtively slipped him two from my basement stash – flat but harmless to consume! 🤐

🏠 Storage Secrets: How to Keep Your Seltzer Singing

Want to keep your seltzer singing its bubbly tune for as long as possible? I learned a few insider cafe tips:

  • Shield from Light: Sunlight degrades flavors and hastens carbon dioxide escape. Stash your cans in cool, dark havens like cellars or fridges.
  • Keep Cans Chilled: Refrigeration slows down carbonation loss and locks in that straight-from-the-source flavor. Think of it as a seltzer spa!
  • Seal Opened Cans: Air is the enemy of fizz. Pour unfinished portions into airtight containers like glass bottles to slow the clock on flatness.
  • Clean Container Exteriors: Sticky residues can damage the can’s integrity and lead to early fizz faltering. Give your cans a quick wipe-down to keep them in tip-top shape.

These simple tips helped keep our Boat Basin Cafe seltzer bubbling with life, and they’ll do the same for yours! Just remember, once cracked open, drink your seltzer like it’s your last dance with a disco ball – embrace the fizz before it fades!

📚 Seltzer in Culinary Creations: Beyond Plain Sipping

Seltzer isn’t just for solo sipping! Its bright bubbles and neutral flavor make it a culinary chameleon:

  • Cocktails (21+ only!): A vodka soda with fresh citrus slices is a summer classic. Or get creative and blend seltzer with syrups, juices, or herb infusions for next-level mocktails – your imagination’s the limit!
  • Baking and Pancakes: Lightly sweet quickbreads get a perfect lift from fizzy favorites. Pancakes, cakes, and crepes all rise higher with a splash of bubbly.
  • Deglazing Savory Pans: Want to add depth and richness to your pasta, stir-fries, and sauces? Deglaze your pans with plain or flavored seltzer – it’s a game-changer!

From mixology to baking, don’t relegate seltzer to just solo sipping. Uncork those food and drink recipes and start pouring!

Does Seltzer Expire? How to Keep Your Sparkle Alive 9
Photo by Geraud pfeiffer

♻ Cheers to Sustainability! Raise a Glass to Recycling!

Aluminum cans are recycling rockstars! Thanks to their ideal properties, they get a new life as fresh cans roughly 60 days after being recycled. That’s not just good for your wallet, it’s good for the planet:

  • Energy Savings: Recycling aluminum saves more than 90% of the energy needed to produce brand new cans, reducing dependence on fossil fuels and saving millions of barrels of oil each year.
  • Reduced Emissions: Aluminum manufacturing generates significant greenhouse gas emissions. Recycling cuts those emissions dramatically, minimizing our environmental impact.

So, by responsibly tossing your empty seltzer cans in the recycling bin, you’re not just decluttering your pantry, you’re helping keep thousands of tons of aluminum out of landfills and reducing your carbon footprint. Now that’s something to fizz about!

Does Seltzer Expire? How to Keep Your Sparkle Alive 10
Photo by Darren Patterson

🎉 Conclusion: Keep the Bubbles Bubbling

As the bittersweet last day at Boat Basin Cafe arrived, I gazed nostalgically at the seltzer fridge that had fueled so many lively memories. No longer would I fill cups with fizzy refreshment for thirsty tourists and quirky regulars – but the bubbly spirit of the cafe would stay with me.

Hopefully these insider tips on handling and storage will help your seltzers maintain maximum fizz factor and flavor nuance. And if one day you happen to pop open a passed-date can, fear not – just sip safely and savor whatever lingering bubbles it has left!

Now if you’ll excuse me, it’s time to enjoy a nice cold seltzer in honor of the Boat Basin while sharing fond stories with friends new and old! 🥤 Who’s in?

❓FAQs: Your Pressing Seltzer Questions Answered

Can you use expired seltzer in a recipe?

You can safely use expired seltzer in recipes. While flat and potentially diminished in flavor, seltzer within its best-by date is still safe to ingest barring signs of contamination. The main concern is lack of fizz, rather than food safety issues. So go ahead and give that flat, forgotten seltzer new life in bubbly baked goods, salad dressings, and more – just avoid baking where active carbonation is essential for rise.

Does seltzer expire in the fridge?

An unopened seltzer stored in the fridge can last up to a year before notable flavor/carbonation loss. Even when refrigerated after opening, seltzer is best consumed within 4 days.

Does hard seltzer expire?

Similar to regular seltzer, unopened hard seltzers typically last 6 months (room temp) to 1 year (refrigerated). After opening, 2-4 days is ideal for taste. Expired hard seltzer is still generally safe to ingest.

Can You Freeze Serrano Peppers? What Happens to Nutritions?

Freeze serrano peppers effectively for up to 6-8 months by washing, drying, and optionally slicing them before packaging in air-tight containers or freezer bags. This method preserves their flavor and spice, making them a versatile ingredient for various recipes even out of season.

🥶 Key Takeaways

  • Freezing extends serranos’ shelf life for 6-12 months
  • Wash, dry, slice, and package peppers properly before freezing
  • Frozen serranos retain more nutrients and flavor than other preservation methods
  • Thaw frozen peppers overnight in the refrigerator before using

📖 My First Serrano Pepper Experience

I’ll never forget the day I took my first bite of a serrano pepper. I was working as a line cook at the Boat Basin Cafe in New York City. We were making a batch of salsa when the head chef passed me a bright green pepper. “Try this and let me know what you think,” he said. I popped it in my mouth whole and bit down hard. An intense burning spread across my tongue as I gasped for air. My eyes watered uncontrollably. I thought I might pass out! Once the firestorm calmed down though, I noticed the fruity, citrusy flavors mingling with the heat. I was hooked and had to learn more about these intense little peppers.

Can You Freeze Serrano Peppers? What Happens to Nutritions? 11
green chili peppers on dark board 2023 11 27 05 12 54 utc

🥣 Why Freeze Serrano Peppers?

Ever since tasting my first serrano, I loved experimenting with them in the cafe’s Southwestern dishes. One patron favorite we featured on the menu was Baja fish tacos with serranos. We would marinate firm white fish like tilapia in lime juice, oil, cilantro, and chopped serrano peppers before grilling. The bright heat perfectly balanced the rich, flaky texture of the fish.

For toppings, we included cooled cabbage slaw, pico de gallo with extra serrano kick, avocado, and lime crema in warm tortillas. Customers raved about the contrast of spicy and cooling ingredients. We went through pounds of serranos each week with this single menu item alone!

However, the supply would dwindle once hot pepper season ended. Patrons were disappointed when we occasionally had to 86 the fish tacos in winter if our serrano stash ran out. We tried using jarred pickled peppers as a substitute, but they lacked the fruity fresh flavor.

Discovering that freezing preserved the taste and heat of fresh serranos so well was a game changer. Now we never run out! We chop up bags of frozen ones to mix into salsas, chilis, stir fries, and sprinkle onto pizzas year-round. The thawed softer texture especially melts beautifully into cheesy dishes. Freezing lets us enjoy their intense summer flavor even in the dead of winter!

🧼 Prepping Your Peppers

Preparing serranos for the freezer takes a little work up front. But it pays off all winter long when you have their zesty flavor and fire on hand! Here are my tips:

Variety of Vegetables
Serranos waiting to be prepped

🚿 A Tale of Washing and Drying

I’ll never forget when a fellow cook pulled a muddy serrano out of the walk-in fridge. He had uprooted some wild peppers from his backyard and just stored them covered in dirt! So rule number one is thoroughly washing the peppers. Debris carries bacteria that survives freezing.

Gently pat dry with towels or air drying works too. You don’t want the water turning to ice crystals during freezing. One cook I knew simply stuck damp peppers on a baking sheet for an hour or two before bagging. No more pesky ice particles to deal with! Those little tricks make all the difference.

🗡️ To Slice or Not to Slice

I heavily debated the slicing dilemma when I first started freezing serranos. On one hand, slicing makes it super easy to grab a few slices rather than defrost a whole pepper whenever a recipe calls for them. You avoid the whole “what do I do with the rest of this pepper” problem too. I dump any extra bits right into my frozen jar of odds and ends for salsa, chili, etc. It’s extremely convenient and reduces waste.

However, the head chef at the cafe insisted on freezing all hot peppers whole. He argued that leaving the seeds and membranes intact inside better preserves the precious volatile oils and heat level compared to exposing them to air. I can’t say my casual home experiments with sliced versus whole peppers showed a tangible difference either way. But the seeds and ribs do get kind of strewn everywhere once you start chopping thawed sliced serranos.

Verdict: I opt for practicality in the home kitchen and freeze the majority in convenient sliced form. But I hedge my bets by vacuum sealing an emergency stash of whole serrano peppers too – just in case!

Serrano FormMy Rating ⭐️
Whole⭐️⭐️⭐️
Sliced⭐️⭐️⭐️⭐️⭐️

🌬️ Flash-Freezing Magic

My tried and true method is flash-freezing sliced peppers first. I line them in a single layer on baking sheets and freeze until solid overnight before transferring to bags. Having them pre-sliced to grab and use is invaluable. I reach for my sliced frozen serranos 10x more than the whole ones!

Flash-freezing prevents annoying clumping by freezing individual pieces first before they make direct contact with other frozen items in a bag. No longer do I need to chisel apart a massive block of fused pepper slices!

For the best texture, flash-freeze on parchment paper then scoop the slices into a container once firm. Parchment peels easily off the frozen pepper pieces. However, the lazy cook in me now just lines baking sheets with foil or plastic wrap instead for easy cleanup.

🍃 The Nutritional Side of Serrano Peppers

I’ll admit – researching the nutritional changes serrano peppers undergo when frozen was quite enlightening! Initially, I assumed that freezing peppers would perfectly preserve their nutrients, just like they were fresh. However, this isn’t entirely true. Let’s explore the data and what I discovered:

Nutrient Changes in Frozen Serrano Peppers

Freezing does affect certain nutrients in serrano peppers, but not all in the same way. Here’s a breakdown based on my research:

  • Vitamin C: It’s known that Vitamin C is sensitive to both temperature and oxygen exposure. A study I came across in the Journal of Food Science indicated that frozen vegetables, including peppers, can lose up to 30% of their Vitamin C content over a period of 6-8 months. However, this loss is significantly less compared to other methods like canning.
  • Antioxidants: Surprisingly, the impact on antioxidants is less severe. According to research from the National Institute of Health, the reduction in antioxidants in frozen vegetables is minimal over the first 6 months of freezing. This means that your serrano peppers will still pack a decent antioxidant punch, even after months in the freezer.

Comparing Fresh vs. Frozen Serrano Peppers

NutrientFresh Serrano Peppers (per 100g)Serrano Peppers Frozen for 6-8 Months (per 100g)
Vitamin C144 mg~100 mg (approx. 30% loss)
Antioxidants100%~95% (minimal loss)

While there’s some nutrient loss during freezing, particularly Vitamin C, frozen serranos still retain a significant amount of their nutritional value. This makes them a far better option than other preservation methods when it comes to retaining that spicy vitamin goodness!

NutrientFresh SerranoFrozen SerranoAfter 6 Months Frozen
Vitamin C100% DV100% DV60-80% DV
Vitamin A10% DV10% DV5-8% DV
Spice Bottles on Shelf
Serrano peppers pack some serious heat!

🔄 Freezing vs Other Methods

In my early days with serrano peppers, I experimented with all kinds of preservation methods beyond freezing. I tried pickling, oil-packing, and even dehydrating batches of peppers. While each technique had some perks, freezing remained my personal favorite.

Obviously drying gave the longest shelf life – we’re talking years. But man did it change the texture into shoe leather! My oil-packed jars looked gorgeous on the shelf, but botulism risks made me nervous. And pickled peppers lasted awhile, though their crisp crunch turned soft.

Meanwhile frozen serranos nicely toed the line between convenience and quality. Their cellular structure basically pauses in time rather than radically changing. Was the texture a little more delicate thawed? Sure. But that bright flavor and searing heat I loved remained wonderfully intact.

For me, freezer serranos strike the ideal balance – ease of storage with excellent flavor and heat preservation. That’s why they remain my number one choice over other methods to this day!

🍲 Cooking with Frozen Serranos

Once I had built up a nice stash of frozen serrano slices and whole peppers, it opened a world of possibilities. I could finally make my favorite Southwestern and Mexican dishes year-round!

I did learn that incorporating frozen serranos into recipes requires a little finesse though. Their more delicate texture doesn’t always hold up to high heat the same. Now I let my frozen peppers fully thaw overnight in the fridge before adding to hot pans for sautéing or stir fries.

Otherwise they can turn mushy if cooked straight from frozen. Giving them time to rehydrate first preserves that nice firmness I love in serrano pepper slices.

My favorite way to use up both whole frozen peppers and slices is blending them into salsas, enchilada sauces, chili pastes, etc. Their softened state actually helps them puree right in seamlessly!

Frozen Serrano Salsa Verde – 2 cups

Can You Freeze Serrano Peppers? What Happens to Nutritions? 12
bowl with green sauce and vegetables on a wooden t 2023 11 27 05 06 23 utc

Ingredients:

  • 1/2 cup thawed, drained frozen serrano slices
  • 2 tomatillos, diced
  • 1 small white onion, diced
  • Juice from 1 lime
  • 1 avocado, diced
  • Cilantro, chopped
  • Salt to taste

Directions:

  1. Combine all ingredients in a medium bowl and mix thoroughly.
  2. Enjoy with tortilla chips!

Because freezing softens the pepper’s texture, add extra slices for a spicier kick if desired.

Freezer Burrito Bowls – Serves 4

Ingredients:

  • 1 cup thawed, sliced frozen serrano peppers
  • 15-ounce can of black beans, drained and rinsed
  • 1 cup frozen corn, thawed
  • 1/2 cups cooked brown rice
  • 1/2 cup shredded cheddar cheese

Toppings: Salsa, avocado, cilantro

Directions:

  1. Combine peppers, beans, corn, and rice in a skillet over medium high heat.
  2. Cook for 5 minutes until heated through.
  3. Serve into bowls and top with cheese, salsa, avocado, and cilantro.

Let the frozen serranos fully thaw overnight in the refrigerator before adding to the skillet. Cook an extra 2-3 minutes if a crunchier pepper texture is preferred.

❄️ Thawing and Refreezing Serranos

Patience is a virtue when it comes to thawing frozen serrano peppers. I know it’s tempting to microwave them into submission when dinner prep is in full swing. Resist! Instead, move them from freezer to fridge at least 8 hours (or up to 48 hours) before needing them.

This slower thaw in the cold air preserves texture without creating mushiness from the inside out. I recommend keeping thawed peppers stored properly in the refrigerator and using within a week for best quality and safety.

As for refreezing previously frozen peppers – don’t do it! Refreezing thawed produce risks quality issues and potential foodborne illnesses. Only freeze serrano peppers once when fresh.

💡 Health and Safety Tips for Handling Spicy Peppers

Serranos contain volatile oils that can burn skin and eyes. I learned this the hard way while charring a batch bare-handed. The searing, blistering pain taught me to respect the pepper oils!

Now I always recommend wearing food prep gloves when handling hot peppers raw. The oils can badly irritate skin and even contaminate contacts if you rub your eyes. Capsaicin is not something to mess around with.

When charring or roasting peppers, proper ventilation is key. Open doors and windows since the pepper smoke carries oils that can sting lungs. Also avoid inhaling right above the hot pan or grill. One whiff had me choking from irritation!

After cutting raw serranos, wash your hands and work surface thoroughly with soap and water. Accidental skin contact can still cause burning hours later if you touch your face or eyes. I keep a dedicated wash area for spicy prep away from other kitchen work. Containment and caution are crucial when handling these feisty fireballs!

🌟 Reflecting on This Spicy Journey

Whew, we covered a lot of ground on successfully freezing serrano peppers! From my fateful first taste, to perfecting my tried-and-true methods today, it’s been quite the journey of smoked tongues and freezer experiments to get here. I hope relaying my real-world experiences gives you the confidence and know-how to start stocking up. Trust me, you’ll never miss these spicy peppers in your cooking again! Until another time, stay cool my friends 🥶🔥

💬 FAQs

Can you freeze pre-made salsa with serrano peppers?

I’ve found it’s better to freeze salsa ingredients separately. Otherwise the thawed salsa turns watery from everything releasing liquid. But flash-freezing measured portions of sliced serranos lets me whip up fresher, crispier salsa anytime!

How do you use thawed frozen serranos if they lose structural integrity?

Great question! Beyond pureeing into sauces, soups are another yummy option. Their softened state actually allows more flavor and heat infusion into broths. I also love folding finely diced thawed serranos into egg scrambles and breakfast burritos. Surprisingly delicious!

Why do people say to remove serrano pepper seeds before freezing if capsaicin oils are stored there?

That’s a hot debate! I believe keeping seeds helps retain heat better during freezing. That said, it also scatters more spicy seeds throughout dishes later. So pick based on your heat tolerance and end use goals. I go both ways depending on the recipe.