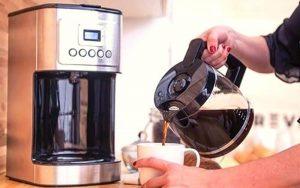
Guide to Pour-Over Coffee: Perfect Ratios & Tips

Master pour-over coffee with the universally recommended 1:15 ratio – perfect for beginners seeking a balanced, flavorful brew. Simple, effective, and a great starting point for coffee enthusiasts!

coffee to water ratio pour over

Coffee to Water Ratio: The Golden Rule

The coffee to water ratio is fundamental in brewing a memorable cup of pour-over coffee. It guides the strength and flavor intensity of your brew. The commonly recommended ratio is 1:15—1 gram of coffee for every 15 grams (or milliliters) of water. This serves as a starting point; from here, you can fine-tune the ratio to your liking, whether it’s a stronger or more mellow cup you desire.

It’s not just about measuring, but understanding the relationship between water and coffee—much like a chef balances salt with acidity in a dish for the right seasoning level. This equation of coffee to water is what dictates the brewing magic that unfolds within the pour-over process.

Taste Test: Adjusting Brew Strength

The beauty of pour-over coffee lies in its adaptability to anyone’s taste. After the initial brew with the 1:15 coffee to water ratio, conduct your taste test. Is your coffee too bold? Increase the water. Is it too weak? Use less water or more grounds on your next brew. This adjustment process is not unlike altering seasoning in cooking until the flavor is just right.

Desired StrengthCoffeeWaterAdjustment
Stronger20g300gIncrease coffee by 2g
Weaker18g300gDecrease coffee by 2g

A discerning palate will inform you best, so trust your senses and make adjustments accordingly.

Water Quality: A Key Ingredient

When crafting a refined coffee experience, we must consider water—not just as a solvent but as a critical ingredient harboring minerals that interact with coffee on a chemical compound and bond level. Water quality can elevate or mute the intricate flavor notes. Soft water can extract a flat cup, while hard water, rich in minerals, can enhance certain flavors but might also bring undesired heaviness.

Pour Over Essentials: Tools & Tips

Before delving into the meticulous art of a pour-over brew, it’s crucial to arm yourself with the tools necessary for this precision-driven process. The essential equipment lineup includes a pour-over coffee maker—like the popular HARIO V60 or Chemex coffee maker—a gooseneck kettle for controlled water flow, coffee filters, a scale, and a coffee grinder.

I would also recommend using your coffee makers’ respective filters for best results:

For those embarking on this journey, remember to start simple: use fresh coffee beans and pre-wet your filter to get rid of any papery residues and preheat the brewing vessel. Evenly saturating your grounds for a balanced extraction is a top tip to redistribute any coffee that’s clinging to the sides of the filter. And when it comes to water, aim for a temperature between 195°F to 205°F for an optimum brew.

Grind Size Mastery for Optimal Flavor

Guide to Pour-Over Coffee: Perfect Ratios & Tips 1

The grind size significantly impacts the flavor of your pour-over coffee. A grind that’s too coarse will under-extract, leading to a brew that’s weak and sour. Conversely, a grind that’s too fine can result in over-extraction, making your coffee bitter and astringent. Achieving a medium grind, akin to sea salt in texture, is a solid guideline for hitting that sweet spot. Adjust according to your taste test results, allowing for a full expression of the coffee’s flavor profile.

Experimentation is key—similar to our approach at Boat Basin Cafe where we adjusted the grind to capture the essence of a single-origin bean or blend perfectly.

The Art of the Pour: Techniques Defined

Guide to Pour-Over Coffee: Perfect Ratios & Tips 2

Beyond just depth of flavor and strength, the pour in pour-over coffee is a defining step that requires precision and patience. One must master a consistent, slow, and spiral pouring motion—starting from the center and moving outward. This ensures an even soak, which in turn promotes a balanced extraction of flavor. The first pour, known as the “bloom,” allows the coffee to release any gas, expand, and prepare for the full brew—usually lasting 30 seconds and using just enough water to wet the grounds.

For an impeccable pour, maintain control of your kettle and aim for a steady, gentle flow rate. The Fellow or any gooseneck kettle facilitates these movements, granting the brewer finesse and precision akin to a chef gracefully managing the heat under a pan.

At Boat Basin Cafe, we found the best results with filtered water that was neither too hard nor too soft. Striking a balance ensures that the chemical makeup doesn’t overshadow the coffee‘s natural profile but instead extracts a harmonious cup.

Maintenance: Ensuring Consistency

How to Make Coffee in a Percolator

Maintain your pour-over apparatus with the same care bestowed upon cherished culinary tools. Routine rinsing of your Chemex or HARIO coffee makers after each use is crucial, and occasional deep cleaning to remove any residual oils is beneficial.

Grinders, often overlooked, should be cleaned regularly to ensure that each batch of coffee grounds is as fresh as the last. Clean kettles and scales to keep your brewing process hygienic and precise. Consistency is the hallmark of a skilled brewer, much like a seasoned chef’s consistent heat on the stove.

Pour Over Perfection: A Home Brewer’s Diary

Capturing the nuances of each brew can help refine your pour-over technique and consistency. Start a brewing diary to log variables such as the coffee to water ratio, grind size, water temperature, and pouring style. This habit can be especially insightful when experimenting with different coffee beans and ratios. Much like a chef tests recipes, noting variations can lead you to your personal standard for pour-over perfection.

Recording your observations and results transforms the process into an enlightening ritual fostering a deeper connection with the craft. Over time, you will accumulate a wealth of knowledge that can be used to replicate that perfect cup or continue exploring new territories within the realm of coffee brewing.

☕️ Pour Over vs French Press: Which One’s Your Favorite? Read more here.

FAQs

When immersing oneself in the ritual of pour-over brewing, questions naturally arise. To assist in your coffee-making journey, here are answers to some frequently asked queries.

Is pour over coffee better than a French press?

Whether pour-over coffee is better than French press is a matter of personal preference. Pour-over typically yields a cleaner cup with more pronounced flavors due to the filtering process which removes most of the coffee oils and fines. A French press allows more oils to remain in the coffee, resulting in a richer, fuller-bodied cup. The choice between the two depends on one’s taste and desired mouthfeel.

Why is my pour over coffee bitter?

Bitterness in pour-over coffee often stems from over-extraction. When water and coffee are in contact for too long, or the water flows through the grounds too slowly, it can extract the more bitter compounds. To combat this, ensure your grind is not too fine, as this slows the rate of water flow. Also, be mindful of pouring too much water or pouring too slowly. Adjusting these elements can help achieve a more balanced and less bitter cup.

Breville Dual Boiler Descaling Made Easy: Expert Guide & Tips

If you’re a coffee enthusiast with a Breville Dual Boiler espresso machine, then you understand the distinct influence of the machine’s quality and maintenance on the taste of your freshly brewed espresso. One key aspect of maintaining your Breville Dual Boiler, and indeed a task every owner ought to master, is the process of descaling.
This guide aims to provide a straightforward yet effective method for descaling your espresso machine at the comfort of your own home!

breville dual boiler descale

Introduction to Descaling: The Why and How

Descaling your espresso machine, a procedure often overlooked, constitutes a critical element affecting the longevity and performance of your machine, and ultimately, your caffeine infusion. Especially in hard water areas, scaling can severely dama the performance of your Breville Dual Boiler due to limescale buildups.

The Critical Role of Descaling Your Espresso Machine

In areas with hard water supplies, the frequency of descaling ought to be high. The mineral-rich water tends to deposit scale inside the water pipes and heating components of your Dual Boiler. These deposits not only interrupt the efficiency of the machine but also shorten its lifespan. Moreover, this water forms the fundamental part of your coffee. Accumulating limescale has the potential to taint the purity and taste of your beloved espresso shots. Don’t let scale buildup hinder your pursuit of the perfect espresso shot, descale your Breville Dual Boiler regularly!

Noteworthy Focus for Breville Dual Boiler Users

The sophistication and precision embedded in the Breville Dual Boiler warrant some extra attention when maintaining it. Users often encounter difficulties in the Breville Dual Boiler descale troubleshooting, escalating their concerns. However, rest assured. While the descaling process might appear intricate initially, it becomes effortless once familiar.

Understanding Your Breville Dual Boiler and Its Water Requirements

Before diving into the descaling process, let’s grasp the internal logistics of your Breville Dual Boiler and how scaling potentially disturbs its operation.

The Ramifications of Water Hardness

Essentially, water hardness delineates the concentration of specific minerals, primarily calcium and magnesium, contained in the water. The higher their concentration, the ‘harder’ the water becomes. These minerals precipitate when this hard water is heated in your Breville Dual Boiler, forming scale deposits. Over time and without rigorous descaling, these deposits accumulate, leading to perceivable impacts on the machine’s performance and your perfectly brewed coffee.

Identifying Symptoms of Limescale Buildup

So, what’s the cue that your machine requires descaling? There are several indicators. If you observe your espresso brewing slower than usual or the machine taking more time to heat up, it’s high time for a Breville Dual Boiler descale. Other noticeable signs include a metallic taste in your coffee or avoiding brewing coffee altogether.

While recognizing these signs is essential, avoid reaching this stage at all. Establish a regular descaling schedule to maintain your espresso machine.

The Art of Descaling: Thorough Guide for the Breville Dual Boiler

Regardless of whether you’re new to the world of espresso or a seasoned veteran, correctly descaling your machine is an absolute necessity. Thankfully, we’ve compiled a comprehensive, step-by-step guide to assist you.

Step-By-Step Guide

Before starting, kindly ensure your Breville Dual Boiler is switched off and cooled down. Now, let the descaling commence!

  1. Make a Breville Dual Boiler descale solution by blending equal parts white vinegar and water. If you don’t have vinegar available or prefer another method, don’t fret! Citric acid is another common descaling agent, vital for users who prefer a citric-acid based Breville Dual Boiler descale.
  2. With the descale solution prepared, switch on your machine.
  3. Initiate the descale process on your machine.
  4. Allow the espresso machine to wholly cycle through the descaling process. This requires patience and is undoubtedly worth the wait, as it contributes immensely towards the long-term performance of your machine.
  5. Once the cycle concludes, clear out the descaling solution twice at least, to certify there are no remnants left. Next, refill the tank with clean water and rinse the machine thoroughly.
  6. To conclude the process, conduct a few more brewing cycles using clean water. By doing this, you’re ensuring any possible residues from the vinegar or citric acid are completely removed, making your machine ready to serve an invigorating brew!

Professional Products for Descaling: A Comparison

The above steps laid out for descaling your Breville Dual Boiler offer various solutions, including the use of white vinegar, citric acid, or specialized descaling products such as Urnex Dezcal Coffee and Espresso Descaler and Cleaner.

While vinegar and citric acid are easily accessible and affordable, they might leave an unpleasant smell or taste if not thoroughly cleansed. Conversely, professional descaling products like Dezcal offer a holistic cleansing process without residues.

Post-Descaling Maintenance

Tips for Espresso Machine Upkeep

Here are some noteworthy tips to uphold your machine’s performance post-descaling:

  1. Always ensure your machine is rinsed thoroughly after descaling, eliminating any chances of lingering tastes or smells.
  2. Utilize filtered or bottled water for brewing. In doing so, you could reduce the harsh effects of hard water that lead to scale buildup.
  3. Regularly clean machine components like the portafilter, brewing heads, and other easily removable parts.

By following these guidelines derived from industry best practices, you will prolong the life and quality of your espresso-making routine significantly.

The Necessity of Regular Descaling

Regularly descaling your espresso machine helps retain the quality of the espresso shots, allowing your machine to operate optimally and consequently extends the lifespan of your Breville Dual Boiler. Thus, maintaining consistency in your descaling routine is crucial.

FAQs

Can I use vinegar for descaling the Breville Dual Boiler?

Yes, you can use an equal parts solution of vinegar and water. Always remember to rinse thoroughly before brewing coffee.

How often should I descale my Breville Dual Boiler?

Industry experts and seasoned baristas recommend descaling your machine every two to three months. However, the frequency can vary depending on the hardness of the water you use.

Can I use citric acid instead of vinegar for descaling?

Absolutely. Citric acid is a common descaling agent. It should be adopted just like vinegar, and thorough rinsing should be ensured after use.

Conclusion

The cleanliness of your machine is directly linked to the quality of your coffee. Hence, it’s crucial to ensure that your Breville Dual Boiler is always in top shape. By investing a moderate amount of time in regular descaling, not only do you enhance the lifespan of your machine but also the satisfaction derived from your morning routine.

So, why procrastinate that descale any further? Grab your cleaning supplies and make this descaling process a quick and easy one, with our ingenious, step-by-step guide to descale your Breville Dual Boiler.

Step-by-Step Guide to Making Perfect Cold Brew with a Bodum Coffee Maker

Cold brew coffee has recently emerged as a refreshing alternative to hot coffee, growing immensely popular due to its unique flavors and refreshing features. With the Bodum Cold Brew Coffee Maker, you can enjoy this invigorating drink right in your comfort zone.

how to use bodum cold brew coffee maker

Why Bodum Stands Out for Cold Brew Coffee?

Choosing the Bodum Cold Brew Coffee Maker can add an extra layer of smoothness to your brewing experience. Its design brilliantly incorporates a steeping technique that allows coffee’s rich flavors to thrive, leaving behind any bitterness that a regular hot water brew might contribute.

Bodum’s excellent grip, smooth plunger action, and substantial capacity, and the bonus of being dishwasher-safe have made it a favored choice among many coffee aficionados. Look over this Comparative Review of Top Coffee Brands to understand Bodum’s superiority over its counterparts from Starbucks and Peet’s Coffee.

Delve Deeper Into Your Bodum Coffee Maker

Knowing your coffee maker like the back of your hand is key to recreate a phenomenal café quality coffee at your home. Therefore, let’s take a closer look at your Bodum Cold Brew Coffee Maker.

Your Bodum Coffee Maker comprises several essential components. The carafe, produced from high-quality borosilicate glass, is the principal arena where your coffee takes birth. The lid, fitted with a built-in plunger and metal filter, primarily functions in the steeping process. The grip handle ensures you can pour your coffee without confrontation.

The coffee beans you choose are equally crucial in determining the taste of your final brew. Specialty coffee has garnered global appreciation, and having a thorough understanding of your beans’ origin and roasts can significantly enhance your coffee experience. For example, when it comes to the Bodum Cold Brew Coffee Maker, medium to coarse beans grind is usually preferred since it prevents over-extraction and leads to a well-balanced cup. Explore our guided tour of the world of specialty coffee to gain in-depth knowledge about your beans.

A Step-by-Step Guide to Using the Bodum Cold Brew Coffee Maker

Though the Bodum Cold Brew Coffee Maker is fairly easy to operate, it does require patience. The brewing process involves steeping the coffee grounds for quite a few hours, and overnight brewing is preferred for achieving the perfect extraction. Drawing from my own experience of preparing the cold brew each night for the next morning while working for the iconic Boat Basin Cafe in downtown New York, the process might be meticulous, but the wait is certainly rewarding. So, let’s dive into it:

StepsDescription
Step 1: SetupPlace the Bodum Cold Brew Coffee Maker on a non-slip surface
Step 2: Coffee SelectionChoose medium to dark roast coffee beans for cold brew
Step 3: GrindingGrind coffee beans to coarse texture similar to sea salt
Step 4: Water FillingFill the carafe with filtered cold water in a ratio of 4 parts of water to 1 part coffee
Step 5: Steeping PreparationAdd coffee grounds into the filter basket and stir for even water saturation
Step 6: BrewingAllow coffee to steep in the refrigerator for 12-15 hours
Step 7: PlungingPush the plunger down to separate coffee grounds from the liquid
Step 8: Enjoy!Pour your cold brew into a cup and avoid leaving brewed coffee in contact with grounds to prevent bitterness

Ride the Wave of Coffee Recipes with Your Bodum Coffee Maker

The Bodum Cold Brew Coffee Maker is not confined solely to coffee; it opens up a world of possibility with various beverage options, including refreshing teas and infused waters! Here’s how you can brew a perfect iced tea using your Bodum Coffee Maker:

  1. Fill the Bodum Coffee Maker with your choice of tea leaves. Loose leaves work the best, but if you only have tea bags, they can get the job done too.
  2. Gently pour cold, filtered water into the carafe.
  3. Just like its coffee counterpart, let the tea steep overnight in your refrigerator.
  4. Come morning, gently push down the plunger, and voila, your very own homemade iced tea is ready to serve!

Experience fun and creative ways to use your Bodum Coffee Maker with our collection of unique recipes – From Cold Brew to Espresso.

Maintenance and Cleaning of Your Bodum Coffee Maker: An Essential Step

Maintaining cleanliness in your coffee maker is critical for ensuring every cup of coffee you make tastes just as good as your first. Here are a few steps on how to clean your Bodum cold brew coffee maker:

Cleaning StepsDescription
Step 1Dispose of coffee grounds/tea leaves and rinse filter
Step 2Remove filter from plunger and wash thoroughly
Step 3Rinse carafe and plunger with warm water and mild soap
Step 4Dry all parts well before reassembling

The simplicity of these maintenance steps enhances the longevity of your coffee maker and guarantees a high-quality brew each time!

FAQs

What is the capacity⁠ of the Bodum cold brew coffee maker?

Bodum cold brew coffee maker comes in varied sizes. The popular version can cater to 12 cups or 51 ounces. However, smaller variants are available too, like the 32 oz Bodum cold brew coffee maker and the 1-liter variant.

What replacement parts are available for the Bodum cold brew coffee maker?

Standard parts such as the beaker and metal filters often get replaced. But for a comprehensive understanding of replaceable components, referring to your Bodum cold brew coffee maker manual would be beneficial.

Can I use my Bodum cold brew coffee maker to make beverages other than coffee?

Definitely! You can experiment with a variety of drinks such as iced tea. The Bodum cold brew coffee maker is excellent for steeping any full-bodied beverage.

How is a Bodum cold brew different from a regular French press?

Though their structures might appear similar, the key difference lies in the brewing method and the temperature of the water used. A French press uses hot water and a shorter steep time, whereas a cold brew requires cold water and a longer steep duration.

Conclusion

The Bodum Cold Brew Coffee Maker holds immense promise for coffee lovers with its ease of use, customization possibilities, and versatility. Now that you have the complete instruction guide in your hands, embrace your inner barista and create the perfect cold brew coffee.

Happy brewing and savoring each sip!

References

  1. Bodum Official Website
  2. Bodum Cold Brew Coffee Maker
  3. Cold Brew Coffee

Keurig Not Descaling? Troubleshooting Tips and Maintenance Guide

If you’re like me, feeling frustrated over wrestling with your cherished morning companion—a Keurig unwilling to descale—you are in the right place. Time to explore the ins and outs of Keurig maintenance and Keurig troubleshooting. By learning to pinpoint and address these issues, you’ll not only enjoy your favorite brew at its fullest but also prolong the lifespan of your Keurig.

keurig not descaling

The Importance of Descaling Your Keurig

Let’s tackle the question that might be nagging at you: Why bother with descaling? The key to this lies in the type of water you feed your Keurig. Unless it’s distilled (which isn’t common due to its lacklustre taste), other kinds of water contain minerals—mainly calcium and magnesium. Over time, these can accumulate to form deposits commonly termed ‘lime scale’.

Now, the slow but persistent build-up of these hard, rock-like minerals within the internals of your coffee maker forms a barrier that causes it to labor double time every brewing cycle. Gradually, this problem could escalate to slower brewing times, increased noise levels, inconsistent water flow, and even a decreased lifespan of your appliance.

Surefire Signs That Your Keurig Needs A Descaling Operation

Keurig Not Descaling? Troubleshooting Tips and Maintenance Guide 3

So, how do you tell when your beloved Keurig is crying out for descaling? Here are some clear signs you should monitor:

  1. Brewing time starts feeling like forever, especially compared to previous speedy runs.
  2. The hum of the machine during brewing cycles becomes noticeably louder or differs in pitch.
  3. There is a noticeable slow-down in water flow, or your brew doesn’t fill your cup quite as much.

If your Keurig is exhibiting any or all of these symptoms, it’s the wake-up call to pronto embark on the descaling operation. Fret not, for this might seem a daunting chore, but it’s a simple, straightforward job with the right parts and instructions.

Step-by-Step Guide: How to Effectively Descaling Keurig

Steps for Effective Keurig DescalingDetails
Step 1: Equipment ChecklistGather required materials: descaling solution, fresh water, ceramic mug, access to sink and clean, dry cloth.
Step 2: Setting the StageEnsure the machine is off and cool. Remove the water reservoir and K-cup holder if present.
Step 3: Descaling Solution SelectionFollow official Keurig descaling solution or use a homemade one like mixed white vinegar and water in equal parts.
Step 4: Kicking Off the Descaling CyclePlace the mug, start the descaling cycle and continue with cycles till the tank is empty.
Step 5: Rinse, Wipe, and Cap It OffRinse the reservoir with fresh water, run brewing cycles till empty again. Wipe the exterior clean.

Step 1: Equipment Checklist

To begin, gather the following essentials: a Keurig descaling solution (or a DIY one like white vinegar), fresh water, a ceramic mug, access to a sink, and a clean, dry cloth.

Step 2: Setting the Stage

Before anything else, make sure your machine is turned off and cooled. Prioritize your own safety from any scalding steam or hot drips. At this stage, remove and empty the water reservoir. If your machine harbors a K-cup holder, take this out too.

Step 3: Descaling Solution Selection

As an alternative to the official Keurig descaling solution, white vinegar mixed with equal parts of water could serve as a safe and inexpensive homemade option. For those going with vinegar, remember to follow up with a cycle using only water to flush out any lingering trace of vinegar.

Step 4: Kicking Off the Descaling Cycle

With the descaling solution ready, it’s time to invite your Keurig to the party. Plant your ceramic mug on the tray and start the descaling cycle. Exercise some patience and let the brewer complete its magic dance. It isn’t uncommon to encounter issues like Keurig not brewing after descaling. Following through with the cycles till the tank is drained should handle such hiccups.

Step 5: Rinse, Wipe, and Cap It Off

Once your Keurig has performed its full descaling performance, be sure to fill up the reservoir with fresh water and continue with brewing cycles until the tank is once again empty. This critical rinsing step ensures no trace of descaling solution remains. After this, use a clean cloth dampened with warm water to clean the exterior.

Congratulations! You’ve performed a successful descaling operation on your Keurig.

Few Handy Tips for Efficient Keurig Descaling

To ensure you get the most out of your descaling efforts, here are some extra tips:

  • Emphasize on using filtered water instead of tap water in your Keurig’s reservoir, which can help prevent rapid scale build-up.
  • Regularly check and clean the needles, which can sometimes get clogged with coffee grounds and slow the water flow.
  • Keep a regular schedule for Keurig descaling, ideally every three to six months, to prevent heavy mineral deposits.

FAQs

How often should I descale my Keurig?

Target for once every three to six months, according to water quality and your coffee consumption frequency.

Can vinegar replace descaling solution?

Absolutely! Vinegar is a proven alternative, but remember to run a pure water cycle after to cancel any residual vinegar aroma.

Are there other homemade Keurig descaling methods?

Yes, other options include diluted citric acid or a mix of baking soda and water.

Will descaling help with brewing issues besides slow processing?

Yes, descaling helps solve most problems stemming from mineral build-up, including irregular water flow and strange sounds.

Can I descale a Keurig model without a descaling cycle feature?

Yes, you can. Use the regular brewing option to run the descaling solution, repeating several times for thorough internal cleaning.

Conclusion

In conclusion, maintaining a regular descaling routine for your Keurig not only ensures efficient functioning but also steps up your coffee’s taste and aroma. Let your bitter descaling battles be a thing of the past—equip yourself with the tips here to enhance your coffee experience and your Keurig’s lifespan. So, go on and enjoy the satisfaction of a perfect brew from your well-cared-for Keurig!

References

  1. Turn Off the Descale Light on Your Keurig: A Step-by-Step Guide
  2. Tips Bulletin – How to Descale a Keurig: Make Your Coffee Tasting New Again
  3. The Comprehensive Guide to Cleaning and Maintaining Your Cuisinart Keurig Coffee Maker

Your Coffee Tastes Better When Your Cuisinart is Clean: The Guide to Descaling

Hello fellow coffee enthusiasts! I’m John Bird, your go-to guy for everything coffee-related. My passion and expertise stem back to the Boat Basin Café Downtown New York, where I had the pleasure of brewing up a storm. Since then, I’ve turned my love for that perfect brew into helping others achieve the same.
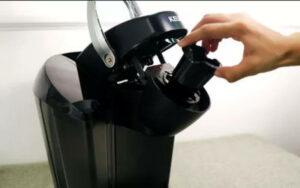
One big secret in attaining that best flavor is regular maintenance of your coffee maker. It’s about time we shed light on Cuisinart descaling instructions. You’ll notice the difference once you have a freshly-brewed cup from a descaled device, I promise!

Every Coffee Lover Should Descaler Their Cuisinart Appliance Regularly

Cuisinart DCC 3200 coffee maker

Whenever you brew coffee, mineral deposits from water begin to accumulate in your coffee maker, primarily calcium and magnesium. Over time, these minerals build up and form what we call limescale.

Here’s the bottom line: limescale is not your friend. It can affect your coffee maker’s performance, causes energy inefficiency, and worst of all – it can negatively impact your coffee’s taste.

But don’t worry! Using the right descaling procedure can help you bid farewell to these pesky mineral deposits. And by doing so, you aren’t only improving your coffee’s taste, but also prolonging the life of your coffee maker.

A Detailed Guide to Descaling Your Cuisinart Coffee Maker

Descaling Your Cuisinart Coffee Maker: A Step-by-Step Guide
Steps
1. Prepare the Essentials
2. Clean your Machine Beforehand
3. Start the Descaling Cycle
4. Rinse your Cuisinart Machine
5. Final Steps

Let’s roll up our sleeves and get down to business! Before you start, make sure you have a Cuisinart coffee maker descaler on hand. It can be any store-bought or homemade solution and clean water.

Let’s start the step-by-step Cuisinart descaling procedure:

Prepare the Essentials

First, choose your descaler. This could be a store-bought product, or for the DIY lovers, you can create a homemade solution like a vinegar-water mix. For a vinegar solution, remember to use equal parts water and vinegar to protect your coffee machine from any potential damage due to acidity.

Clean Your Machine Beforehand

Next, rinse your coffee maker’s water tank, and ensure that the carafe and filter baskets are also clean. After doing so, refill the reservoir with your descaling solution.

Start the Descaling Cycle

Now, if your model has a ‘clean’ button, press it. If not, running a normal brewing cycle is as effective! This process generally takes about an hour.

💡Safety Notice: Make sure your device has ample room to vent steam during this process.

Rinse Your Cuisinart Machine

After the descale cycle or the brew cycle, rinse the carafe immediately. Then, with clean water, refill the water reservoir and run a full brewing cycle to flush out any remaining descaler and minerals. For best results, it is highly recommended to conduct a rinse cycle twice.

Final Steps

Now, power off your coffee maker and unplug it for a moment to ‘reset.’ Plug it back in and you’re ready to start brewing. For the best results, to ensure a clean and descaled machine, rinse one last time with clean water.

Maintenance Tips for Your Cuisinart Appliance Post-Descaling

Here are some tips to help maintain your newly descaled Cuisinart device:

  • Be sure to regularly clean removable parts after each use.
  • To reduce the risk of minerals building up, switch to using filtered or distilled water for brewing.
  • Always follow the manufacturer’s guidelines for specific maintenance measures.

Taking regular care of your coffee maker will save you money in the long run and ensure you’re always sipping the best brew possible!

FAQs

Let’s run through some quick questions about descaling your Cuisinart coffee maker:

How often should I descale my device?

Descaling should be done every three to six months, or depending on how often you use your coffee maker.

Can I use vinegar to descale my coffee maker?

Absolutely! For a DIY approach, the mixture should contain equal parts of vinegar and water. However, under any circumstances, do not use pure vinegar due to its high acidity.

What if my coffee machine doesn’t have a descaling cycle?

Not a worry! Running a normal brew cycle with your descaling solution will do the trick!

Conclusion

There’s nothing better than waking up to a fresh, expertly-brewed cup of coffee. And when it’s brewed from a clean, descaled Cuisinart coffee maker, the taste somehow becomes even more transcendent.

From my experience at the Boat Basin Cafe to my own kitchen, maintaining and descaling my coffee machines has remained a crucial step in my coffee brewing process – and it should be in yours too.

Better tasting coffee is just one descaling away. Good luck and happy brewing!

Sources you might find helpful:

  1. How to Descale a Coffee Maker: Official Guidelines from Cuisinart
  2. The Comprehensive Guide to Cleaning and Maintaining Your Cuisinart Keurig Coffee Maker

Maintaining Your Cuisinart Dual Coffee Maker: The Ultimate Cleaning Guide

If you’re a die-hard coffee enthusiast like me, John Bird, your coffee maker is surely one of your dearest assets. Over the years of serving at the Boat Basin Cafe, Downtown New York, I’ve gathered extensive knowledge about coffee machines. Whether it’s about getting the perfect brew or maintaining a Cuisinart Dual Coffee Maker, I’ve mastered all!
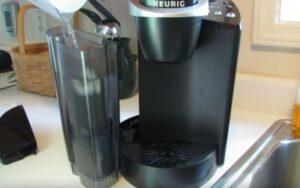
Let’s dive in and explore an ultimate cleaning guide to maintain your coffee maker’s performance and longevity. Do remember cleaning your coffee maker regularly rewards you with outstanding performance and a rich flavor!

The Cruciality of Cleaning Your Cuisinart Dual Coffee Maker

Maintaining Your Cuisinart Dual Coffee Maker: The Ultimate Cleaning Guide 4

Consistent cleaning ensures flavorful coffee. By cleaning your machine frequently, you remove any coffee residue that may affect the taste of your brew. Also, prevention of mineral buildup and clogs is another perk of regular cleaning. The accumulation of minerals from water, like calcium and lime, may ruin your coffee maker’s performance. Moreover, cleaning extends the lifespan of your machine, this in and of itself makes cleaning a valuable and rewarding task that you can’t afford to ignore.

An Easy-to-follow Guide to Cleaning a Cuisinart Dual Coffee Maker

Ready to roll up your sleeves? Enlighten yourselves with these easy steps to clean a Cuisinart dual coffee maker.

StepProcedureMaterials Needed
Cleaning Exterior SurfacesWipe down all exterior surfaces with a cloth dampened with a dish soap and water mixture.Soft, damp cloth; Dish soap; Dry cloth or towel
Cleaning the Water ReservoirEmpty the reservoir. Mix equal parts of white vinegar and fresh water, then refill the reservoir with the solution.White vinegar; Fresh water
Descaling the Coffee MakerStart a brewing cycle. Halfway through, switch off the machine and let it rest for an hour before completing the cycle.White vinegar; Fresh water
Cleaning the Coffee Filter & BasketRemove the filter and the basket, then rinse under warm water.Dish soap; Warm water
Cleaning the CarafeFill the carafe with a mixture of mild detergent, warm water, vinegar and baking soda. Let it sit for 15 minutes then scrub.Mild detergent; Warm water; Soft sponge; Vinegar; Baking Soda
Final Rinse and ReassembleRun a few additional brew cycles with fresh water to rinse out any remaining solution, then let all the parts air dry before reassembling.Fresh water

Gathering the Essential Cleaning Materials

The essentials in this list will assure you a swift and effective cleaning of your dual coffee maker.

  • White vinegar or a designated descaling solution
  • Dish soap
  • Fresh water
  • Soft, damp cloth
  • Dry cloth or towel

Let’s get started with the cleaning process!

Initiate Cleaning from the Exterior Surfaces

Begin the cleaning journey from the outside. Dampen a soft cloth with a mixture of dish soap and water. Lightly wipe down all exterior surfaces, including the coffee lid and handle. To keep the Cuisinart dual coffee maker clean and dry, finish by wiping with a separate towel.

Now, Turn to the Water Reservoir

The water reservoir is where most of the mineral deposits harbor. An effective, cost-friendly trick I learned years ago uses plain white vinegar.

Begin by drawing out any leftover water from the reservoir. Then, fill it with equal parts of white vinegar and fresh water. This natural method for Cuisinart coffee maker cleaning is extremely efficient in combating mineral deposits.

Descaling the Coffee Maker to Remove Mineral Deposits

Descaling the coffee maker takes a bit of time but is entirely worth it. Simply start a brewing cycle with the water-vinegar mix in the reservoir. Midway through, turn off the machine and let it rest for around an hour. After some time, complete the brewing cycle. Afterward, run a few more brew cycles with fresh water to rinse out any remaining vinegar.

Don’t Forget Cleaning the Coffee Filter and Filter Basket

The filter basket concentrates traces of coffee grounds. Thus, it’s essential to clean during the Cuisinart coffee maker filter cleaning process. Remove the filter and basket and rinse it under warm water. To address a heavily stained filter, soak it in dish soap and water mixture before rinsing.

Cleaning the Carafe and Other Removable Parts

Next, turn your attention to the carafe and any removable parts. For those tougher stains on the carafe, a blend of vinegar, baking soda, and warm water proves miraculous. Let this mixture sit for about 15 minutes and then scrub off the stains.

For cleaning the other removable parts, a mild detergent solution works just fine. Make sure to rinse thoroughly to avoid any trace of soapiness in your next coffee brew.

Finally Rinse and Reassemble the Coffee Maker

Once all parts are cleaned and rinsed, let them air dry before you reassemble your coffee maker. Your appliance is now fresher and ready to deliver excellent brews. This deep cleaning of your Cuisinart coffee maker, done occasionally, greatly increases its longevity.

Maintaining a Clean Coffee Maker: Valuable Tips

You’ve mastered the art of cleaning your coffee maker, congratulations! But maintaining the cleanliness is equally important. Here are some of my top maintenance tips:

  • Empty and clean the coffee grounds regularly from the filter.
  • Switch to filtered or bottled water for brewing to minimize mineral deposits.
  • Always keep the coffee maker in a clean and dry environment.
  • Always abide by the manufacturer’s instructions for cleaning and maintenance.

Has this helped you understand how to clean a Cuisinart Dual Coffee Maker better? I hope so, and I trust you to spread the knowledge. Happy brewing!

Riding the waves of John Bird’s experience in coffee-making, your cup of Joe will never taste the same again. His guide to a clean coffee maker guarantees longer performance and richer flavor. From his mastering of brewing techniques to the maintenance of coffee machines, his guide has coffee lovers raving.

References

  1. Cuisinart Official Site: Cleaning Instructions
  2. Coffee Maker Maintenance Tips
  3. Guide to Descaling Coffee Makers
  4. Cleaning and Caring for your Coffeemaker

Turn Off the Descale Light on Your Keurig: A Step-by-Step Guide

The descale light on your Keurig coffee maker is an essential reminder that it’s time to give your beloved machine some much-needed maintenance. Descaling is crucial for keeping your Keurig running smoothly and producing great-tasting coffee.

In this article, we’ll walk you through the process of turning off the descale light on your Keurig, provide you with some helpful maintenance tips, and address common troubleshooting issues.

Why and When to Descale Your Keurig

how to turn the descale light off on a keurig

Understanding Lime Scale and Calcium Deposits

Lime scale and calcium deposits are natural byproducts of using water in your Keurig. Over time, these mineral deposits can accumulate within the machine, affecting its performance and the taste of your coffee.

The Impact on Brewer Performance

When left untreated, these deposits can clog the internal components of your Keurig, leading to longer brew times, weak coffee, and even machine malfunction.

Recommended Descaling Frequency

To keep your Keurig in optimal condition, it’s recommended that you descale your coffee maker every 3 to 6 months, depending on the hardness of your water and how frequently you use the machine.

Step-by-Step Guide to Turn Off the Descale Light

how to empty keurig 2.0 internal tank

1. Prepare Your Keurig for Descaling

First, remove any remaining water from the reservoir and ensure there are no coffee pods in the machine. You’ll also want to place a large mug on the drip tray to catch any liquid during the descaling process.

2. Use the Keurig Descaling Solution or a Suitable Alternative

Next, mix the Keurig descaling solution according to the manufacturer’s instructions. If you don’t have a descaling solution on hand, you can use a mix of white vinegar and water as an alternative.

3. Run the Descaling Cycle

Pour the descaling solution into the reservoir, ensuring it’s filled to the maximum fill line. Then, power on your Keurig and start the descaling process by selecting the largest cup size and pressing “brew.” Discard the contents of the mug after each cycle.

4. Rinse Your Keurig

Once you’ve run the descaling solution through the machine, empty the reservoir and rinse it thoroughly. Fill it with fresh water, then run the machine through several brewing cycles to flush out any remaining descaling solution.

5. Reset the Descale Light

After you’ve completed the descaling process and rinsed the machine, the descale light should turn off automatically. If it doesn’t, consult your Keurig’s user manual for specific instructions on resetting the light.

Preventive Measures and Regular Maintenance

Using Filtered Water

One way to reduce mineral buildup in your Keurig is by using filtered or bottled water instead of tap water. This can help minimize the accumulation of minerals and reduce the frequency of descaling.

Regular Cleaning of the Keurig

Turn Off the Descale Light on Your Keurig: A Step-by-Step Guide 5

In addition to descaling, it’s essential to clean your Keurig regularly. This includes wiping down the exterior, cleaning the drip tray, and washing the water reservoir and lid.

Periodic Inspections for Build-Up

Keep an eye on your Keurig for any visible signs of mineral buildup, particularly around the needle and brew basket. Addressing these issues early can help prevent more severe problems down the line.

Troubleshooting Common Keurig Descaling Issues

Clean Keurig Needle

Descale Light Remains On After Descaling

If the descale light doesn’t turn off after completing the descaling process and rinsing, consult your Keurig’s user manual for specific instructions on how to reset the light. You

may need to repeat the descaling process.

Coffee Maker Not Brewing After Descaling

If your Keurig isn’t brewing after descaling, ensure that there are no clogs in the machine by running a few brewing cycles with water only. If the issue persists, you may need to contact Keurig customer support for further assistance.

Conclusion

In conclusion, turning off the descale light on your Keurig coffee maker is a straightforward process that ensures your machine continues to deliver delicious coffee. By following our step-by-step guide and adopting regular maintenance practices, you’ll prolong the life of your Keurig and enjoy a consistently great-tasting cup of coffee.

Remember, the key to a well-functioning Keurig is preventive care and timely attention to issues like lime scale and calcium deposits. Stay on top of your Keurig’s maintenance, and your coffee maker will reward you with years of excellent performance.

FAQs

How often should I descale my Keurig?

It’s generally recommended to descale your Keurig every 3 to 6 months, depending on how often you use it and the type of water you use.

Can I use any descaling solution for my Keurig?

While there are many descaling solutions available, it’s best to use a solution specifically designed for Keurig machines or follow the manufacturer’s recommendations.

Can I use vinegar instead of a descaling solution?

Yes, you can use a mixture of white vinegar and water as an alternative to a descaling solution. Generally, a 1:1 ratio of vinegar to water is recommended for effective descaling.

What if the descale light doesn’t turn off after descaling?

If the descale light doesn’t turn off after completing the descaling process and rinsing, consult your Keurig’s user manual for specific instructions on how to reset the light. You may need to repeat the descaling process.

How can I prevent mineral buildup in my Keurig?

One way to reduce mineral buildup in your Keurig is by using filtered or bottled water instead of tap water. This can help minimize the accumulation of minerals and reduce the frequency of descaling.

The Comprehensive Guide to Cleaning and Maintaining Your Cuisinart Keurig Coffee Maker

If you own a Cuisinart Keurig coffee maker, you know how great it is to be able to make a delicious cup of coffee with the push of a button.To ensure you continue enjoying the best coffee experience, proper cleaning and maintenance of your coffee maker is essential.

In this guide, we’ll show you step-by-step instructions for cleaning and maintaining your Cuisinart Keurig coffee maker, helping you achieve great-tasting coffee and extend the life of your machine.

Importance of cleaning your Cuisinart Keurig coffee maker

The Comprehensive Guide to Cleaning and Maintaining Your Cuisinart Keurig Coffee Maker 6

Regular cleaning and maintenance of your coffee maker are crucial for several reasons:

  • Enhances the flavor of your coffee
  • Prolongs the lifespan of your machine
  • Prevents mineral buildup and bacteria growth

How cleaning impacts coffee taste and machine lifespan

A well-maintained coffee maker ensures optimal brewing performance and efficiency, resulting in better-tasting coffee. It also prevents issues related to mineral buildup and bacterial growth, contributing to a longer-lasting machine.

Preparing Your Cuisinart Keurig for Cleaning

The Comprehensive Guide to Cleaning and Maintaining Your Cuisinart Keurig Coffee Maker 7

Unplug the coffee maker

Before starting the cleaning process, ensure your coffee maker is unplugged and allowed to cool down.

Gather necessary cleaning supplies

To clean your Cuisinart Keurig coffee maker, you’ll need the following items:

  • Soft, damp cloth
  • Mild, non-abrasive dish soap
  • White vinegar or Keurig descaling solution
  • Large ceramic mug
  • Fresh water

Cleaning the External Parts

how to empty keurig 2.0 internal tank

Wipe down the exterior

Using a soft, damp cloth and mild dish soap, gently clean the exterior of your coffee maker. Be careful not to get water into any electrical components or the K-Cup holder. Rinse the cloth and wipe away any soap residue.

Clean the drip tray

Remove the drip tray and wash it with warm, soapy water. Rinse thoroughly and allow it to air dry before reassembling.

Cleaning the Internal Components

Remove and clean the water reservoir

  1. Detach the water reservoir from the coffee maker.
  2. Wash the reservoir with mild dish soap and warm water.
  3. If your coffee maker has a water filter, remove it and rinse it under running water.
  4. Replace the water filter every two months or as recommended by the manufacturer.
  5. Refill the reservoir with fresh water and place it back onto the coffee maker.

Clean the needle and K-Cup holder

  1. Open the top of your coffee maker and remove the K-Cup holder.
  2. Gently wash the holder with warm, soapy water.
  3. Use a paper clip or toothpick to remove any coffee grounds or debris from the needle.
  4. Rinse the holder and needle thoroughly with warm water and allow them to air dry before reassembling.

Replace the water filter (if applicable)

If your Cuisinart Keurig coffee maker has a water filter, replace it every two months or as recommended by the manufacturer.

Descaling Your Cuisinart Keurig Coffee Maker

Importance of descaling

Descaling is essential for removing mineral deposits that can affect your coffee maker’s performance and taste of your coffee.

Step-by-step descaling process

  1. Empty the water reservoir and fill it with a 50/50 mixture of white vinegar and water.
  2. Place a large ceramic mug on the drip tray and run a brew cycle without a K-Cup, selecting the largest cup size.
  3. Repeat the brew cycle until the “Add Water” light turns on.
  1. Let the coffee maker sit for at least 30 minutes to allow the vinegar mixture to break down any mineral deposits.
  2. After the wait, empty the remaining vinegar solution from the reservoir and thoroughly rinse it.
  3. Refill the reservoir with fresh water and run multiple brew cycles without a K-Cup to flush out any remaining vinegar solution. Repeat this process until there’s no vinegar smell in the water.

How often to descale

The frequency of descaling depends on the hardness of your water and how often you use your coffee maker. Generally, it’s recommended to descale every three to six months.

Reassembling Your Coffee Maker and Performing a Cleansing Brew

  1. Reassemble your Cuisinart Keurig coffee maker, ensuring all parts are clean and dry.
  2. Place a ceramic mug on the drip tray and run a brew cycle without a K-Cup, using fresh water. This will help remove any residual cleaning agents or debris.
  3. Discard the water from the mug, and your coffee maker is now ready to brew!

Tips for Regular Maintenance

how to turn on keurig without power button

To keep your Cuisinart Keurig coffee maker in top shape, follow these maintenance tips:

  • Clean the exterior and removable parts regularly.
  • Replace the water filter every two months or as recommended by the manufacturer.
  • Descaling should be done every three to six months, depending on your water hardness and usage.
  • Use fresh water and high-quality coffee grounds or K-Cups.
  • Store your coffee maker in a cool, dry, and well-ventilated area.

Conclusion

Proper cleaning and maintenance of your Cuisinart Keurig coffee maker are crucial for ensuring the best coffee taste and machine longevity. By following the steps and tips outlined in this guide, you can enjoy delicious coffee and a well-functioning machine for years to come.

FAQs

How often should I clean my Cuisinart Keurig coffee maker?

Regular cleaning of the exterior and removable parts is essential, while descaling should be done every three to six months, depending on your water hardness and usage.

Can I use something other than white vinegar to descale my coffee maker?

Make sure all parts are properly reassembled and try running a few brew cycles with fresh water. If the problem persists, consult the manufacturer or a professional technician for assistance.

Can I clean the K-Cup holder and needle in the dishwasher?

It’s best to clean these parts by hand, using warm, soapy water and a gentle brush, to prevent any damage.

How do I prevent mold and bacteria from forming in my coffee maker?

Regular cleaning, using fresh water, and storing your coffee maker in a cool, dry, well-ventilated area can help prevent the growth of mold and bacteria.

How to Make Iced Coffee with Hot Coffee: A Simple Guide to Chilling Your Brew

We all love our hot coffee, but when the weather heats up, it’s time for a cooler alternative. In this guide, we’ll teach you how to make iced coffee with hot coffee, transforming your usual beverage into a refreshing, cold treat. We’ll also discuss how to enhance the flavor and create unique variations, ensuring you get the perfect iced coffee every time.

Why Iced Coffee?

How to Make Iced Coffee with Hot Coffee

So, why should we choose iced coffee over hot coffee? On a hot day, an iced coffee can provide a much-needed cooldown, while still delivering the caffeine boost we crave. Plus, it opens up a whole new world of flavors and textures, making it an exciting alternative to our regular cup of joe.

The Basic Method

Here’s a simple method to make iced coffee with hot coffee:

  1. Brew a cup of strong, hot coffee.
  2. Let it cool to room temperature.
  3. Pour the coffee over a glass filled with ice.
  4. Add milk, cream, or sweeteners as desired.
  5. Stir and enjoy!

Tips for a Better Iced Coffee

How to Make Iced Coffee with Hot Coffee: A Simple Guide to Chilling Your Brew 8

To elevate your iced coffee experience, consider these tips:

Using Cold Brew Concentrate

Instead of hot coffee, try using a cold brew concentrate. Cold brew is less acidic and has a smoother flavor, which translates to a more delicious iced coffee.

Adding Flavors and Sweeteners

Experiment with different syrups, flavored creams, and sweeteners to personalize your iced coffee. Popular options include caramel, vanilla, and hazelnut.

Creating a Coffee Ice Cube Twist

To prevent your iced coffee from becoming diluted as the ice melts, use coffee ice cubes instead of regular ice. Simply pour leftover coffee into an ice cube tray and freeze until solid. This trick will keep your iced coffee full of flavor until the last sip.

I believe humans get a lot done, not because we’re smart, but because we have thumbs so we can make coffee.

– Flash Rosenberg

Different Iced Coffee Variations

How to Make Iced Coffee with Hot Coffee: A Simple Guide to Chilling Your Brew 9

Once you’ve mastered the basics, it’s time to explore the world of iced coffee variations:

Iced Americano

An iced Americano is made by pouring a shot of espresso over ice and adding cold water. This creates a refreshing, less intense coffee flavor compared to iced

coffee made with hot brewed coffee.

Iced Latte

To make an iced latte, pour a shot of espresso over ice and add cold milk. Stir to combine, and you’ll have a creamy, delicious iced latte. For a dairy-free alternative, try using almond, oat, or soy milk.

Iced Mocha

For a chocolatey twist, create an iced mocha by mixing a shot of espresso, cold milk, and chocolate syrup over ice. Add whipped cream and a drizzle of chocolate syrup for the perfect finishing touch.

Popular Add-Ins

To further personalize your iced coffee, consider adding these popular ingredients:

  • Whipped cream
  • Cinnamon or nutmeg
  • Chocolate shavings or cocoa powder
  • Crushed cookies or graham crackers
  • A splash of flavored syrup or liqueur

Equipment for Making Iced Coffee

While no special equipment is required to make iced coffee, these tools can help enhance the process:

  • A high-quality coffee maker or espresso machine
  • A milk frother for creating foam
  • Airtight containers for storing coffee and syrups
  • A shaker for mixing ingredients

The Importance of Freshly Ground Coffee

How to Make Iced Coffee with Hot Coffee: A Simple Guide to Chilling Your Brew 10

Using freshly ground coffee beans will greatly improve the flavor of your iced coffee. Grinding beans just before brewing helps to release their full flavor and aroma, resulting in a more satisfying drink.

Serving and Presentation

When serving iced coffee, presentation matters. Use a tall, clear glass to showcase the layers, and garnish with whipped cream or a sprig of mint for an extra touch of elegance.

Storage and Shelf Life

Iced coffee is best enjoyed immediately after preparation. However, if you need to store it, keep it in an airtight container in the refrigerator for up to 24 hours.

Conclusion

Making iced coffee with hot coffee is a simple, satisfying way to enjoy your favorite beverage on a warm day. With endless flavor combinations and variations, iced coffee can be a delightful, refreshing treat. So, next time the temperature rises, try your hand at making your own iced coffee – you won’t be disappointed!

FAQs

Can I make iced coffee with instant coffee?

Yes, you can make iced coffee using instant coffee. Simply dissolve the instant coffee in a small amount of hot water, let it cool, and then pour over ice.

How can I make my iced coffee less watery?

To prevent a watery iced coffee, use coffee ice cubes instead of regular ice. This way, your drink will stay flavorful even as the ice melts.

Can I make a large batch of iced coffee to store for later use?

While it’s best to enjoy iced coffee immediately after preparation, you can make a large batch and store it in an airtight container in the refrigerator for up to 24 hours.

What type of coffee should I use for iced coffee?

You can use any type of coffee you prefer for iced coffee. However, using a stronger brew or cold brew concentrate can enhance the flavor and prevent your drink from becoming diluted.

Can I use regular milk alternatives in iced coffee?

Absolutely! Feel free to use almond, oat, soy, or any other milk alternative you prefer in your iced coffee.

Sour Coffee Moka Pot: Causes and Solutions

As a veteran in the coffee industry for over 20 years, I have come to appreciate the importance of a well-balanced cup of coffee. A perfect cup of coffee should be rich in flavor, aroma, and body, without any overpowering tastes. However, one issue that can ruin your coffee experience is sourness.

When it comes to moka pot brewing, sour coffee is a common problem that affects the taste and quality of the coffee. It’s essential to learn how to avoid sourness in moka pot coffee to ensure that you can enjoy a delicious and satisfying cup of coffee every time.

Sour Coffee Moka Pot: Causes and Solutions 11

In this article, we will explore the causes of sour coffee from a moka pot and provide practical solutions to help you fix this issue.

Understanding Sour Coffee

Sour coffee is a common problem that can occur when brewing coffee in a moka pot. It’s characterized by a sharp, acidic taste that can be unpleasant and overwhelming.

Sourness is a problem for moka pot coffee because it detracts from the overall taste and quality of the coffee. In some cases, it can be so pronounced that it renders the coffee undrinkable.

Acidity is an essential component of coffee, and it plays a crucial role in determining the flavor and taste of the coffee. Some coffees are naturally more acidic than others, depending on the type of coffee bean, the growing conditions, and the roasting process. For example, African coffees tend to be more acidic than South American coffees.

When it comes to moka pot brewing, several factors can contribute to sourness in the coffee. One of the most common causes is the brewing temperature. If the water is too hot, it can over-extract the coffee, leading to sourness. On the other hand, if the water is not hot enough, it can under-extract the coffee, resulting in a sour taste.

Grind size is another critical factor that can affect the taste of moka pot coffee. If the coffee is ground too finely, it can over-extract and cause the coffee to taste sour. If the coffee is ground too coarsely, it can under-extract and result in a sour taste.

Water quality is also essential when brewing moka pot coffee. Hard water, for example, can affect the taste of the coffee, making it more acidic. Using filtered water can help prevent this issue.

How to Avoid Sour Coffee in a Moka Pot

Sour Coffee Moka Pot: Causes and Solutions 12

Brewing coffee in a moka pot can be a simple and satisfying way to enjoy a delicious cup of coffee. However, as we discussed earlier, sourness can be a common issue that affects the taste and quality of the coffee. In this section, we will explore practical steps that you can take to avoid sourness and achieve a well-balanced flavor profile in your moka pot coffee.

Step 1: Select the right coffee beans

Choosing the right coffee beans is crucial for achieving a great-tasting cup of moka pot coffee. Look for high-quality coffee beans that are freshly roasted and have a medium-fine grind. Ideally, you should use beans that are specifically labeled for moka pot brewing, as they are typically roasted and ground to suit this brewing method.

Step 2: Add water and coffee

Fill the bottom chamber of the moka pot with cold water up to the level indicated on the pot. Next, add the ground coffee to the filter basket in the middle chamber. Avoid packing the coffee too tightly, as this can lead to over-extraction and sourness.

Step 3: Heat the water

Place the moka pot on a medium heat setting and wait for the water to heat up. Keep an eye on the pot, as you don’t want the water to overheat, which can lead to sourness. Once the coffee starts to flow, reduce the heat further to prevent over-extraction.

Step 4: Serve and enjoy

Once the coffee has finished brewing, remove the pot from the heat source and serve the coffee immediately. Enjoy your delicious cup of moka pot coffee!

To avoid sourness in moka pot coffee, you can adjust the brewing factors, such as the temperature, grind size, and water quality. Here are some tips:

  • Use filtered water to avoid hard water that can affect the taste of the coffee.
  • Brew the coffee at a temperature between 195-205°F (90-96°C) to prevent over-extraction and sourness.
  • Use a medium-fine grind to ensure that the coffee is extracted correctly and avoid sourness.
  • Avoid overheating the water, as this can cause the coffee to over-extract and taste sour.

In addition to these tips, it’s also essential to avoid common mistakes when brewing moka pot coffee, such as:

  • Reusing coffee grounds, which can result in over-extraction and sourness.
  • Using stale coffee, which can affect the taste of the coffee and make it more acidic.
  • Cleaning the moka pot infrequently, which can result in residue buildup that affects the taste of the coffee.

Troubleshooting Sourness in Moka Pot Coffee

Sour Coffee Moka Pot: Causes and Solutions 13

Sourness is a common problem that can occur when brewing coffee in a moka pot. It can be frustrating to experience this issue, especially if you’re a coffee lover who appreciates a well-balanced cup of coffee. However, the good news is that sourness in moka pot coffee can be fixed by identifying the potential causes and making small adjustments to the brewing process. In this article, we will explore the potential causes of sourness in moka pot coffee and provide practical solutions to help you troubleshoot and fix this issue.

Potential Causes of Sourness in Moka Pot Coffee

Incorrect grind size

One of the most common causes of sourness in moka pot coffee is the incorrect grind size. If the coffee is ground too finely, it can over-extract, resulting in sourness. On the other hand, if the coffee is ground too coarsely, it can under-extract, resulting in a sour taste.

Overextraction

Overextraction occurs when the coffee is brewed for too long or at too high a temperature. This can cause the coffee to become too bitter and sour.

Water temperature

If the water temperature is too low, it can cause under-extraction and sourness. If the water temperature is too high, it can lead to over-extraction and bitterness.

Stale coffee

Using stale coffee can also result in a sour taste. Coffee loses its freshness over time, and if it’s not stored properly, it can become stale and affect the taste of the coffee.

Troubleshooting and Fixing Sourness in Moka Pot Coffee

Sour Coffee Moka Pot: Causes and Solutions 14

Adjust the grind size

To fix sourness caused by an incorrect grind size, adjust the grind to a medium-fine size. This size will ensure that the coffee is extracted correctly and will prevent over-extraction and under-extraction. If the coffee is still sour, adjust the grind size slightly to a finer or coarser setting until you find the right balance.

Adjust the brewing time

If the coffee is overextracted, try reducing the brewing time or using a lower heat setting. If the coffee is under-extracted, try extending the brewing time or using a higher heat setting.

Adjust the water temperature

If the water temperature is too low, try using hotter water to brew the coffee. If the water temperature is too high, try using slightly cooler water or reducing the heat setting.

Use fresh coffee beans

If the coffee tastes sour due to stale coffee beans, try using freshly roasted coffee beans. Fresh coffee beans will have a better flavor profile and will not be as acidic as stale coffee beans.

Small Adjustments That Can Improve the Taste of Moka Pot Coffee

Sour Coffee Moka Pot: Causes and Solutions 15

Preheat the water

Preheating the water before adding it to the moka pot can help ensure a consistent water temperature and prevent sourness.

Use filtered water

Using filtered water can help ensure that the water quality is consistent and can prevent hard water from affecting the taste of the coffee.

Clean the moka pot regularly

Cleaning the moka pot regularly can help prevent residue buildup that can affect the taste of the coffee.

Use the right amount of coffee

Using the right amount of coffee is crucial for preventing under-extraction or over-extraction. Use the recommended amount of coffee for your moka pot, and adjust the amount as needed based on your taste preference.

Experiment with different coffee beans

Try experimenting with different types of coffee beans to find the perfect balance of flavor and acidity for your taste preference.

Conclusion

In this article, we have discussed the common problem of sourness in moka pot coffee and provided practical solutions to help you prevent this issue. We identified the potential causes of sourness, such as incorrect grind size, overextraction, water temperature, and stale coffee. We also discussed how to troubleshoot and fix each of these issues.

We provided tips for selecting the right coffee beans for moka pot brewing and discussed common mistakes to avoid when brewing moka pot coffee. Additionally, we discussed small adjustments that can improve the taste of your coffee, such as preheating the water, using filtered water, cleaning the moka pot regularly, and experimenting with different coffee beans.

The key takeaways from this article are that achieving a well-balanced cup of moka pot coffee is all about finding the right balance between the brewing factors and personal taste preferences. It’s essential to adjust the grind size, brewing time, water temperature, and coffee bean selection to avoid sourness and achieve a delicious and satisfying cup of coffee.

We encourage readers to experiment with their brewing process and make small adjustments until they find the perfect balance of flavor and acidity for their taste preferences. With some patience and experimentation, anyone can enjoy a delicious and satisfying cup of moka pot coffee every time.

FAQs

What is the best coffee grind size for moka pot brewing?

The best coffee grind size for moka pot brewing is a medium-fine grind. This size will ensure that the coffee is extracted correctly and will prevent over-extraction and under-extraction, which can cause sourness.

How long does it take to brew coffee in a moka pot?

The brewing time for moka pot coffee can vary depending on the size of the pot and the heat source. Generally, it takes around 5-10 minutes to brew a cup of moka pot coffee.

What is the ideal water temperature for moka pot brewing?

The ideal water temperature for moka pot brewing is between 195-205°F (90-96°C). This temperature range will prevent over-extraction and sourness and will help to achieve a well-balanced cup of coffee.

How can I tell if my moka pot coffee is overextracted?

Overextracted coffee can taste bitter and sour. If your moka pot coffee has a harsh or unpleasant taste, it may be overextracted. Adjusting the brewing time or using a lower heat setting can help prevent overextraction.

Can I use any type of coffee bean for moka pot brewing?

While you can use any type of coffee bean for moka pot brewing, it’s best to use high-quality coffee beans that are freshly roasted and have a medium-fine grind. Using beans that are specifically labeled for moka pot brewing can also help ensure that the beans are roasted and ground to suit this brewing method.