Can I Take Sandwiches on a Plane? TSA Regulations and Tips

Picture this: You’re about to embark on a long journey, and in an attempt to save your wallet from the pricey airplane meals, you consider packing your own sandwiches. Will you be allowed to bring them onboard? Is there an art to packing the perfect in-flight sandwich?

Worry not, for we’ve got you covered with a comprehensive guide to understanding regulations, guidelines, and in-flight snack alternatives.

TSA Regulations and Guidelines

can you bring fruit through airport security
Airport Security

When it comes to bringing food on a plane, the Transportation Security Administration (TSA) is the authority that sets the rules. Generally speaking, you can bring sandwiches in your carry-on luggage, but it’s crucial to be aware of certain restrictions.

For instance, if your sandwich contains any liquid or gel-like substances (such as jelly or soft cheese) beyond the 3.4-ounce limit, you’re required to pack these items separately following the TSA’s 3-1-1 liquids rule. Also, keep in mind that condiments such as mustard and ketchup must be placed in containers of 3.4 ounces or smaller and then packed inside a single quart-sized, clear, plastic, zip-top bag in accordance with this rule.

During the security screening process, it’s a good idea to inform the TSA officer that you have a sandwich in your bag. This way, they can better navigate any potential issues that may arise at the checkpoint.

You may also like: Can You Bring Fruit Through Airport Security? A Friendly Guide

Tips for Packing Sandwiches for Air Travel
can i take sandwiches on a plane
pack sandwiches

Now that we understand the rules, it’s time for some tips and tricks to packing the perfect in-flight sandwich that will remain fresh and intact throughout your journey. Let’s dive in!

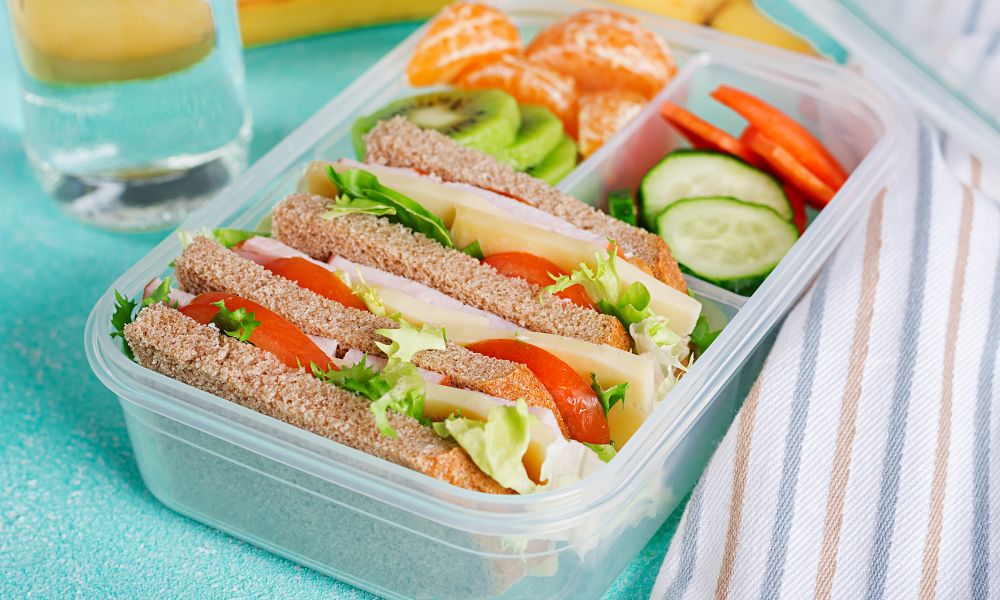
First, consider the container or wrap you plan to use. A sturdy plastic container, reusable sandwich wrap, or even a ziplock bag can help prevent squishing and keep your sandwich fresh. If using a plastic container, add a piece of parchment paper to prevent moist ingredients from leaking out.

When it comes to layering ingredients, keep these pointers in mind:

  • Choose a sturdy bread that can hold up, such as ciabatta or a baguette.
  • Start by placing a “barrier” ingredient, such as lettuce or a slice of cheese, on the bread to protect it from sogginess.
  • Spread condiments sparingly to avoid over-saturating the sandwich. If you desire extra condiments, follow the TSA’s 3-1-1 liquids rule and pack them separately.

Feeling creative with your sandwich fillings? Consider experimenting with different combinations while taking into account the prolonged air travel experience, which may call for sturdier options. The key is to create a sandwich with ingredients that can withstand a bit of time and temperature fluctuations.

Alternative In-Flight Snack Options

Can I Take Sandwiches on a Plane? TSA Regulations and Tips 1
Alternative In Flight Snack Options

Not keen on bringing a sandwich on board? Don’t worry! There are numerous alternative in-flight snack options that are just as satisfying. Consider pre-packaged snack options available for purchase at airports or even on the plane. Some airlines also offer special meal selections for passengers with dietary restrictions.

And if you’re aiming for a healthy, non-perishable snack option that’s travel-friendly, consider packing items such as trail mix, dried fruit, or granola bars. These tasty treats can curb your hunger without the need for a full meal.

Stay tuned for more information on international flights, special considerations, and commonly asked questions about in-flight sandwiches!

Special Considerations for International Flights

When it comes to bringing sandwiches on international flights, there are a few extra factors to consider. Certain countries may have customs regulations that restrict the import of specific food items, so it’s crucial to research your destination’s guidelines before packing your sandwich.

During layovers or long-haul international flights, you may want to look into food options available at airport terminals or even onboard the aircraft. Remember to plan your in-flight meals accordingly, taking into account any allergies or dietary restrictions you might have.

Conclusion

In conclusion, understanding the rules and guidelines for bringing sandwiches on a plane is crucial for a smooth travel experience. When planning your in-flight snacks, remember to consider TSA regulations, packing tips, and international flight restrictions. Don’t hesitate to explore alternative snack options to satisfy your hunger during air travel.

Do you have any sandwich-packing experiences or tips to share? Feel free to leave a comment, and let us know how you make your in-flight sandwich game strong!

{ “@context”: “https://schema.org”, “@type”: “FAQPage”, “mainEntity”: [{ “@type”: “Question”, “name”: “Can I take sandwiches on a plane?”, “acceptedAnswer”: { “@type”: “Answer”, “text”: “Yes, you can generally take sandwiches on a plane. However, certain restrictions may apply based on TSA regulations.” } }, { “@type”: “Question”, “name”: “What are the TSA regulations for taking food on a plane?”, “acceptedAnswer”: { “@type”: “Answer”, “text”: “TSA allows solid food items, like sandwiches, in carry-on bags. Make sure they are properly packed and easily accessible, in case the TSA officer needs to check them. Liquid or gel food items, however, have restrictions.” } }, { “@type”: “Question”, “name”: “Are there any tips for taking sandwiches on a plane?”, “acceptedAnswer”: { “@type”: “Answer”, “text”: “Keep your sandwiches in a clear plastic bag separate from your other belongings, for easy inspection at the security checkpoint. Also, consider avoiding strong-smelling foods out of consideration for your fellow passengers.” } }, { “@type”: “Question”, “name”: “What food items are not allowed in a plane?”, “acceptedAnswer”: { “@type”: “Answer”, “text”: “Most liquid or gel food items are restricted in carry-on bags, including creamy dips and spreads, sauces, salad dressing, etc. They can be transported in checked bags.” } }, { “@type”: “Question”, “name”: “Can I bring drinks on a plane?”, “acceptedAnswer”: { “@type”: “Answer”, “text”: “You can bring drinks purchased after the security checkpoint on the plane. For drinks from home, only those in containers of 3.4 ounces or less are allowed in carry-on bags due to the TSA’s liquid restrictions.” } }] }
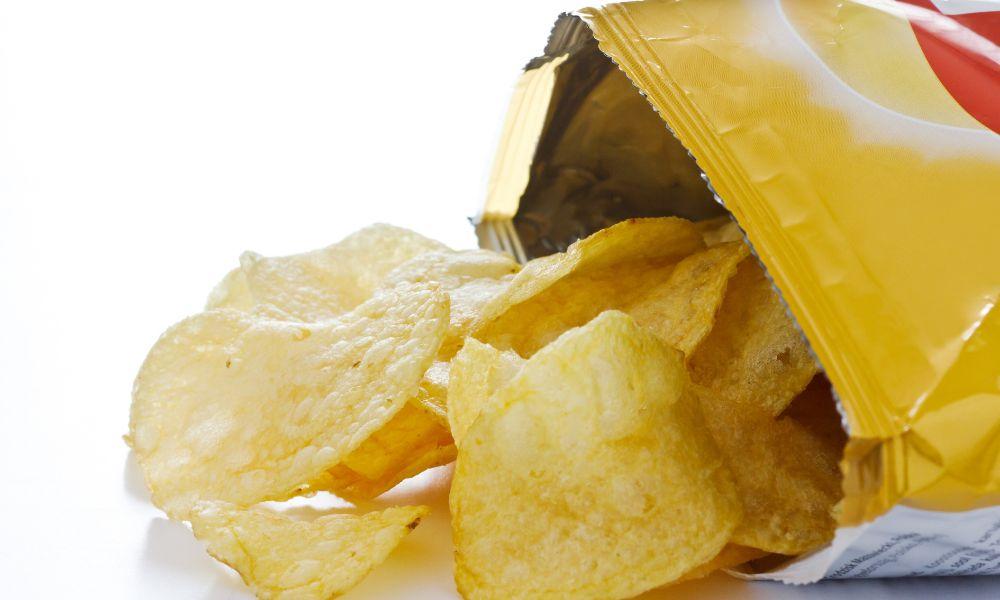
Stale Crisps: Why They Happen and How to Prevent Them

Most of us have experienced the disappointment of reaching into a bag of crisps, only to find that they’ve lost their crunchiness and have gone stale. Fresh and crispy snacks are undeniably more enjoyable, and understanding why crisps go stale can save us from this frustrating situation.

The purpose of this article is to explore the causes of stale crisps and provide prevention tips, in a light-hearted, informative manner.

Understanding Stale Crisps

stale crisps
chips

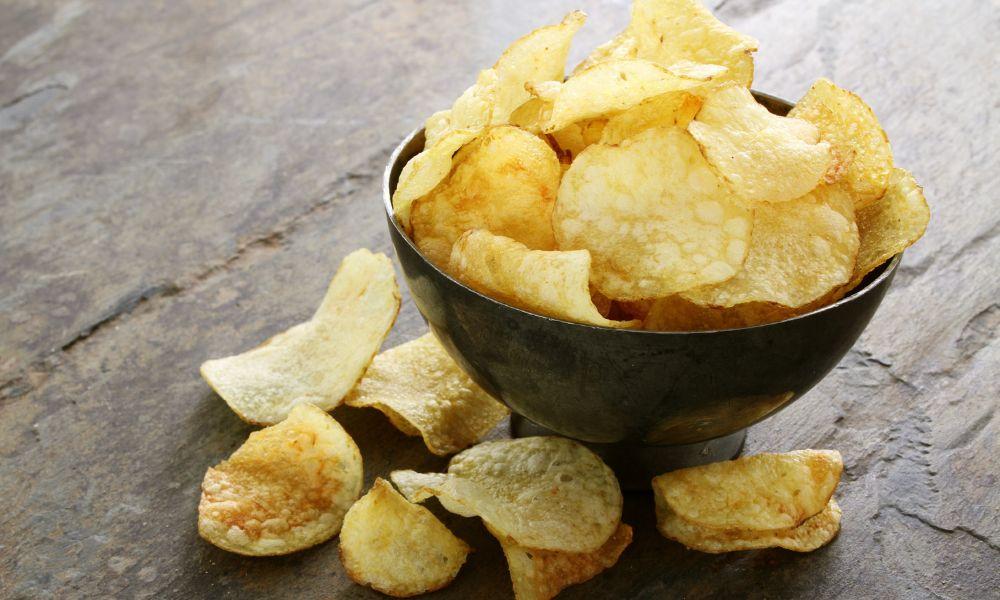
Stale crisps are essentially crisps that have lost their freshness and appealing texture. When a crisp goes stale, it turns soft, chewy, and loses its classic crunch. What causes this undesirable transformation? Let’s dive into the science behind it.

When crisps are exposed to air and moisture, they absorb the moisture, causing them to lose their crispiness. Manufacturers make extra efforts to minimize oxygen and moisture inside the packaging, using modified atmosphere packaging techniques. However, once the packet is opened, the crisps are at the mercy of their surroundings, making them susceptible to going stale.

Signs and Consequences of Stale Crisps

So, how can you identify stale crisps before taking that dreaded bite? There are a few visual and textural clues to watch out for:

  1. Stickiness: Stale crisps might feel slightly sticky to the touch as a result of the moisture they’ve absorbed.
  2. Softness: If you try to snap the crisp, it will bend rather than break crisply.
  3. Lack of noise: Fresh crisps are known for their satisfying crunch. When you take a bite of a stale crisp, it might be disappointingly quiet.

The impact of staleness on taste can vary depending on the individual and the severity of the staleness. Some people might not mind slightly stale crisps, while others find the experience thoroughly unenjoyable. So, it’s essential to identify stale crisps to avoid consuming them if you’re particular about your snacking experience.

How Long Do Crisps Last Before Going Stale?

Stale Crisps: Why They Happen and How to Prevent Them 2
crisps

The shelf life of different types of crisps can vary depending on factors like packaging materials, preparation methods, and storage conditions. It’s worth paying attention to the “Best Before” date, as it can genuinely make a difference in the quality of your snack. However, there’s no precise one-size-fits-all answer – it’s really more of a guideline.

Factors that can affect the lifespan of crisps include:

  • Whether the packaging seals out air and moisture effectively
  • The humidity levels in your home
  • How frequently the crisps are exposed to air and moisture

To assess the freshness of your crisps before consuming them, check the appearance, feel, and smell of the crisps, in addition to noting the “Best Before” date. If they seem off in any way, it’s probably best to leave them be.

Tips to Prevent Crisps from Becoming Stale

Now, for the part you’re probably waiting for: how can you keep your crisps fresh and crispy for as long as possible? Here are some handy tips:

  1. Reseal the opened packet tightly: Using a clip, rubber band, or even a piece of tape can prevent air and moisture exposure.
  2. Transfer crisps to an airtight container or resealable bag: A better option to ensure your crisps stay protected and fresh.
  3. Store crisps in a cool, dry place away from direct sunlight: Exposure to heat and light can cause the crisps to deteriorate more quickly.

Following these simple steps can make a world of difference in prolonging the crispiness and taste of your favorite snack.

Reviving Stale Crisps

Stale Crisps: Why They Happen and How to Prevent Them 3
eat chips

Accidentally left your crisps exposed to air for too long? Don’t worry – you can still potentially revive their crunchiness. Here are some methods to restore crispiness to stale crisps:

  1. Heating in the oven: Spread the stale crisps evenly on a baking sheet and heat them at low temperature (about 150°F or 65°C) for 5-10 minutes. Keep an eye on them to prevent overcooking, and let them cool before enjoying.
  2. Microwaving: Place the crisps on a microwave-safe plate spaced apart, and microwave on medium power for 20-30 seconds. Be cautious not to overcook, as they might become burnt.
  3. Using a food dehydrator: If you have a food dehydrator at home, you can use it to draw out the excess moisture from the crisps and restore their crunchiness.

Remember that revival methods may vary depending on the type of crisp and your personal preferences. Experiment with different techniques and find the one that yields the best results for your taste buds.

FAQs

Why do crisps go stale?

Crisps go stale due to exposure to air and moisture, which causes them to absorb moisture and lose their crispiness.

How long do crisps last before going stale?

The shelf life of crisps varies depending on factors like packaging, preparation methods, and storage conditions. Always check the “Best Before” date as a guideline but remember that proper storage can also make a difference.

Can you revive stale crisps?

Yes, stale crisps can be revived through methods such as heating in the oven, microwaving, or using a food dehydrator to remove excess moisture and restore crunchiness.

What are the signs of stale crisps?

Signs of stale crisps include stickiness, softness, lack of a satisfying crunch, and an unpleasant odor.

How can I prevent crisps from becoming stale?

Prevent crisps from becoming stale by resealing opened packets tightly, transferring them to airtight containers or resealable bags, and storing them in cool, dry places away from sunlight.

Are there any storage tips for keeping crisps fresh?

Yes, for optimal freshness, store crisps in a cool, dry place away from sunlight, and keep them in airtight containers or resealable bags to prevent air and moisture exposure.

Conclusion

In conclusion, understanding the causes behind crisps going stale and adopting preventative measures can make all the difference in enjoying fresh, crispy snacks. Emphasizing the importance of proper storage and awareness of staleness can lead to a better snacking experience.

How Long Does Sourdough Starter Last? Tips for Maintaining a Healthy Starter

Sourdough bread is an all-time favorite for many, but what is the secret behind its unique taste? A healthy and active sourdough starter! If you’re an aspiring bread baker or a seasoned home baker, understanding how long the sourdough starter lasts is crucial for a perfect homemade sourdough loaf.

Let’s dive in and learn how to maintain our starters for as long as possible, giving us delicious bread for years to come.

Understanding Sourdough Starter

sourdough starter how long does it last
Sourdough Starter

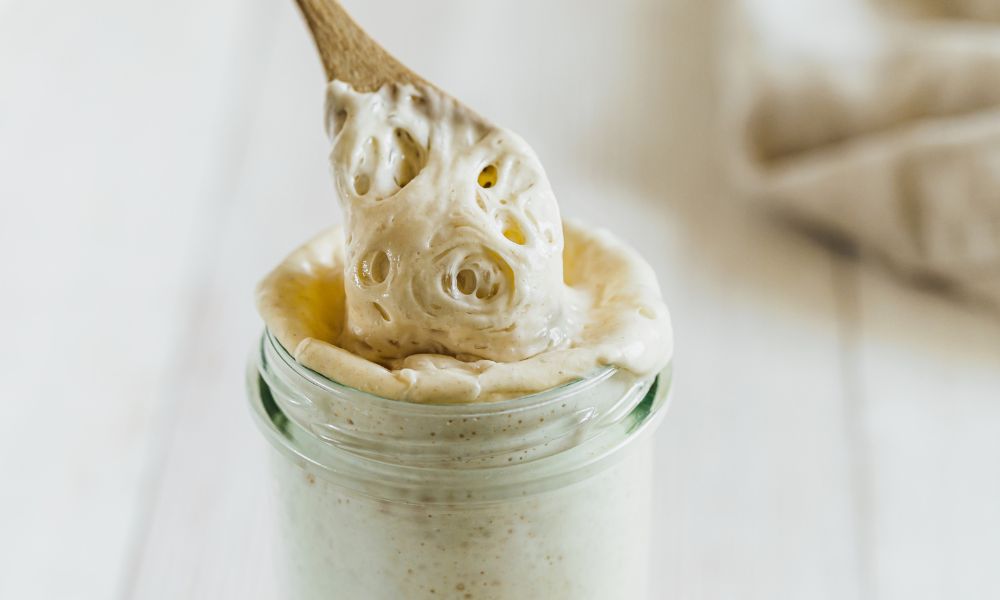
A sourdough starter is a mixture of flour and water, left to ferment over time. This fermentation process allows wild yeast and good bacteria to multiply and result in a powerful natural leavening agent responsible for the unique flavor and texture of sourdough bread. The key to an amazing sourdough loaf is a healthy and active starter.

Feeding your sourdough starter regularly is important as this serves as its source of nourishment. To feed a starter, simply add fresh flour and water based on the starter’s needs.

Factors Affecting the Shelf Life

🌡️Temperature

Temperature plays a significant role in the lifespan of your sourdough starter. Warm temperatures speed up fermentation, causing your starter to reach peak activity and consume its fuel faster. For longer-lasting starters, opt for cooler room temperatures or find a cool spot in your kitchen for storage.

💧Hydration

The ratio of water to flour in your starter, also known as hydration level, can also affect its shelf life. High hydration starters tend to ferment faster, thereby reducing their overall lifespan. Lower hydration starters may last longer between feedings.

👩‍🍳Feeding Frequency

Oftentimes, beginner bakers question “how often should I feed my sourdough starter?” The answer varies based on factors such as temperature and hydration. A simple rule of thumb is to look for signs of activity – if your starter is bubbling and rising, that means it’s craving more food! Regular feedings lead to a healthy and strong sourdough starter.

🫓Flour Type

Finally, the type of flour you use also plays a part in the shelf life of your starter. Whole grain flours not only contribute additional nutrients to the mix but also possess a higher microbial content, which helps promote a more diverse and active fermentation process.

Signs of a Healthy and Active Starter

How Long Does Sourdough Starter Last? Tips for Maintaining a Healthy Starter 4
Active Starter

Understanding what a healthy sourdough starter looks like and recognizing the signs of it being active is crucial for maintaining its shelf life. Some key indicators include:

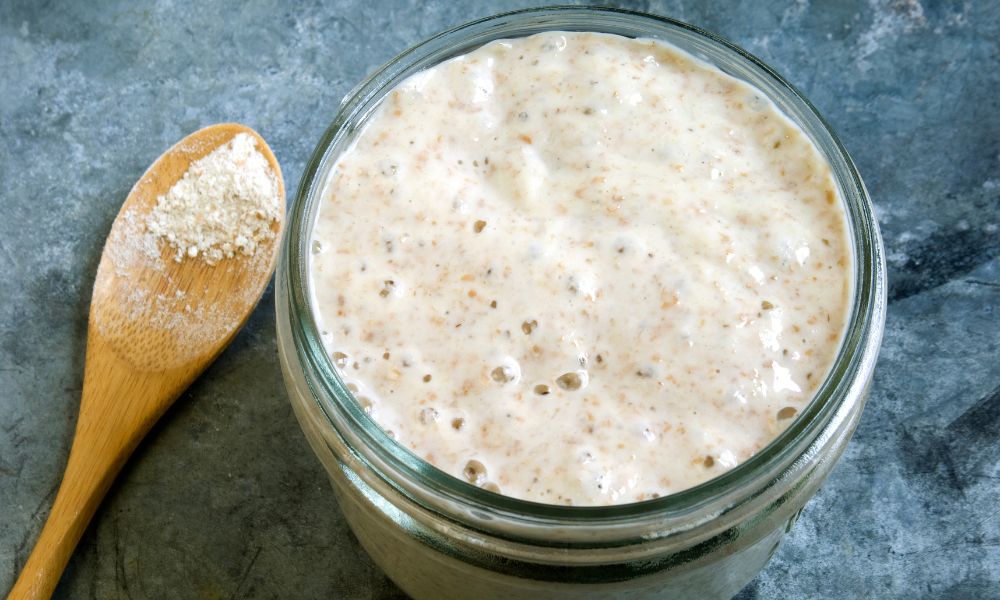
  • Bubbles on the surface of the starter, which show that the fermentation is producing gas.
  • A noticeable rise in volume after each feeding – this indicates that the yeast is metabolizing the new food and producing carbon dioxide, which expands the starter’s volume.
  • A pleasant, sour, yogurt-like smell that suggests the presence of lactic acid bacteria, important for the starter’s performance.
  • PH balance also plays a key role in your starter’s wellbeing – a pH of 4 to 4.5 is ideal for maintaining a healthy environment that discourages the growth of harmful bacteria.

Understanding Sourdough Starter’s Lifespan

At this point, you might be curious about how long does sourdough starter last? When properly maintained, a sourdough starter can last indefinitely. [1]In fact, some bakers boast about their centuries-old starters! However, neglect and unfavorable conditions may shorten the lifespan of your starter.

Several factors can influence your starter’s longevity, such as hydration level, temperature, and feeding frequency discussed earlier. Furthermore, it’s important to look out for signs that your starter may have gone bad or spoiled.

Signs of a spoiled sourdough starter include:

  • Mold growth – visible colored spots on the surface or any streaks in the starter, commonly caused by contamination or poor maintenance.
  • A strong, off-putting smell – while sourdough starter should have a pleasant tangy aroma, an unpleasant, rancid smell indicates something has gone wrong.

If your sourdough starter shows such signs, it’s best to discard it and start fresh.

Extending the Shelf Life of Sourdough Starter

Keep your sourdough starter alive and thriving for a long time with these best practices:

  1. Find the optimal feeding frequency based on the temperature of your kitchen and the activity level of your starter.
  2. Adjust the hydration level to control the fermentation speed and ensure longer-lasting shelf life.
  3. Use whole grain flours to boost the fermentation diversity and make your starter more resilient.
  4. Properly store your sourdough starter, especially during periods of non-use. Keeping your starter in the refrigerator will slow down fermentation, allowing you to go longer between feedings.

Remember that a healthy, well-maintained sourdough starter is the key to delicious, flavorful bread. You’ve now gained enough knowledge to maintain a long-lasting sourdough starter.

Troubleshooting Common Issues

How Long Does Sourdough Starter Last? Tips for Maintaining a Healthy Starter 5
sourdough

Sluggish or Weakened Starter

Problem: Your starter doesn’t seem as active as it should be, and the rise is minimal.

Solution: Increase the feeding frequency or consider using a warmer spot for storage. Incorporating whole grain flours may also provide a microbial boost.

Contamination, Off-Flavors, and Unusual Odors

Problem: Your starter smells particularly unpleasant or has acquired an off-taste.

Solution: Ensure you’re using clean utensils and jars for your starter. If the issue persists, consider starting anew with a fresh starter to avoid potential health hazards.

Mold or Signs of Spoilage

Problem: You observe visible mold or streaks in your sourdough starter.

Solution: Dispose of the affected starter and take preventative measures, such as ensuring cleanliness of all tools and jars when creating a new starter.

Frequently Asked Questions (FAQs)

How often should I feed my sourdough starter?

Feeding frequency depends on factors such as temperature and hydration level. Observe your starter’s activity and adjust feeding accordingly. Most starters require feeding at least once every 24 hours at room temperature.

Can sourdough starter be refrigerated to extend its life?

Yes, refrigerating your sourdough starter slows down fermentation, allowing for longer breaks between feedings (typically once a week).

Can I use my sourdough starter if it hasn’t been fed in a while?

Yes, in most cases. Revive the starter by feeding it consistently and observing its activity. If it returns to its bubbly, rising state, it’s good to use.

What should I do if my sourdough starter separates?

Separated starters can be stirred back together before feeding. If separation persists, consider adjusting the hydration level or temperature at which it’s stored.

How can I tell if my sourdough starter has gone bad?

Look for signs like mold growth or a strong, off-putting smell. If you observe either, discard the starter and start fresh.

Can I freeze my sourdough starter for long-term storage?

Yes. Freezing slows down fermentation drastically. Thaw and feed the starter consistently to reactivate it before use.

Should I discard part of my sourdough starter during feeding?

Discarding a portion of the starter helps maintain a manageable volume and ensures a higher ratio of fresh food to maintain an active starter.

Can I share or give away a portion of my sourdough starter?

Absolutely! Sharing your sourdough starter is a great way to spread the joy of sourdough baking.

What happens if I use expired sourdough starter in my bread?

If the starter produces poor results or an off-flavor in your bread, it may be time to refresh or replace your starter.

How can I speed up the activation of a new sourdough starter?

Store the starter in a warmer environment and consider more frequent feedings or using whole grain flours to boost fermentation activity.

Conclusion

Understanding the shelf life of sourdough starter is essential to bake exceptional sourdough bread. A well-maintained, healthy sourdough starter can last indefinitely, providing you with countless delicious loaves. Follow the guidance provided in this article and stay diligent in observing and adjusting your starter’s feeding and storage methods.

Don’t be afraid to experiment, learn from your experiences, and, most importantly, have fun while baking! We’d love to hear about your sourdough baking adventures – share your stories or ask any further questions in the comments below. Happy baking!

Tomatoes About to Go Bad? Discover How to Rescue and Transform Them!

Imagine the scenario: you stumble upon a neglected batch of tomatoes tucked away in the depths of your fridge or pantry, only to find they’re nearing their expiration date. Good news, tomato aficionados! In this article, we’ll traverse a maze of creative ideas to salvage and rehabilitate those aging beauties, skillfully minimizing food waste while tickling our tastebuds.

We’ll dive into tantalizing recipes, ingenious preservation strategies, and valuable tips to rejuvenate slightly wilted or mushy tomatoes. Grab your aprons and begin prepping – together, we’ll save those blushing gems from an unfortunate demise in the trash!

Assessing Tomato Freshness

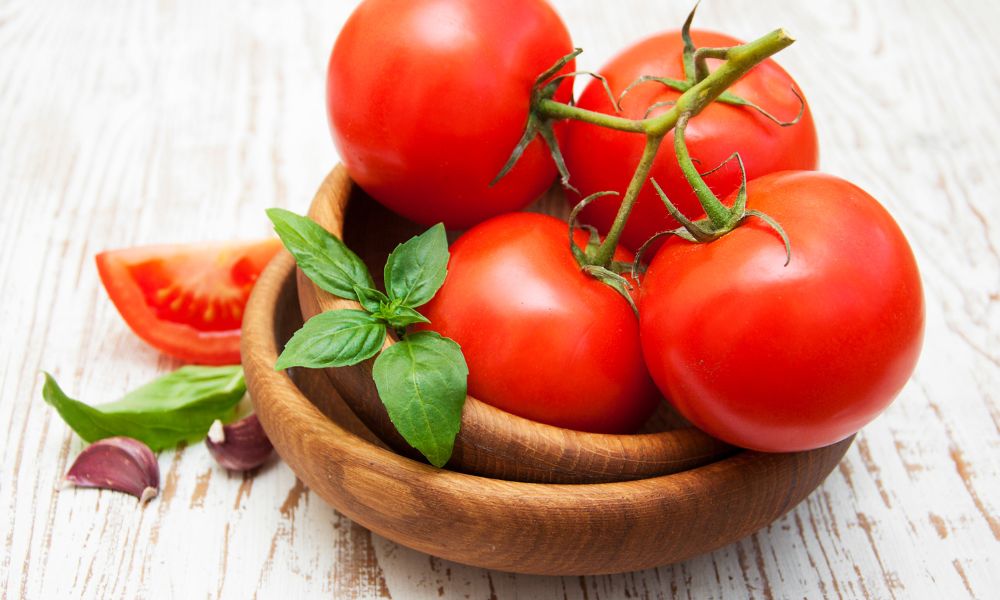
what to do with tomatoes about to go bad
Tomato

Embarking on our culinary journey first involves gauging the freshness of our tomatoes. Is it still safe to indulge in that near-ripe fruit, or is it time to bid farewell? Tomatoes on the brink of spoilage often display wrinkling, softness, or perhaps mold growth. Assessing freshness requires harnessing the power of our senses – observation, aroma, and touch.

Inspect your tomatoes visually. If mold is present, discard them. However, if they’re simply somewhat softened or wrinkled, they can still be salvaged. Next, inhale their scent – a mildly overripe yet edible tomato may boast a more robust aroma than its fresher counterpart but should never smell rancid. Lastly, utilize your tactile sensations – while modestly mushy tomatoes prove valuable in various dishes, excessively squishy or leaking fruits necessitate disposal.

Safety triumphs – always err on the side of caution when contemplating aging produce.

Quick and Easy Recipes for Aging Tomatoes

Now that our crinkled comrades have been deemed edible, let’s delve into a realm of irresistible culinary masterpieces. Presenting quick and easy recipes for aging tomatoes that will satiate your senses while combating food waste:

Tomatoes About to Go Bad? Discover How to Rescue and Transform Them! 6
Tomato Sauce

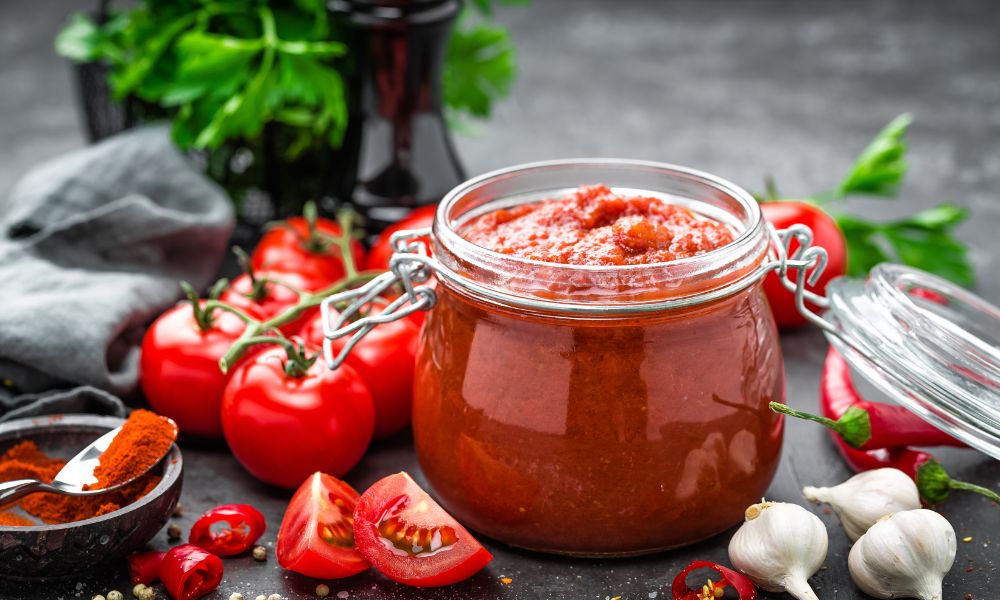
Speedy Tomato Sauce, Featuring Slightly Overripe Tomatoes

Ingredients:

  • 6-8 aging tomatoes
  • 1 generously-sized onion, chopped
  • 2 cloves garlic, minced
  • 2 tablespoons olive oil, from your pantry
  • A sprinkling of salt and pepper, to your liking
  • Fresh basil leaves, chopped (optional, but encouraged)

Instructions:

  1. Initiate the process by blanching those tomatoes: fill a pot with water and bring it to a rolling boil, followed by the tomatoes’ imminent immersion. Keep them submerged for 1-2 minutes until their delicate skins crack open. Retrieve the tomatoes with a slotted spoon, placing them in an ice bath to recuperate.
  2. Cool and ready-handed, peel and chop your previously wrinkled friends.
  3. Heat the olive oil in a large saucepan over medium warmth, toss in the onions, and await for them to soften and transform translucent – approximately 5 minutes.
  4. Summon the garlic, cooking for a further 1-2 minutes in harmony with the onions.
  5. Merge the recently chopped tomatoes, salt, pepper, and fresh basil leaves (if your heart desires) with your sizzling mixture. Boil and reduce, allowing it to simmer gently for 25-35 minutes, stirring occasionally.
  6. Enlist the assistance of an immersion blender, or a regular blender, to mix the sauce to a consistency tailored to your taste buds (optional).
  7. Savor your mouthwatering homemade tomato sauce with an array of pasta or pizza selections!

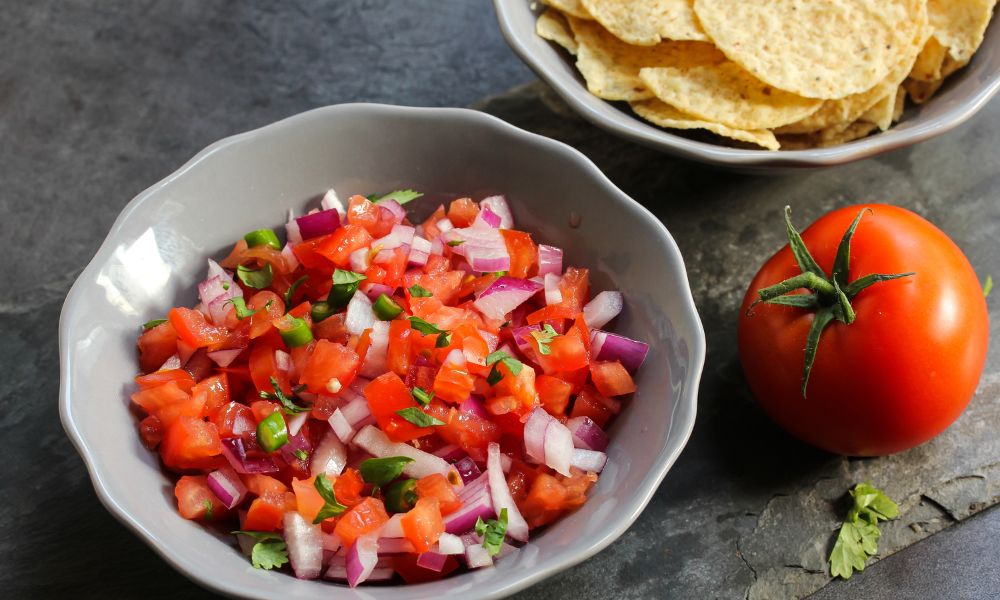
Vibrant Tomato Salsa, Refreshing and Invigorating

Tomatoes About to Go Bad? Discover How to Rescue and Transform Them! 7
Tomato Salsa

Ingredients:

  • 5-6 aging tomatoes (Roma being a prime choice)
  • 1/2 a small red onion, finely chopped
  • 1 feisty jalapeno, minced (discard the seeds for a milder demeanor)
  • 1/4 cup of freshly chopped cilantro
  • The juice of 1 lime, freshly squeezed
  • A seasoning of salt and pepper to suit your preferences

Instructions:

  1. Employ the same blanching, peeling, and chopping techniques used in the previous recipe.
  2. In a medium-sized bowl, gather the tomatoes, onion, jalapeno, cilantro, and lime juice, mixing them harmoniously.
  3. Integrate salt and pepper, adjusting to taste.
  4. For optimal enjoyment, refrigerate your vivacious salsa for a minimum of one hour before delighting in its tangy presence, whether paired with tortilla chips or your favorite Mexican dishes.

Experiment with these culinary creations, and your previously wrinkled tomatoes will transform into a veritable feast. A plethora of recipes awaits exploration, from wholesome soups and stews to zesty roasted tomatoes – your aging produce is a mere canvas for your imaginative brushstrokes in the kitchen.

Preservation Techniques for Tomatoes

To extend the lifeline of our aging tomato comrades, let’s explore diverse preservation techniques, allowing us to savor their delightful flavors in the long run. Canning, freezing, drying, and crafting tomato paste or sauce for long-term storage are all viable options.

We’ll delve into detailed instructions, equipment requirements, and safety measures for each preservation tactic. The rewards reaped from preserving tomatoes include a wealth of future culinary adventures thanks to their convenient availability in your pantry.

Canning Tomatoes

  1. Sterilize your canning jars by boiling them in water for 10 minutes.
  2. Prepare your tomatoes by blanching, peeling, and chopping them, as described earlier.
  3. Fill the jars with chopped tomatoes, leaving 1/2-inch headspace.
  4. Add a tablespoon of lemon juice to each jar for acidity.
  5. Wipe jar rims clean and secure lids and bands.
  6. Process the jars in a water bath canner for 45 minutes.
  7. Allow the jars to cool for 12-24 hours before checking the seals and storing them in a cool, dark place.

Freezing Tomatoes

  1. Blanch, peel, and chop your tomatoes.
  2. Lay them on a parchment-lined baking sheet.
  3. Place the sheet in your freezer, leaving them until solid.
  4. Transfer frozen tomatoes to airtight containers or zip-top freezer bags, removing as much air as possible.
  5. Stow them in your freezer for future use in soups, sauces, and stews.

Drying Tomatoes

  1. Preheat your oven to its lowest temperature setting (around 200°F/93°C).
  2. Wash, core, and cut tomatoes into 1/4-inch thick slices.
  3. Arrange slices on a baking sheet lined with parchment paper, leaving space between each slice.
  4. Sprinkle with salt and optional seasonings, such as herbs or garlic powder.
  5. Bake for 4-6 hours, checking regularly for desired dryness.
  6. Cool the dried tomatoes before storing them in an airtight container or bag, with a silica gel packet if available.

Reviving and Refreshing Techniques

Tomatoes About to Go Bad? Discover How to Rescue and Transform Them! 8
tomato

Not all aging tomatoes need to be repurposed; sometimes, a little bit of tender care can breathe new life into their wrinkled skins. Here are some tips and tricks to revive wilted or mushy tomatoes:

  • Blanch the tomatoes, halting the ripening and firming their flesh.
  • Submerge in ice water as a refreshing wakeup call for your tomatoes.
  • Cooked dishes offer the perfect disguise, accommodating imperfections and creating sumptuous meals.

Don’t shy away from experimenting, as a little creativity can result in surprisingly delightful outcomes.

Conclusion

By embracing creativity in the kitchen and exploring these ideas and recipes, using up those aging tomatoes gifts us with tantalizing flavors and increased sustainability. Enjoy the impressive transformation of your once-wilted tomatoes into a luscious culinary experience. Take the plunge, and share your own tips, recipes, and stories with fellow food adventurers! Happy rescuing!

How to Keep Blueberries Fresh for Longer: Expert Tips and Tricks

Blueberries are a delightful and nutritious addition to any meal, snack, or dessert. Their juicy, sweet, and slightly tangy taste makes them a favorite fruit among many people. However, their delicate nature can often mean that they spoil quickly, sometimes even before we have the chance to enjoy them.

Fortunately, there are ways to extend their freshness so you can savor those berry-licious flavors for longer. In this article, we’ll explore some key techniques and tips to help you make the most of your blueberries.

Why Freshness Matters

how to keep blueberries fresh for longer
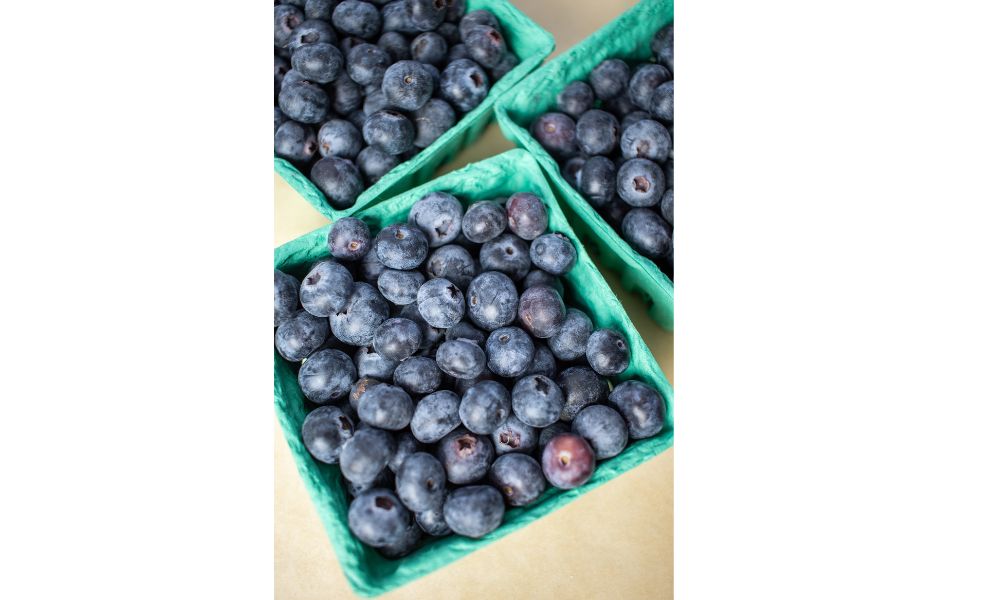
fresh blueberries

Eating fresh blueberries comes with a host of benefits, including superior taste, nutritional value, and optimal texture. When properly stored, they maintain their delicious flavors and healthful properties, contributing to a wholesome and nutritious diet.

On the other hand, consuming stale or spoiled blueberries can lead to flavor degradation and potential health risks. Mold growth and fermentation can cause blueberries to become unappetizing or even unsafe to eat. Moreover, minimizing waste is an important consideration for the environment and our wallets.

By learning how to extend the shelf life of blueberries, we can ultimately reduce food waste and maximize enjoyment of this delightful fruit.

Proper Storage Techniques

How to Keep Blueberries Fresh for Longer: Expert Tips and Tricks 9
storage blueberries

Through my experiments, I’ve discovered that maintaining the ideal temperature and humidity conditions is crucial for preserving blueberry freshness. Here’s what you need to know about properly storing your blueberries to make them last longer:

  • Refrigerate your blueberries: The best way to store blueberries is in the refrigerator, where you can maintain a consistent temperature between 32°F and 34°F (0°C and 1°C). Humidity should be kept around 90% for optimal freshness.
  • Choose the right container: Select a shallow, breathable container such as a basket or colander rather than a tightly sealed plastic container. This will allow air circulation and prevent moisture buildup, which can cause mold growth.
  • Keep blueberries dry: To avoid excess moisture, don’t wash your blueberries until you’re ready to consume them. Store them unwashed, and if there’s any visible moisture, gently pat them dry with a paper towel before storage.
  • Freeze for long-term storage: If you don’t plan on eating your blueberries within a few days of purchase, consider freezing them. Place the unwashed blueberries in a single layer on a baking sheet lined with wax paper or parchment paper, and freeze for an hour or two. Once frozen, transfer them to a resealable plastic bag, removing as much air as possible. Your frozen blueberries should retain their quality for up to 6 months.

Handling and Preparation Tips

Handling blueberries with care can significantly enhance their overall quality and extend their shelf life. Here are my best practices for handling blueberries:

  • Inspect for bruised or damaged berries: When buying or sorting through your blueberries, remove any that are squishy, bruised, or show signs of mold. This helps to prevent mold from spreading to healthy berries while in storage.
  • Gently wash before eating: When you’re ready to consume your blueberries, wash them gently under cool, running water. To remove dirt and contaminants without damaging their delicate skin, consider using a colander or strainer to gently tumble and rinse the berries.
  • Dry thoroughly: After washing, it’s important to remove any excess moisture to prevent spoilage. Lay the blueberries out on a clean kitchen towel, gently rolling and patting them dry.

You may also like: Can You Bring Fruit Through Airport Security? A Friendly Guide

Preserving Blueberries

How to Keep Blueberries Fresh for Longer: Expert Tips and Tricks 10
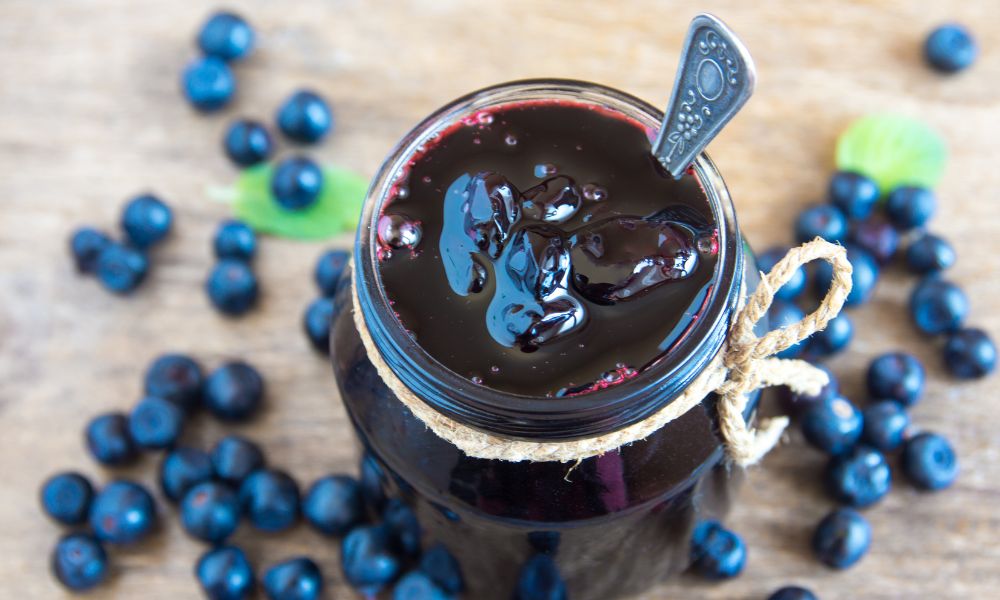
Blueberry jam

If you’ve got a surplus of blueberries and want to savor them for an extended period, consider preservation methods like making blueberry jam, freezing in syrup, or dehydrating. Here are some detailed instructions and recipe ideas to get you started:

Blueberry Jam

Combine equal parts blueberries and sugar in a saucepan, stirring occasionally and simmering over medium heat until thickened (approximately 25-30 minutes). You can also add pectin for a thicker consistency. Pour the hot jam into sterilized jars, seal, and process in a boiling water bath for 10 minutes.

Freezing in Syrup

Prepare a syrup by mixing sugar and water, using a ratio of one part sugar to three parts water. Place washed and well-drained blueberries in single layers in airtight containers, and pour the syrup over your blueberries until they are covered. Seal and freeze.

Dehydrating

To dehydrate blueberries, you’ll need a dehydrator, parchment paper, and a little patience. Follow your dehydrator’s instructions for temperature and time settings. Typically, blueberries are dehydrated at a temperature of 135°F (57°C) for up to 18 hours, or until the berries are pliable and slightly crunchy.

Exploring these preservation methods not only adds variety but can also help you extend the shelf life of your blueberries even further. Get creative and let your personal preferences guide you.

How Long Does Vegetable Oil Last Once Opened? Tips for Storage and Shelf Life

Understanding the shelf life of vegetable oil is essential, as it plays a vital role in many cooking processes. From frying and sautéing to baking and making salad dressings, vegetable oil can enhance the taste and texture of many dishes.

In this article, we’ll delve into how long vegetable oil lasts once opened and explore recommendations on tips for storage and extending its shelf life.

What Affects the Shelf Life of Vegetable Oil?

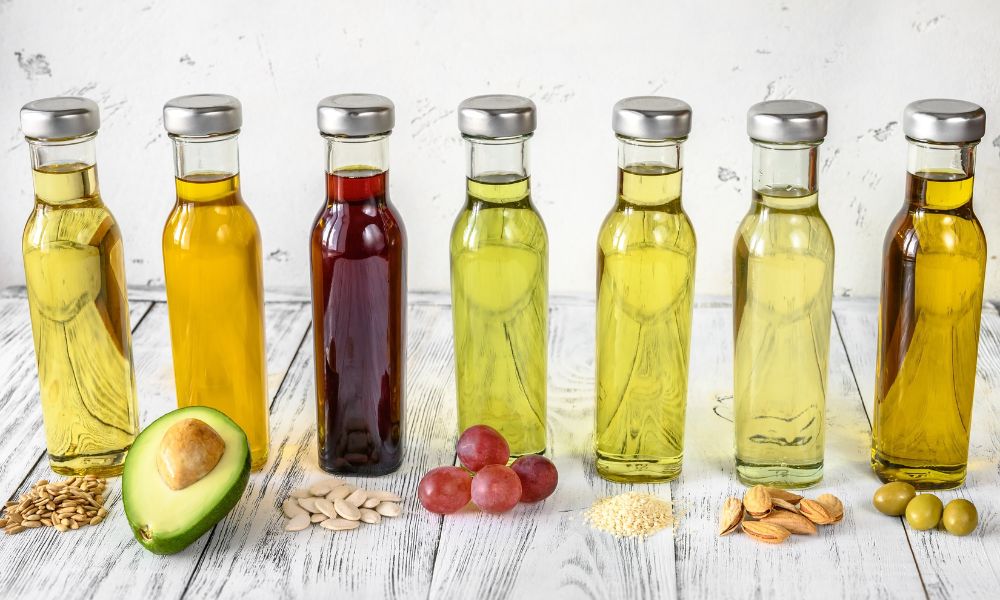
how long does vegetable oil last once opened
Vegetable Oil

Several factors impact the longevity of vegetable oil, and one of the critical aspects to consider is the storage condition. How you store the vegetable oil can greatly affect how long it will last once opened. Exposure to light, air, and heat can significantly impact the shelf life of vegetable oil and hasten its degradation.

When vegetable oil is exposed to light, its natural antioxidants can break down, giving rise to rancidity. Additionally, prolonged exposure to air causes the oil to oxidize, changing its aroma and taste. Lastly, heat can accelerate the breakdown of oil components, shortening its shelf life and even posing a safety risk.

How Long Does Vegetable Oil Last Once Opened?

The average shelf life of vegetable oil once opened primarily depends on storage and the type of oil. However, opened vegetable oil can generally last for 6 months to a year.

Signs of Expired Vegetable Oil
  • Unpleasant off smell (rancid or sour)
  • Cloudy or thickened appearance
  • Changes in taste (bitter or off-flavors)
  • Mold or debris floating in the oil

A simple taste test can help you determine whether or not your vegetable oil is still good to use. Of course, make sure you follow proper food safety practices when conducting a taste test. Dip a clean spoon or utensil into the oil and take a small taste. If it tastes bitter, stale, or otherwise off, it’s time to dispose of the vegetable oil.

Different Types of Vegetable Oil and Their Shelf Life

Various types of vegetable oils differ in terms of shelf life. Let’s take a closer look at some popular options and their expected shelf life once opened:

Oil TypeUnopened Shelf LifeOpened Shelf Life
Canola Oil1 year6 months to 1 year
Olive OilUp to 2 years3 to 6 months
Sunflower Oil1 year6 months to 1 year
Coconut OilUp to 3 yearsApproximately 1 year
Grapeseed Oil6 months2 to 3 months
  1. Canola Oil: Canola oil has a typical shelf life of one year if unopened and six months to a year after opening if stored correctly.
  2. Olive Oil: While unopened olive oil can last for up to two years, once opened, it should be consumed within three to six months for optimal freshness.
  3. Sunflower Oil: Sunflower oil has a similar shelf life to canola oil, with one year unopened and six months to a year after opening under ideal storage conditions.
  4. Coconut Oil: Coconut oil can last for up to three years unopened and approximately one year after opening, given proper storage.
  5. Grapeseed Oil: Grapeseed oil has a shorter shelf life in general, lasting around six months unopened and only two to three months after opening.

If you ever run out of vegetable oil or need an alternative for a specific recipe, check out this informative guide on substitutes for vegetable oil for options to try.

Tips for Storing Vegetable Oil

How Long Does Vegetable Oil Last Once Opened? Tips for Storage and Shelf Life 11
Tips for Storing Vegetable Oil

Following some essential tips can greatly extend the shelf life of your vegetable oil by mitigating the effects of light, air, and heat.

Keep Vegetable Oil in a Cool, Dark Place

Store the vegetable oil in a pantry or cupboard away from direct sunlight and heat sources, such as stoves or ovens. A consistent and cool temperature can help maintain the oil’s freshness for a more extended period.

During one of my pantry cleanups, I discovered an opened bottle of vegetable oil that had been hidden behind other items for over a year. The bottle was stored in a cool, dark, and dry pantry, away from the stove and any sunlight. To my surprise, the oil hadn’t gone rancid, and it was still good to use. However, keep in mind that this is not the norm, and you should always check the signs of expired vegetable oil mentioned earlier before using old oil.

Refrigerate or Freeze Vegetable Oil for Extension of Shelf Life

Refrigerating or freezing vegetable oil can help extend its shelf life, especially for those that are more prone to spoilage like grapeseed, walnut, or flaxseed oils. However, note that freezing might change the texture of the oil, but it’s still safe to use once it returns to liquid form.

Fun Experiment Alert! I decided to freeze a small amount of vegetable oil to observe the changes in texture. After a few hours in the freezer, the oil became thicker, almost like the consistency of soft butter. When I let it sit on the counter for a while, it returned to its original liquid state and was good to use.

Alternative Uses for Expired Vegetable Oil

How Long Does Vegetable Oil Last Once Opened? Tips for Storage and Shelf Life 12
Alternative Uses for Expired Vegetable Oil

If you have expired vegetable oil that you can’t use for cooking, consider repurposing it for other various uses around your home instead of disposing of it immediately. Here are some ideas:

  1. Lubricating hinges and locks: A few drops of expired vegetable oil can help loosen squeaky hinges and door locks.
  2. Removing adhesive residue: Expired vegetable oil can be used to remove sticky residues left by labels or stickers.
  3. Paintbrush conditioner: After washing paintbrushes with soap and water, rinse them in expired vegetable oil to keep the bristles soft and conditioned.
  4. Firestarter: Soak a piece of cloth or cotton in expired vegetable oil and use it as a firestarter for camping or grilling.
  5. Gardening tool cleaner: Rub expired vegetable oil on your gardening tools to remove dirt and help prevent rust.

Proper Disposal of Expired Vegetable Oil

It’s essential to dispose of expired vegetable oil responsibly. Pouring it down the drain can cause plumbing issues and negatively impact the environment. Instead, follow these steps to properly dispose of expired vegetable oil:

  1. Cool the oil: Ensure the vegetable oil is at room temperature or colder.
  2. Pour into a disposable container: Use a sturdy, sealable container such as an empty milk carton or disposable food container.
  3. Seal and label the container: Securely close the container and label it as “used vegetable oil” or “bad vegetable oil” so that others know its contents.
  4. Dispose of appropriately: Place the sealed container in your regular trash or, if your local recycling center accepts it, bring it there for proper disposal.

Properly disposing of expired vegetable oil helps keep our environment clean and our plumbing systems functioning.

Final Thoughts

The shelf life and quality of vegetable oil are greatly influenced by its proper storage and the type of oil being used. Ensure that your vegetable oil remains fresh and usable by keeping it away from light, air, and heat. Always remember to check for signs of spoilage before using it in your cooking.

What is the best way to store vegetable oil?

Store vegetable oil in a tightly sealed container in a cool, dark place, such as a pantry or cupboard away from direct sunlight and heat sources.

How can I tell if my vegetable oil has gone bad?

Check for an unpleasant off-smell, cloudy or thickened appearance, changes in taste, or mold/debris floating in the oil.

Can vegetable oil be frozen?

Yes, vegetable oil can be frozen, especially if it’s more prone to spoilage like grapeseed, walnut, or flaxseed oils. Keep in mind that freezing might alter the texture temporarily, but it’s still safe to use once it returns to a liquid state.

Does the type of vegetable oil affect how long it lasts once opened?

Yes, the type of vegetable oil can impact its shelf life. More stable oils like canola, sunflower, or coconut oil tend to last longer. In contrast, oils that are more prone to spoilage, such as grapeseed, walnut, or flaxseed oils, have shorter shelf lives.

Can rancid vegetable oil be harmful?

Consuming rancid vegetable oil can lead to digestive discomfort and may have long-term health implications if ingested regularly. Always check for signs of spoilage before using vegetable oil.

The Ultimate Guide to Cirkul Flavors: How Long Do They Last?

As a Cirkul user, you understand the importance of staying hydrated while enjoying your preferred Cirkul flavors. However, have you ever wondered about the shelf life of these flavors and how to prolong their freshness?

In this ultimate guide, we will explore the lifespan of Cirkul flavors and share tips on how to maximize their taste and quality. Cirkul has gained significant popularity due to its customizable and convenient hydration solutions. This article will provide you with everything you need to know to fully enjoy your Cirkul experience.

What Are Cirkul Flavors?

The Ultimate Guide to Cirkul Flavors: How Long Do They Last? 13
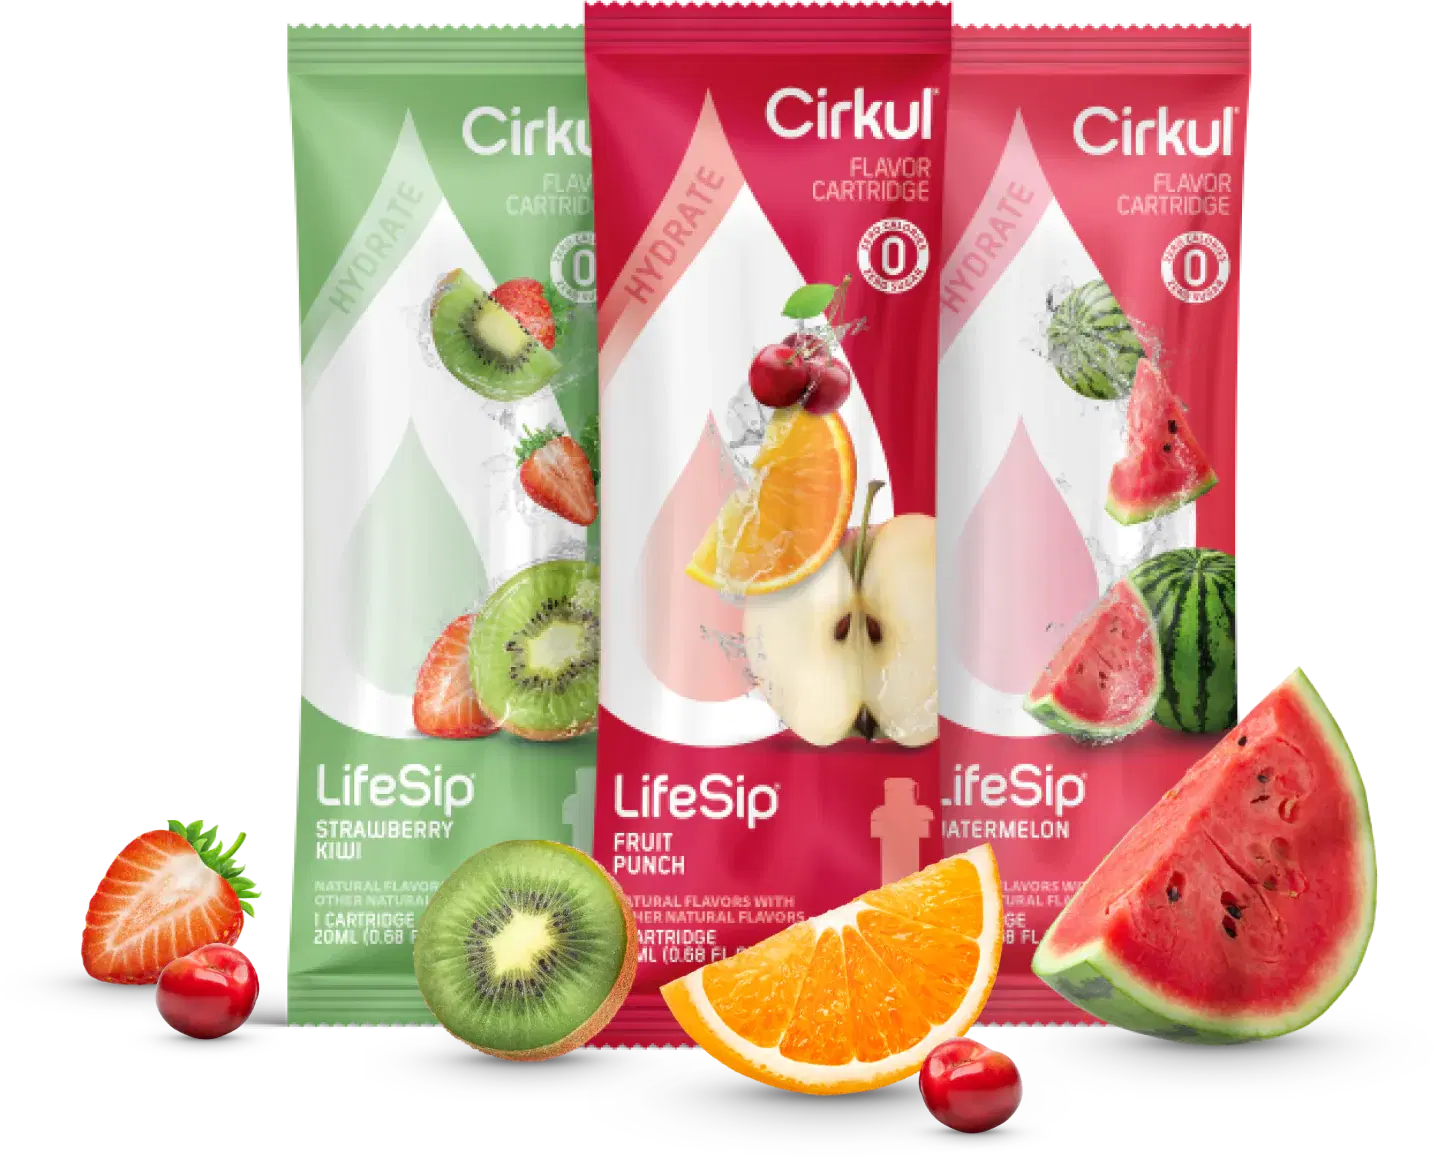
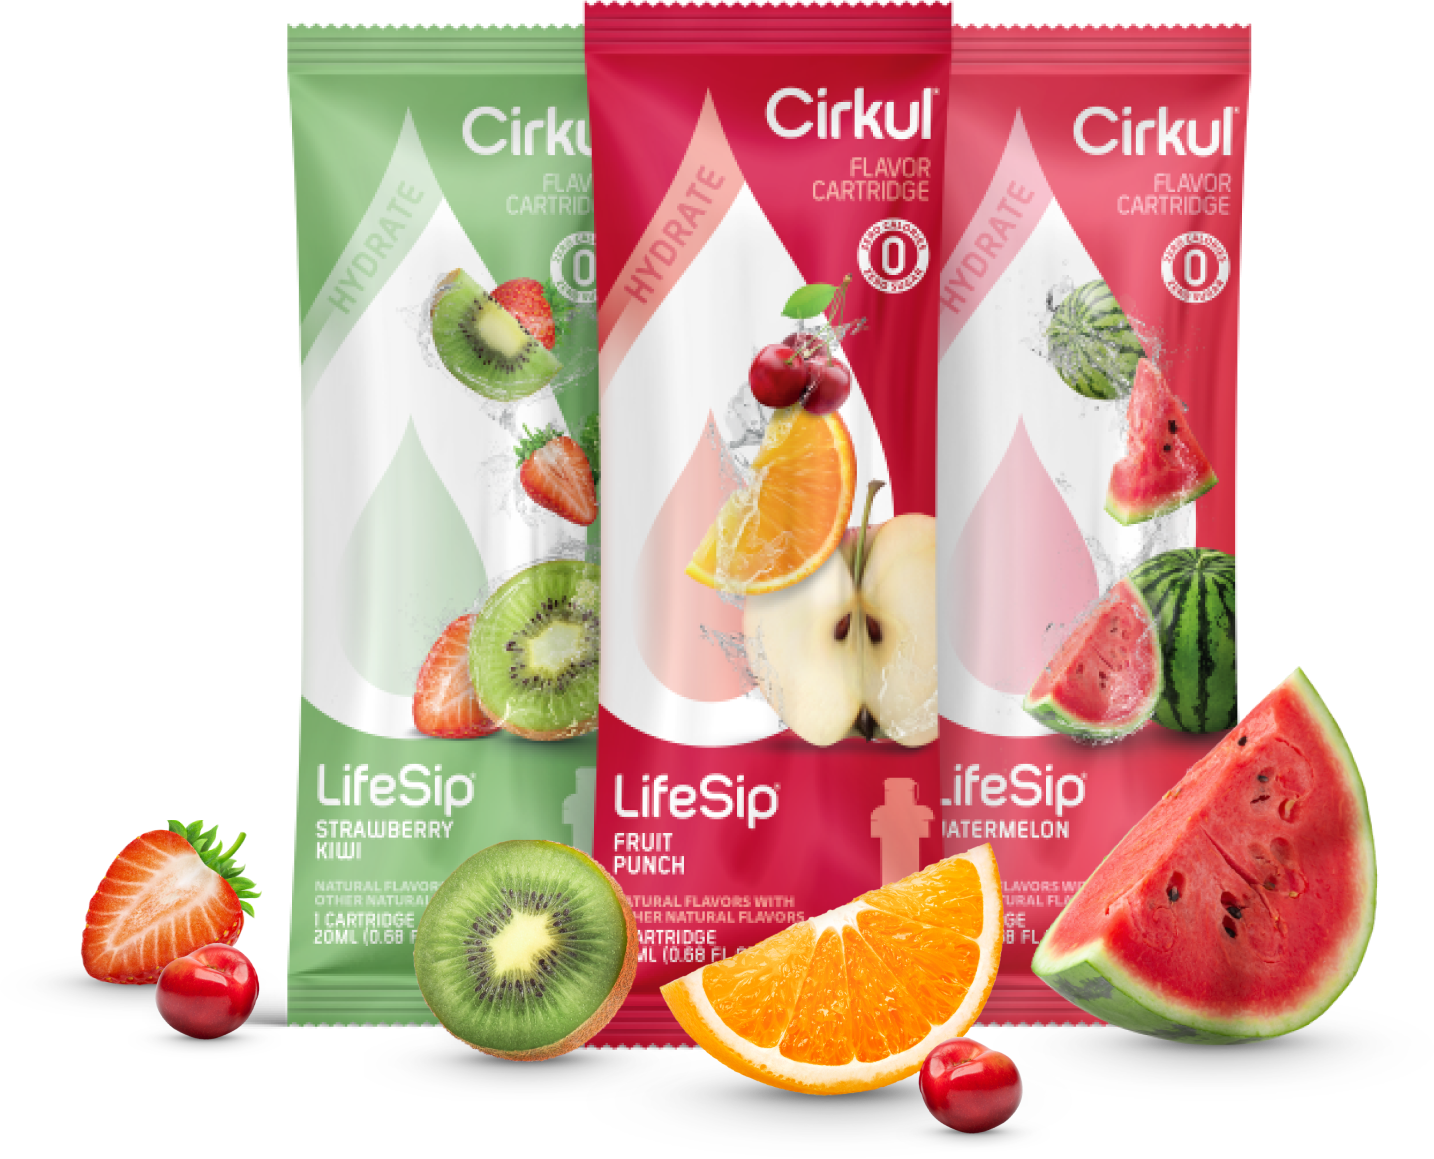
flavor line hero family lifesip

Cirkul flavors are liquid concentrates used to personalize the taste of your water. They come in a small, easy-to-use cartridge that transforms ordinary water into a delicious, flavored beverage within seconds. Cirkul offers a wide variety of flavors, including fruit blends, tea blends, electrolyte blends, and even caffeinated varieties.

With their innovative Sip and Dial technology, you can also control the intensity of flavor in your drink, making it a popular choice among those looking to stay hydrated and satisfied throughout the day.

How Long Do Cirkul Flavors Last?

Typically, an unopened Cirkul flavor cartridge has a shelf life of 12-18 months from the date of production. Once you open the cartridge, it is best to consume it within three months to ensure optimal flavor and quality. To locate the expiration date, check the bottom of the flavor cartridge or refer to the packaging.

Several factors can affect the shelf life of your Cirkul flavors:

  1. Storage Conditions: To prolong the lifespan of your Cirkul flavors, store them in a cool, dry place away from direct sunlight or heat sources.
  2. Frequency of Use: Depending on your drinking habits, a single Cirkul flavor cartridge can last anywhere from a few days to several weeks.
  3. Ingredients: Certain ingredients in specific flavors may have shorter shelf lives than others. For example, natural ingredients may degrade faster than artificial ones.

Storage Hacks for Prolonging Cirkul Flavor Lifespan

We all love to savor our favorite Cirkul flavors, and by following these simple hacks, you can ensure that they remain fresh and last longer:

  1. Batch Labeling: To help you keep track of when you opened each cartridge, use a permanent marker or a small label to write the opening date on the cartridge.
  2. Rotation: Organize your Cirkul flavors by their expiration dates, placing the ones that are closest to expiring at the front for easy access and consumption.
  3. Proper Seal: Make sure to close the cap properly after each use, as it will help prevent any leakage, evaporation, or contamination.
  4. Avoid Refrigeration: Although it might seem counterintuitive, there’s no need to store your Cirkul flavors in the refrigerator; a cool, dry place away from direct sunlight is sufficient.
  5. Keep it Clean: Ensure your Cirkul bottle and flavor cartridges are clean by washing them regularly with warm, soapy water to maintain their quality and hygiene.

How to Dispose of Cirkul Flavor Cartridges

how long do cirkul sips last
Cirkul Sips

Wondering what to do with your used Cirkul flavor cartridges? Follow these steps to dispose of them responsibly:

  1. Empty the Cartridge: Make sure to consume all the liquid inside the cartridge before disposing of it.
  2. Separate Components: Separate the plastic cap from the cartridge itself, as they may have different recycling requirements.
  3. Check Local Recycling Guidelines: Review your local recycling guidelines for disposing of plastics and follow their instructions on recycling the cartridge and cap.
  4. Repurpose: Think of creative ways to repurpose your used Cirkul flavor cartridges, such as using them as small containers for seeds, beads, or other small items.

Conclusion

With the knowledge and tips provided in this ultimate guide, you are now well-equipped to make the most of your Cirkul flavors while ensuring they remain fresh and delicious throughout their lifespan. Remember to properly store and care for your Cirkul cartridges, and enjoy a diverse range of flavors to keep your hydration experience fun and unique. So go ahead, experiment with your Cirkul flavors and stay refreshed!

FAQs

What are the ingredients in Cirkul flavors?

Cirkul flavors are made from a combination of water, natural and artificial flavorings, and sweeteners such as sucralose, stevia, or cane sugar. Some specialized cartridges may also contain functional ingredients like electrolytes, caffeine, and vitamins.

Are Cirkul flavors safe for consumption?

Yes, Cirkul flavors are generally safe to consume. They are carefully formulated and undergo rigorous testing to ensure safety and quality compliance. However, if you have any specific dietary restrictions or allergies, it is crucial to check the ingredient list and consult with your healthcare professional before consuming.

How do you store Cirkul flavors to extend their shelf life?

To ensure the longevity and freshness of your Cirkul flavors, follow these storage tips:
1 Keep the cartridges in a cool, dry area away from direct sunlight or heat sources to avoid degradation and preserve flavor quality.
2 After opening a cartridge, ensure that the cap is securely closed to prevent leakage or exposure to air, which may cause the flavor to spoil quicker.

How often should you change the Cirkul flavor cartridge?

The duration a Cirkul flavor cartridge lasts can vary depending on your preferred level of flavor and your frequency of use. On average, one cartridge provides 132 servings or 6 bottles of a 22-ounce Cirkul bottle filled to the max flavor intensity. Replace the cartridge when you notice a decline in flavor or if the cartridge is past its expiration date.

Can you mix and match Cirkul flavors?

Although mixing and matching Cirkul flavors in a single cartridge is not recommended, you can still play around with different combinations by taking a sip of different flavors while moving the dial to your desired intensity.

Can Cirkul flavors go bad?

As with any other food or beverage product, Cirkul flavors can deteriorate over time due to improper storage or past expiration dates. To identify spoiled flavors, check for signs such as an unpleasant taste, off odor, or discoloration. Discard the cartridge if you notice any of these signs.

[1] https://cirkul.com/pages/faqs [2] https://www.drinkfinity.com/uk/en/how-we-define-fresh-taste [3] https://www.medicalnewstoday.com/articles/324341 

How Long Do Cirkul Sips Last? Tips for Fresh Drinks

Cirkul Sips are personalized flavored cartridges designed to revolutionize the way you drink water, making hydration fun and enjoyable. Knowing how long they last not only helps you maintain freshness but also ensures your flavorful water remains enjoyable.

This article walks you through the different types of Cirkul Sips, their shelf life, proper storage methods, and tips to keep them fresh for an extended period.

What are Cirkul Sips?

how long do cirkul sips last
Cirkul Sips

Cirkul Sips are small, portable cartridges filled with liquid concentrates that you can attach to a specially designed Cirkul bottle. Just like adding a small teabag to your water bottle, the Cirkul system features a variety of flavors, transforming plain water into a refreshing and delicious drink with every sip – and without any hassle.

Types of Cirkul Sips Available

There is a wide range of Cirkul Sips available, from fruity to energizing flavors. Some popular options include Fruit Punch, Lemonade, Raspberry Tea, and Coconut Pineapple. There’s practically a flavor for everyone’s preferences!

Benefits of Using Cirkul Sips

Cirkul Sips offer several advantages, such as making it easier to stay hydrated while cutting down on single-use plastic bottles. It provides a fun and eco-friendly alternative to traditional flavored waters or soft drinks. Additionally, Cirkul Sips are sugar-free, helping curb excessive sugar intake and maintain a healthier lifestyle.

How Long Do Cirkul Sips Last?

How Long Do Cirkul Sips Last? Tips for Fresh Drinks 14
2021 footer facebook 1

Factors Affecting the Shelf Life of Cirkul Sips

Several factors can affect the shelf life of your Cirkul Sips, including storage conditions, exposure to air, and general hygiene. So, how long do they last? Well, their longevity depends on how well you preserve them.

Average Shelf Life of Cirkul Sips

On average, unopened Cirkul Sips can last up to two years if stored in a cool, dry place. Once opened, it’s best to use them within 30 to 45 days to ensure the flavors remain potent and preserve their optimal taste. Beyond this period, your Cirkul Sip may start to lose its zest and effectiveness.

Tips to Extend the Shelf Life of Cirkul Sips

To make the most out of your Cirkul Sips, here are a few helpful tips:

  1. Store in a cool, dry place: High temperatures and humidity can cause Cirkul Sips to degrade faster. Keep them away from direct sunlight and heat sources for better longevity.
  2. Seal the Sips after use: Properly reseal your Cirkul Sips after usage to keep air exposure to a minimum. This helps prevent the concentrates from evaporating, thus retaining their freshness.
  3. Practice good hygiene: To avoid contamination, always wash your hands before handling your Cirkul Sips, and clean your Cirkul bottle regularly.

How to Store Cirkul Sips Properly?

How Long Do Cirkul Sips Last? Tips for Fresh Drinks 15
2021 home slider 10

Proper Storage Methods for Cirkul Sips

For long-lasting and fresh Cirkul Sips, here’s what you can do:

  • Keep Cirkul Sips in their original packaging, as it is designed to protect them from air exposure and help retain freshness.
  • Store in a cupboard, drawer, or pantry – this keeps them away from potential heat sources and direct sunlight.
  • Avoid keeping them in your car, especially during the summer months, as temperatures can rise and compromise their integrity.

Common Mistakes to Avoid When Storing Cirkul Sips

To maximize the shelf life of your Cirkul Sips, avoid the following mistakes:

  • Storing them near a stove, oven, or other heat sources – this can cause the concentrates to evaporate or degrade faster.
  • Leaving them in open space where they are exposed to air and sunlight, leading to faster deterioration.
  • Allowing them to come in contact with moisture, which can affect the overall taste and quality.

How to Know if a Cirkul Sip Has Gone Bad?

If you notice any of these signs, it’s time to discard your Cirkul Sip:

  • A strong, off-putting odor or taste.
  • Changes in texture or viscosity.
  • Mold growth on the Sip.

FAQs

What are the ingredients of Cirkul Sips?

Cirkul Sips contain natural and artificial flavors, purified water, and other ingredients that vary depending on the flavor. For a detailed ingredient list, visit the official Cirkul website.

Can you freeze Cirkul Sips?

While freezing Cirkul Sips may extend their shelf life, it is not recommended as it may lead to changes in taste, texture, or overall quality. Stick to following proper storage methods to keep them fresh.

Are Cirkul Sips safe for kids?

Yes, Cirkul Sips are safe for children. However, it’s a good idea to monitor their usage, as some flavors may contain caffeine, which could affect their energy levels or sleep.

How many Cirkul Sips can you have in a day?

There is no specific limit to the number of Cirkul Sips you can consume daily, but moderation is key. Most Cirkul Sips are sugar-free and low in calories, making them a healthier alternative to sugary beverages.

Do Cirkul Sips contain caffeine?

Some Cirkul Sips contain caffeine, while others are caffeine-free. You can find this information on the product’s packaging or refer to the Cirkul FAQ page.

What are the flavors available for Cirkul Sips?

There is a wide range of flavors available, including Fruit Punch, Lemonade, Raspberry Tea, and Coconut Pineapple. With so many options, everyone is sure to find their favorite flavor!

How Long Are Hot Dogs Good for After Opening? Expert Advice

Hot dogs are a staple at any barbecue, sports event, or family gathering. But, have you ever paused for a moment before taking a bite and wondered: how long have I had these hot dogs in the fridge?

In this article, we’ll delve into the shelf life of hot dogs after opening and why it’s important to be aware of their freshness. Food safety is crucial, as consuming expired food can lead not only to a bad taste in your mouth but also to significant health risks.

How Long Do Hot Dogs Last After Opening?

how long are hot dogs good for after opening
Hot Dogs

When unopened, hot dogs generally have a shelf life of about two weeks when kept in the refrigerator. However, once the package is opened, the clock starts ticking on how long those delicious dogs will be safe for consumption.

Factors that can impact the shelf life of opened hot dogs include storage temperature and packaging material. The temperatures in which the hot dogs are stored play a significant role, as the hot dogs’ quality quickly deteriorates when subjected to improper temperatures. Similarly, improper packaging can allow bacteria to grow and lead to spoilage.

As a general guideline, opened hot dogs should be consumed within 3-7 days, according to the U.S. Department of Agriculture’s Food Safety and Inspection Service. But to be on the safe side, always follow the date provided on the packaging, or use your senses to tell if it’s time to say goodbye to those hot dogs. Remember that when in doubt, it’s always better to be safe than sorry!

Signs That Hot Dogs Have Gone Bad

How Long Are Hot Dogs Good for After Opening? Expert Advice 16
eating hot dog

Nobody wants to bite into a spoiled hot dog, and there are some telltale signs that you should be aware of. Some common indicators that hot dogs have spoiled include changes in color, texture, and smell.

For color, we’re on the lookout for any grey or dull hues – fresh hot dogs are usually bright pink. Next is texture – sliminess or stickiness is a big red flag. Finally, smell plays a crucial role in detecting spoiled dogs, as fresh ones have a distinct, slightly salty aroma. If you notice any off-putting, sour scents, it’s probably time to discard those hot dogs.

Eating spoiled hot dogs poses health risks, such as food poisoning due to harmful bacteria like Staphylococcus aureus or Salmonella. So, always proceed with caution when uncertain about whether your hot dogs are still good to eat.

Proper Storage Techniques to Extend Shelf Life

How Long Are Hot Dogs Good for After Opening? Expert Advice 17
storage hot dog

Proper storage of hot dogs can make all the difference in preserving their freshness and preventing any unintentional bacteria growth. Storing hot dogs in the refrigerator at a temperature between 32-40°F is imperative. In addition, be sure to keep them away from the refrigerator door or any uncooked foods to prevent cross-contamination.

It’s always best to use air-tight packaging, like plastic wrap, to keep bacteria from settling on your hot dogs. For the storage masters out there, consider vacuum sealing your hot dogs to minimize air and bacteria exposure.

Contrary to what some may believe, hot dogs can be frozen. Freezing hot dogs extends their shelf life significantly, allowing them to last for 1-2 months. When it’s time to thaw and enjoy, place them in the refrigerator to defrost safely.

FAQs

Is there a general rule for the freshness of hot dogs stored in the fridge?

Indeed, unopened hot dogs typically have a two-week shelf life in the refrigerator. However, things change once you open the package, and it’s best to savor them within 3-7 days. For utmost safety, follow the storage guidelines on the packaging.

Wondering if freezing hot dogs is possible? Want to prolong their freshness?

Absolutely! Placing hot dogs in the freezer is a fantastic way to extend their shelf life. Tightly wrapped, they’ll remain fresh for up to 1-2 months. When you’re ready to indulge, thaw them properly in the refrigerator.

How can I spot expired hot dogs?

Keep an eye out for color, texture, and aroma alterations to identify spoiled hot dogs. If you see any grey tones, detect sliminess, or sniff an unpleasant odor, it’s time to discard them.

Health risks from expired hot dogs – what should I know?

Ingesting bad hot dogs may cause food poisoning, which can stem from dangerous bacteria like Staphylococcus aureus or Salmonella. This can lead to nausea, vomiting, diarrhea, and fever – not a delightful experience!

On the hunt for the optimal method to store hot dogs? Want longer shelf life?

To ensure maximum freshness, stash hot dogs in the refrigerator within 32-40°F, and use air-tight packaging to prevent bacterial invasion. As a bonus tip, consider vacuum sealing your franks for optimal results.

Curious about how to pick fresh, mouthwatering hot dogs at the grocery store?

It pays to be vigilant when choosing hot dogs. Inspect the expiration date on the packaging and scrutinize the product for spoilage indicators. Vibrant pink hues, a mild salty fragrance, and no signs of sliminess are the marks of fresh, delectable hot dogs.

How Long Are Cooked Potatoes Good For in the Fridge? Find Out Now!

Imagine you’ve just made a delicious batch of mashed potatoes, but even after second servings, there’s still some left. What now? Knowing how long cooked potatoes can last in the fridge is essential for keeping your meals fresh, tasty, and safe to eat.

In this article, we will embark on an exciting journey, divulging various factors that affect cooked potato storage and offering you some handy tips to help them last as long as possible!

How Long Do Those Lovely Spuds Stay Fresh?

How to reheat cooked potatoes
Cooked Potatoes

First things first: Under usual circumstances, cooked potatoes can last around 3 to 5 days in the fridge. However, this isn’t a simple case of “one size fits all!” Different factors like temperature, packaging, and storage methods can cause this timeframe to fluctuate.

For example, while setting your fridge to a cool 35°F and 40°F (1.7°C and 4.4°C) may seem like a small detail, it’s actually the perfect temperature to keep those potatoes chilled the right way.

Now, you may be thinking, what kind of container should I use? That’s a great question! Airtight containers or plastic wrap are your best bet to preserve your potatoes’ flavor and freshness. If you’re in the mood for a little experimentation, try using both to see which one yields the best result for your taste buds!

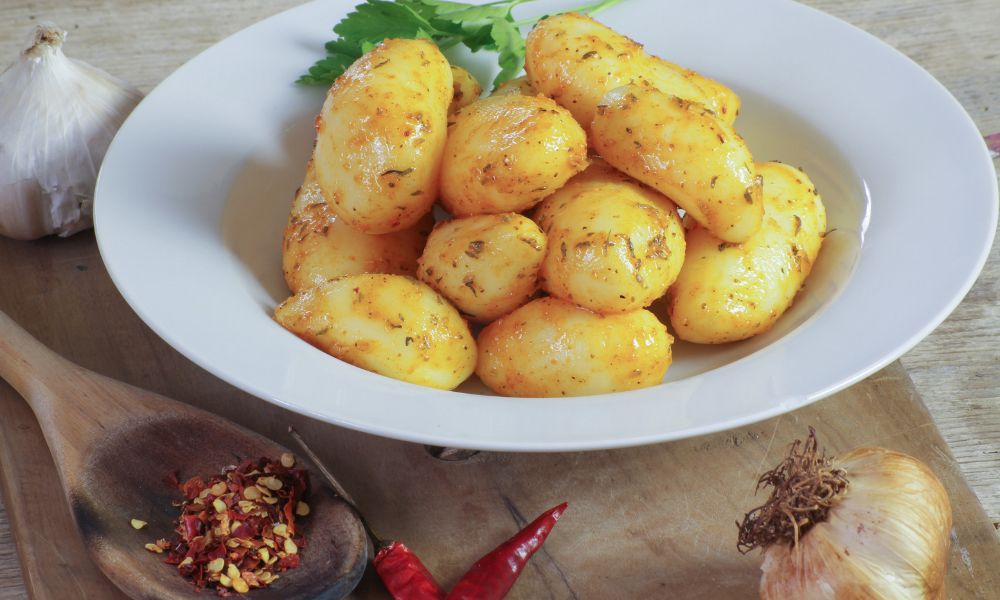
If you’ve ever had the misfortune of biting into a rotten potato—I’ve been there, believe me—you’ll want to learn how to spot spoilage. Unpleasant odors, mold, or sliminess are clear signs that it’s time to say goodbye to those precious spuds. It’s crucial to pay attention to these signs, as eating expired cooked potatoes can lead to some pretty unfun consequences, like food poisoning or stomach aches.

Factors and Storage Methods: What You Need to Keep Your Spuds in Top-Notch Shape

But wait—let’s backtrack a bit. We mentioned some factors earlier that can impact the shelf life of cooked potatoes. What are they, exactly? Fear not, for we have the answers!

Temperature

When it comes to keeping your potatoes fresh and scrumptious, your fridge’s temperature is crucial. Keeping your fridge within that 35°F – 40°F (1.7°C – 4.4°C) sweet spot is like wrapping your potatoes in a snug, cozy blanket that wards off nasty bacteria.

Moisture

Leaks in the fridge got you down? It’s time to up your game and protect those cooked potatoes from moisture. Exposure to dampness could bring about bacteria and mold growth, and nobody wants that. So, make sure the storage container or plastic wrap you use is bone dry, and choose a nice, dry spot in your fridge for your spuds to chill.

Exposure to Air

Air may be essential for us humans, but it’s downright pesky when it comes to keeping your potatoes fresh. To prevent your cooked potatoes from drying out and shriveling into wrinkly, unappetizing shadows of their former selves, seal those spuds in airtight containers, sturdy plastic wrap, or aluminum foil. Your future self will thank you!

Powered by Potatoes: Tips for the Ultimate Spud Storage Experience

How Long Are Cooked Potatoes Good For in the Fridge? Find Out Now! 18
Reheating Cooked Potatoes

Ready to become a bonafide potato storage expert? Here are some extra pointers to help your cooked potatoes stay in their prime for as long as possible:

  • First off, label and date your containers whenever you store your cooked potatoes. That way, you can easily track how long your spuds have been chillin’ (literally) in the fridge.
  • Now, you might feel tempted to let those leftover potatoes bask in the glory of room temperature air, but resist the urge! Leaving cooked potatoes out for more than two hours can cause bacteria to run wild, so it’s best to play it safe and keep them chilled.
  • Sometimes, portion control does wonders. For instance, splitting your cooked potatoes into smaller containers can help you avoid exposing the entire batch to temperature fluctuations when reheating, thereby delaying spoilage.

Embarking on this potato-filled adventure has truly been a blast. Keep these tips and tricks in mind, and you’ll be sure to keep your cooked potatoes fresh, tasty, and ready for your next meal!

FAQs: Your Burning Potato Questions, Answered!

It’s only natural to have some lingering questions about your cooked potatoes. So, let’s dive into some of the most frequently asked queries and clear up any confusion!

How can you tell if cooked potatoes have gone bad?

Your senses are your best friends in determining the fate of your cooked potatoes. A foul smell, visible mold, or slimy texture are all signs that your once-delectable spuds are now spoiled. When in doubt, remember: It’s better to be safe than sorry (and sick)!

Can you freeze cooked potatoes?

Why not give freezing a try? Cooked potatoes, like mashed or diced, can be safely stored in the freezer for up to 12 months if properly packaged. Just make sure you let them cool to room temperature first, then seal them in airtight containers or freezer bags before stashing them away. To reheat, gently defrost and warm them up in the microwave, oven, or stovetop.

How long can you keep cooked potatoes in the freezer?

As mentioned above, you can store cooked potatoes in the freezer for up to 12 months if properly sealed in airtight containers or freezer bags. Make sure to label and date your potatoes so you can easily track their freezing time!

Can you store cooked potatoes in the pantry?

Unfortunately, storing cooked potatoes in the pantry is not recommended. Cooked potatoes can quickly become a breeding ground for bacteria when stored at room temperature, so it’s essential to store them in the fridge or freezer.

How can you tell if cooked potatoes are still safe to eat?

Trust your senses when it comes to determining if your cooked potatoes are still safe to consume. If they smell and taste fresh, haven’t been left at room temperature for too long, and show no signs of mold or sliminess, chances are they’re good to go! Remember that the general rule is 3 to 5 days in the fridge.

The Potato Storage Master: Final Tricks and Resources

You’re now armed with all the knowledge to be a potato storage extraordinaire! But before we wrap up, let’s take a look at some related searches on this spud-tastic topic. If you’re looking for more insights, don’t forget to check out this comprehensive resource, which explores all your questions about potatoes: How Long Mashed Potatoes Last in the Fridge.

We hope this lively and informative guide has provided you with all the tools you need to keep your cooked potatoes fresh, delicious, and ready for their next culinary adventure! So, go forth and confidently store those spuds, and enjoy every last bite.