Sushi V Sashimi V Nigiri: What’s the Difference?

It’s easy to get confused between sushi, sashimi, and nigiri. That’s why we’re here to clear things up for you! Know what you’re eating and enjoy it more with this article.
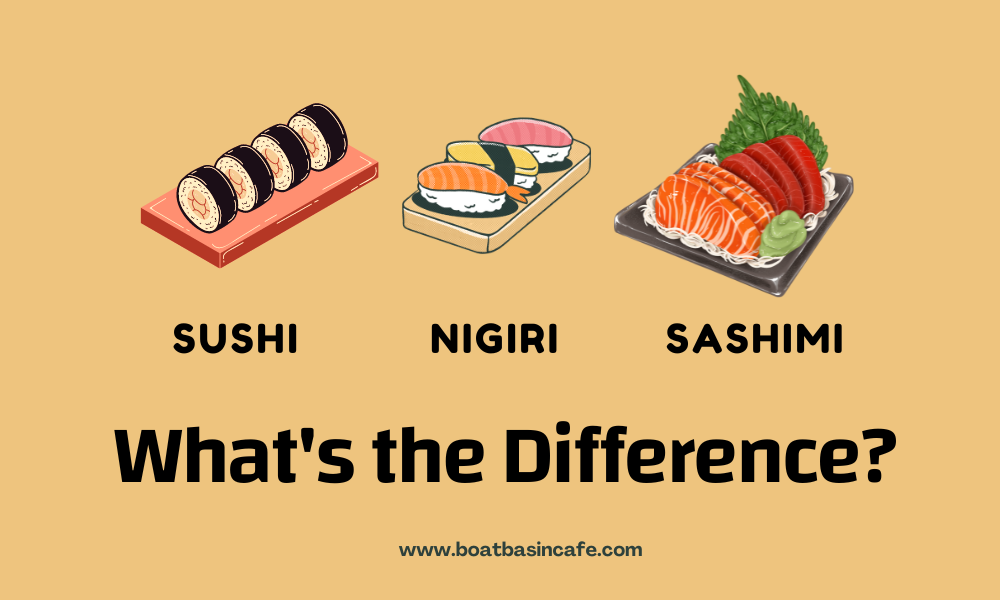
Sushi V Sashimi V Nigiri: What's the Difference?
Sushi V Sashimi V Nigiri

If you love Japanese cuisine as much as I do, you’ve eaten sushi, sashimi, and nigiri — sometimes all at the same time! The thing is, it’s easy to get confused with the three.

If you’re planning to make some sushi, sashimi, or nigiri and want to get your terms and recipes right, you’re at the perfect place. We point out each unique characteristic of sushi, sashimi, and nigiri for you in this article!

What is Sushi?
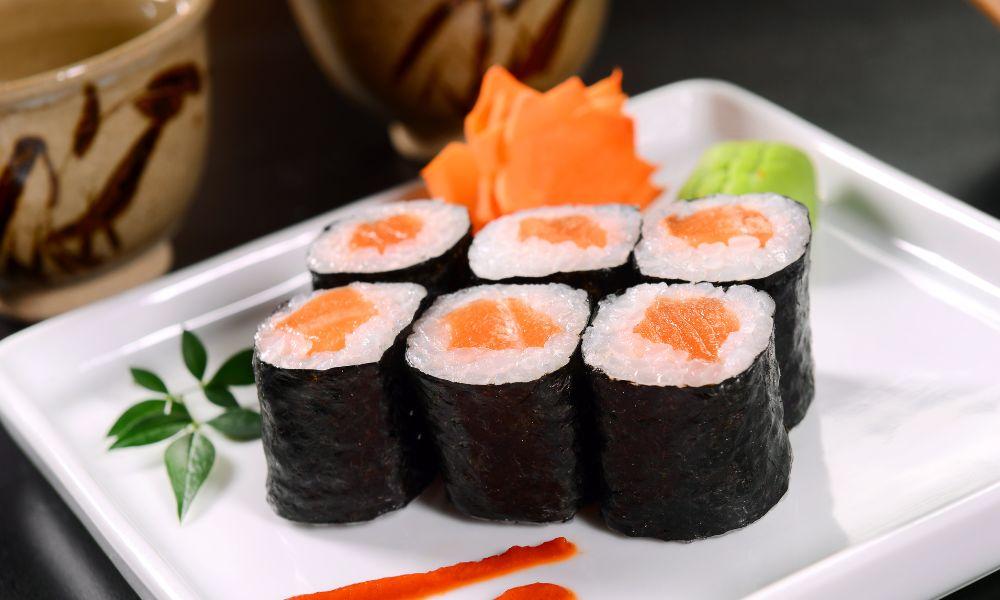
Sushi V Sashimi V Nigiri: What's the Difference? 1
Sushi 1

Sushi is one of the most popular Japanese cuisine out there. If you’ve been eating sushi for a while, you know its ingredients. Sushi is done with prepared vinegared rice, sugar, salt, vegetables, and fish.

Apart from these main ingredients, sushi also involves popular fish toppings, among pickled ginger, radish, and wasabi. Soy sauce is also popular in eating this delicious treat!

How Is Sushi Prepared?
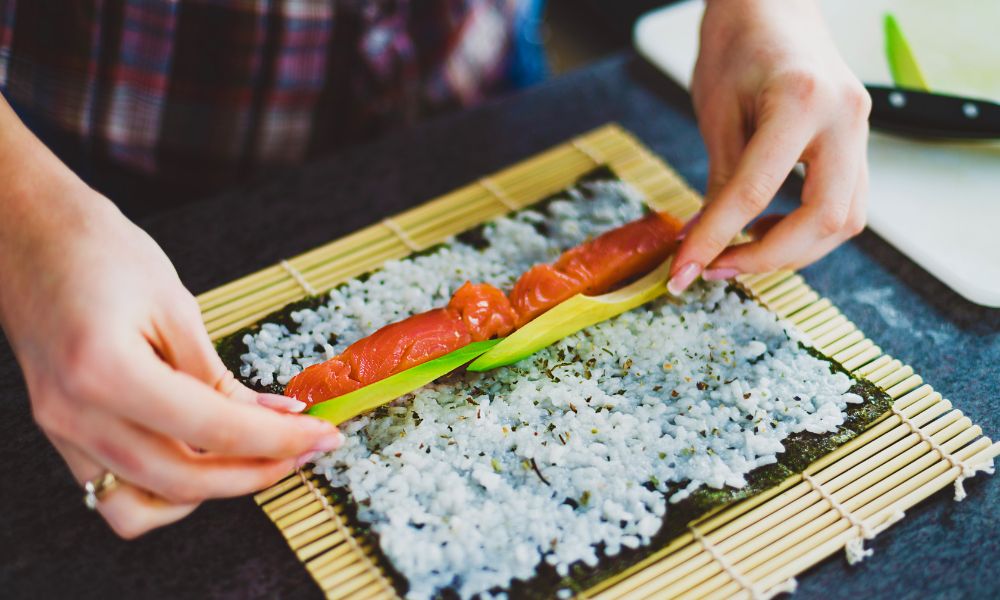
Sushi V Sashimi V Nigiri: What's the Difference? 2
make sushi

Normally, most sushi first timers will experience fast-food sushi, but the good sushi out there is prepared by a sushi chef.

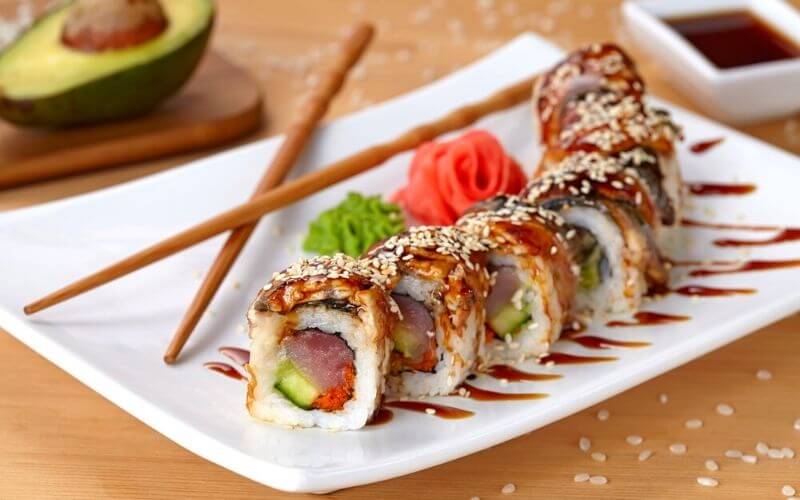
Sushi involves a spread of nori or seaweed onto a bamboo mat made for rolling the sushi. Sushi rice is spread onto the nori, and a groove is placed onto the center. Thin slices of vegetables, fresh fish, imitation crab, and even fruit — for that tangy flavor! — are placed onto the groove.

The bamboo mat is used to roll the sushi into place before being sliced into pieces. Sushi is served raw, with fresh slices of pickled ginger, soy sauce, and wasabi to garnish.

What is Sashimi?

Sashimi refers to the popular Japanese dish typically involving thinly sliced raw fish. However, other meats can also be used. Sashimi is shaped differently according to the ingredient used. Flat, diagonal, and cube slices can be used.

While fresh, raw fish is usually used in sashimi, there are sashimi dishes out there that use beef, pork, and chicken. And while the tradition is to serve sashimi raw in a Japanese restaurant, some meats will be braised, seared or boiled for flavor or texture.

When sashimi-grade fish is served in a Japanese restaurant, it’s typically eaten with shredded daikon radish, shiso leaves, soy sauce, ginger, and wasabi.

What is Nigiri?
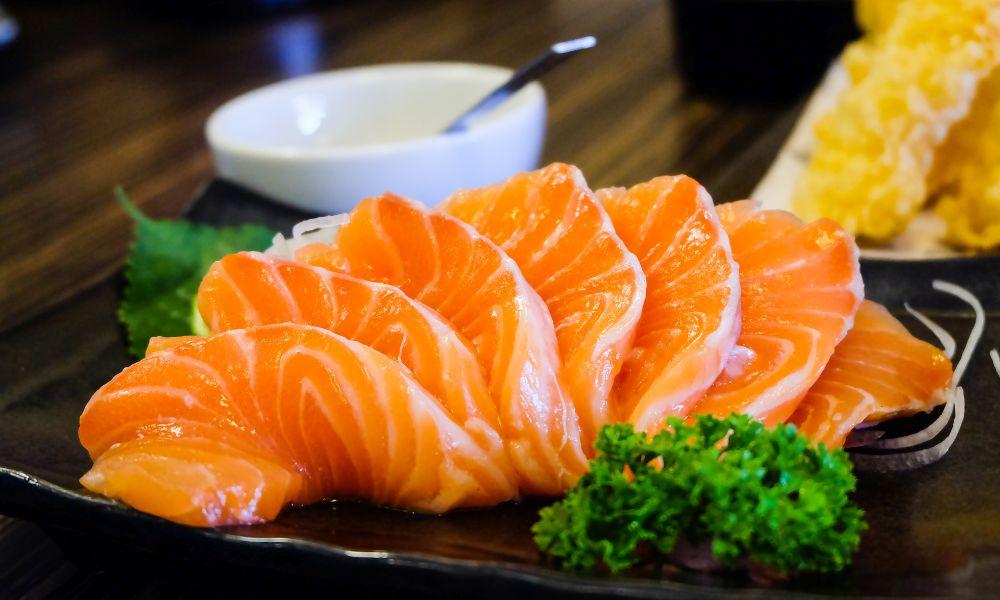
Sushi V Sashimi V Nigiri: What's the Difference? 3
Sashimi

Nigiri translates to “two fingers” which is the size of the oval mounds and hand-pressed fish, served raw, seared, or cooked.

Nigiri and sashimi are different, but sushi and nigiri are not far from one another! Nigiri is actually a type of sushi, made with oval-shaped rice and a thin slice of the best fish on top. Nigiri sushi is typically molded by hand, with thin slices of fish hand-pressed on top.

Wasabi, scallions, and pickled ginger are common garnishes in nigiri.

Sushi V Sashimi V Nigiri: What’s the Difference?

SushiSashimiNigiri
Has riceYesNoYes
Includes raw ingredientsYesYesYes
Is hand-pressedNoNoYes

Sashimi VS Sushi

Sushi refers to any dish that invovles vinegar rice, vegetables, fish, pickled ginger, and soy sauce. Sashimi, meanwhile, only refers to raw fish or meat, and doesn’t involve the vinegared rice at all.

Nigiri VS Sushi

Sushi isn’t that far from nigiri! In fact, nigiri is a type of sushi. With nigiri vs sushi, the only difference is the shape and how it’s made. In a sushi restaurant, sushi could refer to any dish made with vinegared rice, vegetables, fish, pickled ginger, and soy sauce.

Sushi menus could include anything from sushi rolls to chirashi. Nigiri can be found in those menus as nigirizushi. Nigiri translates to “two fingers,” the size of each portion, and as hand-pressed sushi — and that makes all the difference. Nigiri is hand-pressed oval mounds of rice, sized around two fingers, with sliced fish pressed on top.

Sashimi Nigiri Comparison

Nigiri VS sashimi — what is actually the difference? If raw, cooked or seared nigiri simply refers to hand-pressed vinegared rice and fresh fish, sashimi is a whole different ball game. Sashimi usually only involves raw meat and does not contain vinegared rice.

While usually sashimi-grade fish is used, you can find raw meat involved in sashimi in any sushi menu.

What Fish Is Used in Sushi, Nigiri and Sashimi?

The commonly-used fish in sushi, nigiri and sashimi are the following:

  • Tuna
  • Japanese amberjack
  • Salmon
  • Mackerel
  • Snapper
  • Yellowtail

Usually, when ordering sushi, sashimi, and nigiri, the most valuable cut is the toro, or the fatty slices. Sometimes, squid, scallops, pierced meat, and sea urchin are also used among fish in sashimi, nigiri, and sushi.

Types of Sushi, Sashimi, and Nigiri
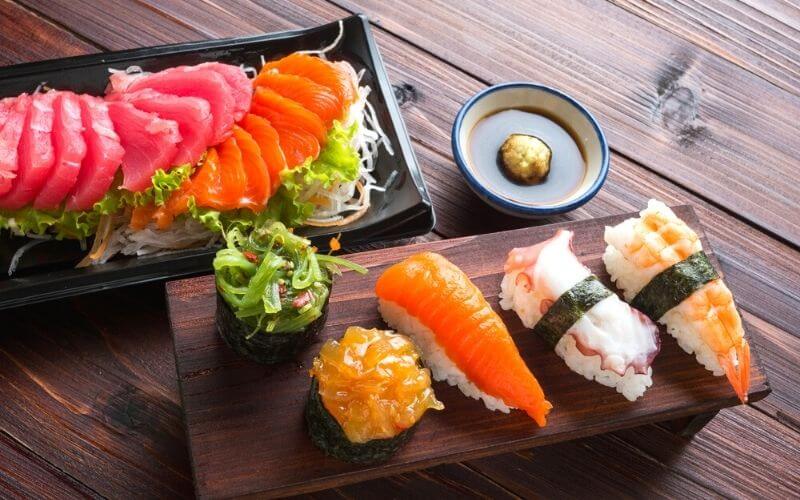
difference between sushi and sashimi

Types of Sushi Dishes

1. Chirashizushi

This Japanese dish is also known as scattered sushi! Unlike the popular sushi roll, chirashizushi comes in a bowl. The rice portion is placed first before having toppings of high quality fish and vegetable garnishes.

2. Inarizushi

Love sushi and tofu? The inarizushi is the must-try for you. A pouch of fried tofu is filled to the brim with sushi rice, sometimes combined with omelette.

3. Makizushi or maki sushi

Maki sushi or makizushi is another popular variant of sushi. With the help of a bamboo mat, rice, meat, fish, and vegetables are rolled together in nori. Occasionally, instead of nori, omelette, shiso leaves, soy paper, or cucumber is used to wrap it as well.

There are many variation to the makizushi. Some are fried, thinly sliced, or large and cone-shaped. In the sushi world, constant innovation for your favorite dish reigns!

4. Narezushi

Narezushi, or matured sushi, is a type of sushi dish which involves fermented sushi. The cooking process is long — often involving up to six months of preparation before the sushi dish can be considered edible.

5. Oshizushi

Oshizushi or pressed sushi is a type of sushi dish where the sushi comes in wooden block molds. The result is bite-sized sushi you can eat together with soy sauce and pickled ginger.

Types of Sashimi

There are many types of sashimi out there, but we’ll cover the top five types of sashimi and the different flavors each one has:

  1. Katsuo (Bonito or Skipjack Tuna)

Better known as katsuo no tataki, this type of sashimi is lightly seared on the outside to give more depth and flavor. The result is a slightly smoky taste you’ll love. It involves chopped green onions, ginger, and ponzu as toppings!

  1. Sake (Salmon)

Sake or salmon are popular fish toppings and ingredients for sashimi, but they’re relatively new to the sashimi scene! It’s sweet, with the added benefit of being packed full of omega-3 acids and fatty goodness. Pair your sake sashimi with lemon and a touch of wasabi.

  1. Maguro (Bluefin Tuna)

Maguro sashimi is iconic in Japanese culture. The fish used is what we know as tuna, and is served in 3 main grades. There are several parts to the fish that can be used for sashimi:

  • Se-kami – the red, fatty part of the tuna fish
  • Senaka – part of the red fish
  • Se-shimo – red and less fatty
  • Hara-kami ho-toro – the extra fatty part of the fish
  • Hara-naka chu-toro – the fatty pat of the fish
  • Hara-shimo – mix of the less fatty part and the red fish

Depending on the sashimi chefs, you may get a mix of these parts of the fish with your sashimi order.

  1. Ahi (Yellowfin tuna)

The yellowfin tuna sashimi is also a popular choice for Japanese food. It’s best paired with rice vinegar, soy sauce, pickled ginger, and wasabi.

  1. Aji (Horse Mackerel)

Best for the early summer season, the aji or horse mackerel sashimi has light, well-balanced flavor you’ll enjoy. Order it at the next sushi restaurant you visit!

Types of Nigiri

  1. Maguro nigiri sushi

It’s best to get the fatty part of this raw fish. This nigiri practically melts in your mouth! It’s a combination of sushi rice and raw fish, plus some garnishes on the side with soy sauce and wasabi to taste.

  1. Ika (Cuttlefish)

Aside from raw and cooked fish, nigiri also makes use of other seafood and meat. Ika is the pure, white flesh of squid, which is chewy and yummy to taste!

  1. Shrimp

Raw prawns and boiled shrimp are also typically used in nigiri dishes. If you don’t feel like eating raw fish, this type of nigiri may be for you.

  1. Unagi (Eel)

Served with a sweet sauce, eel is a popular choice among the Japanese for nigiri. Serve it with soy sauce, daikon radish, and wasabi!

  1. Tamago (Egg)

Yes, eggs can also be used in nigiri! The sweetened, baked egg also has a strip of seaweed to keep it in place.

How to Make Sushi Rolls at Home

Wondering how to make your own sushi rolls at home? We’ve got you. The best sushi can come from your very own kitchen!

The California Roll Recipe
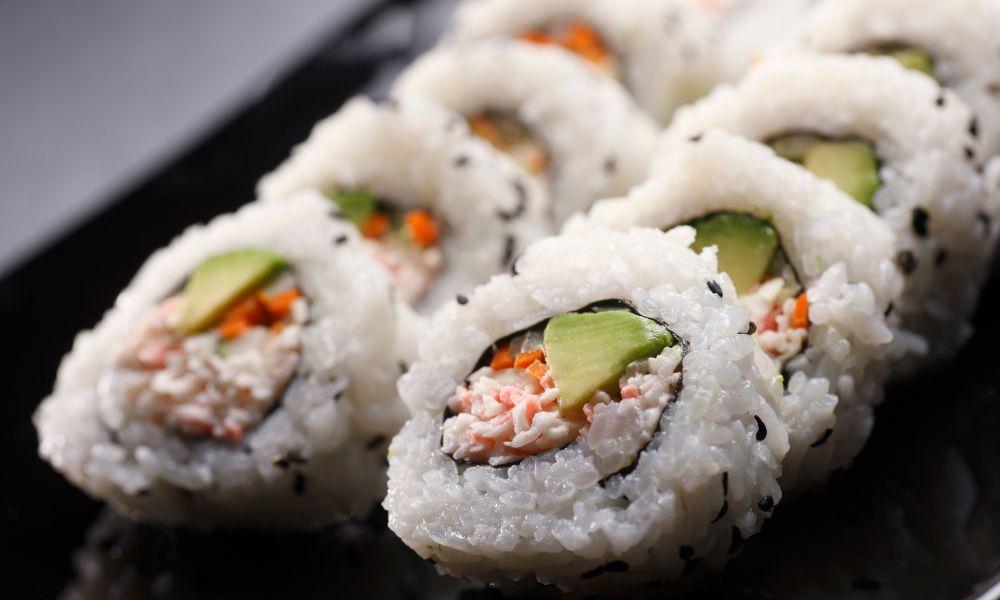
Sushi V Sashimi V Nigiri: What's the Difference? 4
California Roll

Let’s start by making a popular, regular maki roll: the California maki.

  1. Prepare the rice

You have to make the rice first. To do this, rinse the short-grain rice you’ve prepared before setting it to cook in the rice cooker.

In another bowl, mix rice vinegar, sugar, and salt together. Once the rice has cooked — and it’s shiny and fluffy! — you can pour the rice vinegar mixture over the rice and combine it completely. Let the rice cool and set aside. You’ll be using it as a main ingredient later!

  1. Prepare to roll

Get your sushi mat and place it on the table. Start by getting a sheet of nori or seaweed. Cut the nori in half and lay it down on the mat, rough side up. Use your fingers to add the rice and spread it all throughout the seaweed sheet.

Add masago or orange fish roe to the spread. Flip the sheet.

  1. Add oTher Ingredients

Now’s the time to add your other ingredients onto the california roll! Arrange the mango strips, kani, and cucumber.

  1. Roll, Roll, Roll

Roll the mat by tucking your thumbs underneath it and lifting it. Use your other hand to hold it in place. Continue rolling until you reach the end of the sheet.

  1. Slice Everything and Serve

Press the mat so everything fits and sticks together tightly. Peel away the mat and use a sharp knife to cut the roll into pieces.

Serve with wasabi and soy sauce. If you like, you can add a dollop of cream cheese as topping!

How to Make Nigiri at Home
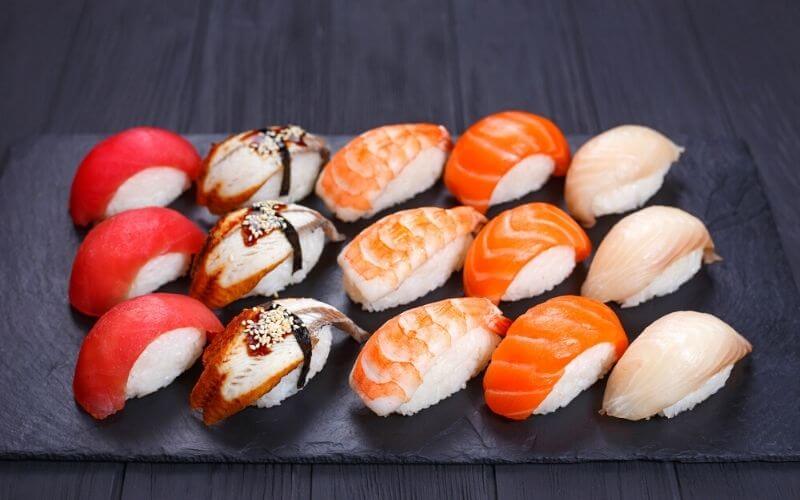
Nigiri vs Sushi
Nigiri vs. Sushi

  1. Prepare the rice

Make at leas two cups of sushi rice for this recipe. To make sushi rice, rinse the rice thoroughly and cook it for twenty minutes in your rice cooker. After, pour a mixture of vinegar, sugar and salt and combine everything in a bowl. After tossing, set it aside to cool.

  1. Cut Your Selected fish

You can use fish, other seafood like shrimp and eel, or even eggs! For this recipe, we’re assuming you’re using the best fresh fish you’ve found. Cut against the grain and make it around 1/4 inches thick.

  1. Form some rice

Nigiri is popular for being hand-pressed, with oval-shaped rice mounds. To form your rice, prepare a small bowl of water. Now, you have to combine the rice with the prepared fish. Lay one piece of fish across your fingers and then a mound of rice on top. Press inward with your two fingers to make sure they both stick together.

  1. Serve and enjoy

Congratulations, you’ve made your very first nigiri! Serve it with some ginger, wasabi, and soy sauce.

How to Make Sashimi at Home

Unlike nigiri and sushi in general, making sashimi is much more straightforward. All you have to do is pick the raw fish you want to use for your sashimi. Personally, with raw fish, I choose salmon: it’s packed with protein, good fat, and is light on the stomach.

Sharpen your knife before you begin cutting your raw fish. When you slice it, be sure to cut it into thin slices, around 1/4 inch thick. It should be rectangular and bite-sized!

You can mix wasabi, soy sauce, and lemon together to make your dipping sauce. Raw fish combines well with this mixture — and you’ll be sure to enjoy every bite!

Frequently Asked Questions

Is sushi the same as nigiri?

Nigiri vs sushi — are they the same? Well, it’s as close as it can get! Nigiri is a type of sushi. Most sushi places offer nigiri as part of their menus.

What is the difference between sushi and sashimi?

Sashimi chefs typically don’t cook fresh fish at all. Instead, they serve it raw — and as fish or meat alone. Sushi, meanwhile, involves different ingredients.
The traditional sushi roll, for example, involves fish, vegetables, fruit, imitation grab, toasted seaweed, shredded daikon radish, and vinegar rice. Sometimes, it’s even topped with cream cheese!

Why is Sashimi More Expensive Compared to Nigiri?

Sashimi uses the most expensive cuts of fish, which are caught fresh and served right away. Moreover, the fish is not farmed and is of very high quality, making sashimi rather pricey.
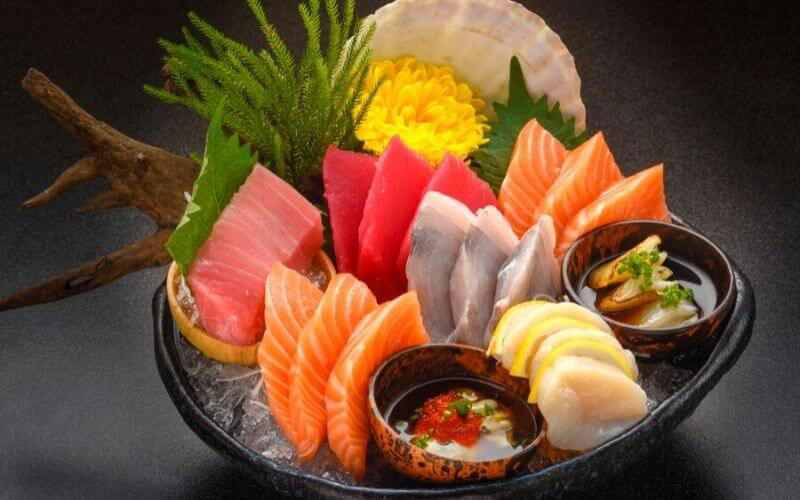
Roll vs Hand Roll Sushi: What’s the Difference?

If you happen to order sushi regularly, something that might have come to your mind is sushi roll vs hand roll. Even though they sound very much the same, they are not! 

But what is a sushi roll and what exactly is a hand roll? If you want to know more about the difference between these two and the eBay way to eat sushi, keep on reading! 

History of Sushi

History of Sushi
History of Sushi

Sushi is one of the oldest dishes that can be traced as far back as the 4th century! 

The modern sushi that we all know and love looks and tastes nothing like the sushi from that time. Even though we simply assume sushi originated in Japan, China created the first-ever sushi dish. 

In China, sushi was a way to keep fresh fish edible for longer. They used to place fresh fish on fermented rice to increase the shelf life. It tasted similar to pickled fish. 

This method of preservation happened by accident! Farmers used to bury fish with rice for storage and realized this makes the fish last longer. And that’s how sushi was born!

Since then sushi has gone through an evolution in itself. The sushi that we know now is a product of the 20th century. 

The modern sushi roll and hand rolls we are accustomed to eating are not traditional recipes either. That doesn’t mean they are not delicious! 

With our fast-paced lifestyle, temaki and maki sushi is a great way to have a nutritious full meal on the go. No wonder it’s so popular in the west! 

Rolled Sushi or Maki Sushi

roll vs hand roll
roll vs hand roll

Sushi roll is called “Maki” in Japanese which is short for Makizushi. It’s called Maki because it’s made using a makisu aka bamboo mat. Maki sushi is sushi that looks almost cylindrical and then cut into thin pieces. 

Maki sushi is known to originate during the Edo period which was in the 18th century. So it’s a relatively new addition to the sushi family. 

The reason why maki sushi became so popular is because of its easy and versatile ingredients. You can use any type of protein or vegetables to make it. This means maki sushi can be enjoyed all year round.

You can make maki sushi with either thin pieces of veggies or thicker pieces to make a bigger roll. Maki sushi contains sushi rice, nori sheets, and fresh fish and veggies. 

The seaweed sheet is first laid on the bamboo mat and then a thin layer of seasoned sushi rice is spread on top of it. Then you can add your favorite fillings. 

You can add thin cuts of fresh fish or veggies and then use the mat to wrap the sheet into a round roll. When it’s tightly rolled, cut them into smaller 1-inch pieces. Make sure your knife is super sharp or the roll will crumble and break. 

Maki sushi is super easy to make at home. You don’t need a lot of skill or knowledge to make a sushi roll. 

If you don’t know how to use a bamboo mat, some fun gadgets can do it for you! They might look sketchy but trust us, some of them are very fun to use. I like to use Camp Chef Sushezi as it makes perfectly rolled sushi each time. It’s a lot of fun to do this with kids and family together!

Types of Maki Sushi:

Maki sushi comes in a wide variety of styles so there’s a lot to discover. We are going to mention the most popular ones today! 

Hosomaki:

Hosomaki is the smallest-sized sushi and is known for its thin appearance. Hosomaki means small. This type of sushi uses only one filling which is why it’s so thin. 

Some of the popular types of hosomaki sushi include: 

  • Kanpyo maki
  • Kappa maki
  • Shinko maki
  • Natto maki
  • Tekka maki

Futomaki:

Futomaki means thick rolls. This is the polar opposite of hosomaki. You will find a lot of different fillings in futomaki like shrimps, cucumber, crab, eel, tofu, eggs, and a range of vegetables.  

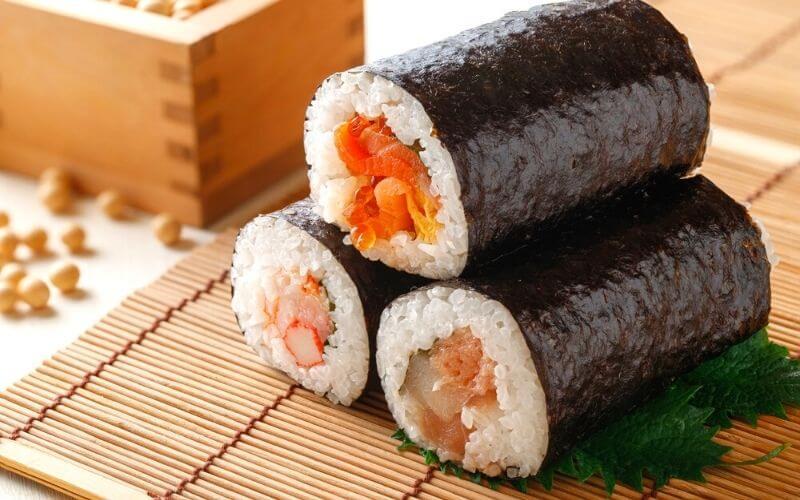
The most popular type of futomaki is called ehomaki which is kade using seven different ingredients to represent seven gods of fortune in Japanese culture. This dish is eaten during a festival called Setsubun.

Nakamaki:

The third type of maki sushi is called nakamaki which is an in-between size. It’s not too thick like futomaki and neither too thick like hosomaki. You will find on average three ingredients so it’s very convenient to eat. 

Read More: What is Tobiko in Sushi? and What is Masago in Sushi?

Hand Roll/ Temaki Sushi

regular roll vs hand roll

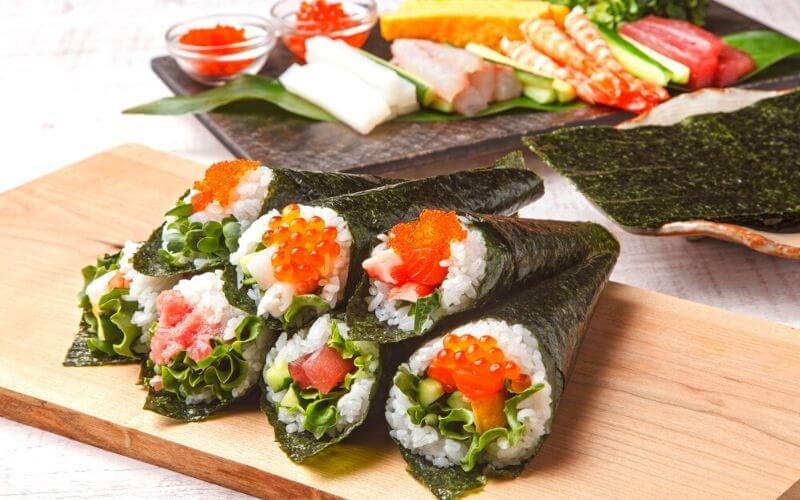
Hand roll or temaki sushi is casual-style sushi that’s very popular in Japan. It looks cone-like and is wrapped in nori sheets. 

You won’t find temaki sushi in formal Japanese restaurants as it’s a very homey dish. While we know sushi for its artistic and skilled style, temaki is the opposite of that. You don’t need any particular skills to make a delicious temaki at home. 

Temaki is a very good choice for parties and hangouts as it takes only a few minutes to make. All you have to do is wrap a scoop of seasoned rice in a nori sheet and add your favorite fish and fillings on top. The fillings are called neta in Japan. 

You can eat temaki with any type of sauce. We love to mix our fish slices in garlic mayo with a few drops of lemon juice. It’s divine! 

Temaki is traditionally eaten with bare hands as it’s more convenient. One thing you are never supposed to do with temaki is letting it sit for hours before eating. 

You should enjoy temaki sushi immediately after it’s made. That’s because the nori sheet can turn soggy if it sits for too long. 

If you want to make classic temaki at home, here are some fillings ideas to try:

  • Add radish sprouts with cucumber slices.
  • Baked salmon tastes good with fresh vegetables.
  • Avocado slices with scallions and salmon with sesame seeds.
  • Spicy tuna and radish sprouts.
  • Crab and Kewpie Japanese Mayonnaise with roasted nori sprinkles. 

What is the Difference between Roll and Hand Roll

I think it’s pretty clear by now how different hand rolls and sushi rolls are. Let’s look at some of the key features of maki sushi and temaki sushi.

Sushi Roll:

  • Sushi roll or Makizushi means something that’s wrapped or coiled.
  • Sushi rolls contain cooked fish, rice, crab, shrimp, and vegetables.
  • Maki sushi rolls rarely have raw fish.
  • The maki rolls are made using a bamboo mat to give the cylindrical shape.
  • Maki rolls are cut into relatively smaller pieces so that they can be eaten with chopsticks.
  • Sushi rolls are cut and served in a dish so they can be shared.
  • Sushi rolls are always wrapped in nori sheets or soy sheets.
  • Sushi rolls require skill and precision to make them perfectly.
  • Maki sushi is often found in formal restaurants as it’s a classic dish.
  • Some of the popular ingredients in maki sushi include mushrooms, omelets, cucumbers, and sakura denbu

Hand Roll or Temaki:

  • The name Temaki refers to something with a conical shape.
  • Hand rolls are much larger than sushi rolls. They are not bite-size pieces. Instead, you get something that resembles a mini burrito.
  • Hand rolls are made using only hands as tools. You don’t need a bamboo mat for this.
  • Temaki is usually made with raw fish instead of cooked ones.
  • A hand roll is not meant to be shared as it’s made for one person only.
  • Unlike sushi rolls, hand rolls do not require rice to make. Some of them contain only veggies and fish.
  • You don’t need chopsticks to eat hand rolls. It is eaten with bare hands.
  • Temaki is a casual food that’s very popular for home parties.
  • When hand rolls are made at home, it’s made with cooked ingredients like smoked salmon, fried seafood, etc.

Do Hand Rolls Have Sushi Rice? 

Hand rolls or temaki contain rice but it’s not always the case. Rice is the main ingredient in classic sushi rolls. Check out the Best Sushi Rice Brands in 2021.

With hand rolls, some contain a generous scoop of rice while others have very little. Some hand rolls have no rice at all. Your hand roll can have only fish and vegetables too. 

Frequently Asked Questions

What Does Hand Roll Mean?

Hand roll or temaki is a taco or a burrito made using seaweed sheets, rice, and fish. The seasoned rice is put on the nori sheet and then wrapped into a cone-like shape. 
On top of the rice, fish, veggies, and other toppings are added. It’s a simple and easy food to make and enjoy. 

What is a Classic Roll Sushi?

Classic roll sushi is a type of sushi that’s made using a bamboo mat. A seaweed sheet is laid on top of the mat and then a small layer of rice is added. You can add any fillings you want. We love adding seafood to our classic roll. 
Then the mat is wrapped to create a cylindrical shape which is then cut into bite-size pieces. Classic sushi rolls are very popular and are enjoyed with soy sauce, wasabi paste, and grated ginger. 

How Do You Eat Sushi Hand Rolls? 

Sushi hand rolls are eaten with bare hands. You don’t need any chopsticks or a fork for it. All you have to do is grab the sushi roll like a burrito and proceed to eat! It’s super convenient especially when you are on the go. 

Do You Eat the Seaweed in a Hand Roll? 

Of course! Seaweed is delicious when you combine it with rice. It has crispiness that’s very enjoyable to eat. The saltiness of the seaweed balances out the sweetness of mayo and rice. 

Are California Sushi Rolls Cooked?

Yes, California sushi rolls use cooked fish and seafood instead of the classic Japanese style. Japanese sushi rolls have raw fish marinated in either mayonnaise or vinegar. 
California sushi rolls are a fusion between eastern and western cuisine. It’s not authentic but absolutely delicious! 

How Many Pieces in a Sushi Roll? 

A standard sushi roll has 6-7 pieces of sushi. The number can vary depending on how long the sushi roll is and how chunky you want your sushi pieces to be. 

Is Eating Sushi with Your Hands Rude?

If you are in Japan or a Japanese restaurant, it’s respectful to eat sushi with chopsticks. Japanese people respect their food and culture a lot. So eating sushi with your hands can be perceived as rude. 

Takeaway 

As the sushi trend is growing every single day, people are inventing fusion versions of maki and temaki. 

It’s fun to see so many different varieties of sushi being celebrated with such passion. Whether you want a delicately made sushi roll or a quick-grab hand roll, the options are endless. 

We do love our homemade version a lot though. Nothing can beat a freshly made temaki with some wasabi and ginger. 

How do you like your sushi? What’s your favorite? Let us know in the comments below. 

If you are looking for a way to store your maki rolls, check out our article Can You Freeze Sushi.

How Much Ground Coffee Per Cup? Making the Perfect Cuppa Everytime!

Sounds like a pretty straightforward thing right? Turns out making coffee involves quite a bit of math. And here I thought I won’t have to calculate ever again after grad school!

No worries for you as we have gathered everything you need to know into one bite-size article. So within the next 5 minutes, you will learn how to make up to 12 cups of coffee effortlessly. And yes, you won’t have to calculate a single thing!

Making the Perfect Cup of Coffee: The Golden Ratio

coffee beans to ground coffee ratio

We all have heard of the golden ratio of faces. But did you know that coffee has its own golden ratio too? It’s basically the ratio between the coffee and the water. 

As we know, adding too much or too little water or coffee can ruin the taste. Some people are instinctively good at this. They just throw some random amount of coffee into the water and voila! A great cup of coffee is ready.

For us normal folks, we need a bit of help. The Speciality Coffee Association of America (SCAA) created the golden ratio for us folks. 

According to them, the ideal ratio between coffee and water is 1:15 to 1:18. This means you need approximately 150ml of water for 8.3g of coffee.

If this seems too complex then don’t bother. We have created a table with different cup numbers and their required ratios in the next part. You will find ground coffee to water ratio, whole bean to ground coffee ratio, and all other ground coffee measurements there. So keep reading if you are interested!

To know more about this, check out tips for making coffee in a percolator.

So How Much Coffee Per Cup?

Exactly how much coffee ground to use per cup? Although it can depend on a multitude of things, there is a basic guideline to follow. 

Keep in mind your coffee can taste different depending on the type of coffee beans you use, the brewing method, your coffee machine, and even the type of water for the coffee. So it’s not a linear result. 

But as most of us use coffee machines, they require exact ratios and numbers. 

Here are all the calculations you need to make any amount of coffee:

Number of CupsCoffee Ground (grams)Coffee Ground (tablespoons)Water(oz)
18.31.66
216.63.212
541.5830
649.89.636
866.412.848
10831660
1299.618.272

Need to Make Tons of Coffee? Use a Percolator!

how much ground coffee per cup

If you have guests around and need to make more than a few cups, instead of using your coffee machine, go for a percolator. It’s faster and easier than any other method. 

Yes, coffee percolators can seem rather intimidating. trust us, it’s not.  They are a very old-fashioned coffee maker that has been around since the 1800s. The best thing is, no matter how much coffee you are making, the method remains the same. 

Here’s how you can use ground coffee for a percolator to make coffee in no time:

  1. Open your percolator and fill up the main pot with tap water. Most percolators come with markings inside the pot to help you measure properly. 
  2. Either your percolator has built-in filters or you need to use one of your own. Insert the filter at this point. You can also use paper filters to collect maximum sediments. 
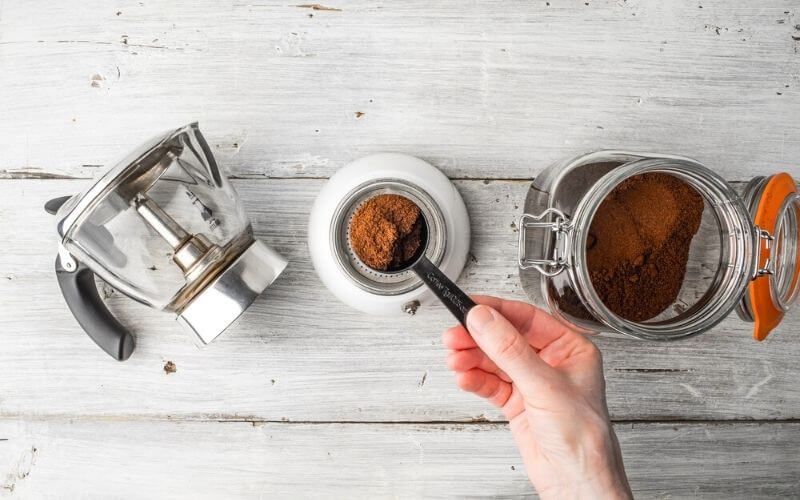
  3. Add coffee grounds to the filter basket. Use our chart to know exactly how much coffee per cup to use. 
  4. Make sure to evenly distribute coffee grounds. We prefer coarsely ground coffee over fine grind as the former provides better taste. 
  5. Put the lid on and turn on your percolator. If it’s a stovetop percolator, keep the flame at medium and keep an eye on it until it starts to boil. For an electric percolator, you need 50-60 seconds of brewing time per cup. 

And there you have it. Making coffee using a percolator is that easy. You can check out this video to further understand the process.

Our Key Tips for the Perfect Coffee

how many ounces of ground coffee per cup

Making the perfect coffee is not just the water and coffee ratio. It involves a lot of other subtle things as well. Here are some of our tips for that:

Pick the Right Coffee Beans:

There are two types of coffee lovers. One who knows A to Z about coffee beans and the other who grabs whatever is available in the store. We think knowing and trying a few different types of coffee beans helps you to understand what you love and prefer. 

For starters, there are two basic types of coffee beans: Arabica and Robusta. Arabica is used in most coffee shops. It’s a great option with a nuanced flavor profile. 

This type of coffee bean does not produce the strongest type of coffee. It does not have that high caffeine content either. 

If you are looking for a stronger coffee, we recommend trying Robusta beans. They are more bitter and have a very strong taste. 

Looking for some strong coffee options? Check out What is the Strongest Coffee of 2021?

Use a Coffee Grinder:

Do you really need a home coffee grinder? The answer is yes. We do not recommend buying pre-ground coffee. 

They not only last only a few months, but the taste also is not very great either. Pre-ground coffee goes stale very quickly. So you end up with a bland-tasting coffee with a  watery, thin consistency. 

So instead buy unroasted/roasted coffee grounds and grind them each week. This will give you the best kick of flavor and caffeine and don’t forget how amazing freshly ground coffee smells. 

If you are looking for a good coffee grinder, check out our Baratza Encore vs Capresso Infinity coffee grinder review. 

Use a Quality Coffee Maker:

As a former instant coffee addict, I can understand why it feels so intimidating to own a coffee maker. Who wants to learn this complicated-looking machine for a cup of coffee? Oh, how wrong I was back then!

The truth is, coffee machines are really easy to operate. Most modern machines nowadays also come with pre-set features like espresso, double shot, and even dairy options like cappuccino or latte. 

So all it takes for you is to fill up the water tan and add some coffee grounds to it. Then press a button and your coffee is ready! It’s actually worth every penny for a coffee lover. 

Besides, are you even a coffee lover if you don’t have more than one coffee maker? 

Check out The Hottest Coffee Makers of 2021 to compare and pick your favorite.  

Milk and Its Alternatives:

As more and more people are turning towards plant-based milk options, it’s curious to know which of them works the best with coffee. 

Everyone has their preferred milk alternatives. We personally love almond and cashew milk for its sweet, creamy and nutty flavor. If you ask me, I have totally converted to almond milk as it actually tastes better than dairy. 

But there are actually tons of different options from soy milk to oat milk. To know more about this, check out our Best Coconut Milk Substitutes

One thing to keep in mind is, coffee is very acidic. So make sure to add milk first and then the coffee. This way the milk doesn’t curdle up and separate. 

If you are looking for a good coffee percolator, check out our best coffee percolator machine review

Frequently Asked Questions

01. How Much Caffeine is in a Tablespoon of Ground Coffee?

This can not be very specific as different types of coffee beans have different caffeine levels. But on average, a tablespoon of coffee has 7 mg-110 mg of caffeine. This is specifically for Arabica and Robusta beans. There are of course stronger coffee options but we are not talking about them. 

02. How Much Ground Coffee per Cup is Needed for French Press?

In general, it’s ideal to use a ratio of 1:15 of coffee to water. This means you should use 1 gram of coffee for every 15 grams of water. If you convert it to tablespoons, that would be around 3 tablespoons per cup. 

03. How to Measure Ground Coffee for Brewing?

We like to use a tablespoon for coffee grounds. So for each cup of coffee, use 1-2 tablespoons of coffee grounds. If your coffee is strong, use only a tablespoon. But for lighter beans like Arabica, you can go for 2 tablespoons. 

Most standard coffee makers actually mention the amount of coffee you need to add. So it’s not that complex to understand. 

04. How Much Ground Coffee is Needed for 12 Cups?

If you are wondering how much ground coffee is for 12 cups, the answer is pretty simple. You will need 18 tablespoons of coffee ground for 12 cups of water. 

This will make the perfect coffee every time. But depending on your preference you can add or reduce a few tablespoons here and there. 

05. Can You Use Ground Coffee in a Keurig? 

Yes, you can use ground coffee in your Keurig coffee maker. But you have to make sure the grind is not too fine and neither too coarse. Keurig is very specific so you have to grind your coffee accordingly. 

Takeaway

Now that you know exactly how much ground coffee per cup is needed, you are able to make the perfect coffee each time. And the best part is, our chart helps you to make any amount of coffee with the best ratio. 

Which coffee brewing method is your favorite? Do you use a percolator? Let us know in the comments below!

Learn more about:

How to Clean Sticky Grease Off Kitchen Cabinets: Quick and Convenient Solutions

Grease is a sneaky fiend. You deep fry some chicken on a weekday night and wipe down your counters, hob, and cabinets. Fast forward to two weeks later, and you realize your kitchen cabinets are covered in sticky grease.

Removing grease from kitchen cabinets is no easy task, as a washcloth is no match for it. So how to clean sticky grease off kitchen cabinets quickly and easily? This article will show you nifty tricks for cleaning kitchen grease build-up, without damaging the wooden cabinets.

If you want to banish grease from your kitchen and learn what to use to clean kitchen cabinets, this article is for you.

What You Will Need to Remove Kitchen Grease

Need to Remove Kitchen Grease

This list will tell you what to clean kitchen cabinets with, and you can use whichever you have at home.

The Best Way to Clean Kitchen Cabinets

how to clean sticky grease off kitchen cabinets

The best cleaner for wood kitchen cabinets (as well as other materials), is soap and warm water. This makes sense because what removes grease from wood cabinets better than the humble bar of soap?

But why is soap used to remove grease? The soap breaks down the grease and makes it easier to wash away with water. To clean grease this way, soak a sponge in hot or warm water and wipe your cabinets to loosen the grease.

Then, spray down the whole area with warm soapy water. The beauty of this method is that you can use any soap, including liquid dish detergent. Next, use your scrub brush or sponge to clean the grease off your cabinets.

To prevent any residue from remaining, wipe down your cabinet with a lightly damped kitchen towel, and then follow it up drying with a different dish towel.

If you are worried about the soap drying out the wood of your kitchen cabinets, you can also apply some kind of beeswax polish to them. This makes it look new and shiny, prevents the wood from going dry, and even repels grease!

How to Clean Greasy Oak Cabinets

removing grease from kitchen cabinets

People with oak furniture tend to be quite protective of them. Regular soaps or a commercial kitchen cabinet degreaser can be too strong for them as well. So, how to clean oak kitchen cabinets without damaging them?

The answer is cleaning kitchen cabinets with vinegar. Dilute some vinegar with a little water and spray it onto your cabinets. At the same time, soak a sponge or washcloth with this diluted vinegar as well.

Then scrub or rub the grease off your cabinets with a cloth or sponge. Then spray some more vinegar solution and let it sit for 10-15 minutes. Once the time is up, wipe down the cabinet with a damp cloth or microfiber cloth until all the vinegar is gone.

Last but not the least, dry the cabinet with a dry kitchen towel and you will have a splendid oak cabinet free of grease.

How to Remove Stubborn Grease from Cabinets

If you’ve neglected your kitchen surfaces for a while, chances are there is some serious grease buildup on everything. How to get grease off wood cabinets that have been there for ages? The best cleaner for kitchen cabinets is actually cheap and, in your pantry, right now!

How to clean wood cabinets naturally? Cleaning kitchen cabinets with baking soda is the answer. Here’s what you gotta do:

Loosen up the grease with a warm damp sponge. Then, make a kind of thick paste with baking soda and a little water. Apply this paste onto your cabinets and scrub away with a cloth, sponge, or brush.

You can even add salt if you have an extreme case of grease. The baking soda cuts through the greasy film without damaging the wood. Once you are done, use a damp dishcloth or towel to remove the baking soda paste and use a dry one to finish up.

This is the best kitchen grease cleaner for those on a budget and a great way to use up the bulk of baking soda in your cupboard. You can also use this for your counters, kitchen island, and even stovetop.

Other Ways to Clean Sticky Wooden Kitchen Cabinets

Besides what we’ve mentioned above, there are still a couple of kitchen grease remover options left. If you want to learn how to clean painted kitchen cabinets without damaging the color, diluted Castile soap is the way to go.

Simply dilute the liquid soap with some warm water and spray it across your cabinets. Use a sponge to buff off any buildup and use a damp dishtowel to remove any residue before drying off the surface.

And if you are a one-size-fits-all kind of person, using a multi-purpose cleaner will work just as well. With these sprays, you just spritz some and let them sit for a while, before scrubbing off any pent-up grease.

Preventing Grease Building Upon Your Kitchen Cabinets

Getting rid of grease is difficult and requires getting your hands dirty. Preventing any oil from landing on your cabinets and building is a much easier answer.

To do so, you should invest in a splatter guard or shield, which will prevent the grease from ending up on your counter or cabinets in the first place.

Besides this, you should make it a point to wipe down all your kitchen surfaces with diluted soap once a week, to prevent any errant drops of grease that may end up on your cabinets. This will prevent grease from going sticky and building up over time.

You can also wash your hands often when cooking. This will prevent oil from transferring to different surfaces across your kitchen, slowing down the process of buildup.

Still Got Questions?

This section has answers to questions people often have about cleaning sticky grease off kitchen counters.

01. How Do I Clean Sticky Wood Cabinets?

You can scrub sticky grease from wooden cabinets using soap, vinegar, baking soda, and multipurpose or commercial degreasers.

02. Will Cleaning Grease from Cabinets Remove Their Polished Finishing?

If you use mild cleaners like diluted dish soap or vinegar, you can break down grease without damaging the finishing on your wooden or painted cabinets.

03. Can I Use Murphy Oil Soap to Clean Wooden Cabinets?

Murphy Soap can break down deeply rooted grease and grime, and do so without damaging the wood or polish of the kitchen cabinets.

04. Is It Safe to Use Steel Wool on My Kitchen Cabinets?

You should never use steel wool or strongly abrasive materials to remove grease from your cabinets or kitchen counters. Instead, use a sponge, soft brush, or dishcloth to scrub off the grease.

Last but Not Least

Figuring out how to clean sticky grease off kitchen cabinets is a serious game changer for your housekeeping skills. You can easily remove grease, and prevent it from coming back the next time you want deep-fried quesadillas. 

Whether you like commercial soaps or DIY natural cleaners, this article will have something for you. You can also learn to clean grease from waffle makers, as well as clean griddles!

But now let’s hear it from you. What would you use to clean hardwood cabinets in the kitchen and get rid of grease?

How To Tell If Shrimp Is Cooked: A Foolproof Guide

Learn how to tell if shrimp is cooked by looking at its color and size and how to prevent overcooking them so that they don’t become rubbery and less juicy.

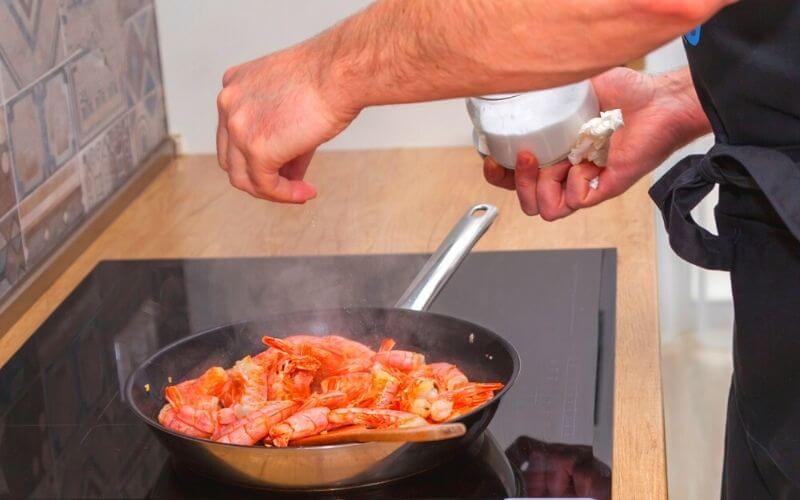
cooking shrimp in a pan

Shrimp is a type of seafood with shells belonging to the crustacean family and it’s the most common seafood that the US imports

These can vary in size and the larger ones are called prawns although they don’t belong to the same family.

You can make various dishes with shrimp like salads, pasta, and chowder. 

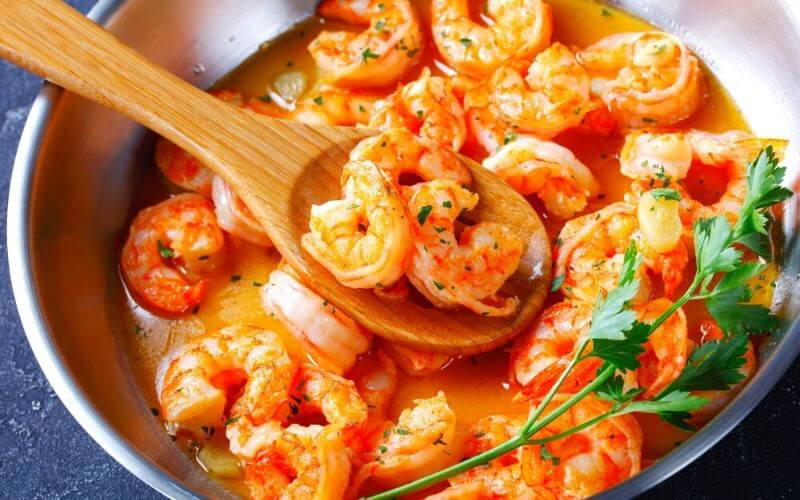
They are also great to have on their own sautéed in olive oil.

However, it’s a bit tricky to cook shrimp as the difference between undercooked, cooked, and overcooked shrimp is just a matter of minutes. 

In this post, we will cover all you need to know about what does cooked shrimp look like. 

How To Tell If Shrimp Is Cooked: A Foolproof Guide 5
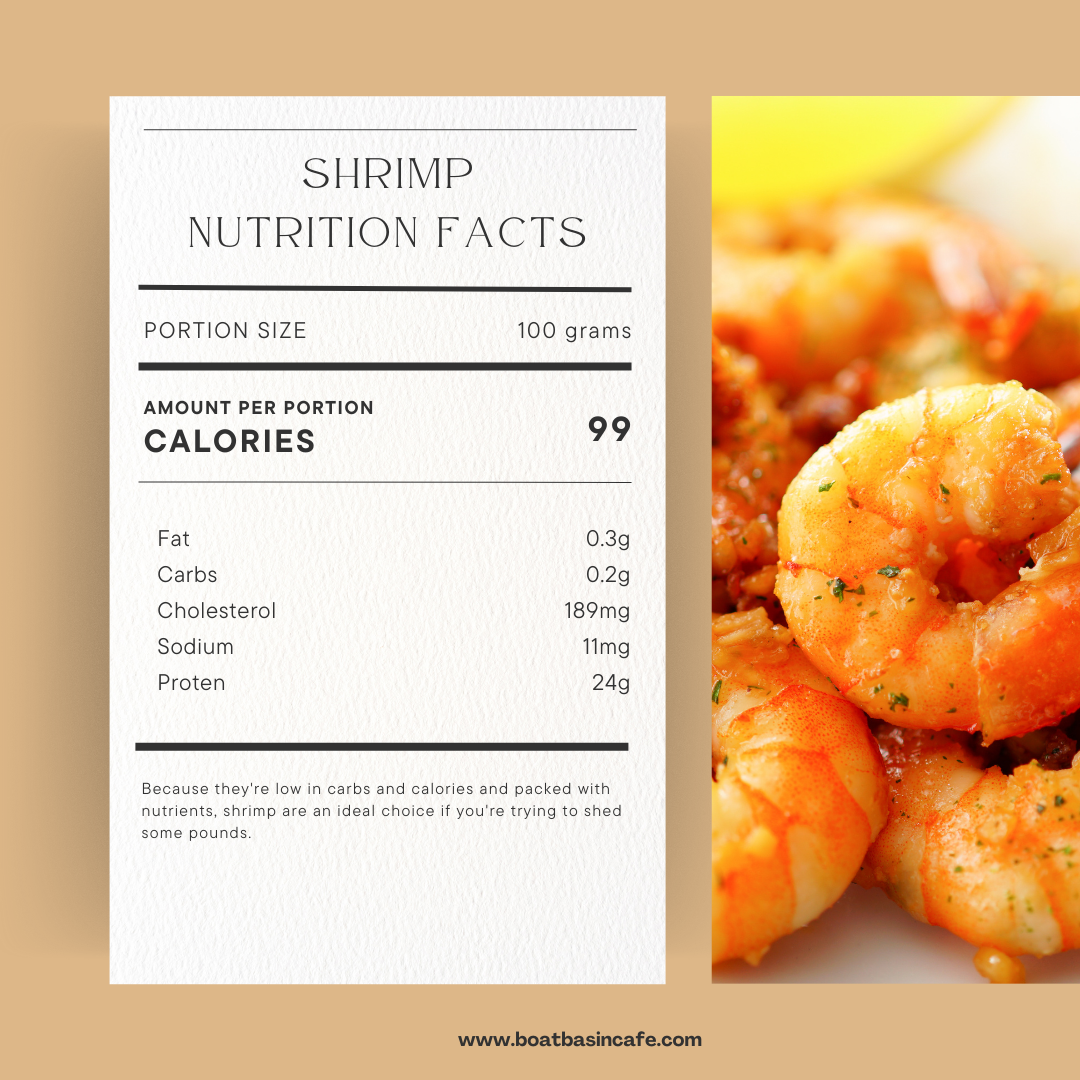
Nutrients Per 100 Grams Of Cooked Shrimp

How To Know If Shrimp Is Cooked

How To Tell If Shrimp Is Cooked: A Foolproof Guide 6
How To Know When Shrimp Is Cooked

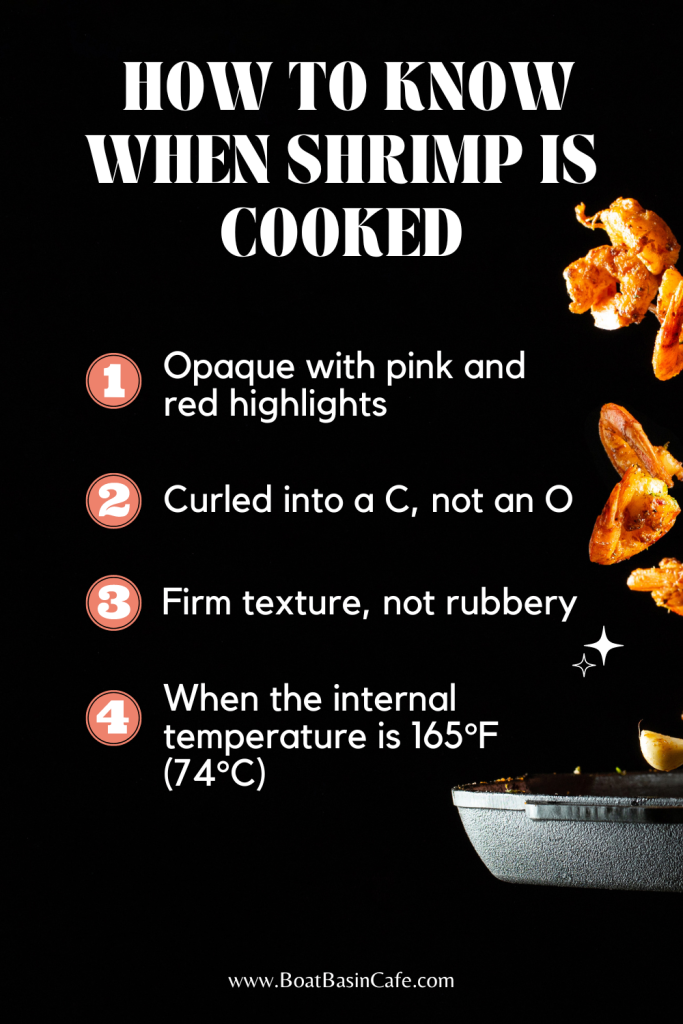
There are several ways to tell when shrimp is cooked thoroughly. 

If you’re an expert, then you already know what color is cooked shrimp. 

However, for those new to cooking shrimp, here are the best ways to know when shrimp is cooked. 

Color

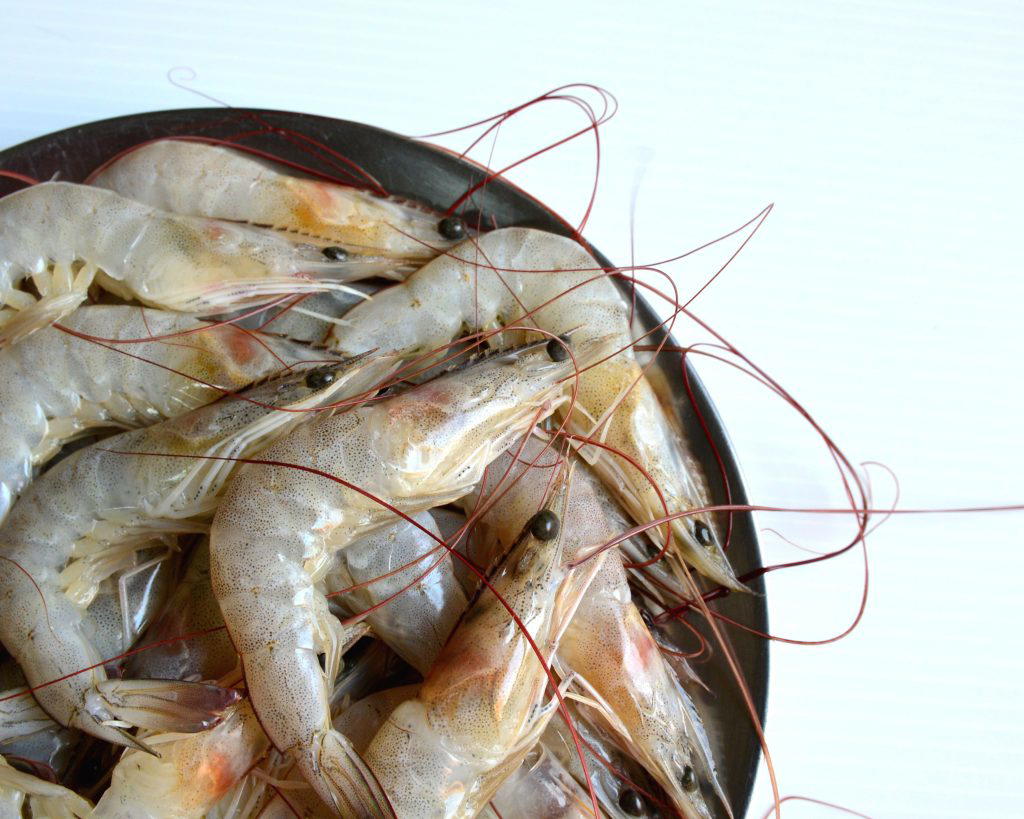
Translucent shrimp with grey shells are raw shrimp, meaning that light penetrates through the flesh somewhat but not all the way through. 

Cooked shrimp still translucent means you need to cook it some more before it turns pearly white with tinges of pink and red. 

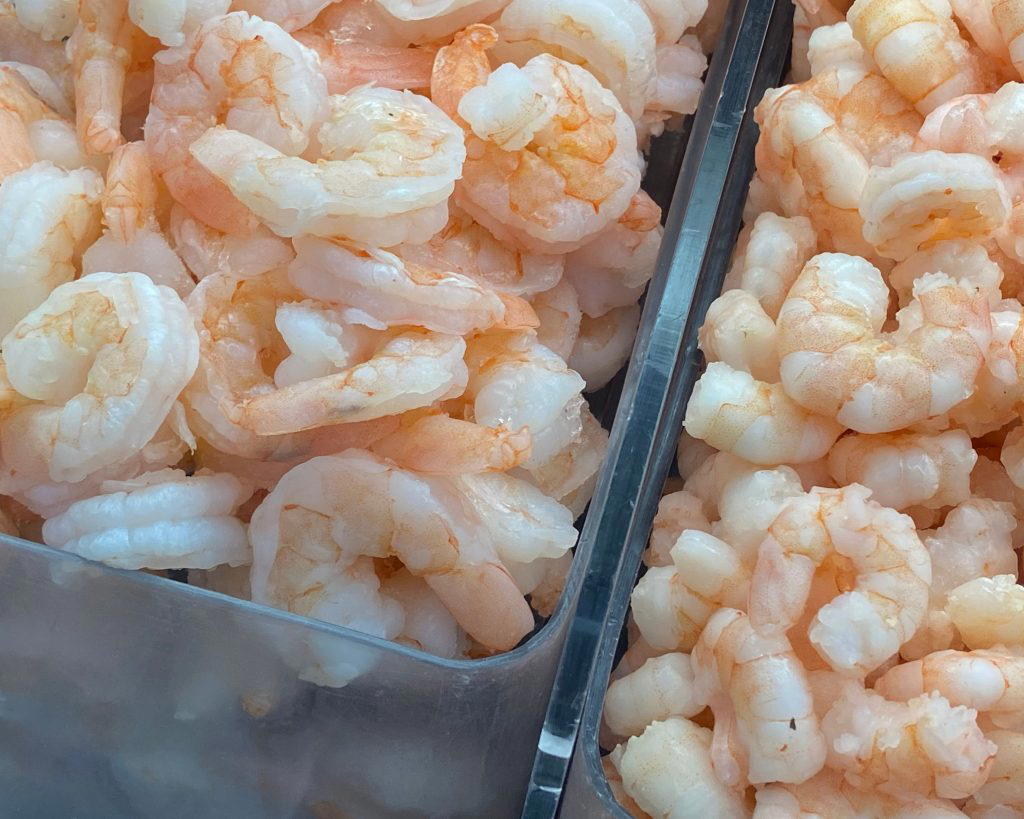
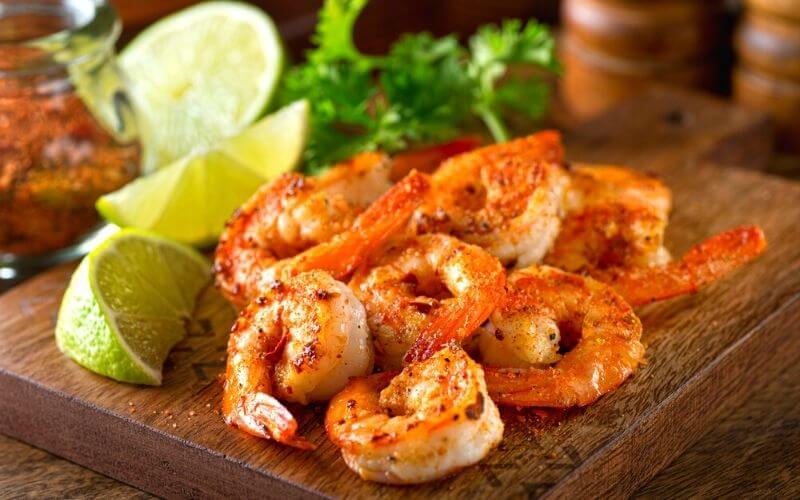
Opaque white shrimp is the correct sign when you know you have properly cooked shrimp. 

When shrimp is done on one side, you can see hints of pink and red highlights on the exterior and the tail.

Take note of the degree of whiteness in the flesh. 

Just when it starts to turn white is about the right time when you know that the shrimp is done. 

If you wait for the white to be a more solid white then you will have overcooked shrimp in your hands. 

Then flip to cook the other side but how would you know that the inside has turned white?

The best way to tell when the shrimp is done is to keep an eye on the crevice on the back of the shrimp where it was deveined. 

The shrimp is thickest at the opposite end of the tail, so make sure to focus on that area.

You want to wait until the flesh at the base of that crevice turns from translucent to opaque to know you have perfectly cooked shrimp. 

Temperature

If you’re not confident yet about how to tell if prawns are cooked, the easiest way is to check the temperature of the skillet or the internal temperature of the shrimp. 

When your instant thermometer shows a reading of 165°F (74°C), that’s when you know you have prepared shrimp properly.

It’s not safe to eat raw shrimp unless they are sushi-grade

Speaking of temperature, you should know how to cook frozen shrimp the right way to avoid rubbery texture and also to ensure that there’s no chance of getting food poisoning. 

Shape

Shrimp shrinks when they’re cooked as their muscles contract and the shrimp curl as a result.

Some chefs say you’ll know they’re done when they form a C shape, but if the opaque color shrimp keep forming an o shape, they’re overcooked.

So C is for cooked and O is for overcooked. 

That’s a simple way to tell if shrimp is cooked!

However, what if you have the shrimps on skewers?

They won’t be able to curl if barbecued using skewers. 

In this case, it’s better to go back to the lesson we have learned about what color is shrimp when cooked – opaque white. 

How To Tell When Shrimp is Done: Factors That Affect The Cooking Time 

Size

It’s a no-brainer that cooking shrimp of smaller size will take less time than the large ones.

The trick is to pay attention when you’re cooking the smaller shrimp so you can adjust the heat to ensure that they don’t get overcooked. 

Shells On Or Off

If you serve seasoned or boiled shrimp, it’s recommended to cook them with the shells on to pack in the flavor and moisture. 

Of course, the cooking time will increase with the shells on as you will need five full minutes to make sure they are cooked thoroughly. 

It’s better to remove the shell and cook or boil them if you’re going to add shrimp to pasta or rice dish as otherwise, it will take a lot of work to remove the shells at the table. 

Without the shells, shrimps take two to three minutes to cook. 

Heat

Cooking shrimp over a low and slow flame will take longer than cooking them over high heat.

Shrimp is something that should not be slow-cooked, however. 

It’s not like beef or mutton that will have a fall-off-the-bone effect when cooked over low heat.

Shrimp turns out best if you pull a fast one over high heat. 

Cooking Process

Sauteing with veggies1-2 minutes
Sauteing for adding to salad or pasta1-1.5 minutes
Grilling2 minutes for each side

The cooking method of shrimp affects the time it takes to cook shrimp.

The shrimp should be cooked in 1 to 2 minutes if you’re stir-frying them with veggies; however, the vegetables should be very hot before adding the shrimp.

If you’re planning to add the shrimp to a salad or pasta, it should be sautéed over medium-high heat for one to one and a half minutes before being removed from the fire to allow it to finish cooking. 

For boiling shrimp, bring the water to a boil before adding the shrimp if you’re cooking them for a dish like a shrimp cocktail. 

After adding the shrimp, keep an eye on the pot and turn off the heat just as it begins to boil again. 

Remove the shrimp as soon as they become pink and immediately submerge them in freezing water.

If you’re grilling shrimp, it takes about 2 minutes to cook shrimp on each side. 

Skewer them separately from other meats and veggies. 

In this manner, since the cooking durations for each item probably vary greatly, you also don’t run the risk of overcooking them. 

Frozen Or Fresh

Last but not least, whether you’re cooking frozen or fresh shrimp will impact the total cooking time. 

Frozen shrimp tend to cook faster than thawed or fresh shrimp. 

So time your cooking well and make sure you’re cooking frozen shrimp for a shorter time. 

What To Do Before You Cook Shrimp

How To Tell If Shrimp Is Cooked: A Foolproof Guide 7
What To Do Before You Cook Shrimp

For the best tasting shrimp, start with buying the right shrimp.

You can buy raw shrimp from fishmongers, at the seafood counter, or frozen shrimp from supermarkets. 

The shrimp size will usually be mentioned on the package – small, medium, large, extra large, or jumbo.

If you’re a busy person, buying deshelled and deveined shrimp will save you much time and you can have your shrimp meal sooner than later. 

But if you’re someone like me who wants to savor every bite of grilled shrimp and treat friends, it’s better to buy shrimp with shells. 

This will prevent the shrimp from drying out and will keep the mildly sweet flavor of this beloved crustacean intact. 

Whether you sauté shrimp in a pan, broil it on a skewer, or add it to a soup, it cooks rapidly. 

It doesn’t take long for raw shrimp to go from gray to pink and get cooked properly.

If you have frozen shrimp and you’re suddenly craving a shrimp meal, don’t worry.

To thaw frozen shrimp, put it in a bowl and run a cold water tap over it until it has defrosted. 

Or, put the frozen shrimp straight into the pan to cook.

Or, if you want to cook the shrimp for guests, you can put frozen shrimp in the refrigerator overnight to thaw. 

Tips To Cook The Perfect Shrimp

how to tell if shrimp is cooked
  1. If you want to cook the perfect shrimp, make sure to give them each some breathing room by laying them in a single layer in a large pot. 

This allows for optimal contact with the hot frying surface, giving the shrimp a deep sear and even cooking throughout.

  1. If you’re concerned that you overdid the shrimp, you can stop the shrimp from cooking by taking them out of the pan right away.

Even if the heat is turned off they’ll still cook a little bit. 

But if you leave them in the pan, the heat will make them dry out.

  1. Don’t grill or cook shrimp beyond 5 minutes. 
  2. Always use the same size of shrimp as a mixed size of medium and jumbo size shrimps won’t cook uniformly and you will have some shrimps undercooked while others are overcooked. 
  3. Frozen shrimp can become rubbery faster than defrosted or raw shrimp. 

Therefore, make sure to cook frozen shrimp for a shorter time. 

  1. Avoid defrosting frozen shrimp in the microwave oven as this will make them rubbery.

How To Tell If Shrimp Is Bad

Cooking the perfect shrimp will mean zilch if the shrimp was bad in the first place. 

How to tell if the shrimp you’re buying is bad?

Fresh raw shrimp should give off a slight smell of the ocean, not a strong fishy smell. 

Moreover, a translucent and glossy look means the shrimp are fresh and good to buy. 

If shrimp looks cloudy or feels slimy to the touch, drop them immediately!

That covers fresh shrimp. 

What about cooked shrimp?

How do you know it has gone bad?

Do the sniff test!

If you smell anything unusual, then it’s off. 

Or, if it doesn’t have a pale pink fresh look on it, it’s time to toss it. 

How To Store Shrimp

How To Tell If Shrimp Is Cooked: A Foolproof Guide 8
How To Store Shrimp

It’s best to store fresh shrimp in the refrigerator as soon as you buy it. 

This will stay good for two days in the fridge provided the constant temperature of the fridge is 40°F (4.4°C). 

If you want to make it last longer, you should freeze shrimp. 

Before putting it in the freezer, wrap the shrimp in plastic wrap or aluminum foil and place it in a freezer bag or airtight container

What if you have leftover shrimp you cooked last night?

Well, you should bring them down to room temperature and refrigerate it in an airtight container. 

This will last for up to four days in the fridge. 

Can You Fix Overcooked Shrimp?

Unfortunately, no!

Once you have rubbery shrimp, there’s no way back.

The worst thing you can do is keep it on the flame and hope that it will taste good again.

The best thing under the circumstances would be to add it to a creamy pasta dish instead of having them on their own. 

What Happens If You Eat Undercooked Shrimp?

You may get food poisoning if you eat shrimp that has been partially cooked. 

Although in China and Japan, eating raw shrimp is okay, it’s not recommended as there can be Vibrio bacteria present in raw or live shrimp. 

Some variants of this bacteria can be really harmful for human health. 

FAQs

Are Pink Shrimp Cooked?

Yes, when the exterior parts of the shrimp turn pink, it means it’s cooked. 

How Do You Know If Shrimp Is Undercooked?

Undercooked shrimp will appear gray and translucent. 

What Does Fully Cooked Shrimp Look Like?

When shrimp is fully cooked, it looks white and opaque with touches of red, orange, and pink on the exterior and on the tail. 

Can You Eat Undercooked Shrimp?

Only if it’s sushi-grade shrimp can you eat undercooked or raw shrimp. 
Otherwise, you may fall sick due to the bacteria present in undercooked shrimp. 

How Long Does It Take Shrimp To Cook?

It takes 2 to 5 minutes for the shrimp to cook.

Do Coffee Grounds Go Bad? Find Out the Truth!

Even though we do not think about it, coffee grounds have an expiry date too. So is your coffee okay to eat or have they lost their luster? In this article, we will find out the way to tell if the coffee has gone bad and all the tips to store your coffee properly. 

If you find this interesting, then keep on reading!

Do Coffee Grounds Go Bad? 

All good things eventually come to an end. Your precious coffee beans are no exception. 

If you are anything like us, chances are you have at least two extra coffee grounds containers somewhere in the pantry. But how long are they going to last? 

What if they go stale before you get a chance to enjoy them?

It turns out, even though it’s a dry ingredient, coffee grounds go bad eventually. They go bad because they give a certain shelf life. No matter how well you try to store them, they will eventually become stale. 

Of course, there are a few tricks to keep your coffee fresh for longer. If you are interested, keep on reading!

How to Store Ground Coffee

do coffee grounds go bad
how long are coffee beans good for

If you want to store ground coffee so it does not go bad within a few months, you need to make sure of a few key things:

  • Buy coffee beans instead of coffee grounds as beans stay fresh for much longer. Grinding coffee beans is time-consuming. But every time you grind them, the smell of fresh coffee will blow you away. There is nothing quite like it. 
  • Store your coffee grounds in an airtight container, preferably a glass one. This prevents the coffee from getting exposed to oxygen thus keeps it fresh. 
  • Keep your coffee beans and grounds in a dry place. Do not store them in the fridge! You’d be surprised by how many people actually store their coffee in the refrigerator. 
  • Moisture is the biggest enemy for your coffee grounds. So try to keep your coffee moisture-free. This prevents them from going stale. 
  • If your coffee container is really big, transfer some to a smaller container and use that one every day. This way all of your coffee grounds do not get daily air exposure. This keeps the oil inside the coffee intact. 

How Long Does Ground Coffee Last 

How long your coffee ground lasts depends on how well you have stored them. If you keep your coffee in an average container, it will go stale within a week. 

If you keep your coffee grounds in a vacuum-sealed container, it can last years without any issue. Once you open the coffee jar, it needs to be consumed within a few months. Keeping the container in a cool, dry place might help to increase the time. 

That’s why we like to store our daily coffee in smaller containers. This keeps the main coffee container intact for longer. 

If you grind your own coffee at home, try to finish it within a month as the quality of the coffee is at its peak during this time. After that, the coffee stays good but the taste deteriorates. This happens because the oil inside starts to dry down. 

How to Tell if Ground Coffee is Bad

expired coffee grounds
expired coffee grounds 1

There are a few different ways to tell if the coffee ground has gone bad or not. Let us get this out first, always close the lid properly.

We can’t tell you how many times we had to throw away coffee grounds because we forgot to properly close the lid and the coffee turned stale. It’s the worst mistake!

Now that we know what not to do, here’s how you know it’s time to toss out your favorite coffee: 

Molds:

Molds occur when moisture gets inside the coffee jar. Do you use your wet spoon to take coffee out of the container? If so, then no wonder your coffee is all moldy and spoiled. 

Moisture is basically the enemy of coffee or any other dry ingredients. So when you dip a wet spoon, small water particles stay inside and wet the whole coffee. Over time molds can develop and ruin the whole thing. 

Smell:

We all know the smell of good-quality coffee. The smell is very specific and unique.

One of the best ways to know if the coffee is bad is to give it a good sniff. If it smells mellow or dusty, the coffee has probably lost its flavor. 

Flavor:

If you can not tell yet, the best way to know if your coffee is good or not is to brew a cuppa for you. 

Brew a small cup and check if you see any shade difference. Bad coffee has a lighter brew instead of the classic deep black color. Taste the coffee to see if it’s up to your standard. Stale coffee tastes bland. So you will know instantly. 

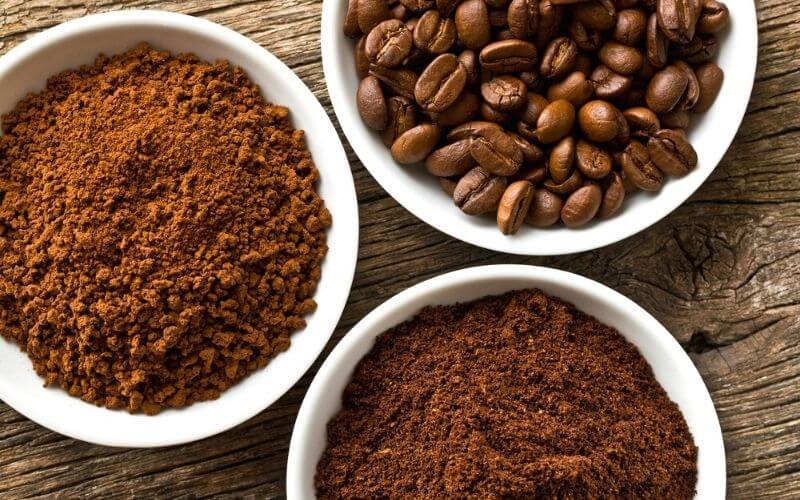
Coffee Beans vs Coffee Grounds

Coffee Beans vs. Coffee Grounds
Coffee Beans vs Coffee Grounds

This is all about what is convenient to you and what you want from your coffee. If you want a quick way to get your daily coffee, coffee grounds is the way to go.

But if you are looking for a way to store a lot of coffee at home, coffee beans are the best choice. All you need is a coffee grinder and a few minutes. It’s super easy to do. 

We prefer coffee beans as it’s the only way to get fresh coffee every single day. Ground coffee lacks depth and vibrancy as it loses a lot of flavor and oil through the packaging process. 

Coffee beans can last for 1.5 years in a sealed container. 

We already know how long coffee grounds last. We think doing the extra work of grinding the coffee at home is so worth it. 

Should You Freeze Coffee?

This is actually a very debatable topic in the coffee community. Some coffee lovers swear by this method whereas others are strongly opposed to it.

Some believe freezing coffee grounds helps to retain the natural oil that prevents it from getting stale faster. We don’t freeze our coffee nor do we advise you to do so. 

Freezing can add a lot of ice particles to the coffee which can make the coffee go stale. Think about it, we just mentioned moisture is the biggest enemy for coffee grounds.

The refrigerator is all about water and ice. Why would we put out coffee in the freezer then? It does not make sense. 

Yes, keeping your coffee grounds in the freezer might help to keep it slightly fresh. But if you keep it for more than a week, it’s going to become a dull, tasteless powder. So, no, you should never freeze your coffee!

Best Containers for Coffee Grounds/Beans

You might think any airtight container is good enough to store coffee. But we would have to disagree. If you want to keep your coffee fresh for a really long time, investing in a good coffee container is worth it. 

You need something that can vacuum seal and prevent any air circulation. It should either be stainless steel or solid thick glass. 

Simpli-Magic 5 Piece Mason Jars are a great pick as it is both affordable and sturdy with vacuum-sealed technology. You can also use a vacuum sealer to keep your coffee in Ziploc bags. Nutrichef is a classic choice for that. 

Frequently Asked Questions

01. How Long are Coffee Beans Good for? 

Coffee beans can last for a few weeks after roasting. If you roast them, they can last even longer. Usually, well-roasted coffee beans can last 3-5 months in an airtight container. Storing the coffee beans properly helps to ensure quality over time.

02. Can You Drink Expired Coffee Beans? 

You can drink expired coffee beans but it won’t taste good. You are not going to be sick from it but the flavor might be off-putting. It will taste stale and rancid. Unless you are talking about brands that are 3-4 years old, then we recommend not even trying to drink it. 

03. When Does Coffee Go Bad? 

Coffee tends to deteriorate with time, especially if it’s ground coffee. Ground coffee can go stale after a few weeks of opening the container. 

Coffee beans last longer than ground coffee but you need to store it properly. Brewed coffee can go bad after 3-4 hours of making it. That’s why it’s never a good idea to batch-make the whole day’s worth of coffee at once. 

04. How Long Does Ground Coffee Last in an Airtight Container?

Ground coffee does not survive oxygen. If you don’t store it properly, it will go bad in a few weeks. To keep it fresh for longer, use an airtight container ideally made of glass. This helps to protect your coffee from going rancid. 

A well-stored container of coffee can last up to 5 months without any issues. 

05. Is It Bad to Leave Coffee Grounds Out Overnight?

Leaving your coffee grounds out overnight can cause them to go stale faster. The reaction between hydrogen and oxygen raises the pH level in your coffee. This makes your coffee taste more acidic and bitter. 

When the pH level increases, the coffee becomes stale. This is why it’s so important to store your coffee in an airtight container. 

06. Can Old Coffee Grounds Make You Sick?

An old coffee can not necessarily make you sick unless it has molds and bacteria growing inside. Old coffee is basically stale coffee or a coffee that has lost its kick. Drinking old coffee won’t make you sick but it won’t give you the energy boost you’re looking for either. 

07. Do Unopened Coffee Grounds Go Bad?

You can actually store your unopened coffee grounds for a long time. It can last 5-6 months past the expiration date. If you store the container in the freezer, it can stay good for up to 2-3 years. 

Unopened coffee beans never “go bad” as it is considered to be a shelf-stable dry food. They might lose the freshness after a few weeks but they won’t go stale for years. 

08. What Can I Do with Expired Coffee Beans? 

If you have a few containers of stale coffee beans and you don’t feel like just throwing them away, there are a few creative ways to use them. 

Firstly, you can even use coffee as a fertilizer in your garden. They are filled with nutrients that help plants grow faster. 

Coffee grounds also repel insects and pests so they will protect the plants from being affected. You can grind the coffee beans and add olive oil to make a body scrub from it. They are really good and gentle on your skin. 

Coffee beans are great at removing fleas from your pets. As it’s not a chemical, it’s safer to use. 

You can also use stale coffee beans to make chocolate-covered coffee beans. They might not taste as good as the fresh ones, but they will taste delicious nonetheless. 

In Brief

The worst thing for a coffee lover is to open a container and find stale, bland coffee grounds inside. The great news, however, is that we have mentioned all the tips and tricks to make your coffee last as long as possible. 

Was it helpful? What are your tips for the best brew? Comment down below to let us know!

Happy caffeinating!

What is Tobiko in Sushi? Learn All About It Here!

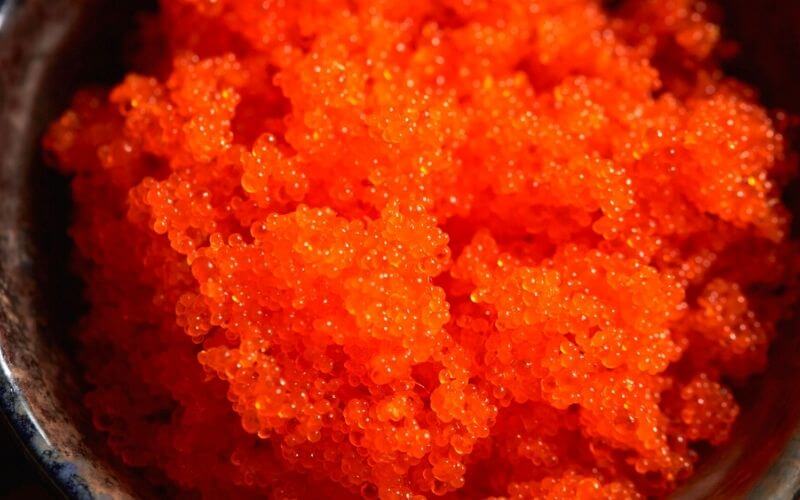
If you have ever tried Japanese sushi then you noticed some bright-colored things on top of them. They usually are added as a topping on different sushi rolls. These are known as tobiko which is a Japanese term for ‘flying fish roe’. 

Tobiko eggs are very distinctive looking with their super small size. They usually range between 0.5 to 0.8 mm in diameter. 

Most of the restaurants add colors or wasabi to tobiko eggs. But if they are natural without any added condiments, they have a reddish-orange color.

This color can change depending on what you mix with it. They can turn green, black or light pink too. 

Let’s find more about it!

What is Tobiko in Sushi?

what is tobiko in sushi

Tobiko is used as a topping for sushi dishes to make them look more appealing and delicious. This garnish is commonly used in raw Japanese dishes as it adds a salty, smokiness to it. 

There are a few different types of flying fish roe that is used interchangeably in Japanese dishes. Tobiko, masago, and ikura are some of the most common types.

Masago eggs are visually very different from Tobiko as they are even smaller in size. Ikura is basically Japanese salmon eggs which makes them the Japanese version of caviar. 

Even though tobiko is not that known in the west, you can find them in many grocery stores in Japan. They come in a wide range and packaging. All you have to do is grab a spoon and take as much as needed. 

What is Tobiko Made of?

Tobiko is made of Argentina’s national fish, the Toba. The hyper-realistic tobito can fly and lives a long time – sometimes up until three years old!

What is “roe” in Sushi?

Some people think roe is an ingredient, but it’s actually not. It tends to be found in colder fish like salmon or mackerel and can come as vacuum packed pieces which you thaw before cooking with them for added texture – sometimes they’re also served on top of sushi rolls where there are small balls that look just like eggs!
It doesn’t really have any flavor itself so this will depend entirely upon what else has been put onto your tongue first; some common pairings include rawerton sauces (a type made from tomatoes)avocado leaves sheets dippers cress etc…

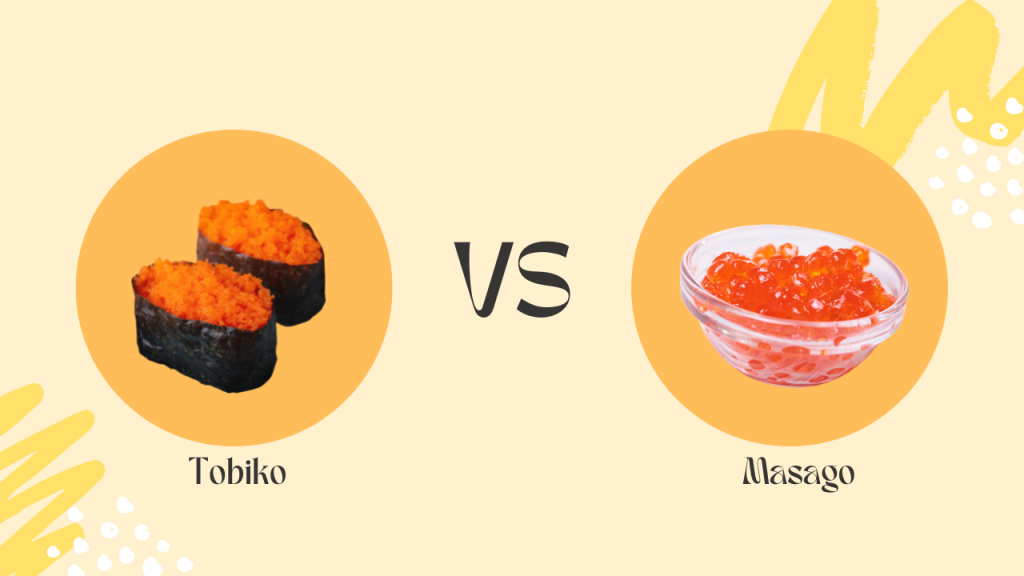
What’s the Difference between Tobiko and Masago?

What is Tobiko in Sushi? Learn All About It Here! 9
Whats the Difference between Tobiko and Masago

Masago and tobiko both are the roe of the capelin fish. This means they have a lot of similarities. Despite how interchangeable they are, a keen eye can spot the differences at a first glance. 

Masago’s color is dull compared to tobiko which is bright red/orange. Masago is often dyed or mixed with other condiments to change its look and appeal. 

The taste of masago is not similar to tobiko. Masago is not as crunchy and is a juicer. It looks smaller than tobiko. Masago actually looks a lot like sand as the eggs are super small. 

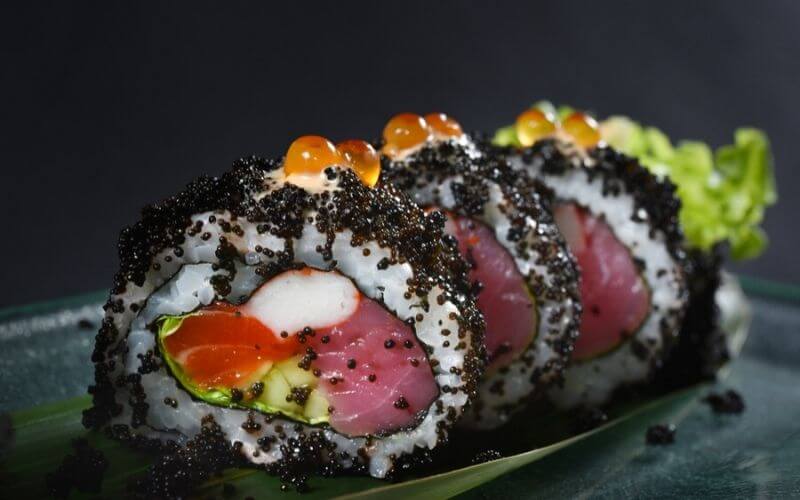
What is Black Tobiko?

black tobiko sushi
black tobiko sushi

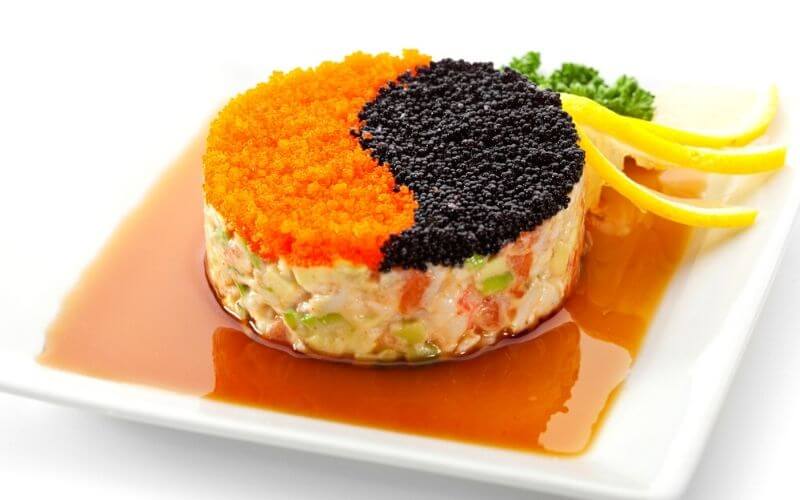
Black tobiko is basically tobiko that has been dyed with either squid ink or food colorings. The color can vary from deep blackish-red to green. 

Tobiko eggs absorb colors very well which is why sushi chefs like to use different colors for different dishes. This not only makes them look unique, but it also adds to the appeal of the dish. 

To color tobiko eggs, chefs use beetroot for red, wasabi for green, and of course squid ink for jet black. 

One color you won’t find in tobiko is blue. Blue is a very rare color to find.

There are however some species of fish that produce natural blue roe in Australia. Actually, there is a wide range of fish roe all around the world and each has its uniqueness. But we will get to that some other day. 

How Do You Eat Tobiko Sushi?

You probably have eaten tobiko many times before without knowing or realizing it. How can’t you! They are everywhere in Japanese sushi places. 

They have been around for a long time yet we never realized they are fish eggs. The difference is, people are now curious about what they are eating thanks to the internet! 

Eating tobiko sushi is quite simple. They are added on top of the sushi to give a vibrant color. Tobiko is used as a topping or garnish. So next time when you eat sushi with chopsticks, notice the tiny balls on top of the sushi rice.

They look colorful and delicious. You can add a bit of ginger or wasabi on top of the tobiko eggs to enhance the smokiness of the roe. 

How to Make Tobiko Sushi?

If you want to make tobiko sushi at home, it’s pretty easy to do. If you have made sushi before, this will take only 10-15 minutes for you. So here’s how to make tobiko sushi:

Ingredients:

  • 4-5 tablespoons of tobiko eggs
  • Half a cup of sushi rice (cooked)
  • One nori sheet
  • Your favorite veggies. (cucumber, carrots, etc.)

Instructions:

  1. Put on your gloves and get your hands before handling the sushi rice. Sushi rice tends to be very sticky so this helps to prevent mess. 
  2. Grab a handful of sushi rice and add small ovals that look around 2-3 inches long. 
  3. Take your nori sheet and cut it at 1-2 inches in width. Then wrap it around your rice. The nori seaweed helps to keep the rice protected. So when you use your chopsticks to eat it, the whole thing does not break into pieces. 
  4. When you are wrapping the nori strip, make sure to leave a little space above the rice. This is where the tobiko goes.
  5. Use water to seal the nori together. 
  6. Push some rice down and make a small dip. Add your tobiko on top of the rice. After you are done, serve the sushi immediately. Tobiko sushi tends to get soggy quickly. So eat as soon as possible. 
  7. Add wasabi, grated ginger, and soy sauce to the platter to enhance the taste of the tobiko eggs. 

See how easy it is? Tobiko sushi is probably the easiest type to make. So try next time with your family and friends! 

Where to Find Tobiko for Your Sushi?

Tobiko is not a very known ingredient. So your best bet is the local Asian stores. Look for Japanese grocery stores in your area. They definitely carry more than one type of tobiko. 

We recommend going for the smaller size the first time. You don’t need a lot of it anyway unless you are making tons of sushi for everyone. 

If you can’t find it anywhere, oh well there’s always amazon. We like the Bemka Flying Fish Roe Caviar for fresh tobiko roe. 

How to Eat Tobiko in Other Dishes

tobiko sushi recipe
tobiko sushi recipe

Nobody said you can only eat tobiko with sushi and sashimi. In fact, there is a wide range of ways you can enjoy tobiko and add it to your usual diet!

  • Tobiko Pasta: We just love adding a tablespoon of tobiko on top of freshly made pasta. If you are making creamy pasta with a cheesy sauce, add some tobiko on top as garnish.

    The small salty bites will balance out the creaminess with a hint of smokiness. Who doesn’t want that!
  • Dips: Imagine adding tobiko to nachos or crackers. It will taste divine especially with some lemon zest on top.
  • Salads: This is actually the simplest way to add extra nutrition and protein to your salad. The salad not only will look more colorful but it will also last taste delicious! 

Frequently Asked Questions 

01. Is Tobiko the Same as Caviar?

Tobiko is not actually the same as caviar. Even though they might look similar in color and size, tobiko is saltier. It’s made by salt-uring the fish roe which gives it the intense smoky and salty taste. 

Despite the salt, tobiko is much sweeter than caviar. Tobiko can be made from any fish roe whereas caviar is specifically made from fish eggs of a sturgeon. 

02. What is Tobiko Eggs Made of?

Tobiko eggs are made of a type of fish roe. It can look very similar to salmon eggs. It has a very different texture and taste from other types of fish roe like caviar. 

Tobiko is very popular in Japan and it actually has much smaller eggs than other fish species. It looks vibrant, bright reddish in color. Some people think tobiko eggs are not real eggs. 

That’s a misconception. Tobiko basically comes from flying fish species. Their eggs look so colorful and tiny that people assume it’s not real. 

03. What Does Tobiko Eggs Taste Like?

Tobiko eggs have a very distinct and unique taste which makes them so popular. They are salty and smoky without being overpowering. 

Even though it’s so salty, it has a note of sweetness as well. When you bite into them, instead of popping like caviar, they feel crunchy. This gives them a very pleasurable mouthfeel. 

04. Is Tobiko Fake?

No, tobiko is not fake! Due to their bright orange color and super small eggs, tobiko looks like cartoon food, in a good way of course! 

But they are anything but fake. Tobiko roe comes from a type of flying fish. They are super popular in sushi and other Japanese dishes due to their unique texture and flavor profile. It adds a hint of umami to any dish. 

05. Is Tobiko Bad for You?

Tobiko is rich in protein and fatty acids. It has omega-3 fatty acids which are amazing for our heart and liver. These fatty acids help to reduce inflammation and help our brain to function better. If you have a weak immune system, adding tobiko to your diet can boost it very fast. 

However, tobiko contains a high level of cholesterol which can be damaging for high blood pressure patients. Eat it in moderation if you are diabetic or overweight.

Typically, tobiko is served in smaller portions anyway. So it’s not a big issue. 

06. What is Roe in Sushi?

Roe is basically fish eggs. When fish eggs are fully ripe they look bright red or orange in color, this is the best time to eat them. Fish roe is a very common ingredient in Japanese cuisine. 

They are added in both cooked and uncooked manner to dishes. A lot of Japanese sushi is covered in fish roe which adds a salty, smoky flavor to the food. 

It melts in your mouth and gives you that umami sensation we all love. In case you are wondering, fish roe does not smell or taste fishy at all. 

In Short

No wonder tobiko is so cherished and loved by so many people. Just a small dash of tobiko completes the dish.

We just love the crunchy texture of tobiko in different recipes. Don’t hesitate to try tobiko with different dishes. You will be pleasantly surprised by how good it tastes!

On that note, here are the best lists of jasmine and brown rice brands if you are interested. Enjoy!